Product Requirements:
Device:
1st or 2nd generation Apple iPod
I started out very excited about replacing the battery on my iPod.
Although it had only really come up dead on two or three trips (where I had
forgotten to specifically charge it up and have everything ready right at
liftoff), it would still get disappointingly low on juice for my morning commute
if I hadn’t charged it in the last day or so. The more I wanted to listen to
something besides the radio, it seemed, the more often I found it dead or nearly
so when I wanted it to be ready for it’s assigned entertainment duties.
First impressions
So, seeing the Crayton Electronics
iPod battery replacement kit offered on The Gadgeteer web site made me
rush to apply for the review. I got the email that I had been selected, and the
anticipation began. Then, one afternoon, the battery came, I dropped everything,
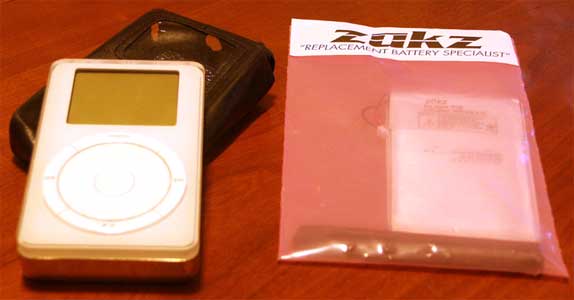
popped open the package, and – man, what is this? A plain white padded envelope
held a plastic rack-hanging card with a nondescript tag stapled to a pink
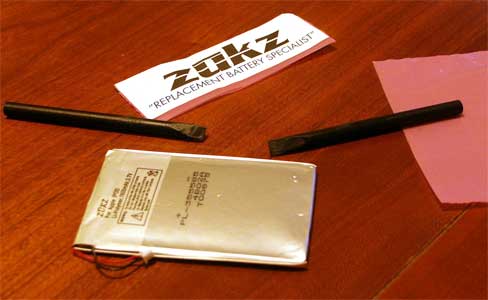
anti-static poly bag. Inside the bag was the battery and a few plastic dowels,
and nothing else. What a dead first impression! I wrote Julie, and she
confirmed that this was exactly the way it had arrived at Gadgeteer Central. Oh,
well, onward we go.

Got instructions, reviewed process
Usually when you buy some type of DIY project, there are instructions for how to
proceed, or at least a mention on the packaging of how or where to obtain such
instructions. Not so in this case. Only because Julie had mentioned the company
site in the review kit posting did I have any idea how to proceed. For those who
may want to try their skill, here is the link.
http://craytonelectronics.com/ipod_battery_removal_and_install.htm

A few nights later, I had some time I could devote to opening up my beloved
iPod and performing the heart transplant. For those who haven’t taken a close
look at an iPod, check it out next time you’re close to one. There is no seam,
no screws – nothing. The metal of the back and the plastic of the front just
morph from one into the other. It’s almost organic. But, never fear, I was sent
two first class tools to use to pry the case open. Well, I had two crudely
sharpened plastic rods. For any of you who built models as a kid where the
pieces came on a thick rod of plastic that you eventually tossed, this is the
impression I got. (Those of you who used these sticks and a lighter to make
modern art sculptures can leave now. You’re scaring the rest of us.) Put one of
those thick rods on a grinding stone to get a fuzzy edge and you’ve got the tool
included in the package.

Against my protective instincts, I began to try and pry the metal backing
away from the plastic front piece. I could not get the fuzzy edge of the tool
into the seam in any way. After about 30 minutes, I decided a little judicious
use of a screwdriver or small blade might be in order.
It did help me get the case apart a bit more, like 2-3 mm over a 5 mm space.
I could then insert the plastic rod in and twist, but the case would not open
any more. I tried opening from the other side while one side was wedged open,
but still, no luck. I was getting frustrated at this point. (Well, I had been
there for a while, actually. I was sorta getting mad.) I started using a bit
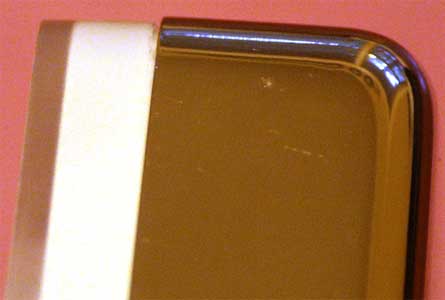
more force with the screwdriver blades, and, once or twice, the blade slipped,
giving my nice pristine iPod a few distress marks <scratched corner>– great if
it was an antique chest, not so nice on a precision piece of electronic
equipment. The more things I did trying to get the case open, the more I
realized there are people paid to do this, and they guarantee their work.

Admitting defeat (well, deciding to cut losses at the few scratches), I wrote
Julie, ready to send the package on to a true gadgeteer, one whose DIY skills
would allow them to crack open an iPod, rather than to surrender to it. To her
credit, she was very supportive, and asked that I warn other readers with this
tale of failure. It’s a tough thing to admit, but in cases like this, where the
original item was not designed to be opened or repaired in the field, it may be
better to send it to a technician trained and properly equipped to do the job
without inflicting damage.
So, how do you rate a product that you couldn’t even use, because you
couldn’t prepare the place of intended use? I came up with several areas to
rate: skill level, quality of materials, and overall experience.
I judge the skill level of this item an 8 on a 1-10 scale. You should know
more than how to hold a screwdriver, and have a wealth of DIY experience under
your belt before attempting to use this puppy.
The quality of materials was somewhat lacking. Since I never got to test the
battery performance, I can only judge the included tools. 2 out of 10.
My overall experience began with the poor packaging (no part numbers, no
indication of what it was designed for), was furthered by the lack of
instructions and the above mentioned poor quality pieces included. Again, 2 out
of 10.
Some may argue that my inability to perform the replacement should not count
against the product’s quality or the overall experience, but I would counter
that nowhere in the instructions (which were only discovered by chance) was it
mentioned that this was difficult, and that one should be highly skilled in this
area before attempting the replacement. The most they say in this regard is “Use
caution not to scratch the case.”
I would also submit that my ten years as a tech support person, who has
disassembled printers and computers, in many cases without having been given
guidance or a manual, qualifies me as pretty handy with a set of tools. I have
replaced parts deep within these beasts, reassembled them and had them work good
as new afterwards. So just because you can change out the high voltage power
supply on an HP LaserJet III in the dark, don’t think this item is a cakewalk.
Price: $31.99
Pros:
None
Cons:
No instructions
Too difficult to open the iPod
Syncwire 3.5mm Nylon Braided Aux Cable (3.3ft/1m,Hi-Fi Sound), Audio Auxiliary Input Adapter Male to Male Cord for Headphones, Car, Home Stereos, Speaker, iPhone, iPad, iPod, Echo & More – Black
27% OffAmazon Basics Stereo 2.0 Speakers for PC or Laptop, 3.5mm Aux input, USB-Powered, 1 Pair, Black
$13.43 (as of January 31, 2026 17:19 GMT -06:00 - More infoProduct prices and availability are accurate as of the date/time indicated and are subject to change. Any price and availability information displayed on [relevant Amazon Site(s), as applicable] at the time of purchase will apply to the purchase of this product.)Product Information
| Price: | 31.99 |
| Manufacturer: | Crayton Electronics |
| Pros: |
|
| Cons: |
|


Gadgeteer Comment Policy - Please read before commenting
Post your comments here on the Crayton Electronics 1st / 2nd Generation iPod Replacement Battery Kit Review.
http://www.the-gadgeteer.com/craytonelectronics-1and2gen-ipod-batterykit-review.html
Just click the POST REPLY button on this page.
Smythe – excellent review on your user experience. Thank you for taking the time to try it, and to write about what happened.
Hopefully another future reader-review item will come up that works better for you. :0)
I performed a battery replacement on my 3G iPod using Newertech’s replacement model which has approximately 30% more battery life than the stock unit. The install was quite difficult, but using an X-acto knife and the tools provided, I was able to perform it without any sort of cosmetic damage to my iPod.
Battery life is now quite good. A worthy upgrade for under $30.
Here is a link:
http://eshop.macsales.com/Catalog_Page.cfm?Parent=1225&Title=iPod%20Batteries&Template=1
If you don’t feel comfortable doing it yourself, they have technicians who will perform it for a nominal fee. (I think it’s like $10.)
Yeah, but but how can anyone live without his/her iPod for that long? :rolleyes:
No instructions? “Don’t scratch the case?” Hey, if you’re smart enough to browse this site, you’re smart enough follow directions given that they’re clear enough.
I get tired of products that exploit how difficult they are to use in order to make more money for the person selling it. I would cite an example any tech product packaged in that nearly indestructable plastic you have to maul with scisors. They package it that way cause you’re less likely to return it.
A product packaged with no instructions marketed twords Gadgeteers who have trouble admiting defeat? I’m SO sure it’s a lucky acident.
I ordered Crayton’s 1st gen iPod battery replacement. I pulled up their webpage 30 min ago, and had little trouble opening the iPod. I used the stronger plastic stick first, and squinted at Crayton’s website to determine which way to pry the side open. I easily got the one side to separate a bit. I then used the second tool as they said, but really all one needs to do once you have separation on the one side is to use your other hand and start yanking it apart.
There’s no way it should take 20 min – just stick the strong tool on one side, separate it 1 mm, and yank. I had more trouble removing my old battery because there are two sticky strips on the top and bottom which hold the battery tight to the hard drive. Use a sharp edge to gently unstick these from the old battery.
Reassembly is literally a snap.
My iPod now just shows the low battery icon – I will have to charge it up at home. This process was very simple!