Product Requirements:
Device:
Palm III or m100 Series
PalmPix.PRC 61k
Approx. 100k per picture
Desktop:
Windows Systems: Windows 95, 95B (OS R/2), 98, 98SE, 2000, NT 4.0 with
Service Pack 3 or higher, PC with a minimum 486 processor, Minimum of 16 MB RAM,
Minimum of 20 MB hard disk space, CD-ROM drive, Color Monitor with 256 colors
(16-bit color recommended)
Macintosh Systems: Palmconnect Kit, PowerMac system, Macintosh OS 7.5.5
to 9.04 inclusive, Minimum of 16 MB RAM, Minimum of 20 MB hard disk space,
CD-ROM drive, Available USB port, Color monitor with 256 colors (16-bit color
recommended)
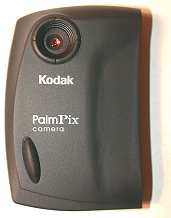
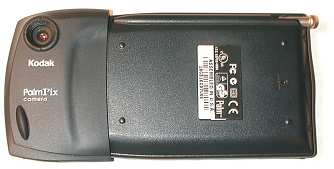
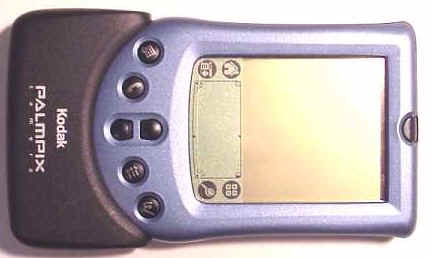
The Kodak
Palmpix
Series of digital cameras are designed to clip onto the bottom of either the
Palm III or the Palm m100 series PDAs, and soon the Palm m500 series. What sets them
apart from other digital cameras is the fact that they have no moving parts, no
memory card, no film, no “Ready” light, no flash, and no zoom lens;
but once attached to your Palm, it turns that regular PDA into a “digital
camera with a 2X digital zoom”.
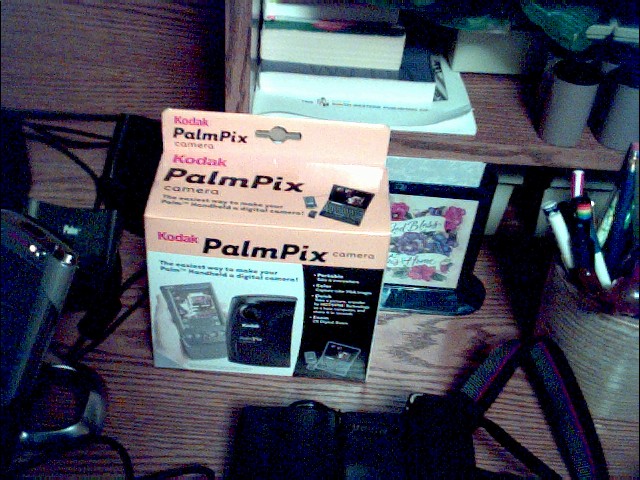
Included in the box:
Kodak PalmPix Camera for the Palm III or m100 Handheld, Kodak Photolife AAA
Alkaline Battery, Camera User’s Guide, Quick Setup Guide, Registration
Card, CD ROM with software, including: PalmPix Macintosh Conduit, PalmPix Windows
Conduit, PalmPix Application for Palm III or m100 Handheld, ArcSoft
PhotoImpression 2000 Software
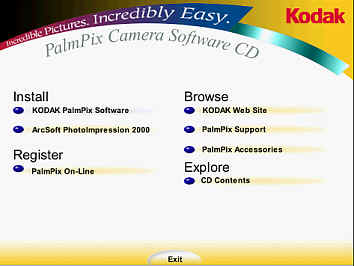
The Kodak software is easy to install. You simply insert the disk, and choose
your options.
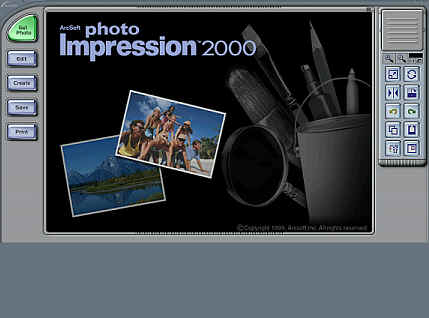
The PalmPix also includes ArcSoft PhotoImpression 2000 Software, which is
capable of allowing you to edit and enhance digital pictures you have taken.
There are a variet of functions available, and the best thing you can do is take
some time and really explore this software…play with it, and be creative with
some of the pictures you will take.
Making the PalmPix camera work is as easy as hot-syncing the PalmPix
application to your Palm, and then attaching the camera module itself to the serial port
connection on the bottom of the Palm. A PalmPix icon will then appear in your
launcher.

To activate the PalmPix, you simply tap the icon. You will come to a Image
List screen, which looks basically like the filing program that it is.
On this screen, you are presented with several options: You can set the
self-timer, decide what quality or resolution pictures you would like to take, or
view how many pictures are still available to be taken – based on available
memory and resolution chosen.
Resolutions available include Good: 320 x 240 and Better: 640 x 480. You set
the resolution by tapping one of the two size boxes at the bottom of the screen –
one will highlight, showing
that it has been selected. Obviously, the lower the resolution, the more
pictures you will be able to take. The pictures are saved to the PDA’s memory.
Once pictures have been taken, they are listed by a number, then time and
date stamped. You may file the pictures by different categories provided, or
edit and create your own categories.
It is possible to beam images to another Palm, by accessing the Record
menu. It is also possible to select which images are uploaded or deleted, by
accessing the Options menu. You have to actually delete the pictures from
the PDA. They will not automatically delete when you hotsync.
There is a detailed FAQ
available on the Kodak site, if you have any specific questions that we don’t
address in this review.
One thing you might want to consider, especially if you have a 2MB PDA, is
the use of a storage device, such as the Memory
Safe or the Flash Plug. Both devices can
substantially add to your device’s ability to take and save more pictures.
PalmPix for the Palm III Series
by Julie Strietelmeier
The Palm III series PalmPix can interface with the Palm III, IIIc, IIIe, IIIx, IIIxe, VII, IBM Workpad and TRGPro PDAs. I used
it with the Palm IIIc for my review.
One of the first things that I noticed was the lack of a lens cover or storage
pouch. I could live without a storage pouch, but I really think a small cap of
some type should be included to protect the camera lens. It would be very easy for a foreign object to
scratch the lens while the PalmPix was at the bottom of a gear bag or pocket.
The clip-on module adds a little weight to the PDA (0.1 lbs/45g) but not near
as much as a full sized digital camera.
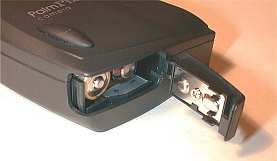
The camera is powered by 2 AAA batteries. So far, the camera doesn’t appear
to be a battery hog. I still have the same set of batteries in the PalmPix that
were included with the package.
The PalmPix is made of plastic but feels very sturdy. It snaps on to the bottom of the
Palm IIIc easily. Removing it requires you to just pull it off. I would rather
that it had spring loaded clips like the original Palm Modem as they would make
removal easier.
When the PalmPix is attached, you hold the PDA horizontal with the screen
facing you. This becomes your viewfinder. The actual lens points out the back
(away from you).
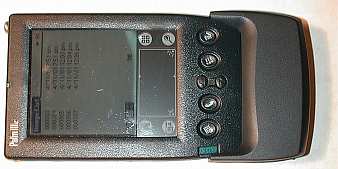
A small rubber grip helps you hold onto the PDA/PalmPix configuration. Holding the PDA
this way feels pretty comfortable and quite camera-like.
You use your thumb to press the shutter button which is the DateBook
application button. One press to this button will turn the viewfinder (the PDA
display) on.
Another press will capture a picture. The viewfinder is pretty sluggish but it
does change as you move the camera around and the picture that you see isn’t
very clear. It’s really pixilated. I noticed that the viewfinder is
black and white even while using the IIIc. Although you can view the pictures in
color on the IIIc. One other thing that I noticed was
that you can not turn off the Palm while it is in the viewfinder mode. The power
button has no effect.
I had a lot of trouble using the PalmPix with my Palm IIIc outdoors. The
color screen made for a horrible viewfinder. It would be great if the PalmPix
also had a regular viewfinder that you could look thru to help line up a shot.
The PalmPix isn’t really speedy as far as capturing a picture and writing it
into PDA memory. I did some timing tests and found that it took approximately 10 secs
from snap to finish for the small size (320 x 240) pictures and 15 secs for the
large size pictures (640 x 480). So you can’t expect to take pictures in rapid
succession.
For those of you that are photographers, here are the camera specs:
Color CMOS Imager
2X digital zoom
Fixed focus f/2.0, 6.1mm focal length
Shutter speed: 1/15 – 1/500 seconds
Focus range: 36″ to infinity
Automatic exposure and white balance
File formats: JPEG, BMP in 24 bit color
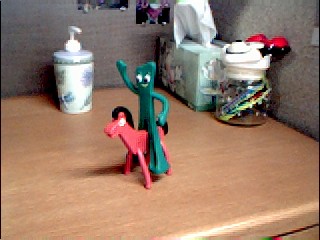
As far as picture quality, I found that the camera was pretty much all over
the place. Sometimes the pictures that I took were pretty clear and sharp and
other times they were quite blurry. Almost all the pictures came out somewhat
grainy. I think that lighting plays a major part in how well the pics turn out.
Low light conditions and really bright conditions make for very poor photos. You
need the light to be ‘just right’.
You can check out some of my non-edited pictures below. Clicking the
thumbprints will bring up the full-size pictures.
640 x 480 127k (taken indoors with regular ceiling, 2 bulb lighting)

640 x 480 80k (taken outdoors with early morning sunshine)
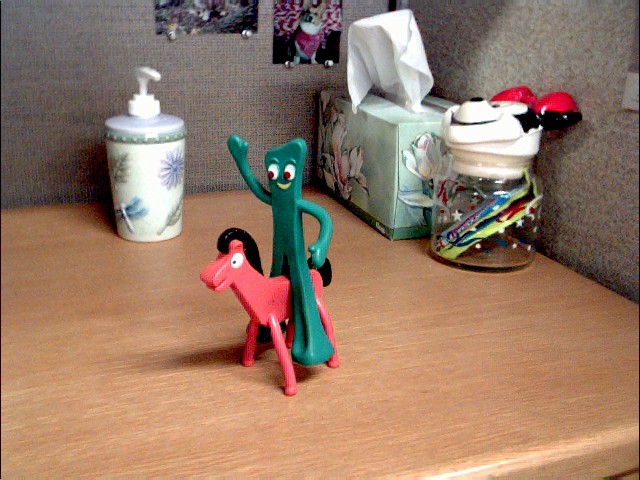
640 x 480 102k (taken indoors with florescent lighting)
320 x 240 31k (taken indoors with florescent lighting)
Even though the image quality of the PalmPix isn’t the best in the world, I
still think that it is a nifty little accessory for your Palm PDA. Of course you
can get a throw away disposable point and shoot camera at any drug store, but
having the ability to snap a picture almost anywhere and view it on the PDA
immediately is priceless.
Price: $99.95
Pros:
Portable
Easy to use
Cons:
No flash
Grainy pictures
Hard to use with IIIc in sunlight
No lens cap
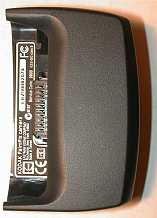
PalmPix for the Palm m100 Series
by Judie Clark
The PalmPix
for the m100 only adds 1.25″ (31.76mm) to the bottom of the Palm when
installed. By itself, its dimensions are 1.9″ (48.26mm) at it widest point
on the side x .09″ (22.87mm) thick x 3.3″ (83.83mm) across the bottom.
The PalmPix weighs 1.6 ounces without its battery.
When I first received the PalmPix , I had a question in my mind: How could a
digital camera that had no flash, fixed focus, and no viewfinder possibly hope
to compete with the other more traditional digital cameras on the market today?
It took a trip to Hawaii to show me…
Like many tourists and vacationers, I wanted a photograph of almost
everything that occurred on my family’s trip. I didn’t want to have to try to
remember from scratch how happy my daughter looked as she enjoyed her first cup
of vanilla macadamia nut coffee at an actual coffee plantation, or what the
hanging bridge at Hanapepe looked like right before we made a mad dash across it.
I didn’t want to forget how the waterfall on our private hike cascaded down the
rocks to the swimming hole underneath. I certainly didn’t want to forget the
local color and sites of the island of Kauai.
Knowing that I needed to review the PalmPix, I packed my Palm m100 in my bag,
with the camera attached. I also brought my Sony Mavica FD-81, which is the
digital camera I use every day.
I already knew before leaving that it would be unrealistic to compare the quality of the photos taken by either camera. However as I soon found out – it
doesn’t matter how great your regular camera’s photos may or may not be – if you
aren’t willing to carry that camera with you everywhere, you will miss the
“shot”… Every time.
I was very good at bringing both cameras with me when the family went out for
the first day or so, but by the third day – I wasn’t in the mood to lug the Mavica anywhere,
anymore. I found that I was leaving it in the glove box of the car or back in
our cabin at the Waimea Plantation most of the time – while the PalmPix, which
fit almost weightlessly in my purse, was accompanying me everywhere.
One of the only “organized” things that we did on our vacation was
enjoy the 4 hour hiking trip offered by the Princeville
Ranch. We climbed hills, and made our way through an amazing forest filled
with interesting flora and fauna, so that we could have lunch and enjoy swimming
in a natural pool fed by a waterfall. Although it was chilly, we all managed to
get in and have fun, splashing around. This picture of the waterfall itself, was
taken on a slightly overcast day.

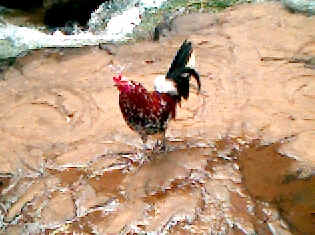
Imagine our surprise, when while out in the middle of no-where, we were
joined by one of the thousands of chickens that roam the island. This particular
rooster had two hens with him, and he was quite adept at trying to steal some of
the delicious food our guide had brought.
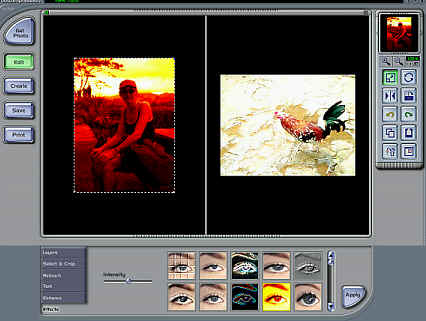
On our trek back, I was nursing a new blister, but I had to stop and marvel
at the view of the mountains and valleys from the top of “our” hill.
By now, it was quite overcast, and you can see that the picture is a bit dark. I
was able to touch it up a bit later, using the included editing software.


(Left: Unmodified pic, Right: Modified pic)
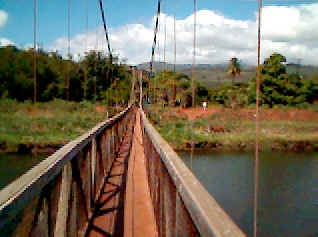
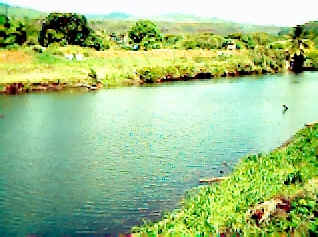
On one day – we decided to check out the “Famous Hanging Bridge of
Hanapepe.” It was sunny and beautiful outside, and I was able to get
these shots of not only the bridge, but the water to its side. It was beautiful.
After I took the pictures – we decided to run across the bridge – which made it
sway and rock – too much fun! As we walked back, we noticed that some of the
nails were coming up from the boards, so maybe running hadn’t been the best
idea…
I had never seen a coffee bush, much less a coffee plantation before, so it
was a treat to visit the home of Kauai
Coffee Company. It was amazing to see thousands of acres loaded with the
tall coffee bushes. These picture was taken facing into the sun – so it is more
exposed than it should have been…

And here is Sarah, enjoying that cup of vanilla macadamia nut coffee. She was
sitting in the shadows, under an open slat-beam roof…

So there you have it. While the PalmPix won’t be able to help me recall the “island
music” that we enjoyed on a local station everyday, the pictures that I
snapped with it certainly will help me remember what a fun time we had on our
spring break.
Should this replace your regular digital camera? Definitely Not.
However, if you can afford an extra camera, and you are wanting one that
won’t be a chore to remember to carry around, and if you are already using a PDA
that it can be plugged into, then the Kodak PalmPix is a winner. You won’t miss
another shot.
Price: $99.95
Accessories
are also available
Pros:
Extremely portable
Easy to use
Cons:
Expensive
No flash
Must be at least 36″ away from subject
Pictures somewhat blurry/focus is iffy

Zip Ties Assorted Sizes(4”+6”+8”+12”), 400 Pack, Black Cable Ties, UV Resistant Wire Ties by ANOSON
(as of May 24, 2026 13:10 GMT -05:00 - More infoProduct prices and availability are accurate as of the date/time indicated and are subject to change. Any price and availability information displayed on [relevant Amazon Site(s), as applicable] at the time of purchase will apply to the purchase of this product.)
STREBITO Electronics Precision Screwdriver Sets 142-Piece with 120 Bits Magnetic Repair Tool Kit for iPhone, MacBook, Computer, Laptop, PC, Tablet, PS4, Xbox, Nintendo, Game Console
(as of May 24, 2026 13:10 GMT -05:00 - More infoProduct prices and availability are accurate as of the date/time indicated and are subject to change. Any price and availability information displayed on [relevant Amazon Site(s), as applicable] at the time of purchase will apply to the purchase of this product.)Product Information
| Price: | $99.95 |
| Manufacturer: | Kodak |
| Pros: |
|
| Cons: |
|