REVIEW – My quest for the ultimate mechanical keyboard took me on a whole new adventure of assembling a keyboard from scratch when I accepted the offer to review the IQUNIX Tilly 60 mechanical keyboard kit. Let’s get out the stabs and lube and get started!
What is it?
The IQUNIX Tilly 60 is a 60% layout gasket-mounted mechanical keyboard DIY kit available in two case colors and layout options. The aluminum case is available in either silver or black and the layouts are HHKB and WK layouts. What is the difference? According to IQUNIX:
…the compact HHKB layout ensures essential keys are easily accessible, striking a perfect balance between power and minimalism, beloved by enthusiasts of smaller form factors. Compared with HHKB, WK layout is more suitable for ordinary people to use.
I’m pretty ordinary, so I went with the Silver WK layout version. 🙂
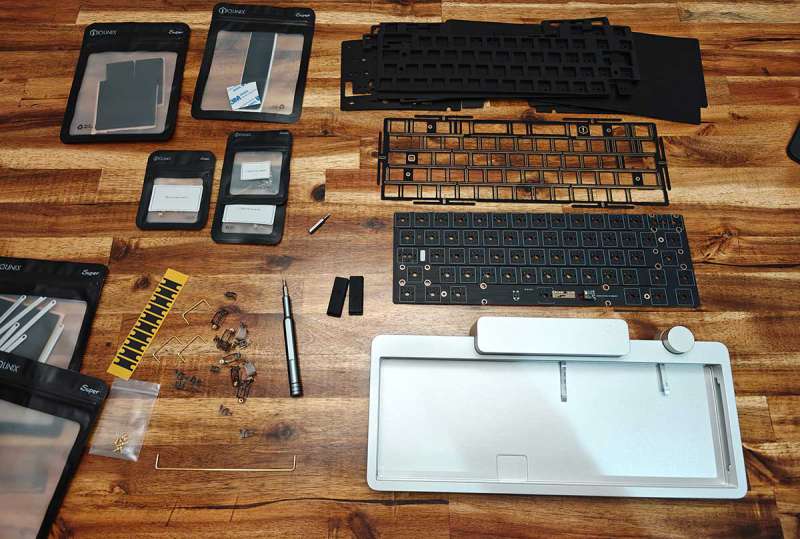
What’s in the box?
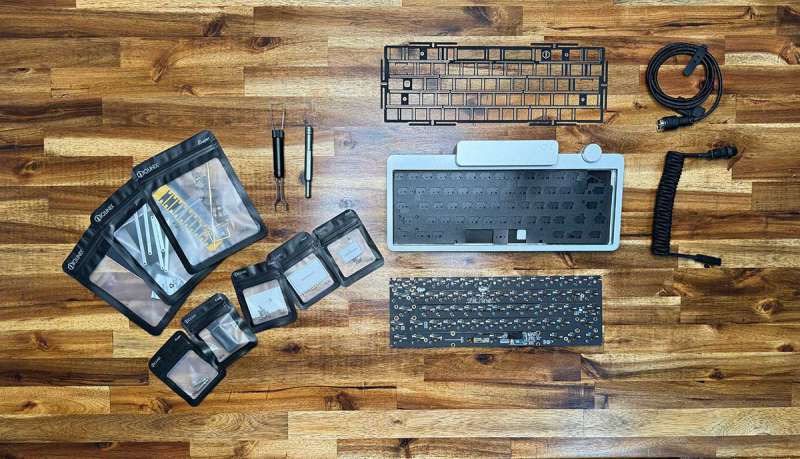
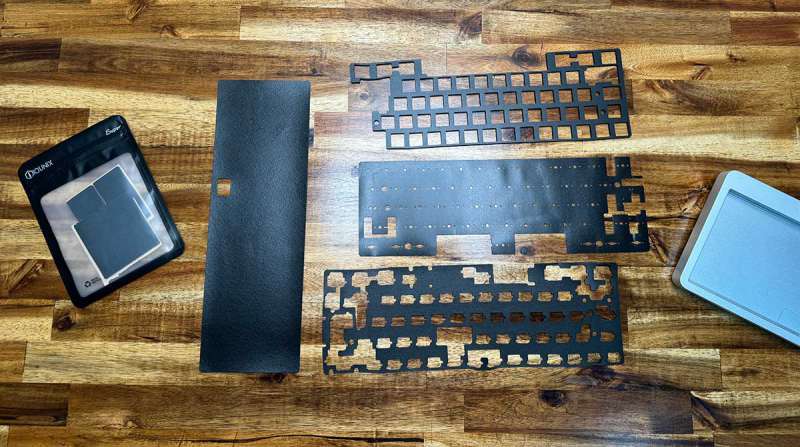
- IQUNIX Tilly 60 aluminum case
- PCB
- FR4 Plate
- Gasket set
- Stabilizers
- Mounting hardware
- USB cable
- USB dongle
- Bit driver
- Keycap, switch removal tool
Tech specs
Click to expand Specs
Tilly 60
Gasket mount
Aluminum case
Typing angle: 6.5″
Tri-mode connection: Bluetooth, 2.4G dongle, hardwire
Dimensions: (302.5 x 138 x 20 mm)
Weight: (2.3kg)
Moonstone switches
Linear
5-pin
Pre-lube
Sound: Deep & Thock
Operating Force: 37±5gf
End Force:47±5gf
Pretravel:2.0±0.4mm
Total Travel: 3.7±0.3mm
Durability: 80 million actuations
Design and features
The IQUNIX Tilly 60 is a 60% sized mechanical keyboard that is housed in an aluminum case.
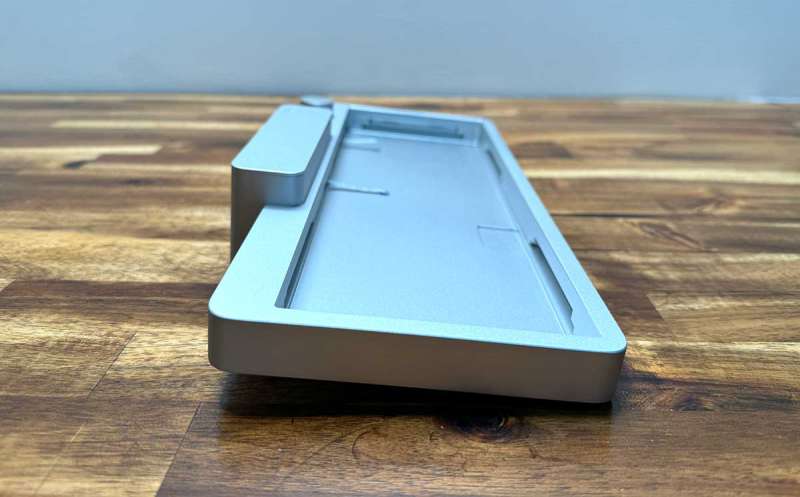
This case has a built-in typing angle of 6.5°. This angle is not adjustable and there are no folding feet on the bottom of the case.
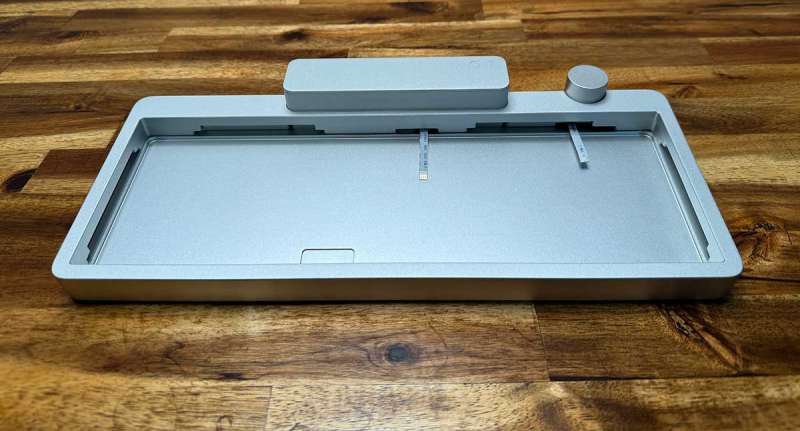
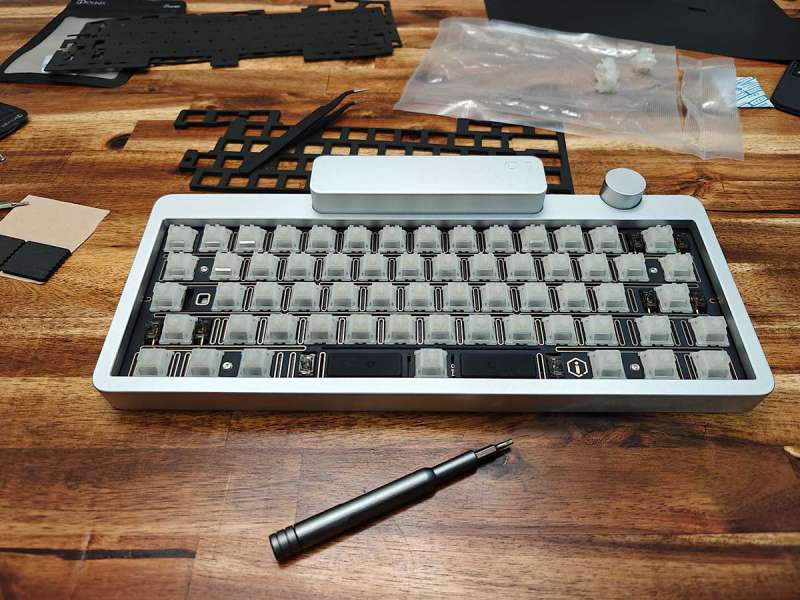
You might be wondering about that rectangular block on the back edge of the keyboard. The bottom section of the block houses the keyboard’s battery.
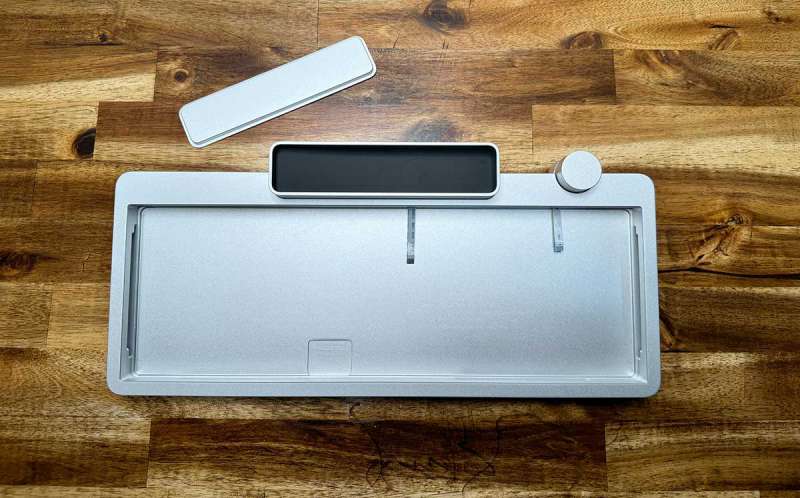
But the block also doubles as a small storage area with a cover that lifts off. I suppose that you could use this space to hold little tools or items that you use infrequently but would like to have nearby for those times when you do use them. Items that come to mind are SIM eject tools, a tiny flashlight, knife, etc.
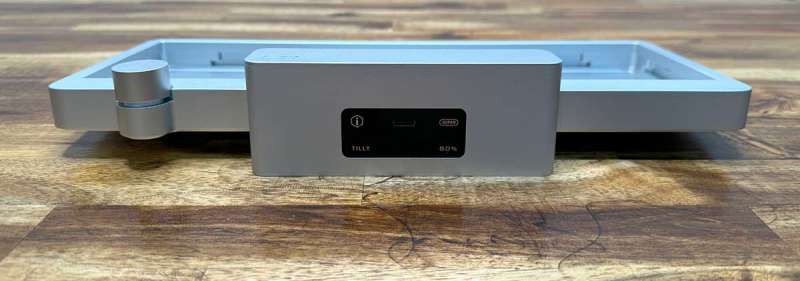
The back view of the IQUNIX Tilly 60 gives you a better look at the center storage/battery holder “block.” This is also where you plug in the USB cable for charging or hardwiring to your computer.
This angle also lets you get a good look at the analog knob, which has become a must-have feature when I shop for mechanical keyboards. This one freely rotates and can be pressed.
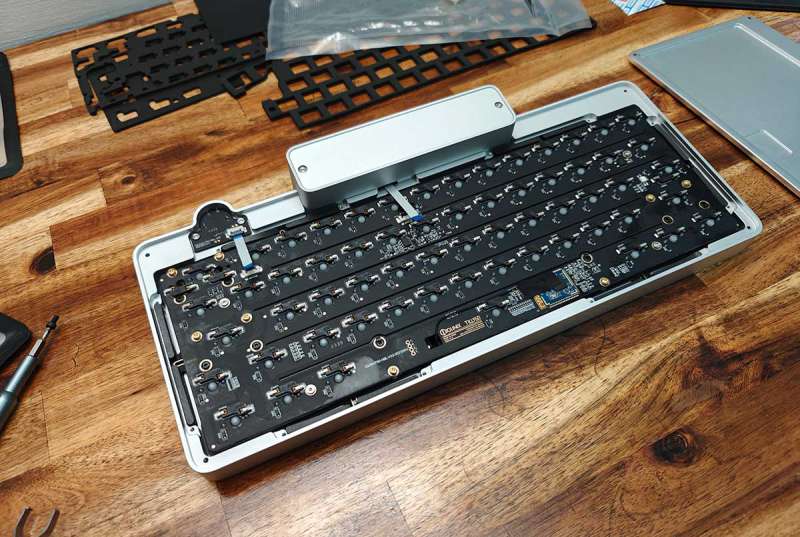
Lots of assembly required
If you like to order a mechanical keyboard, rip open the box, and connect it to your computer for immediate use, the IQUNIX Tilly 60 isn’t going to be the mechanical keeb for you because this one will take more than a few minutes to assemble.
There’s a lot to building the Tilly 60 and although it isn’t difficult, it can be a little intimidating if you’ve never built a mechanical keyboard from a kit before. Everyone is a newbie from the start, though, and that’s what I was when I received this kit and set out to build it.
My building adventure did run into a few speedbumps, which started with the fact that this kit does not come with ANY instructions whatsoever. Google and YouTube helped me find a few videos that helped me through the assembly process. Thanks go out to the videos from Mad Mod Labs and TAZAKEY.
Note: After I posted the review, I found a card packed in with the keyboard. It had a QR code that took me to a page with a build video and user guide links. I didn’t notice this card before – my fault.
I ran into another stopping point when it came to installing the stabilizers (stabs for short). I had to find a couple of videos to explain putting the stabs together correctly, lubing, and installing the wires.
Speedbump #3 came when I found that a couple of the included gaskets were torn. I didn’t know if that would be a big deal, so I asked IQUNIX and they decided to send me another set, so I waited…
Then I realized they hadn’t included any switches, so they sent me a set of their Moonstone switches.
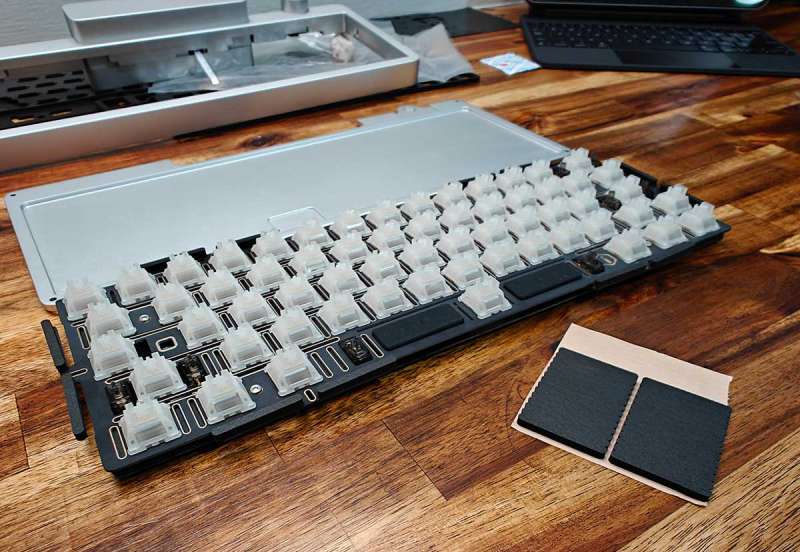
With the various poron foam pads and switches installed in the correct order, I reassembled everything, and it was time to put on the keycaps.

The included keycaps seemed a little boring compared to the look of the keyboard case, but the end result is a nice looking keyboard. Note: IQUNIX also offers a set of black tangerine keycaps which I think would look awesome on this keyboard.
The first time I connected it to my computer and started typing, I noticed that the enter key was stuck and wouldn’t move. So I pulled off the keycap and found that one side of the enter key stabilizer did not move. ARGH. So, guess what I had to do to fix it? Yes, I had to completely disassemble it and yes, it was painful. But I learned an important lesson to double check the stabilizer action after installing them.
First impressions
After typing on this keyboard, I now know what true thocky sound should be. But this smaller 60% sized keyboard does require some compromises, notably the lack of dedicated arrow keys and function keys. I didn’t realize that I used arrow keys as much as I do until I didn’t have them. But what does the IQUNIX Tilly 60 sound like? You can hear it below.
See and hear it in action
Unboxing
Assembly timelapse
Sound test
What I like about the IQUNIX Tilly 60 mechanical keyboard
- The kit includes everything you need (minus the instructions) to build the keyboard, including tools
- Unique look
- Thocky goodness
What needs to be improved?
- A larger version (75%) with dedicated arrow keys would be great
Final thoughts
Despite a couple of small hiccups, assembling the IQUNIX Tilly 60 mechanical keyboard was a great learning experience for me in my keyboard journey. This keyboard combines quality components to create a unique keyboard that looks as good as it sounds. All the gaskets and foam pads allow this keyboard to bring the thock in a great way. I think it’s a great DIY kit for both beginners and keyboard gurus. Well done IQUNIX.
Price: $245.00 – $269.00
Where to buy: IQUNIX
Source: The sample for this review was provided by IQUNIX. iQunix did not have a final say on the review and did not preview the review before it was published.