
I scream, you scream, we all scream. Someone calls the police and the situation becomes awkward. And one great way to break through that awkwardness is with home made ice cream. Today we are going to take a look at the Pampered Chef Ice Cream Maker. How easy is it to use and will it help get you out of a mandatory 24 hour police hold? Read on to find out…
There are 3 basic kinds of ice cream makers. The first is the traditional ice/rock salt maker where you line the outside of the ice cream container with a mix of rock salt and ice. You fill the container with your favorite ice cream recipe, put into the mixer and within hours you have ice cream. A lot of us grew up with the hand-crank version of this where your parents told you that not only did the ice cream taste better when you cranked it yourself but that your efforts over the next few hours would build character. When we grew up, we put a motor where the hand crank used to be and put a stop to building character through manual labor.
The second type is the compressor model, where a refrigerant is built into the mixer and all you need to do is put your ice cream mix into the container and press the button. You no longer need to prep by getting rock salt and ice nor do you need to spend hours on your knees turning a crank and wondering what the big deal about character is.
The latest type of ice cream maker is a compromise between the two. It is the chilled container ice cream maker, and this is the type Pampered Chef delivers. You no longer need to get a refrigerant via ice and salt, but rather you use the one you already have – your own freezer. Place the container in the freezer for some length of time prior to actually making the ice cream, and when it is properly chilled you remove it from the freezer, pour in your ice cream recipe and press the button.
Let’s face an important fact here: making ice cream at home will never be a spontaneous activity. Assuming for the moment you have all of the necessary ingredients on hand to actually make the ice cream itself, there is always some level of prep involved. Whether that is cooking the mixture prior to freezing it, chilling the container, lining the maker or any of a host of prep activities, you are pretty much never going to think “I want home made ice cream” and 20 minutes later you are eating it unless you made it yesterday.
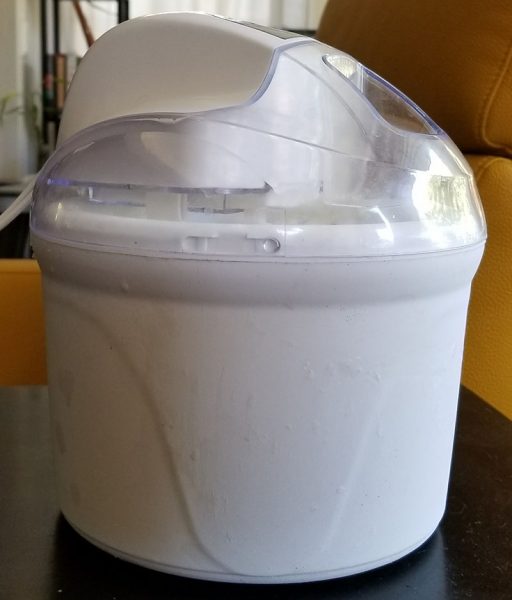
The Pampered Chef Ice Cream maker consists of a freezer container on the bottom and the mixing unit with the paddle as the top of the maker. The set also comes with an orange silicon topper for the container so you can store the ice cream you make in the freezer container. The mixing unit simply twists on and off, and the paddle snaps into place or can be removed for cleaning and storage.
So how easy is the Pampered Chef to use? Well, it is no less easy or more difficult than any other ice cream maker. Place the freezer container in your freezer 8-12 hours before you want to make ice cream to allow the container to get to the proper temperature. After that, it is up to you and your ice cream recipe to do the rest. Once thing to note, though: although the freezer container is very nicely insulated, if you are making ice cream in a warm location – say, a kitchen without air conditioning – then it is going to take longer to get your ice cream to soft-serve consistency. Much longer. Like double the time. Not a fault of the Pampered Chef unit by any means, but more of the hybrid approach. So be warned, and also don’t make your ice cream in direct sunlight.
Once your mix is in the container, turn on the paddle and wait. On 3 runs, it took me on average 35 minutes in the mixer to get the right consistency. The unit runs on its own and when it is done, it stops. Remove the top, take the paddle off (remembering to lick the paddle AFTER you have removed it from the motor) and place the container in the freezer with the silicone lid on for about 2 hours. And your ice cream is ready.
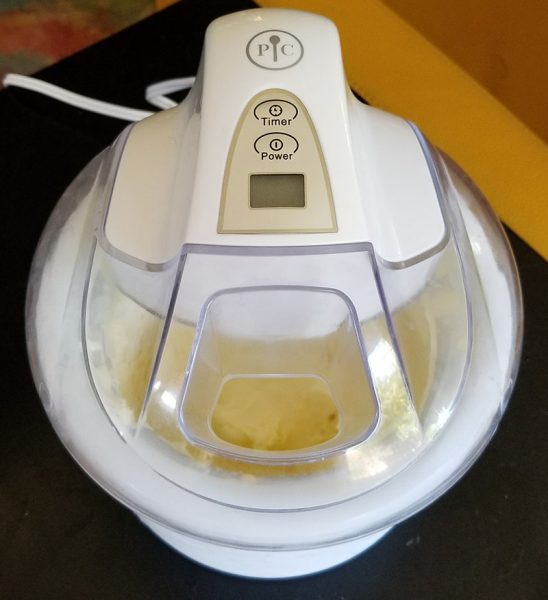
That said, there are quirks. The instructions for the unit tell you to mix your ice cream and then start the paddle. Pour the ice cream mix into the unit with the paddle moving via that small hole on the top. As I am not Luke Skywalker and have never hit a womp-rat with my T-16, getting the ice cream mix into the thermal exhaust port proved to be challenging. The first two batches – cherry (because we have a cherry tree) and coffee (I live in Seattle and it’s the law) – saw a significant portion of my ice cream all over the side and on the counter. On batch 3 (pineapple-vanilla liqueur custard) I decided to pour directly into the container and then put the top on. Less mess, more ice cream. And the world did not explode because I did not follow the instructions.
Another quirk is consistency. Assuming you have a good ice cream recipe and you follow it, you are never going to get solidly frozen ice cream even after sitting in the freezer overnight. No matter what I did, I could only get soft-serve consistency. This isn’t bad by any stretch of the imagination, but something to consider if you want to use the ice cream as the filler for, say, ice cream sandwiches. Probably not going to turn out well if you do.
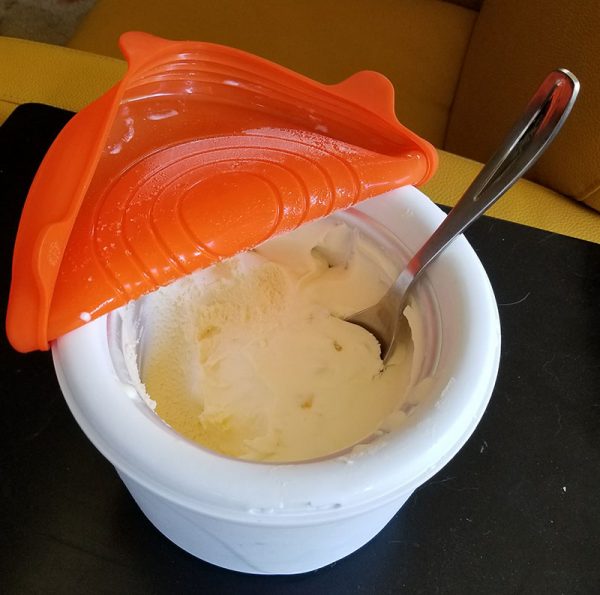
When you are done, though, you can enjoy a nice dish of pineapple-vanilla liqueur ice cream. And there aren’t that many better ways to cap off a hot summer evening.
So, is the Pampered Chef Ice Cream Maker worth your hard-earned money? If you accept that any kind of home made ice cream requires work and planning, and if the taste of the ice cream you make appeals to you, then the answer is yes. This is a well-made maker and seems like it could be a part of your kitchen arsenal for years to come. If on the other hand, you want ice cream now and are willing to trade taste for expediency, then you might want to head to a local ice cream parlor instead. Me, I land in the middle. I love having the Pampered Chef for special occasions like an outdoor movie party, but when I need a quick fix I call on my old friends Ben and Jerry.
The sample for this review was provided by Pampered Chef. For more info visit their site.
Product Information
| Price: | $80.00 |
| Manufacturer: | Pampered Chef |
| Pros: |
|
| Cons: |
|
Gadgeteer Comment Policy - Please read before commenting
Um, pineapple-vanilla liqueur ice cream? Where might I find this bit o’ heaven’s recipe?
Is there any chance the ice cream did freeze up because of the use of alcohol in the base? Personally, I prefer my ice cream slightly softened. I’m thinking some homemade ice cream might be in the making this weekend.
The pineapple-vanilla liqueur custard is probably the most labor-intensive recipe I tried, but easily the best one, too. Recipe below.
Normally alcohol will lower the freezing point, but the average freezer should be able to handle it in 24 hours. Especially true because you cook the alcohol out of the base.
Follow the recipe you see here: https://www.pamperedchef.com/recipe/Desserts/Frozen+Custard/1287092
EXCEPT: remove the teaspoon of vanilla extract and replace it with 1-2 tablespoons of Liqueur 43, added to the mix while you are heating initially (to cook out the alcohol and leave the flavor). Just before you pour the base into the ice cream maker, take a small can of crushed pineapple (drained) and add it to the base. Mix, freeze and enjoy!
Thanks, David. Can’t wait to try this.
we use an attachment for our mixer
loading the mix is awkward at best
one solution that is inexpensive (and works) is to use a flexible cutting “board” rolled to fit the opening
another is a canning funnel
to change the consistency remove the ice cream from the mixer and shift it to a…we use a large covered glass mixing bowl…thin walled container
it seems the maker’s bowl acts as an insulator
I made it for first time today. I used recipe for vanilla …3 eggs and cooked. I cooled in fridge then started machine using a container with spout. I thought about 25 min was perfect. It was soft serve so put in 2 containers and froze for 3 hours. Perfect consistency and put strawberries on top and it was heaven. I thought there wouldn’t be very much but it expands…we had 4 servings (2 now) 2 later. Generous pig size. Very happy! I recommend!
The flimsy paddle has a tendency to flake off small pieces of plastic into the ice cream. I showed the pictures of the worn paddle to PC and never receive a reply. I like the maker but if they provided a metal paddle it would definitely make it better.
I would definitely look around a bit more. I have tried it a few times a d followed the instructions to the letter. It is very soft ice cream. Not great
My ice cream the next morning was hard as concrete. Is it because I used a sugar free alternative? Can you thaw container in the microwave?
I exclusively use monk fruit sweetener, so I doubt that is the cause. Sounds like there may be too much water (or other liquid) in the mix, and that is freezing. Maybe try reducing the liquid a little (very little) and see if that helps.
As for the container, I don’t know if it is microwave-safe. After I make ice cream, I put it into a different container immediately. You could do the same and maybe that you could microwave. I would just be concerned about how long you do it for, unless you really like pineapple vanilla soup…