REVIEW – CNC machines used to be the kind of tool you’d only find in professional shops, but in recent years they’ve made their way into the hobbyist space with more compact and accessible designs. I’ve been curious about CNCs for a while, but like many apartment dwellers, I don’t have the space or the tolerance for the dust and noise that comes with running a traditional open-frame machine.
The Makera Carvera Air Desktop CNC Machine is aimed squarely at makers like me who lack a large workshop but still want access to serious tools. Its enclosed design and compact footprint make it possible to achieve professional-level results without overwhelming my workspace. The Air promises precision, versatility, and the ability to work with wood, plastics, and even some metals, all in a desktop-friendly package. And it delivers. After spending time with it, I can confidently say it’s capable of some impressive results once you get past the initial learning curve. That versatility doesn’t come cheap, though. The Air’s base model starts at $2499, while the 4th Axis Laser Bundle I reviewed is priced at $2997.
⬇︎ Jump to summary (pros/cons)
Price: $2499 Base, $2997 Carvera Air 4th Axis Laser Bundle as reviewed
Where to buy: Makera and Amazon
What is it?
The Makera Carvera Air is a desktop CNC milling and engraving machine. It offers three-axis milling out of the box, with an optional fourth axis and laser module in the bundle I tested.
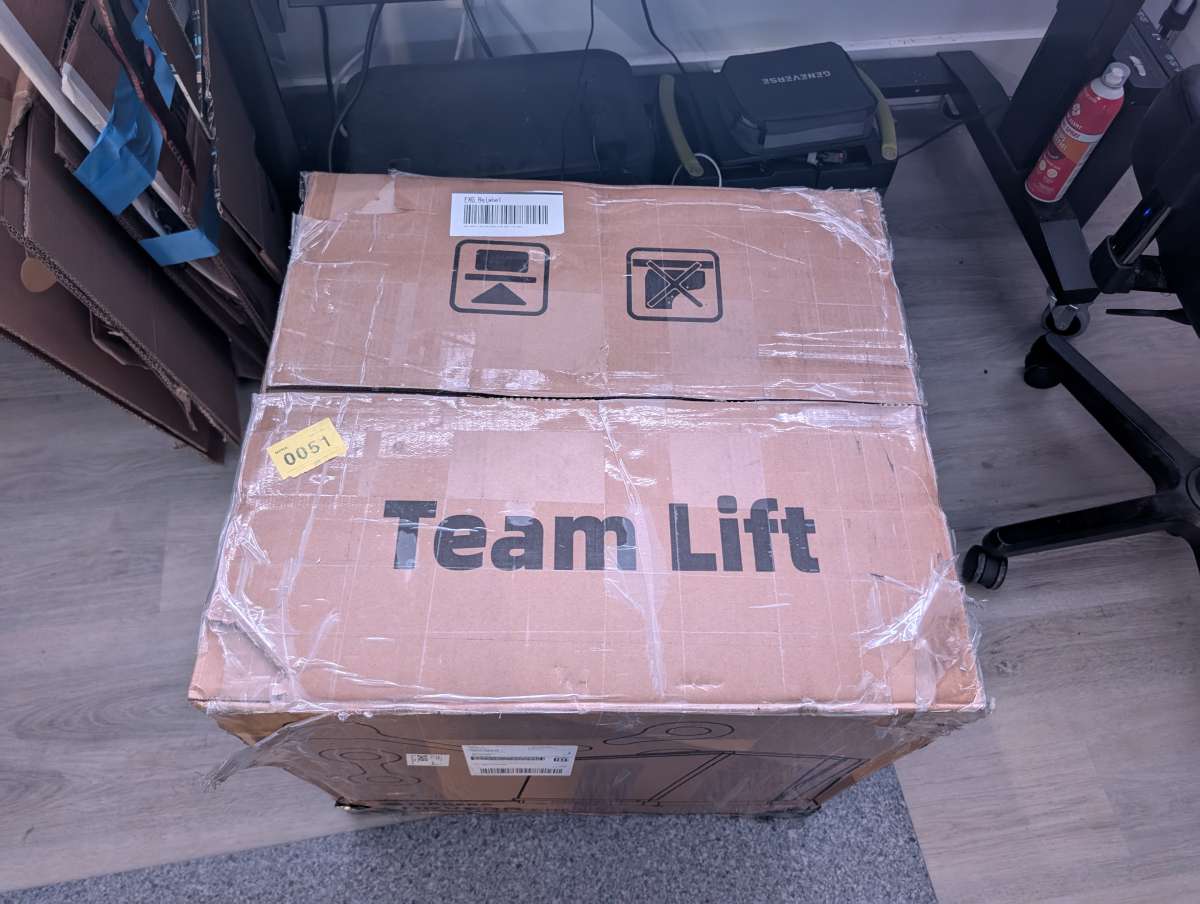
The Carvera Air arrives in a VERY heavy box, so make sure you have someone to assist you with lifting it (I didn’t).
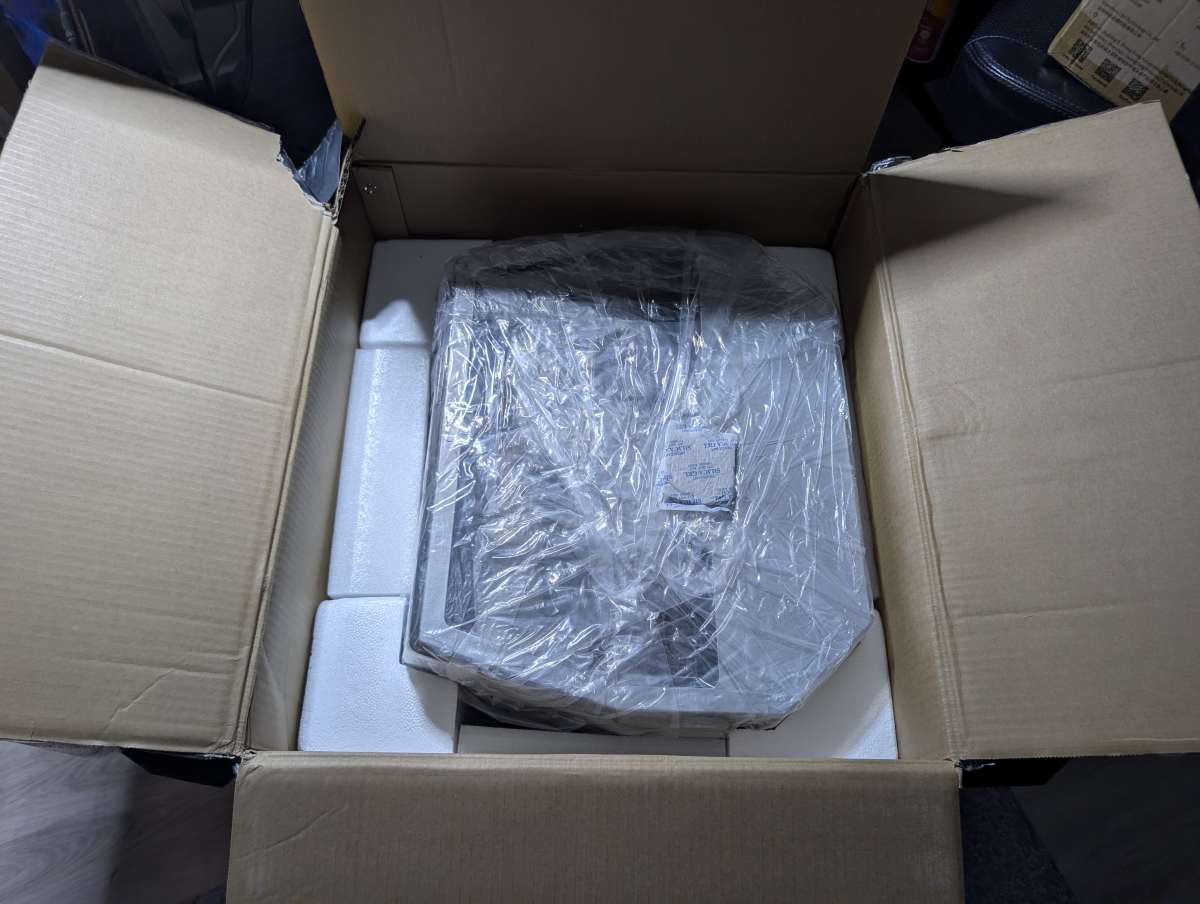
There’s plenty of packing protection to prevent any damage to the Carvera Air during transit.
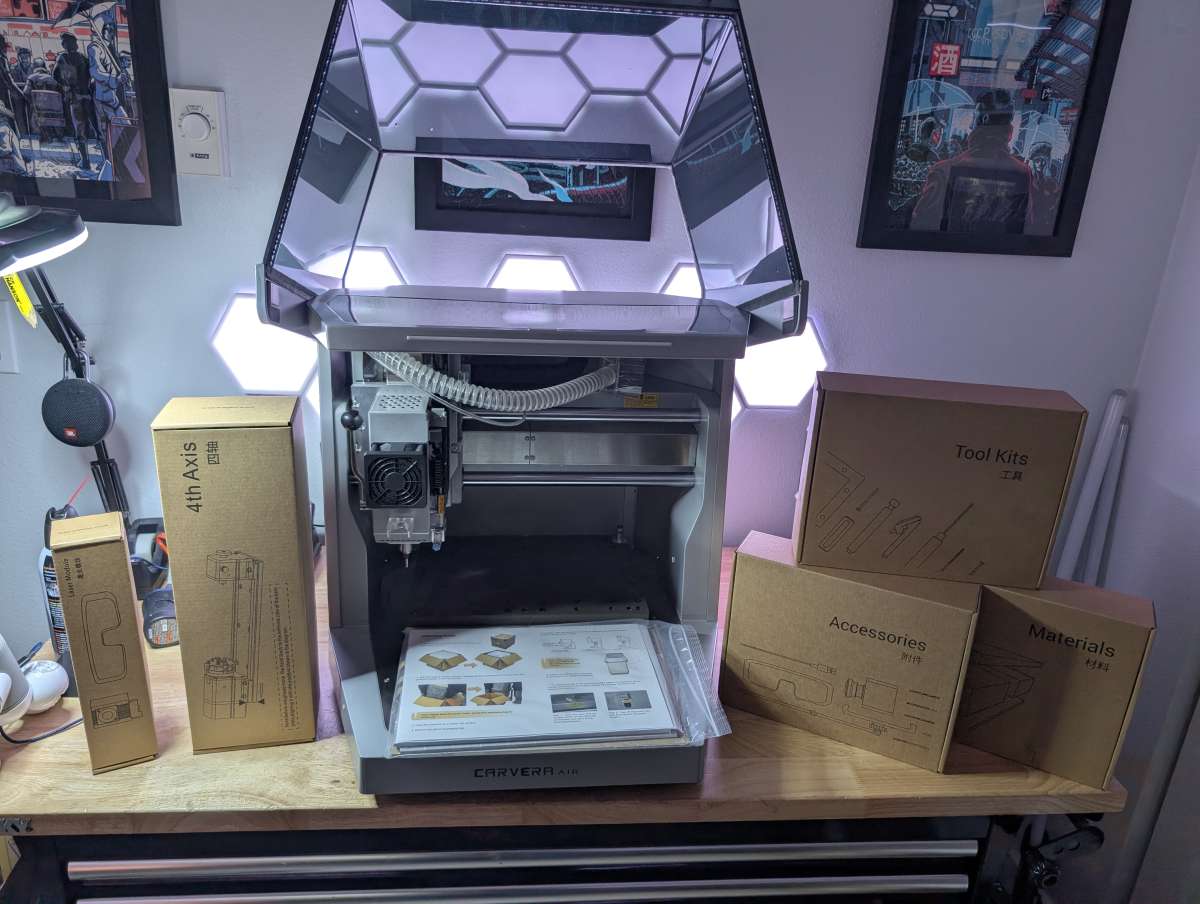
What’s included?
- Carvera Air desktop CNC machine
- Optional:
- 4th axis rotary module
- Laser engraving module
- Power cable
- Collets and Tool Kit
- holding clamps and fixtures
- Safety goggles and Laser Safety Goggles
- Starter set of end mills
- Emergency Stop Button
- Phone/Tablet Holder
- USB data cable
- User documentation and quick start guide
- Various Project Materials
Tech specs
- Work Area (3-axis): 11.8 in (30 cm) X × 7.9 in (20 cm) Y × 5.1 in (13 cm) Z
- Work Area (4-axis): 3.6 in (9.2 cm) Diameter × 7.9 in (20 cm) Length
- Gantry Clearance: 4.7 in (12 cm)
- Max Height (Lid Open): 33 in (84 cm)
- Footprint: 19.7 in (50 cm) Width × 17.7 in (45 cm) Depth × 17.7 in (45 cm) Height
- Weight: 66 lbs (30 kg approx.)
- Power Supply: Input: 100–120 VAC / 200–240 VAC @ 50/60 Hz
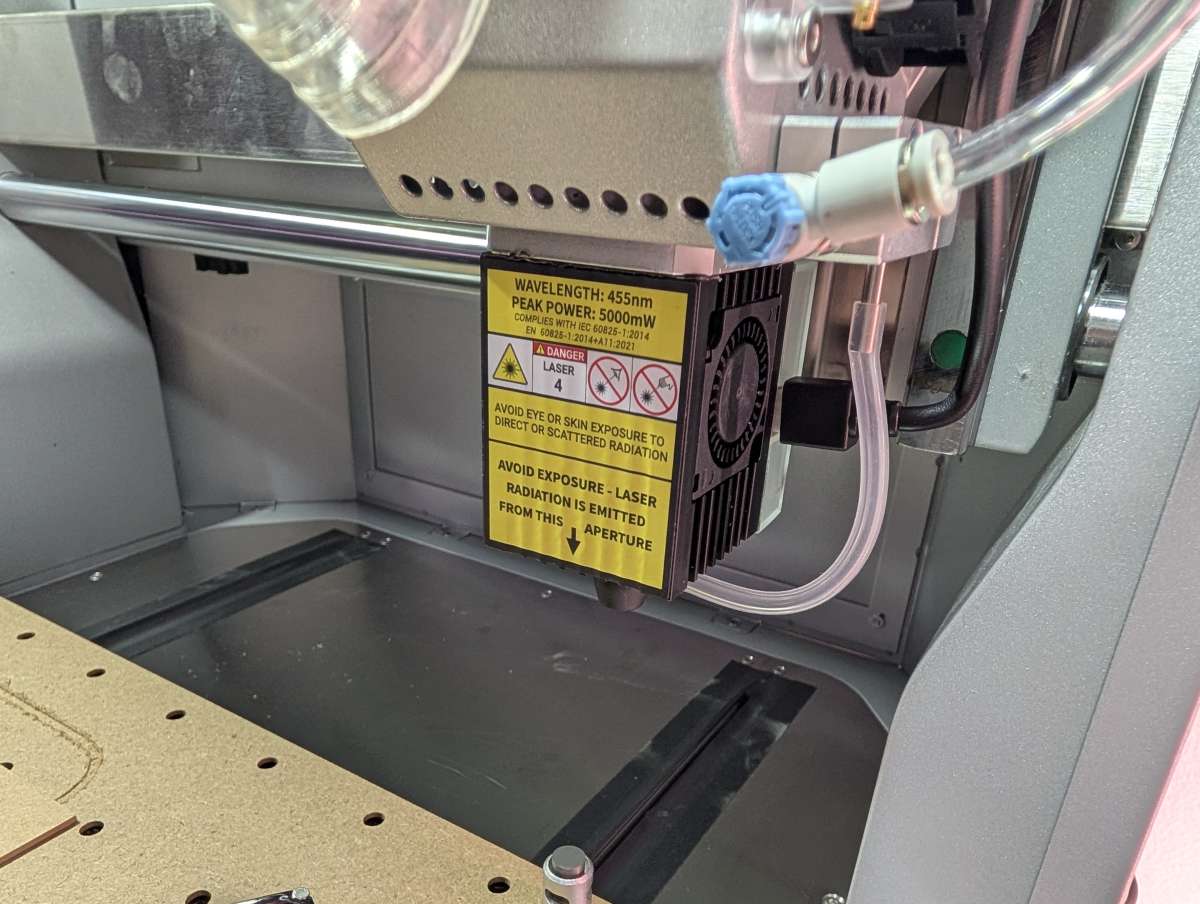
- Optional Laser Module Power: 5 W (445 nm semiconductor diode laser)
- Spindle:
- Power: 200 W
- Collet: Custom collet with 1/8 in integrated (optional: 1/4 in, 6 mm, 4 mm)
- Speed: 0–13,000 RPM with closed-loop control
- Runout: < 0.0003 in (< 0.01 mm)
- Motor Resolution: 0.0002 in (0.005 mm)
- Supported Materials:
- Wood: Hardwoods, softwoods, MDF, plywoods
- Plastic: Foam, PVC, ABS, acrylic, PC, HDPE
- Composite Materials: Carbon fiber, FR4
- Non-Ferrous Metals: Aluminum, brass, copper
- Laser Engrave Materials: Wood, plastic, fabric, leather, cardboard
- Controller Software:
- Controller: Dedicated software supports Carvera functions
- Connectivity: USB / Wi-Fi
- Operating Systems: iOS, Android, macOS, Windows, Linux
- Dedicated CAM Software: Makera CAM
- Compatible CAD/CAM Software: Fusion 360, SolidWorks, AutoCAD, VCarve Pro, Aspire, Illustrator
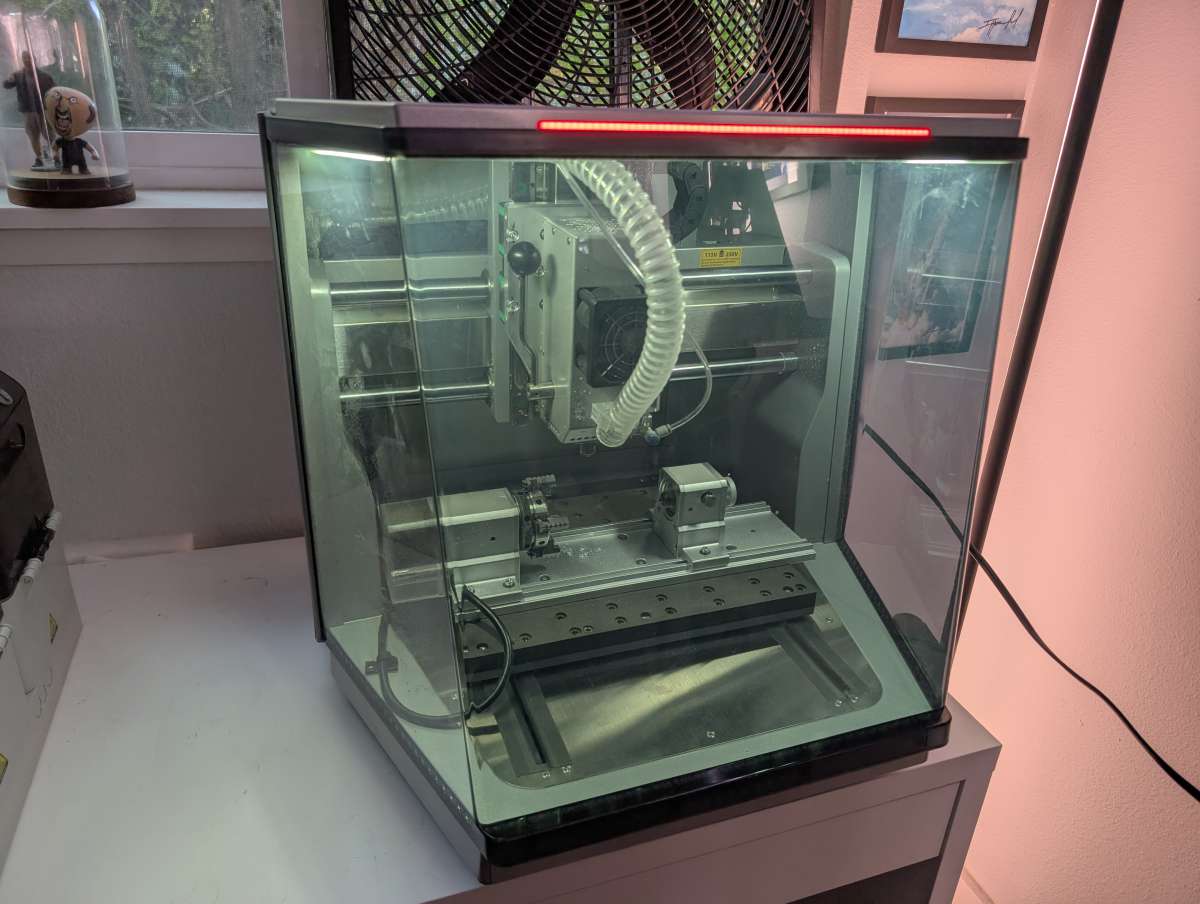
Design and features
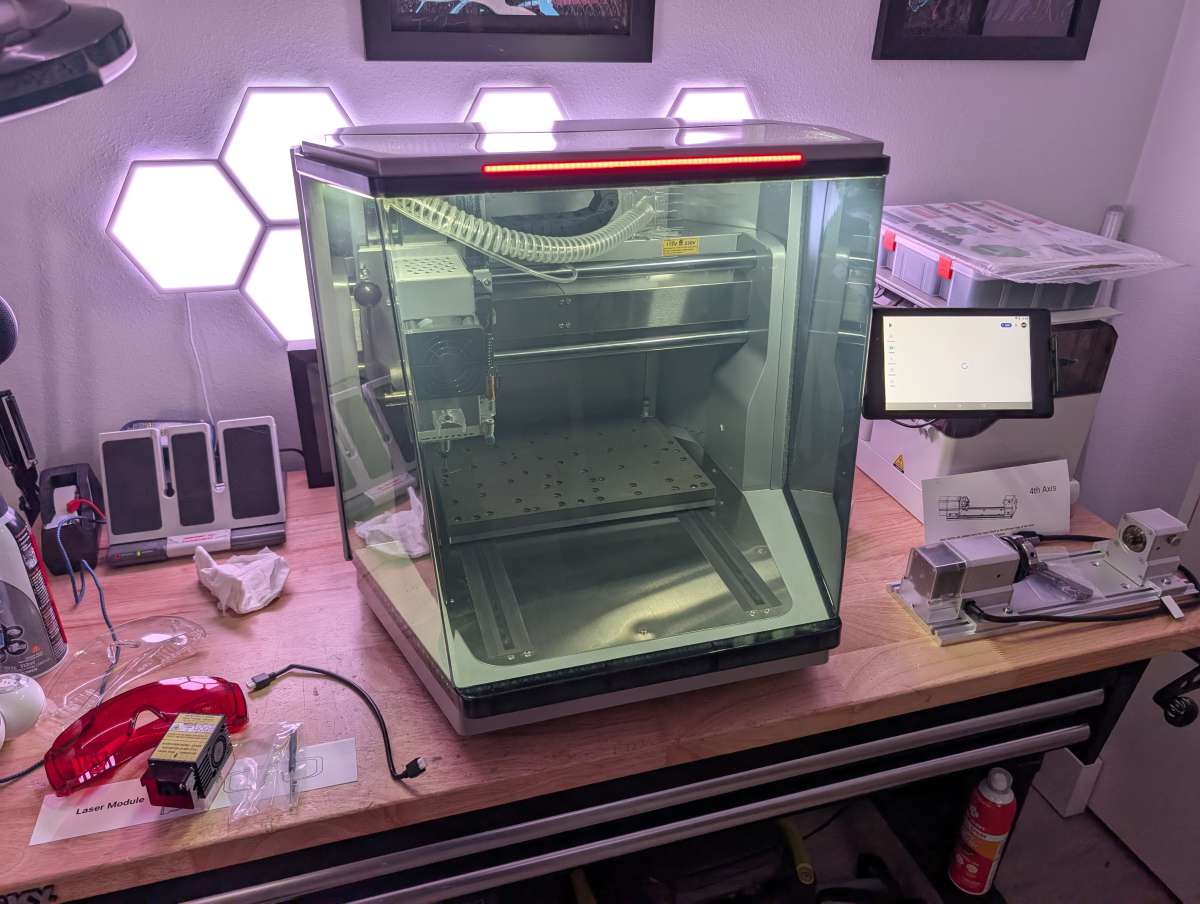
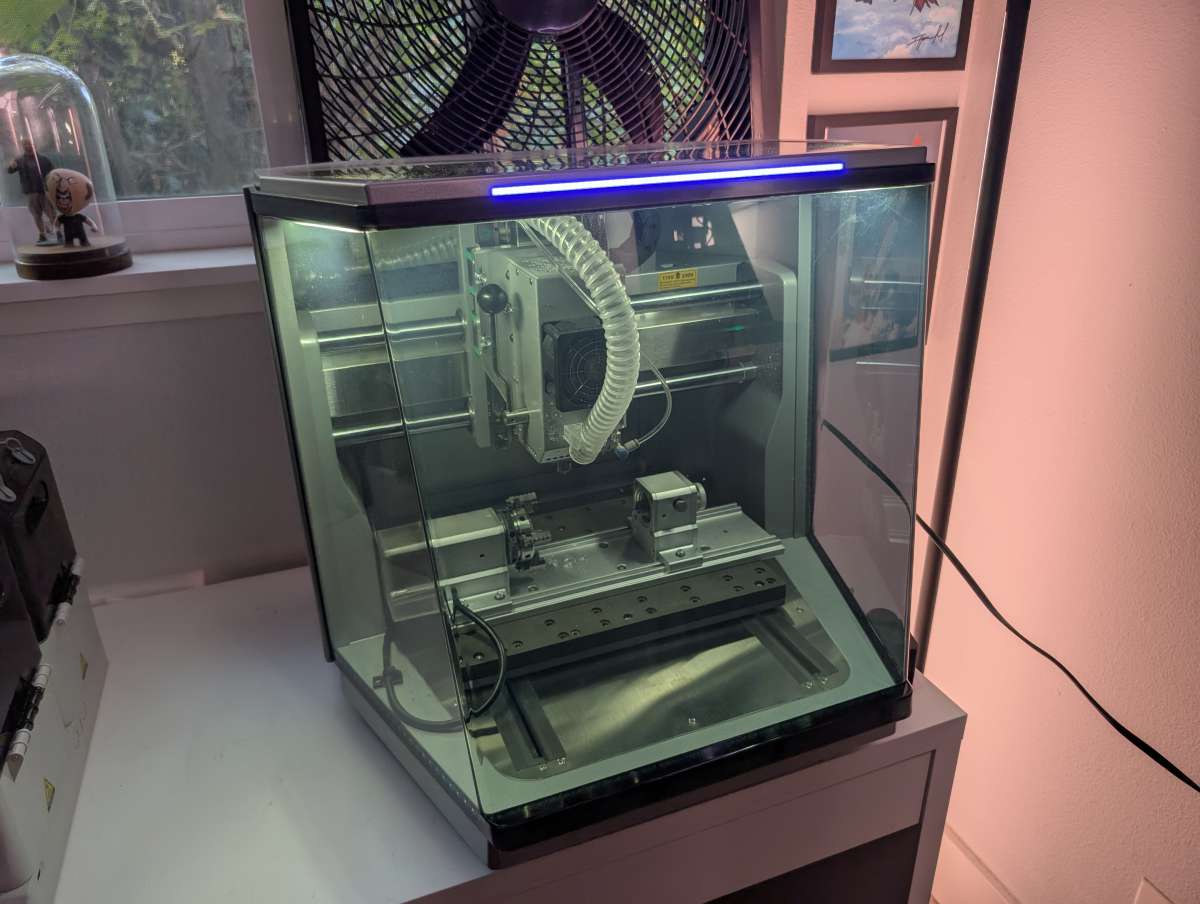
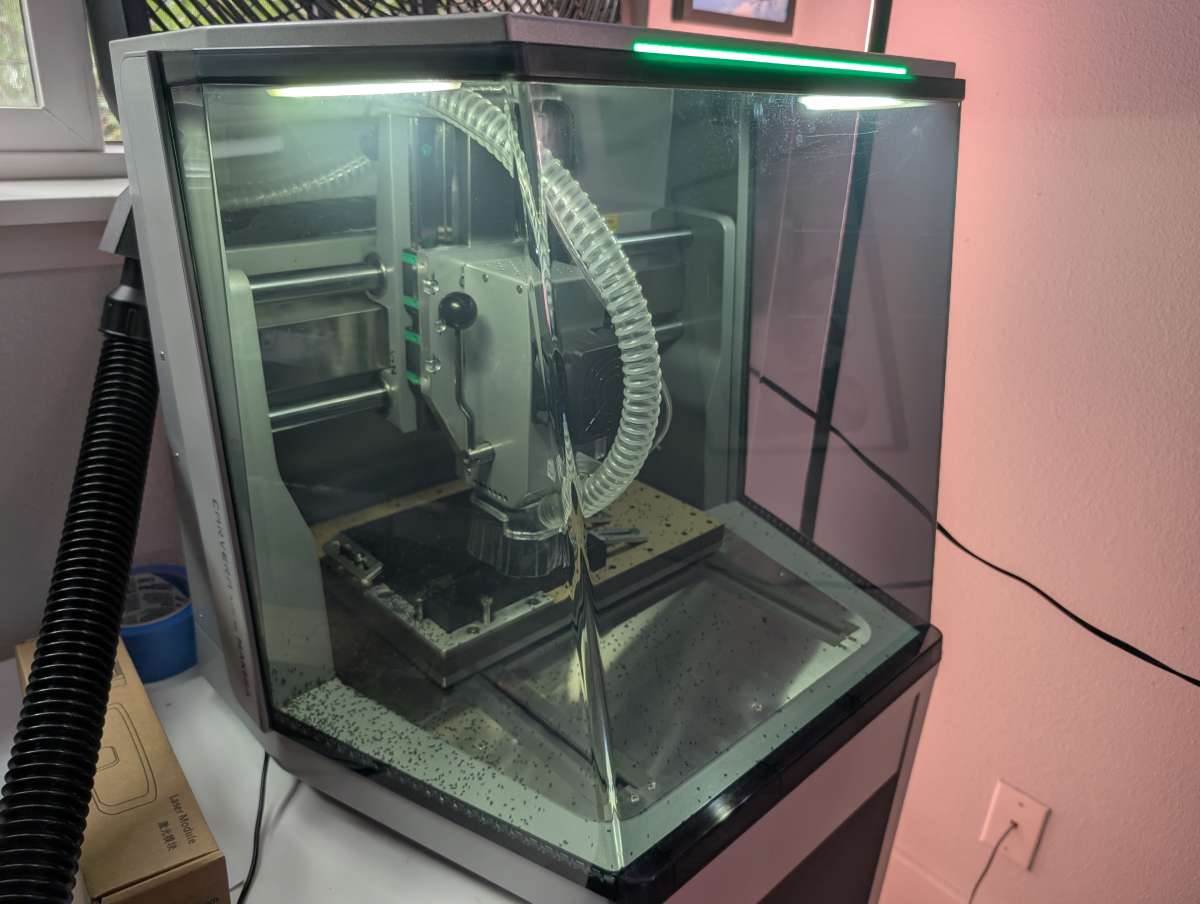
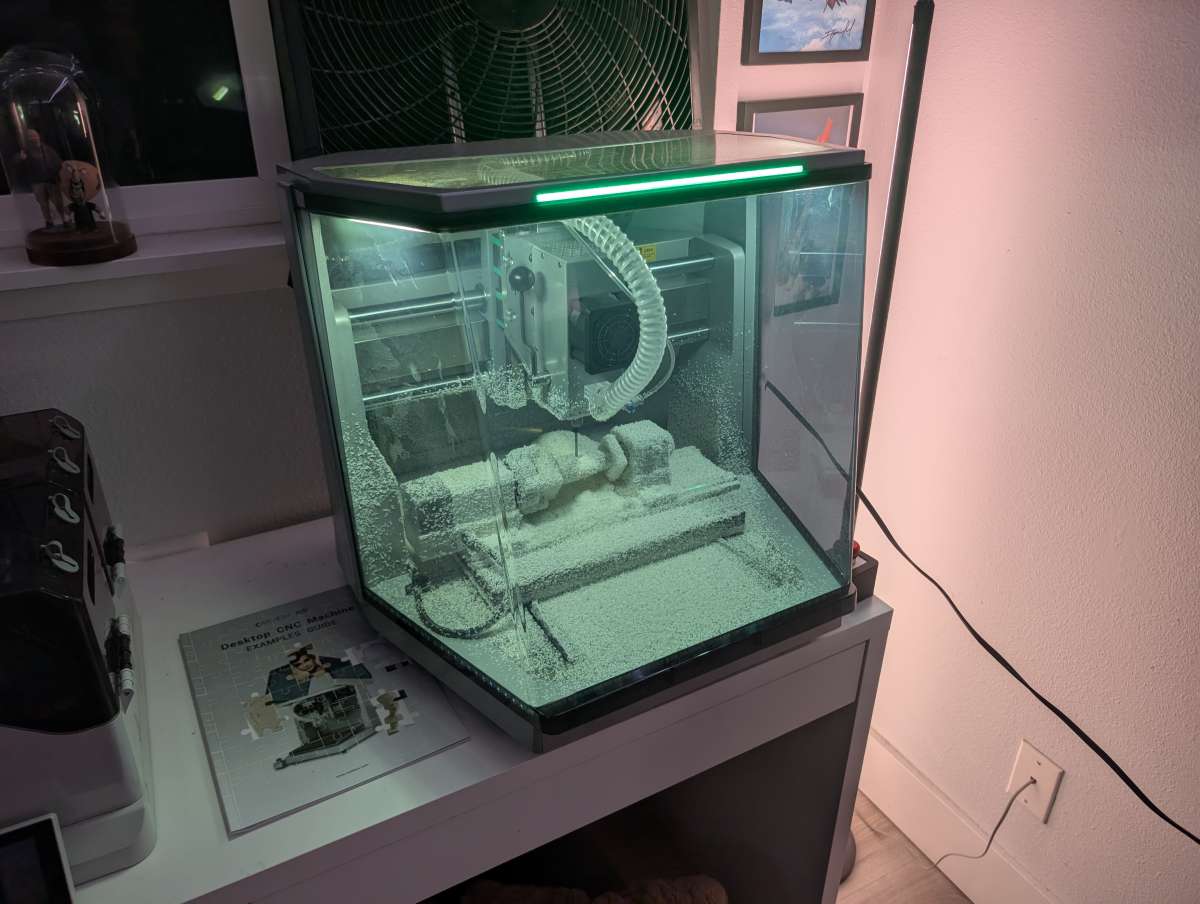
The Carvera Air has a compact, self-contained design that works well on a desk in an apartment. The front features a large transparent door that swings up and open to reveal the work area. The enclosure not only contains dust and chips but also helps reduce noise and gives the Carvera Air a polished, professional look.
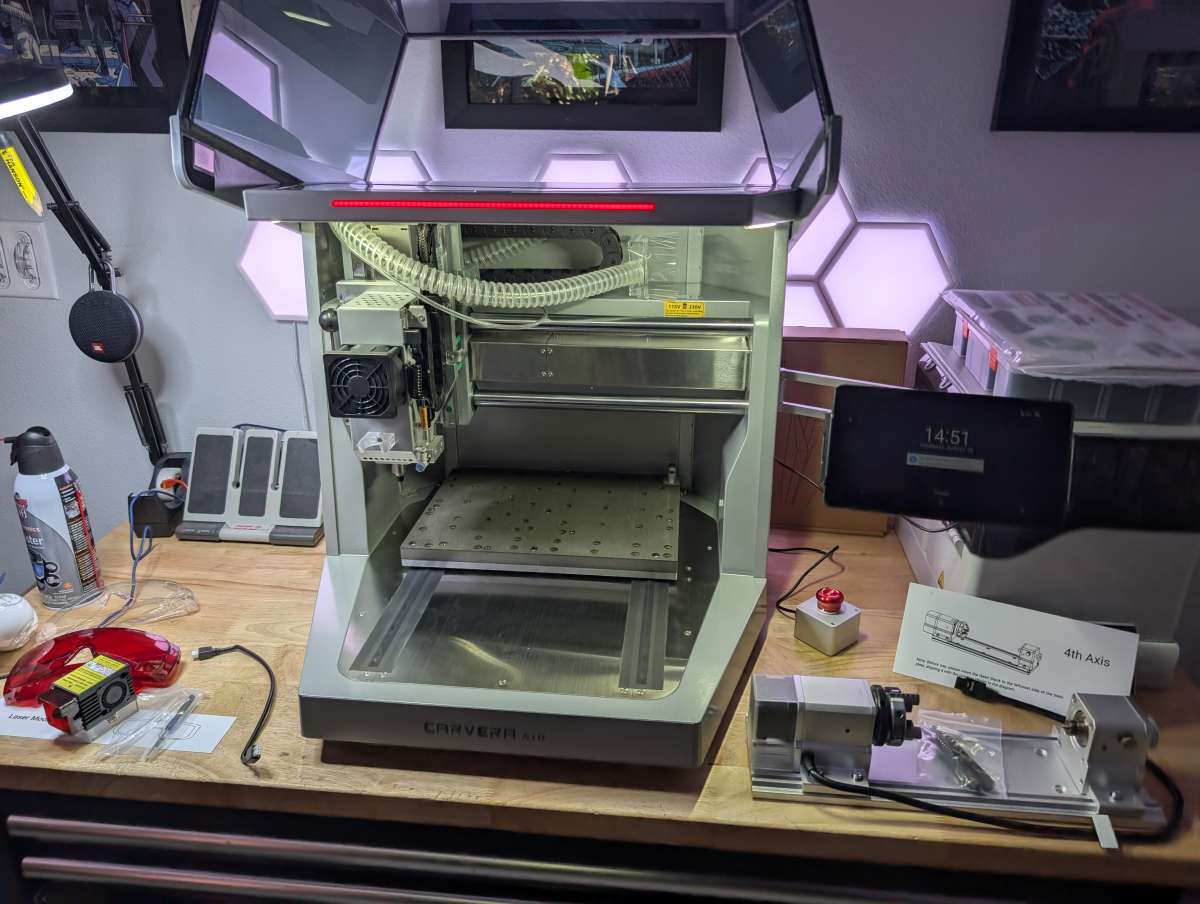
Build quality is solid, with metal used for the gantry and main structural elements, and durable plastics used sparingly. At about 66 lbs, the machine is stable enough to handle milling without moving, yet light enough to reposition on a sturdy table when needed.
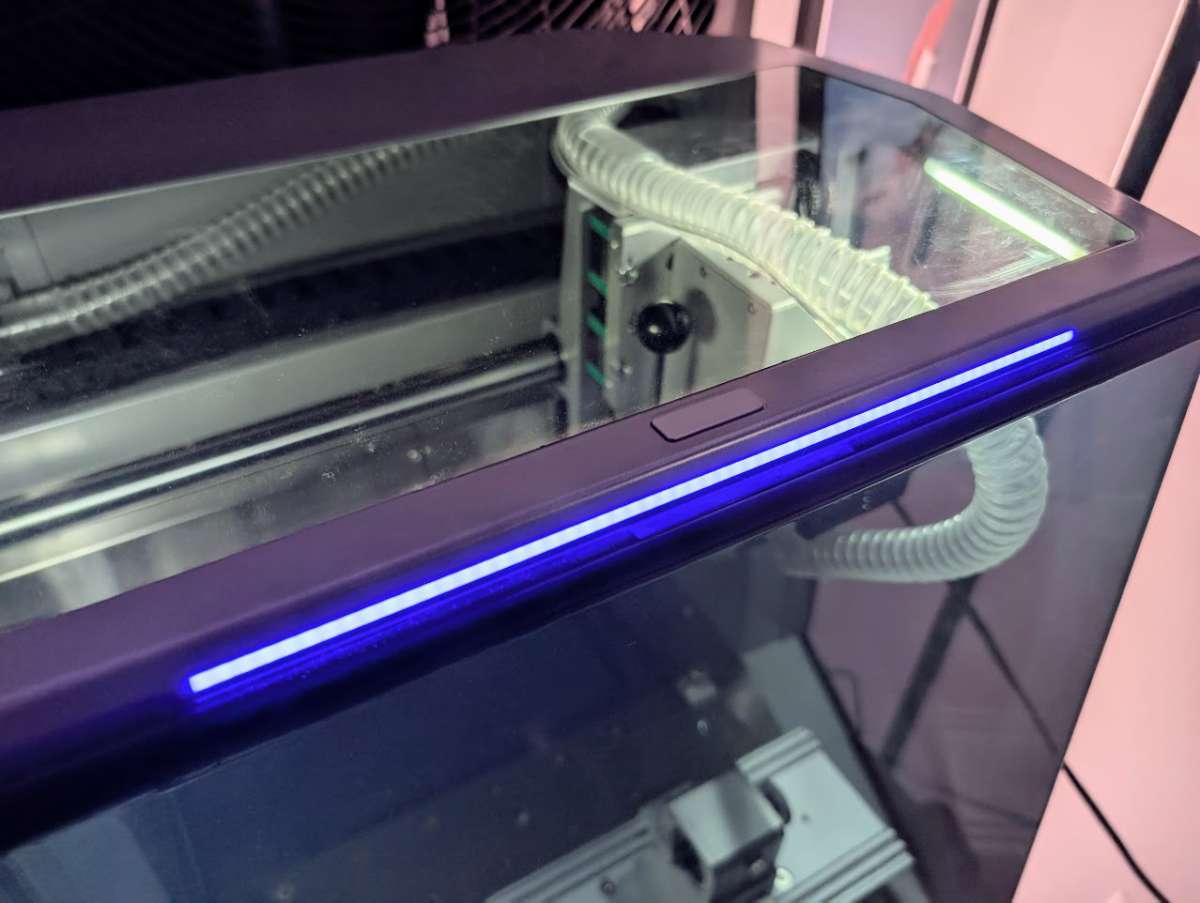
There’s a long LED strip along the top of the unit for conveying machine status and a small button above it for confirming tool changes.
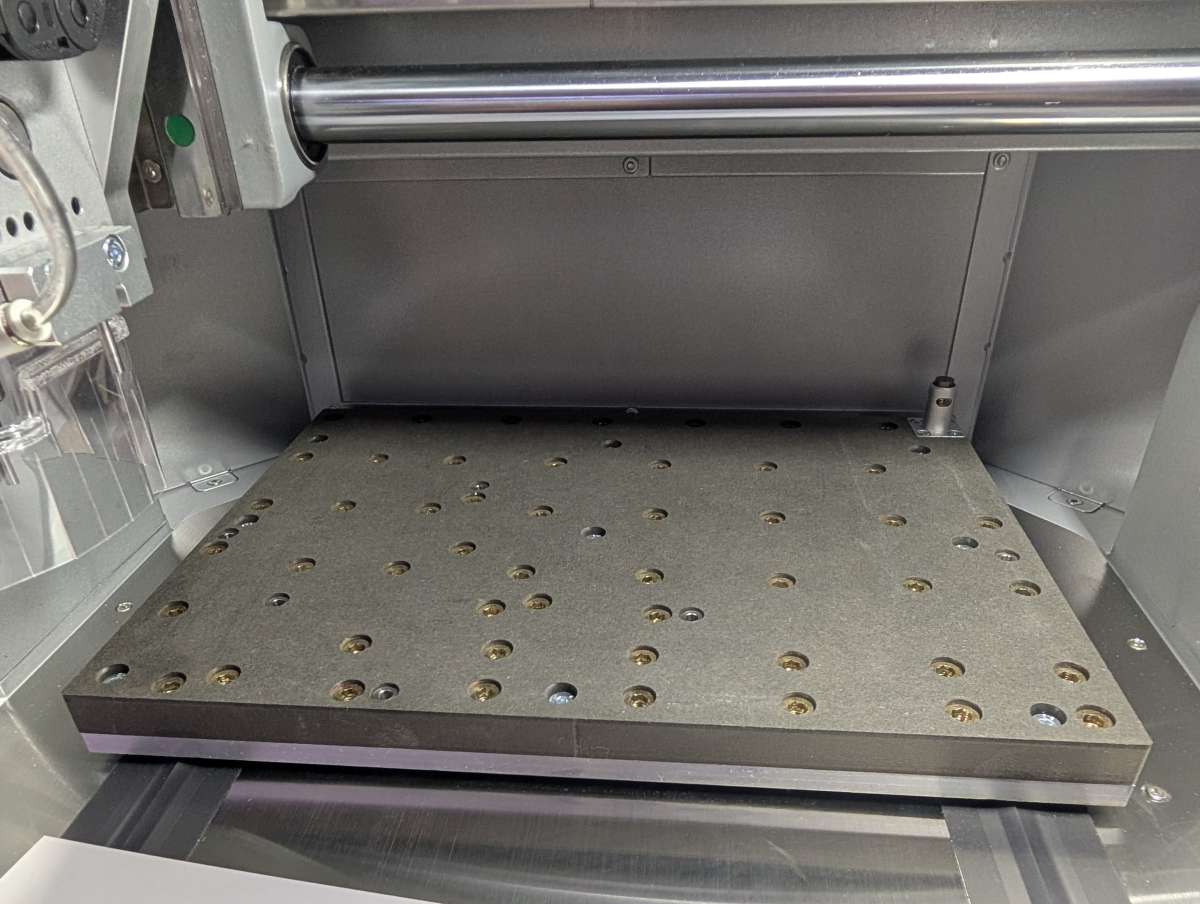
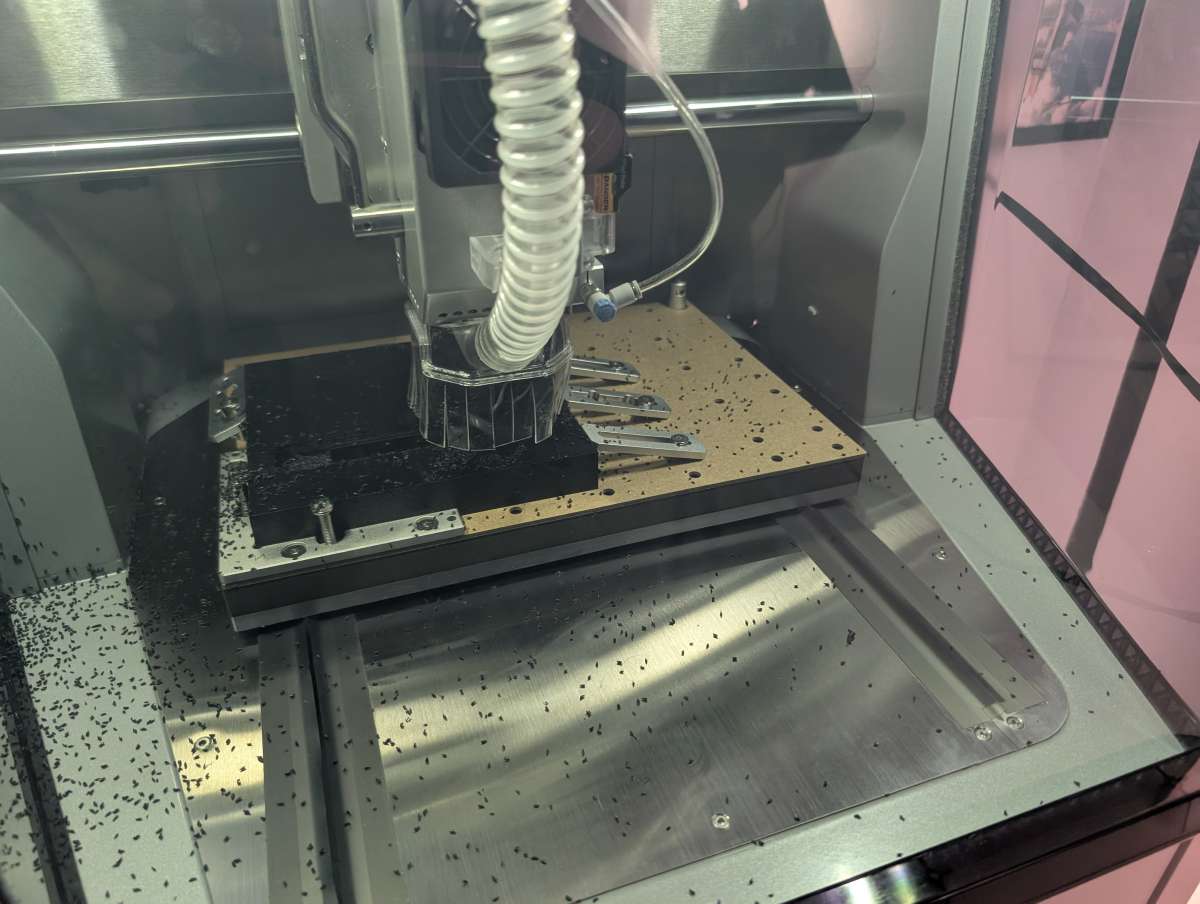
Inside, the cutting bed dominates the interior, with threaded holes to attach clamps, fixtures, or the fourth axis module.
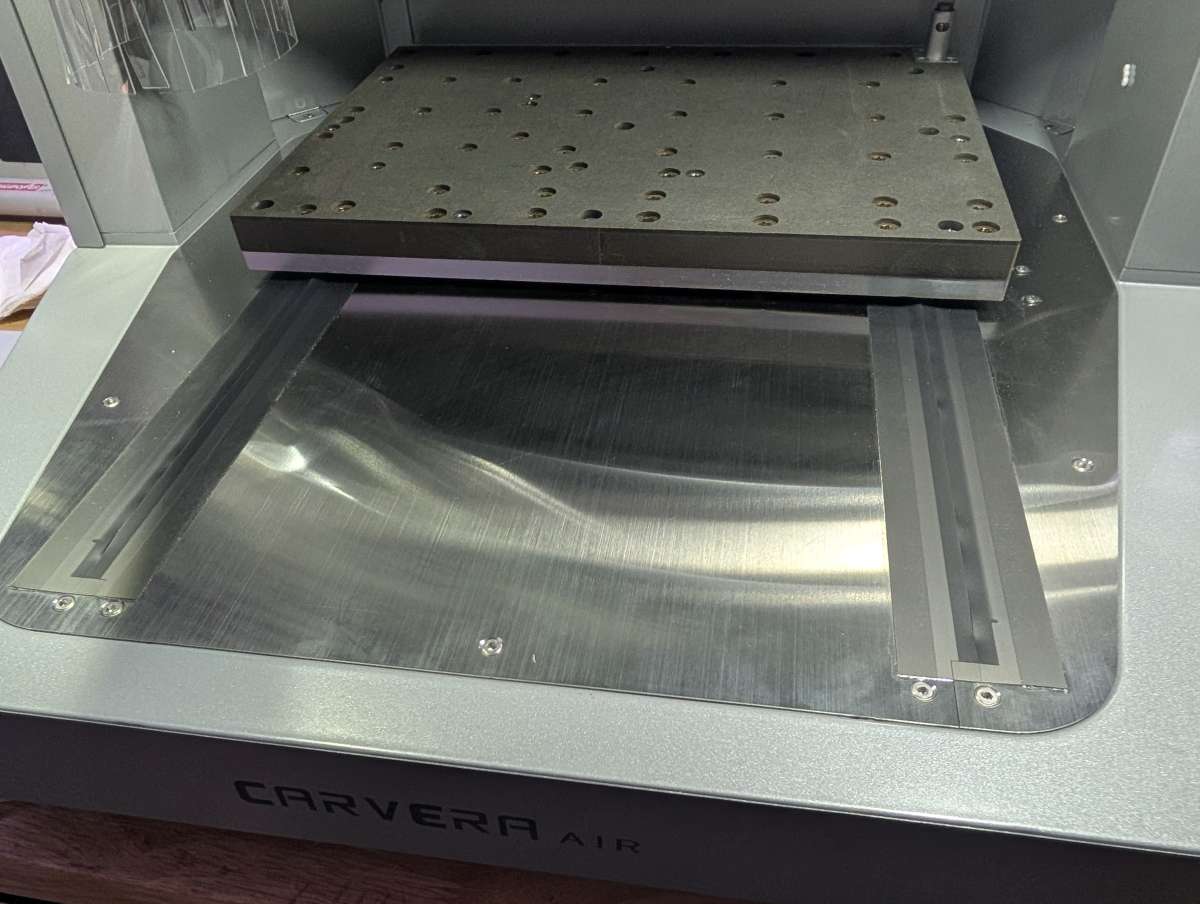
The gantry slides along the bed of the Air via two tracks cut into the bottom. The tracks are covered with thin rubber gaskets to prevent any waste material from escaping the interior.
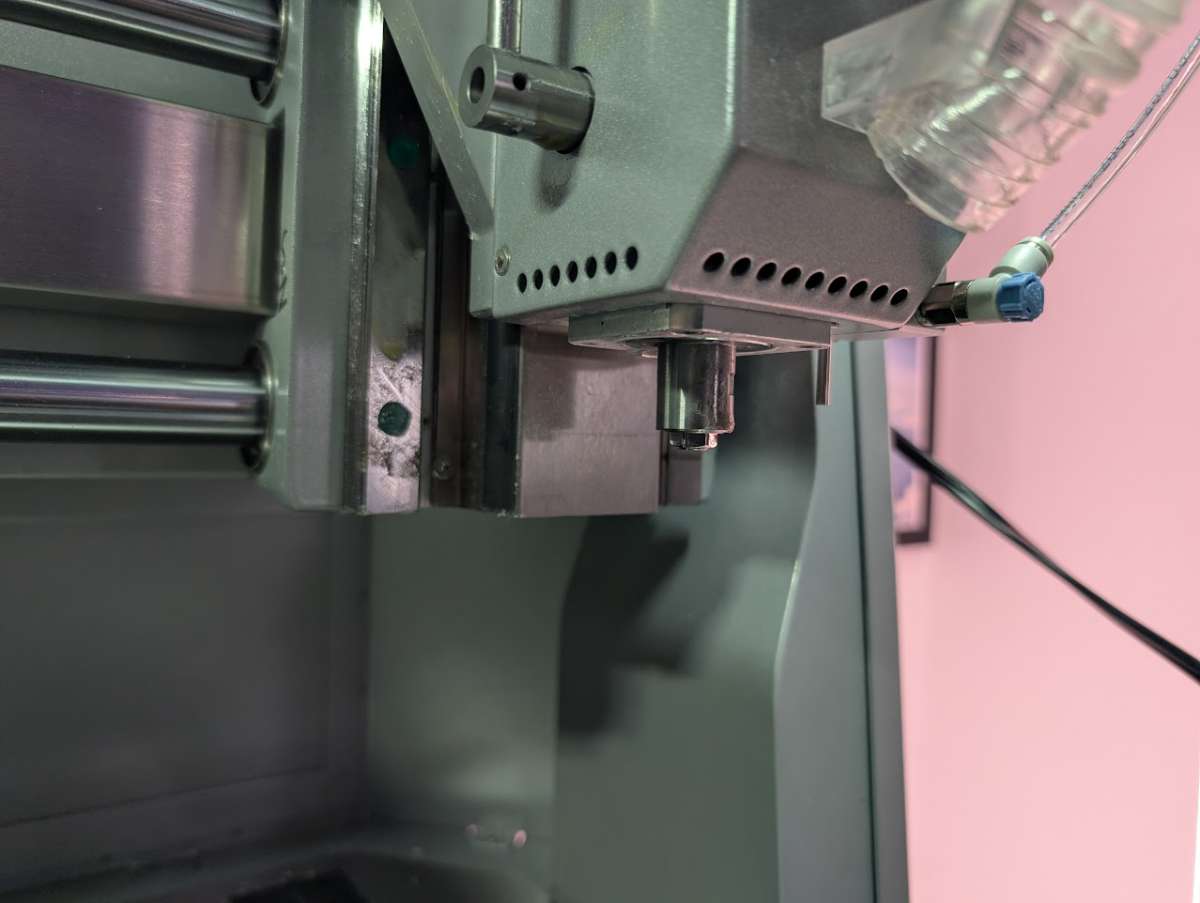
The spindle moves smoothly on a rigid gantry system across the X, Y, and Z axes.
An integrated tool-changing system lets you swap bits quickly once you understand the workflow.
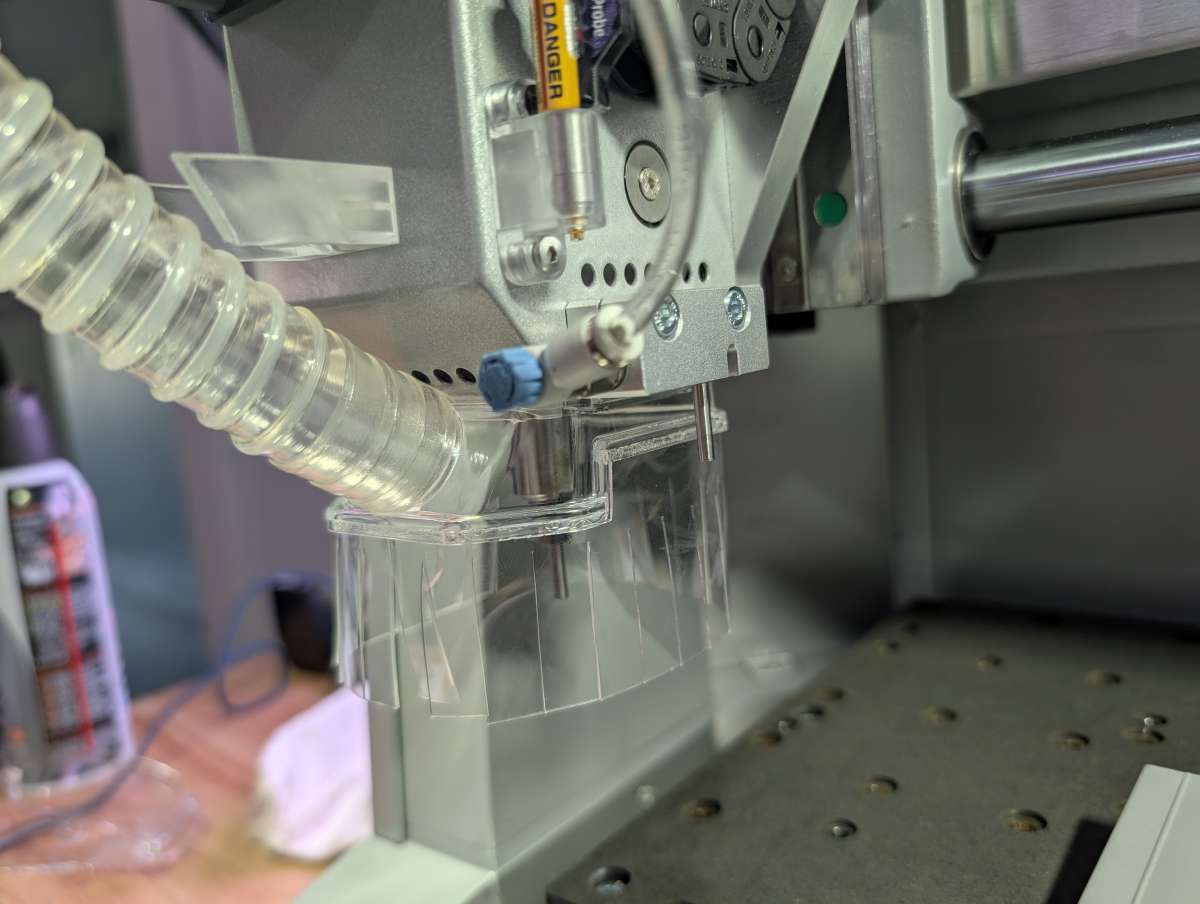
The Air has a dust shoe which connects to a small hose and works to pick up dust and waste material during use. The dust shoe connects with small magnets and is easily removable when not needed.
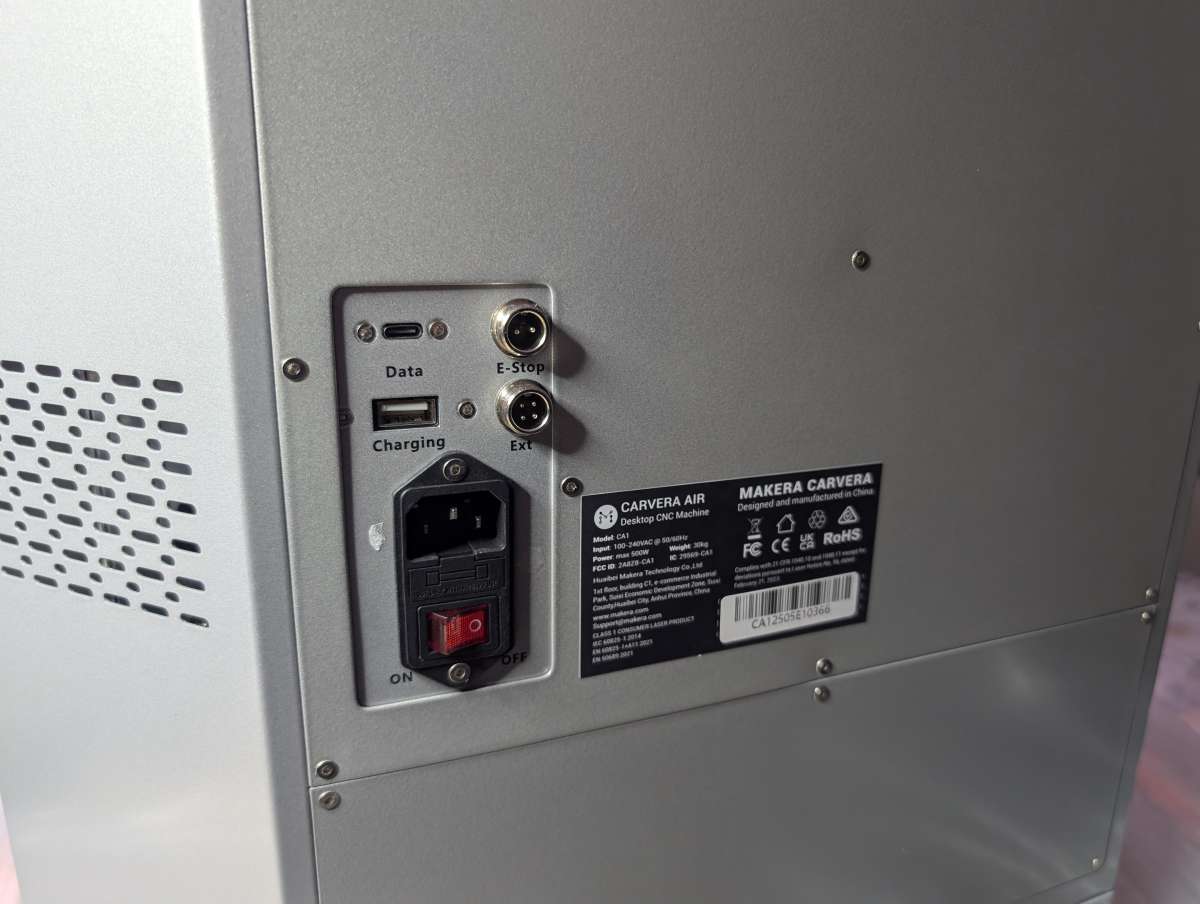
Around the back of the Air, you’ll find the main power input and switch, a USB-A charging port, a USB-C data port, and ports for the emergency stop button and an extension.
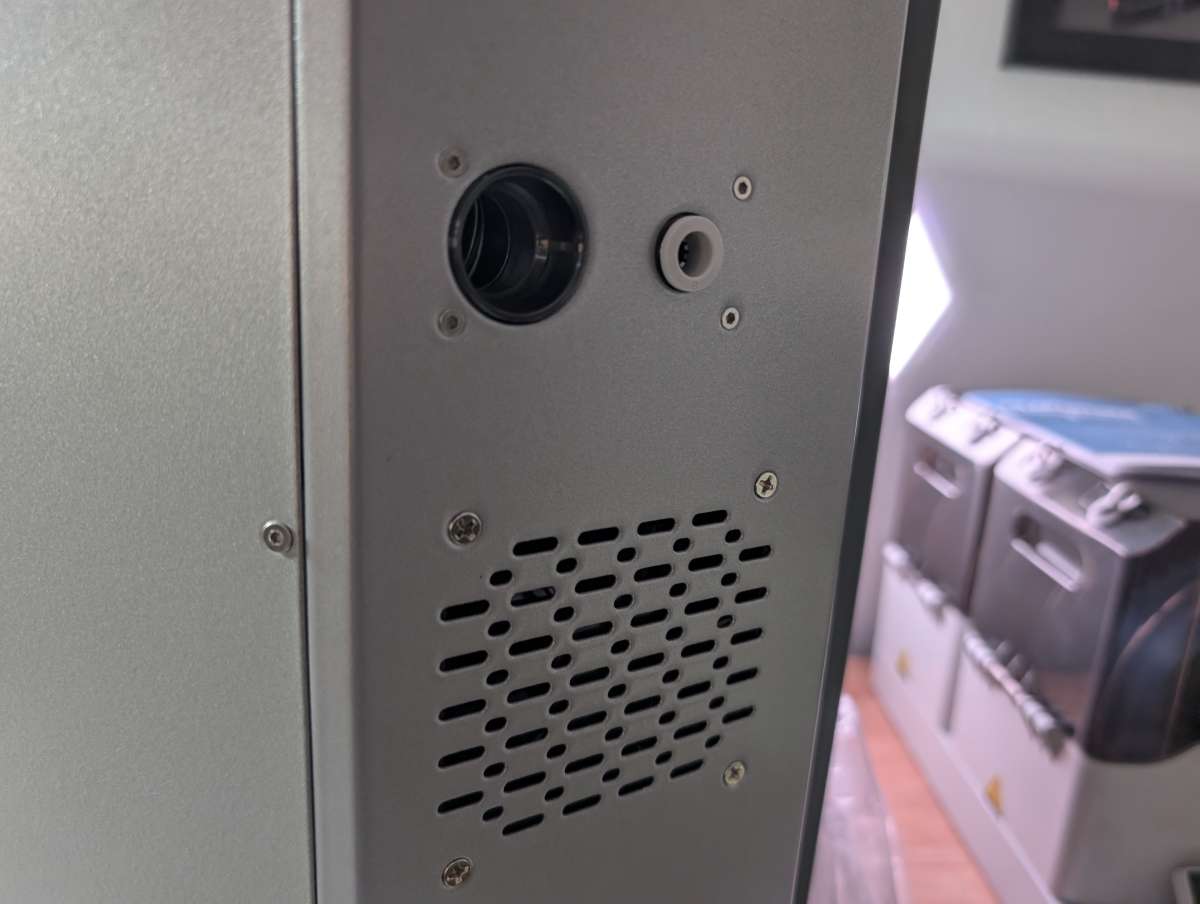
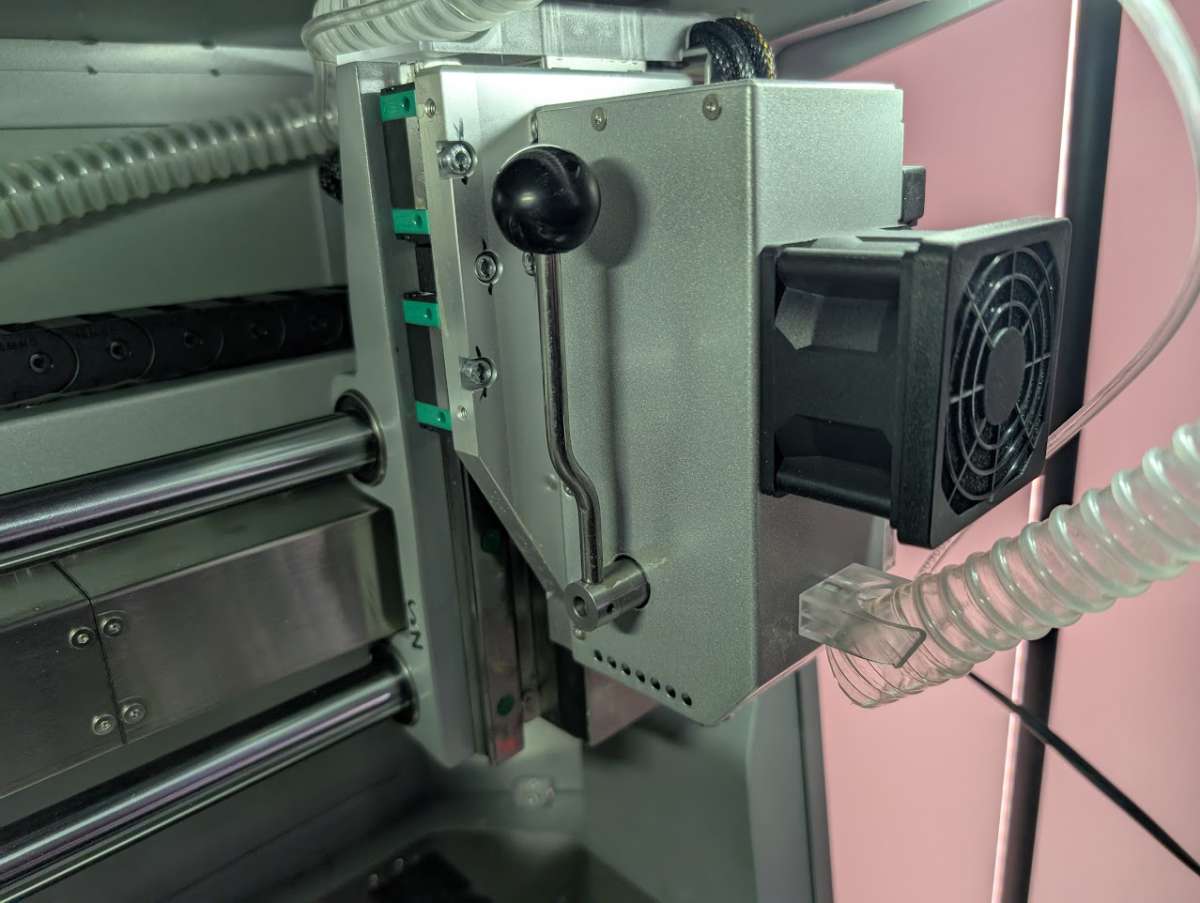
On the other back side of the unit is a large vent for cooling the internals, as well as a dust extraction port and air inlet. The dust extraction port allows you to connect the hose of a shop vac to suction out material via the dust shoe during operation. It works surprisingly well, although I had to 3D print an adapter to use my Dewalt shop vac. The air inlet port does the opposite, it allows for airflow into the unit to cool the spindle. I do wish the Carvera Air came with a small air pump, instead of requiring you to source your own.
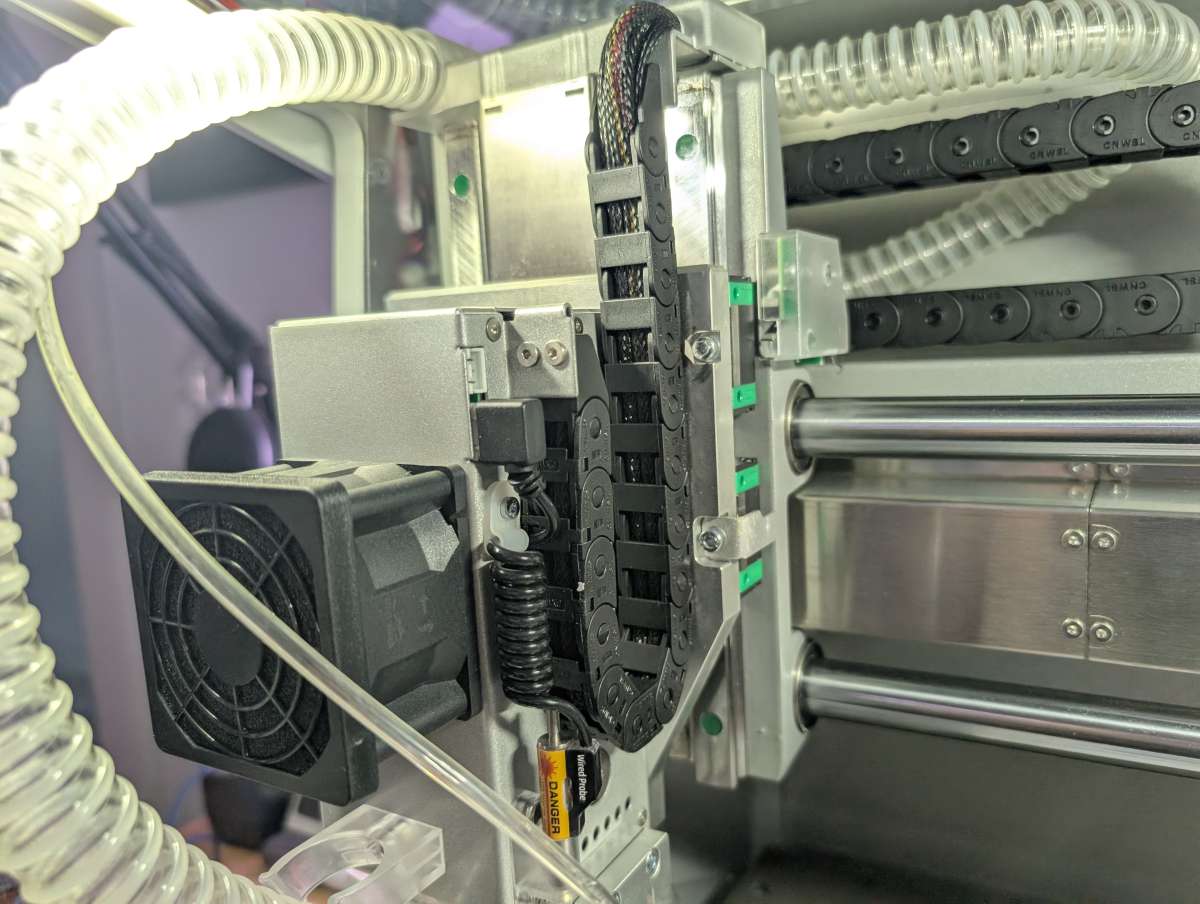
All of the internal cables are well protected and secured out of the way of all moving parts.
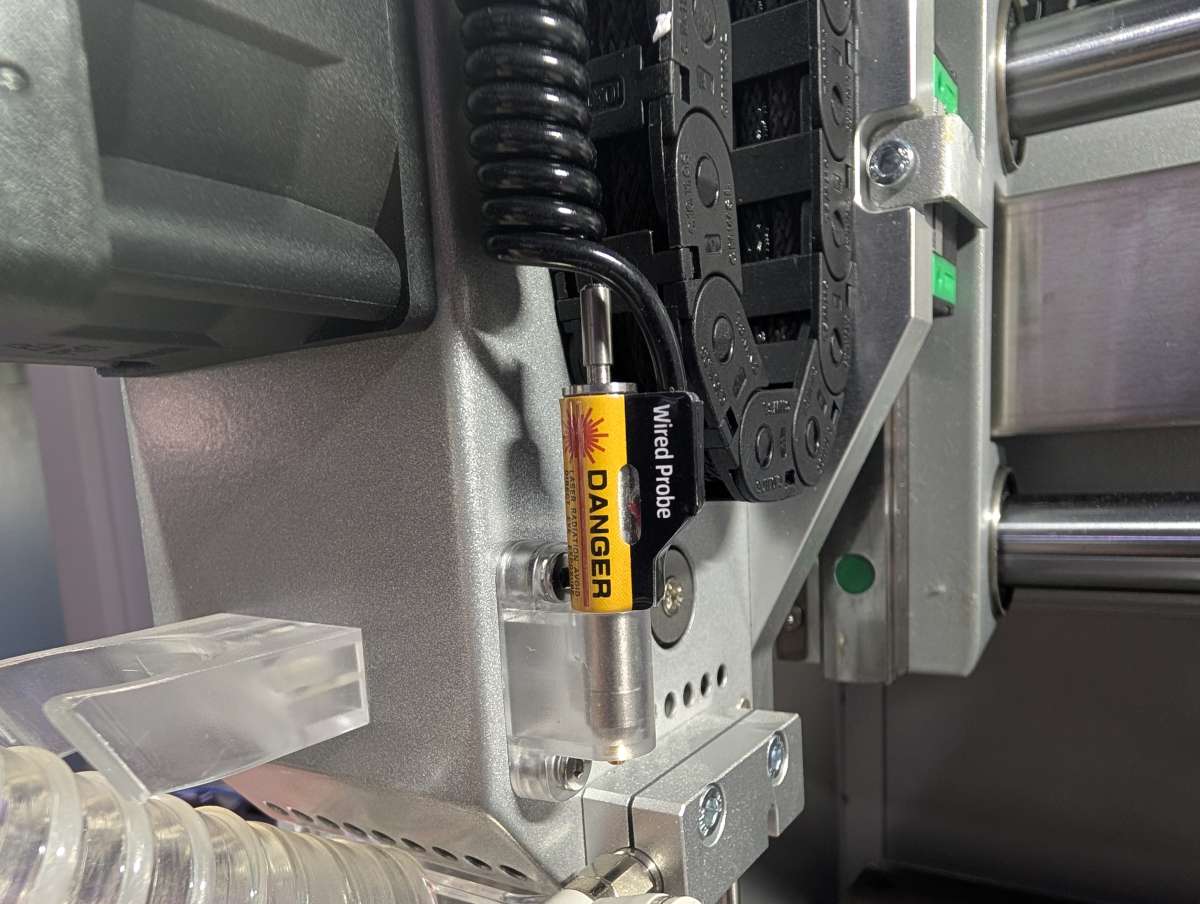
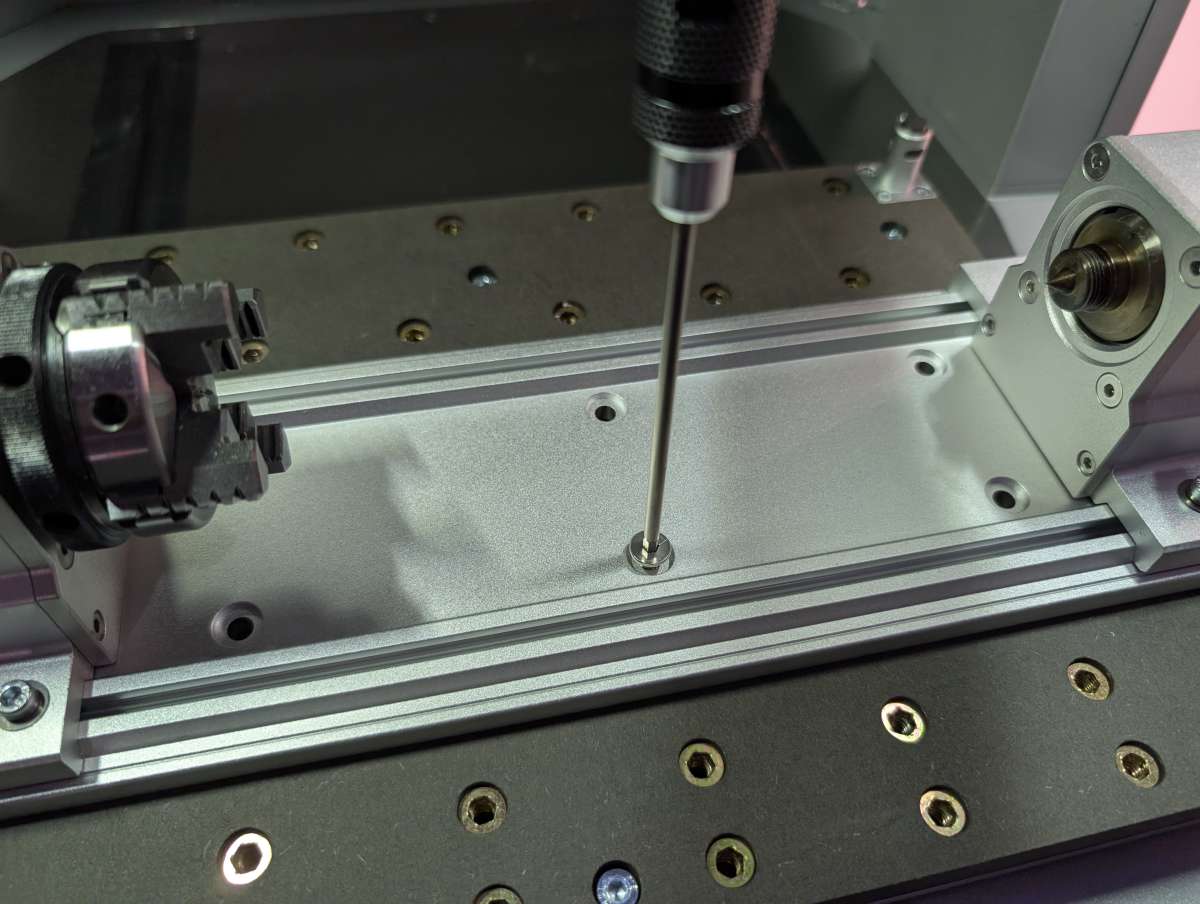
Above and to the right of the spindle is the wired laser probe. This probe is used before every job to automatically level the machine as well as measure and calibrate the height of the stock being used.
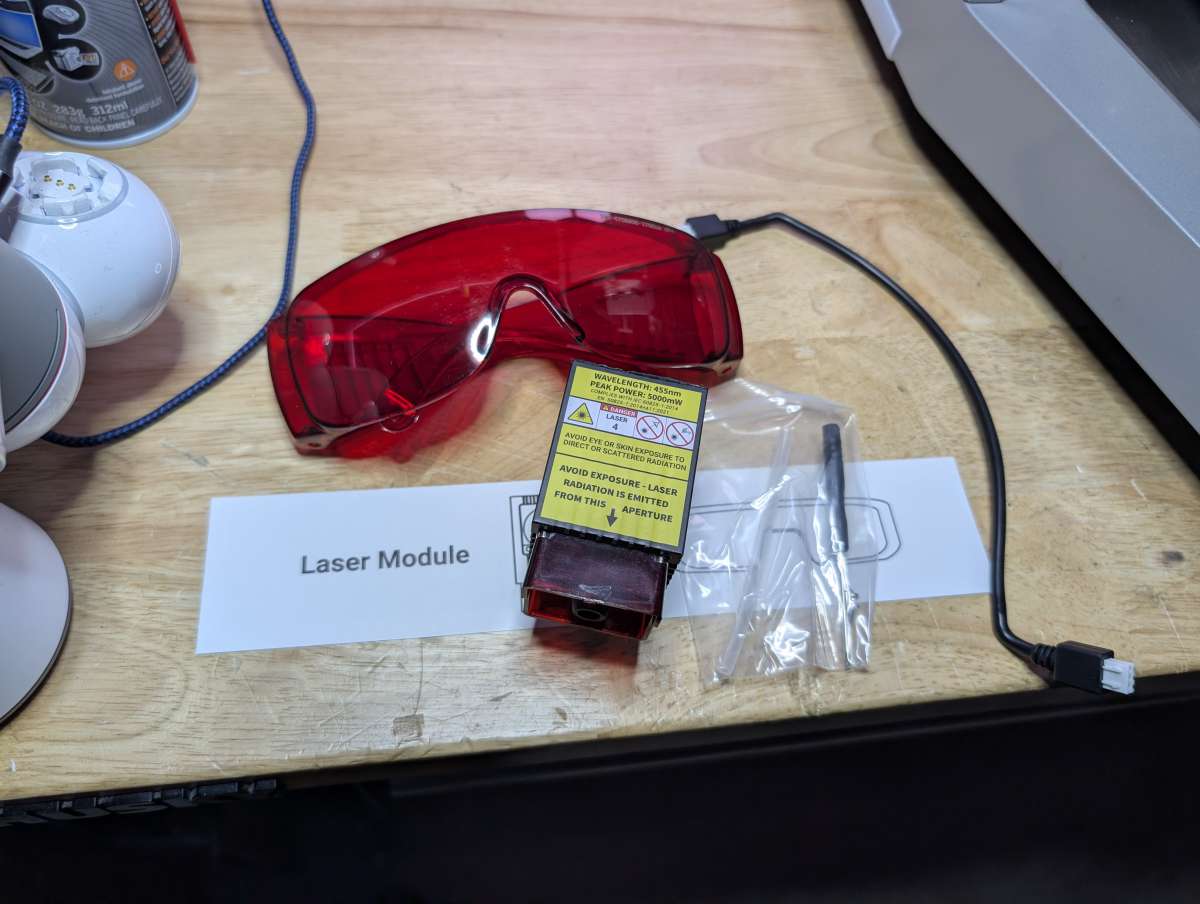
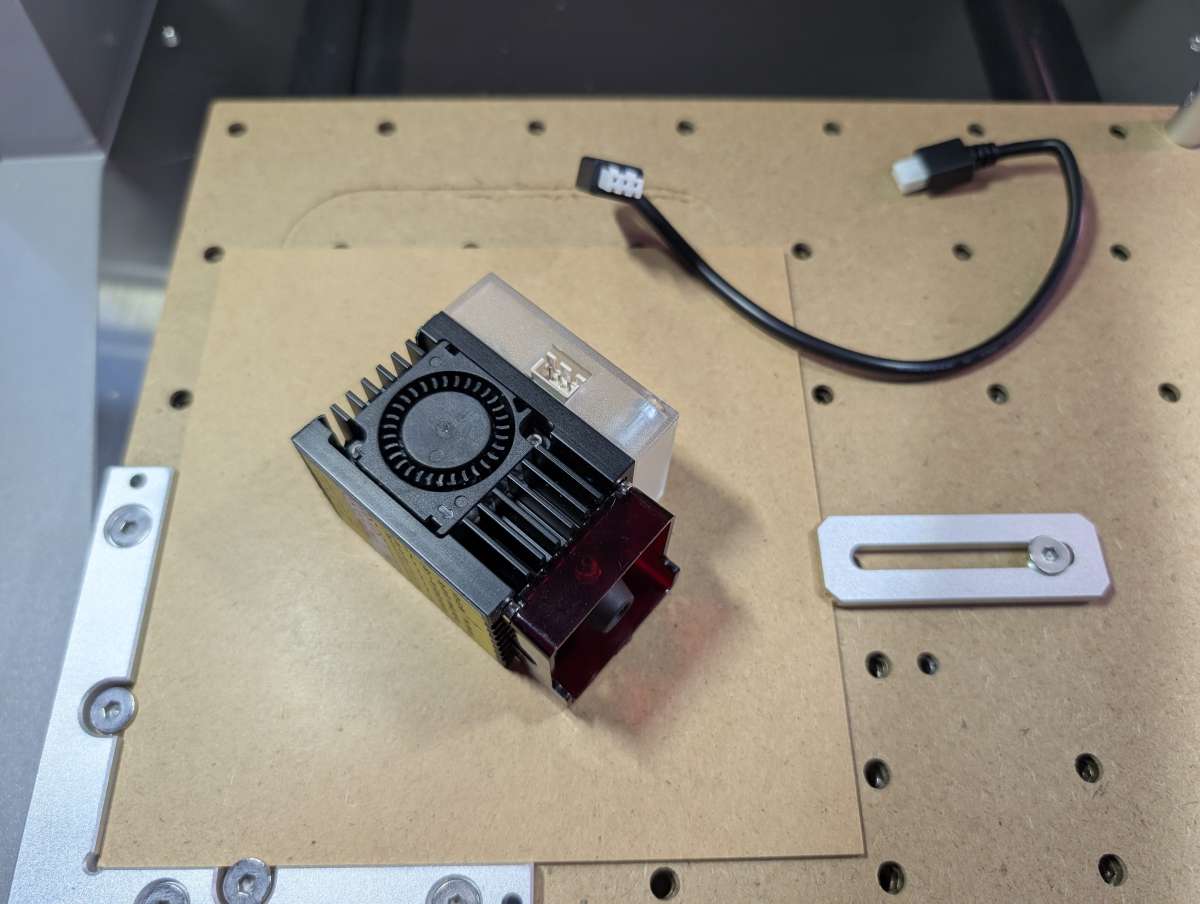
The optional laser module connects to the spindle mount like any other tool and is recognized automatically by the software.
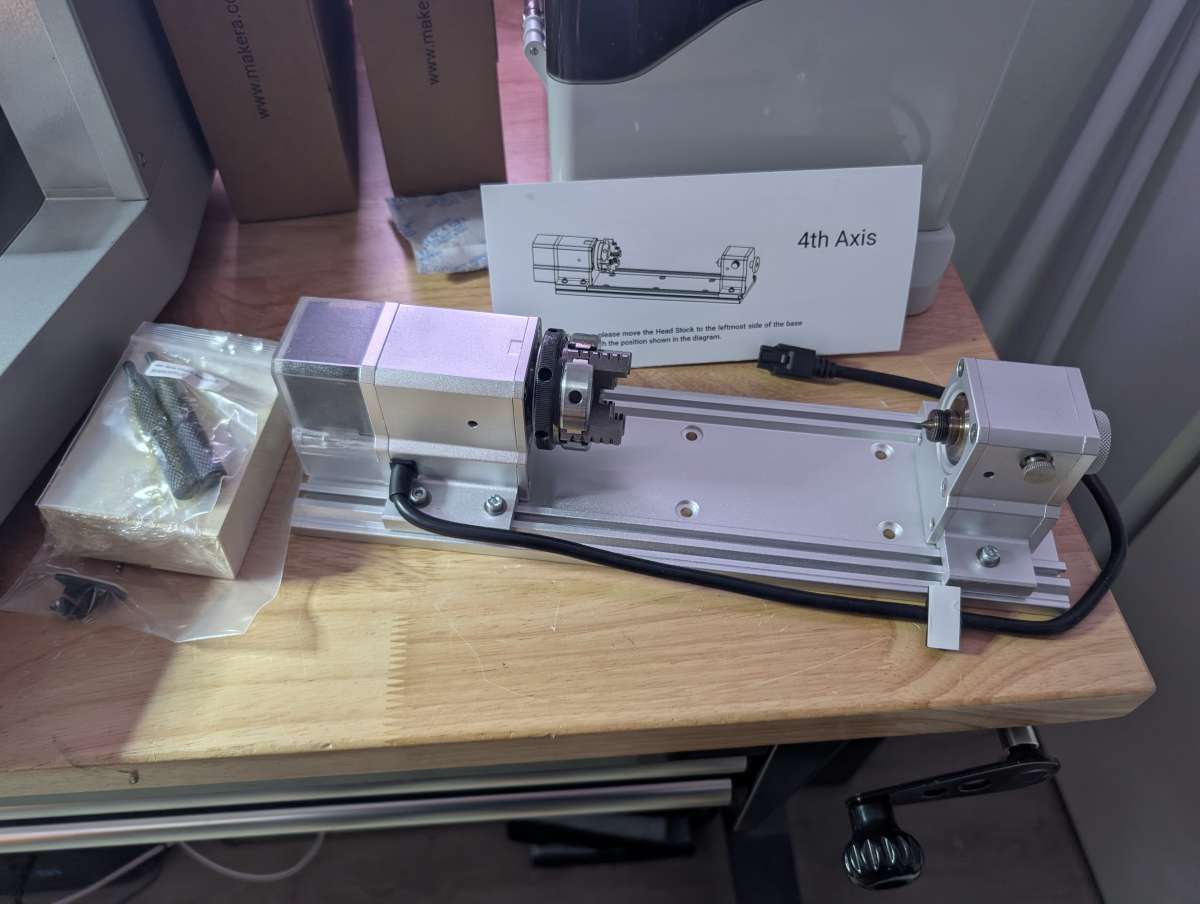
The rotary axis attaches to the bed and rotates workpieces for cylindrical or complex relief projects. Two knurled chuck wrenches are included for opening and closing the head.
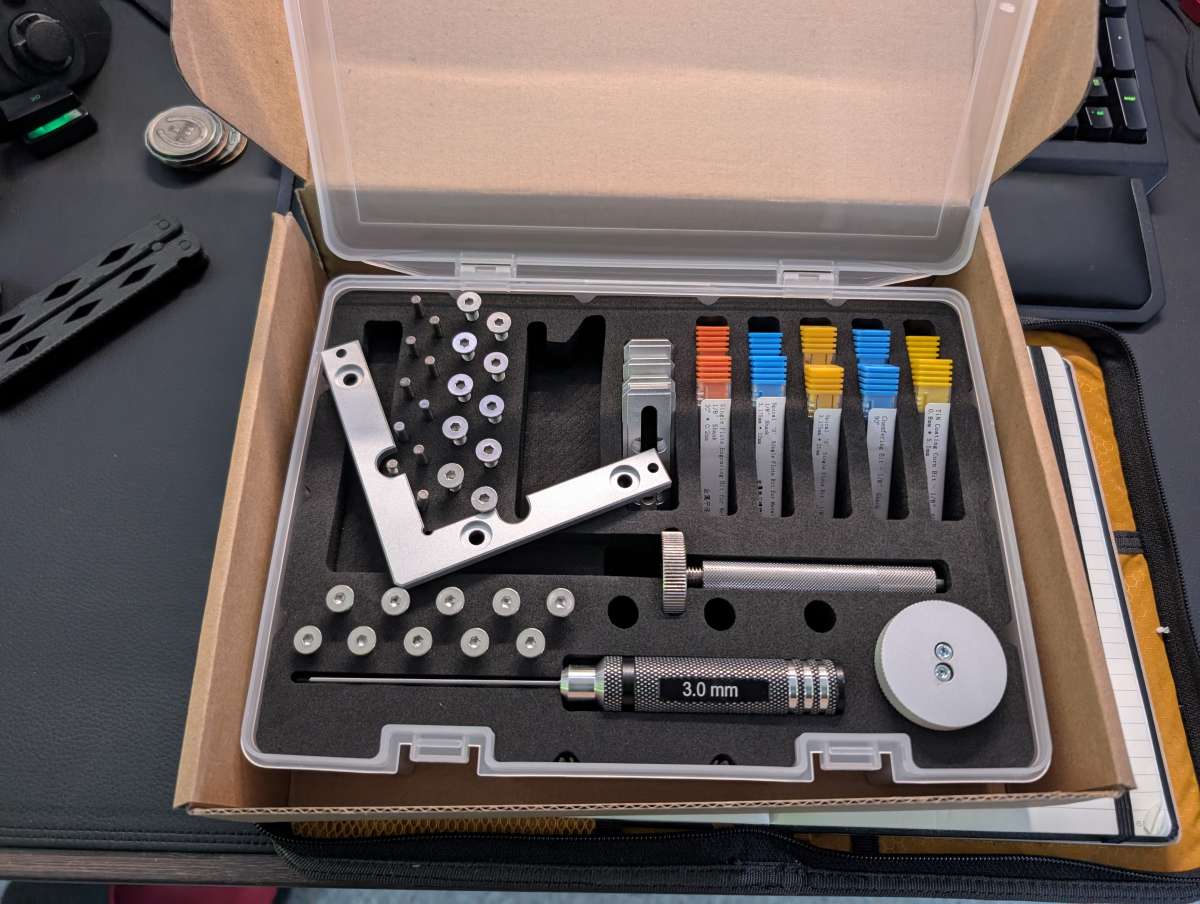
The Carvera Air comes with a tool kit which includes a set of spindle tool bits, mounting brackets, screws, and pins for holding materials in place, and an Allen wrench.
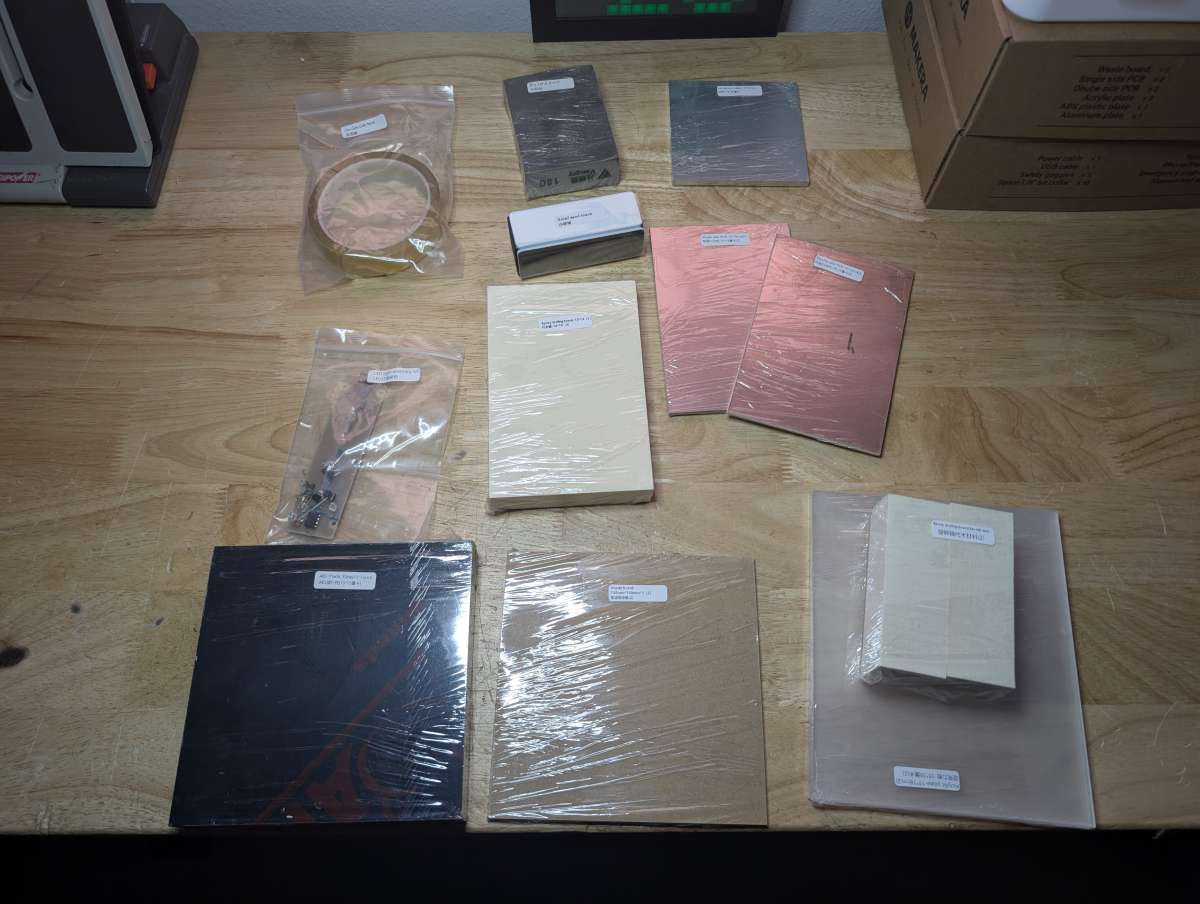
Makera provides enough material to complete every demo and still have some left over for other projects.
Assembly, Installation, Setup
Unboxing and setting up the Carvera Air is easier than many other desktop CNCs because most of the machine comes pre-assembled. After placing it on a sturdy desk, setup involves connecting the power supply, plugging in cables, and installing Carvera Studio. Calibration is guided by the software and includes spindle alignment and bed leveling.
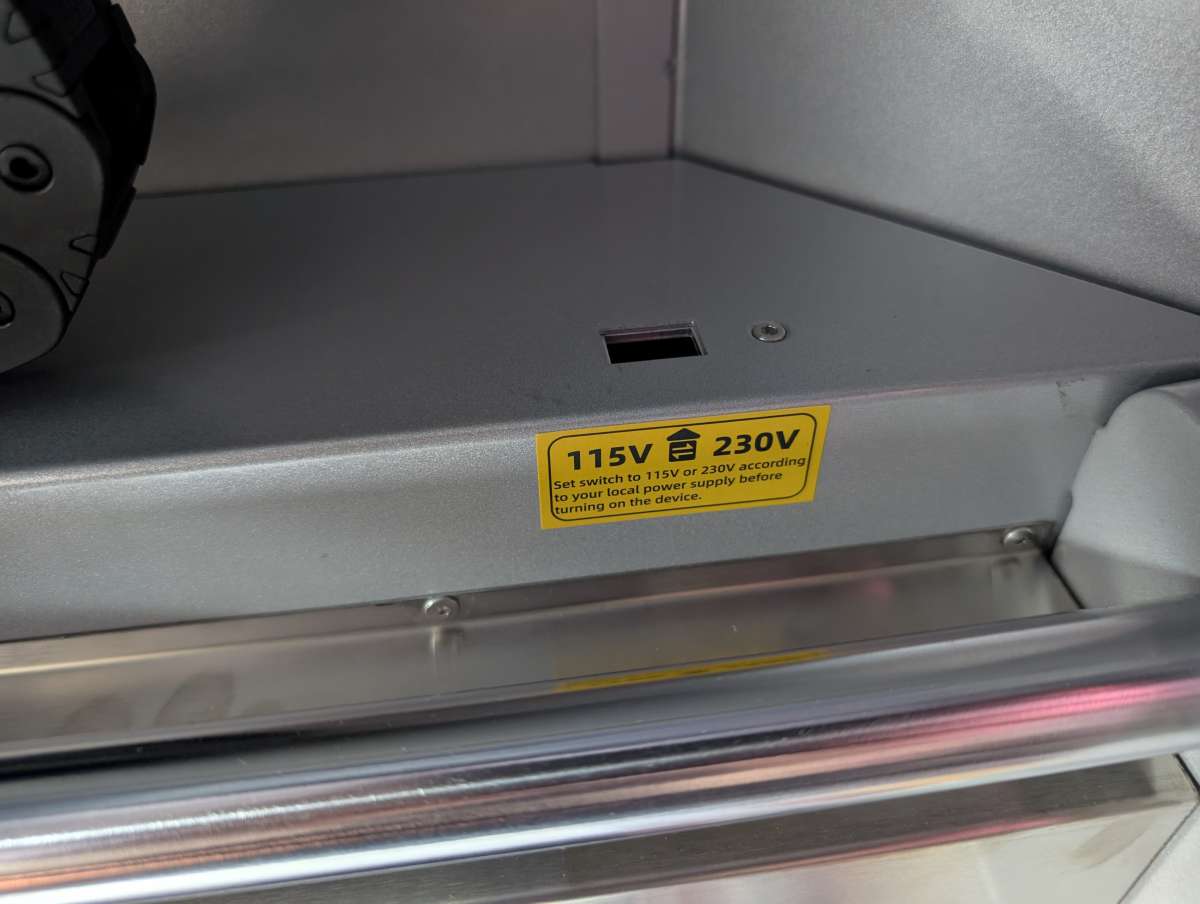
The most important part of the setup is making sure that the internal voltage switch is set to the correct voltage for your country, 115V for the U.S.
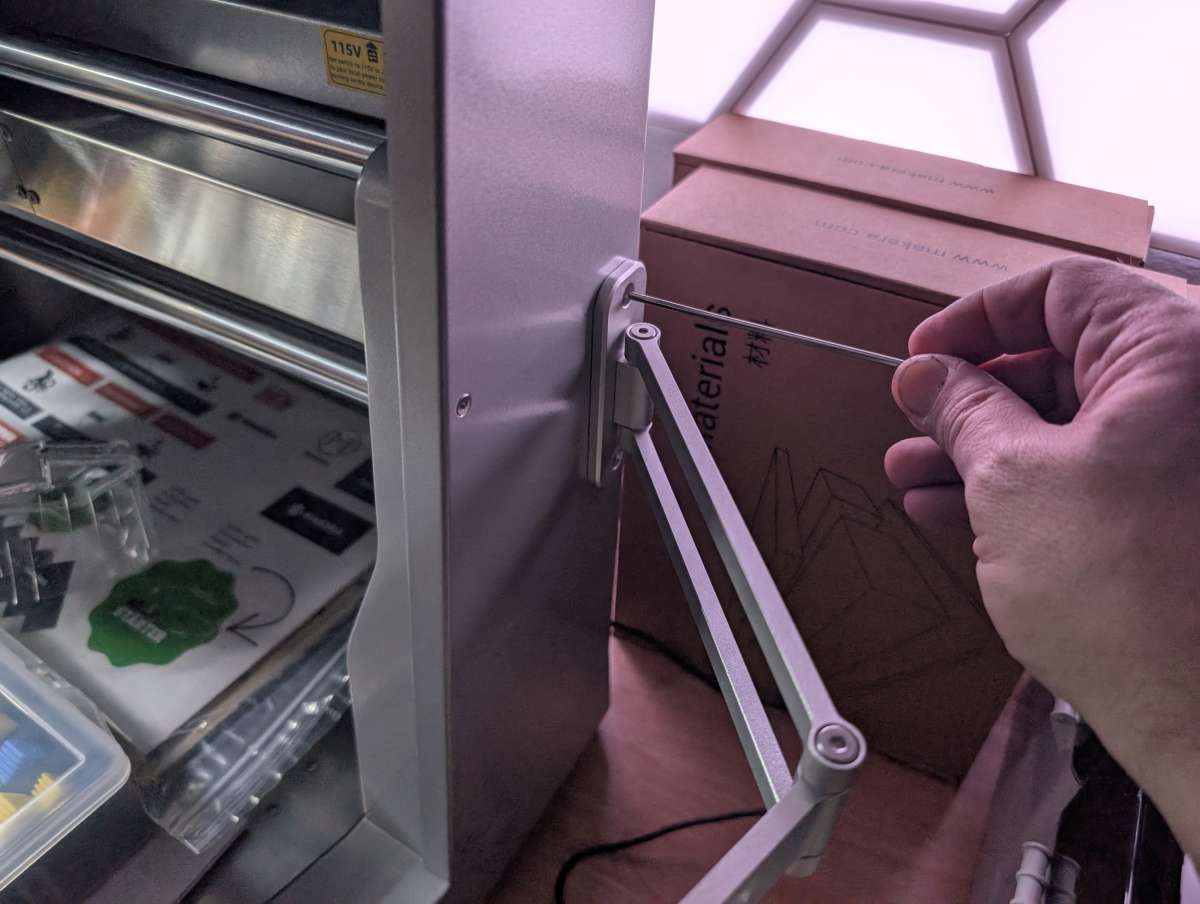
One other easy setup task is installing the phone/tablet holder. You simply remove two screws on the side of the unit and then secure the holder in place with the same screws.
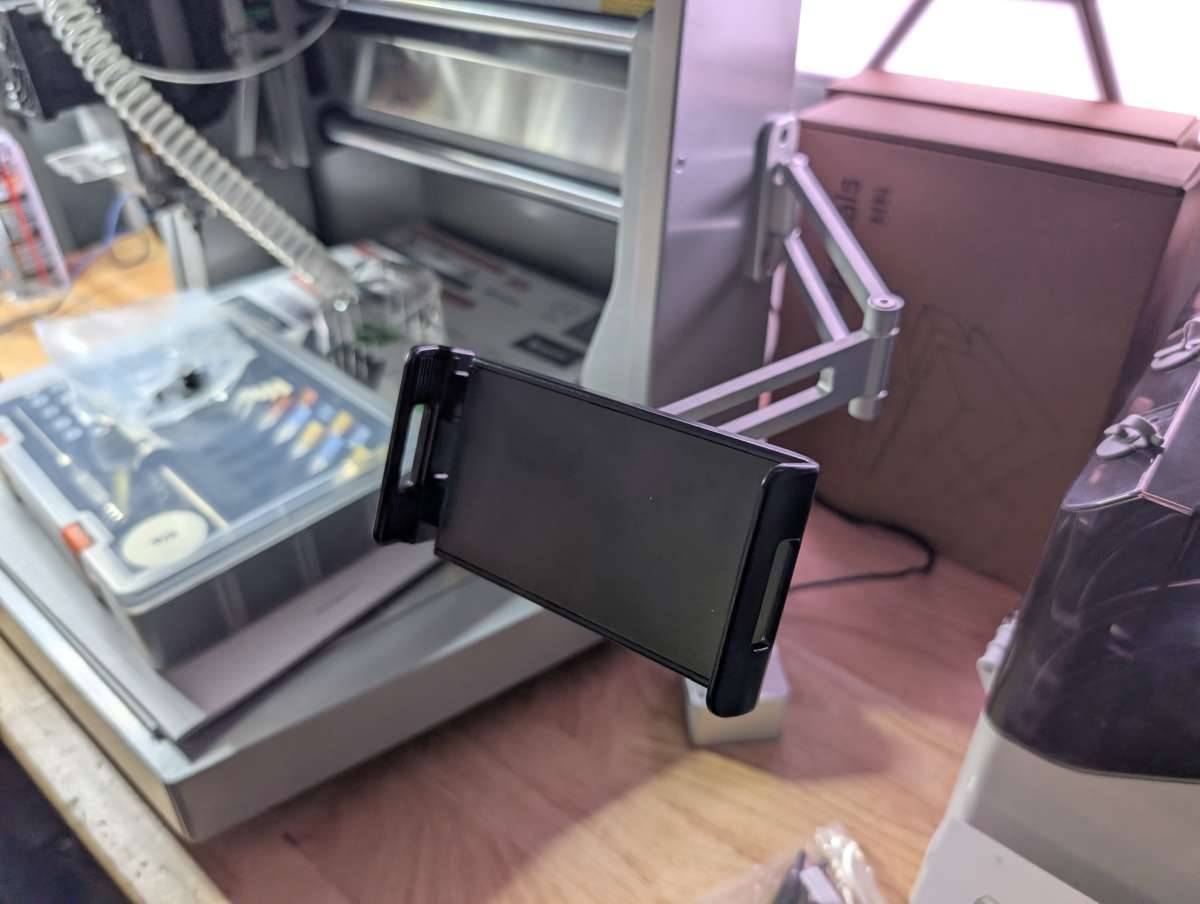
The holder swings forward when you need it and tucks back behind the unit when not in use. This is only used if you are operating the Carvera Air from your phone or tablet and not via a computer.
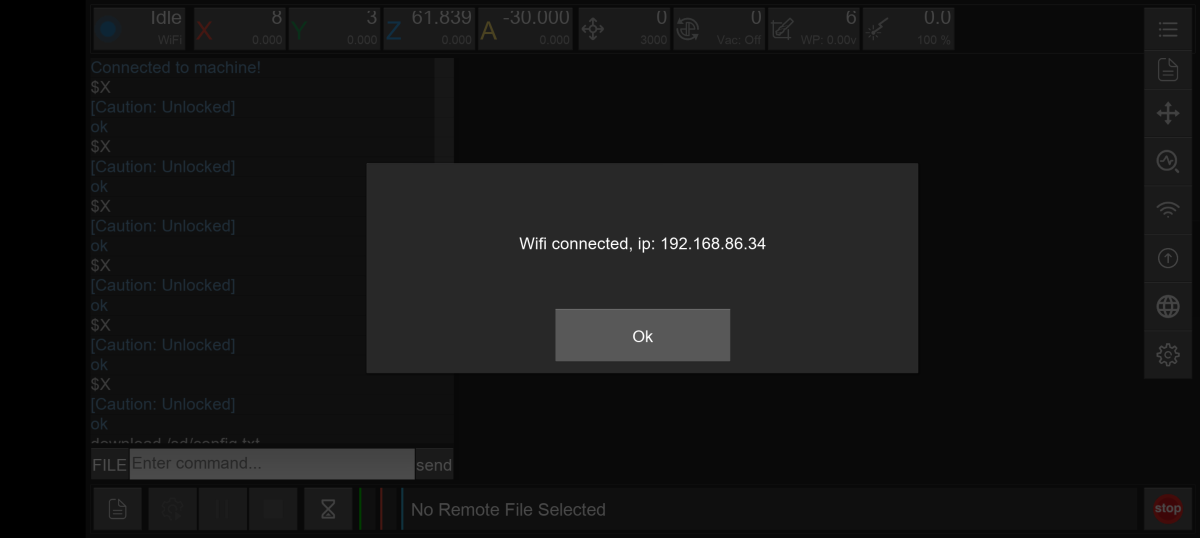
The last part of setup is connecting to the Carvera Air via WiFi, which involves joining the machine’s hotspot and then configuring it to connect to your home network. After that it’s easy to run the Air from a phone, tablet, or computer using the Carvera app over WiFi.
Performance
Once the machine was up and running, I tested it using two of the Makera demo files. Makera provides a book specifically to walk the user through all of the demo steps, but it’s not as clear as it could be and is, at times, very confusing. The good thing is that Makera also has a ton of instructional videos on YouTube that are much more useful.
First, I ran the LED Light example, which involved cutting and engraving acrylic, plastic, and aluminum to make a small LED housing. The Carvera Air performed very well, producing clean edges and precise pockets. Noise was surprisingly manageable, and the enclosure helped contain any dust and chips.
The learning curve for using the Air and the Cavera controller software is significant. The software does a good job of walking you through material selection, tool changes, and file imports, but it takes patience to follow each step carefully.
Watching the Air in action is impressive. Since the demo I chose to start with combines working on metal, acrylic, and plastic, boy was it messy,
Luckily, the dust shoe and vacuum port worked perfectly, sucking up as much debris as it could.
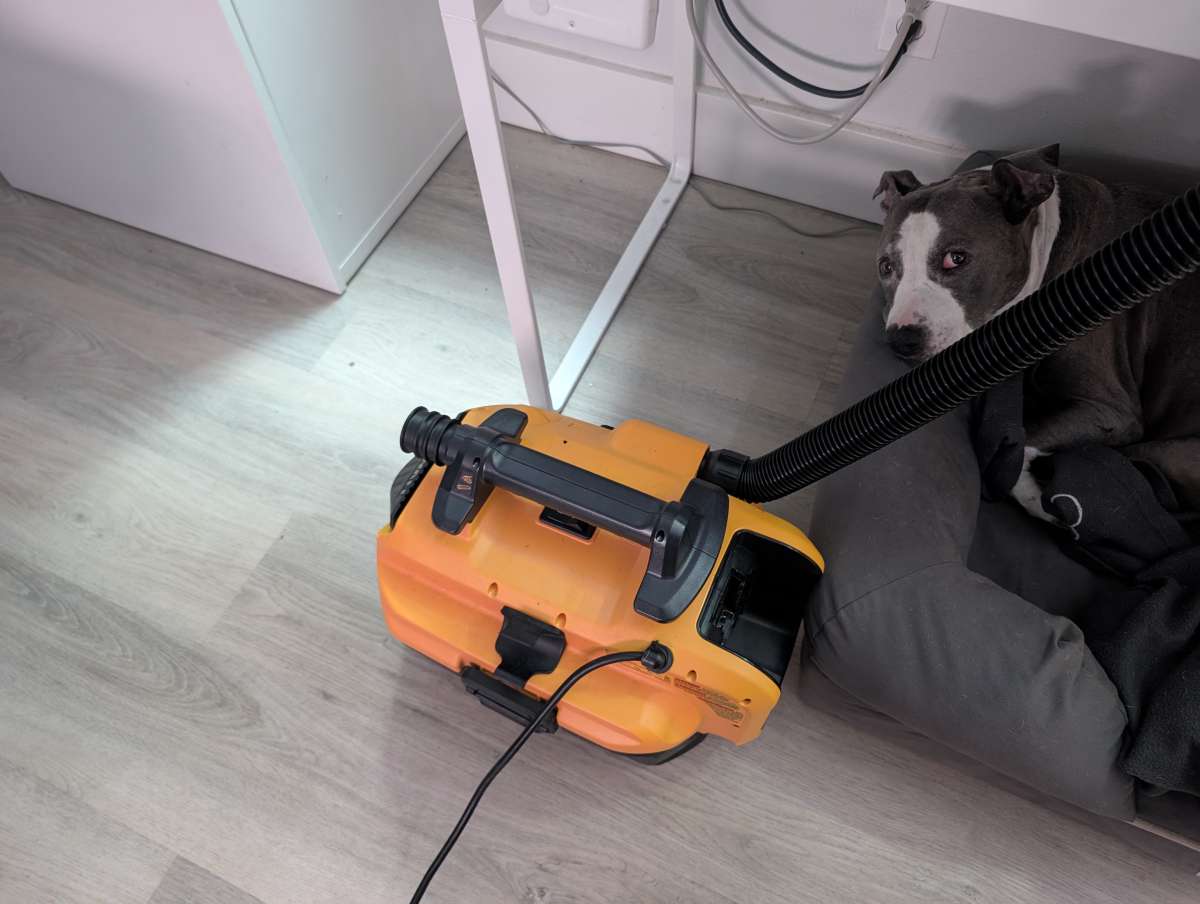
Although my roommate wasn’t very pleased with all of the noise from my shop vac.
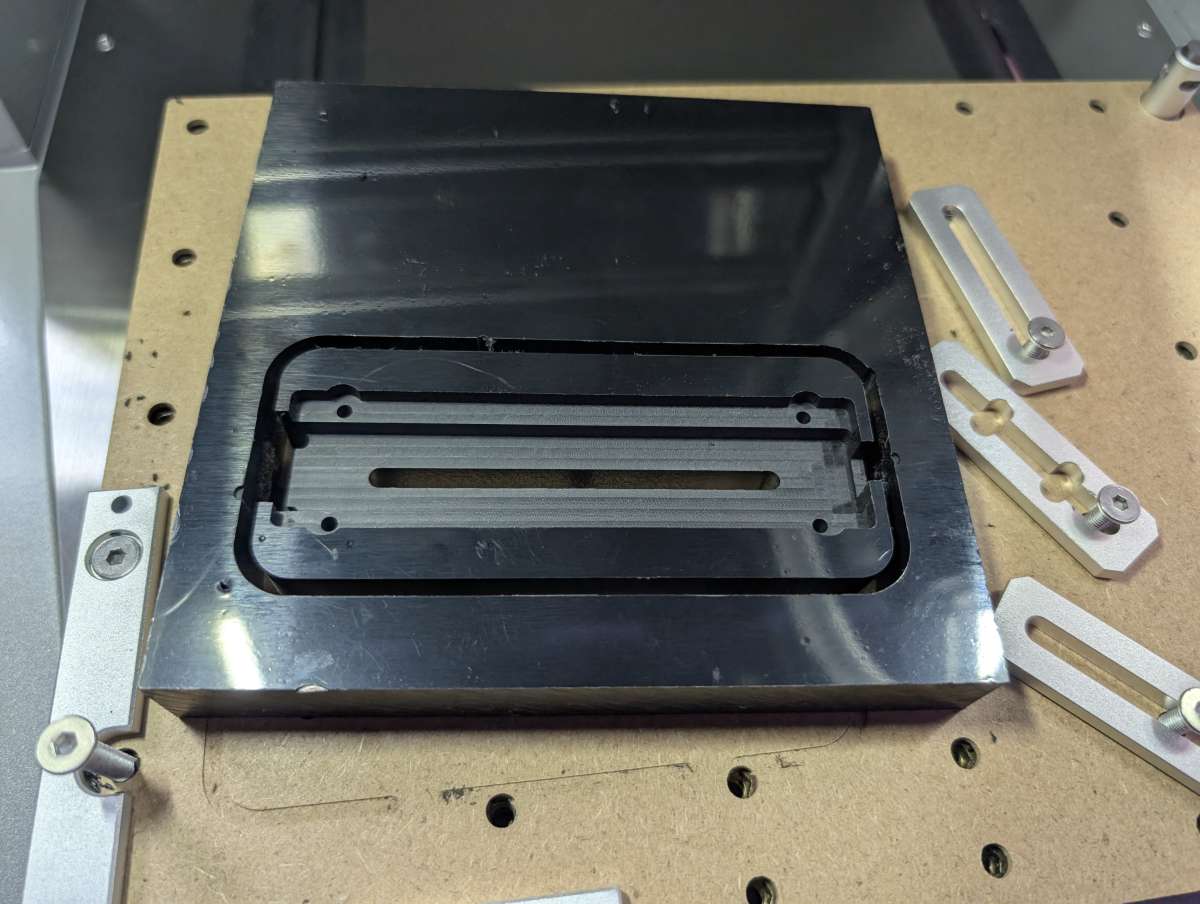
The accuracy of the Air was immediately apparent once the cutting finished and I was able to inspect the handiwork. The edges were remarkably smooth with precision cuts all around.
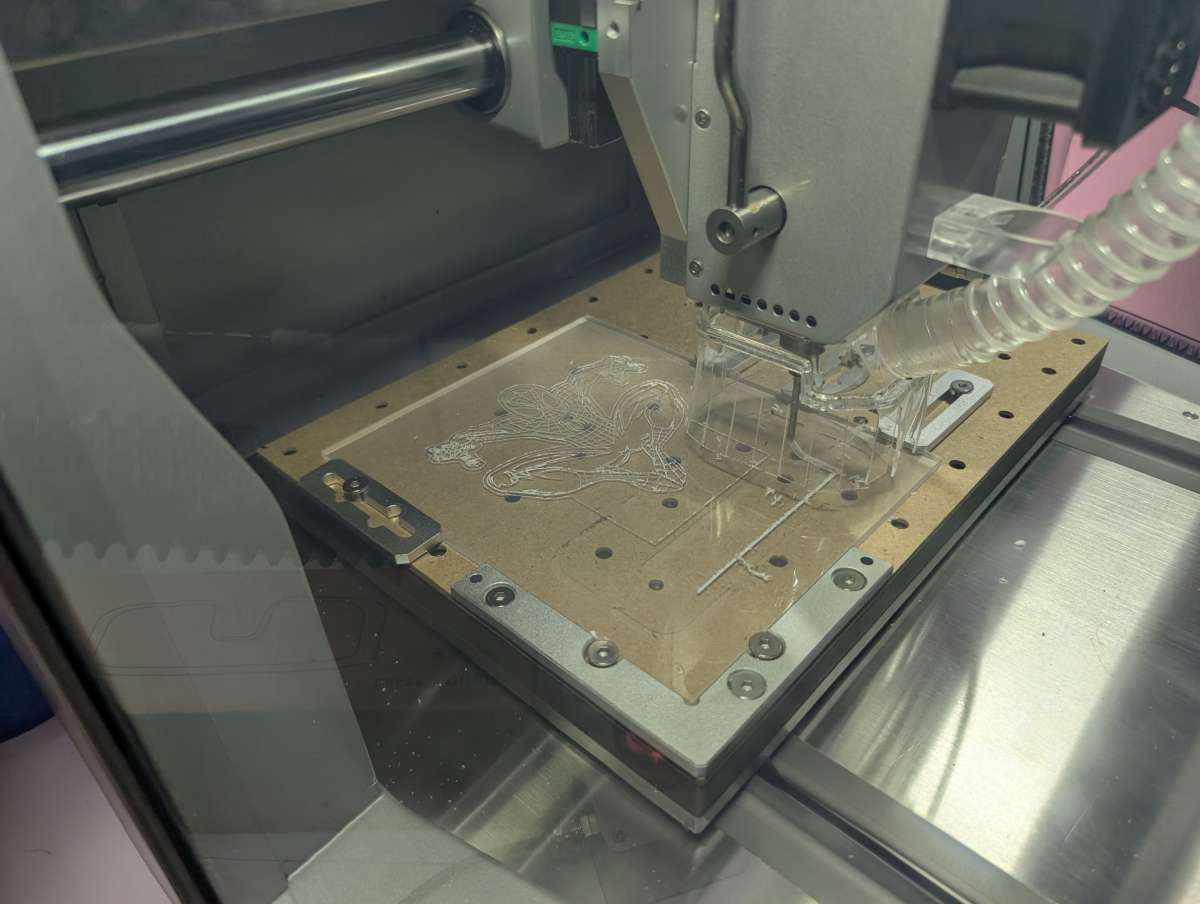
Next up was engraving and cutting out a piece of acrylic. Makera provides a few images to choose from for this demo and I went with Spiderman. The Air slowly and methodically engraved a line drawing of Spidey on the thin piece of acrylic.
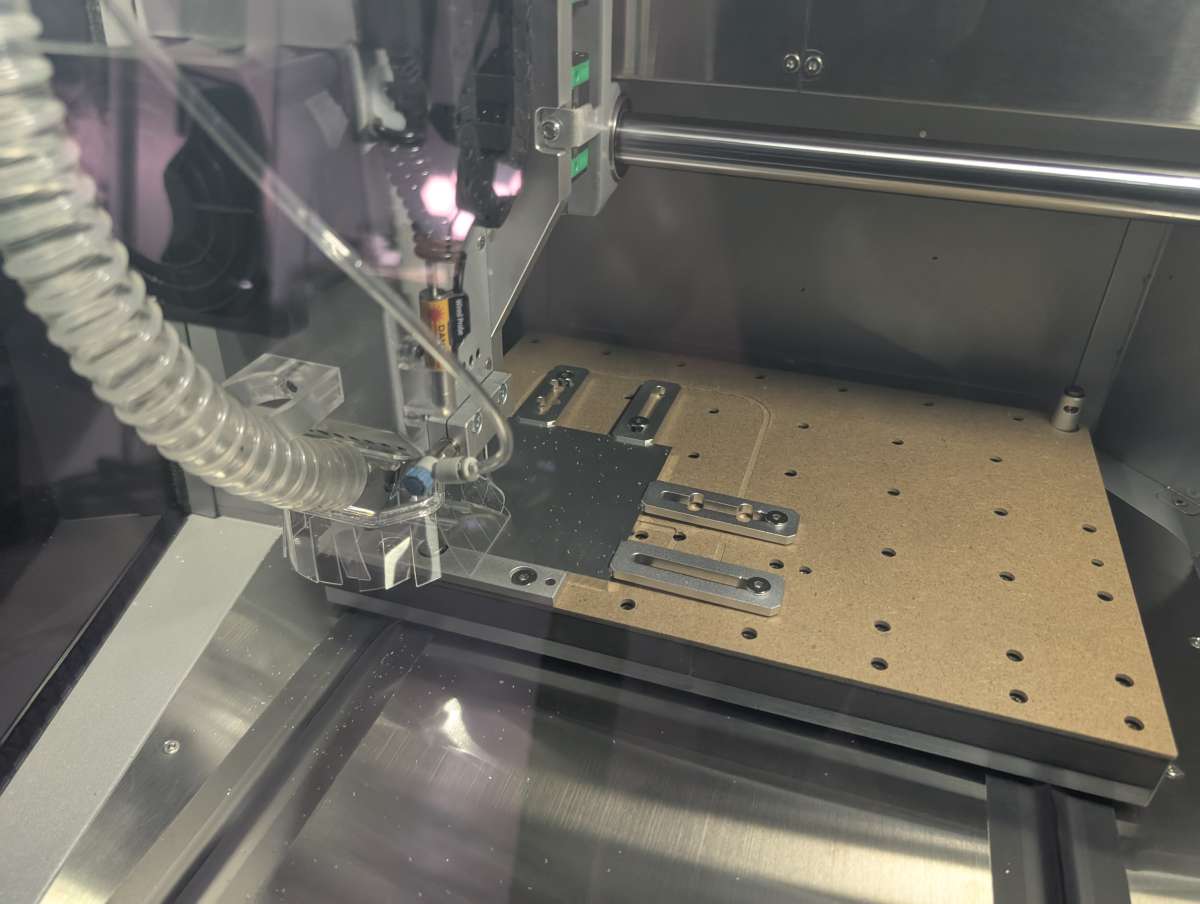
With the acrylic done, the demo next required a small piece of aluminum to be cut out of the supplied plate. It’s still unreal to me how easily the Air slices through thick media like aluminum in no time at all.
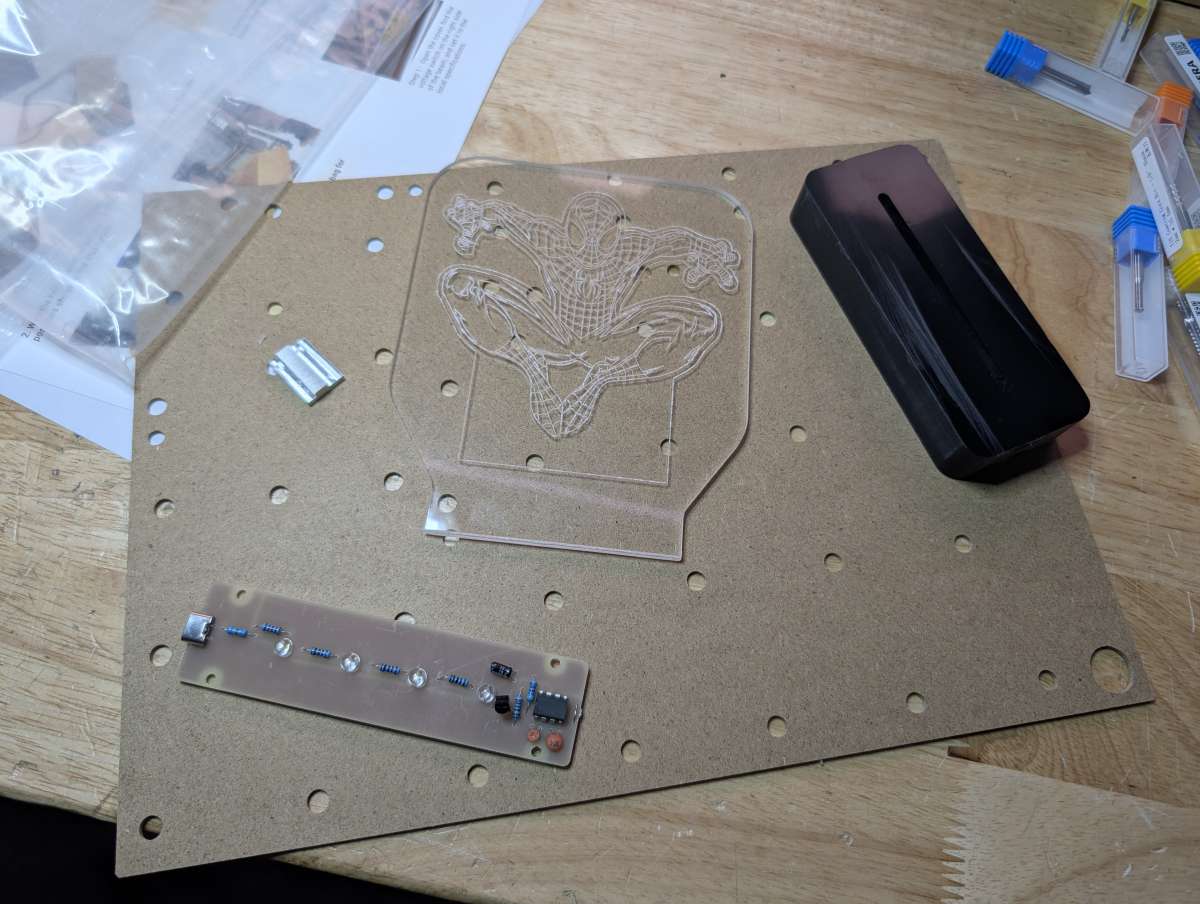
With all the parts of the LED demo cut out and engraved by the Air, the last step was to assemble it all along with the included circuit board and lights. There’s a version of the Air that includes everything you need to fabricate your own PCB boards, but I didn’t opt for that bundle.
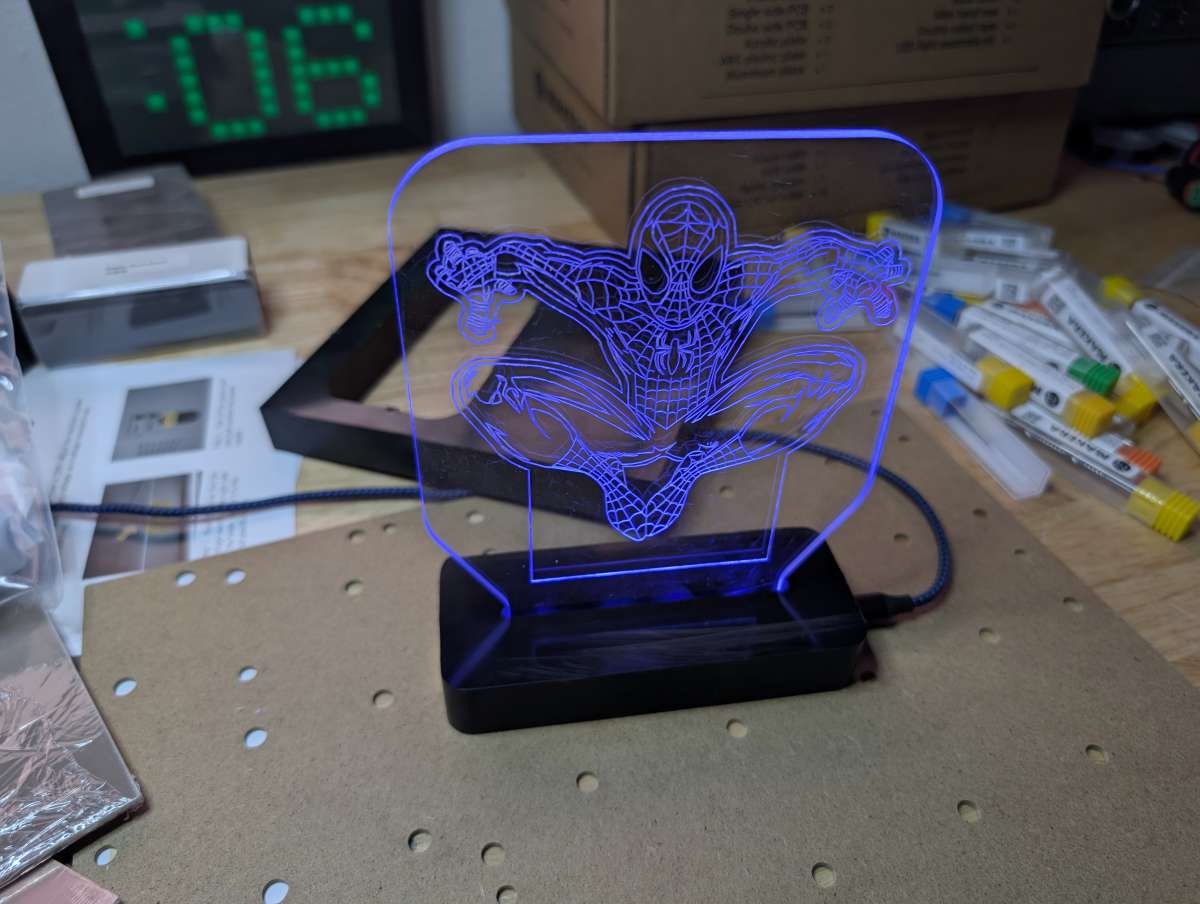
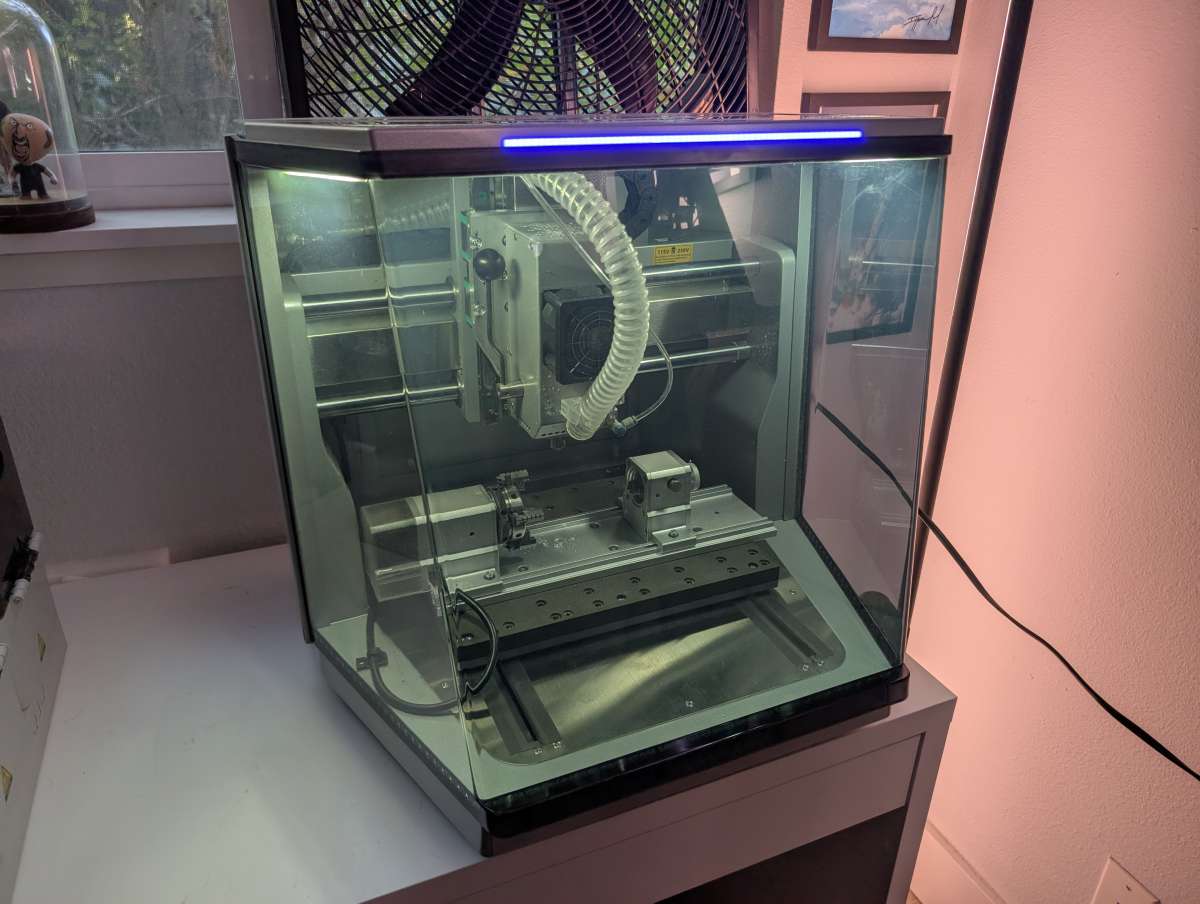
Once everything was assembled and plugged in Spidey lit up blue and earned a spot on my bookshelf.
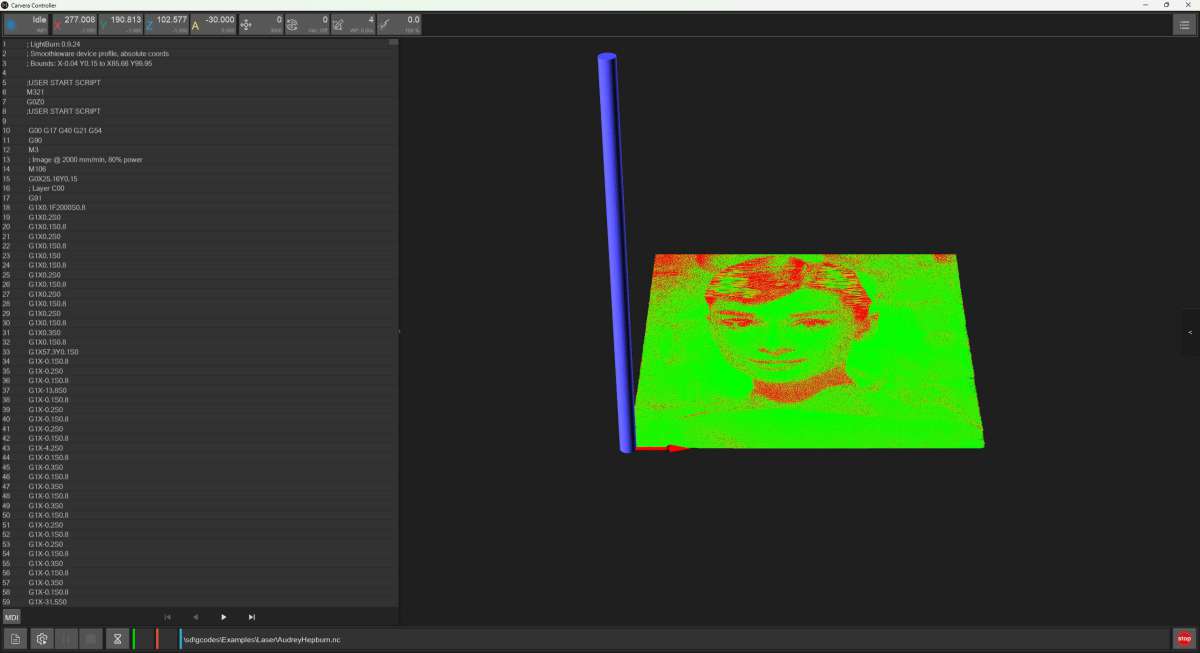
I also attempted the laser engraving demo, but the laser module would not activate no matter what I did, so I was unable to complete that file.
While disappointing, this seems like a one-off hardware or connection issue rather than a systemic problem with the machine.
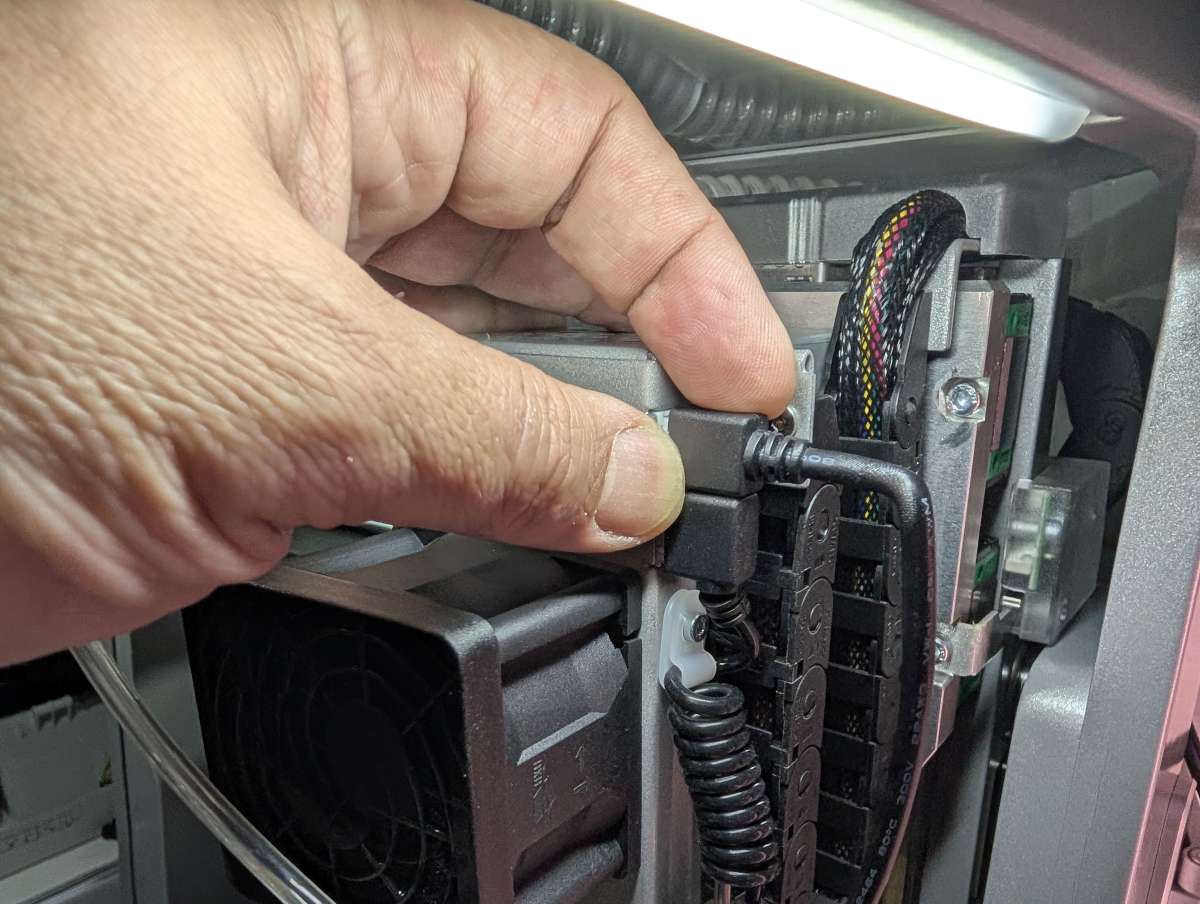
I checked and rechecked the connections where the laser module plugs into the control unit.
If the laser module had worked, this would’ve been a great time to have installed an air pump, since air is used to cool the material being cut.
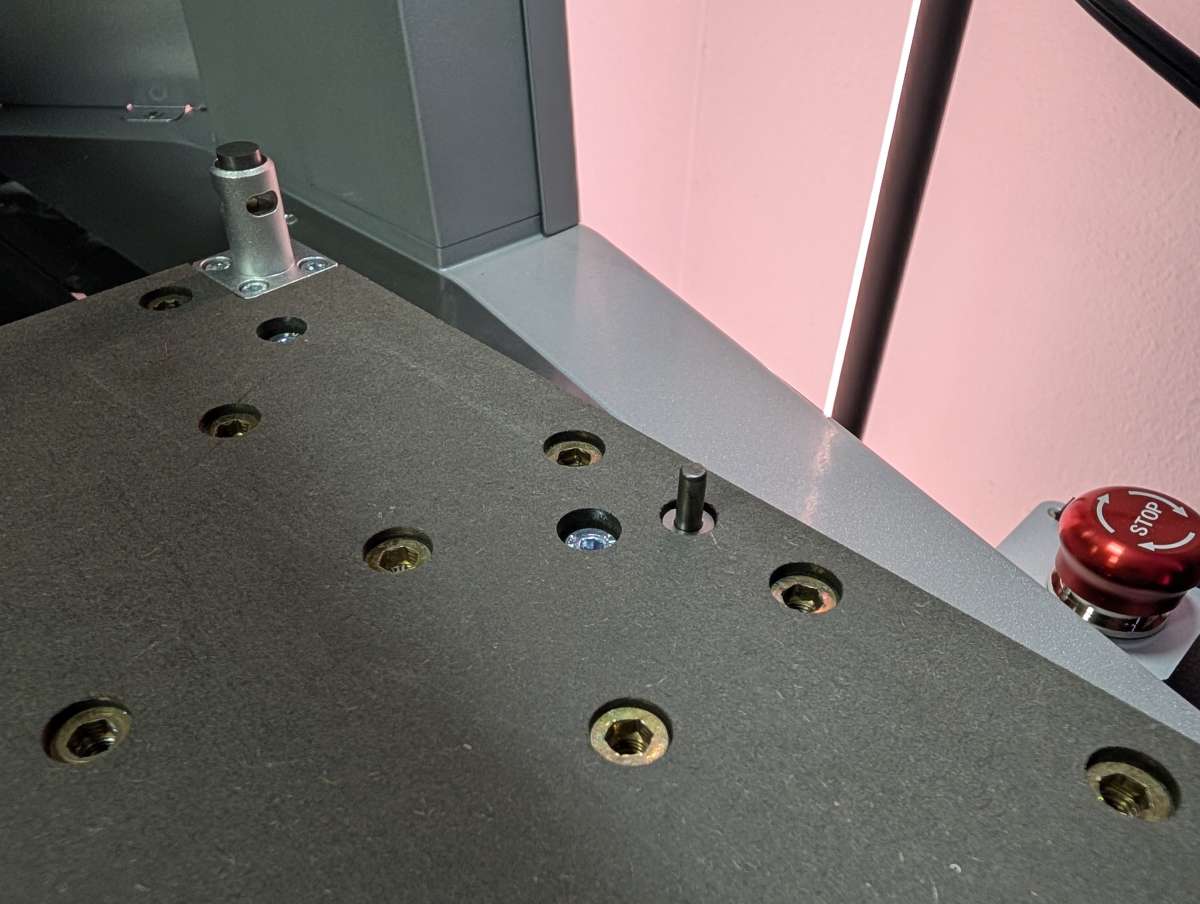
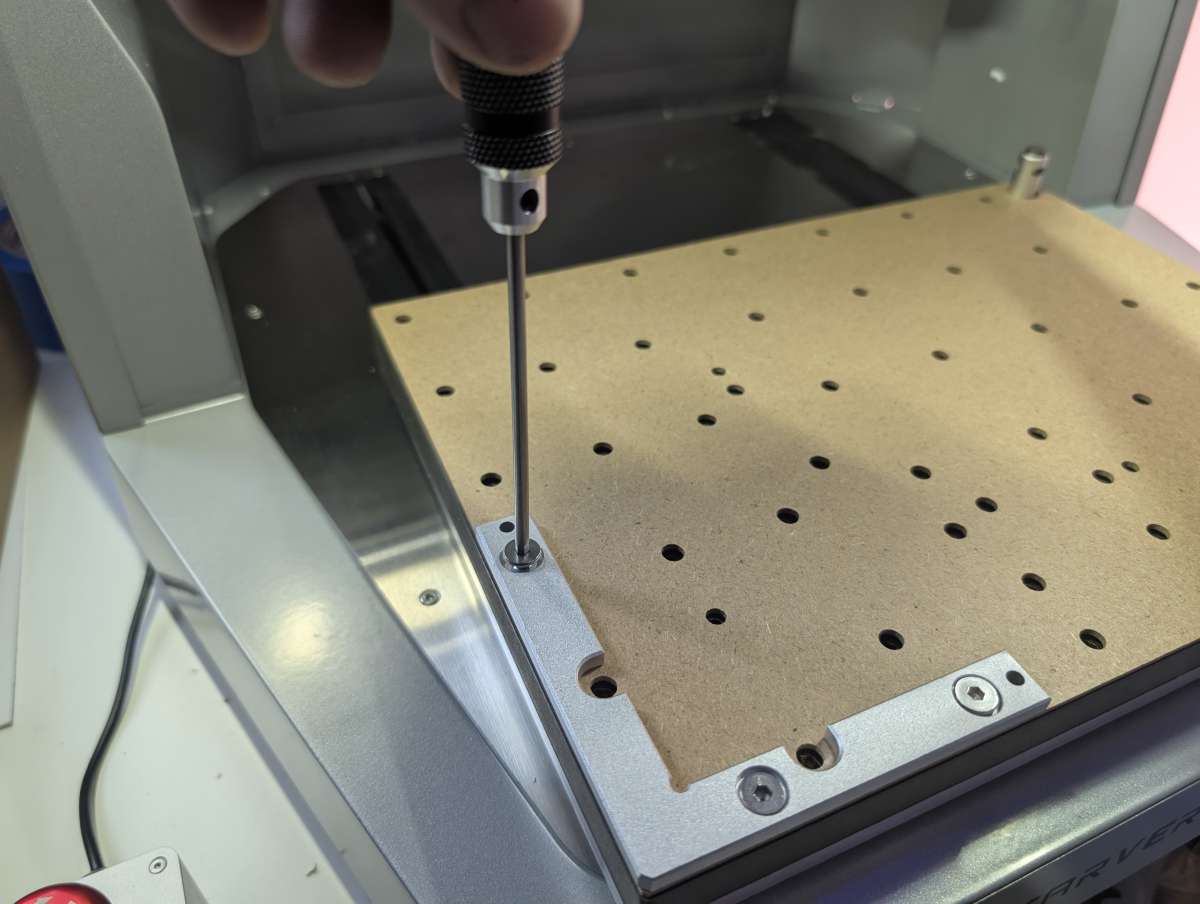
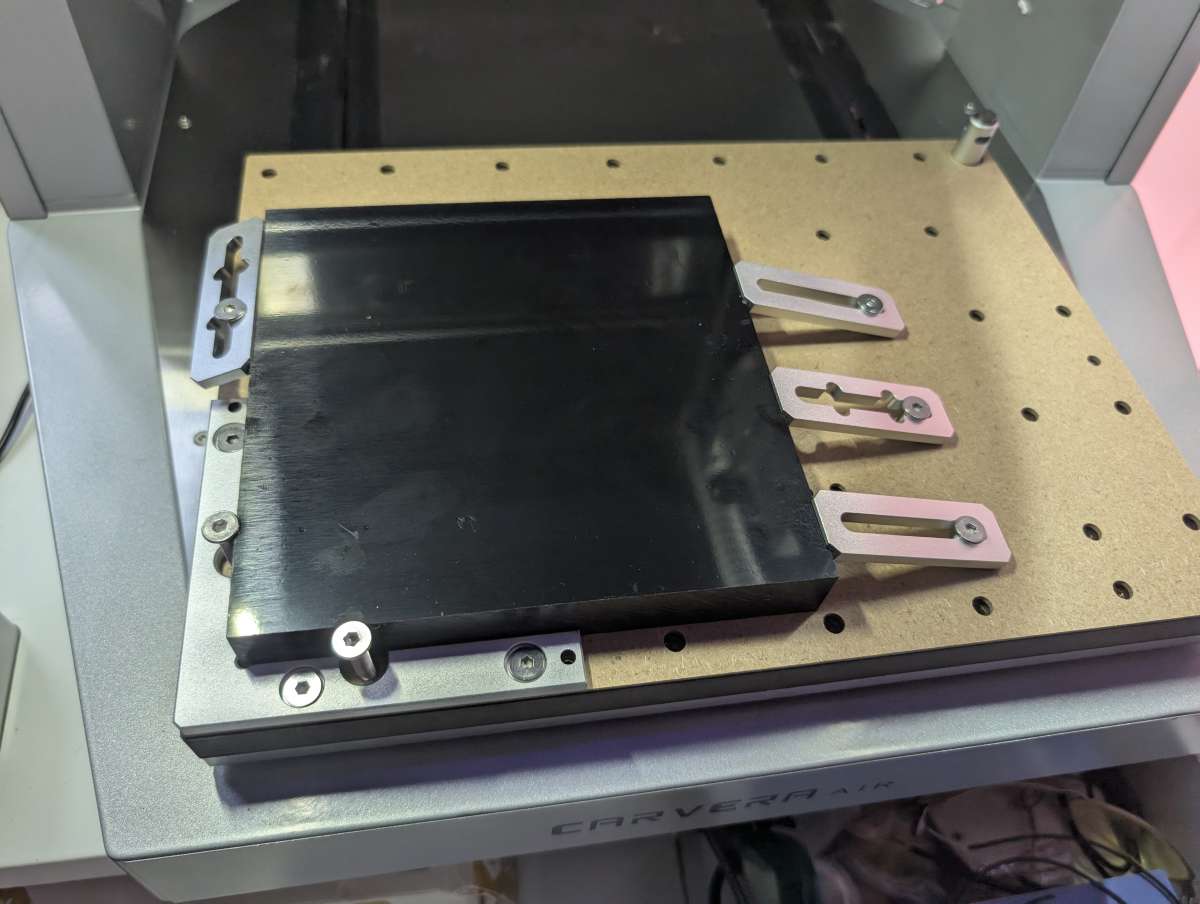
Next was the 4th Axis Relief example, a small bust of Nefertiti. Installing the fourth axis is mechanically simple, a couple of pins are inserted into the base which line up with holes under the 4th axis module.
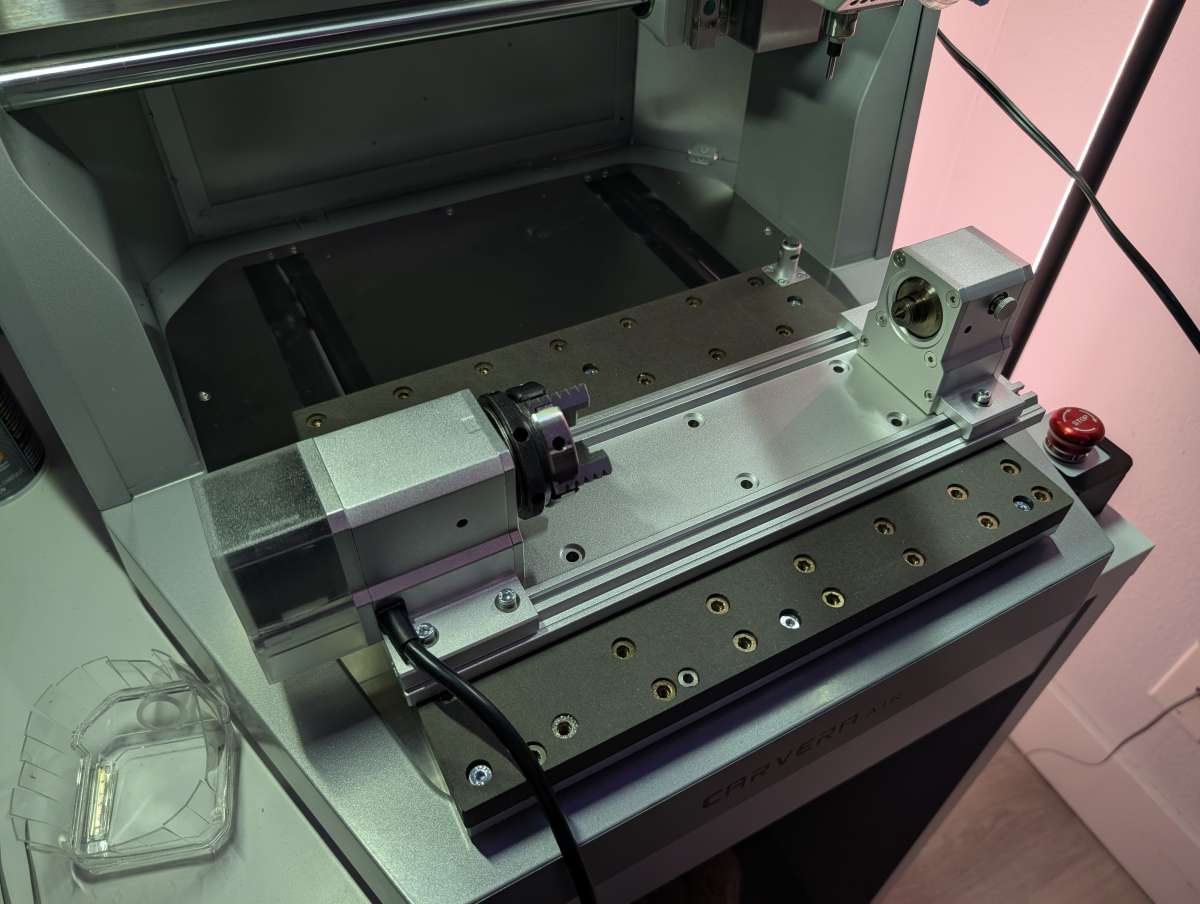
Once the module is locked into the pins, it has to be secured and connected to the control unit.
Six screws hold the 4th Axis module firmly in place to the machine bed.
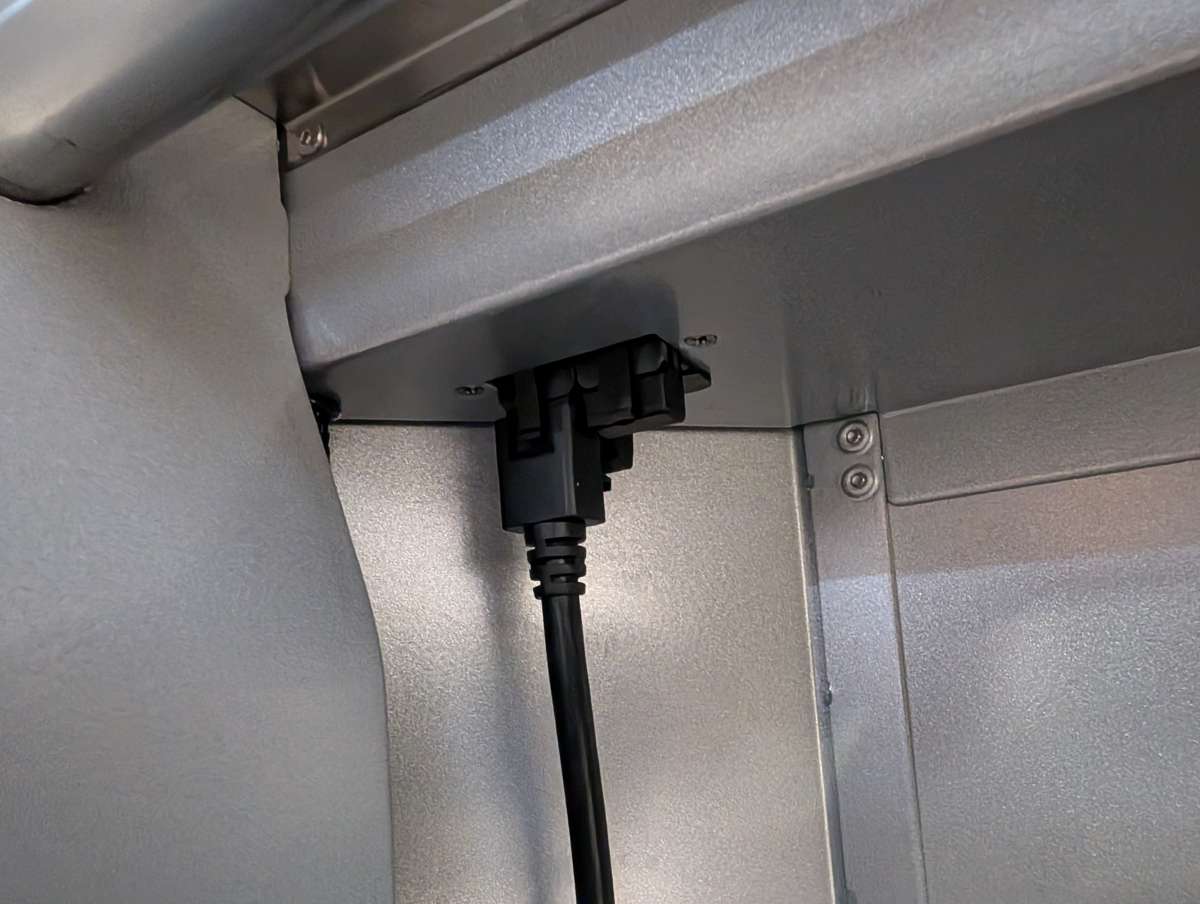
The connector for the module is tucked up inside the back of the interior. Make sure to open the dust cap before trying to plug it in.
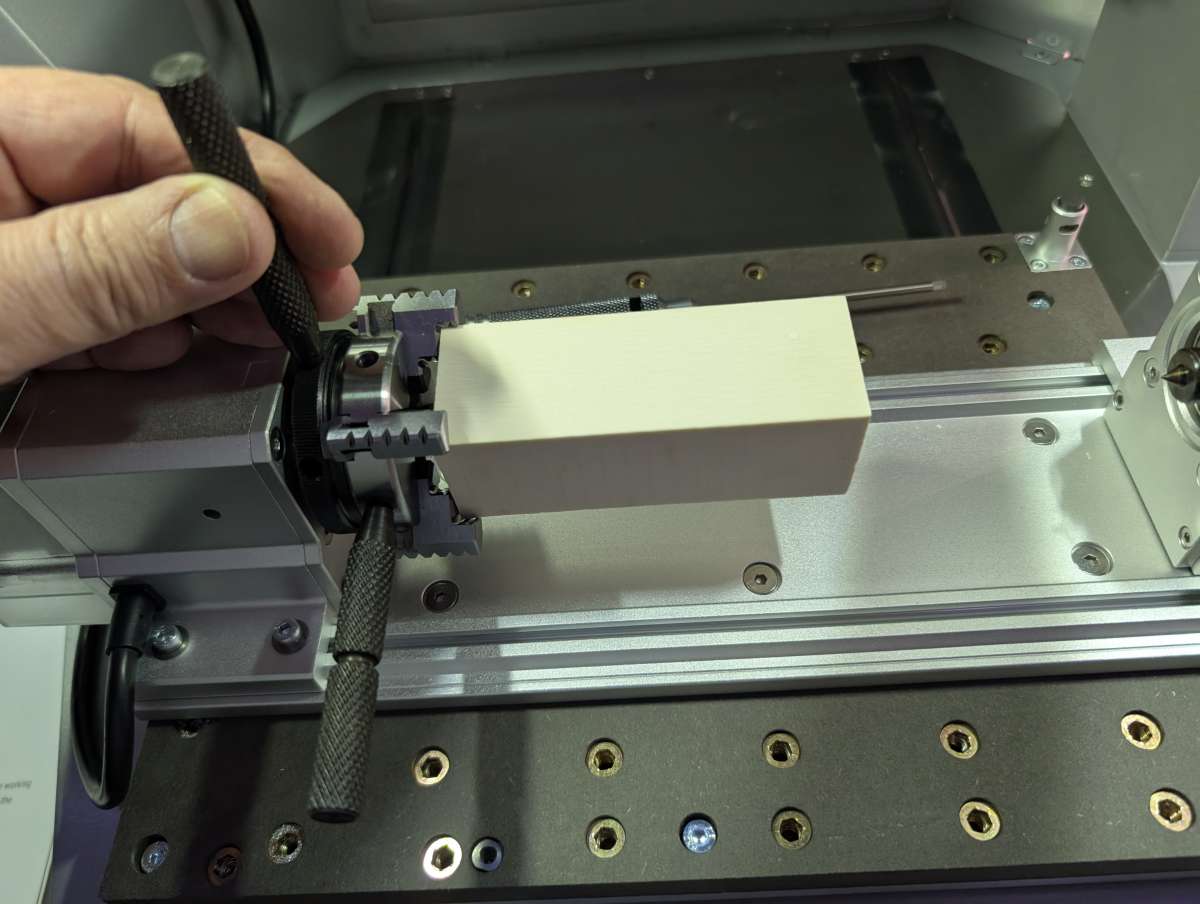
Overall, setup is manageable but the instructions could be clearer, especially for first-time users. I had to reference a few videos before I learned how to adjust the head of the 4th axis module correctly for holding the material.
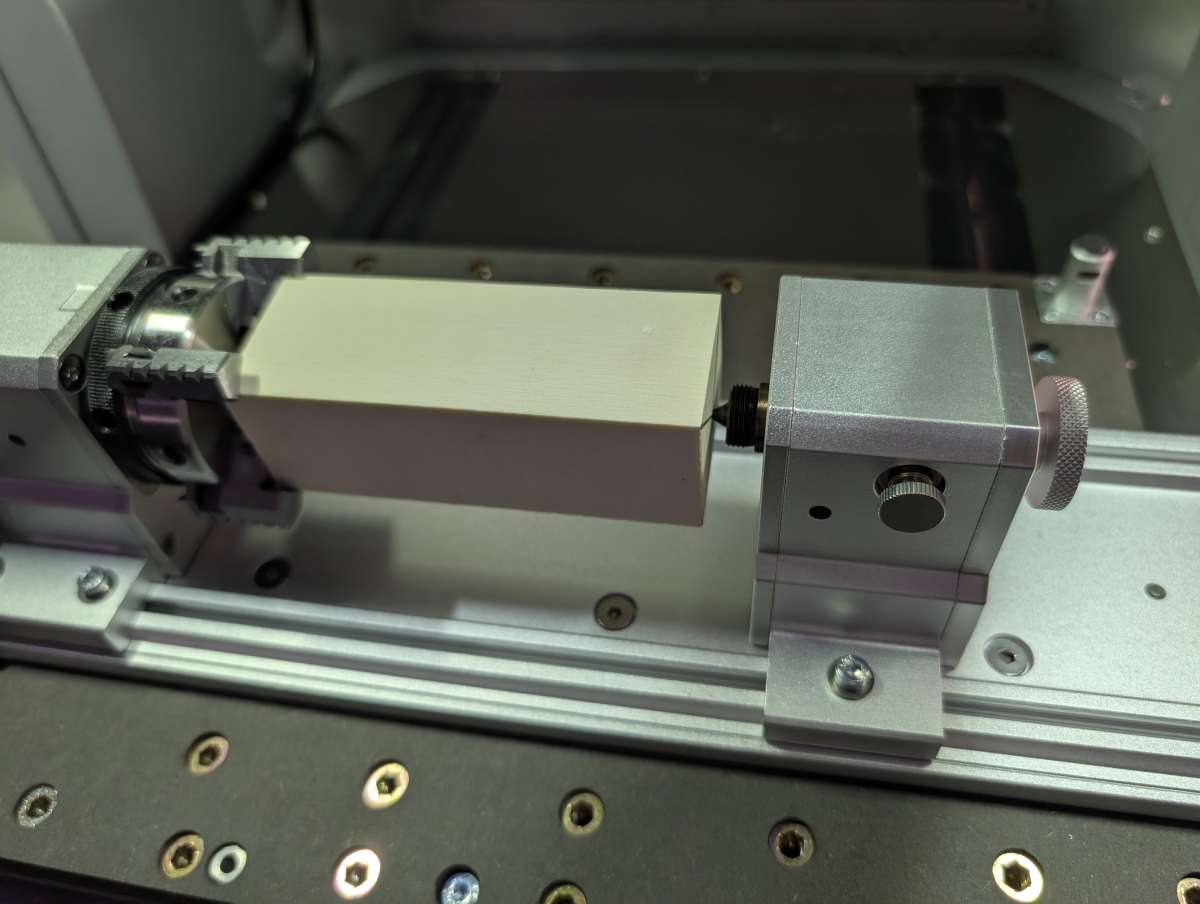
Once done correctly, the material is held tightly in place and you can proceed to the program setup.
Inputting all of the specific values for this demo was similar to what I had to do for the LED demo. I didn’t understand many of the parameters I was configuring, so I didn’t get a clear sense of how to set up my own projects with the 4th Axis module. I’m guessing that will take a lot more trial and error projects on the Air.
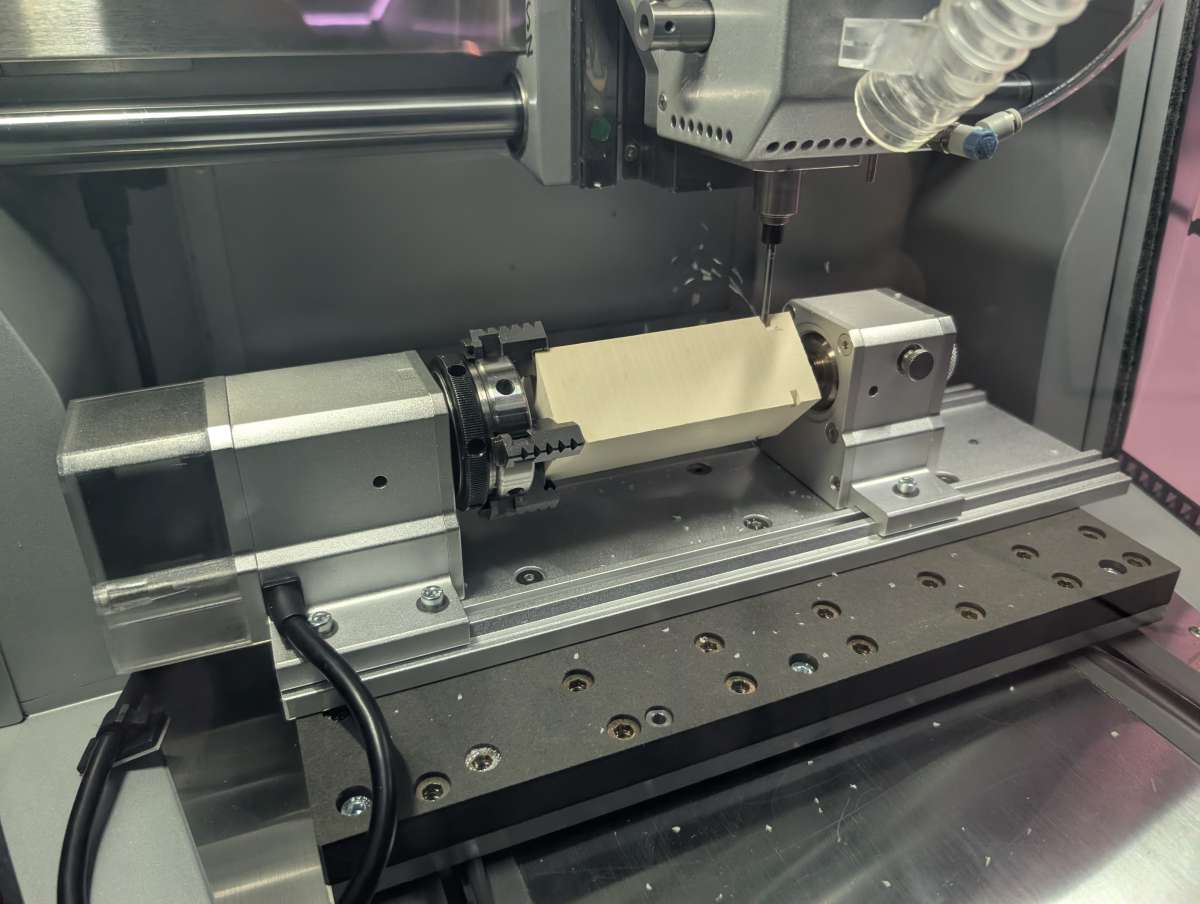
After starting the program, the Air dug right into the wood block, slowly chipping away everything that wasn’t a Nefertiti bust.
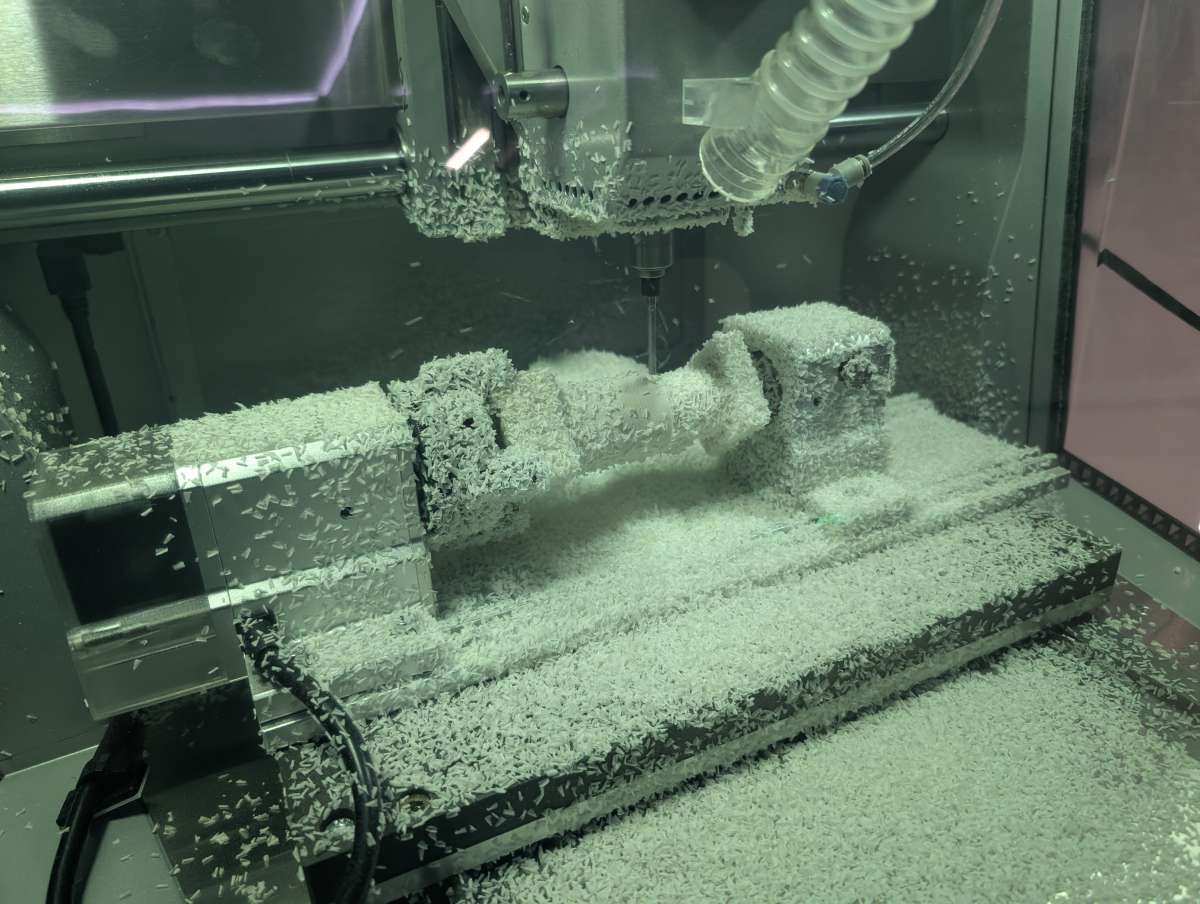
The Carvera Air handled this part beautifully, capturing fine details and producing smooth curves as the wood rotated on the fourth axis. This was by far the messiest build, and the 4th Axis module prevents use of the dust shoe and vacuum port, so clean up was a bit more involved.
Watching the bust take shape was a reminder of how capable this compact machine is when properly calibrated.
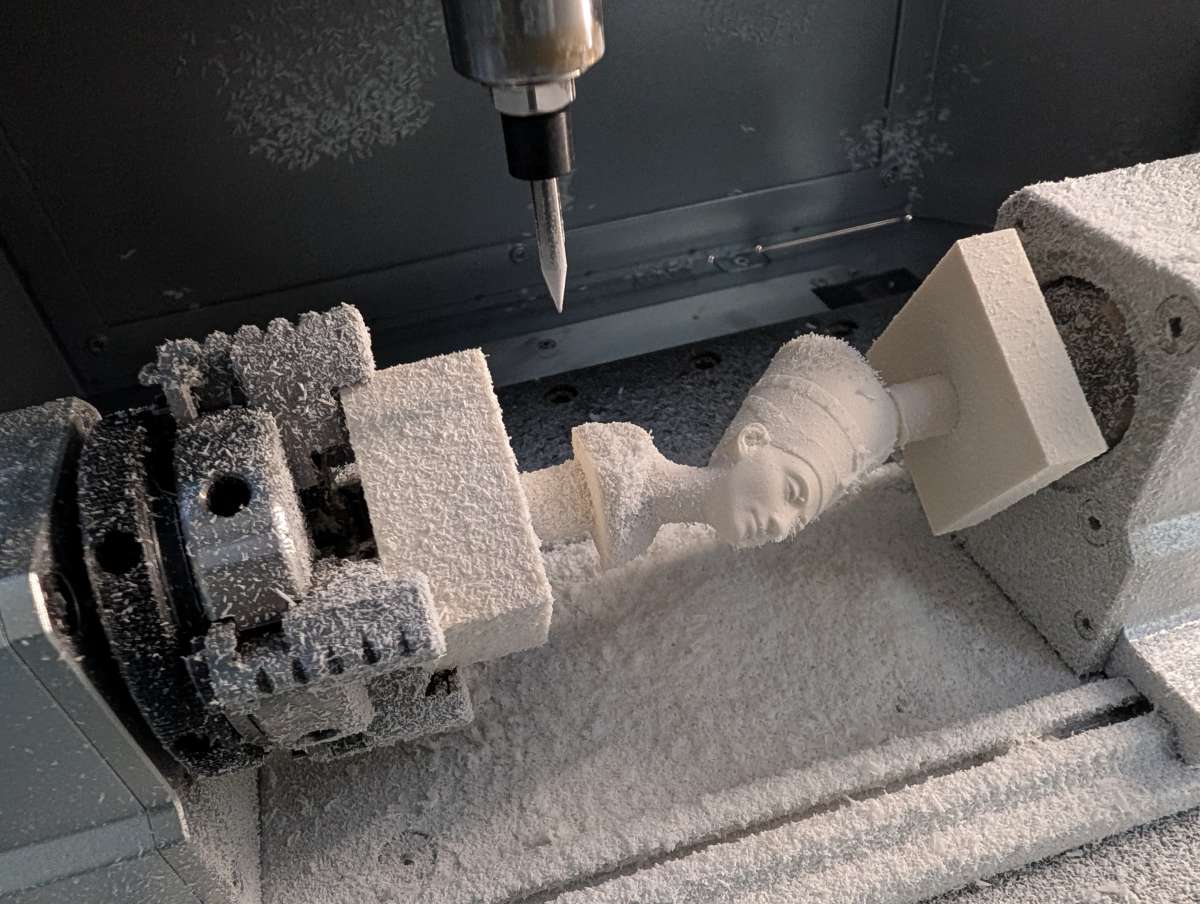
The first tool bit made larger cuts in the wood and the second bit did all of the close-up detail work.
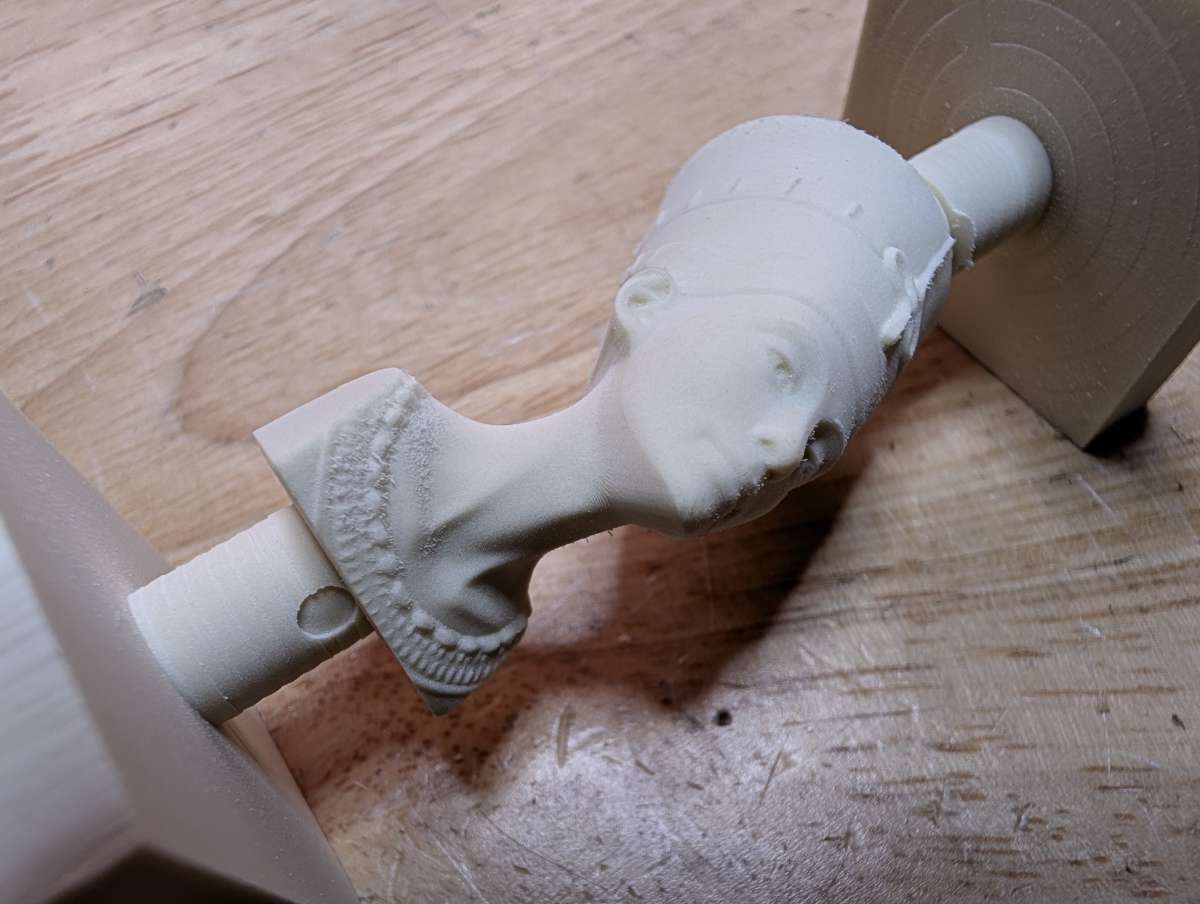
After cleaning up the small wooden bust, I couldn’t help but marvel at how well the Air handled all of the tiny curves, edges, and subtleties of the sculpture.
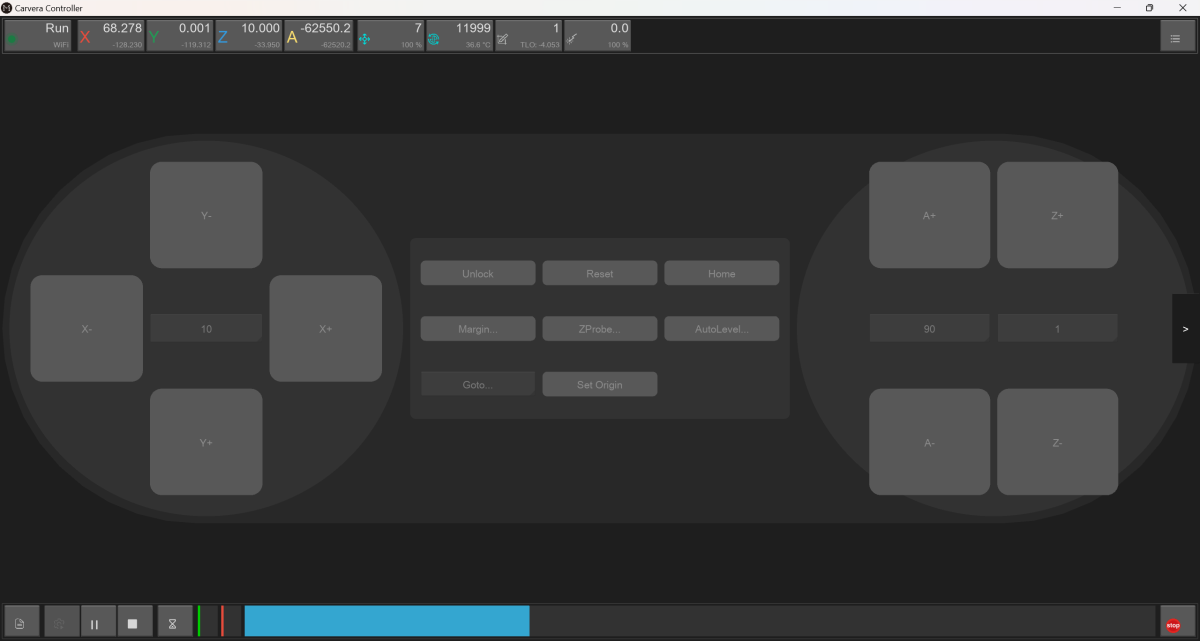
Beyond the demos, I tried milling hardwood and a small piece of aluminum plate on my own. The machine delivered impressive results with both materials, though the aluminum required slower feeds and careful attention to tool paths. I’m still figuring things out, but I’m getting there. The software’s preview and tool-changing features helped make managing jobs pretty straightforward after some getting used to.
Final thoughts
The Carvera Air Desktop CNC Machine is a compact and powerful tool for makers who want a high-quality, multi-use CNC machine in a small space. It handles woodworking, engraving, plastics, and light metalwork with ease. The optional 4th Axis and laser module add-ons allow for a wide range of different projects. The learning curve is significant, particularly for those new to CNC machining. While the laser module didn’t work during my testing, after contacting Makera support they agreed to send a replacement module out quickly. That said, the system is well-built, tightly integrated, and delivers professional-quality results once you get up to speed. At $2,499 for the base model or $2,997 for the 4th Axis Laser bundle I reviewed, it’s a big investment, but for hobbyists or small-space makers looking to bring precision CNC capabilities into their workflow, the Carvera Air is a terrific choice.
What I like about the Carvera Air CNC machine
- Compact, enclosed design great for small workspaces
- Solid build quality
- Practically no assembly required
What needs to be improved?
- Learning curve for new users
- Laser module failed to activate during testing
- Should include airflow system at this price
Price: $2,499 Base, $2997 Carvera Air 4th Axis Laser Bundle as reviewed
Where to buy: Makera and Amazon
Source: The sample of this product was provided for free by Makera. Makera did not have a final say on the review and did not preview the review before it was published.
Check out these other reviews!
- LUNYEE 3018 Pro Ultra CNC Machine review – a great entry to the world of CNC
- TwoTrees TTC6050 CNC Router Machine review – Automate Your Creativity

2-Pack LED Video Light Kit, NiceVeedi Studio Light, 2800-6500K Dimmable Photography Lighting Kit with Tripod Stand&Phone Holder, 73" Stream Light for Video Recording, Game Streaming, YouTube
(as of July 8, 2026 13:59 GMT -05:00 - More infoProduct prices and availability are accurate as of the date/time indicated and are subject to change. Any price and availability information displayed on [relevant Amazon Site(s), as applicable] at the time of purchase will apply to the purchase of this product.)