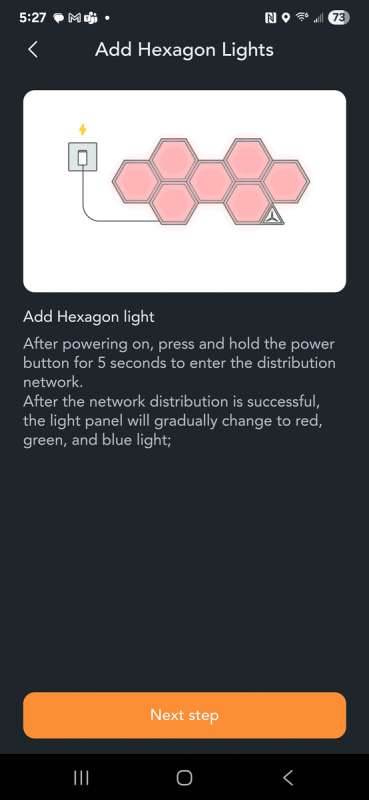
REVIEW – I am fortunate to have an entire room in my house dedicated to my gym. Finding things to put on the wall in that room has been challenging. I have one full wall taken up with mountains built out of trim wood, so when I ride my stationary bicycle, I can say I am pedaling in the mountains. Another couple of wall sections are occupied by some artwork composed of two separate pieces of metal art. The final section that holds my Tonal gym has a huge blank space to the right of the machine that has been sitting empty for four years. I have always loved the look of those hexagon light panels, so when the Linkind Smart Hexagon Panels came up for review, I requested them and was lucky enough to receive them.
⬇︎ Jump to summary (pros/cons)
Price: $94.00
Where to buy: Walmart
What is it?
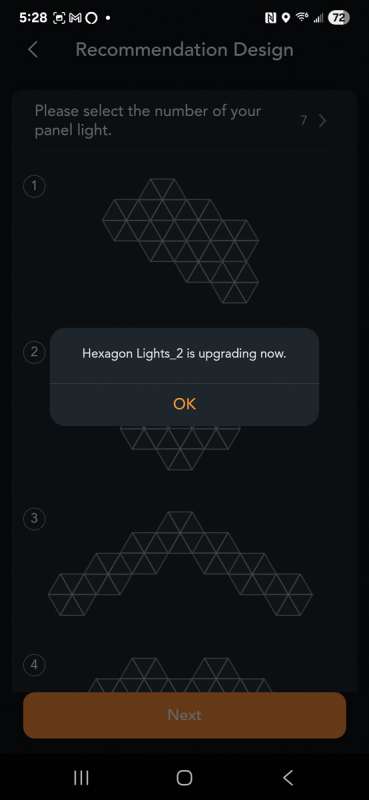
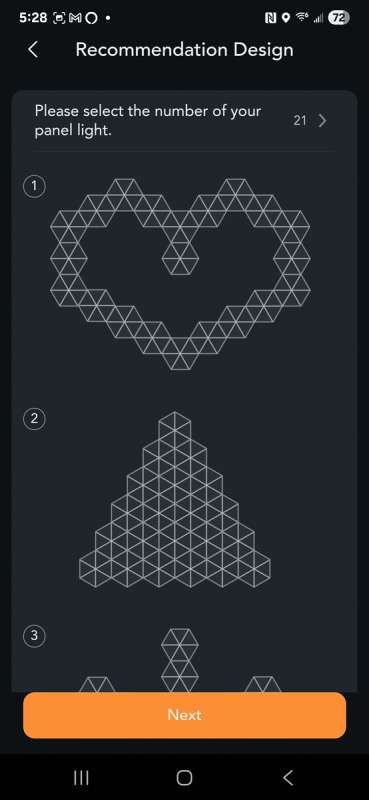
The Linkind Smart Hexagon Panels are hexagon-shaped LED light panels that mount to your wall. They interconnect with each other and can light up into five different colors in each panel. They come in packages of seven and up to 21 lights can be connected and controlled by a single controller. They use an AiDot app on your Apple or Android phone to control the lights. Amazon Alexa can also control them.
What’s included?
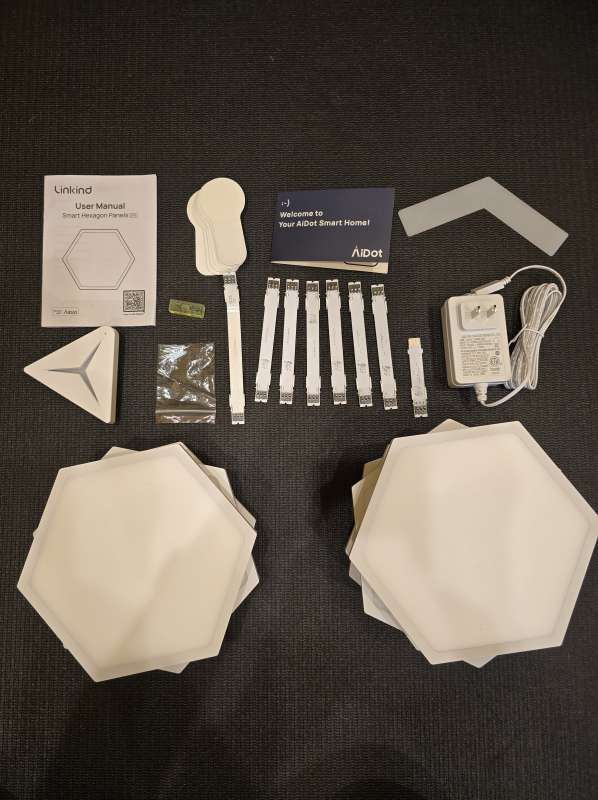
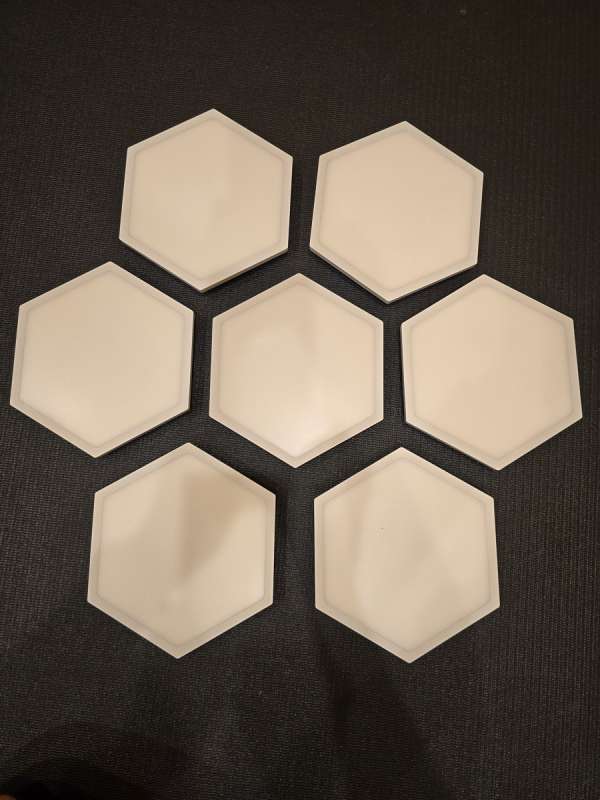
Each box of 7 hexagon panels includes:
- Seven light panels
- Seven mounting bases
- Power adapter
- Controller
- Six hard linking brackets
- One flexible linking bracket
- One short linking bracket
- Seven hexagon-shaped cardboard pieces – used for mounting
- Nine adhesive backing strips
- Spirit level
- Angle ruler
- 21 nails
- 36 auxiliary stickers – not pictured but used to place the cardboard pieces on the wall.
- User manual
Tech specs
-
Adapter Output-AC100V – 240,50/60Hz
-
Voltage-DC24V
-
Current-1.5A
-
Power-36W
-
TA -10℃ to 40℃/14℉to 104℉
-
Dimension-7.05in×6.14in×0.75in
-
Number of Panels-7
-
Mount Type-Wall Mount
Design and features
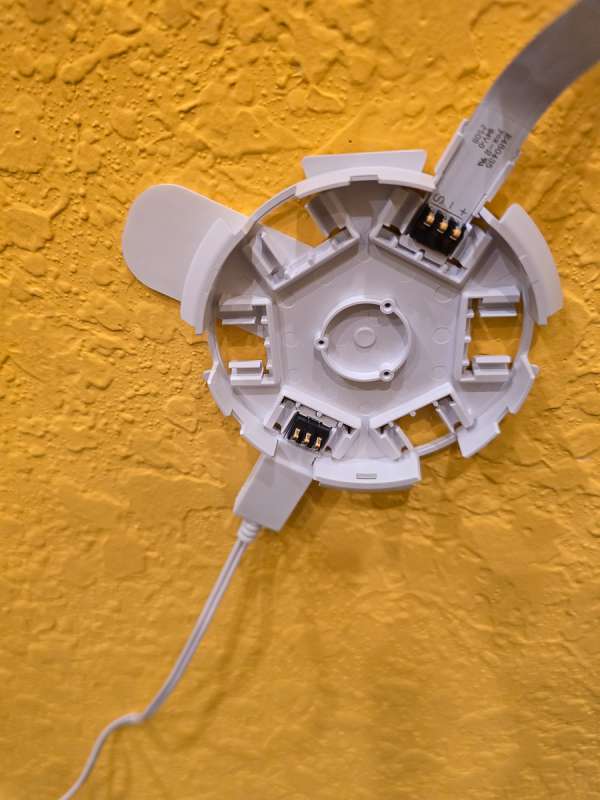
Each hexagon panel comes with the mounting bracket installed on the back. To remove it, slide a fingernail into the gap created for the linking brackets to connect. You can connect the panels to each other, the controller, or the power supply on any of the five sides. Each panel can connect to up to five different panels, if desired, or to a single panel.
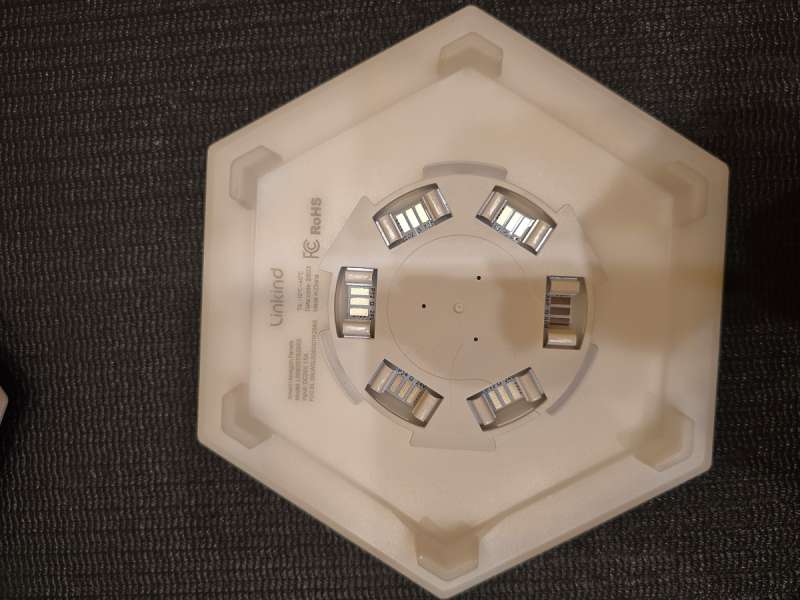
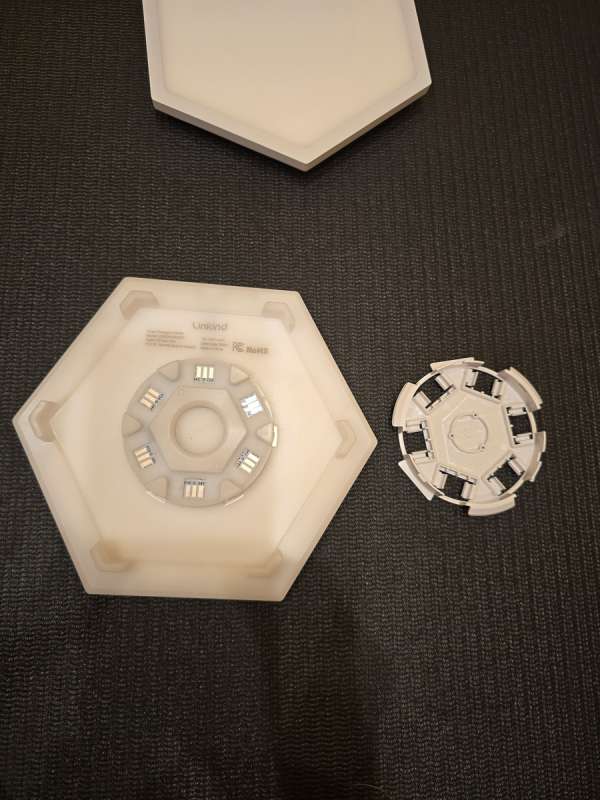
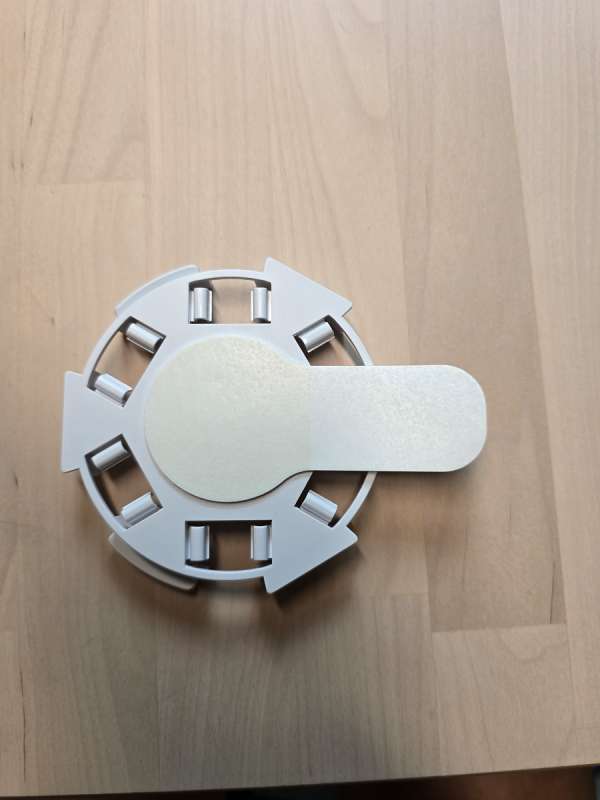
The linking brackets snap into place. The spacing for each of the standard linking brackets will make both hexagon panels sit right next to each other. The picture below shows the inside of the mounting bracket that will snap to the back of the light panel. If you wanted a hexagon panel to be slightly removed by about an inch from another panel, you would use the flexible linking bracket. Because of the way I have my panels arranged, I was also able to use the flexible linking bracket on two panels that were adjacent to each other without any issues.

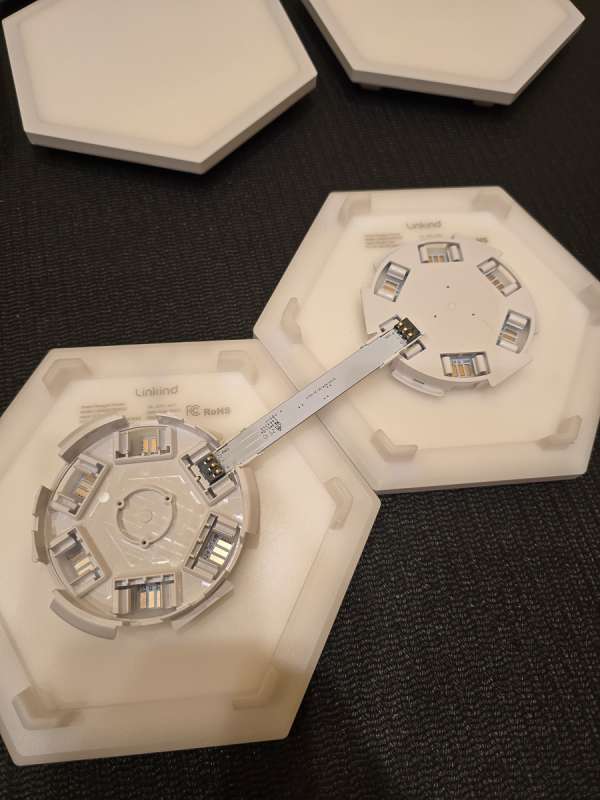
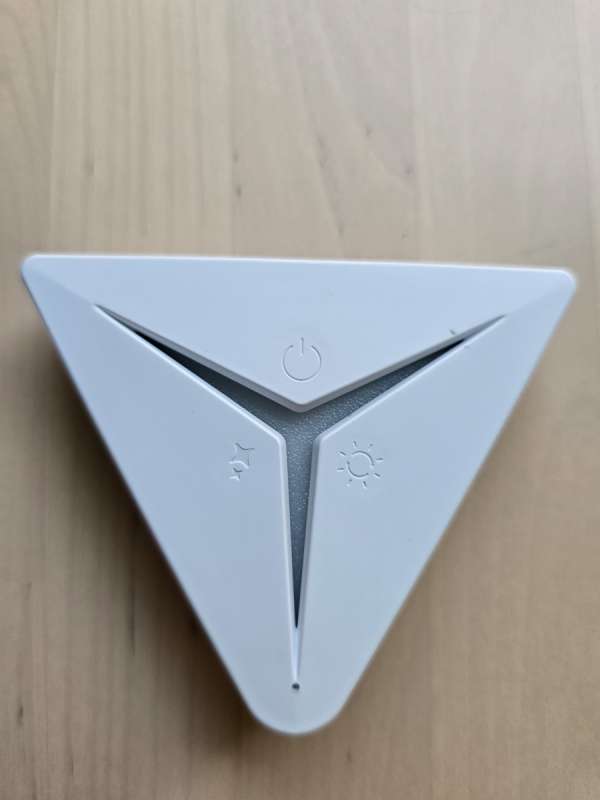
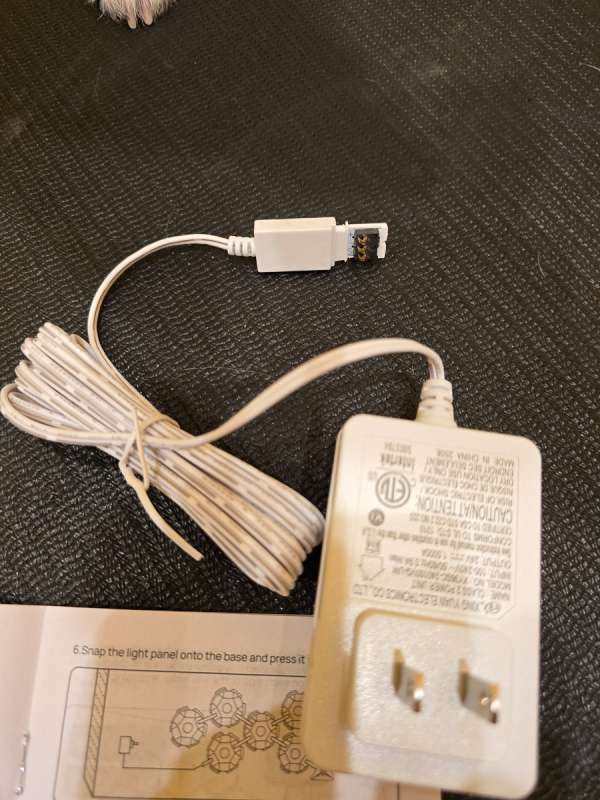
The controller will connect to a single panel using the short linking bracket.
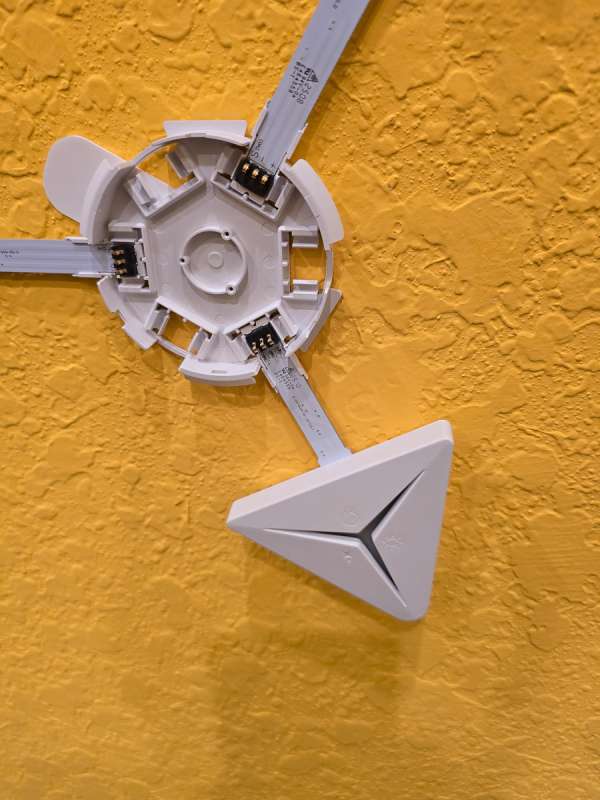
The power supply has the same end connector as the connecting backets.
Assembly, Installation, Setup
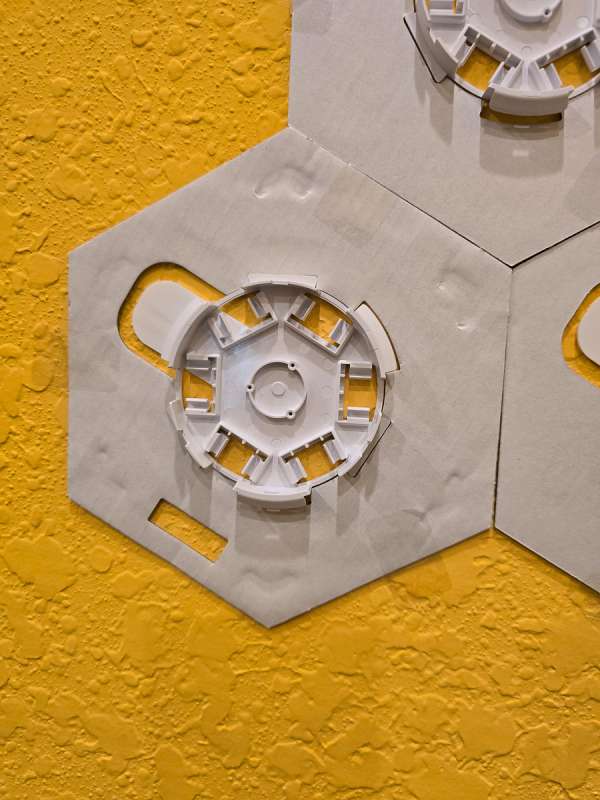
You need to be very meticulous when installing your lights. The cardboard cutouts are provided for you to mount on the wall, allowing you to build your design ahead of time and ensuring the proper spacing between each panel. You want to ensure that the tab on each cutout faces in the same direction when you mount the cutout on the wall. If you don’t do that, when it comes time to place the bracket in the cutout, your connecting brackets will not be able to connect properly to the panels. Another feature of the cardboard cutout that I did not use is the small slot that is in each cutout. That slot is there for you to ensure that your first panel is level to the ground, as the small spirit level that is provided fits inside. I did not realize this, but I also wanted the top of my design to have a point at the top of the design, rather than a flat space. Lucky for me, I was able to eyeball the placement, and it was perfectly aligned to the ground. You use the auxiliary stickers to mount the cutouts to the wall. They allow you to remove the cutouts from the wall without damaging it.

Once your design is in place on the wall, you can decide how to mount the panel brackets. Adhesive strips, such as Command strips, are provided, allowing the tail of the strip to be used to remove it from the wall if necessary, without damaging the wall. Linkind also provides small thin nails. You would use three per bracket to mount it to the wall. I chose to use the adhesive strips since I was mounting on drywall. If you select the adhesive strip option, be very careful when applying it to each bracket. There is an outline indicating where the strip should be placed and where the tab should be positioned.
Once the adhesive strip is applied, place it on the wall inside the cardboard cutout. The bracket will fit perfectly in the cutout, with the tab positioned in the correct cutout space.
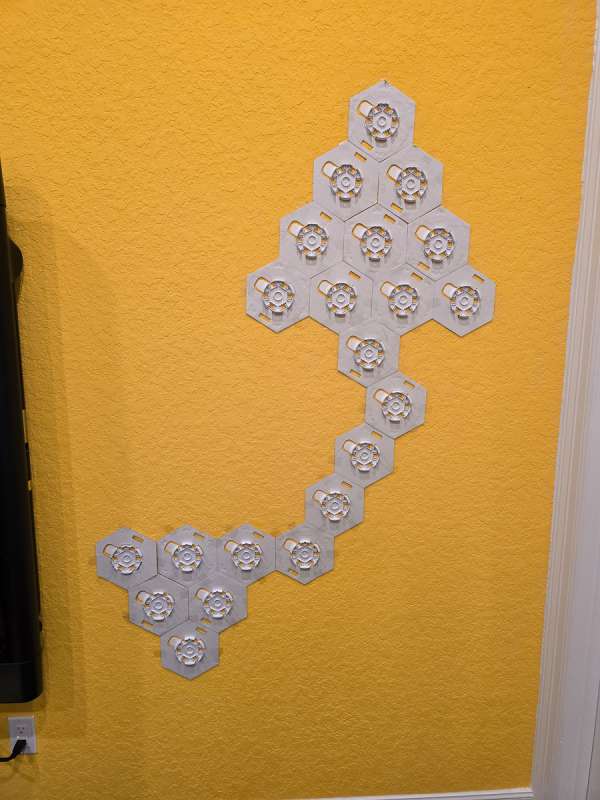
Here is my design with all of the brackets installed.
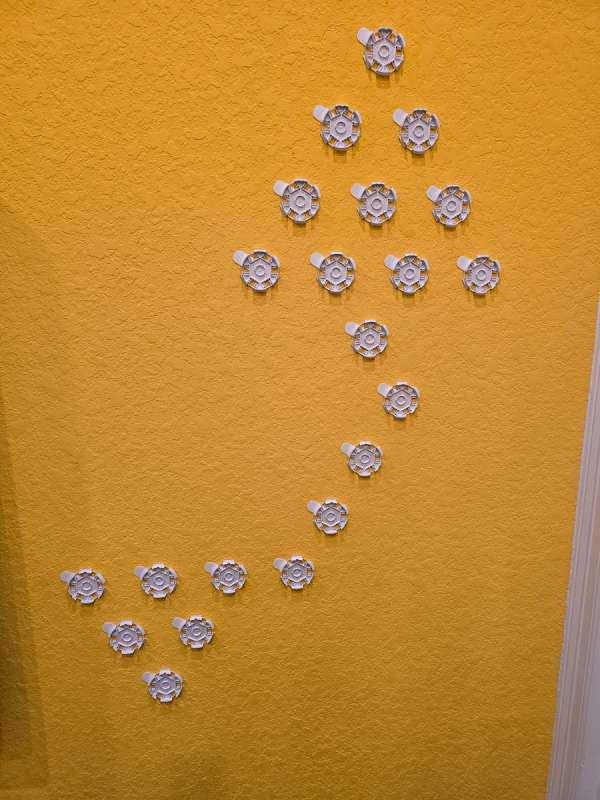
I then removed all the cutouts, leaving only the brackets on the wall.
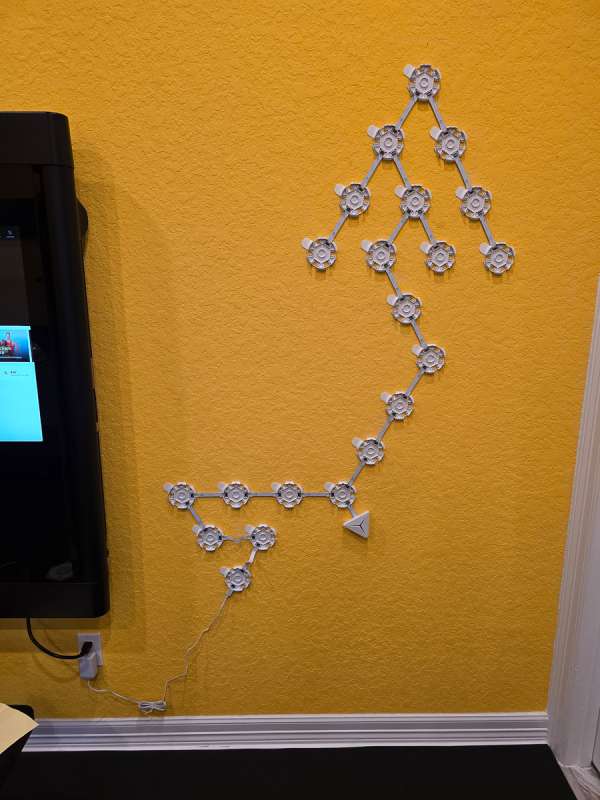
Next, I used the linking brackets to connect each mounting base to the other. You can see where I placed the first power strip and the control panel. I ended up putting another power strip on the first bracket below the first triangular shape. Linkind recommends a power supply for each group of seven panels, but I have been able to get all 21 to work with only two power supplies. I then clicked each light panel into place. They all fit perfectly. I will note that there was some play on a few of the panels. What I mean by that is due to the texture on my walls, the mounting brackets were not all completely level with each other. When I first powered up the lights, a section would not light up until I pressed down harder on a light, completing the connection. Linkind recommends a completely flat wall for these lights. It is not stated on their website.
After plugging in the lights and making sure they all came on, I installed the AiDot app. It asked me to create an account.
Next, I added the lights to my 2.4 GHz WiFi network.
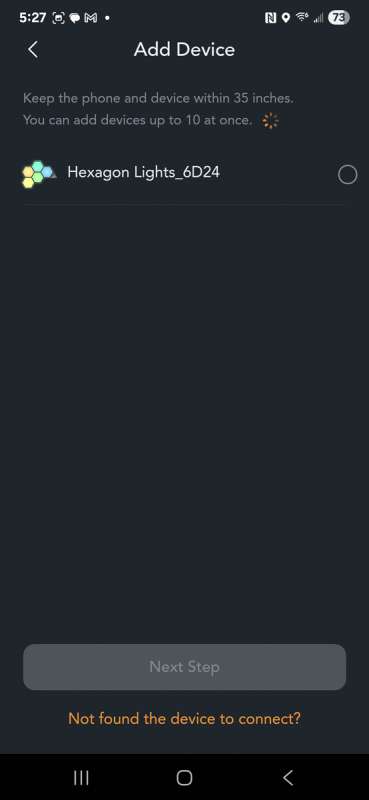
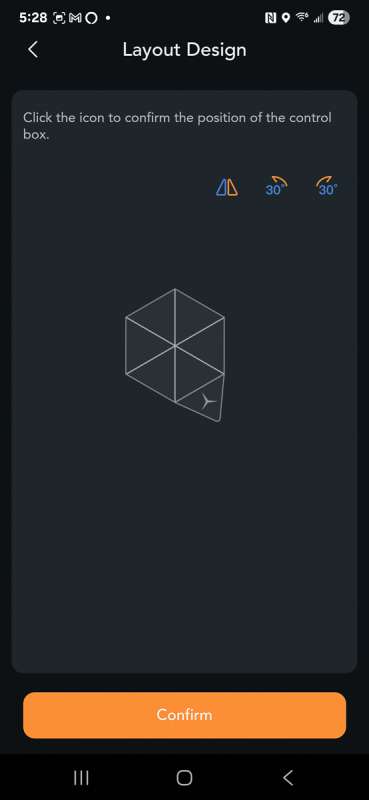
I then had to tell it how many lights it would control, along with the placement of the controller. I find it rather strange that it had to ask me how many lights it was going to control when it could recognize the design I built with the panels.
Performance
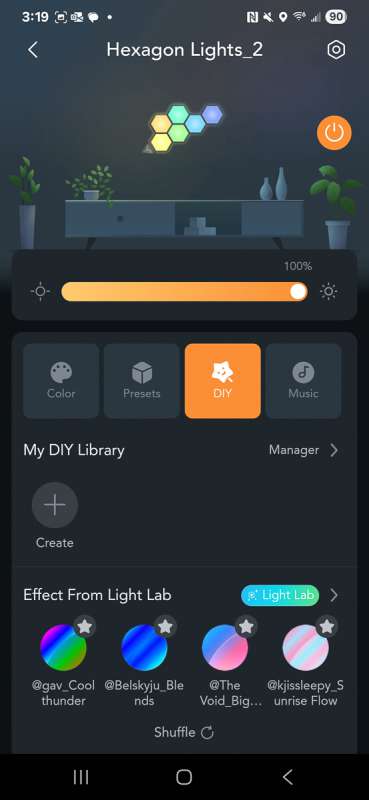
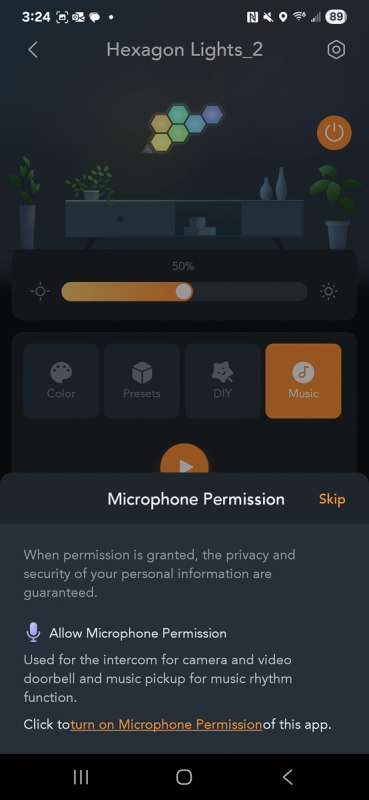
The AiDot app allows you to configure your lights in every conceivable way. The most basic way is to choose solid colors for your lights or keep them in a basic form of white.


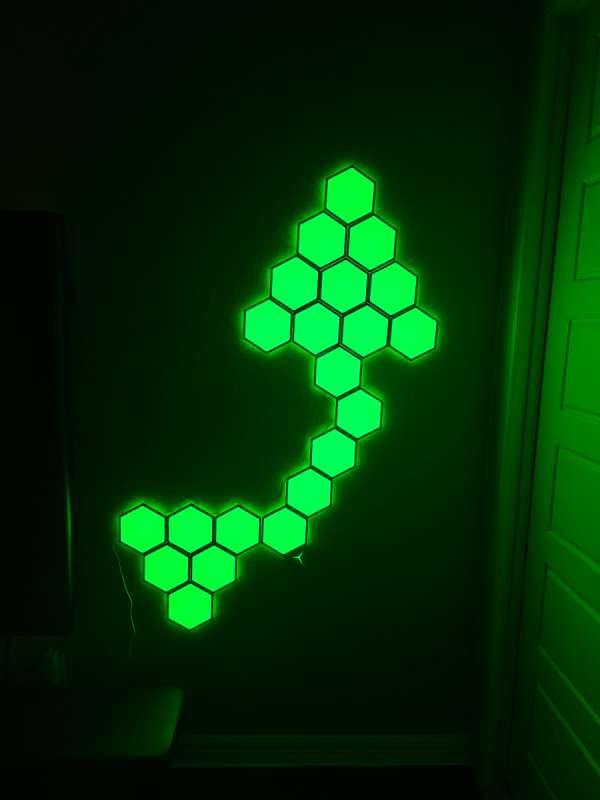
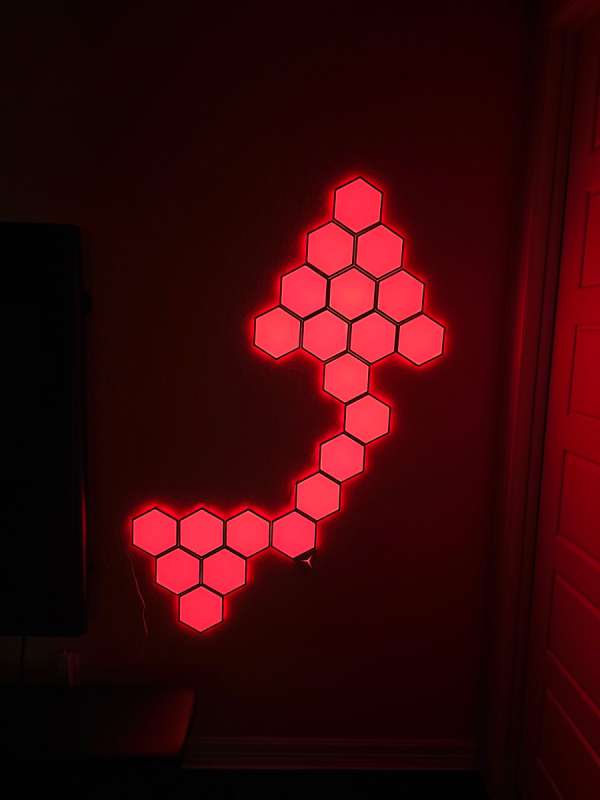
Here are the lights lit up in green, blue, and red.
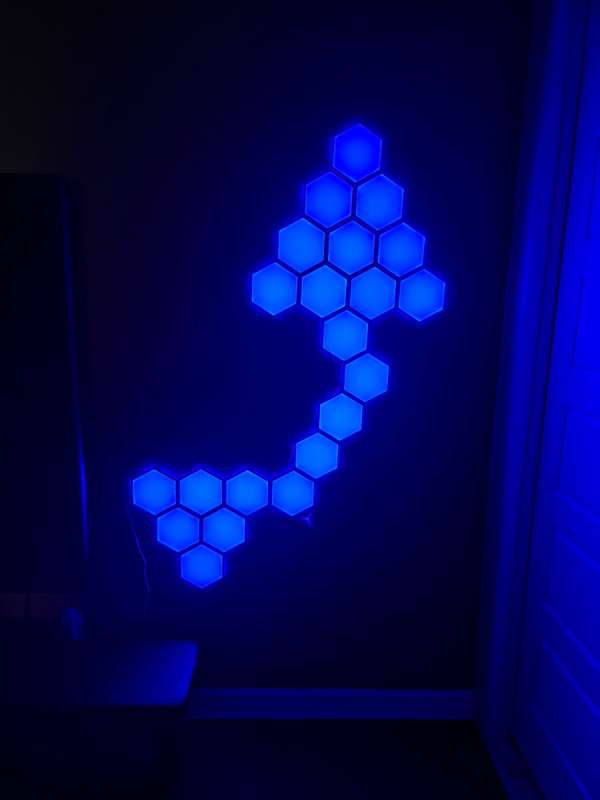
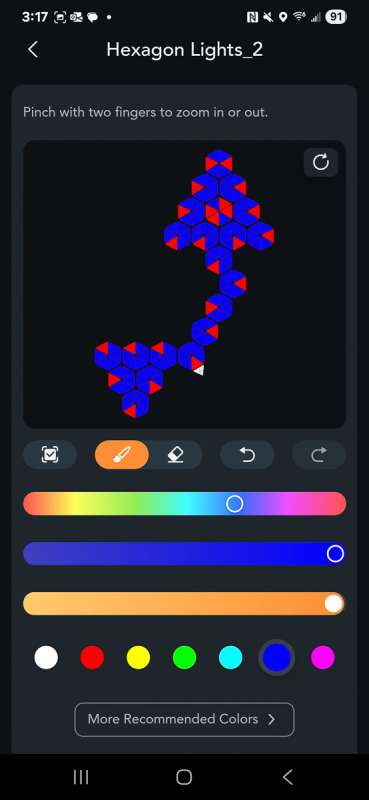
The app even lets you control the colors of each of the five segments of a panel. The choices seem endless! You can save off the design you built.
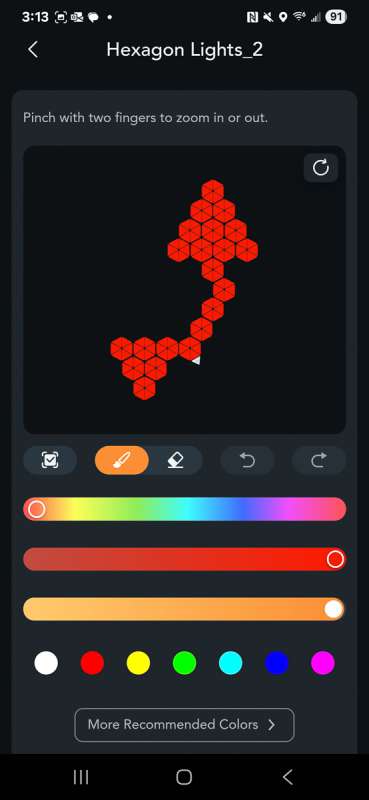
Here is one I built using blue as the main color with red highlights.
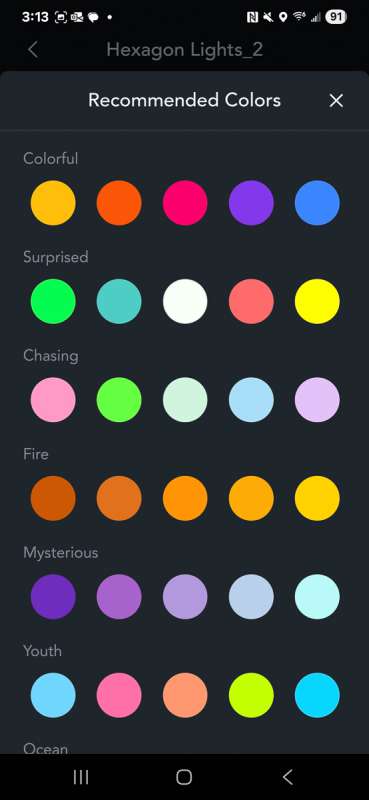
The app also provides presets where colors are set based on various themes.

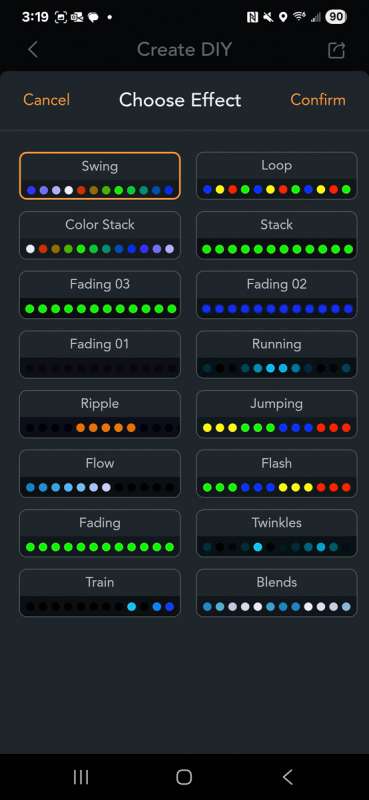
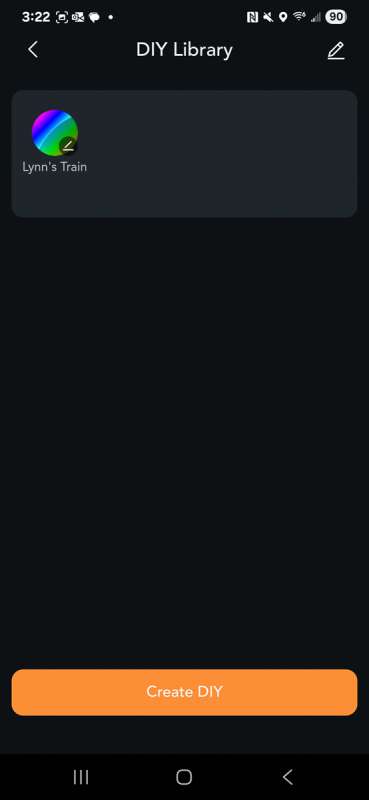
They also offer a section called DIY. In this section, not only do you specify colors, but you can also specify transitions. You can save your creation and share it with others using this app.
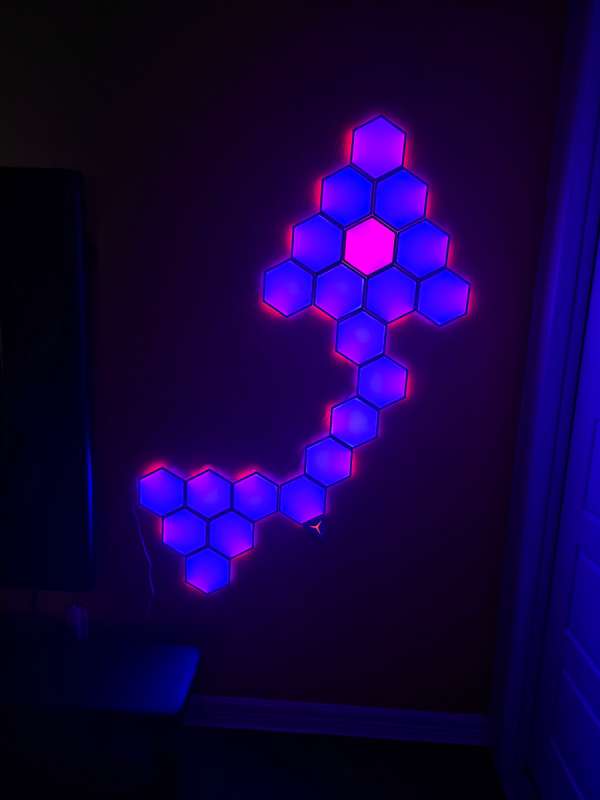
I ended up picking the train effect and a series of colors.
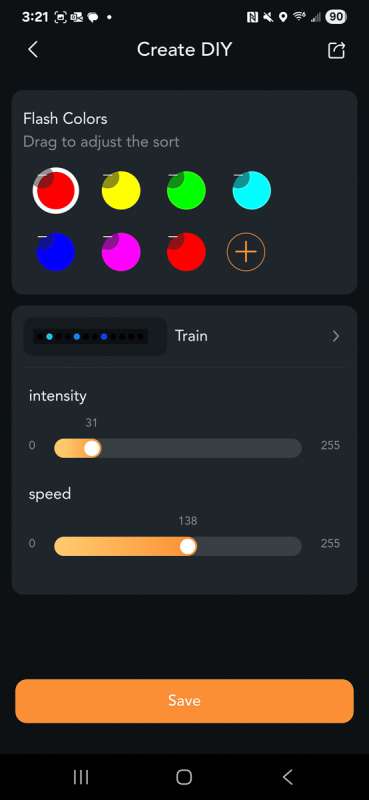

Here is what it looks like.

Here is a short video of my train DIY.
The app’s last option is music. To use the music option, you need to either use the phone itself or connect the app to a device like a speaker that is connected to the same network. I tested this briefly and found a slight lag. I chose the disco effect and multicolored lights. I then played a piece of music with a strong beat.
This video shows how each of the five sections can change color on each panel.
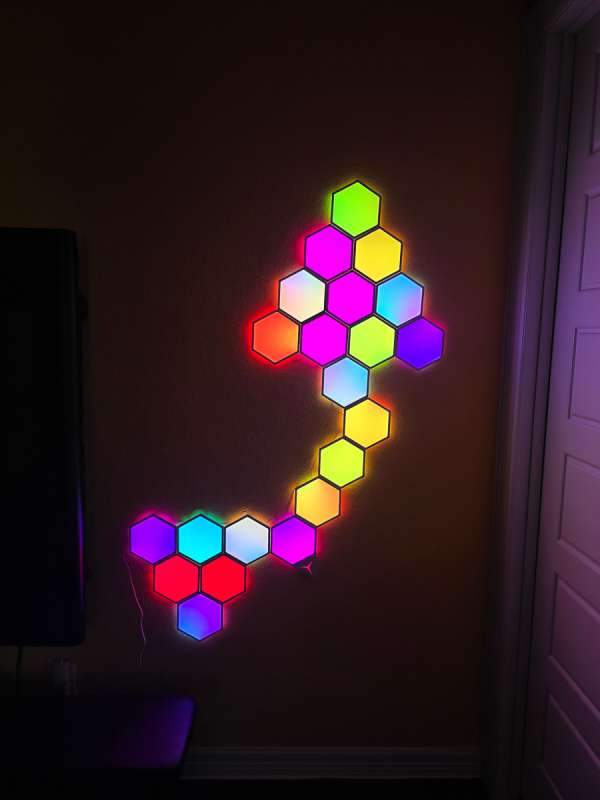
Finally, this is a shot of my most used display. It is a multicolor effect that I love.
Final thoughts
The Linkind Smart Hexagon Panels are a fun way to add some creative light art to your walls. You need to have as flat a wall space as possible with minimal to zero texture. This allows the brackets to sit flat and allows the panels to light up properly. There are a million ways to customize them. Also be prepared to use multiple power supplies if you are connecting more than seven panels together.
What I like about Linkind Smart Hexagon Panels
- So many design, color, and motion choices!
- The lights are very bright, but you can also dim them down if you choose.
- Up to 21 panels on a single controller.
What needs to be improved?
- Mention on your website that additional power supplies will be required for each set of seven panels.
- Mention on your website that textured walls could present an issue.
- Sell a power supply that could handle all 21 panels at once.
Price: $94.00
Where to buy: Walmart
Source: The sample of this product was provided for free by Linkind. Linkind did not have the final say on the review and did not preview it before it was published.
Check out these other LED lighting reviews!
- Govee H70B3 Curtain Lights 2 review – Instantly up your LED display game!
- Govee Glide Hexagon Light Panels Ultra review

ESR for MagSafe Wallet, 5 Card Holder with RFID Blocking, MagSafe Sticker Included, Slim Magnetic Wallet for iPhone 17e/17/16/15/14/13/12 Series and Selected Samsung Devices, Not for 13/12 Mini, Black
(as of July 4, 2026 11:03 GMT -05:00 - More infoProduct prices and availability are accurate as of the date/time indicated and are subject to change. Any price and availability information displayed on [relevant Amazon Site(s), as applicable] at the time of purchase will apply to the purchase of this product.)