REVIEW – The video quality, resolution, and low light capability of video surveillance equipment continually improve with each innovation in camera sensors. The Reolink CX810 is the company’s first 4K 8MP resolution PoE IP camera with proprietary ColorX full-color night vision. I have one to review; read on to see what I think!
What is it?
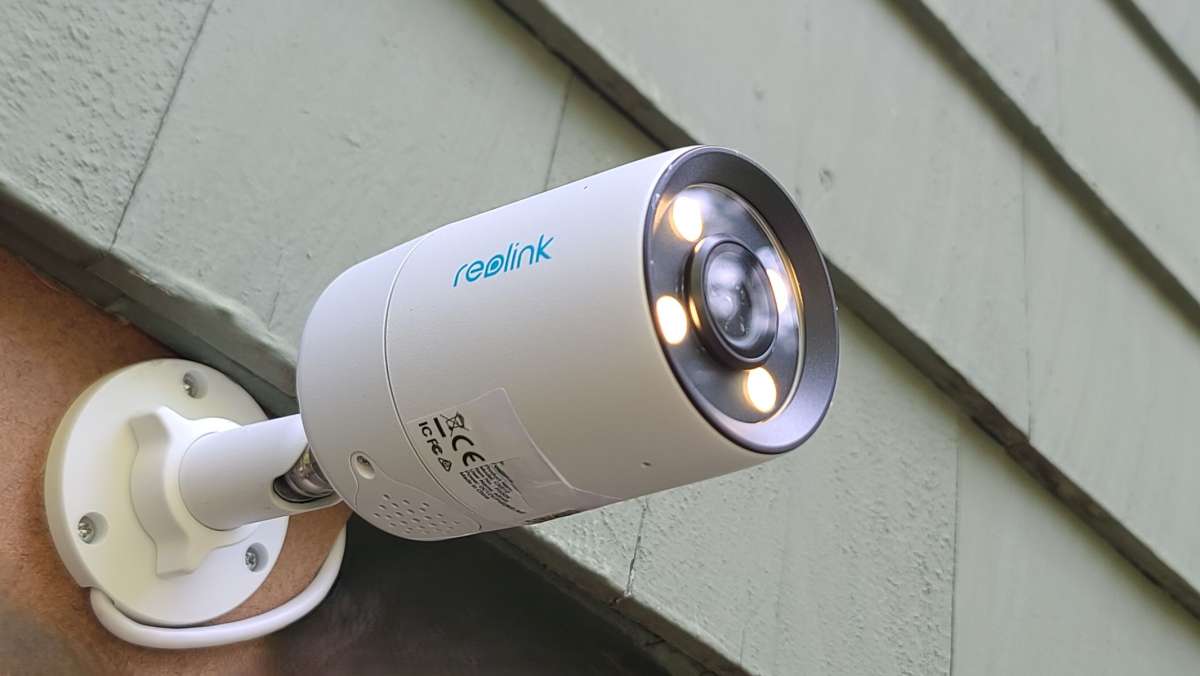
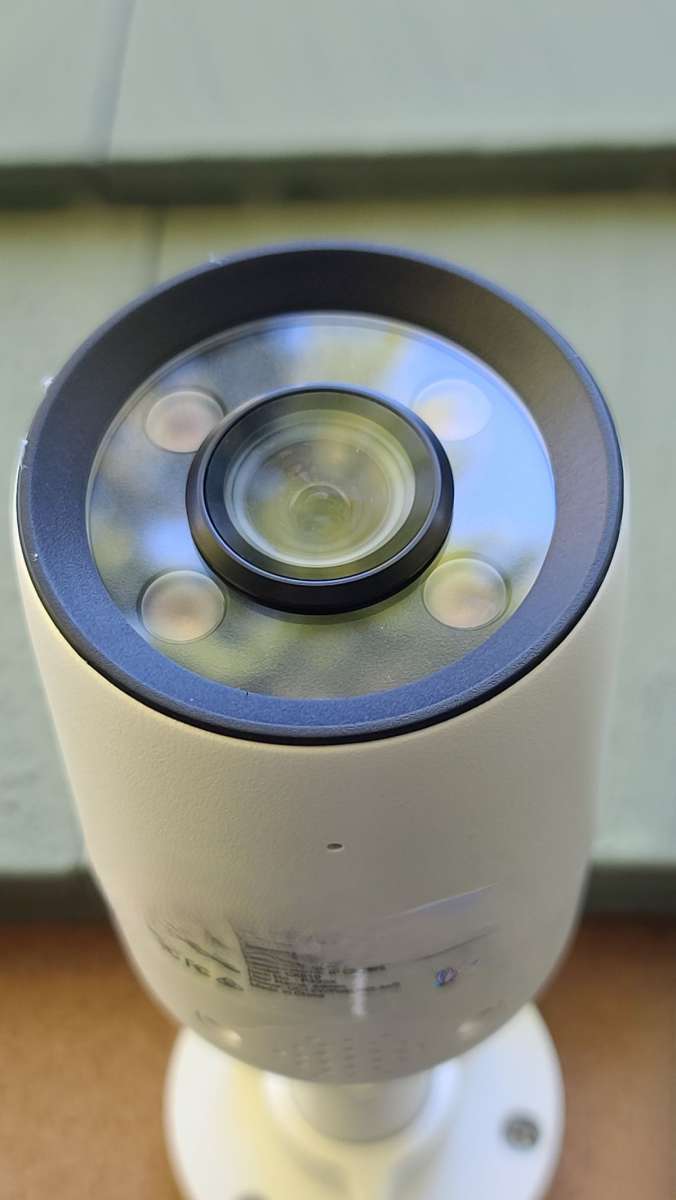
The Reolink CX810 is a bullet-style, fixed-position security camera that communicates with and is powered by an ethernet cable. The camera’s main features include a high resolution 4K 8MP image and low light color image capture so that full-color video can be captured in low light conditions without requiring black and white infrared illuminated video. The F1.0 super aperture lens on this camera is 1/1.8″ in size, which enables sharp details even in low light conditions. The resulting image surpasses the typical un-illuminated phone camera, spotlight-illuminated camera, or infrared camera results. The low light capabilities are paired with daytime 4K resolution, which provides more clarity to the surveillance than a comparable 2K or HD image. The 4K image can be captured at up to 25 frames per second, which captures action in lifelike movement. The camera has intelligent image analysis and can alert when the shapes of people, vehicles, and animals are detected. The analysis occurs on camera and no subscription fees are required to receive the alerts. Once the camera detects motion, the camera may be set up to shine a light and simultaneously sound an alarm. The camera lights have a warm 3000K temperature and have adjustable intensity to limit disturbances to neighbors. The camera has a built-in microphone and speaker to enable conversations with people in front of the camera.
What’s included?
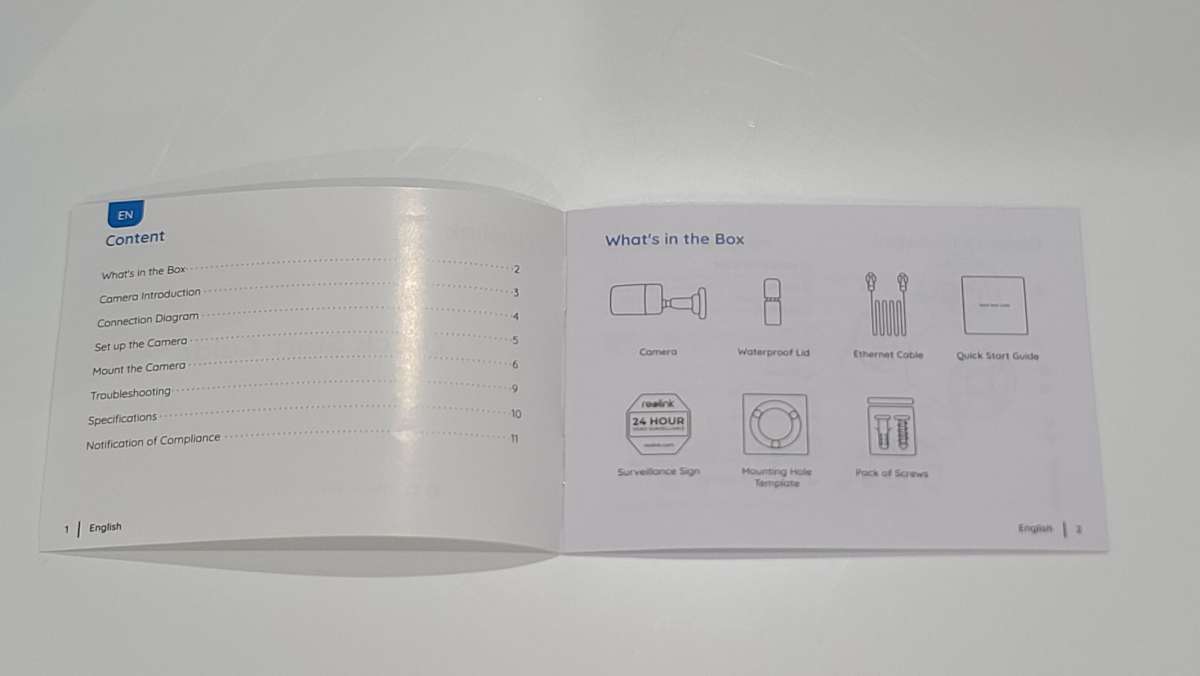
- CX810 camera
- weatherproof shroud for RJ45 connector and installation guide
- 1M ethernet cable
- quick start guide
- intruder deterrence/surveillance sign
- mounting hole template
- mounting hole backing foam
- mounting screws
Tech specs
Click to expand
Video & Audio
Image Sensor: 1/1.8″ CMOS sensor
Resolution: 3840×2160 (8 megapixels)@25fps
Lens: f=4.0mm, F=1.0 IR CUT
Video Compression: H.265/H.264
Zoom: N/A
Horizontal Field of View: 93.2°
Vertical Field of View: 48.2°
Diagonal Field of View: 111.6°
Infrared Night Vision: N/A
Color Night Vision With spotlights: 4pcs/3w/3000K/400 Lumens (Max illumination distance:15m)
Main stream frame rate: 2fps – 25fps (default: 25fps)
Sub stream frame rate: 4fps – 15fps (default: 10fps)
Main stream code rate: 1024Kbps – 8192Kbps (default: 6144Kbps)
Sub stream code rate: 64Kbps – 512Kbps (default: 256Kbps)
Audio: Two-way audio
Power Requirements
PoE: IEEE 802.3af, 48V, active
Power Requirements: DC 12V⎓1A, <12W
Interface
Power Port
DC power port
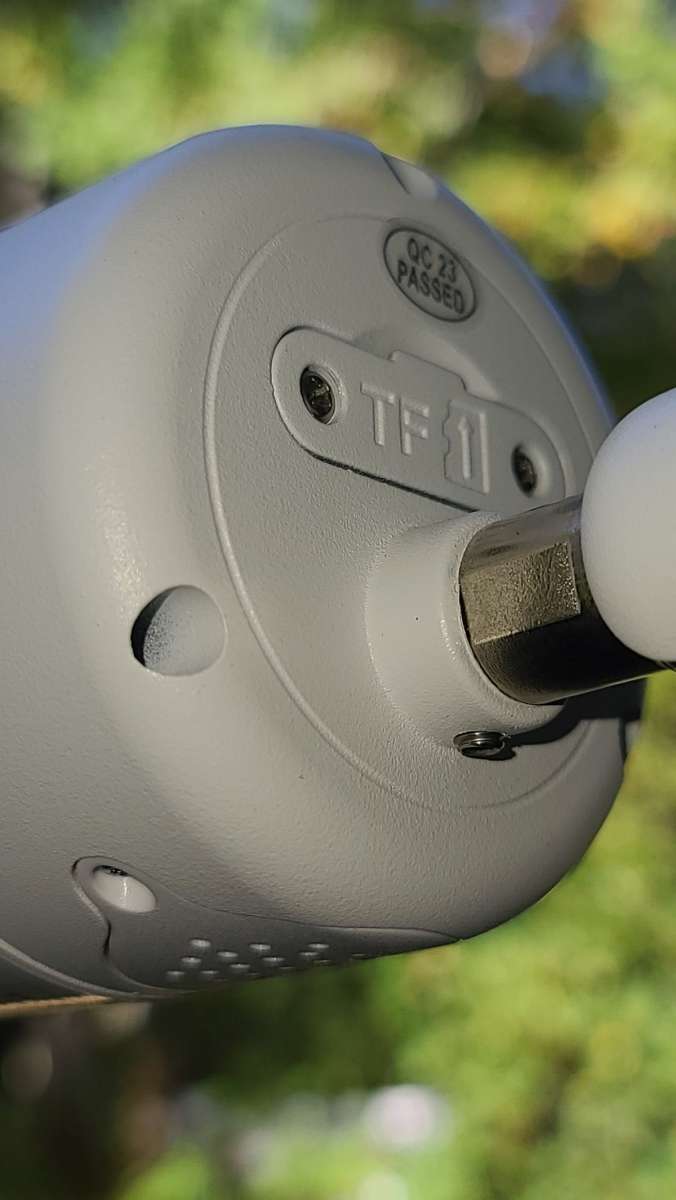
SD Card Slot Supports Max. 256GB microSD card
Reset Button: YES
Audio In/Out: Built-in microphone and speaker
External Interfaces
Ethernet Ports: One 10M/100Mbps; RJ45
Software
Browsers Supported Edge, Chrome, Firefox, Safari
OS Supported: PC: Windows, Mac OS; Smartphone: iOS, Android
Protocols & Standards: HTTPS, SSL, TCP/IP, UDP, HTTP,IPv4, UPnP, RTSP, RTMP, ONVIF, SMTP, NTP, DHCP, DNS, DDNS, FTP, P2P
User Access: Max. 20 users (1 admin & 19 users); Max. 12 simultaneous streams (2 main hi-def & 10 sub lo-def streams)
Other Feature(s)
Smart Alarm: Motion detection; person detection; vehicle detection; animal detection
Recording Modes: Motion-triggered recording (default); scheduled recording, 24/7 recording
Time Lapse: YES
Smart Home Compatibility: Google Assistant
Working Environment
Operating Temperature: -10°C~+50°C (14°F~126°F)
Operating Humidity: 10% ~ 90%
Weatherproof: IP67
Mechanical
Dimensions: 67*187mm
Weight: 467g
Warranty
Limited Warranty: 2-year limited warranty. For support, visit https://support.reolink.com/hc/en-us/.
Refund instructions: 30-Day Money Back Guarantee
Shipping instructions: Free Shipping
Design and features
Unboxing
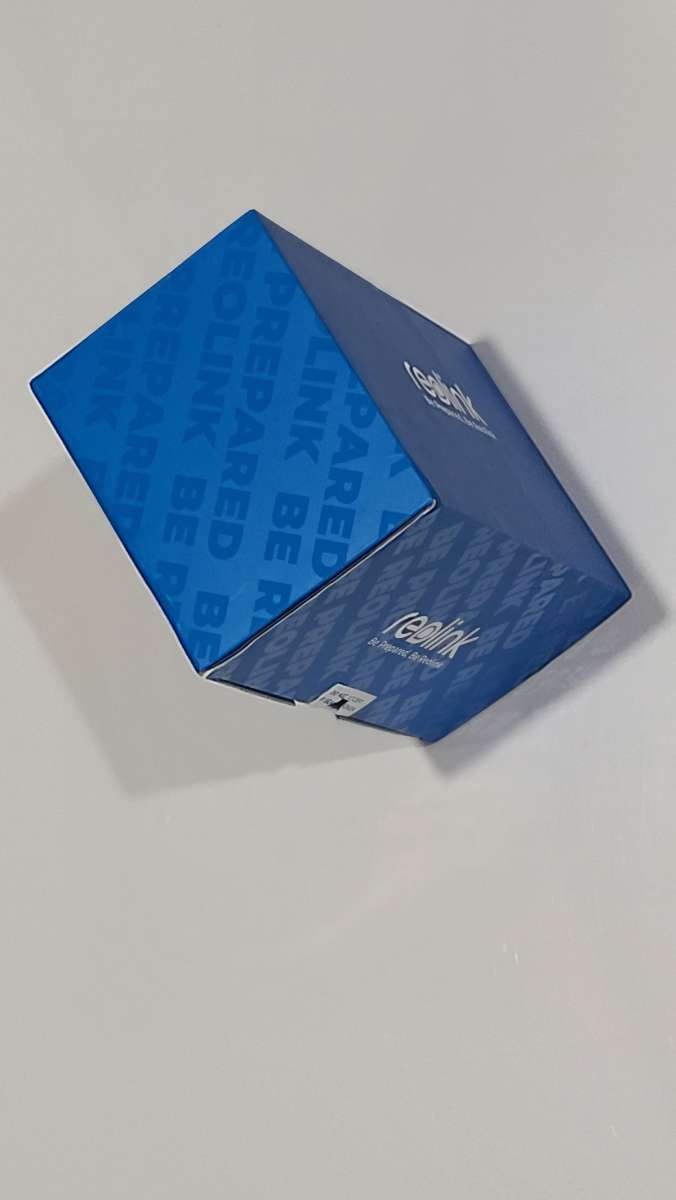
The Reolink CX810 security camera comes in a small cardboard box that looks more like it is designed for a professional security systems integrator than for a customer. The outside of the box is blue with white text. The Reolink logo appears on the top and front (apparently upside down) with the motto, “Be Prepared, Be Reolink” printed below. The top sides and bottom of the box have the logo repeatedly printed in glossy text on a matte background. The back of the box has camera information (including serial number), limited warranty, terms and privacy, and regulatory and compliance markings.
Inside the box, the paperwork is in a small cardboard pamphlet with the Reolink logo printed on the top. The camera is held securely in a foam-padded form. Below the camera are the base gasket, ethernet cable gasket, ethernet cable, and mounting screws.
Assembly and Installation
The Reolink CX810 security camera is a Power Over Ethernet design. You need to provide it with a powered ethernet cable or an ethernet cable and a separate DC power. The power requirements are PoE, IEEE 802.3af, 48V, active or DC 12V⎓1A, <12W. Feeding the camera with a single cable that carries both power and ethernet is easier than supplying the camera with separate power and data cables. While testing the camera I used the TRENDnet Powerline 200 AV PoE+ Adapter reviewed on The Gadgeteer in 2018. The adapter provides power and transmits data to the paired transceiver installed near my network hub.
Depending on the mounting location the cables can be routed through the base and out the bottom of the camera mount or routed out a hole to the side of the base and left exposed adjacent to the camera. It is prudent to install the supplied waterproof lid around the ethernet cable if the cables are exposed to the elements. Reolink does not include a waterproof lid adapted for DC input so if the cables are exposed it is best to use a PoE injector and only supply one cable to the camera.

If you are using the local storage on the camera you should install the TF card before remotely mounting the camera. The cover plate for the TF slot has a gasket for weather protection.
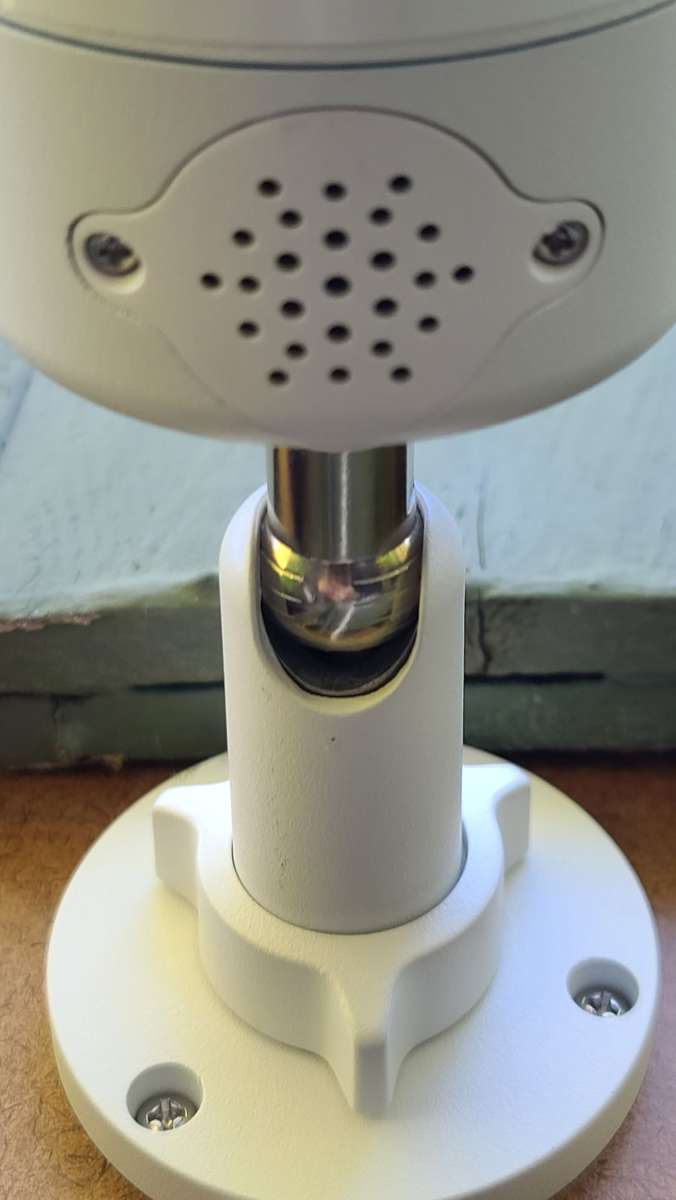
Loosen the nut on the camera base to adjust the camera’s positioning.
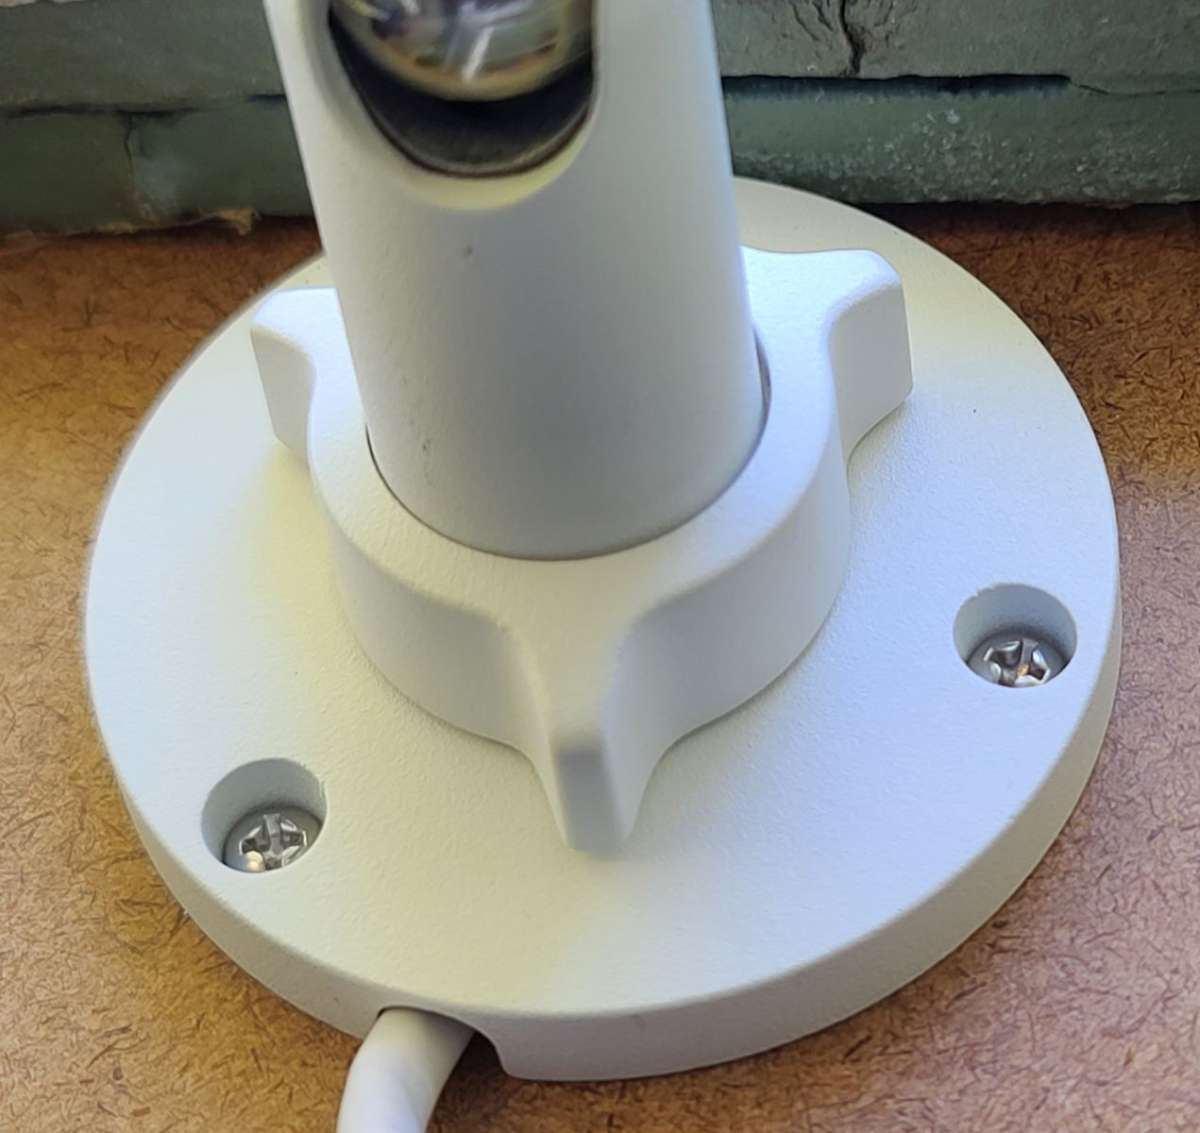
The base rotates from 0 degrees (base directly behind the lens) to about 90 degrees and around so the camera can be mounted to a wall, ceiling, or pedestal. The Camera can flip the signal horizontally and vertically but cannot rotate the image, so the camera should be mounted with this in mind. It may be easier to aim the camera if the installer notices that the speaker is mounted on the bottom of the camera.
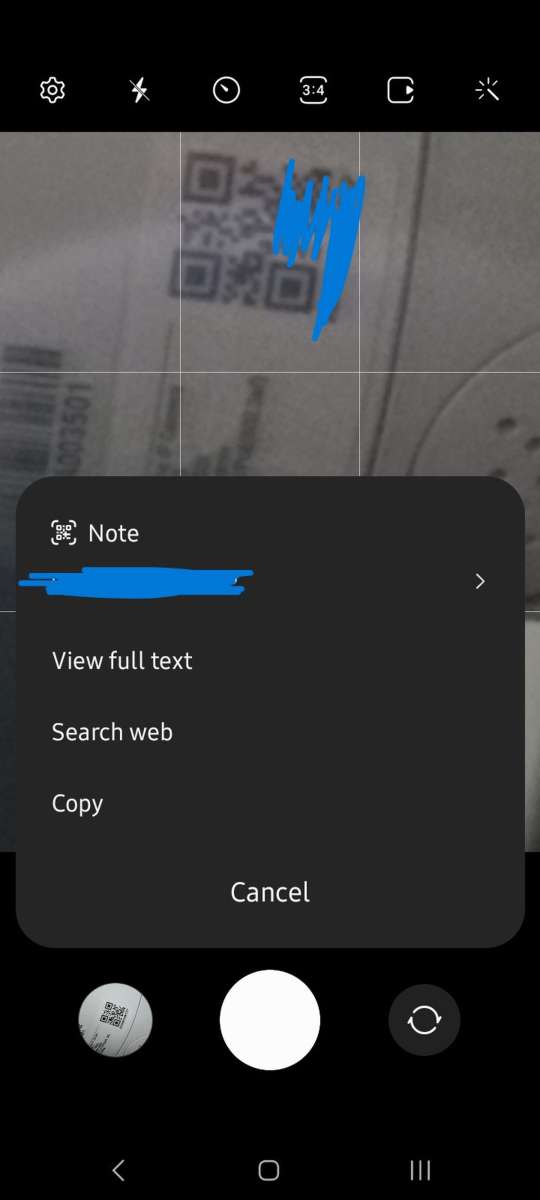
One last bit of advice is to take a picture of the QR code on the side of the camera. Pairing the camera with the Reolink app may require the QR code. If the camera is mounted remotely having this image at hand may make the pairing process easier.
Setup
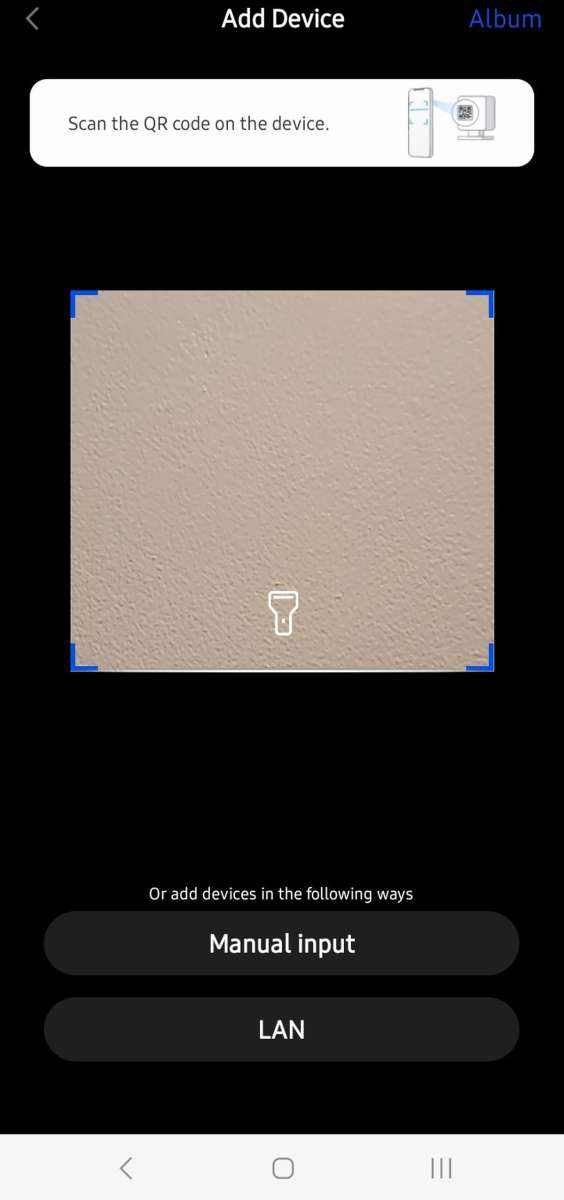
The setup below relates to pairing the Reolink CX810 camera to the Reolink app and using the app to control the settings and reports from the camera. The setup is rather straightforward. The camera may be paired using the QR code on the side of the camera, a UID (a product-unique identifier encoded into the QR), the IP address assigned to the camera, or an authorization link (I’m not sure what this is). Multiple people can install the app and share the camera amongst them.
After pairing the device to the app you can change the device name to something appropriate for the location it is monitoring and also something convenient to ask Google Home to show if that is a feature that will be used.

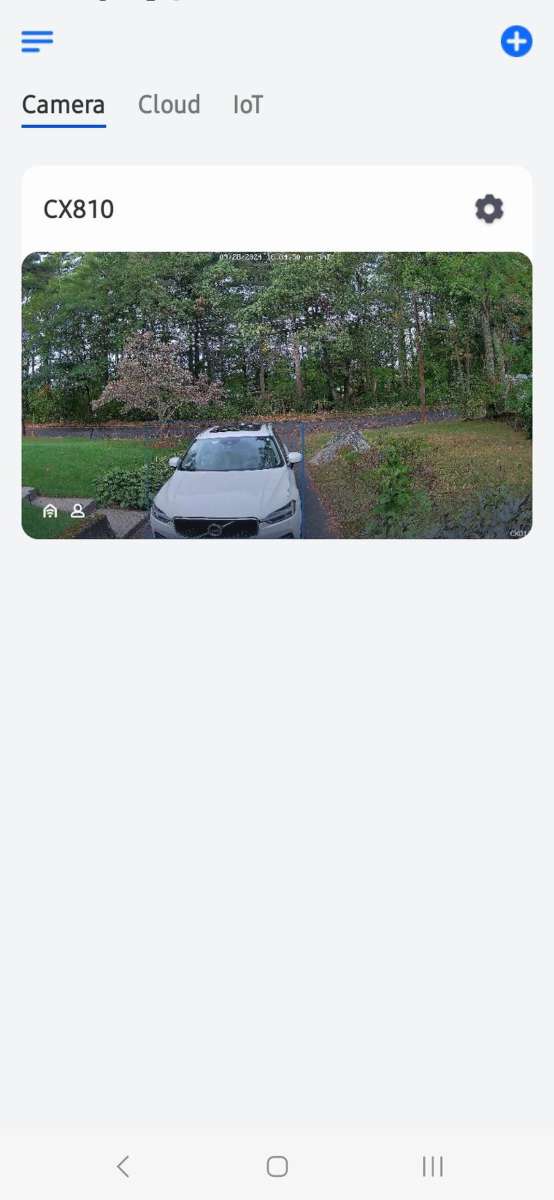
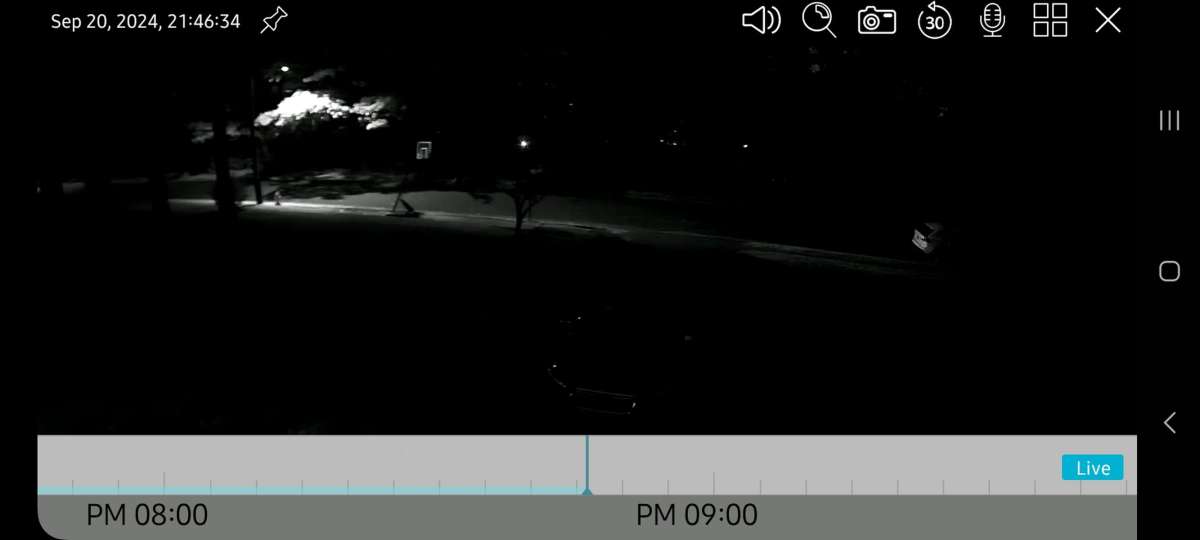
The app shows a preview of the current captured image. If more than one Reolink camera is paired the app displays multiple preview images on this screen. The preview is not live but is routinely updated throughout the day and each time the app is opened. A click on the preview image opens the live view for that camera. The live view may be pinch-zoomed and panned. The live view image has 6 icon buttons immediately below the feed (Play/pause, volume, photo capture, video capture, bandwidth, and fullscreen), 3 icon buttons, a drop-down menu button in the top left corner, and three buttons at the base of the screen (push to talk, magnifier, and playback).
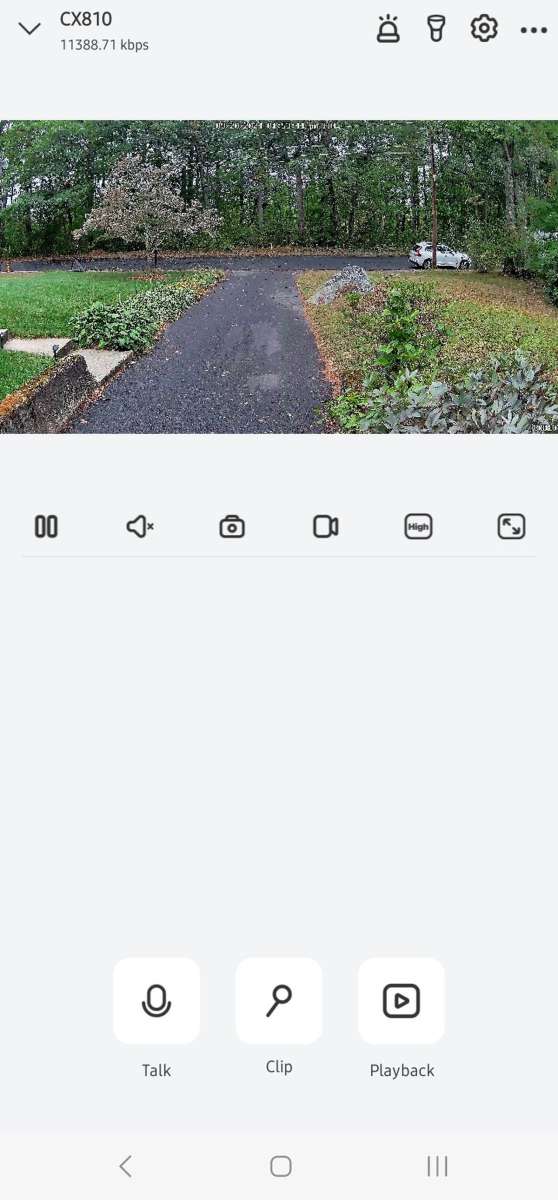
In the top left of the screen, the camera name and the current bandwidth of data transfer are displayed. I have my camera pointing at a field of trees so there is always a lot of movement and there is usually a very high bandwidth. The bandwidth changes with the selection of the image encoding. The camera supports high-definition “Clear” encoding and lower-definition “fluent” encoding. The camera can also adjust bit-rate dynamically in the “Balanced” mode. On the top right of the screen is a button to activate the siren a button to start the flashlight, a settings gear, and an overflow button containing a submenu for immersive or picture-in-picture viewing. The siren sounds like a siren but is not very loud and in my opinion, does not add to the security of the surveiled area. I have not reviewed a camera with a real high-decibel siren installed in the housing.
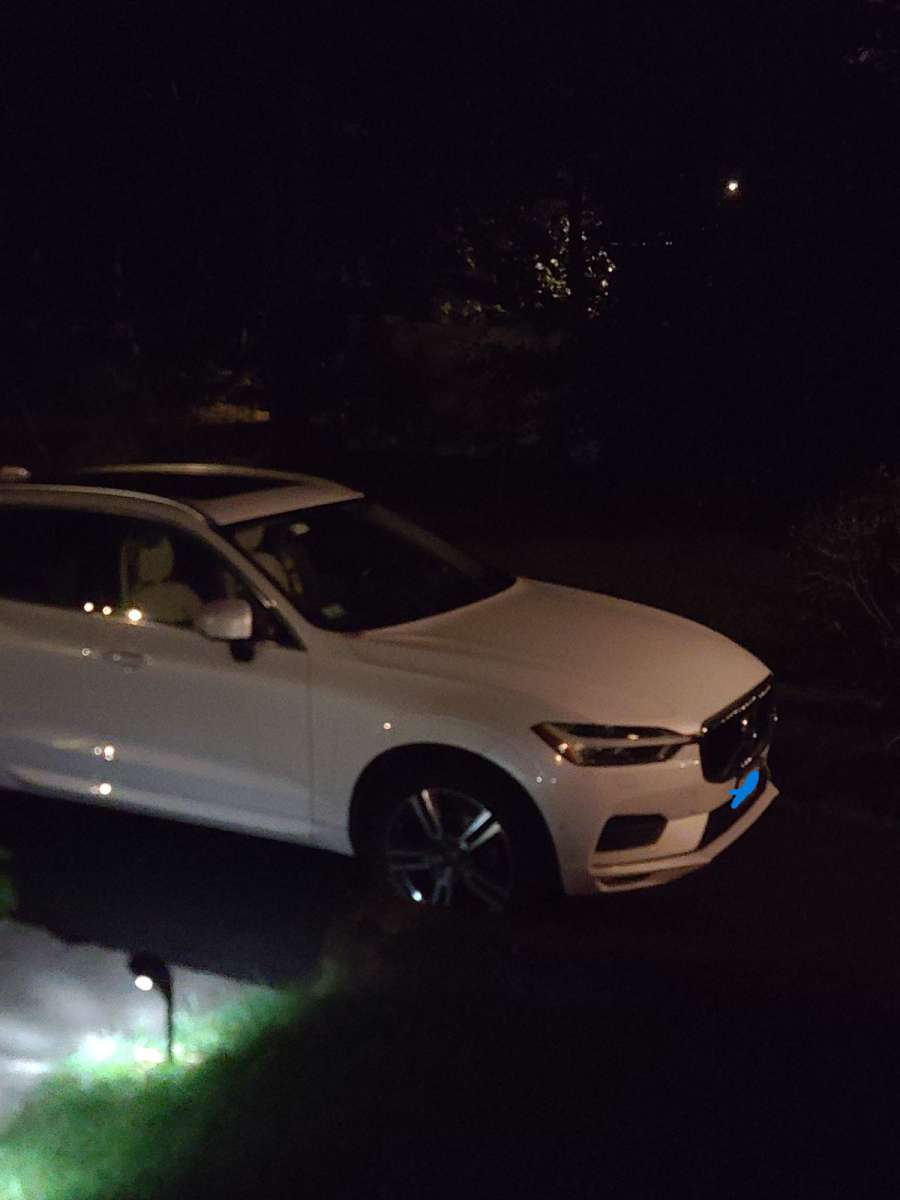
Four lights on the camera can enhance the picture of low-light scenery. The output of the lights is adjustable. The camera image is significantly enhanced by very little light. The output of the lights can be controlled in four ways. The lights can be set off (this is good to make the camera a bit more discrete), it can be set to stay on at a fixed brightness during a set period, it can be set to turn on whenever the camera senses it will improve the quality of the image, or it can come on when an event is detected, such as movement, a person, animal, or vehicle. I prefer to keep the lamp off since my camera is pointed at a street with a street lamp. The image below is with the lights set to dim:
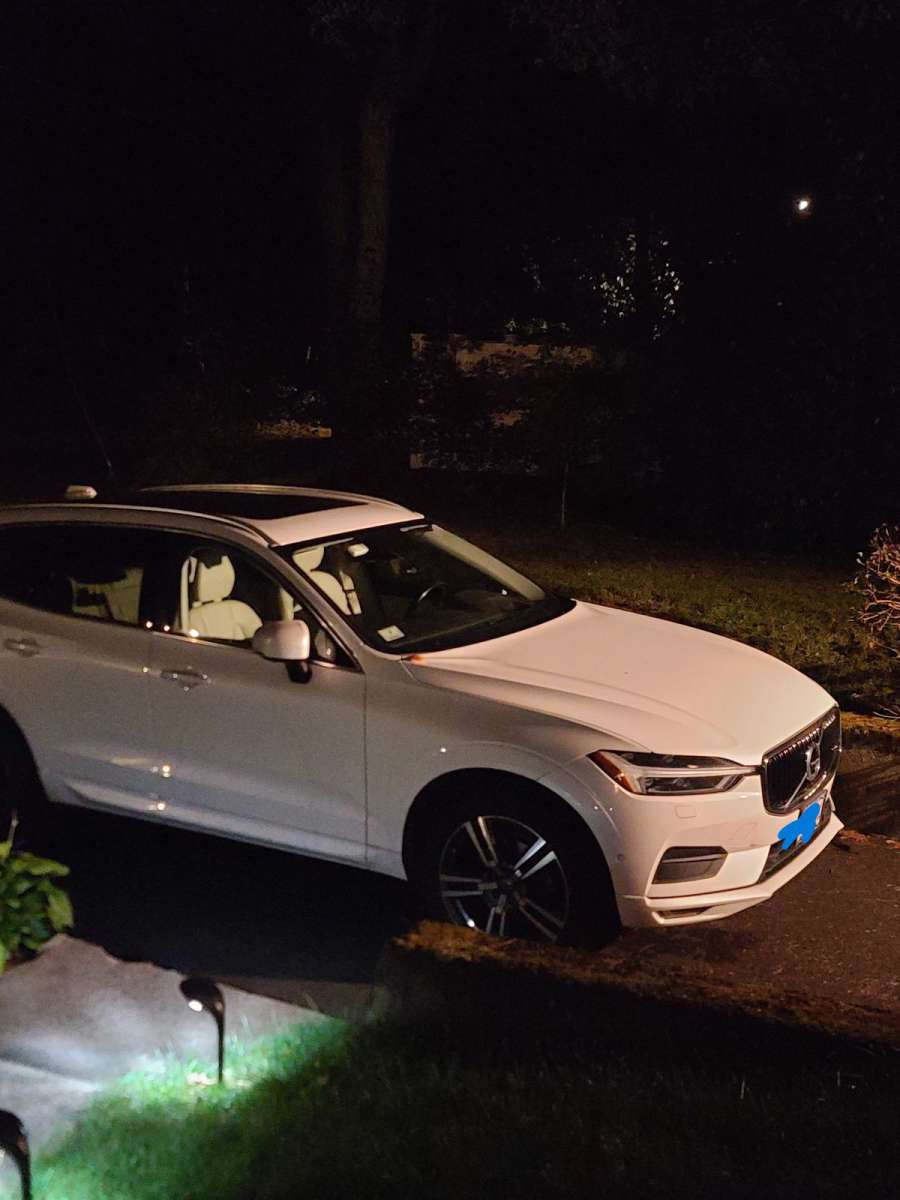
This is the setting with the lights set to high:
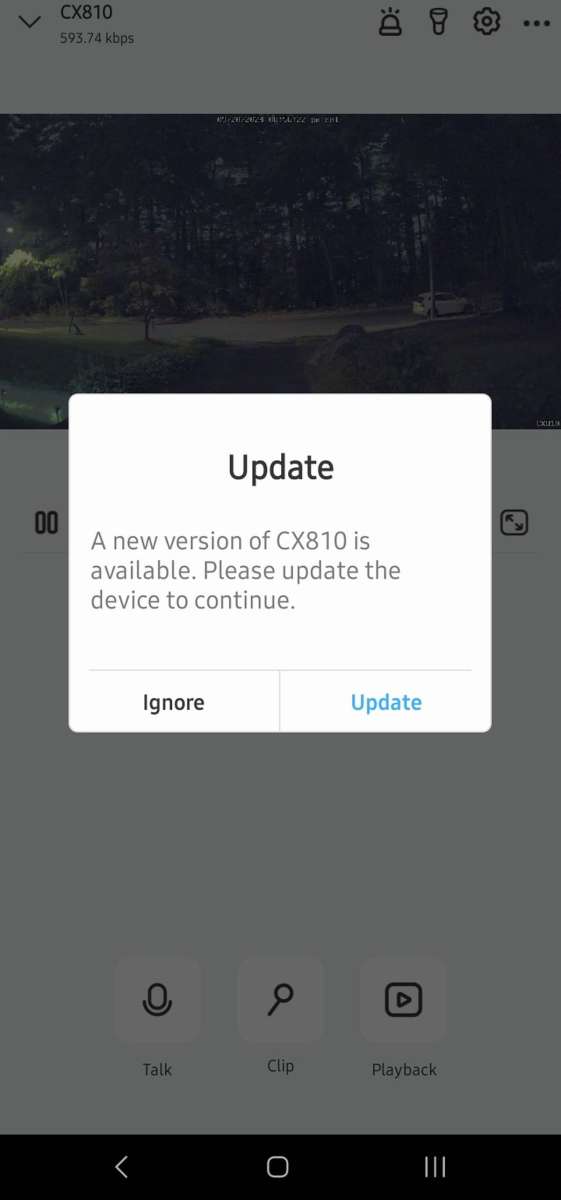
The settings menu has a lot of options and provides a lot of information. The top of the screen shows a picture of the camera type, the current memory capacity and use, and the type of power adapter in use (PoE or 12 VDC). Clicking this area provides more information about the camera serial, network settings, and firmware. A submenu on this screen allows the selection of automatic firmware updates and checking and installing the latest firmware version. I updated the camera firmware during the testing and I found it was a very easy task.
The display submenu permits rotating and flipping the image, adjusting the resolution and framerate for different transmission templates, and applying antiflicker, HDR, and brightness. The camera image can optionally be labeled with the date and time, camera ID, and a ReoLink logo. The display menu allows the selection of a binning mode to optimize image brightness at night. The display menu lets the user independently adjust the brightness and shadows for day and night mode.
The sound menu has a slider to adjust the alarm and speaker volume and a switch to enable or disable noise reduction.
The settings menu includes features to customize the detection capabilities of the camera. An exclusion zone can be painted around any area that does not need to be monitored for the presence of movement or objects. The camera supports marking moving items in a rectangle to make identifying them easier. The camera also has a setting to delay the triggering of an alarm if the motion does not persist in the detection area. This may be useful to prevent squirrels or other animals from triggering the alarm unnecessarily. The size of the detected objects can also be excluded for very small or large objects. At this point in testing the Reolink CX810 camera I haven’t been concerned with nuisance alarms, but these capabilities will prevent the camera from sending notifications for undesired objects.
The camera recording menu allows the schedule for recording to the local memory to be specified. The recording can take place at certain times or only when motion is detected. The desired recording duration after the motion ceases can also be selected for 15, 30, or 60 seconds. This menu is also where the ability to overwrite recorded images can be selected.
The app supports several types of notifications. The app itself can send push notifications. The interval between sequential notifications and the schedule can be specified and the notification can even be assigned as general, important, or urgent. The app notifications are not rich, they will identify the type of detection and the camera that recorded the movement. Clicking on the notification will bring up the app and display the film clip or the motion when it occurs if the camera has recording capability. The email notifications can include text, a picture, a picture with text, or a video with text. The video sent to email is 640×360 resolution 10 frames/sec.
The App can also notify detection of motion with an alarm or by sending a notification to an FTP server. The siren sound is customizable.
The Reolink CX810 camera can also make a time-lapse of different events. The events include Event/people/traffic, Moving clouds, sunrise, sunset, construction, or blooming. Each setting has specific customizations available within. The recording modes are preconfigured settings of capture start, duration, interval, quality, and file type. The sunset and sunrise timelapse uses the camera location to time the recordings accordingly.
The app allows for viewing the screen in an immersive setting and as a floating video window. The app can also integrate with Google Home and stream the low-definition signal.
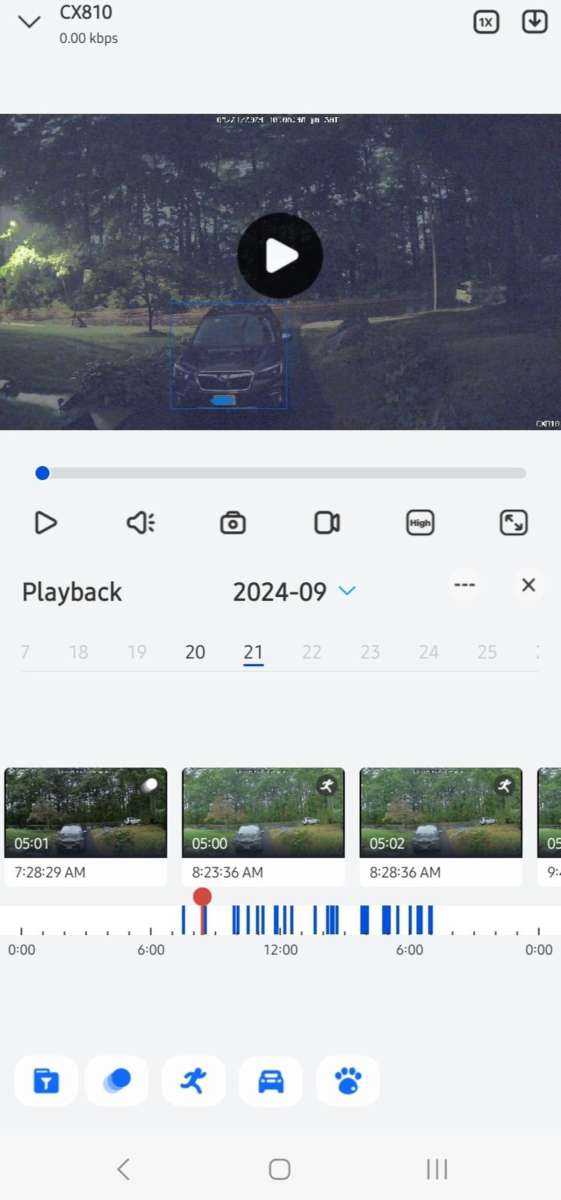
The app playback button displays a calendar of recorded days and a timeline that shows how much of each day is recorded. The events detected by the camera are displayed in dark blue, so it is easy to select what time an event may have been detected. A thumbnail of the captured video at that time is also presented.
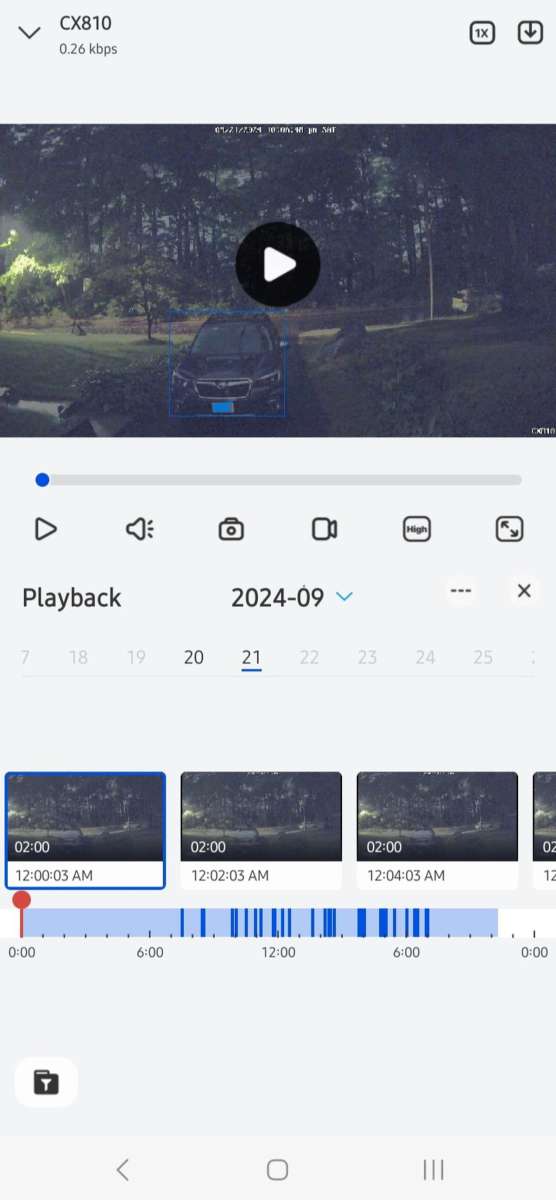
The app allows the user to filter the type of detected activity so that specific movements can be observed.
Performance
The high-definition video and the color nighttime video are the key performers for this camera. The daytime and evening images are both superb. Some may be disappointed by the lack of a WiFi interface, but the wired connection allows for very high bandwidth data transmission. While reviewing recorded video there was no buffering nor any errors from the camera that the system was disconnected, as frequently happens with WiFi cameras.
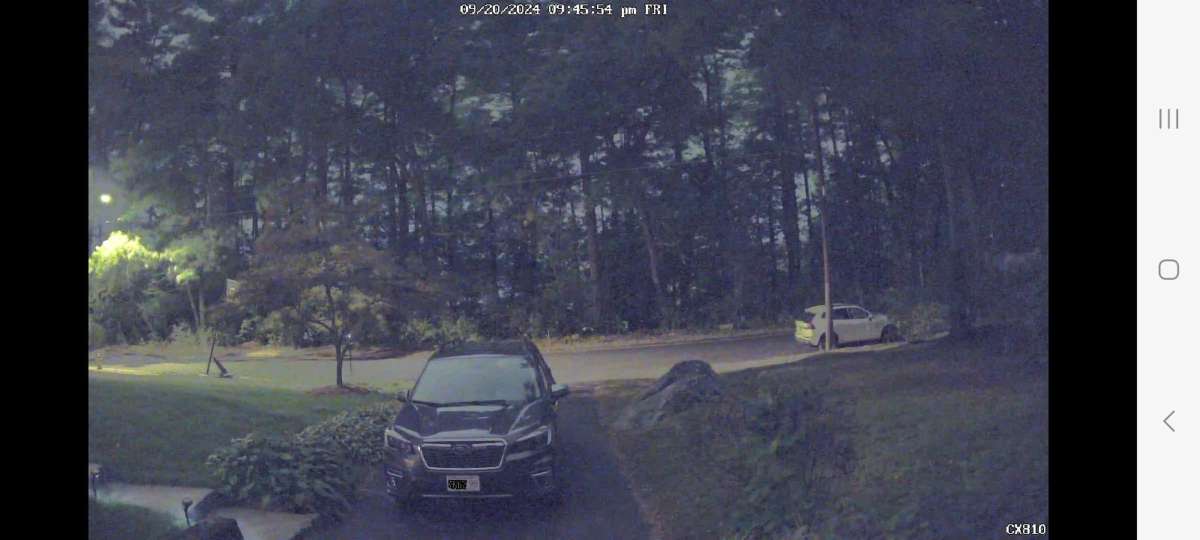
The detail of the images is excellent. License plates are very readable, and people’s faces are recognizable in the image, even at a distance. It is incredible to see the illumination the camera sensor can pick up from ambient lighting at night. One common issue for low-light sensors is that bright lights can wash out fine detail adjacent to the light source. The Reolink CX810 camera has this same drawback, and streetlamps while providing sufficient ambient light for the surroundings, wash out the image of the street below.
At low light levels with no spotlight, the frame rate is not as high and there is some binning of the pixels and oversampling. This can lead to ghosting on fast-moving objects.
One thing I noticed about this camera and other cameras is that they are susceptible to spider webs and debris on the lens. If you’re not using the light, maybe a nano glass coating on the outer ring of the camera can help prevent this from happening.
The interface is easy to use, and very responsive. Perhaps due to the PoE interface everything comes in clear and fast. Tasks such as scrubbing at 0.25x to 16x, which some other platforms struggle with, the CX810 handles easily.
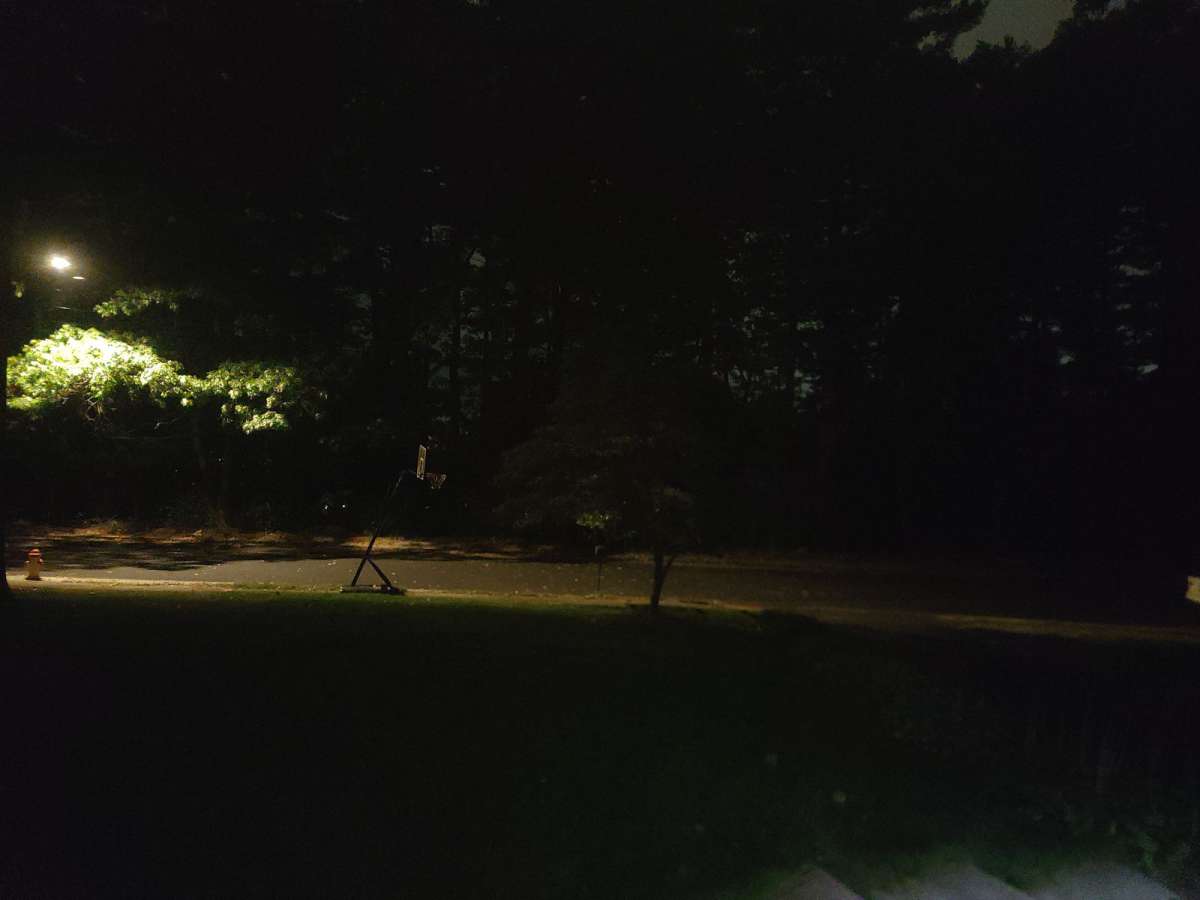
The fact that the app does not have rich notifications is not as fully featured as some other systems, such as SpotCam or Arlo. However, the support for rich email, including video, makes up for the lack of rich notifications. Also as observed by the screenshots comparing the Reolink and the Spotcam below, there is no sense in holding out for a rich notification system if the camera cannot observe the area
Also, this is a similar shot made with a Samsung S20 Ultra.
What I like about the Reolink CX810 security camera
- Superb high-definition video and the color nighttime video
- powerful on-device movement and image analysis
- subscription free-features
- preconfigured time-lapse settings
What needs to be improved?
- Some ghosting in low-light conditions.
Final thoughts
The Reolink CX810 is a fantastic security camera for capturing low-light images in high detail. The color reproduction during the day and night is excellent. The camera can support larger surveillance systems with an NVR or operated with full features using the app. The app is powerful and the lack of rich notifications is not an issue with email notifications. If you want to experience color video in the evening like Dorothy Gale did in The Wizard of Oz, try out the CX810 from Reolink!
Price: $109.99
Where to buy: Reolink and Amazon
Source: The sample of this product was provided for free by Reolink. Reolink did not have a final say on the review and did not preview the review before it was published.

KAMRUI Pinova P2 Mini PC 16GB RAM 512GB SSD, AMD Ryzen 4300U(Beats 10110U/3500U/N95,Up to 3.7GHz,4C/8T)Mini Computers,Triple 4K Display/HDMI+DP+Type-C/WiFi/BT for Home/Business Mini Desktop Computers
(as of June 23, 2026 14:15 GMT -05:00 - More infoProduct prices and availability are accurate as of the date/time indicated and are subject to change. Any price and availability information displayed on [relevant Amazon Site(s), as applicable] at the time of purchase will apply to the purchase of this product.)