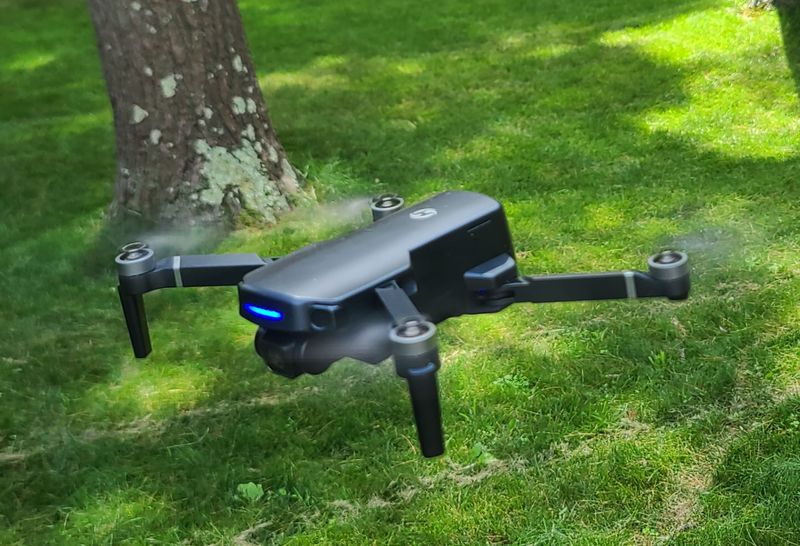
REVIEW – Camera drones are a class of gadgets that have very short new product introduction cycles. Features available today didn’t exist months ago and what products were available are now more affordable. I’m reviewing the Holystone HS360S drone which has new features and a lower cost. Read on to see what I think!
What is it?
The Holystone HS360S drone is an upgrade to the HS360 that was reviewed in January 2022, by The Gadgeteer. The drone comes in a carrying case that includes room for cables and instructions as well as room for 2 spare batteries. The weight of the drone with a battery and TF card installed is 249 grams (< 0.55 lb) so it can be flown outside of the jurisdiction of 14 CFR Part 107 Small Unmanned Aircraft Systems if the flight is for recreational use only. A fully charged battery lets you take about 20 minutes of 4K video at 20 fps to the TF card or HD video at 20 fps recorded on the attached mobile. The HS360S camera is shock mounted and has a motorized adjustment to change the pitch remotely. The Holystone HS360S can maintain a stable hover using GPS signals. GPS can also be used to track the position of the mobile device attached to the remote control and to fly a preprogrammed flight path. If the GPS signal is weak the drone can use an onboard altimeter and compass to maintain a stable hover. An optical flow positioning sensor can help to maintain position over textured ground cover. The drone has many different video and camera shooting modes that can be used to take selfies (or dronies) without having to simultaneously use the remote control.
What’s in the box?
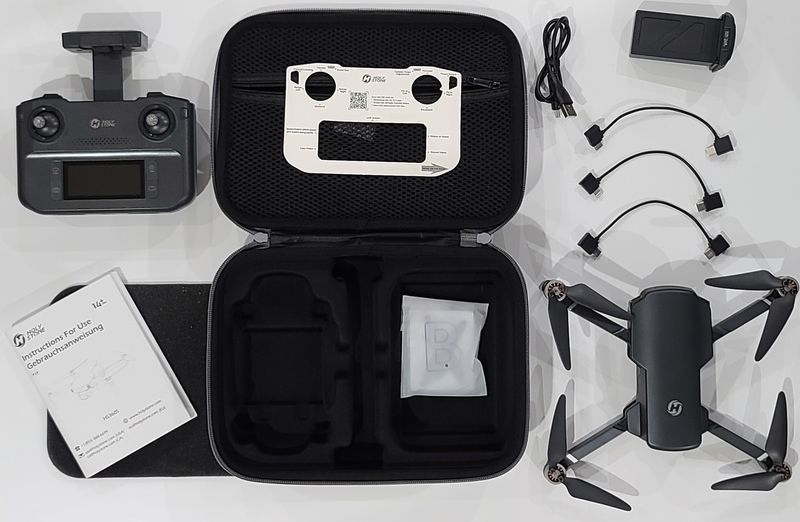
- Holystone HS360S drone
- transmitter
- Drone Battery
- 2 forward spinning airfoils
- 2 reverse spinning airfoils
- 8 airfoil screws
- screwdriver
- 3 mobile connection cables (USB-C, micro USB, lightning)
- USB-C to USB-A charging cable
- Camera cover
- joysticks (in the base of the controller)
- instructions
- battery warning
- quick start guide
Hardware specs
- Model: HS360S
- Weight: 249 g/8.78 oz/ < 0.55 lb
- Max Flight Time: 20 minutes (per battery)
- Operating Temperature Range: 14°F to 104°F
- Size: 14 1*94*56 mm (folded) 297*215*56 mm (unfolded)
- Drone Battery Capacity: 1500mAh
- Drone Battery Voltage: 7.4V
- Drone Battery Type: Lithium-ion Polymer Battery
- Drone Battery Rated Power: 11.1 Wh
- Drone Charging Temperature Range: 41°F to 104°F
- Drone Charging Time: about 3 hours
- Transmitter Operating Frequency: 5500-5700MHZ
- Transmitter Charging Time: about 2 hours
- Transmitter Usage Time: about 2 hours
- Max Flight Distance: 6562 to 9842 ft (outdoor and unobstructed)
- Transmitter Battery Type: 3.7V 1500mAh
- Max Photo Resolution: 3840 x 2160P (in TF card) 3840 x 2160P (in mobile phone)
- Max Video Resolution: 3840 x 2160P@20fps (in TF card) 1280x720P@20fps (in mobile phone)
- Lens Angle: FOV 85
- Photo Formats: JPEG
- Video Formats: AVI/MP4
- Supported TF Cards: Supports TF Card (Class 10 above) with storage up to 128 GB
- File Systems: FAT32
- USB Charging Cable Input: 5V/2A
- USB Charging Cable Rated Power: <10 W
Design and features
Unboxing
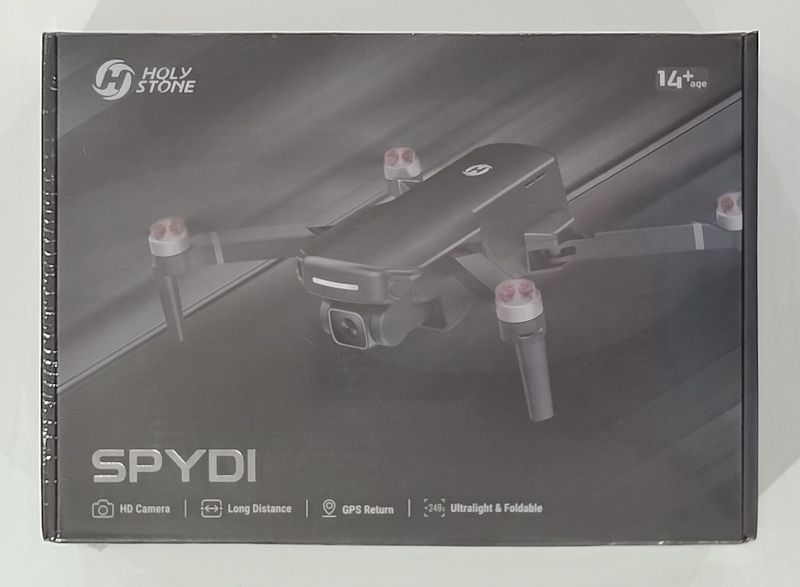
The Holystone HS360s drone comes in a full-color printed roll end tray box with a locking cover. The front features a computer illustration of the drone in flight with the model name “Spydi” in the lower left. The sides of the box are labeled with Holystone. The rear of the box has information about the manufacturer and some compulsory labeling about the battery, radio, and general safety.
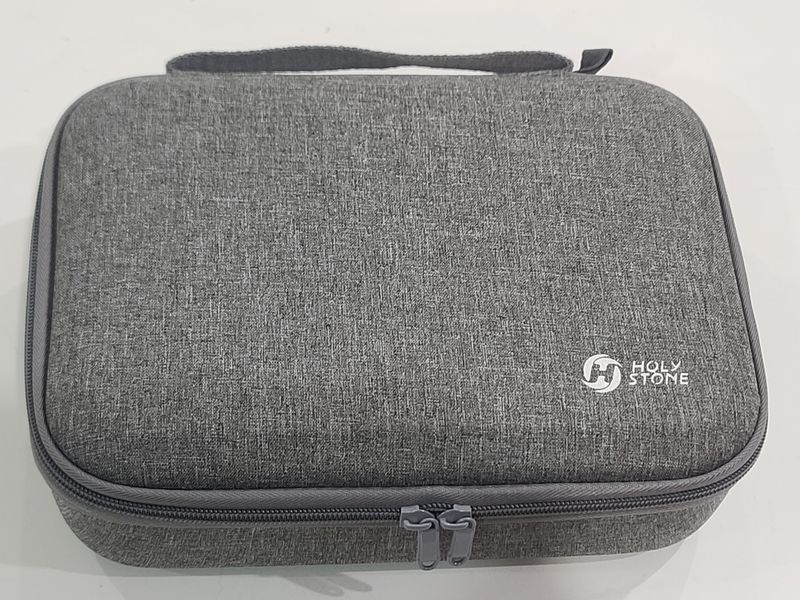
Inside the box is the carrying case, with the Holystone neatly packaged within. It’s refreshing that the Holystone HS360S is packaged with close to zero disposable packaging materials. The items that are disposed of, including bags and quickstart guide, are also recyclable.
Setup
Setting up the Holystone HS360S drone is pretty easy. The first requirement is to charge the batteries. I have a number of USB-C chargers that are PD compatible, but the Holystone will not recognize those devices. The directions say that a 10W charger should be used. I have had success with a 12W charger, but nothing more. The transmitter also has this restriction. Using a USB tester indicates that the power draw for each of these items is about 5 W. This is in line with the specifications that indicate the transmitter has a 1500 mAh battery that takes about 2 hours to charge and the drone has an 11 Wh battery that takes a little longer (an average 3.7 W delivery is not unreasonable for the drone battery).

The information on the batteries is almost illegible because it is grey text on a light grey background. While the batteries are charging the Holystone app can be downloaded, a tutorial video can be watched and the instructions can be read, all from this link here.
The controller has a USB-C connection on top of the device that connects to the smartphone running the Holystone app. The connection allows the HS360S controller to act as an RF interface between the app and the drone. The installed cable is a USB-C to USB-C cable. If your phone has a lightning port or a micro USB port then the cable needs to be switched to the correct interface. It’s nice that the controller interfaces with the mobile device using a cable and doesn’t rely on a Wi-Fi signal or Bluetooth.
One thing that is not available is a place to tether the controller or the phone (or both) so that it is not dropped. I have a wrist lanyard on my phone case and if I put that around the spring retain phone holder on the controller then I can attach a neck lanyard to the wrist tether.
On the Holystone drone, the TF card can be installed in the base of the drone. The TF card is installed with the contacts facing up when the drone is in the normal flying position. Before first using the TF card it will need to be formatted in the slot so please use a blank card.
The final setup step is to make sure that the internal compass is calibrated. To perform this step deploy the propeller arms and place the drone on a level surface. Turn on the drone and the transmitter and wait for the transmitter and the drone to connect. The connection process can take up to 40 seconds. The phone can be inserted in the transmitter and the transmitter can be connected to the phone while the connection process is being performed. After the drone is connected push both joysticks towards the inner and upper corners. this will enable the compass calibration. First, rotate the drone horizontally about its center until the transmitter beeps. The next step is to hold the drone with the camera facing towards the sky and rotate the drone with the camera at the center of the rotation.
To unlock the motors and be able to start the drone push both joysticks towards the inner lower corners. After this step, the drone can be launched by pressing the up-down arrow or by pushing the left (mode 2) joystick or right (mode 1) joystick to the top. Takeoff and landing can also be achieved by short-pressing the takeoff/landing button to the left of the left joystick.
Design
The design of the Holystone HS360S drone is very similar to models sold by other manufacturers. While researching the drone and the features it supports, I discovered that Holystone HS360S is based on the same body style as the Contixo F28 Pro and shares a design with the SJRC F5 Pro and the Vantop Snaptain P30. Based on the relative ages of the manufacturer’s web pages the Contixo was released first. Holystone HS360S has slightly decreased the batter capacity to permit the whole drone assembly to weigh under 250 grams. This is a design decision that allows the drone to be legally flown for recreational use in the USA without registering it with the FAA Drone Zone. The controller is also improved over the HS360 controller with a larger easier-to-read interface. This controller is also common to the SJRC F22 which also has a website that predates the site for the HS360S.
The HS360S has a foldable design that permits easy storage and transportation of the drone. The blades fold towards the center of the drone. The parts seem to all be made of plastic to keep the strength-to-weight ratio high. The electrical lines running to each motor are visible at the inside of each joint and are covered in braided nylon which is a nice touch over bare wires or a rubber covering. None of the arms have any lights on them so it is difficult to fly this in low-light settings. Lights on the arms help orient the drone to let the operator know what the heading is so that she can pilot the drone based on its current heading. Some drones have a headless mode, which adjusts the directional input of the drone relative to the orientation it has with the operator on takeoff, but the HS360S does not. The HS360S has a bright multicolor strip on the bottom and a blue LED strip above the camera. These features help a little bit. The best way to identify the heading of the drone is to use the compass on the app.
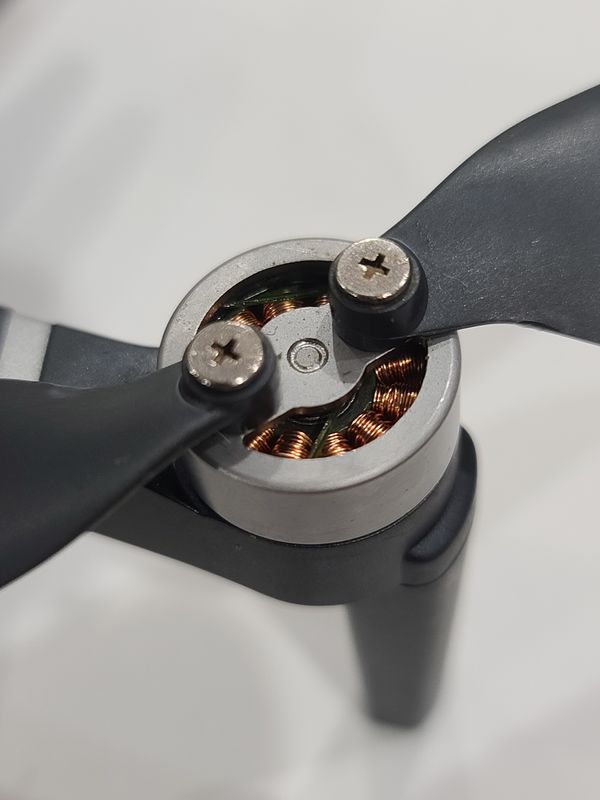
The propellers are two-piece and are mounted to the motor with one screw each. The propellers are marked in the molding at the hub if they are reverse drive. Forward drive propellers have no marking.
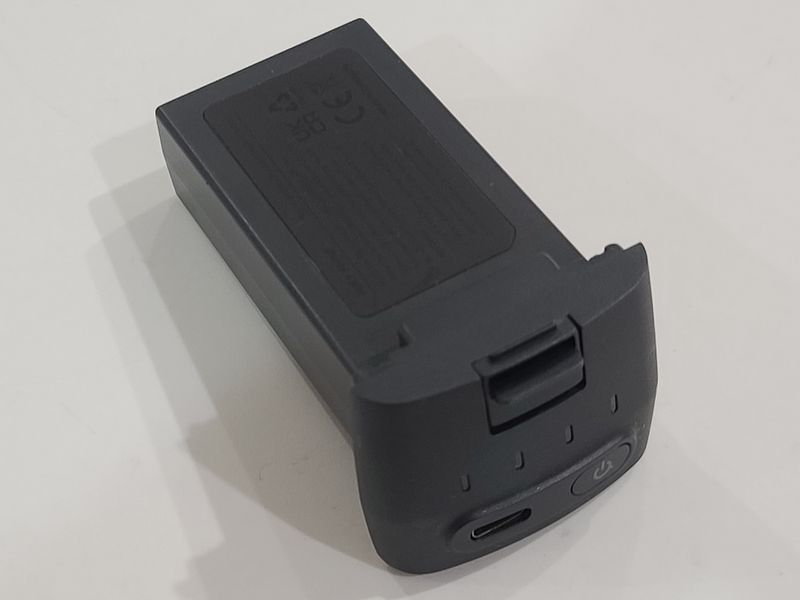
The bulk of the drone body is taken up by the battery. The kit only comes with one battery but a second HS360S battery can be ordered from here. The rear of the battery always displays the remaining capacity when the drone is powered on. To turn it on and off the power button is pressed and held for 3 seconds.
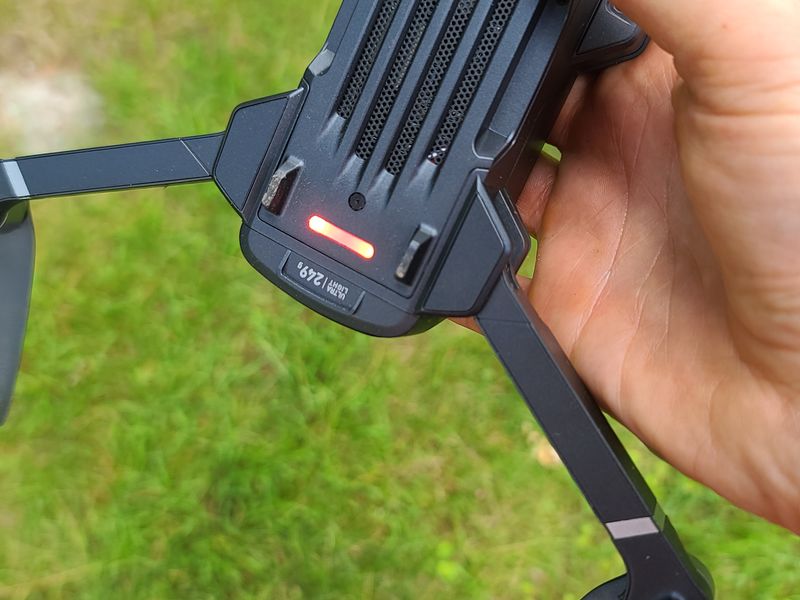
On the bottom of the drone is a status lamp. The lamp mode changes to indicate status.
- blinks red – the drone is disconnected from the controller or if the battery is low.
- pulses blue – the drone and controller are in attitude mode.
- blinks blue – the drone is in GPS mode but searching for a signal.
- solid blue – the drone is in GPS mode with a signal.
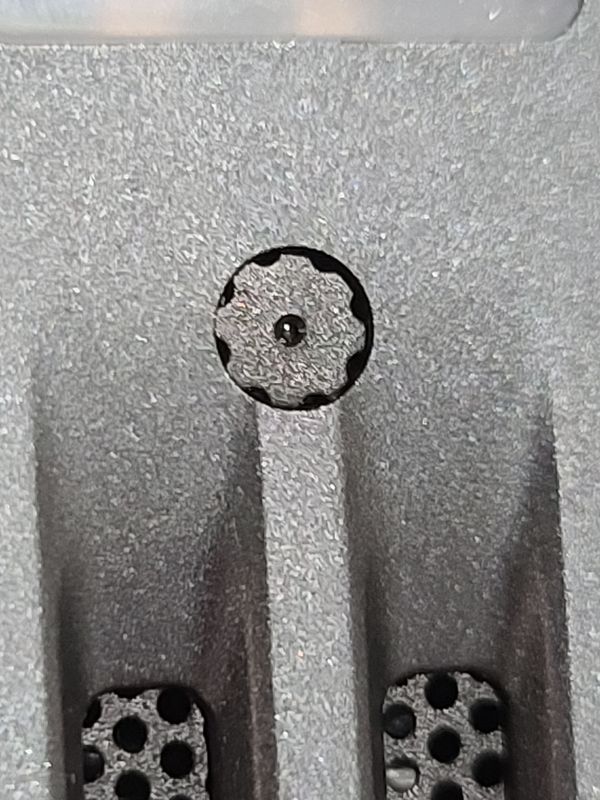
The bottom of the HS360S also has a tiny camera module that is used for optical flow positioning. This camera can use an image of the ground or floor below to determine if the drone is moving and then correct the speed of the propellers to limit the movement of the drone. This is one of the reasons why the HS360S controller does not have a trim adjustment.
The bottom of the drone also has a large vent set up to cool the controller parts. All of the speed controllers for the propellers can generate a lot of heat.
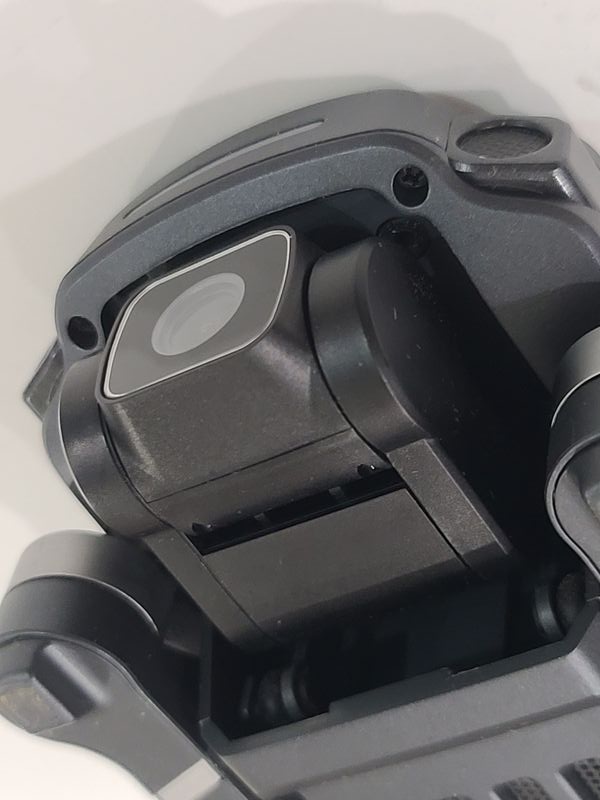
The camera is in a hollow section at the front of the drone that protects the camera from being struck or jostled. The camera is mounted on a gimble that has dampening in all three axes but only the vertical (pitch) axis is controlled by a motor allowing the camera to be positioned anywhere from straight down to about level with the horizon. The camera is capable of 4K photo and video and has an 85° field of view but there are not any other specifics about it.
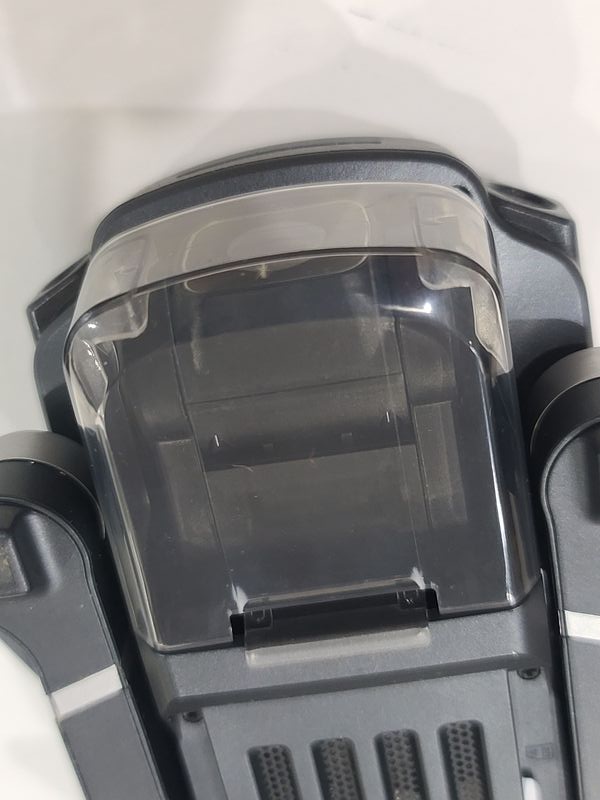
A clear cover is included to prevent the gimble from accidentally being struck.
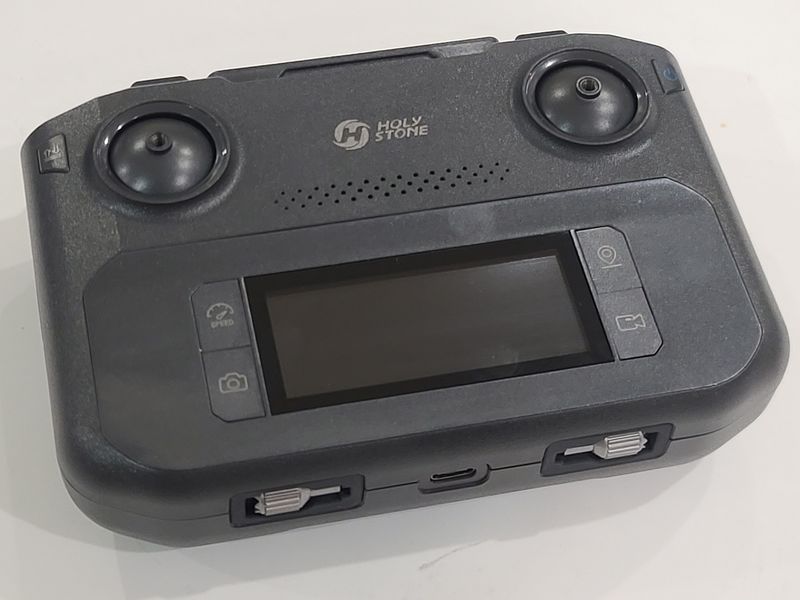
The controller weighs 313 grams and has roughly the dimensions of 4 x 6 x 1.5 inches. The feel is similar to holding an Xbox controller but the sides are square and they don’t meet at a point. The back of the HS360S controller is contoured to help grip and there is also a rubber material to provide extra hold. The tops of the joysticks are screwed in place and there is a convenient location for storing them at the base of the controller. Each of the joysticks is spring-return action to the center. Since the drone is capable of maintaining an altitude I think that it is ok that the left joystick is spring-return and doesn’t maintain a position. The top of the controller has dials that can be manipulated with the index finger and these are for the camera zoom and the camera angle.
The LCD window on the controller is polarized black except for the text (reverse-lit). The backlight is bright and easy to read in the sun, but the window is glossy and so may cast glare of the sun in certain circumstances.
The controller and the drone fit nicely into the carrying case. If the battery stays installed in the drone then there is room for two additional batteries in the case. The case can also be used as a makeshift launchpad if there are tall grasses or large pebbles in the area where the drone is being launched.
Operation
Once in the air, the HS360S camera angle can be adjusted by scrolling the camera adjustment dial. The camera zoom can be adjusted by scrolling the dial to the right to zoom in and scrolling to the left to zoom out.
The speed of the HS360S can be adjusted so that a fill tilt on the right joystick has different maximum values. By short-pressing the speed button the maximum speed changes from camera mode, to normal mode, to sport mode. Long-pressing the speed button will change the drone operation from GPS mode to Altitude mode. In attitude mode, many of the functions of the drone are limited.
The buttons to the bottom left and right of the screen are the camera shot and video start/stop controls. When the video mode is active the drone is unable to take photographs.
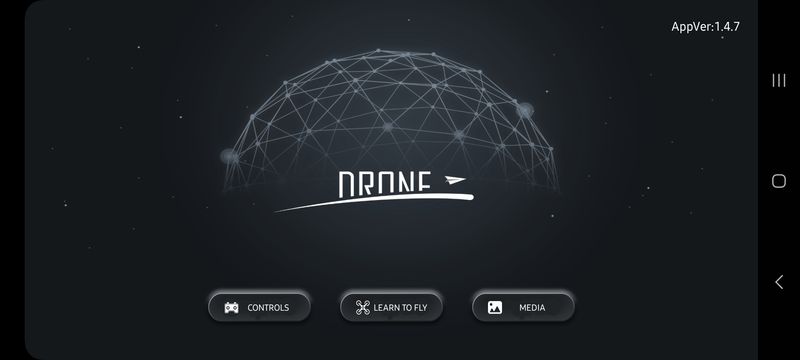
The rest of the functions are accessible from the app. The app screen is mostly a first-person view from the camera but the perimeter of the screen is lined with icons that perform certain functions or bring up submenus. The app also has a synthesized voice that announces things like the compass needs calibrating or the changing of a mode so the volume should be up as well. The top of the controls display has a yellow gradient with white text on it. It is sometimes difficult to read. The remainder of the top row contains the compass interference, controller battery level, GPS signal, drone battery level, and settings.
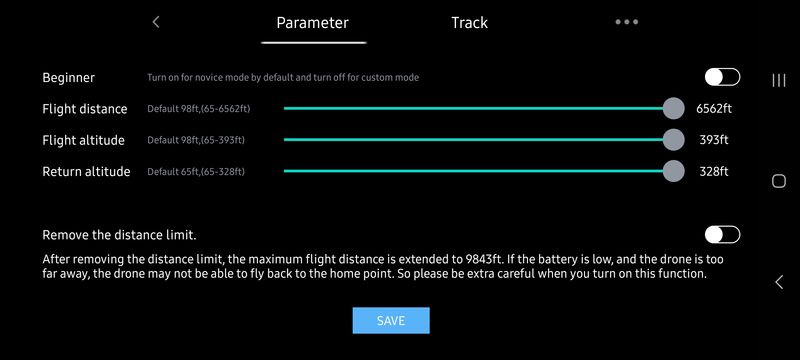
The settings can be used to adjust the maximum altitude and flight distance. The maximum distance from the start point the drone may be and still guarantee a return to home is 6562 ft. The controller may work up to 9843 ft away but a low voltage may not permit the drone to be able to fly back to the home point.
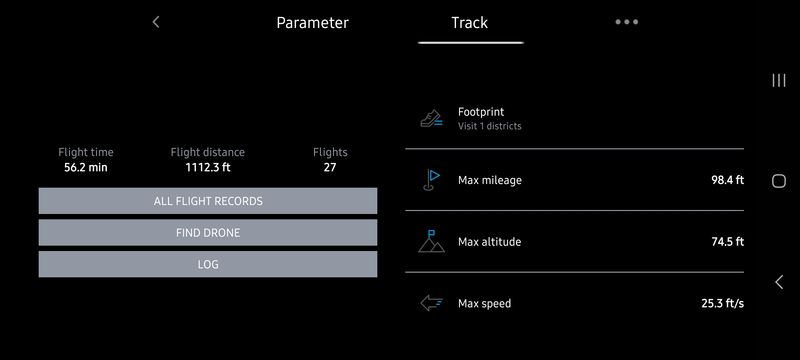
The settings also have a log that shows the position and controls of the drone for each flight.
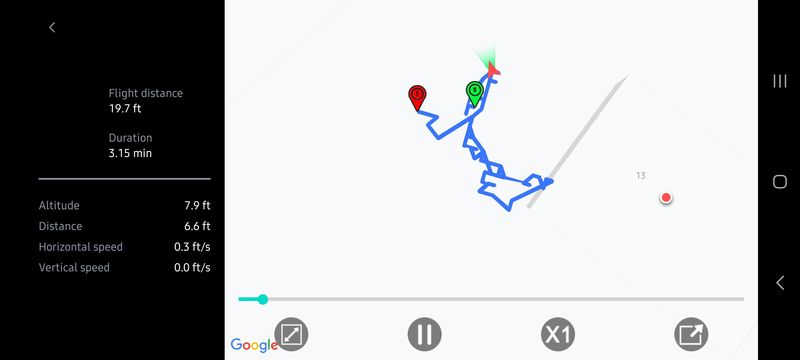
Each flight can be reviewed to see the location of the drone on a map, the altitude and distance from the starting point, and the instantaneous horizontal and vertical speed. The information used to provide this screen is stored in a human-readable format on Android devices.
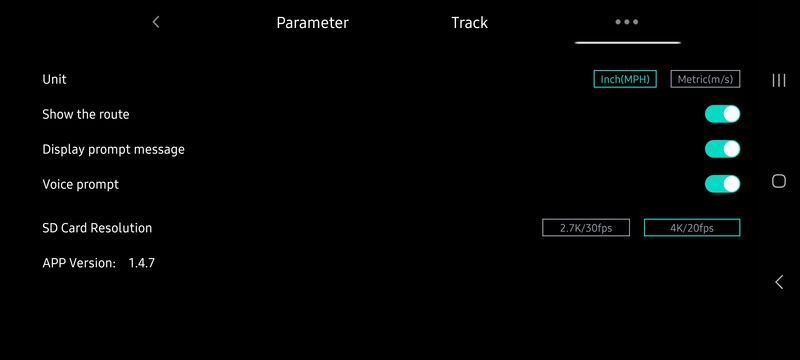
The settings allow configuration of the units of measure, the prompts provided, and the SD card resolution, either 2.7K and 30 fps or 4K at 20 fps.
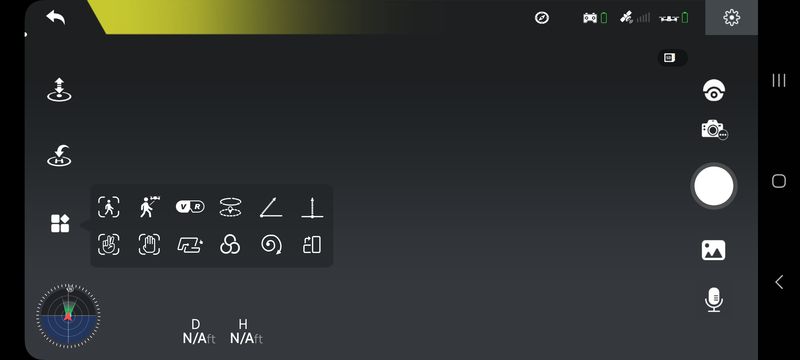
The icons on the left side of the screen are:
- Takeoff/Landing: Tap the icon, and follow the instructions in the prompt box to takeoff/land.
- Return to Home: The drone returns to the last recorded Home Point.
- Multi-function:
- Image Follow: After selecting a target, the camera will always point towards it no matter how the target moves. The position of the drone in the air remains unchanged. (The target should not move too fast.)
- GPS Follow: The drone stays at a distance from the operator and follows the GPS position of the paired mobile The drone needs to be < 164 total feet from the controller.
- VR Screen-Split: Pair the mobile phone with a pair of VR glasses first. Then use this function to watch a simulated 3D live feed in real-time.
- Point of Interest: The drone flies around a point within a set radius.
- Catapult: The drone flies backward about 82 feet from the target and ascends, with the camera locked on the subject. A video is made during this.
- One-key Ascension: The HS360S drone ascends straight up to 49 feet with the camera locked on the subject. A video is made during this.
- Gesture Selfie: When in this mode, you can trigger the shutter of the drone camera by holding a “V” sign near your face. (The drone camera should be pointing to your face.)
- Gesture Selfie video: When in this mode, you can trigger the shutter of the drone camera by holding your palm near your face. (The drone camera should be pointing to your face.)
- TapFly: The drone flies along the flight path of up to 16 waypoints that you draw on the screen of the mobile phone. This mode can be canceled by tapping the TapFly icon again.
- Camera Filter: Choose from cartoon, sketch, or black and white.
- Spiral Up: The drone ascends and spirals around the subject up to a height of about 49 feet. A video is made during this.
- Portrait: The shooting mode will turn from landscape to portrait.
At the bottom left corner is a compass dial that shows the orientation relative to the original position. Tapping on this changes this to a Google map of the area. Tapping this again swaps the video feed and the Google map, filling the entire screen with the Google map. From this view a satellite layer may be selected and the orientation may be switched from fixed north to rotating with the mobile device. Clicking on the reticle image at the top of the map returns the screen to the default view.
Along the bottom of the screen are the flight distance from the controller and flight altitude from the controller.
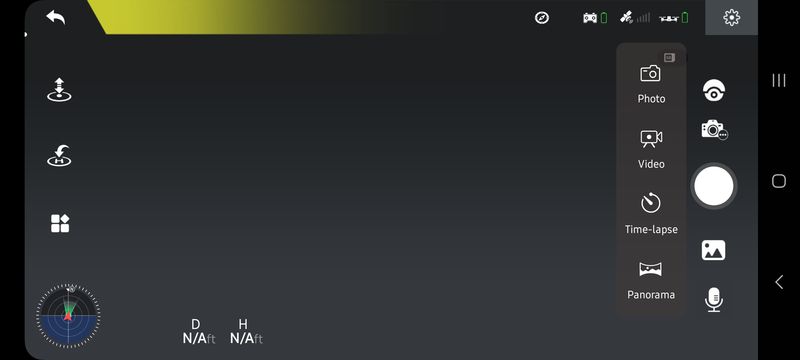
Along the right-hand side are adjustments to the zoom and camera angle. The next button has a submenu with the following items:
- Take photo
- Take video
- Time-lapse: Tap to use time-lapse shooting. The speed increase can be between 4x and 50x.
- Panorama: Tap to use the Panorama function. The HS360S will maintain its current position and rotate. A panorama picture is then
auto-generated and saved to the album. A prompt box will pop up when this is done.
Also on the right side is an icon to review the photos and videos that are stored on the mobile device and an option to include audio from the mobile device when making a video.
While the app can communicate with the controller and hence the drone, one thing that the HS360S drone does not do is label the photos and videos that it takes with the current time and date. They are all from 12/31/1979!
Eventually, the HS360S needs to come home and this can be done by piloting it or by using one of the return-to-home features. The return to home can be activated by pressing the GPS pin button on the top right of the controller display. The drone will fly to a preset return altitude and then drop vertically onto the starting point. The return altitude should be above anything that might be in the way between the drone location and the starting point. The return-to-home function will also be automatically started if the drone loses communication with the receiver. If the drone recovers communication or if the manually started return-to-home needs to be canceled then pressing the GPS pin button will accomplish this. If the battery is running low the Return-to-home feature will be started and cannot be canceled. It is important to remember that there is no obstacle avoidance on this unit and if the starting point is covered then the drone will collide with the cover on the return-to-home trajectory.
Performance
The HS360S is very capable but in the end, is really still a novelty device so comparing it with a $1000 DJI drone is not really valid. Here are the obvious differences.
- The HS360S has a lot of fun features and in some cases, they work great. However, not every feature is guaranteed to work all the time. The image follow mode will not hunt the object it is following down like an AI-controlled UAV from a sci-fi movie, but it will work within limits. The GPS follow works if the distance is maintained.
- The panorama didn’t work for me. It rotated 720 degrees but then didn’t superimpose the images correctly.
- The point of interest operates at 49 feed so using it for a horizontal perspective will require a large radius.
- The Catapult, One-key Ascension, Gesture Selfie, Spiral up, and Gesture Selfie videos all seemed to work great and could be really useful for a selfie of a large gathering. Here’s an example of the catapult.
- The TapFly works well for the limited functionality that it presents. It is interesting that the app is creating such a detailed log. It begs the question if the log could be repeated at a later time. Could a flight sequence be saved and re-enacted?
- The camera gimble limits some shake but the overall effect of pitch and roll on the camera causes obvious knocks on the image. Here’s an example of trying to follow my son into the pool. I need to pull up right after the pool because there are ham radio antenna wires on the far side of the lawn. You can see how all the pitch and roll are captured by the camera.
- Depending on the final use, a 2.7K image at 30 fps may produce better results than a 4k at 20 fps. If all this is going to be used for is stills, then the higher resolution may produce better results. Post-processing the video through Microsoft Hyperlapse Pro or an equivalent can help.
- The camera has some issues with contrast and brightness. Image quality is one of the most important features of this drone and while this gets passing marks for pixel count, the images look have too much contrast and there is a lot of haze in the image.
Above all the fact that this is a drone that can achieve a very stable hover with just about zero drone piloting experience is a real positive. I remember trying to trim out my first drone, only to crash it and then having to retrim it because of changes to the rotor thrust due to a slightly dented propeller. The electronics and stabilization on this unit have really improved the ability to take it out of the box and have fun with it.
The return to home works really well if you understand how it is supposed to operate; it is important that there are no obstacles above the take-off point to the return altitude. This feature should help avoid losing a drone because of a dead battery.
The max speed I measured in the horizontal is 25.3 ft/s or about 17.25 miles per hour. The camera mode max speed is about 14.1 ft/s.
The battery lasted 16 minutes before requiring the drone return to home. This is the capacity after being charged twice. It still may need a few more cycles before the maximum capacity is available.
What I like
- Lots of features
- Similar look and feel to prosumer drones
- very stable hover
- good return-to-home functionality
What I’d change
- dates on photos and videos
- improved filter on the camera
- improved contrast on the app status bar
Final thoughts
I opened this review with the concept of a drone being a function of features, quality, and cost. After reviewing the Holystone HS360S drone I can conclude that it has a very full set of features and it can (mostly) perform what it sets out to do in terms of quality. The question I have is if it makes sense to purchase this for $160 or does it make more sense to purchase the DJI Mini 2 SE for about twice as much. Or, does it make sense to learn with the Holystone HS360S and then move to something with even more capability? It may be that the DJI mini 2 SE will have a bit smoother video and a bit better images but if you are a beginner it may also end up being a permanent tree ornament or water-intolerant submersible. I would suggest that the Holystone is a great way to get introduced to what modern drones with the latest features like the DJI Mini 2 SE are capable of. Using the Holystone HS360S now may lead to some impressive videos and enjoyable experiences.
Price:
Where to buy: Amazon
Source: The sample of this product was provided by Holystone.


Gadgeteer Comment Policy - Please read before commenting
I bought this a few weeks ago and have been pleased overall with this being my first drone.
The ease of flight and intuitive app design is a big plus, the camera quality is far less impressive. I really was expecting much better video and photo quality, but that has not been my experience.
I’ve only had one instance when the drone completely lost its surroundings and took off without the ability to stop it until it crashed. Fortunately, the crash didn’t seem to affect it any and I haven’t had any issues since.
It’s a fun little drone as a first timer and as long as your expectations aren’t too high, I think you’ll be pleased.
I just got the HS 360s a few weeks ago and haven’t had any problems at all. Out of my HS 710, and HS 110G the HS 360s is fast becoming my favorite. Although the HS 710 is the best flying drone. It’s the connection I love about the 360s and range.
I’ve got the HS720G and love it! I haven’t had many issues with it. The best thing about HolyStone products would probably be their customer service department.
I am pleased with the HS360S. I had purchased a DJI Mini 2 but I returned it, then purchased the Holy Stone HS360S. For how often I would use a drone, the dJI was too expensive. The HS360S is just as much fun and cost me a whole lot less. The biggest differences I see are flight time, and camera stability when shooting video. Landing is not as soft as the DJI drone either. Holy Stone support has been excellent too.
Just received this drone and completely agree with you. This is my very first drone and purchased it with the intent of learning and getting familiar with drone operation and not having to worry about breaking it because of it’s price point. Im incredibly impressed with it’s performance for and control for it’s cost.