I was in Greenland a few years ago and fascinated by the multi-choice toilets which allow the “consumer” to flush using either a half or full tank of water, the idea being to conserve water. The capability was built into the commode and I thought that was a really cool idea. Meanwhile back in the States, no such model was readily available. However, there is a compromise: the Brondell PerfectFlush (PF), a device that allows you to retrofit your American throne so that it too allows you a choice of a half or full flush.
Before becoming too excited about it, note that The PerfectFlush requires some installation. While not technically challenging, it does require draining the tank of your toilet, removing certain pieces from the tank; installing new pieces, and these steps can be time-consuming. They can also be troublesome for those of us who tend to be klutzes. Ahem. With that forewarning, The-Gadgeteer presents an overview, parts discussion, installation and operation summary of the Brondell PF. . .
Overview
The Perfect Flush (PF) sells for $99. The basic concept of operation is that the PF is used to hold up the flapper in the tank to allow flow to the bowl. A half-flush causes PF to hold the flapper to open for a short period of time, a full-flush holds the flapper open for a longer period of time. It’s a fairly simple concept, but I had to stare and watch the thing in action many times before I could figure out what it was doing and how it was doing it.
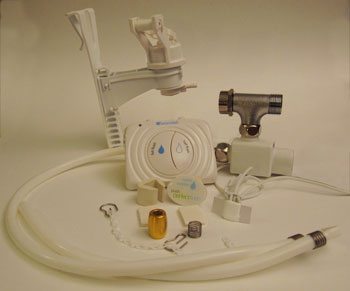
There are three primary mechanisms that contribute to the functionality: the user console; the T-Valve with solenoid; and the flapper lifter arm controller.
 |
 |
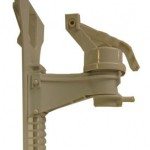 |
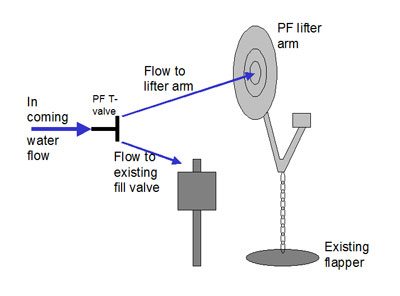
The figure below illustrates the basic concept of these pieces working in conjunction with the existing toilet tank hardware. The controller (powered by two AA batteries) initiates the flush cycle; the T-Valve controls the amount of water flowing to the lifter arm (water is also diverted to the existing fill valve as in a normal flush); and the lifter arm then lifts the flapper. (The controller is not shown in the figure.)
Parts
The system comes in a kit form and while there are three major components, there are a number of smaller parts that make up the whole system, shown in the figure below.
When I pulled all of the parts out of the box I was intimidated and knew I’d need a bottle of Chardonnay (preferably from the Holy Cross Abbey) for courage before trying to assemble the system. But the instructions that came with the PF were actually clear and well-written. And made it seem like a logical and systematic procedure to install.
Installation
The instruction page first gives a clear warning that the PF is not compatible with tanks that have a tower-style, pressure assist, flapperless flush valve. This is important but they should put this warning on the Brondell web site. It would be aggravating to purchase the product only to find that it won’t work with that style of internal workings. The PF is fine for tanks using the pilot fill valve or ball-cock style fill valve.
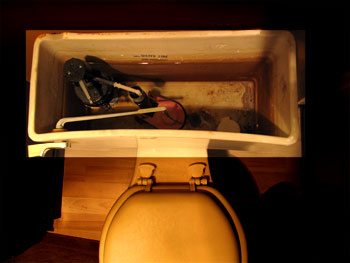
- Tank with existing fill valve (before installation of PF)
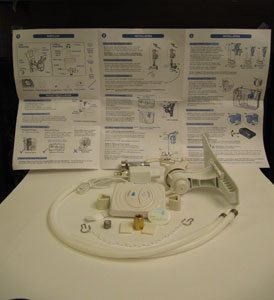
I am always skeptical about instructions (I am also an idiot and can interpret phrases in different ways) and decided to time myself on each of the steps broken down by the instructions sheet. Here is a table showing the basic steps and the time taken for each. By the way, step 7 involved removing the existing handle from the tank — that took me much longer than needed because I didn’t realize that you have to turn the bolt the opposite way to remove it than you do for removal of a normal bolt. Live ‘n learn. (Same thing with propane connectors; found that out the hard way too.)
TIME TABLE (these are BASIC steps, each of these steps actually have sub-steps)
1. Turn off water and drain tank (4 minutes)
2. Disconnect water supply (< 1 minute)
3. Connect T-valve (4 minutes*)
4. Install lifter (2 minutes)
5. Attach flapper chain (7 minutes*)
6. Adjust flapper chain (2 minutes)
7. Position U-tube on tank (1 minute)
8. Attach short hose to lifter (2 minutes)
9. Connect control wire to control button (< 1 minute)
10. Turn on water (1 minute)
11. Adjust water flow (2 minutes)
Total: about a half an hour, much better than I had anticipated
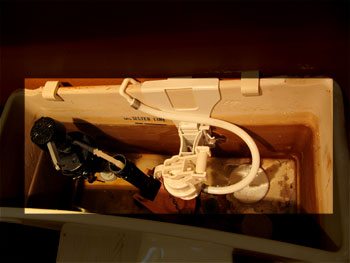
Part of the time spent in the table above was just trying to get access to the various parts of the toilet. In my bathroom the space between the sink cabinet and the toilet is about 10 inches so it takes time to find the right contortion to perform some of the assembly.
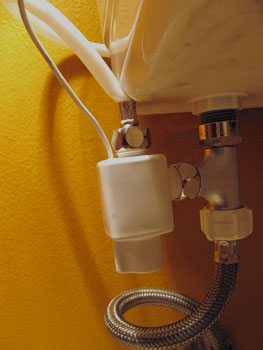
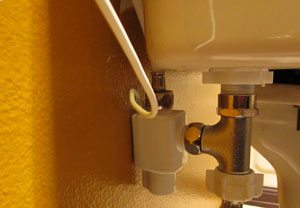
Also, during installation, although it is not mentioned in the instructions it is important to ensure that the hose does not become kinked. This sounds obvious, but in following the instructions I did not notice that I had kinked the hose and later had to uninstall then re-install the valve to rotate it so that the hose was not pinched. (And remember that each time the T-valve is removed, the tank must be emptied, the water turned off, etc.) Another gotcha that got me was the amount of space between the wall and the T-valve’s solenoid. Again, the space in my bathroom is minimal and during installation the solenoid was sitting too snugly against the wall. This caused some problems and the Brondell tech support then gave me instructions on reconfiguring the solenoid into a roomier profile. (Again, this required turning of the water, emptying the tank and so on.)
Finally, another wish-I-knew-then-what-I-know-now-moment involved the flapper’s chain: I re-used the original metal flapper chain and hook thinking that OEM flapper hardware would be less invasive than the plastic chain and hook provided in the PF kit. But the PF chain and hook are better made and easier to work with and the original chain and hook made it very difficult to adjust the chain when fine-tuning the operation of the PF.
Operation
When it is all installed, it’s very gratifying when you first push one of the flush buttons and the throne whooshes back to life. The following video shows the PF in action, using a half flush and you can see that indeed it only uses half of the tank’s water…
See it in Action
NOTE: the above file is also on http://www.clowngineering.com/hacks as an FLV file.
Once the elation and happy dance is finished, the operation of the device has to be “tuned” a little. This involves finding the sweet spot for the lifter arm so that it can properly lift the flapper in a straight line up and down. The equipment allows you to adjust the lifter both horizontally and vertically fairly easy. Just as with any toilet flushing system, you also will most likely have to adjust the length of the chain holding the flapper. (For me, adjusting the chain length was difficult since I had used the original chain and hook rather than the more open-ended plastic chain and hook provided in the kit.) Also, adjusting of the fill tube may also be needed, again this all depends on how much water flow you have, the size of the tank, etc.
Finally, more tuning can be performed using the water flow control knobs on the rear of the user console.
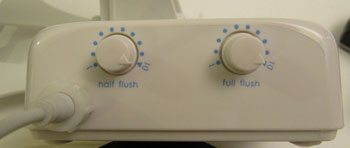
Another nice touch is that the battery-operated console will beep when its batteries are running low.
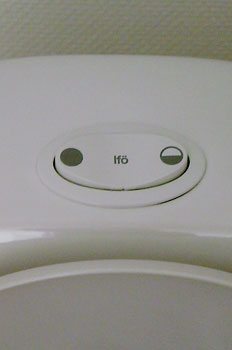
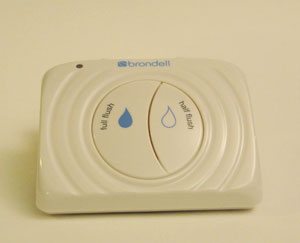
A possible nit-pick but something that could have been done better is the icon on the console switch that represents a half vs whole flush. To me I couldn’t grok immediately which was which – I had to stop and think whether dark blue meant full or all white meant full flush. (Whereas the European switch was more intuitive – it had a half/full icon that was obvious).
So does it work? You betcha. What better way is there to save the environment than by using electronics to flush your toilet?
Summary and Epilogue
The PF is a great idea. Even if newer toilet models are ever provided with the half/full flush choice, there are millions of existing commodes that can be retrofitted. The installation of the PF is not technically challenging but can be time-consuming and messy. My recommendations are:
a) Make sure your toilet has the proper type fill valve (pilot or ball-cock)
b) Check the amount of room you have to do the job and to position the T-valve
c) Get towels, sponge, coffee can or small bowl to catch water when emptying the tank and disconnecting the water inlet
d) Double-check the position of the T-valve and hose for space and kinking
e) Use the replacement chain and hook provided in the kit for the flapper
e) Remember that the “lefty-loosey rightie-tightie” rule does not necessarily work on all nuts (or for all nuts in my case)
Amazon Echo Show 15 (newest model), Full HD 15.6" kitchen hub for home organization, with built-in Fire TV and Alexa+ Early Access
(as of February 2, 2026 18:19 GMT -06:00 - More infoProduct prices and availability are accurate as of the date/time indicated and are subject to change. Any price and availability information displayed on [relevant Amazon Site(s), as applicable] at the time of purchase will apply to the purchase of this product.)Amazon Echo Spot (newest model), Great for nightstands, offices and kitchens, Smart alarm clock with Alexa+ Early Access, Black
(as of February 2, 2026 17:35 GMT -06:00 - More infoProduct prices and availability are accurate as of the date/time indicated and are subject to change. Any price and availability information displayed on [relevant Amazon Site(s), as applicable] at the time of purchase will apply to the purchase of this product.)Product Information
| Price: | $99 |
| Manufacturer: | Brondell |
| Requirements: |
|
| Pros: |
|
| Cons: |
|


Gadgeteer Comment Policy - Please read before commenting
I wonder how much water and energy are used in the creation of each battery and how long the batteries last. Also, there exist non-electronic competitors at a fraction of the cost and without consumables.
There are two other options available for under $30, MJSI’s HydroRight (http://www.gomjsi.com/hr/) and One2Flush (http://one2flush.com/). They essentially replace the flapper with a plastic cylinder that allows for two different water levels to be used when flushing. I opted for the HydroRight because it didn’t require the removal of the tank, although I really like the One2Flush handle as opposed to pressing a button to flush. Adjusting the water levels after installation (10-15 minutes) required adjustments on the cylinder but that was pretty painless.
“When I pulled all of the parts out of the box I was intimidated and knew I’d need a bottle of Chardonnay (preferably from the Holy Cross Abbey) for courage before trying to assemble the system.”
I can’t BELIEVE that you actually recommend us to be slightly drunk during installation! Priceless 😀
Though I have not tried these retrofit kits, I purchased one of these complete dual-flush systems to replace a crapped out toilet. I am on a septic system with a well and using less water is very important. It works great! The low volume flush is great for your #1 tasks and the full flush certainly removes all evidence of #2 tasks. I endorse these! And a retrofit kit is even better (assuming your old toilet is still in good shape) as it puts less crap in the landfill.
(apologies for the gratuitous use of the word ‘crap’ in this post)
The Toto Aquia and Caroma Caravell are both dual flush toilets that are available in the US. I have the Toto Aquia II and it works very nicely. Toto by far makes the best toilets on the market, in my opinion.
Jim
We have two 1.6 gpf and one 1.23 gpf Toto toilets in our house – they work great! In fact, the 1.23 gpf toilet works the best out of the three. I have no idea why – the three bowls are the same, only the tank is different.
I grabbed a dual flush toilet a year ago at my Sam’s Club. That went for $99.
The flush/half flush concept had me intrigued, but the ability to specifically adjust the value of each is what had me sold. Count me in!
The real eye-opener is that building codes here in Australia have required all new toilets to be dual-flush for a couple of decades or more…
When I flush my toilet, I do not just push the handle all the way down kafloosh. I operate the handle in a way to manually control the water flow according to the need of the moment. Most toilets will allow you to control the flush in this way. And its Free. Not for everyone however – requires presence of mind immediately after zoning out on the pot. This pretty much rules out all visiting relatives.
I’m baffled by the needless complexity of this product. The “european” solution is much easier: the half-flush doesn’t open the valve (at the bottom of the tank) completely, hence the water pressure (of the tank) closes the valve after a liter or so. Works like a charm.
This product reminds me at a (finctional?) story about NASA and the Russian equivalent. NASA spent hundreds of thousand of dollars on developing a ball-point which would work in zero-gravity. After months of developing they finally had a working model.
The Russians however simply equipped their astronauts with pencils 🙂
I can see parallels between this story, and the PerfectFlush.
@Valcon, it is fictional – http://www.snopes.com/business/genius/spacepen.asp
@BaldSpot – I used that method also but decided to get the one I mentioned in my post because I have a three year old.
Hmm — when our tight-fisted landlord installed low-flow toilets in our building a while back, I noticed that the flushing mechanism on the tank stops the water flow as soon as you release the handle. In other words, the longer you hold down the handle, the more of a flush you get. I assume this water-saving solution is as easy as using a weighted stopper, which can’t possibly cost $99…
Dual flush has been available for a while, I bought one at lowes probably 5 years ago. Quick flip of the handle just uses a little water, if you need the full amount you have to hold it down. The whole commode was $129 and was a one peice, tank was integrated with the base so no leaky seals to ever worry about. Can’t recall the brand as we moved a year ago.