REVIEW – Having worked for years as a professional in the digital arts, I’ve spent countless hours hunched over a computer, recreating real-world objects in digital space. With digital calipers in hand, I’ve measured everything from TV remote controls to surgical appliances to a particularly stinky trout (don’t ask). The goal was always the same, to produce 3D models that could be manipulated and modified to match an Art Director’s vision. When 3D scanners came on the scene, I was absolutely ecstatic to give them a try, in the hopes of cutting down some of the production time. Unfortunately, the results were mixed, and the scanners were always priced well out of my range of affordability. I did mess around with some DIY scanners using a hacked Xbox Kinect, but the results weren’t great.
Recently, the Creality Raptor Pro 3D Scanner caught my attention. It seemed to check all the boxes as a professional-grade handheld device combining dual blue laser modes with infrared structured light, all in a compact form. At $1,799, it’s not exactly an impulse buy, but the investment could be worthwhile if it delivers on its promise of fast, versatile, and accurate scans. After spending time with the Raptor Pro, I can say it’s not the ultimate solution I’ve been searching for, but it comes close.
⬇︎ Jump to summary (pros/cons)
Price: $1899.00
Where to buy: Creality and Amazon
What is it?
The Creality Raptor Pro 3D Scanner is a handheld, dual-mode scanner designed for high-precision 3D capture. It uses blue laser lines and near-infrared structured light to digitize objects into detailed 3D models, supporting both geometry and full-color texture capture.

The Raptor Pro’s box got a little beat up during shipping; the thin cardboard didn’t handle the trip very well and I was concerned there might have been some damage incurred.
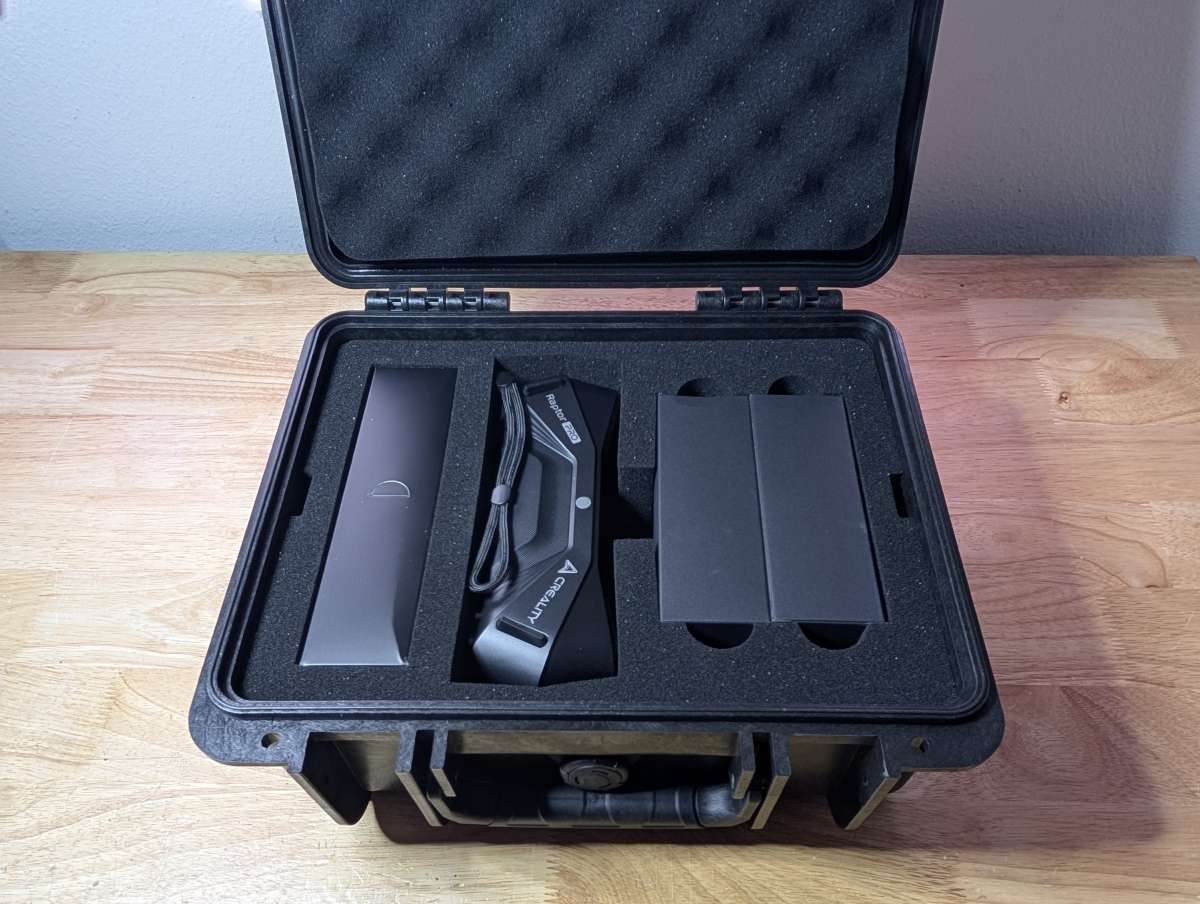
That was until I realized that Creality provides a Pelican-style carrying case for the Raptor Pro that would protect it from all but the most extreme shipping damage.
What’s included?
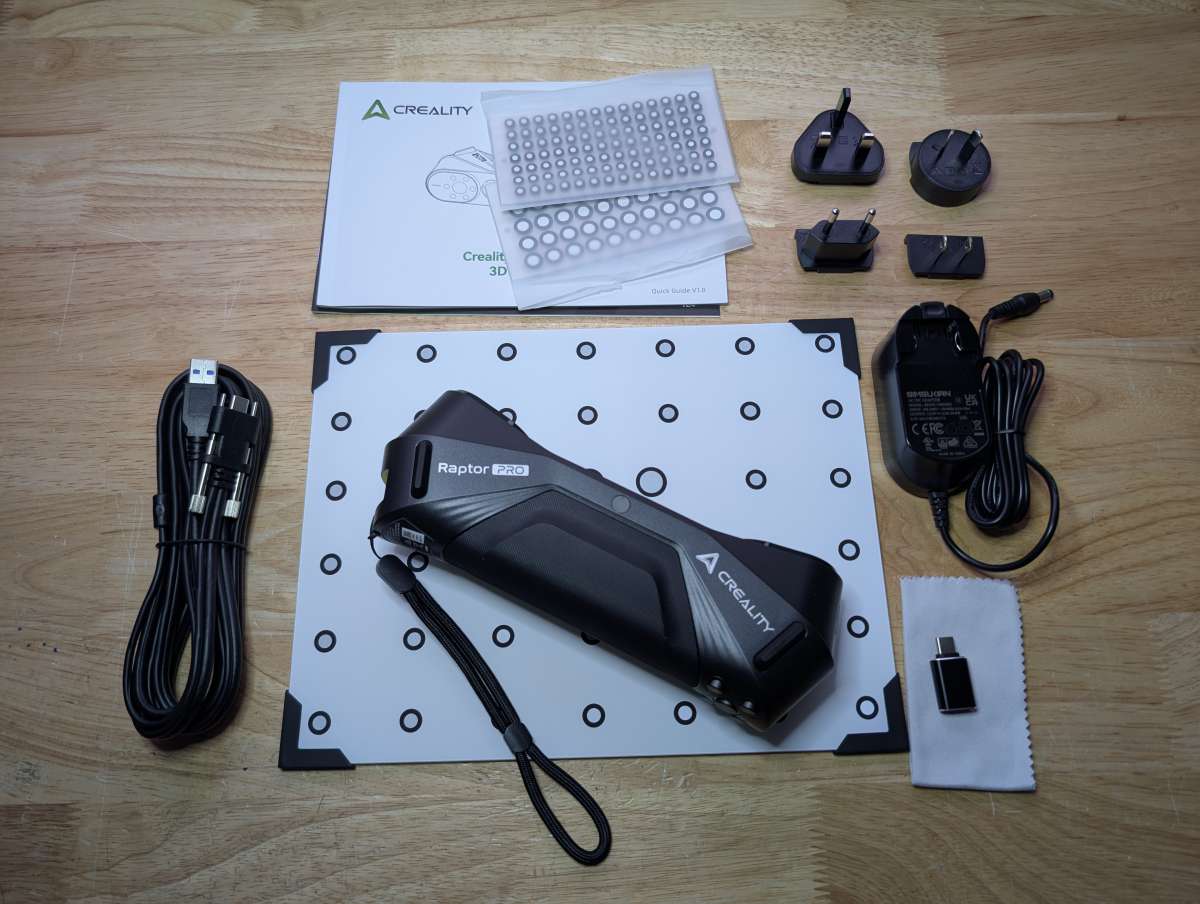
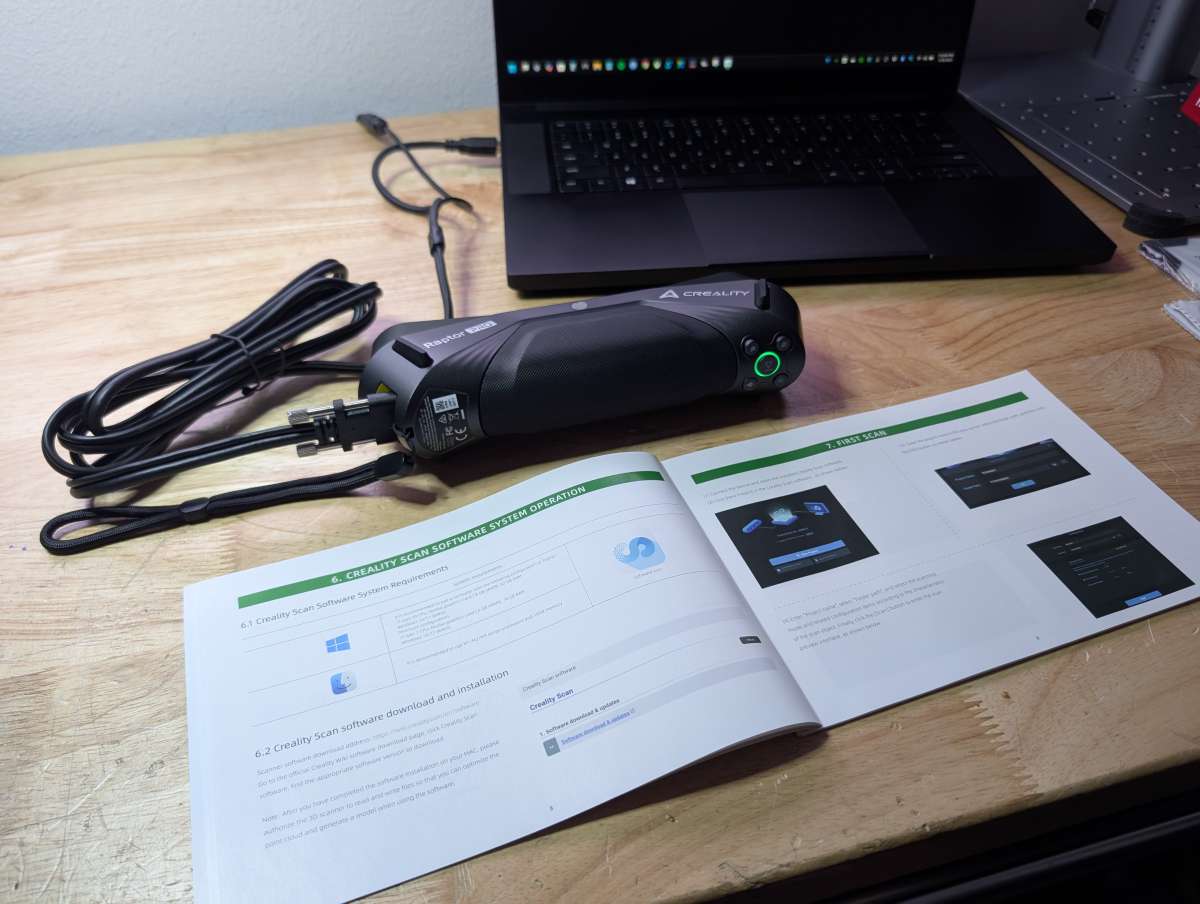
- Creality Raptor Pro 3D Scanner
- Hard carrying case
- USB 3.0 data cable (USB-C to USB-A)
- Power adapter with international plug converters
- Glass calibration board
- Adhesive reflective markers
- USB-A to USB-C adapter
- Cleaning cloth
- Quick start guide
Tech specs
- Scanning modes: Dual blue laser (22 cross lines for coverage, 7 parallel lines for detail) and infrared structured light
- Accuracy: Up to 0.02mm in blue laser mode; 0.075mm in infrared mode
- Volumetric accuracy: 0.02mm + 0.08mm/m (blue); 0.075mm + 0.1mm/m (infrared)
- Speed: Up to 60 fps and 660,000 points/sec in blue laser mode; 30 fps in infrared mode
- Single capture range: Blue laser up to 397 × 290mm; infrared up to 630 × 550mm
- Object size range: 5mm – 4000mm (0.197in – 157.48in)
- Color capture: 24-bit full-color texture
- Weight: 14.29 oz (405 g)
- Connectivity: USB-C 3.2
- OS support: Windows 10/11 (64-bit), macOS 11.7.7+
- Recommended hardware: i7-class CPU, 16–32 GB RAM, dedicated GPU with 6-8 GB VRAM
Design and features
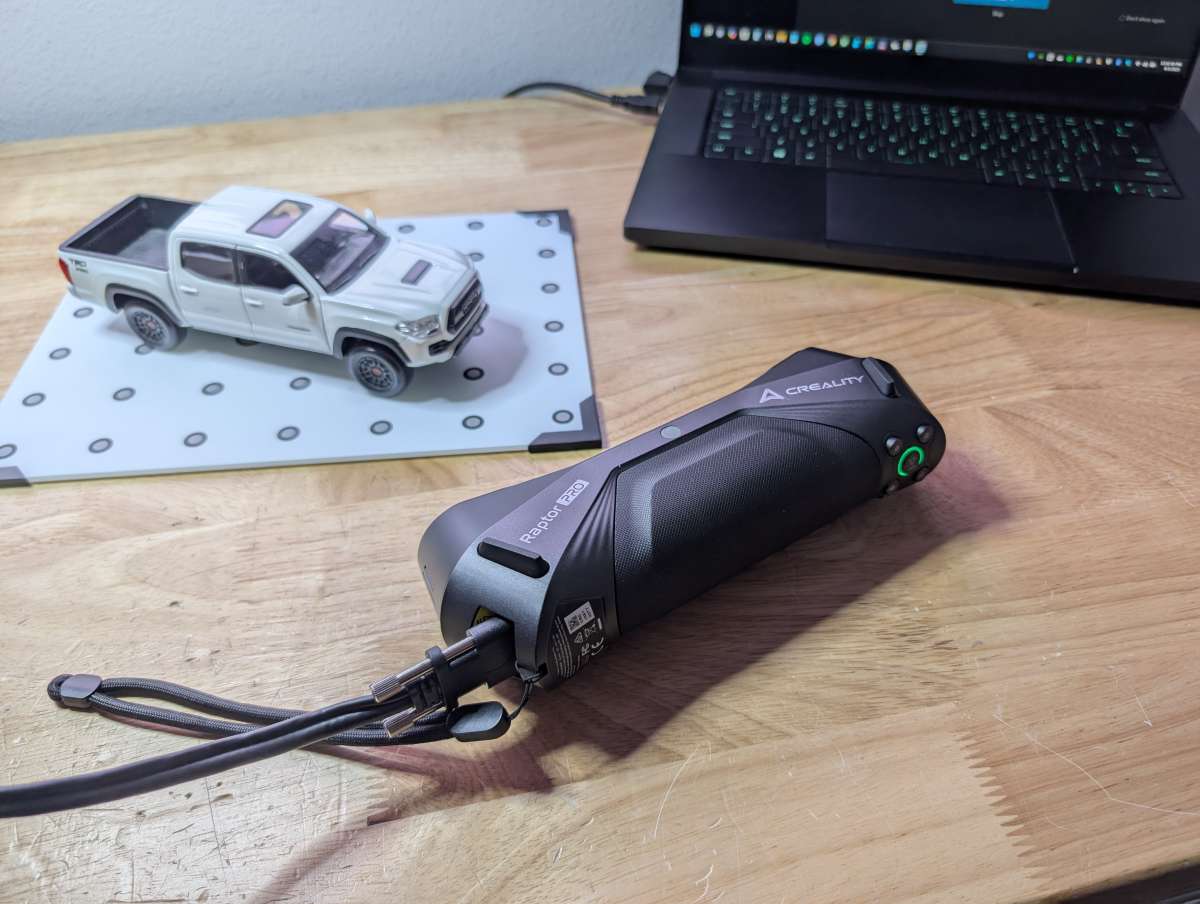
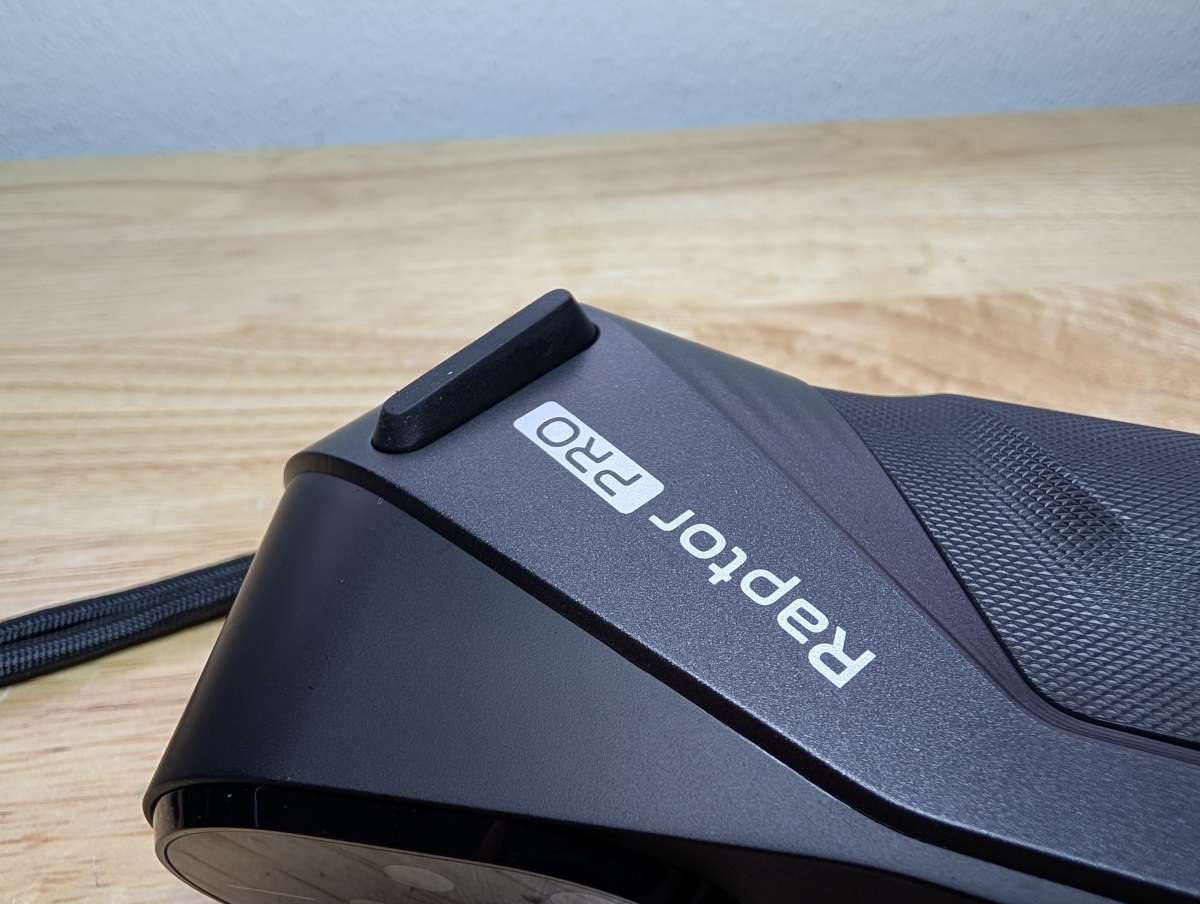
The Raptor Pro looks and feels like a premium tool. It’s about the size of a large old fashioned phone handset and weighs just under a pound, so it’s easy to hold for extended sessions without fatigue.
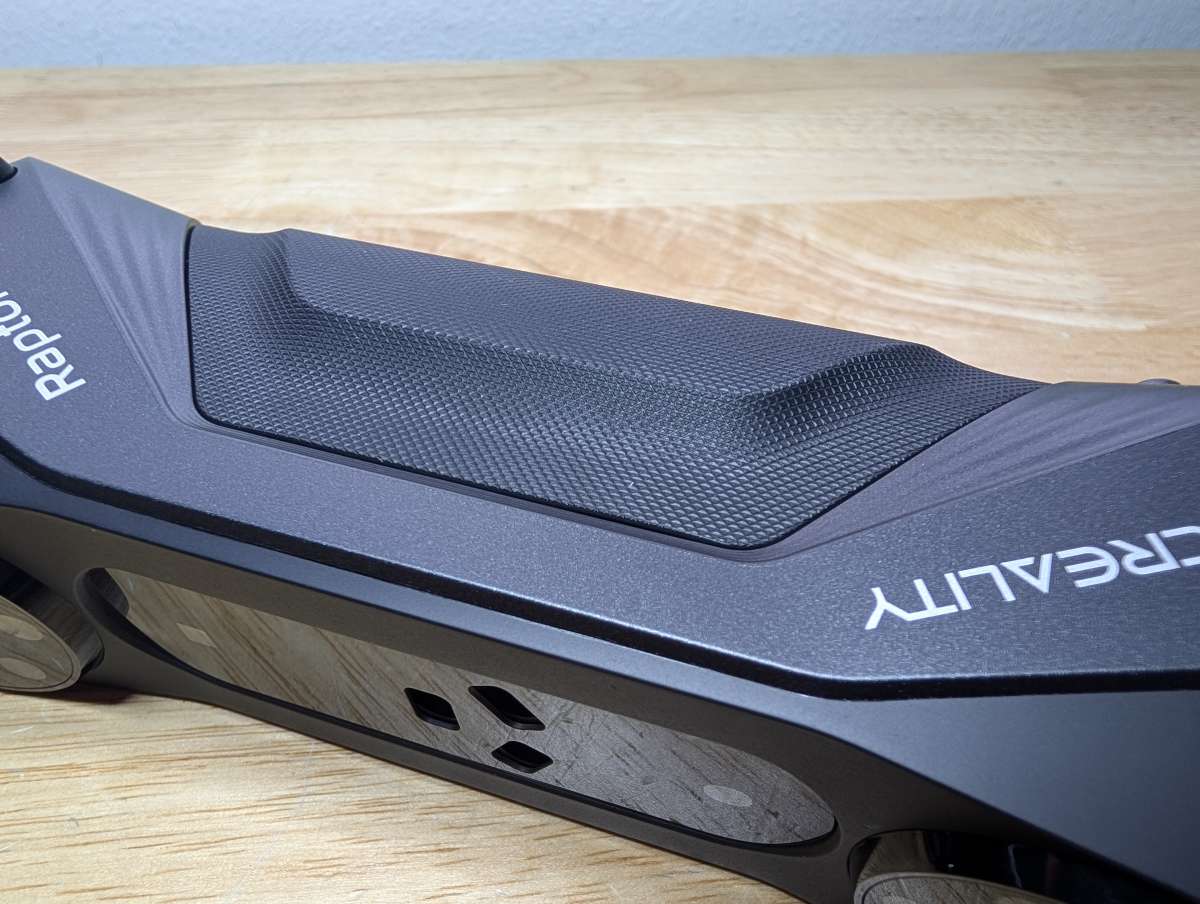
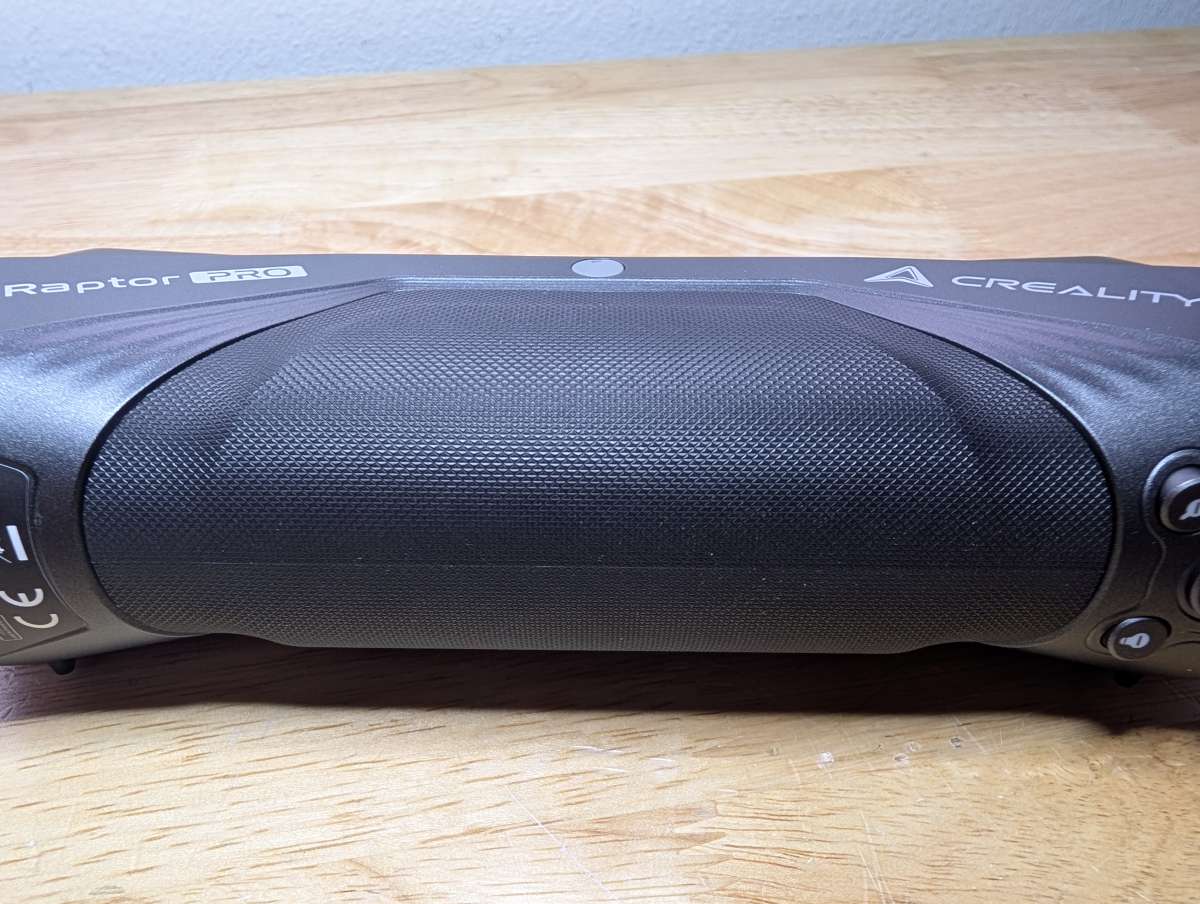
The grip of the Raptor Pro is heavily textured to help prevent slippage and extends along the center of the unit.
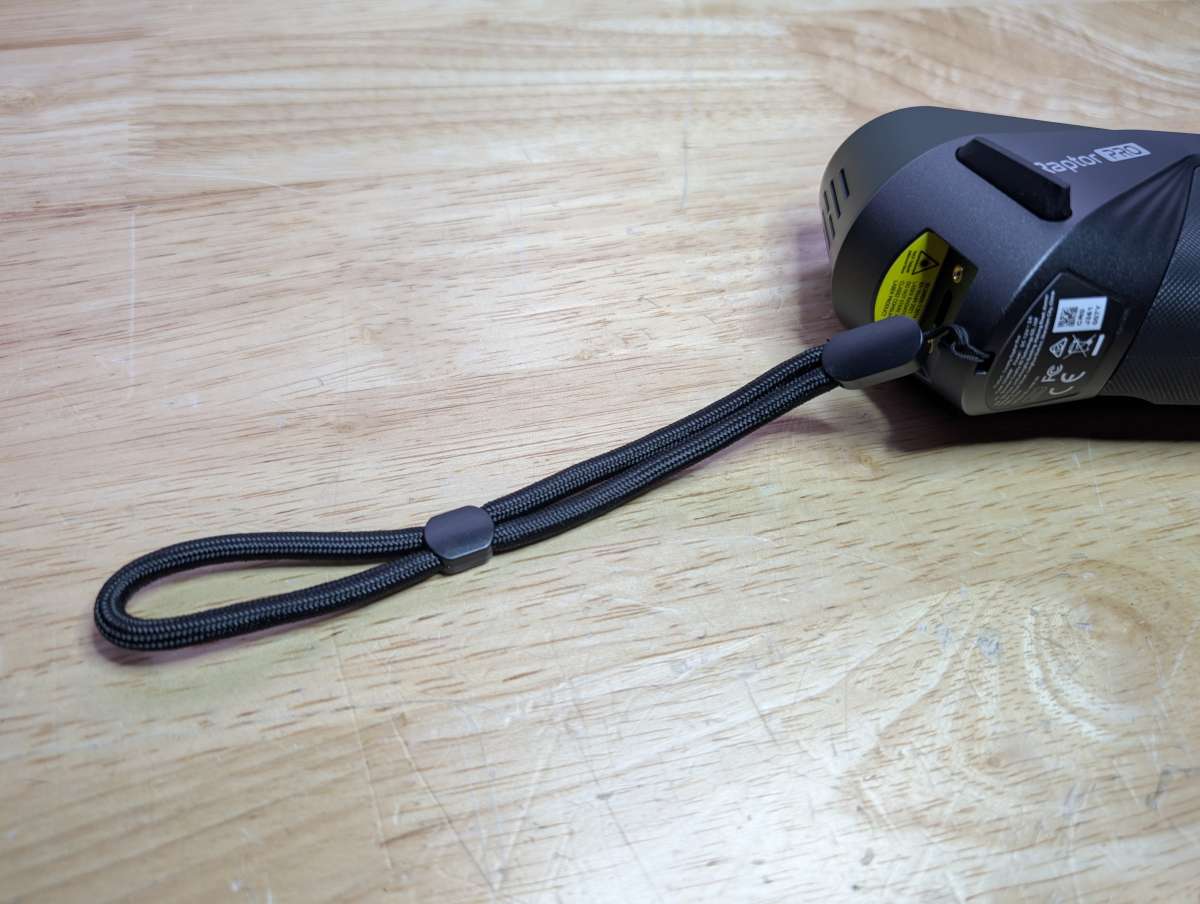
A detachable wrist strap adds additional peace of mind when working over hard floors.
The grip is also contoured a bit to make it easier to hold on to while operating the controls of the Raptor Pro.
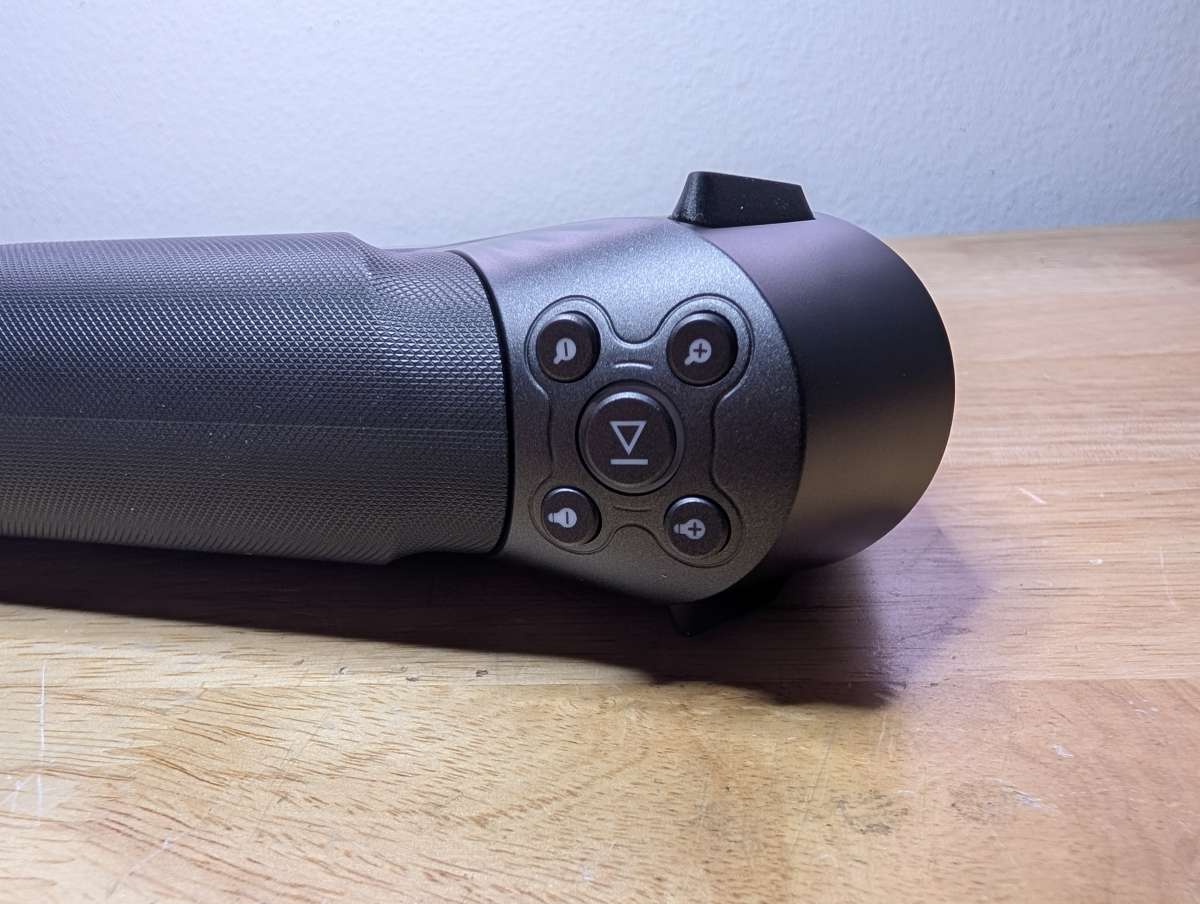
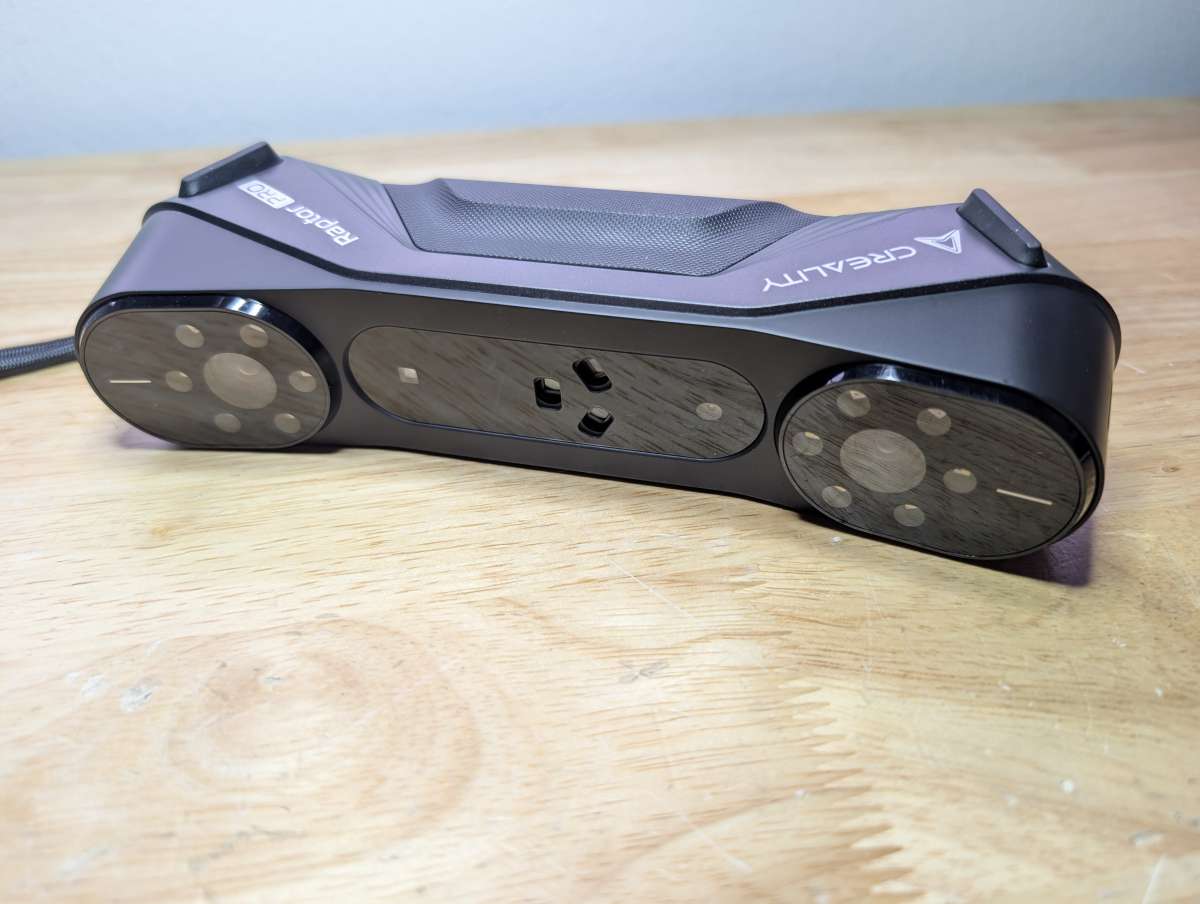
The controls are arranged along one side of the unit as round push buttons. There’s an LED status ring around the main button that provides updates on the unit’s operation. The controls allow you to stop and start scanning, zoom in and out, and increase or decrease the laser and light brightness.
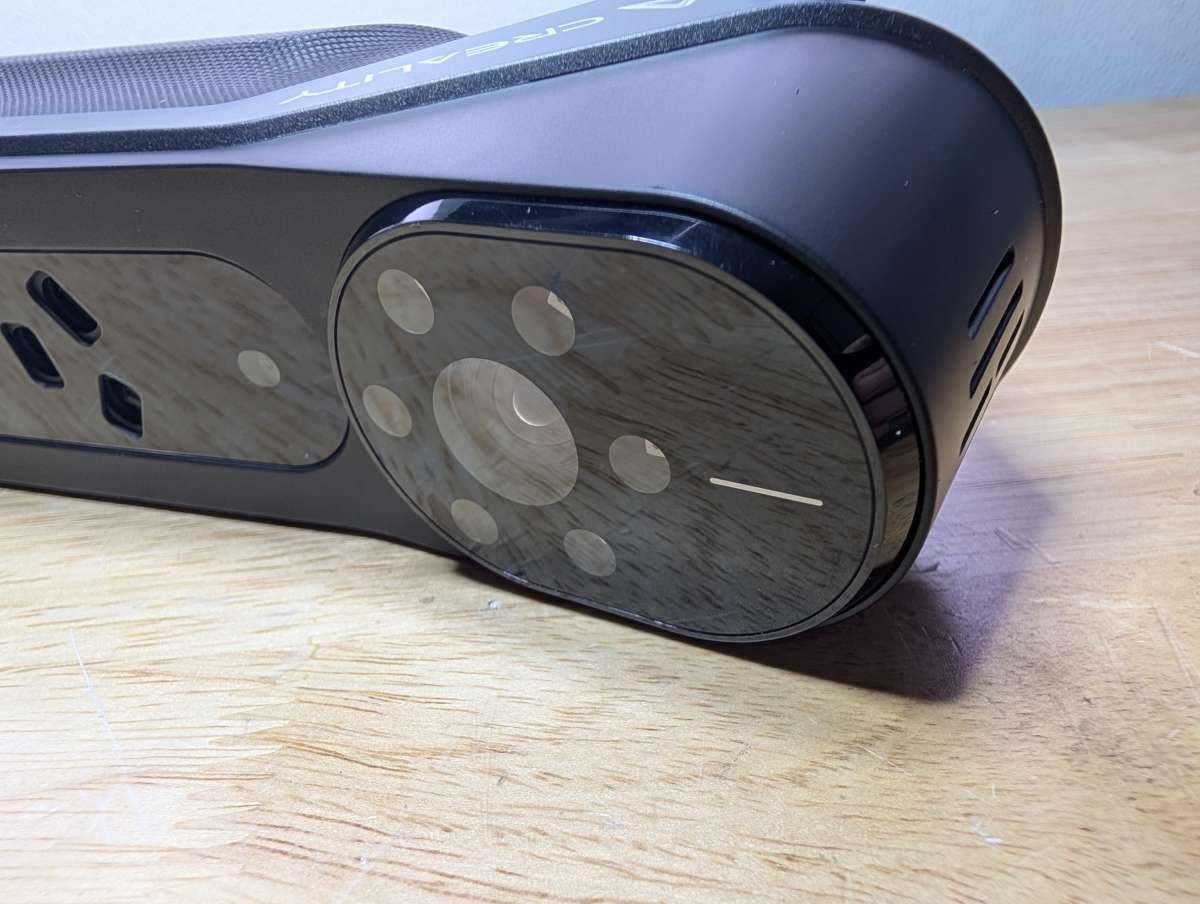
The lenses are placed along the inside of the Raptor Pro and include the blue laser emitters along with a color scanning camera and 3D scanning camera.
There are four rubber feet on the Raptor Pro, two on either side, for setting the unit down without damaging it.

Just below where the safety strap attaches is a USB-C port for connecting the Raptor Pro to a laptop or PC.

The USB-C cable attaches securely via two small screws to prevent disconnection during use.
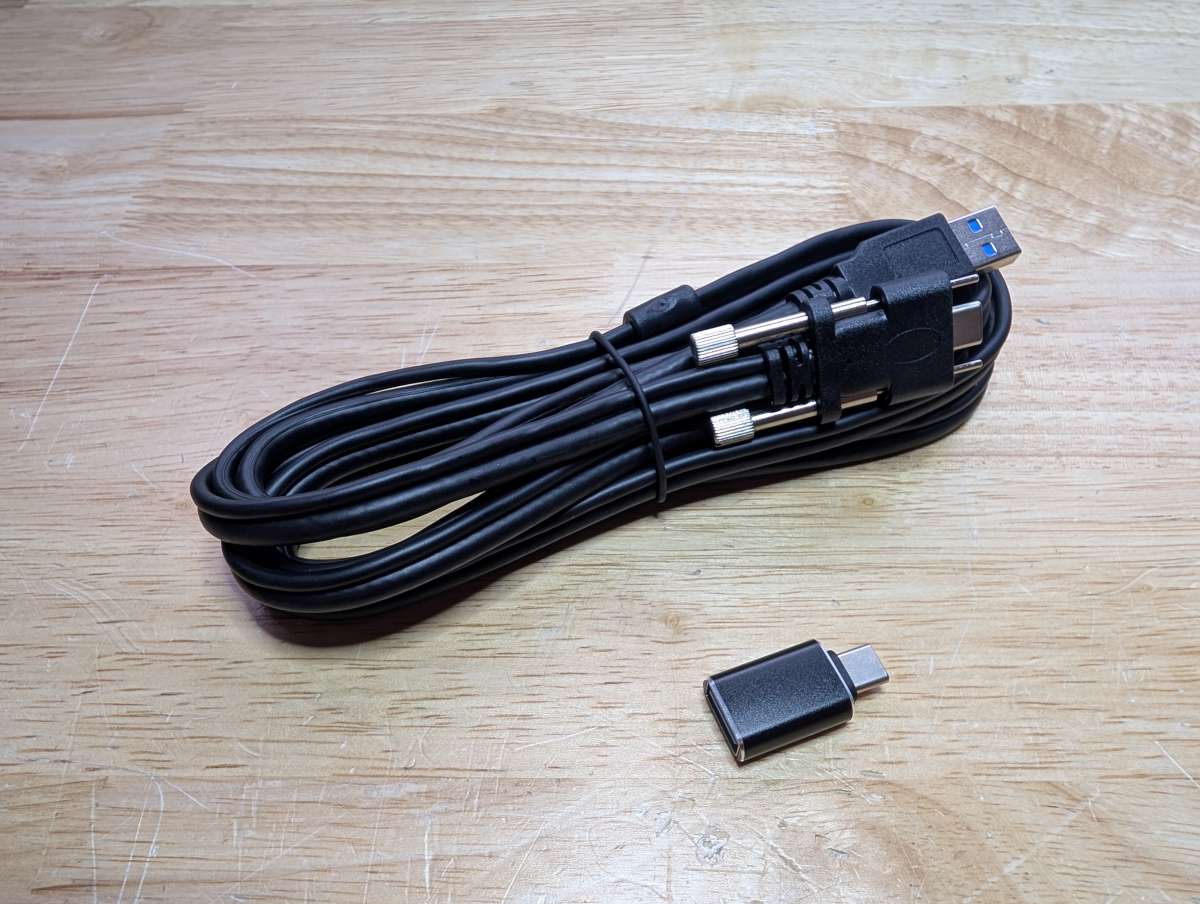
The included USB-A to USB-C data cable also comes with a USB-A to USB-C adapter.
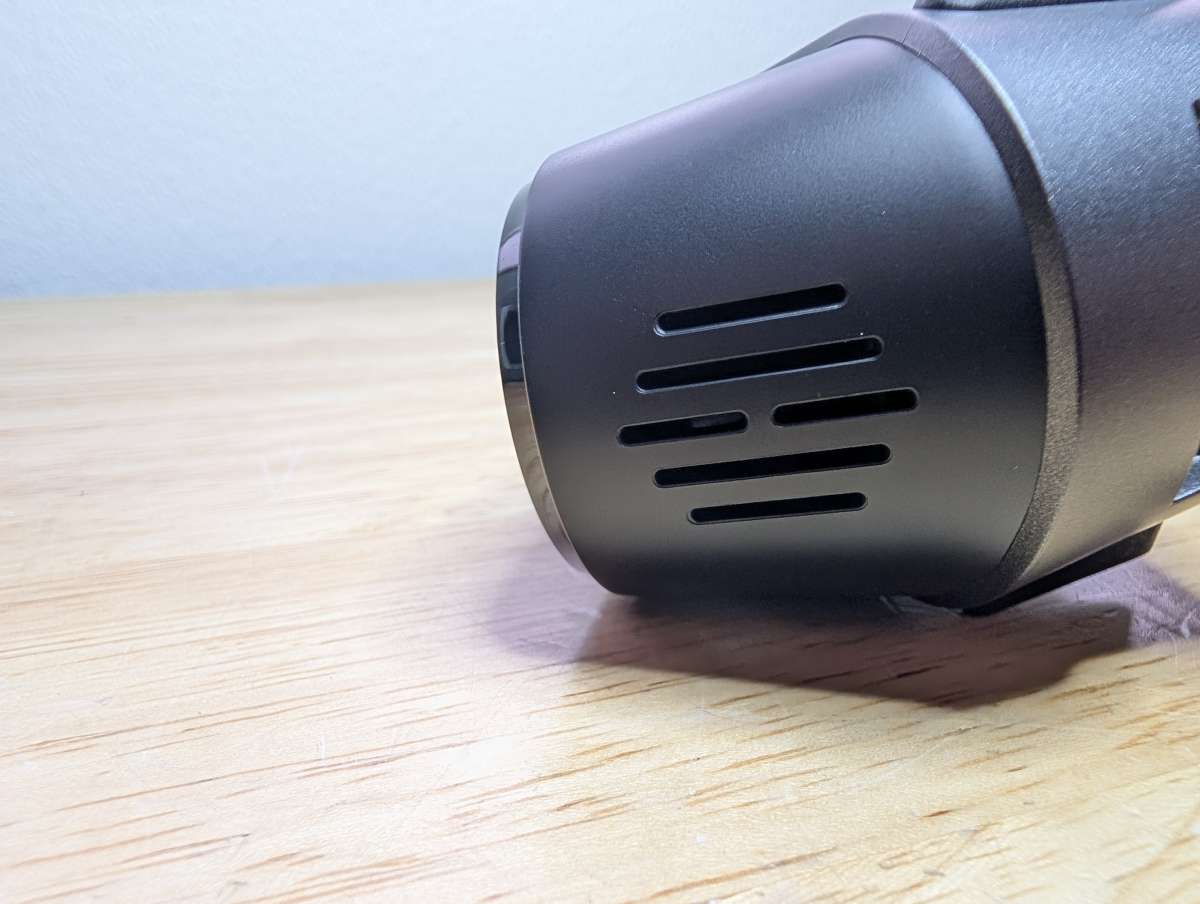
On the other end of the Raptor Pro are vents for cooling the internals.
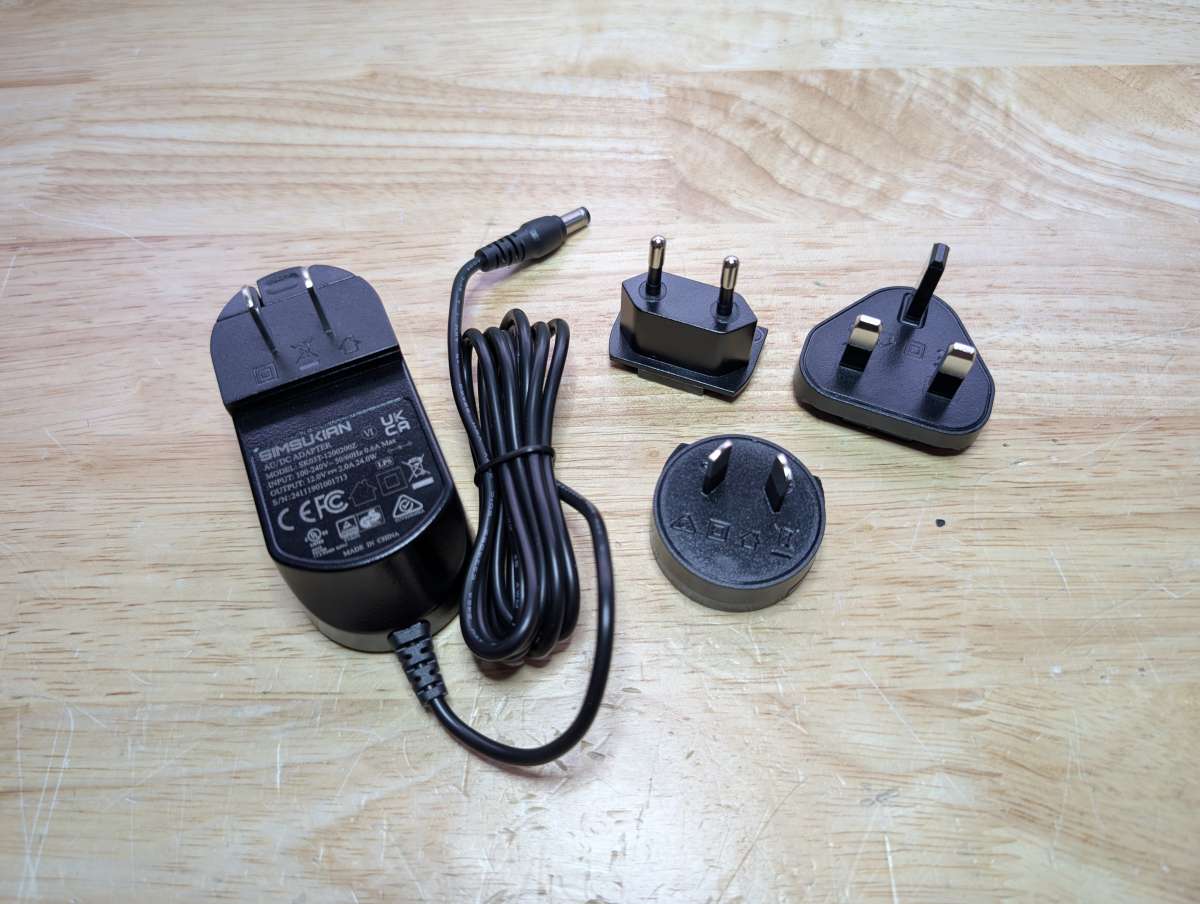
Creality includes several different international power plug adapters as well.
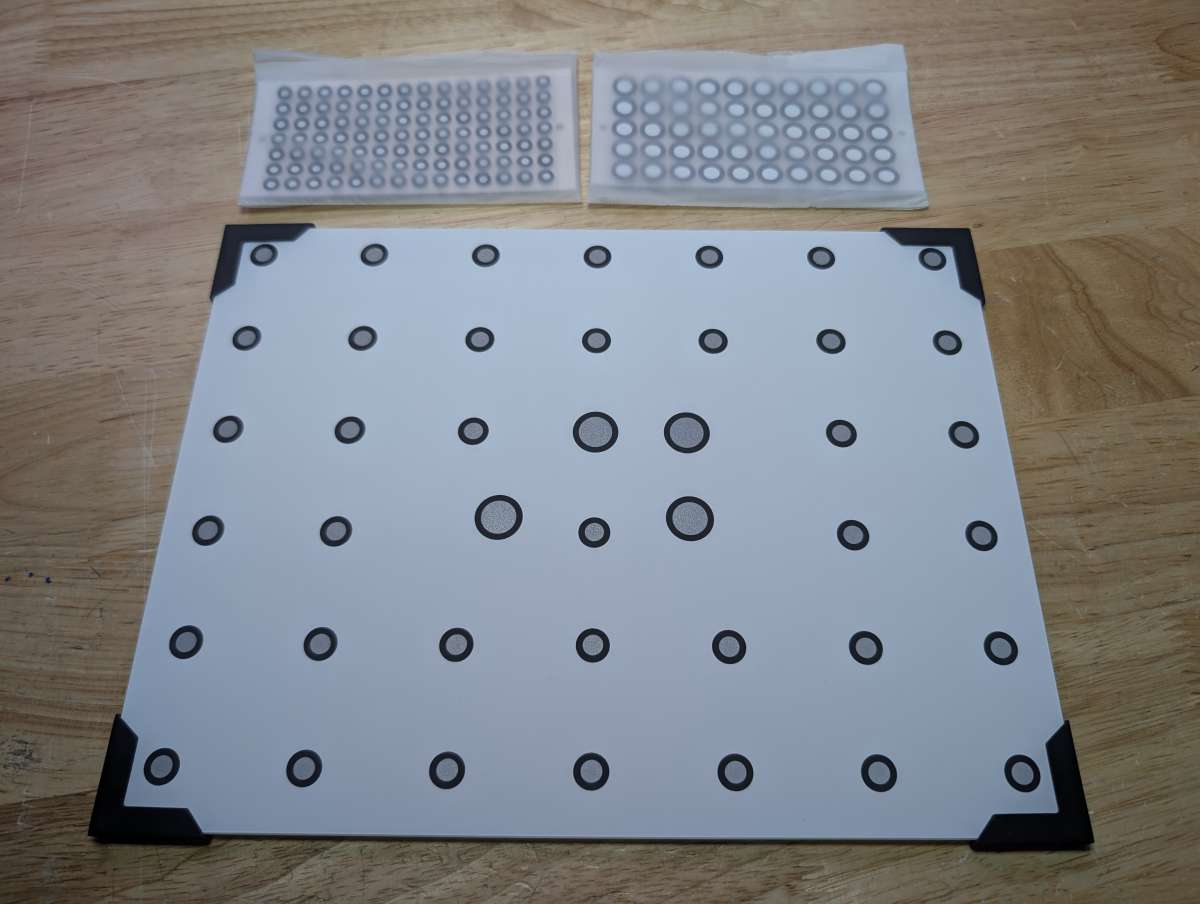
Along with the glass calibration board, the Raptor Pro ships with two sets of different-sized adhesive reflective markers to assist with scanning accuracy.
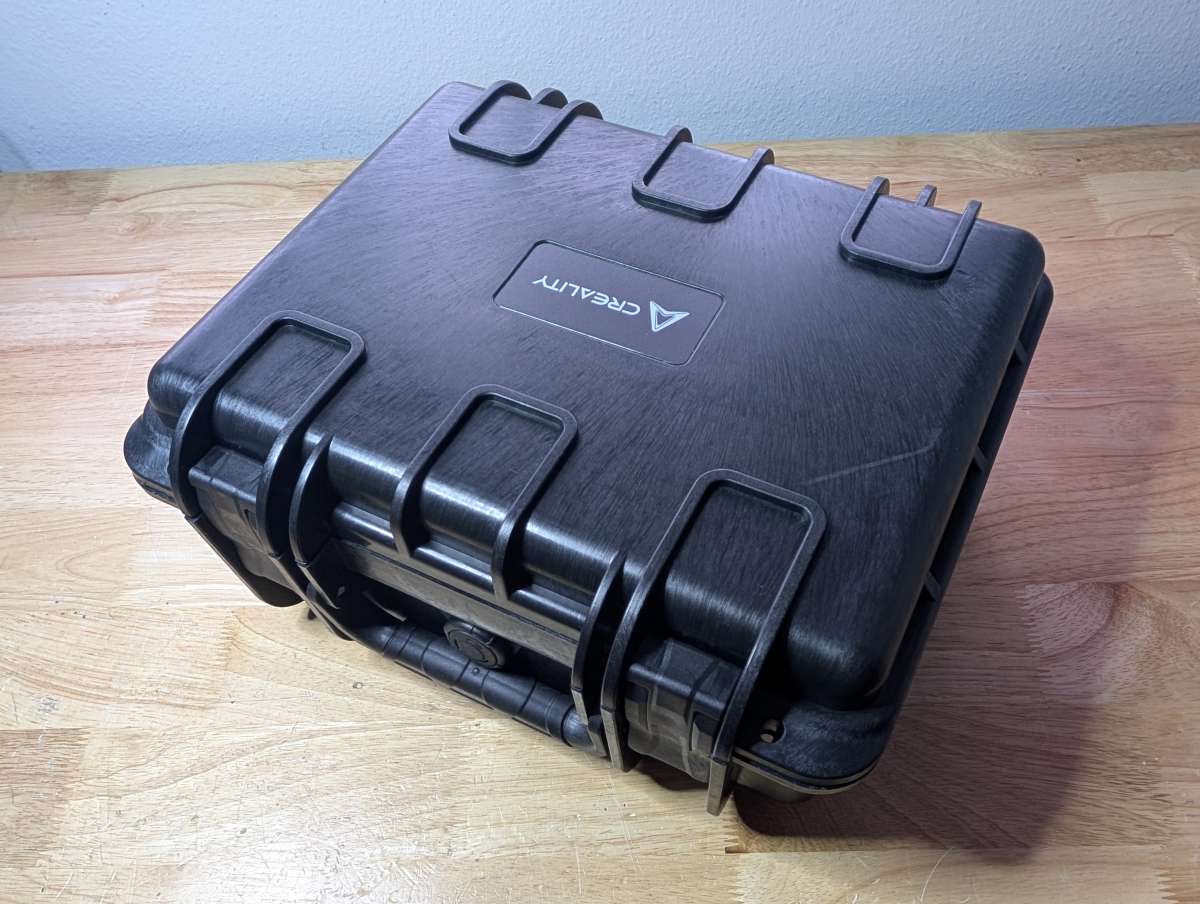
To be honest, the one item included with the Raptor Pro that I was most excited about was the carrying case. A good case can really make a difference when it comes to the longevity of expensive, delicate, high-tech equipment like the Raptor Pro.
Assembly, Installation, Setup
Getting the Raptor Pro ready to use is relatively simple. Out of the box, the scanner is a single unit, so nothing to assemble. Plug the USB cable into the scanner and your computer, connect the power adapter, and you’re physically set.
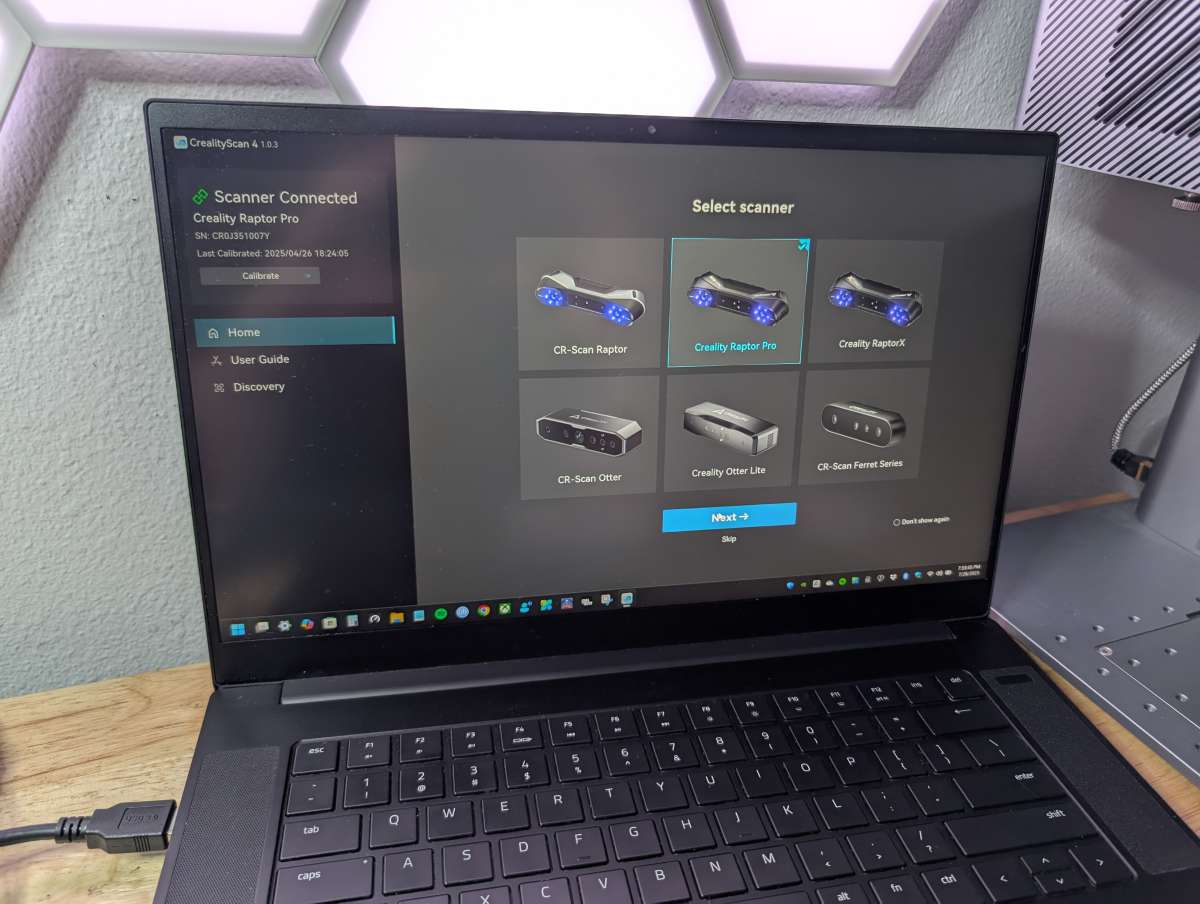
The meat of the setup is installing Creality’s scanning software and calibrating the Raptor Pro. The installer runs like any standard application, and the program launches with a guided setup that walks you through calibration.
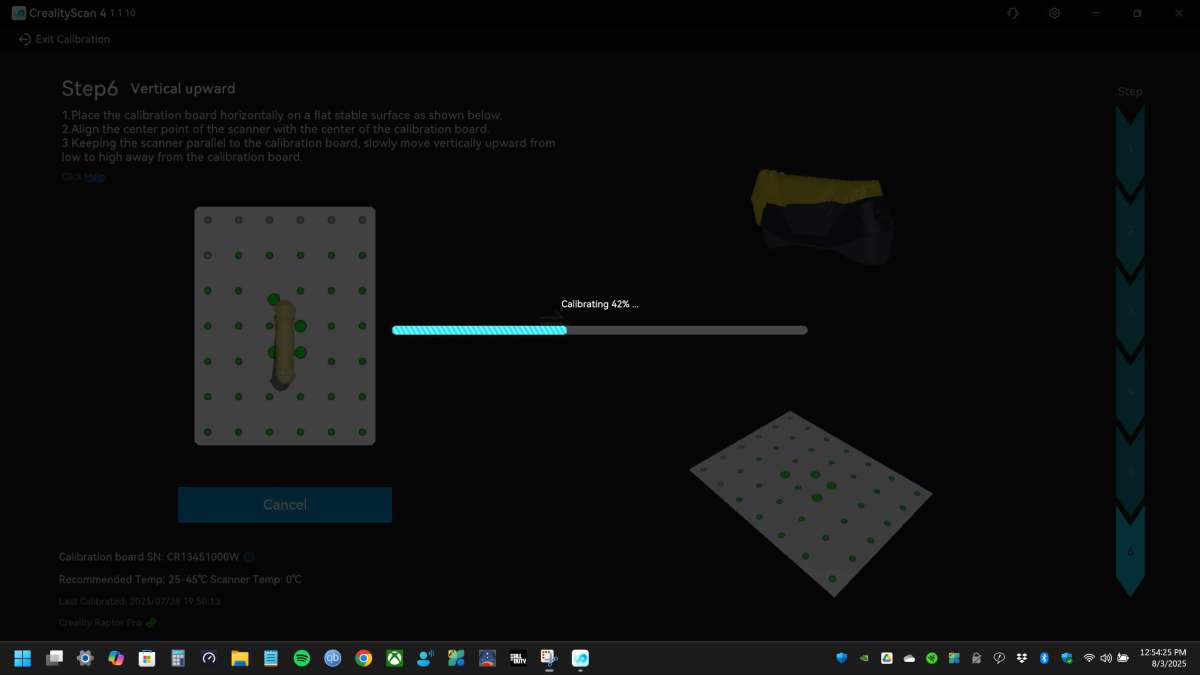
Calibration is supposed to take just a few minutes, but every time I recalibrated the Raptor Pro, it took significantly longer. The software first prompts you to scan the glass calibration board, which is simple enough. Once that calibration is saved, you’re then prompted to tilt and rotate the Raptor Pro over the board until it captures enough data and confirms alignment. The software guides you through various heights and angles, but I could never make sense of the positioning logic or match the visual guide provided. The process was uniquely painful and frustrating.
Once finally calibrated, you choose your scanning mode, blue laser for precision or infrared for larger objects. For small items, the included glass pad helps keep things stable and provides a textured background for better tracking. If you’re scanning something featureless, the included reflective markers can be applied to maintain alignment.
Performance
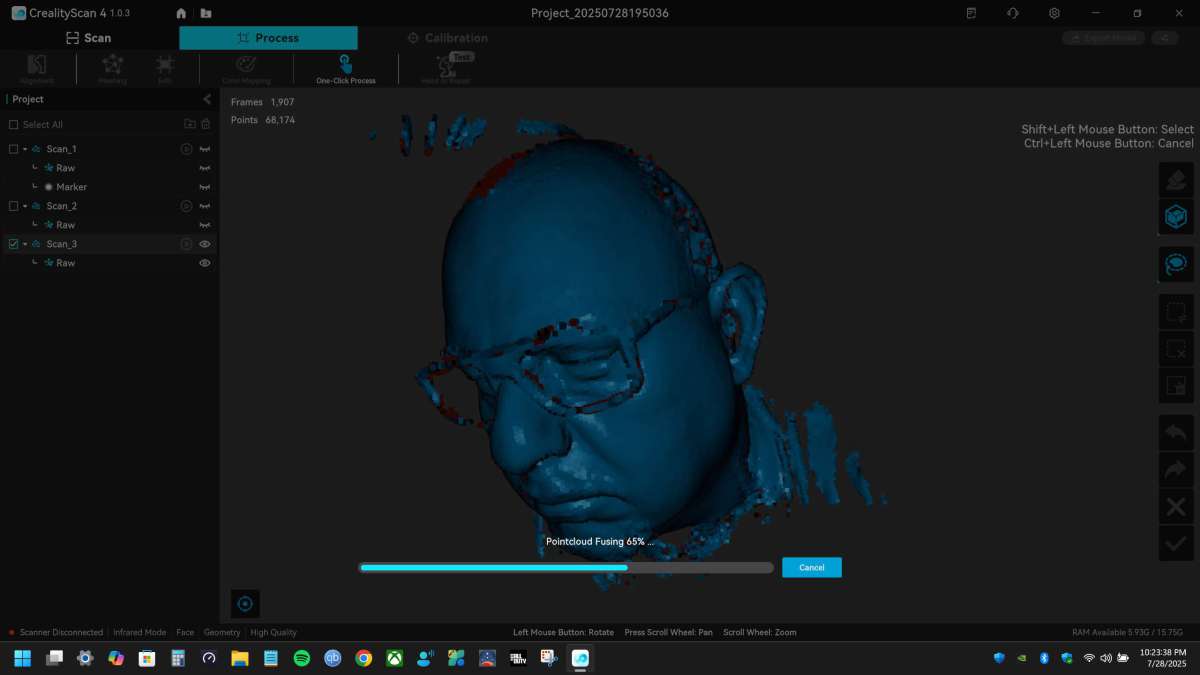
Scanning with the Raptor Pro should be as simple as moving the device around an object while watching the live point cloud build on-screen. The software stitches frames together in real time, and if you miss a spot, you can pause and rescan that area. When you’re done, the software can automatically align multiple passes, generate a mesh, and apply textures if you captured color. That’s how everything should work, in practice though, not so much.
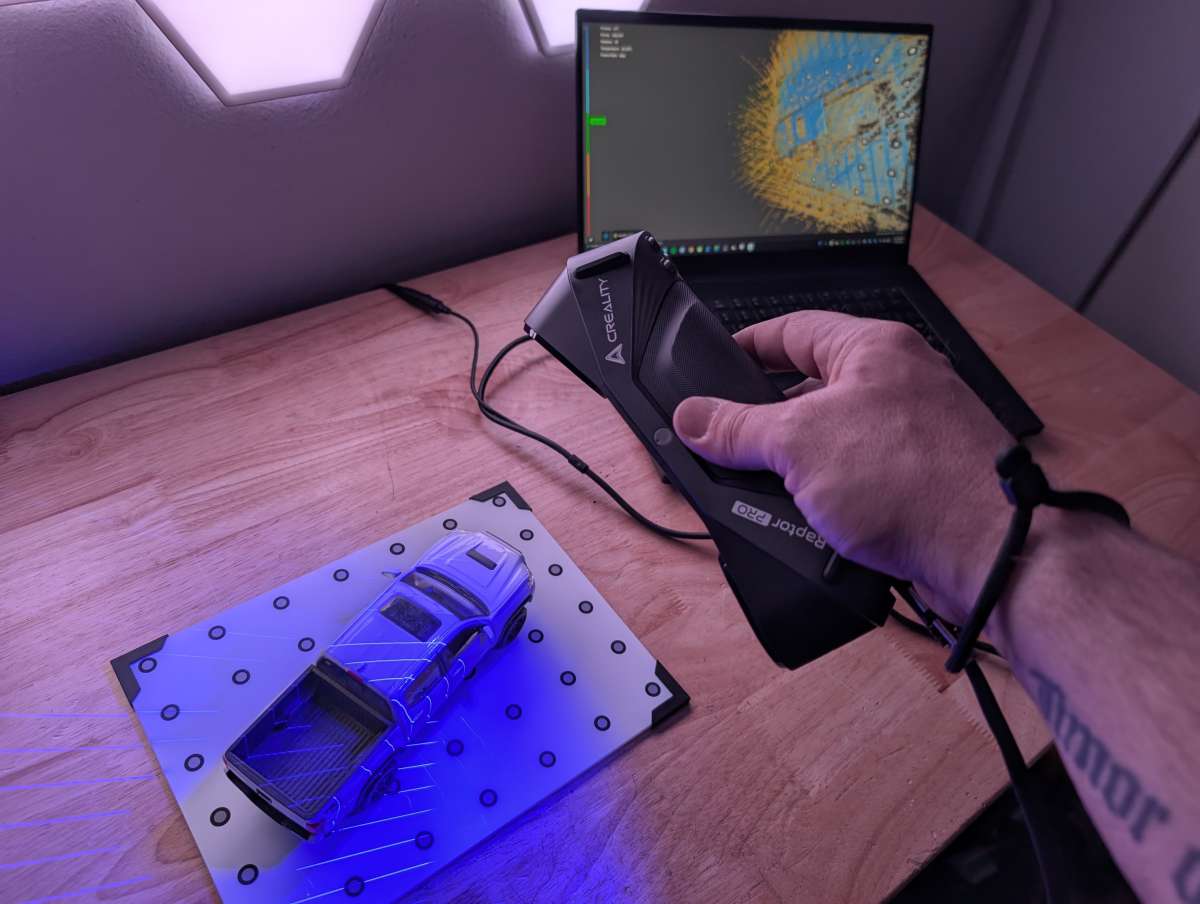
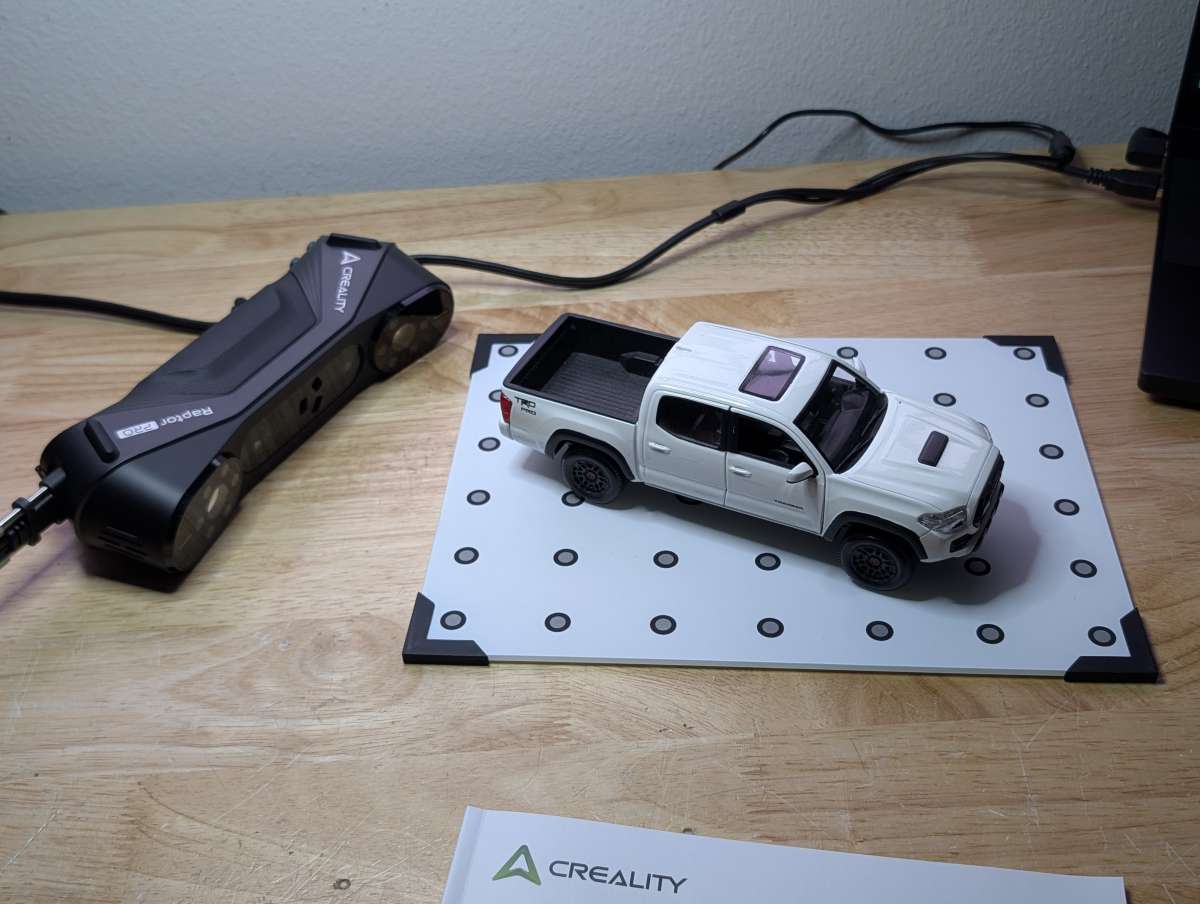
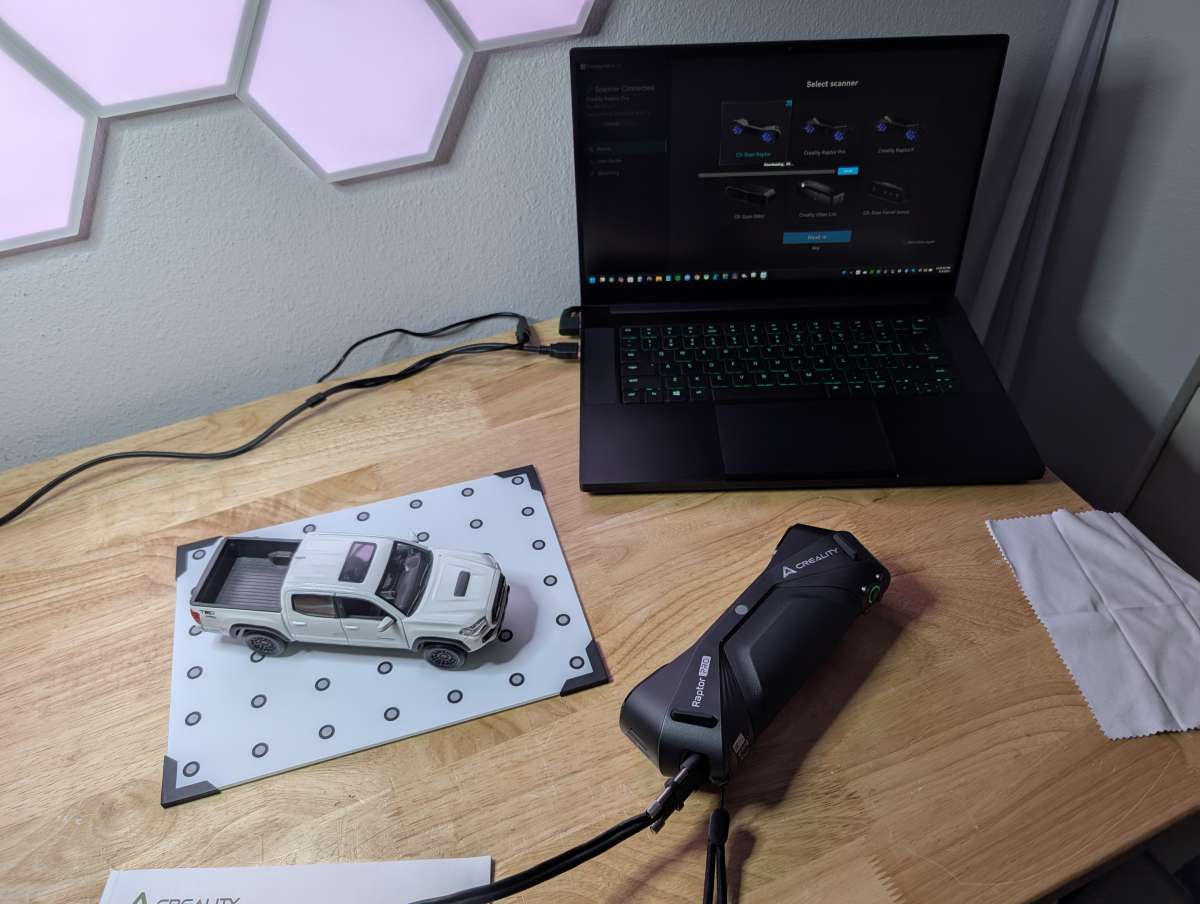
All I wanted to do was scan a small model of my truck so I could import it into a 3D program like Blender and modify it to test out different gear configurations. Pretty simple, right?

Well, the Raptor Pro definitely didn’t think it was simple. No matter how slowly I moved the Raptor Pro, or how level I kept it, or how perfectly I kept it at the optimum distance from the model as indicated in the scanning software, I simply could not get a coherent scan. The software would interpret duplicate models or fail to pick up on easy-to-see details.
While my scans were problematic, the Creality Scan software itself is well designed and easy for newbies to pick up. It offers great control for advanced users as well and provides live feedback during scanning, automatic alignment, and one-click meshing. It also has options for manual alignment and mesh cleanup, which I definitely took advantage of. Export formats include STL, OBJ, and PLY, so integration with CAD or 3D printing workflows is straightforward.
After a lot of time spent trying to make the scan work and tons of frustration on my part, I gave up on the truck model and tried to get the Raptor Pro to work on some other simple items of different colors and materials.

First, I tried to scan a statue of my favorite Hindu God, Ganesh. Even though Ganesh is known as the Remover of Obstacles, one obstacle Ganesh couldn’t overcome was getting the Raptor Pro to produce a good scan.
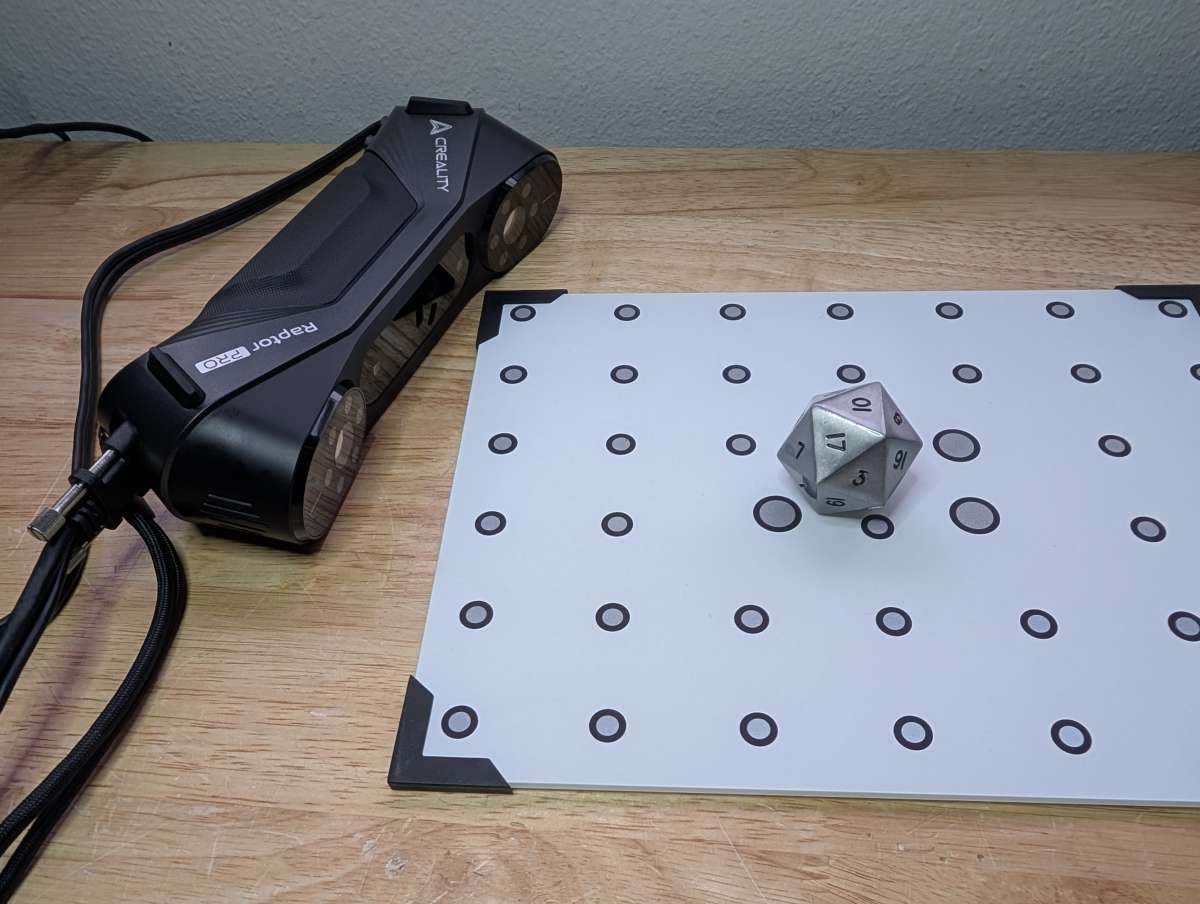
Then I tried my lucky stainless steel 20-sided die. I rolled a natural 1 on skill check for this scan as well, critical failure.
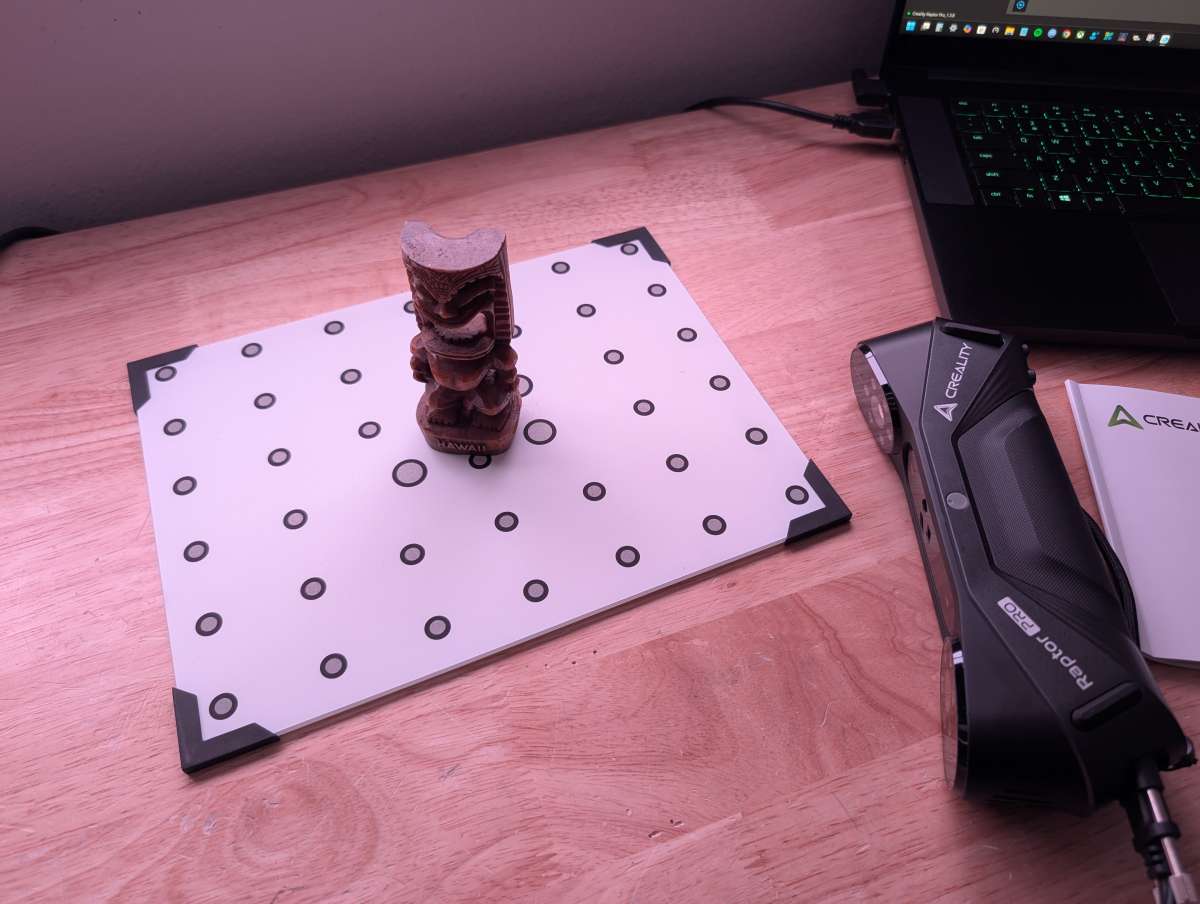
I then tried to scan my favorite Tiki God and had about as much luck as the Brady Family did with their Tiki God (Google it, Millennials).
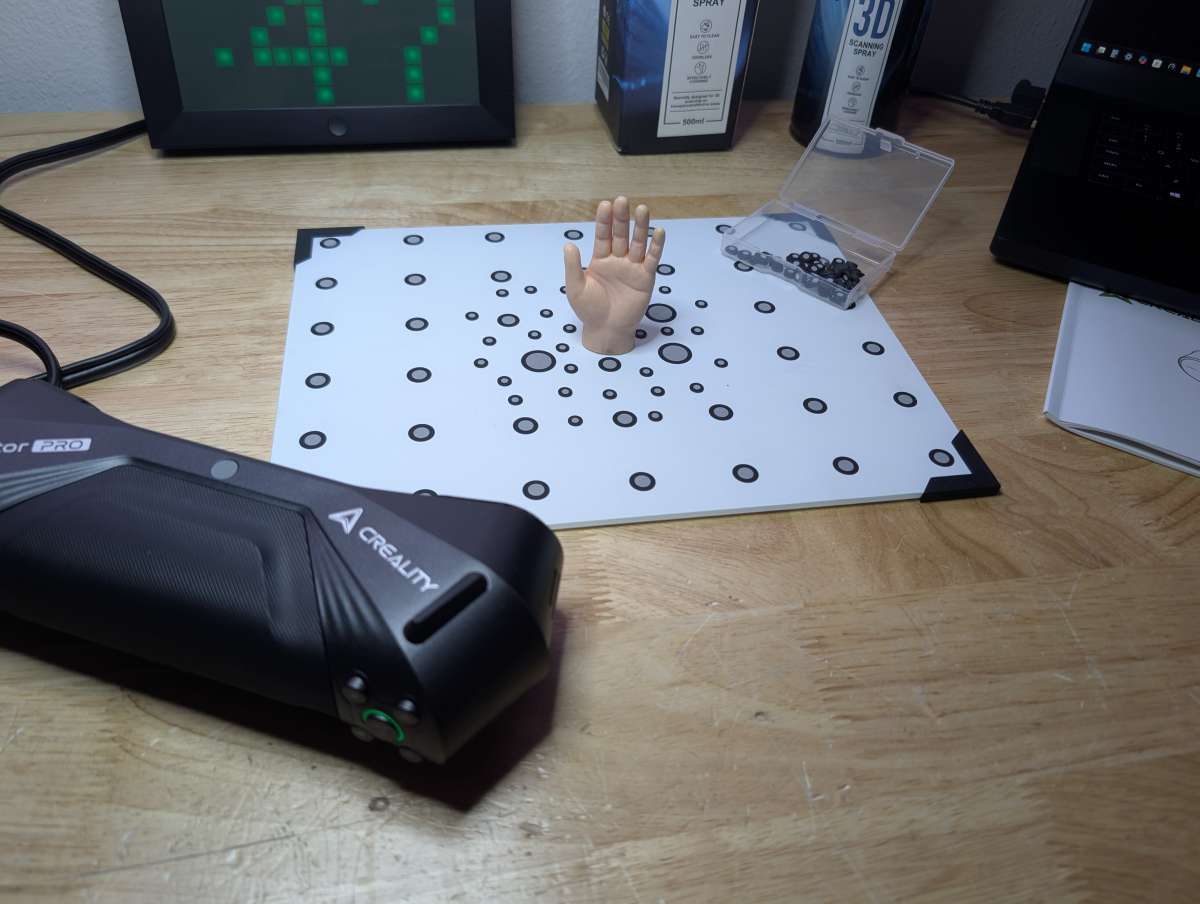
For my final attempt at getting a decent scan with the Raptor Pro, I pulled out all of the stops. Not only did I choose a simple object with good contrast, texture, and color, I also stacked the deck a bit by using 3D scanning spray and a lot more reflective markers on the calibration board.

I opted for the higher precision dual blue laser mode with parallel lines.
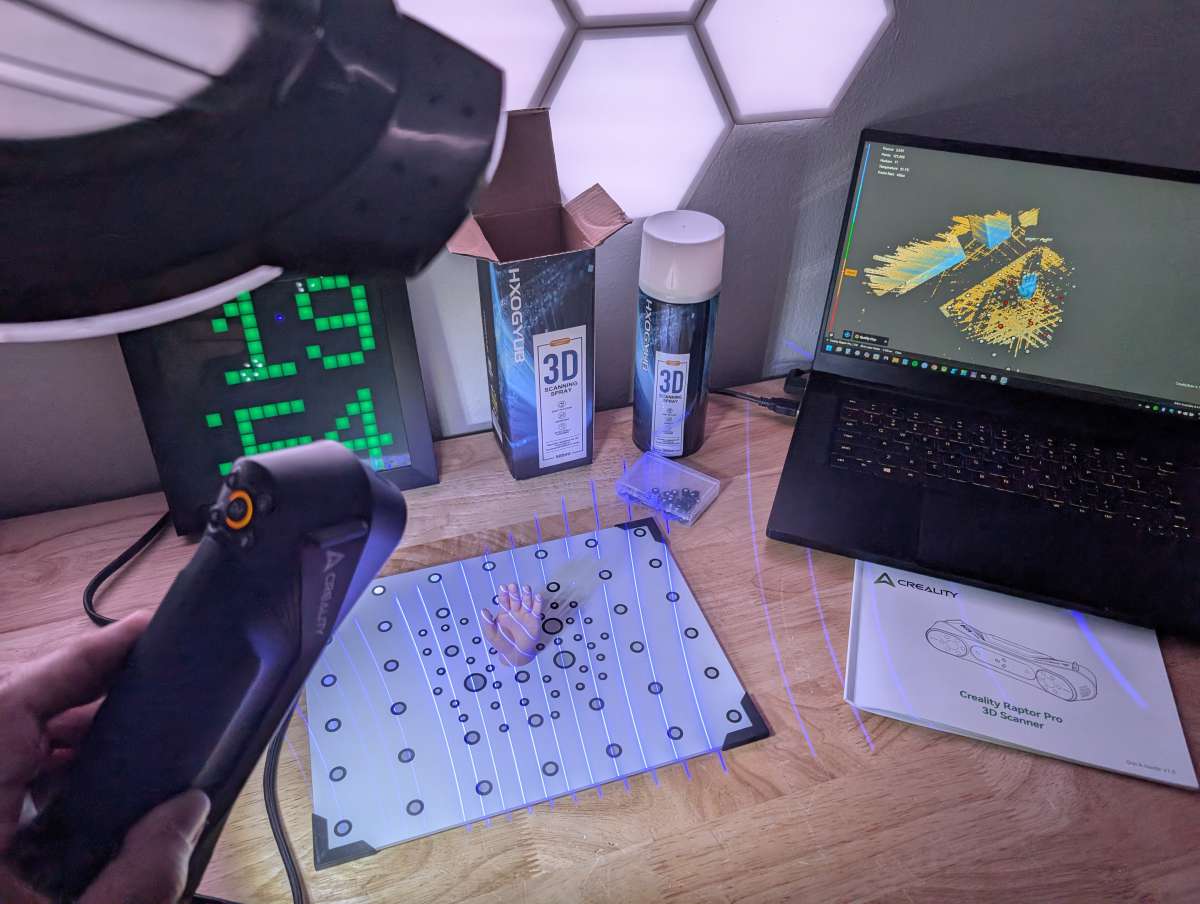
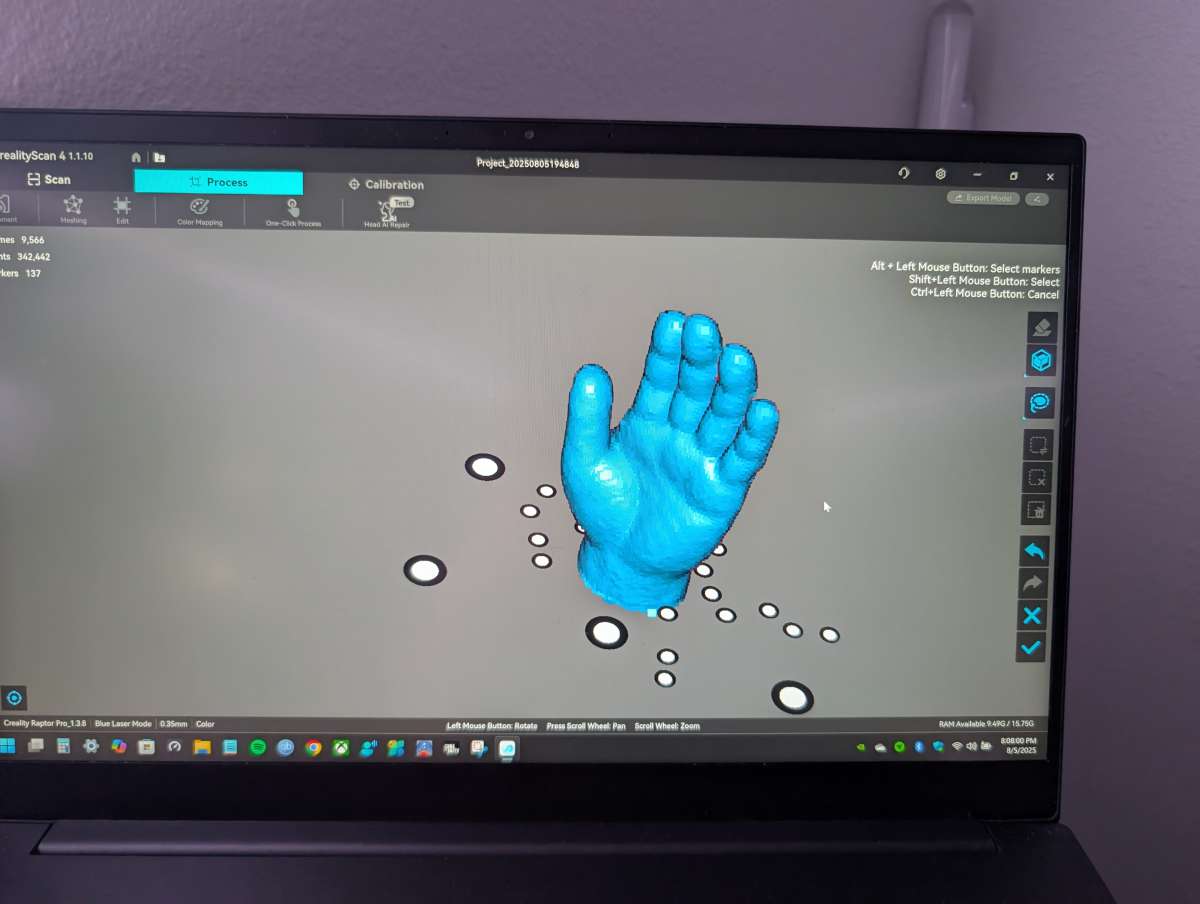
Finally, my efforts paid off as the scanning software picked up on the details of the tiny hand model I was using.
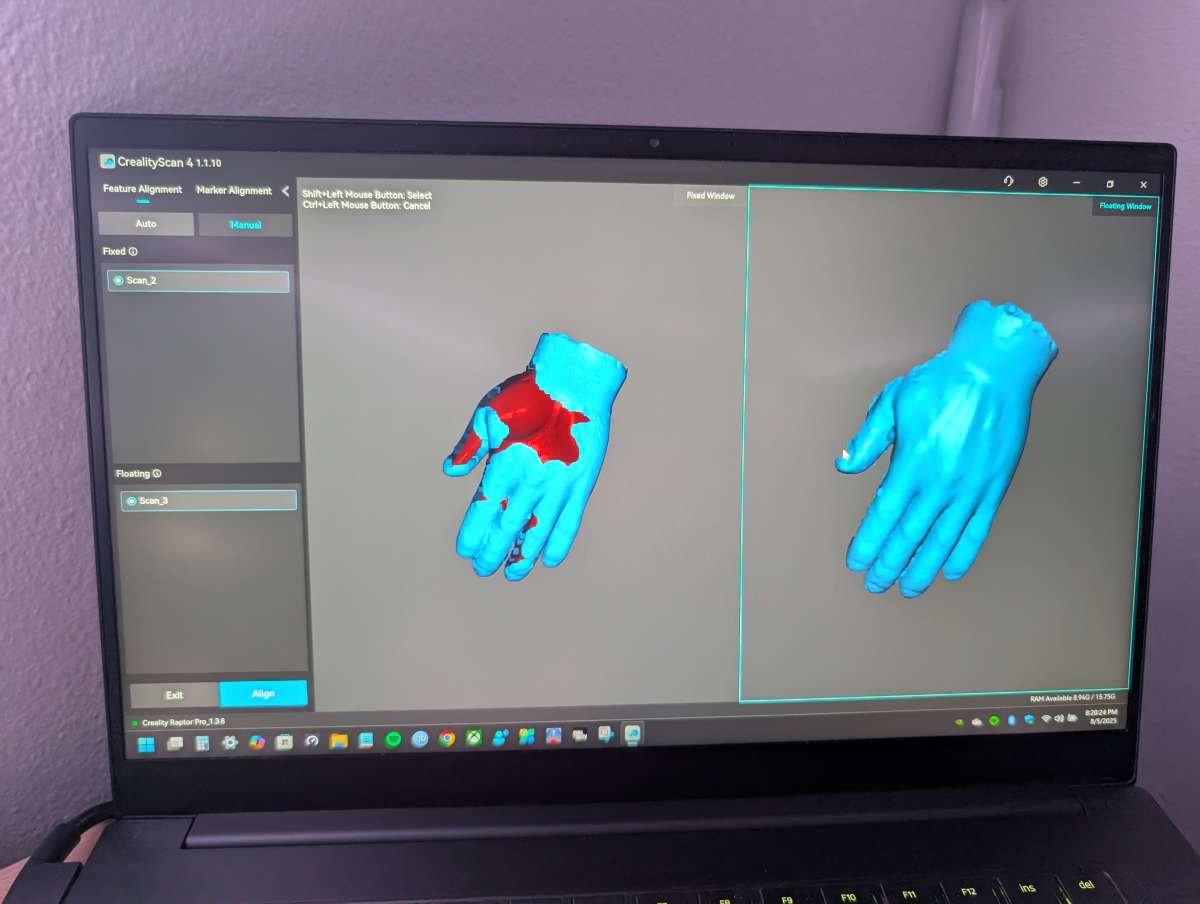
After several slow passes of the hand with the Raptor Pro, I was able to get enough data for the scanning software to work with. The Creality software was able to stitch together several passes by using the calibration board as a common denominator to sync on.
After the scans were merged, I manually cleaned up the model using the edit function of the scanning software. This took some time and when combined with all of my hit-or-miss scanning efforts ended up being about as long as it would’ve taken me to model this hand from scratch.
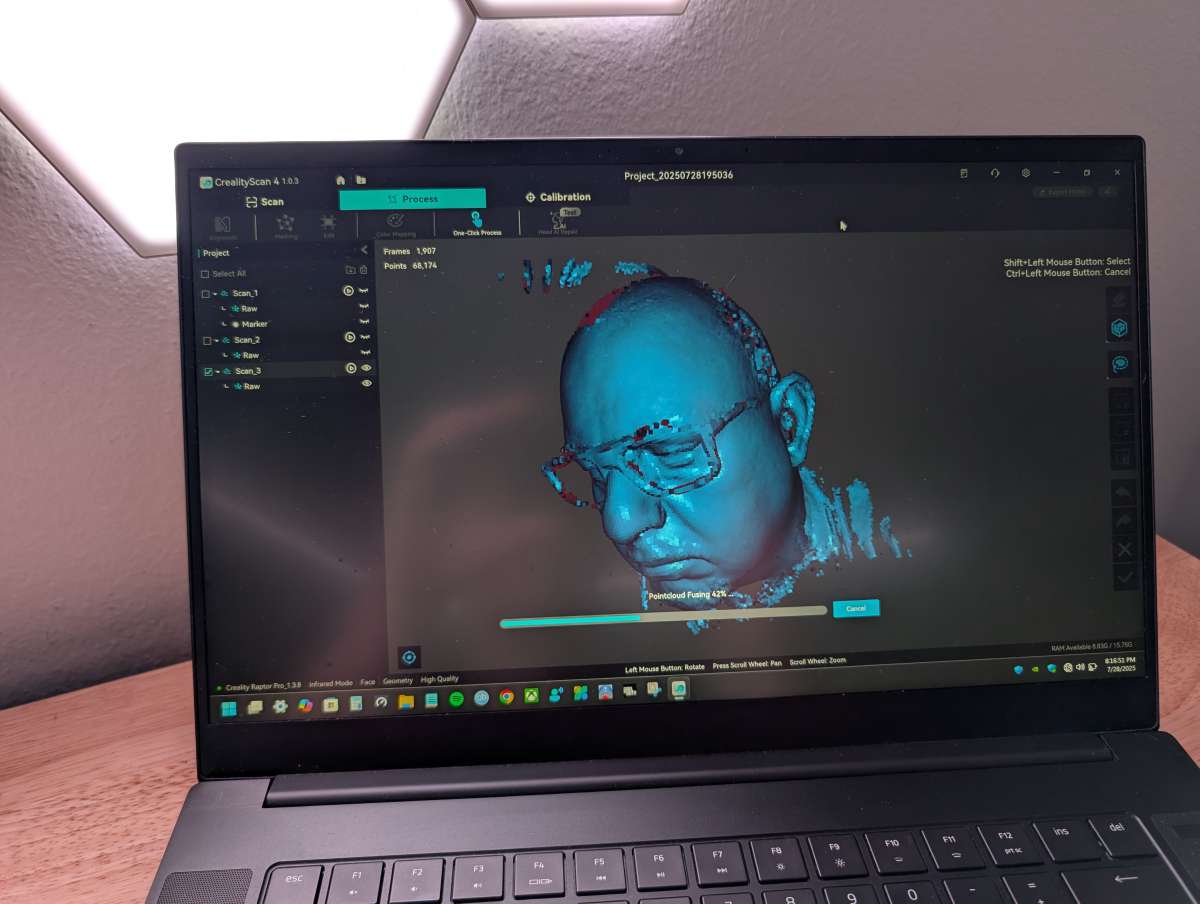
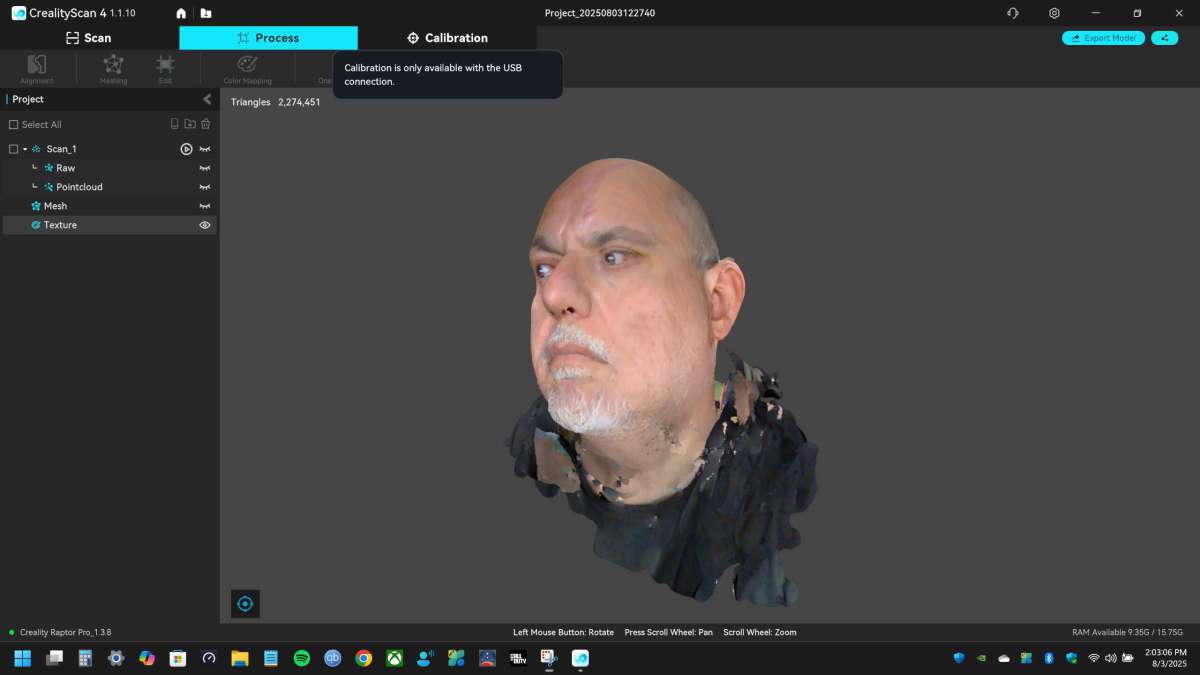
With my confidence bolstered, I decided to give the Raptor Pro’s Infrared mode a try. Infrared mode trades some precision for coverage, but it’s ideal for scanning people or bulky items. With no models readily available I made do the best I could and tried to scan my ridiculous flesh melon of a head.
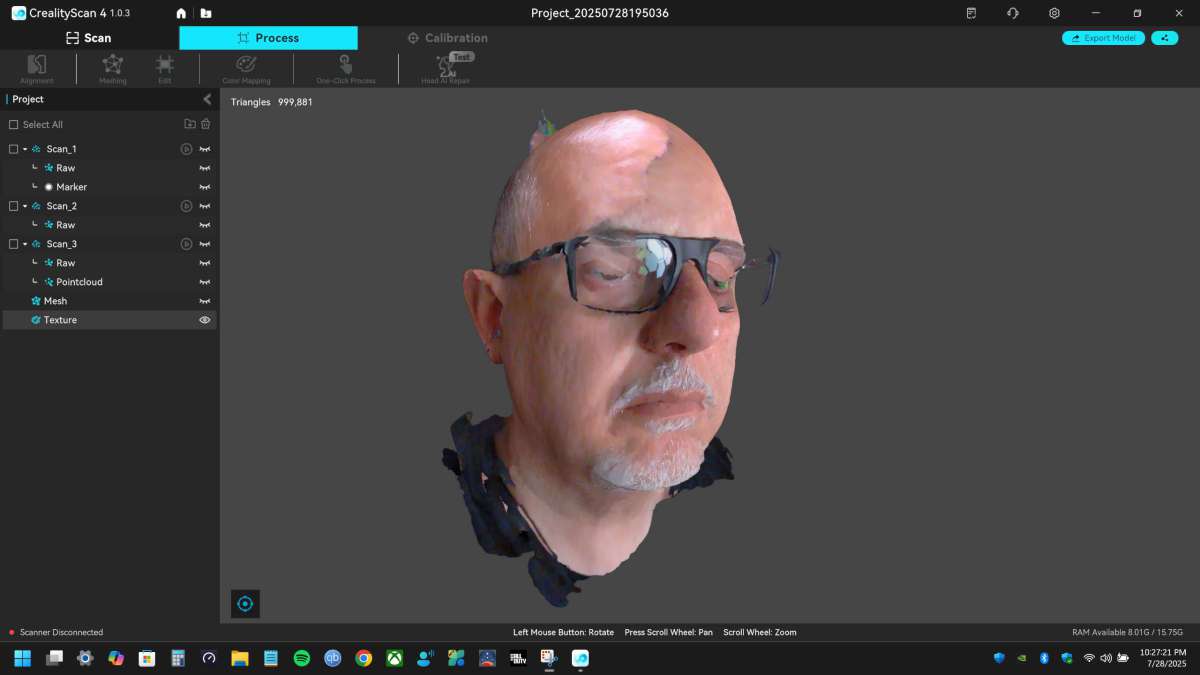
Infrared mode was a lot more forgiving when it came to the scanning process and it was much easier to get a complete scan of my entire head. However, I did have to force my arm holding the Raptor Pro into some odd, painful angles.
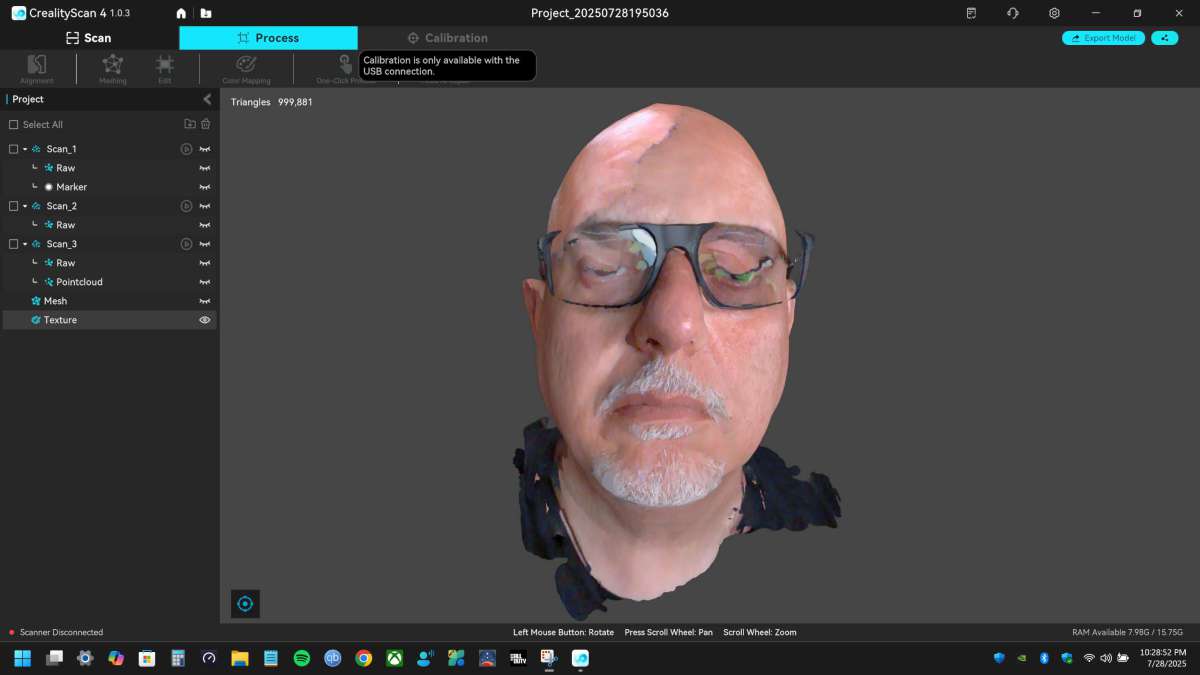
The resulting scans were OK but very inconsistent. Some areas had a lot of great detail and others were incomplete.
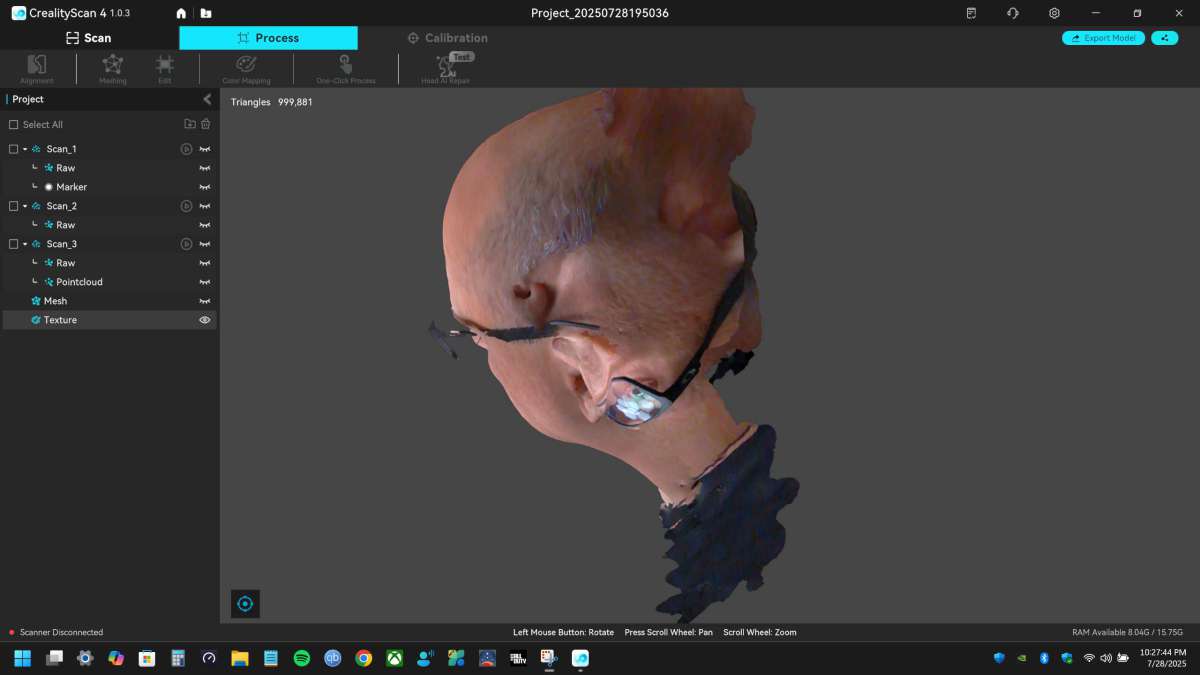
As with the truck model in laser mode, the infrared mode produced duplicate models on top of the original, resulting in some disturbing body horror imagery.
I tried to clean up the head model manually like I did with the other models, but it proved to be very difficult.
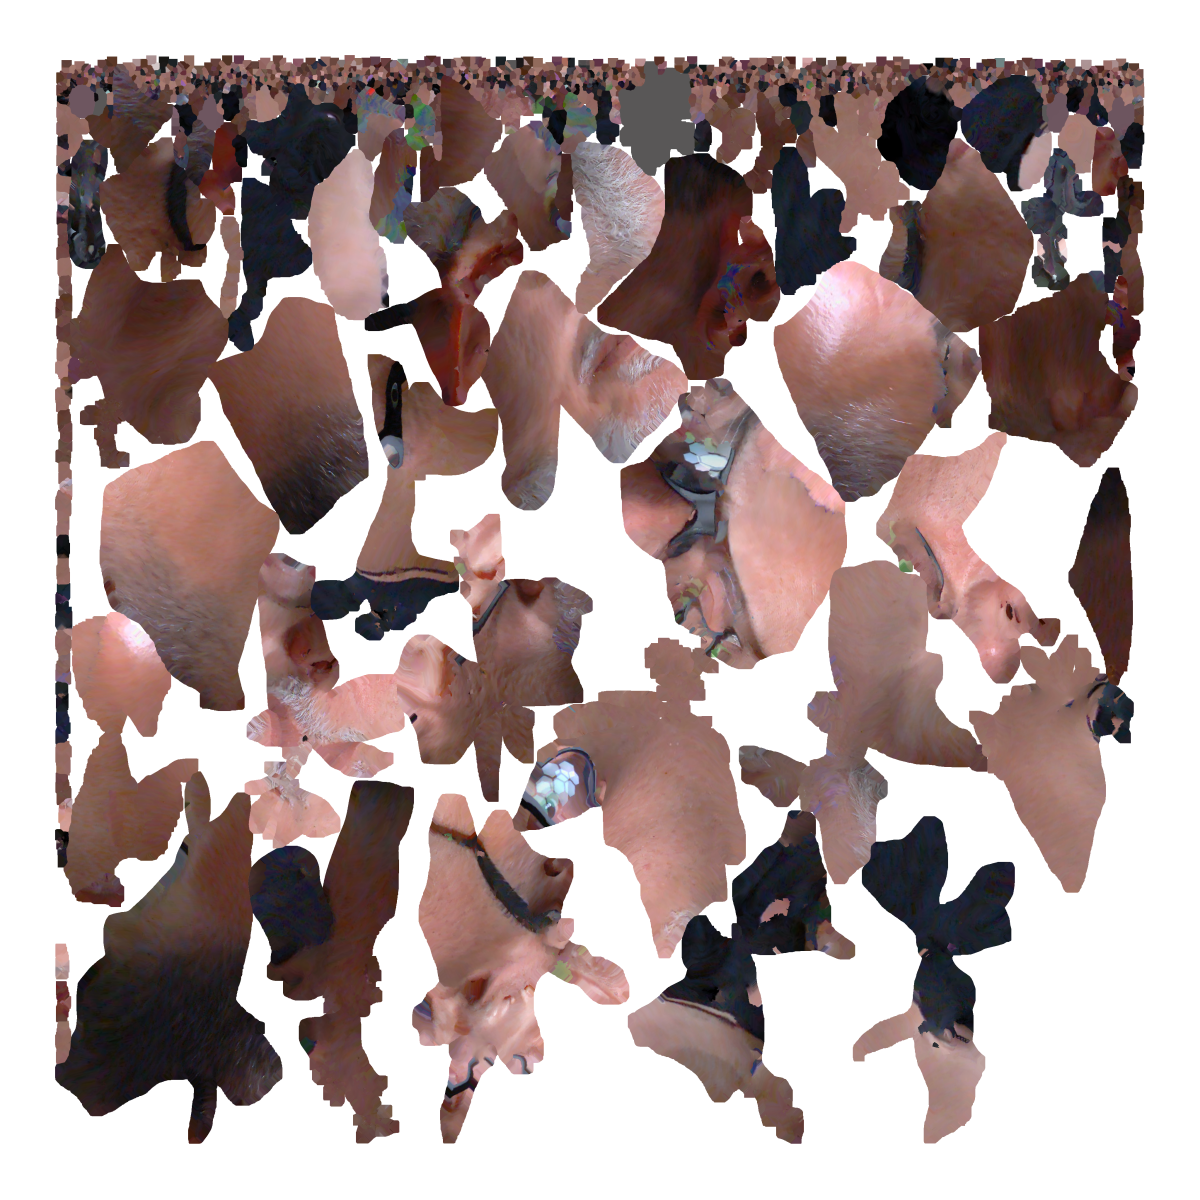
The color map produced by the scanning software was impressive, but also most likely would need more data to be fully completed.
I tried scanning without my glasses on since reflective materials can be problematic.
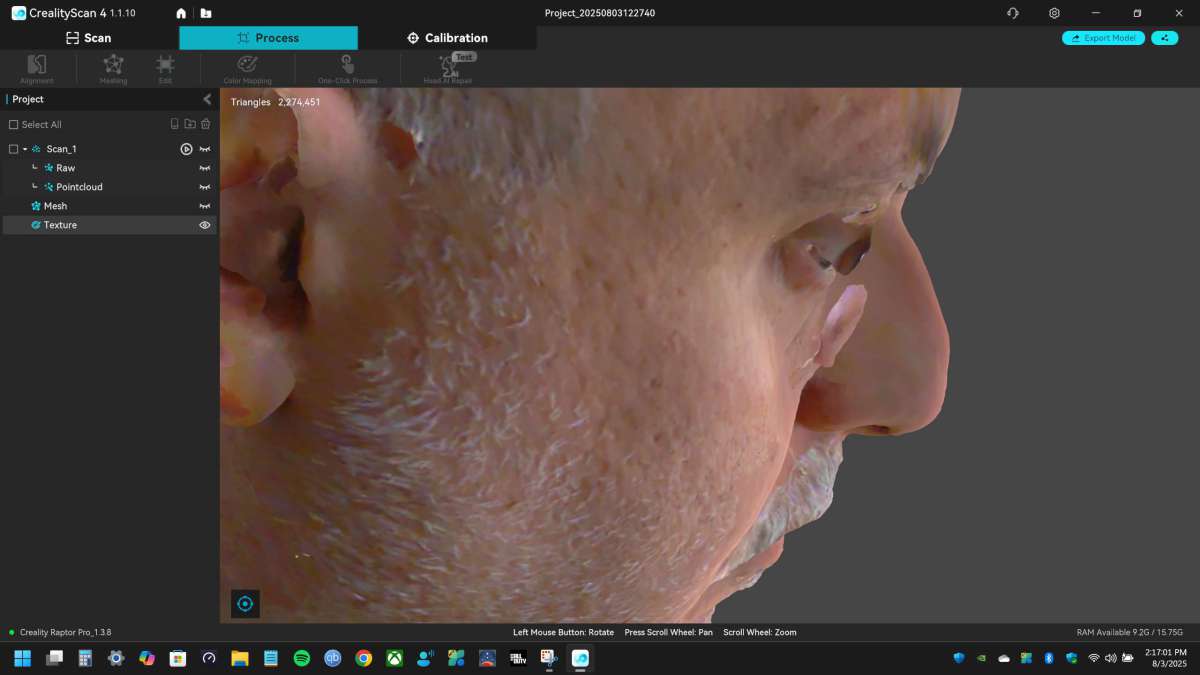
The results were slightly better but there were still a bunch of anomalies like a distended eyeball and several weird facial appendages.
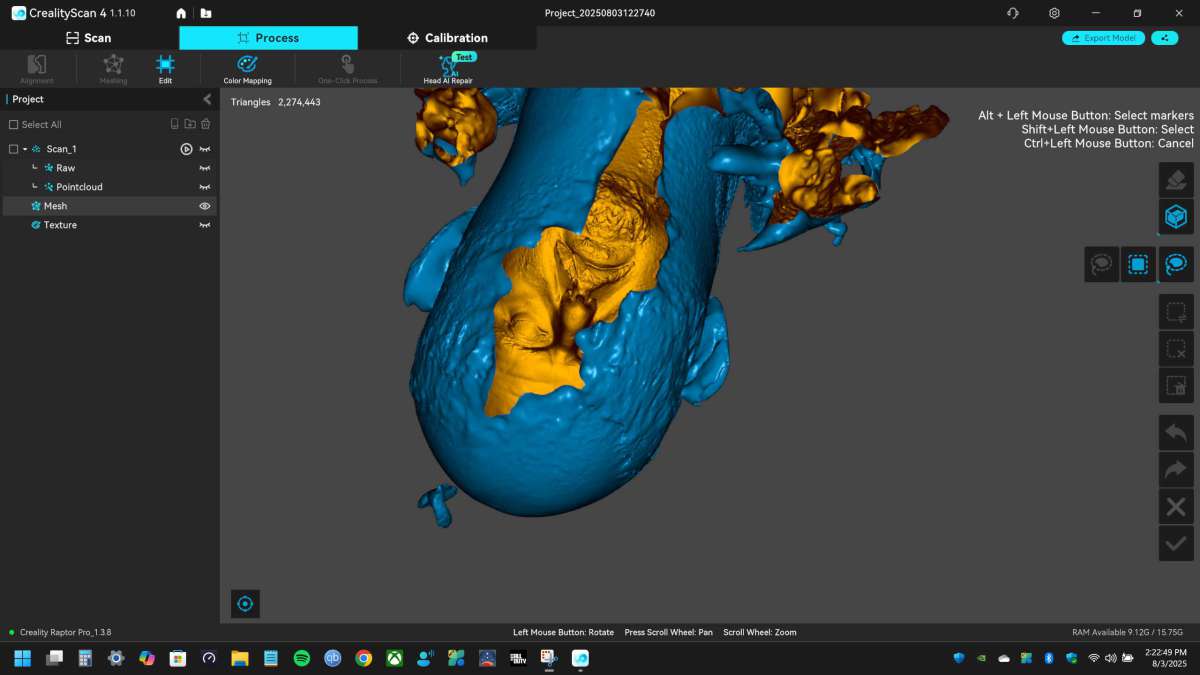
The final model the Raptor Pro produced might be useful with a lot of editing and modification, but again the time spent correcting the scan devalues the whole process.
Final thoughts
The Creality Raptor Pro 3D Scanner is a powerful tool that combines professional-grade accuracy with user-friendly design. At $1,799, it’s a significant investment, and it does offer features and performance to justify the price. However, the steep learning curve, inconsistent output, and unreliable accuracy make it difficult to recommend for those new to 3D scanning. Scanning, merging, and refining my models took as much time or more than modeling them from scratch. If the price drops and you’re willing to learn 3D scanning the hard way, the Raptor Pro could be worth considering.
What I like about the Creality Raptor Pro 3D Scanner
- Easy setup straight out of the box
- Comes with a hard case
- Includes two sizes of adhesive reflective markers
What needs to be improved?
- Very difficult to achieve a clear scan
- Instructions and guidance are severely lacking
- Wireless module should be included at this price
Price: $1899.00
Where to buy: Creality and Amazon
Source: The sample of this product was provided for free by Creality. Creality did not have a final say on the review and did not preview the review before it was published.
Check out these other Creality reviews!
- PioCreat HALOT-X1 Resin 3D Printer, Auto Feed Unit resin management system, and Creality Washing/Curing Machine review
- Creality Falcon2 Pro 40W laser engraver review – a great laser engraver with tons of features

Gerber Gear Suspension 12-in-1 EDC Multi-Plier Multitool with Pocket Knife, Needle Nose Pliers, Wire Cutters and More, Gifts for Men, Camping and Survival, Grey
9% Off