REVIEW – I’ve reviewed a few laser engravers in the past and we get offers to review others all the time, but they don’t seem to differ much. Most all of them have the same form factor, offer basic functions, and a few safety features. So, I haven’t thrown my hat into the ring to review any for some time. Then Toocaa offered their L2 laser engraver and cutter and I was intrigued. Yes, it has the same form factor, but this one is enclosed, lit inside, and looks like a serious piece of equipment. Needless I was excited once it finally arrived. I was ready to play! Is it really all that different from any other I’ve tried? Read on below to find out. You may as well. You’re already here.
What is it?
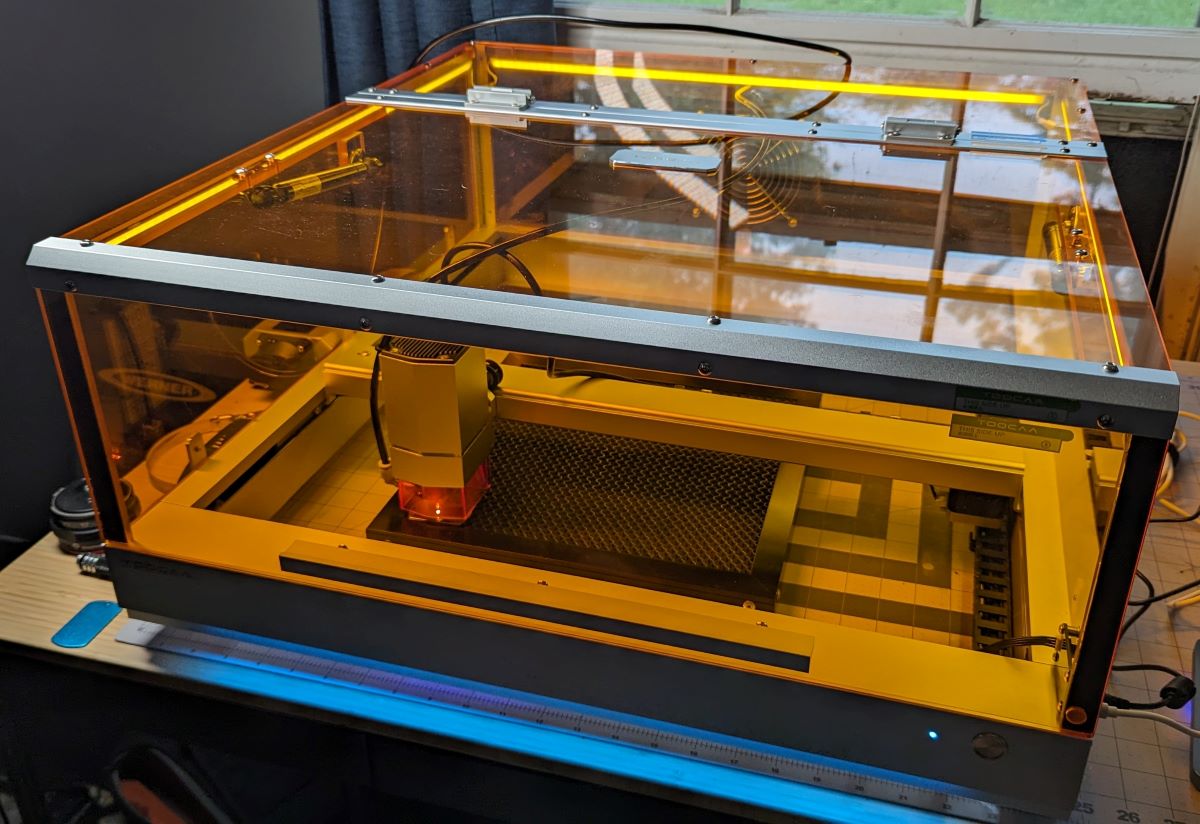
The Toocaa L2 is a 10W or 20W diode laser engraver, depending on the package you choose, that cuts and engraves numerous materials with safety in mind.
What’s included?
- Machine framework with all motors, tracks, and wiring installed
- Parts to build and install the cover
- Tool kit with installation harware
- Fan kit
- Power adapter
- 10W diode laser module
- User Guide
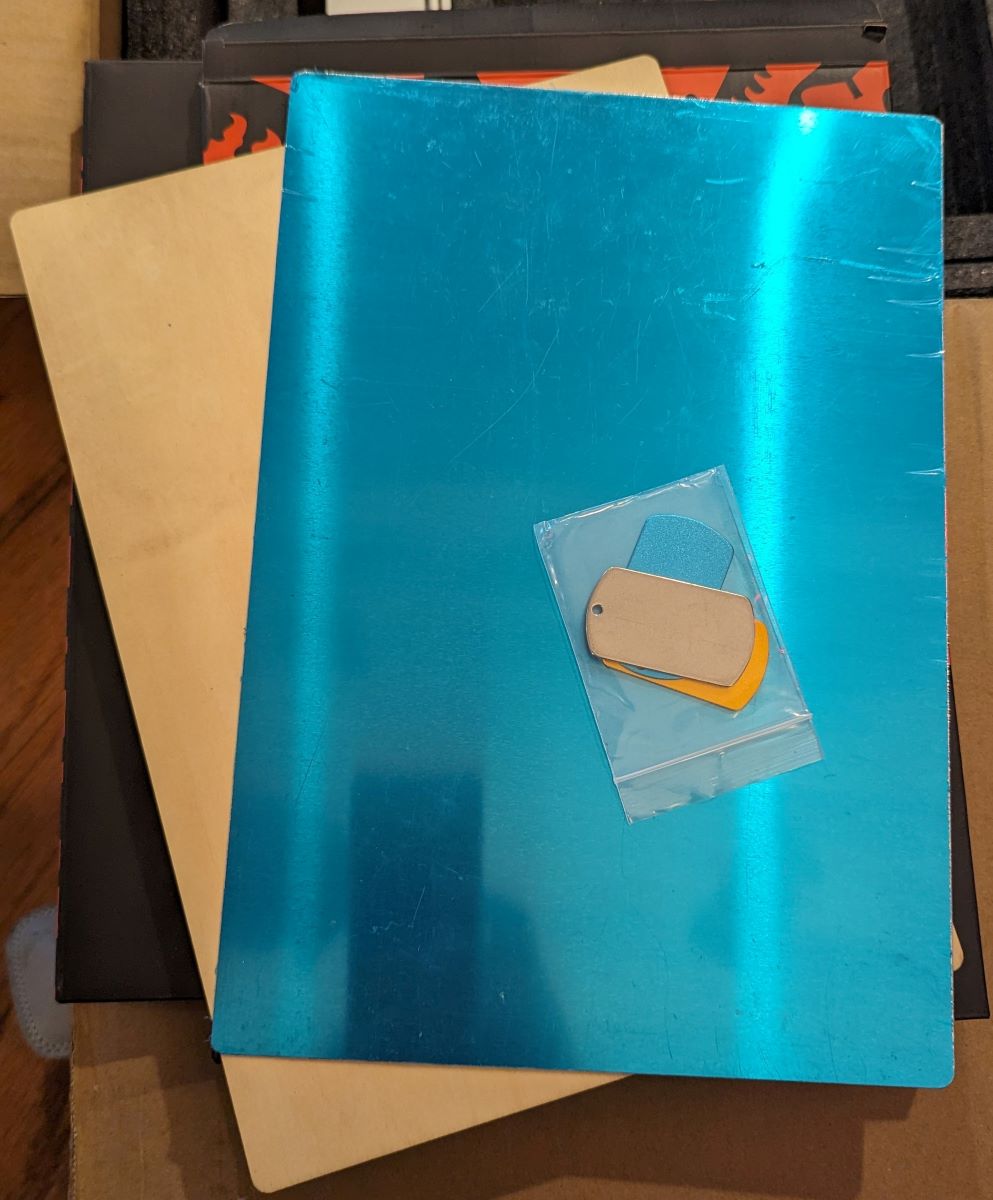
- Consumables kit
- Extra laser window mirror
- USB A drive lock
- TF card and reader
- Goggles
Tech specs
Click to expand
Spot size for 10W: .075*.18mm
Work area: 415mm*395mm
Engraving speed: 400mm/s
Supported Software: Lightburn/LaserGRBL
OS: Windows, Mac, and Linux
Connection method: USB C and TF card
Machine size: 645*617*306mm
Machine weight: 13kg
Machine material: Aluminum alloy
Enclosure material: Acrylic plate and aluminum alloy
Design and features
Let’s start with the safety features. I haven’t used a laser engraver with this many safeguards in place before. The first one is what Toocaa calls its smart enclosure. There’s a switch on the front that stops the machine when opened if it’s running.
That’s great if you have precocious kids who might be tempted to see just what is going on in there.
Next, there’s a flame detector and I can attest that it indeed works. I was trying to engrave and then cut some leather. It engraved just fine but once it started to cut the leather, it started to burn. The L2 stopped and the air assist was able to blow it out. I didn’t get the leather cut out like I wanted but I also didn’t have a house fire. I think I did well with that trade-off. Then you have a USB interlock. There’s a USB A key that is inserted into the L2 in order to operate. Without it installed, it simply won’t work. Next there’s a gyroscope detector. So if the L2 isn’t level or is moving, it’s disabled.
The Toocaa L2 laser engraver I received came with the 10W diode laser.
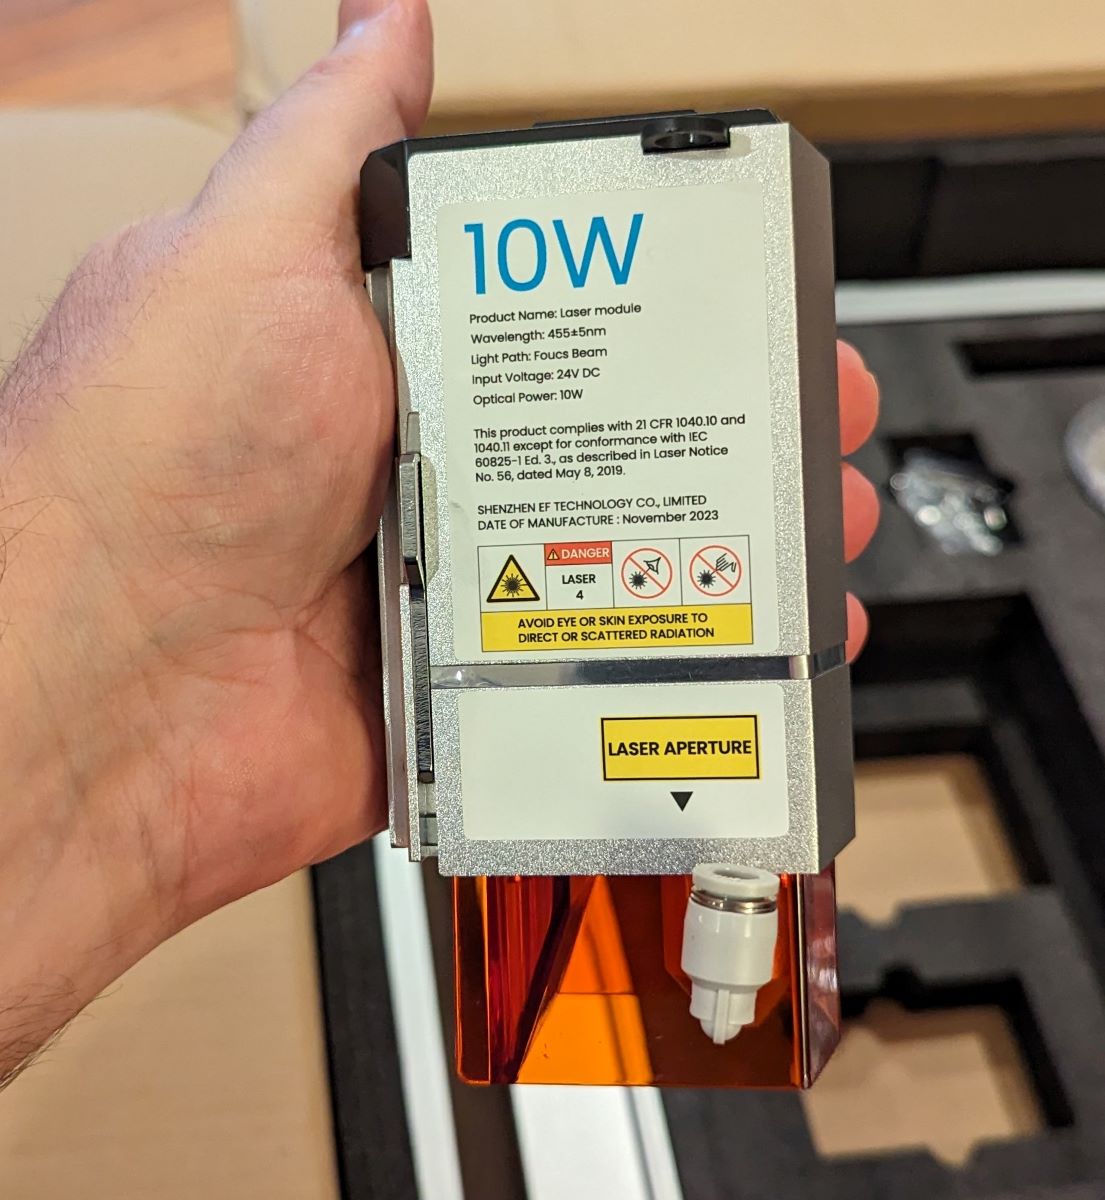
With this module, you can cut and engrave several different types of material, such as several types of wood, fabric, canvas, plastic, and dark acrylic except blue. They even include some materials in the included consumables pack.
They also offer the L2 with a 20W laser module or you can purchase the module separately. I’d love to have both just for comparison, although I’m sure the 10W will do almost everything I want to do.
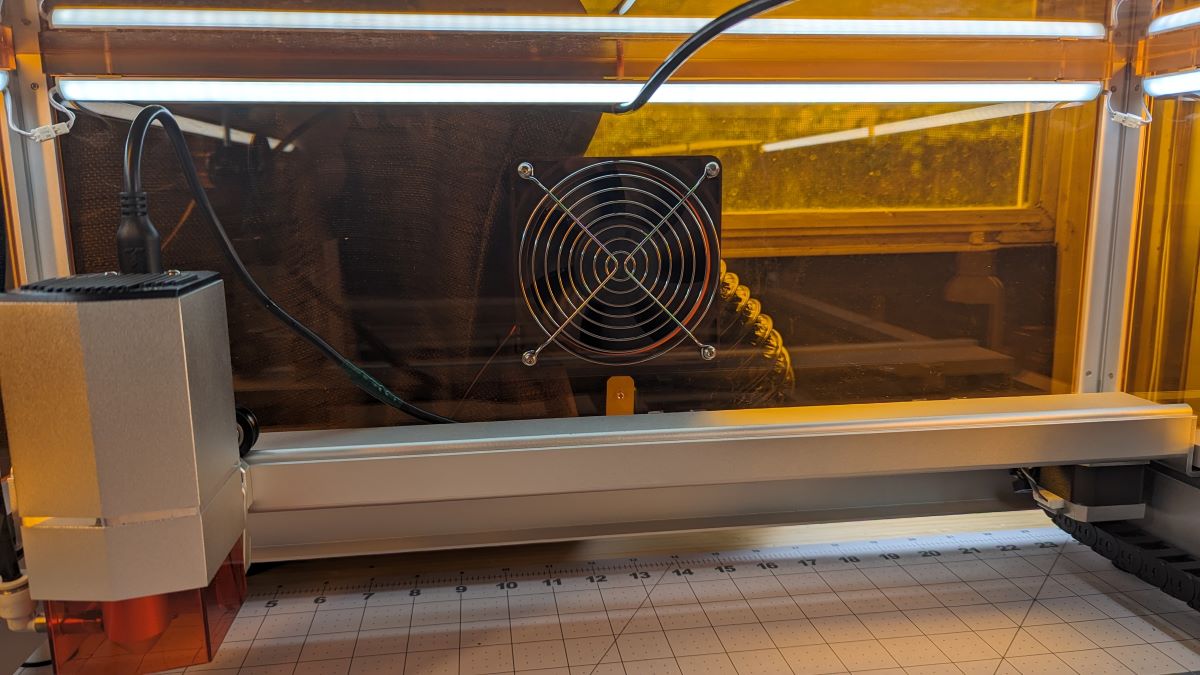
Next, there’s the exhaust fan. It doesn’t look like much, but man, is it strong. This, along with its hose, did a fantastic job of pulling all the smoke and fumes out my window. The only space I have for it currently is in my office so needless to say, if there were no exhaust, I couldn’t run it. It’s so good that there’s barely even any smell when running it. If I’m engraving wood, you can smell some smoke, but it’s faint. I was really impressed but it is loud, so be prepared.
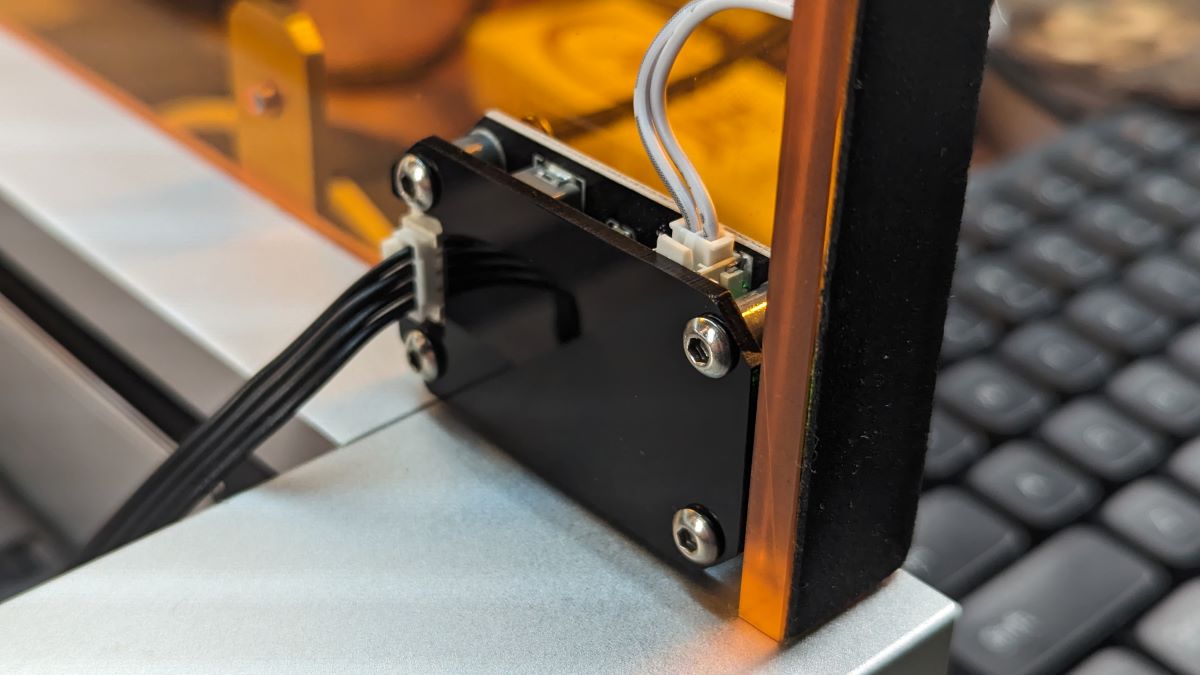
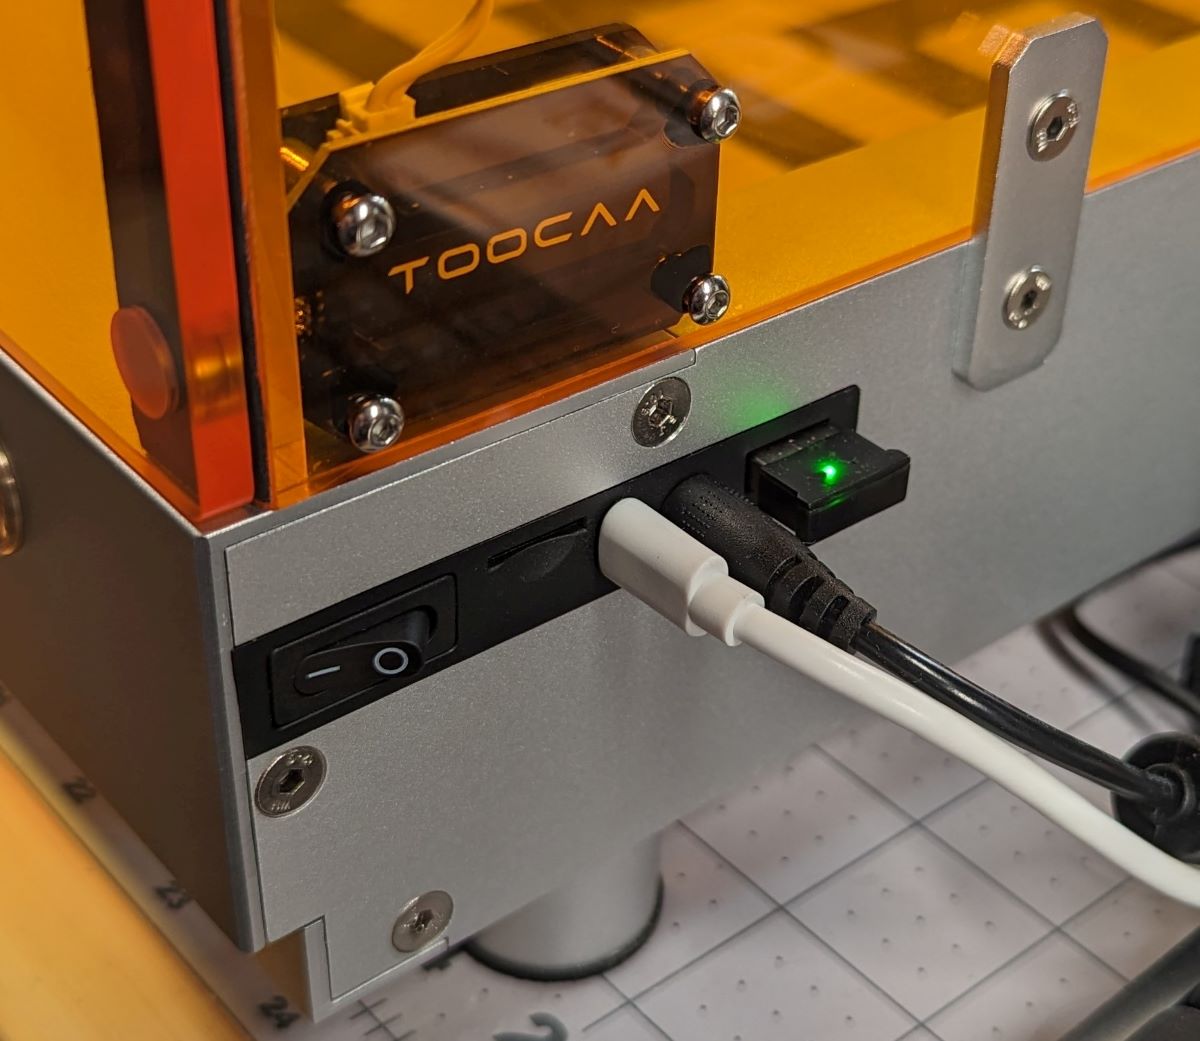
Another feature I want to mention is the location of all the ports and switches. Everything you need to reach is on the right front side.

As you can see, the power switch, TF card reader, USB C port, power, and USB lockout port are all within easy reach. Here’s what it looks like connected, powered on, and with the USB lockout installed.
A couple of other items I received with my unit were the air assist and the honey comb working panel. I don’t think these are included with the L2, although I could be wrong.
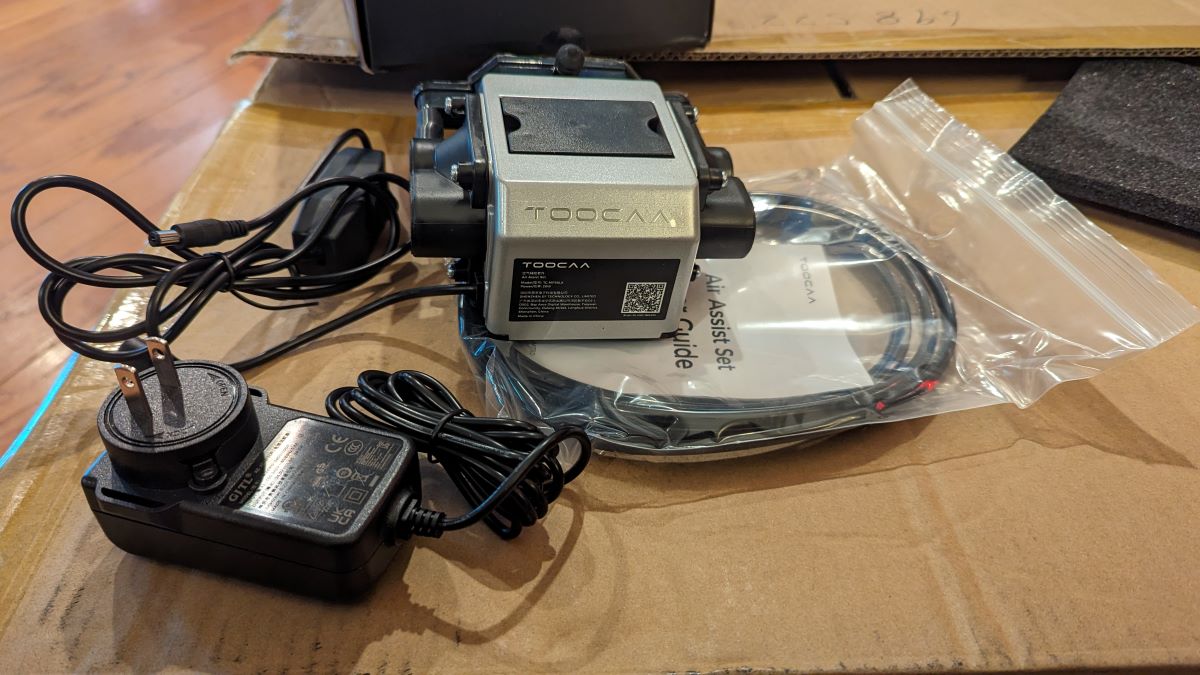
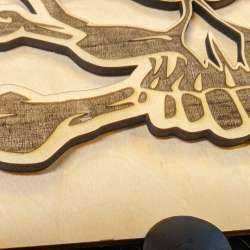
You’ll definitely want the air assist if you’re wanting to cut wood. It provides a cleaner cut. I have an example of the cuts I was getting in the gallery below.
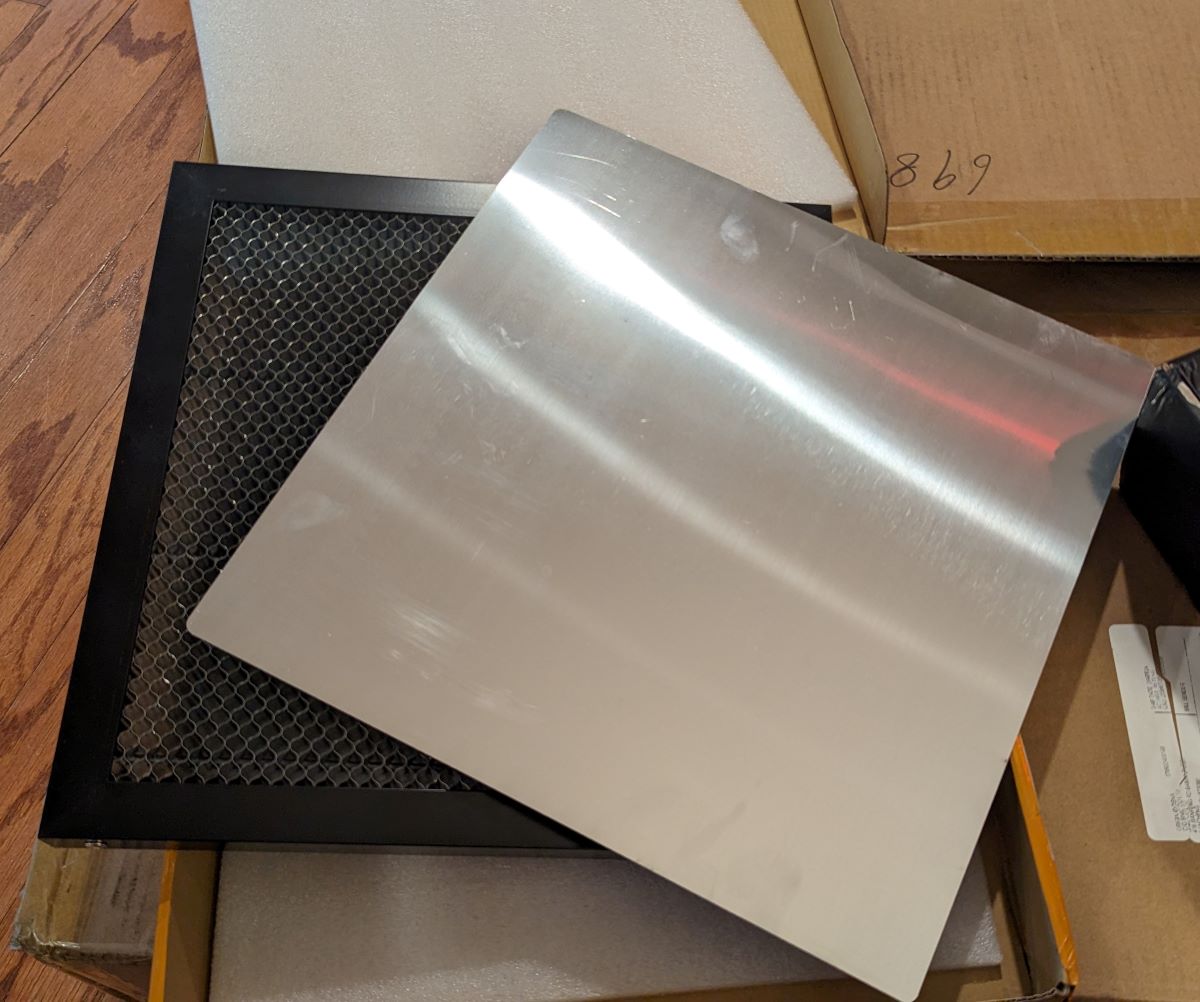
The honeycomb working panel may not necessarily be a necessity, but I like to use one. One it lifts the item off the table top, keeping it from getting too hot, and two, it allows for better airflow. I find this works better for the air assist.
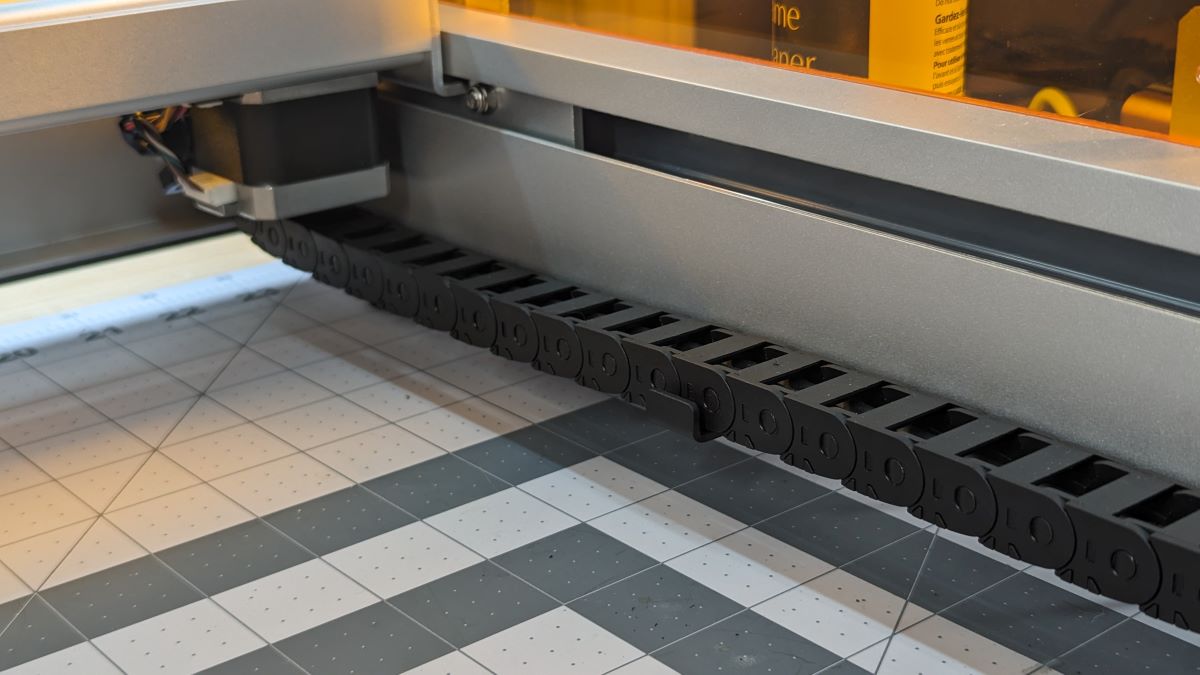
I think Toocaa did a wonderful job with the L2’s build. The guild rails and wheels are all enclosed, keeping debris from gumming up the tracks while also protecting the belts.
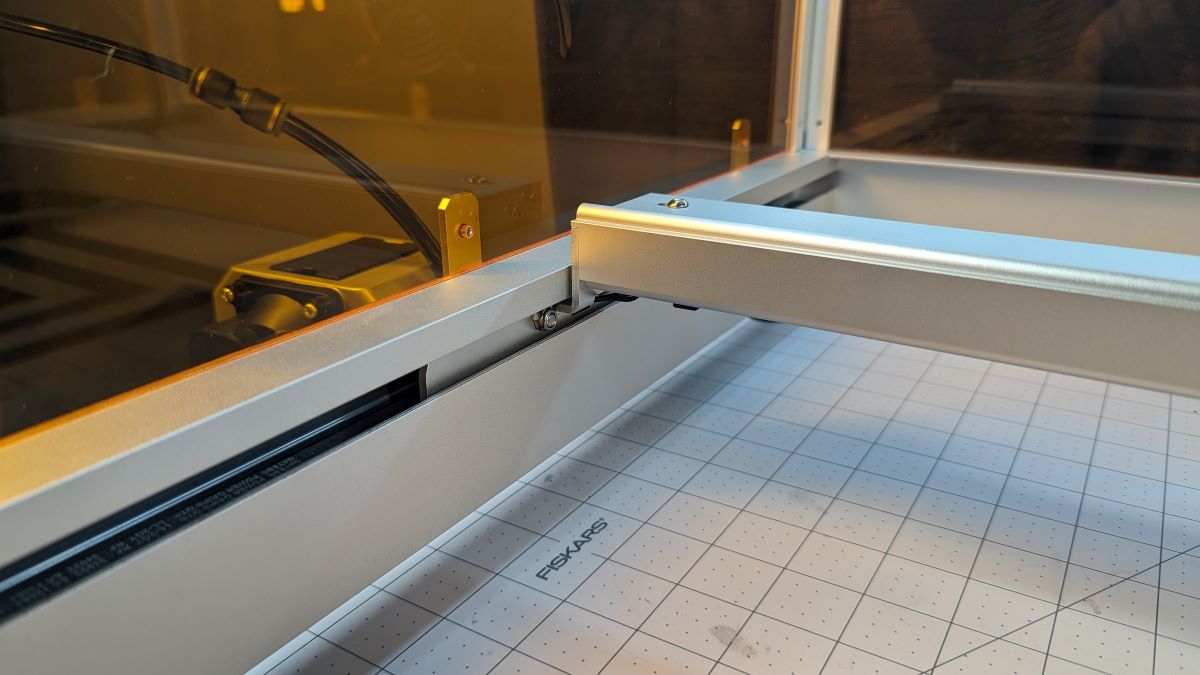
And finally, they’ve already installed and routed the cabling through this segmented, enclosed cable trough, keeping it all out of the way. This way you don’t have to worry about running it yourself and then using tape or cable ties and hoping you gave yourself enough slack so everything works right.
Assembly, Installation, Setup
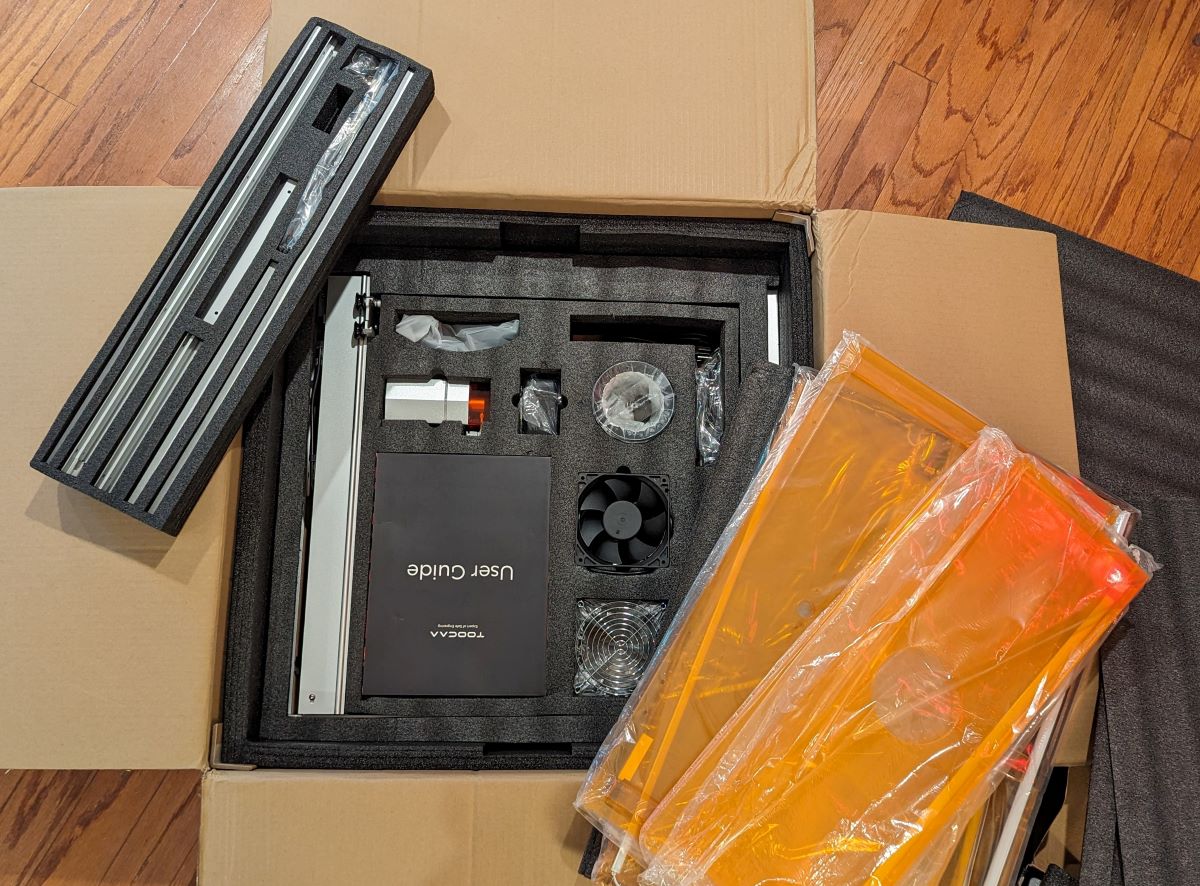
Some assembly is required for the Toocaa L2 laser engraver. You’ll have to assemble the enclosure and connect some cables. It is a breeze, though. The included manual is excellently written, with perfect illustrations showing you what you need to do. I was impressed with it. There’s a PDF copy included on the TF card, and it can be found on their site.
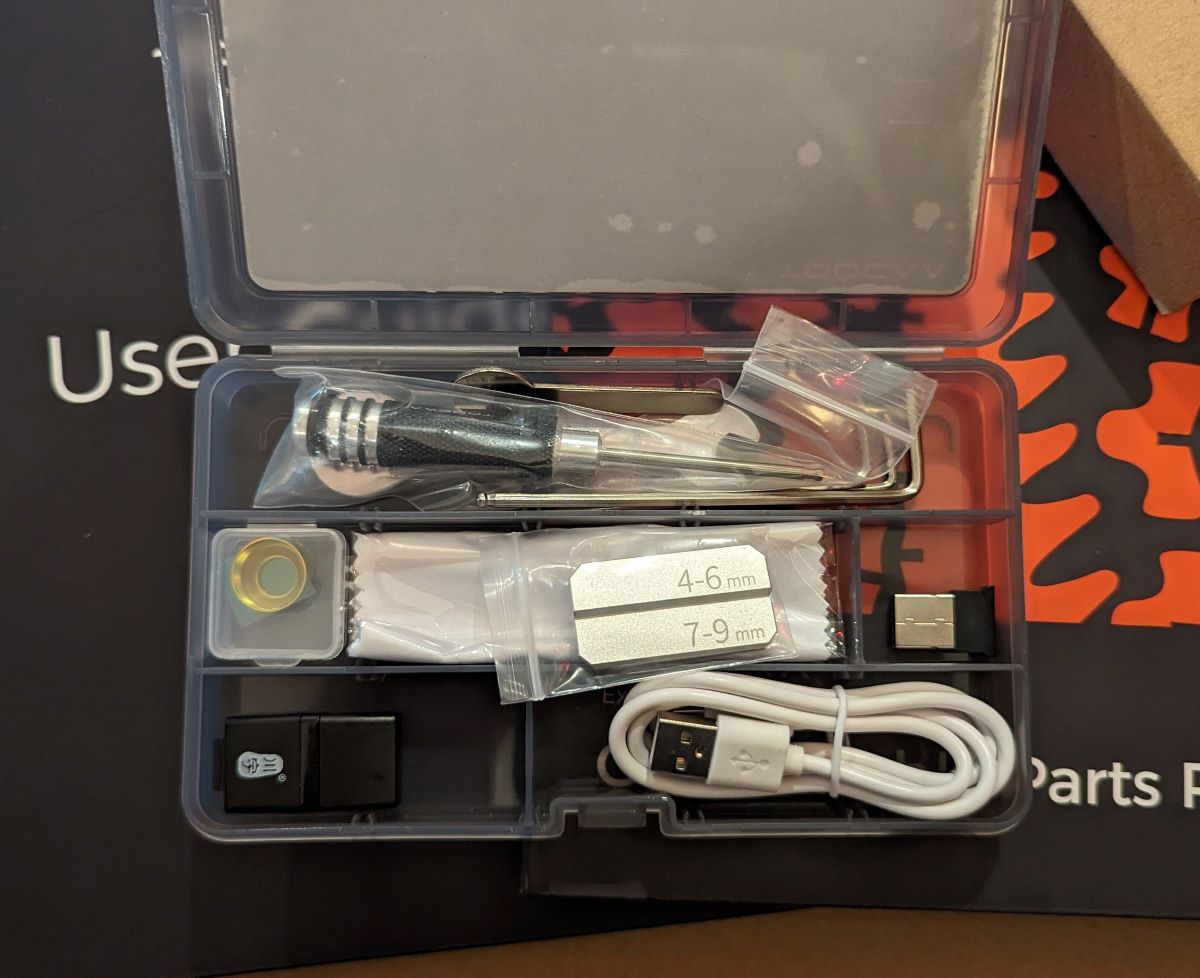
The included toolkit isn’t anything to write home about but it got the job done just fine. I was able to put it all together by myself with no trouble at all.

It also helps that each bag of hardware was labeled what it was and what it was used for. Thank you, Toocaa but taking out any guesswork.
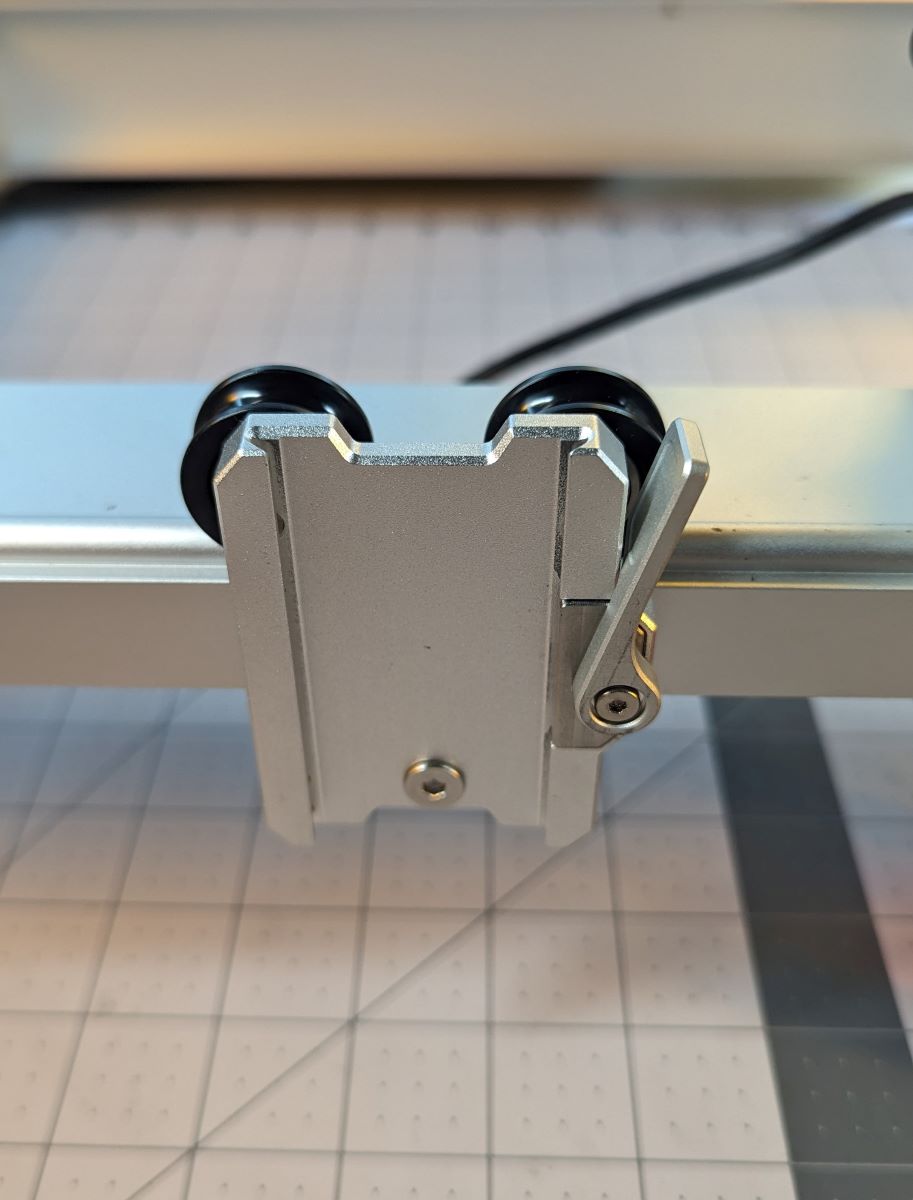
The laser module was simple to install as well. It simply slides into the piece above. Then, you lower the lever to lock it in place. The laser is connected to the system through a USB C cable that’s prewired and routed. All I had to do was connect it and screw in two screws to secure it.

The Toocaa L2 laser engraver has two operating methods: offline and online. To use it offline, you can use the included TC card, insert it into the reader on the side of the unit, and press the button to start. All of this is described in the user manual. I didn’t want to do that for every project and I already have Lightburn so I chose to use the online method. This method was not in the manual so I had to go to the Toocaa website to find it. I will say the website can be difficult to navigate when looking for these types of instructions. Typically, I would go to the support section link at the top of the page and search for it. After not finding anything there, I discovered I had to go to their Help Center page. Its link is all the way at the bottom and leads you here. With that out of the way, I was able to find the instructions I needed. I connected the L2 to my PC via USB C and added it to Lightburn with the required files supplied on the included TF card.
Performance
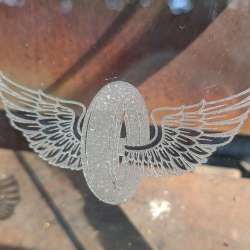
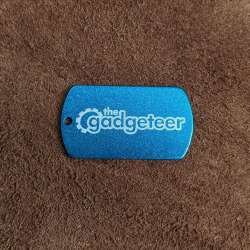
I love the Toocaa L2 laser engraver. I think it’s the easiest laser engraver I’ve used. There’s always a learning curve with a device like this because to get the full benefit, you’ve got to learn some third party software. In my case, I purchased Lightburn and can stumble my way through it enough to do what I want. The great thing about the L2 is it’s always seen by Lightburn, meaning, every time I go to use it, Lightburn can communicate with it. I’ve had a couple of other laser engravers that would stop communicating. Then I’d have to remove them altogether and reinstall them. I’ve had no such problems with the L2. It also helps if you know the settings you need to use with a 10W laser and your selected material. Luckily, YouTube can help you out. I’ve learned a lot from the Louisiana Hobby Guy. He also has a forum where if you join, you can download laser libraries and art. The coolest feature I found while using the L2 was the ability to physically move the laser module to where you want it to start. I can bring the laser to my material by moving it with my hand and starting it there. All the other laser engravers I’ve seen have to start at there home position or have to be moved through software. This made it a million time easier for me to use. Here are some examples of what I was able to do with the L2:


See it in action
The only problem I had with the Toocaa L2 laser engraver was with the USB C cable that attaches to the laser module. I didn’t notice that I had a twist in the cable when I installed it which caused the cable to get in the way of the laser module carriage as it got closer to the front of the machine. It was enough of a problem that it got caught in the rollers and cut the insulation on the cable.
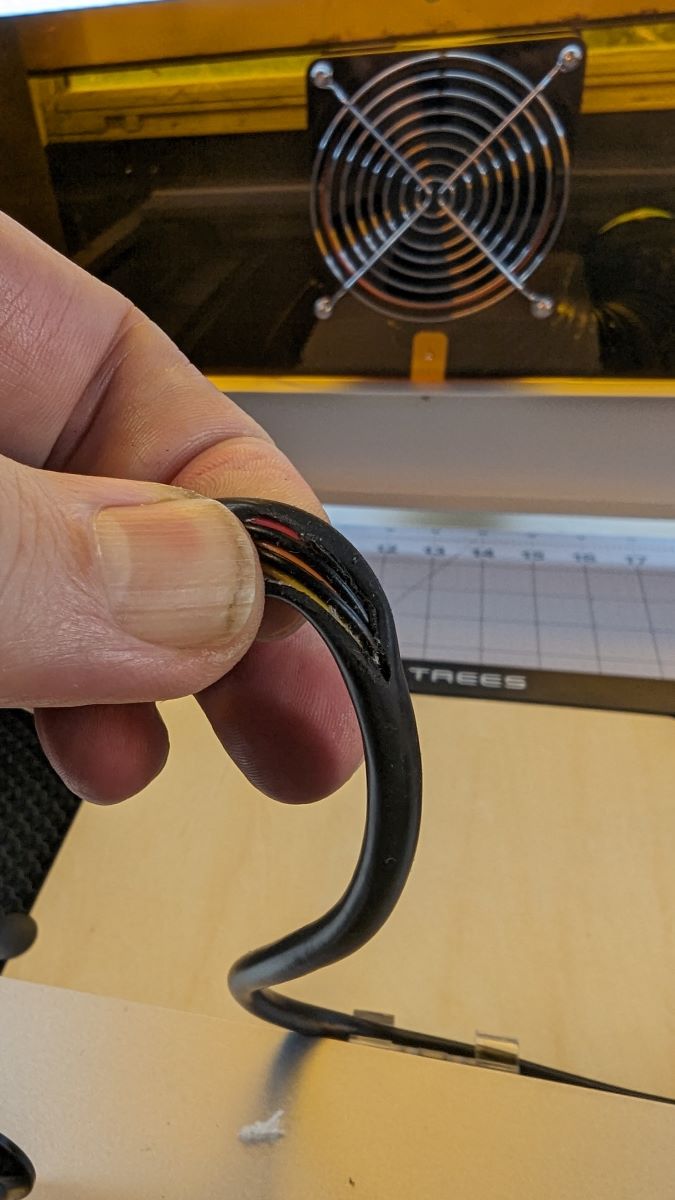
It didn’t damage any of the conductors so I taped it up. I then disconnected the cable, flipped it around, and reconnected it. The L2 has worked fine ever since. Toocaa has said they’re shipping out a new cable so I can swap it out. Thanks again, Toocaa!
What I like about Toocaa L2 laser engraver
- Ease of assembly
- Ease of use
- Great documentation
- Responsive support team
What needs to be improved?
- Online support document location; it wasn’t intuitive to find the documents I needed
Final thoughts
I absolutely love the Toocaa L2. Like I’ve said, I’d love to try the 20W laser module to see what more I could do with it. $850 is nothing to sneeze at. I get it. But if you’re looking for a great diode laser engraver, I think you should give Toocaa a consideration. This is a great device considering all it can do and all of its safety features. Now, back to engraving more DUNE stuff!
Price: $849
Where to buy: Toocaa
Source: The sample of this product was provided for free by Toocaa.Toocaa did not have a final say on the review and did not preview the review before it was published.

INIU Mini Portable Charger, Small 45W PD Power Bank, 10000mAh USB C in&Out Fast Charging Pocket Size Battery Pack, Travel Essentials Powerbank for iPhone 17 16 15 14 Pro Air, Xiaomi, Samsung S24 etc
(as of March 17, 2026 10:20 GMT -05:00 - More infoProduct prices and availability are accurate as of the date/time indicated and are subject to change. Any price and availability information displayed on [relevant Amazon Site(s), as applicable] at the time of purchase will apply to the purchase of this product.)