REVIEW – When the opportunity to review one of the 700 Series E-Bikes from Ride1Up, an E-Bike company started 5 years ago in San Diego created to build affordable E-Bikes with high quality parts, I jumped at the chance. How would the 700 Series compare to a previous E-Bike I reviewed and how would it compare to the E-Bike I purchased for myself after that initial review?
What is it?
The Ride1Up 700 Series E-Bike is a class 3, full size (non-foldable) hub-driven, 8-Speed E-Bike.
What’s in the box?
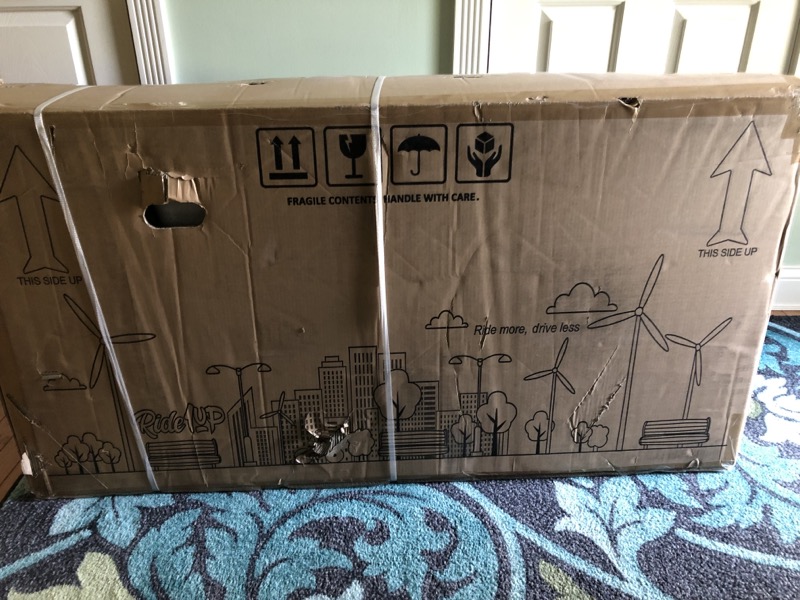
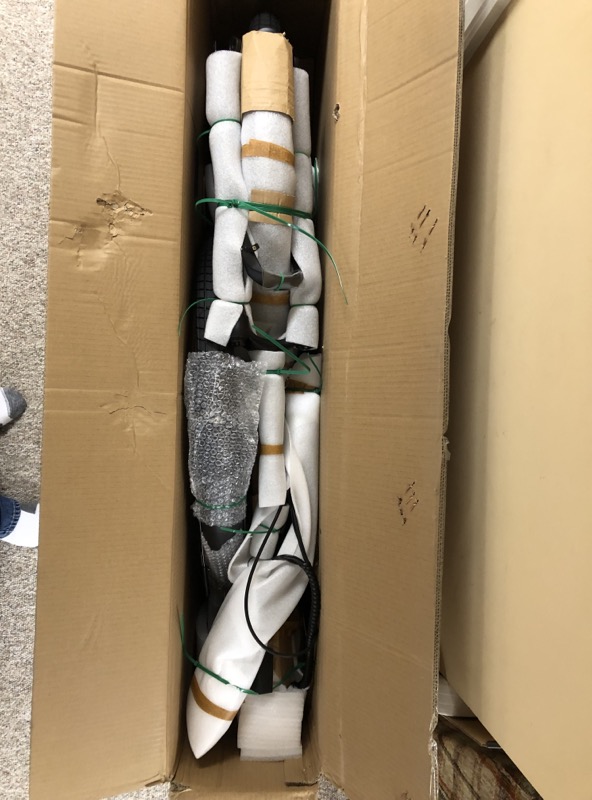
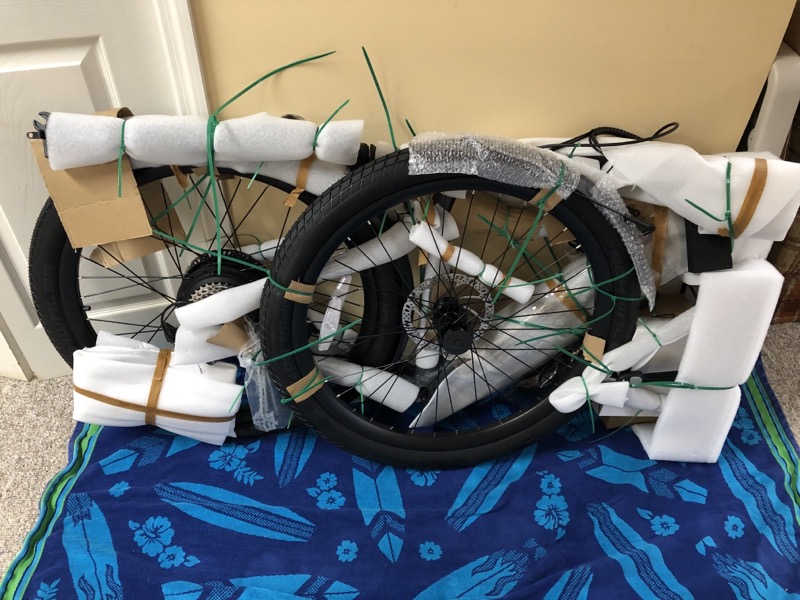

As is evidenced by two of the above images, the Ride1Up 700 Series bike is tightly packed in its shipping box.
- The Ride1Up 700 Series E-Bike in compressed form (See Image)
- Assorted Bike Parts, Seat, Back Rack, etc.
- Battery Charger
- Bike Tool Set – Very nice
- Ride1Up Branded Stocking Hat
- E-Bike Owners Manual – Magazine quality, Color Printed
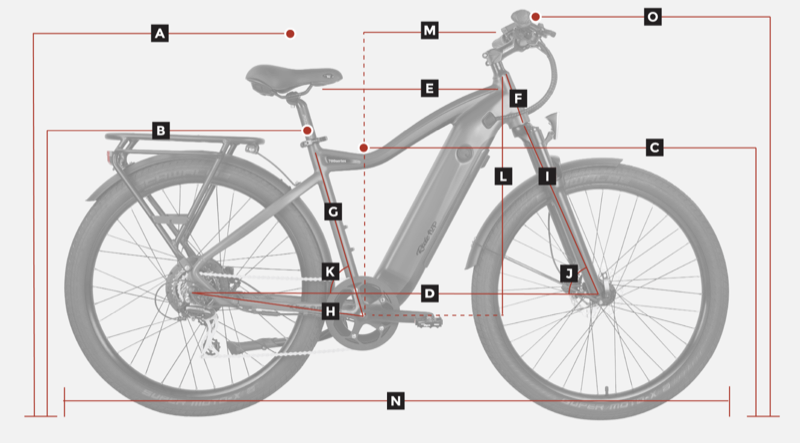
Hardware specs
Reference the following photo in the table that follows.
| Bike Weight | 62lbs |
| Weight Capacity | 300lbs |
| Rider Height Range | 5’5″-6’4″ |
| A – Maximum Seat Height | 40in |
| B – Minimum Seat Height | 33in |
| C – Stand-Over Height | 29in |
| D – Wheelbase | 44in |
| E – Top Tube Length | 23in |
| F – Head Tube Length | 6in |
| G – Seat Tube Length | 19in |
| H – Chainstay Length | 18in |
| I – Fork Length | 20in |
| J – Head Tube Angle | 68° |
| K – Seat Tube Angle | 70° |
| L – Stack | 25in |
| M – Handlebar Reach | 15in |
| N – Total Length | 70in |
| O – Handlebar Height |
41in |
Feature Specifications
- Motor – 48V Geared Hub Bafang Motor
- Controller – 48V18A DMHC Sine-wave
- Battery – 48V15ah Reention Rhino, 39 x 21700 Samsung Cells
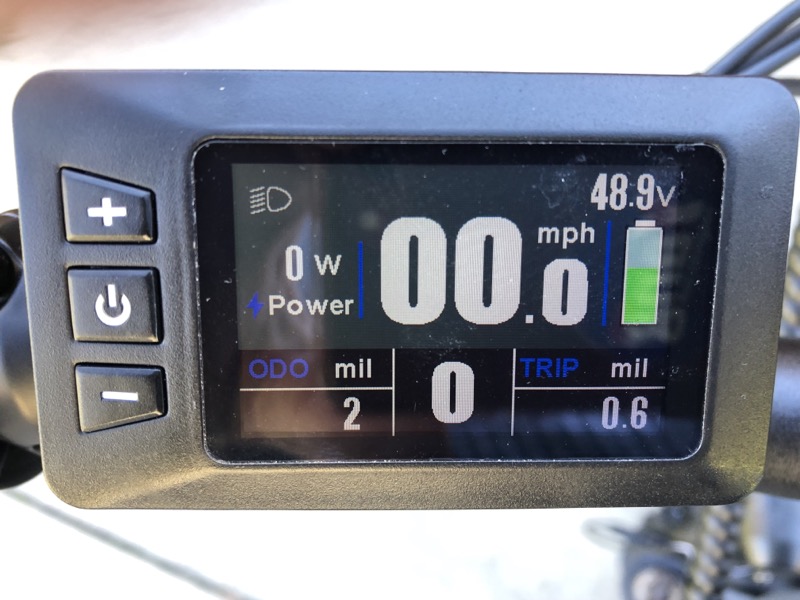
- Display – KD218 Adjustable Speed Color Display
- PAS Sensor – Integrated Sensitive Cadence Sensor PAS
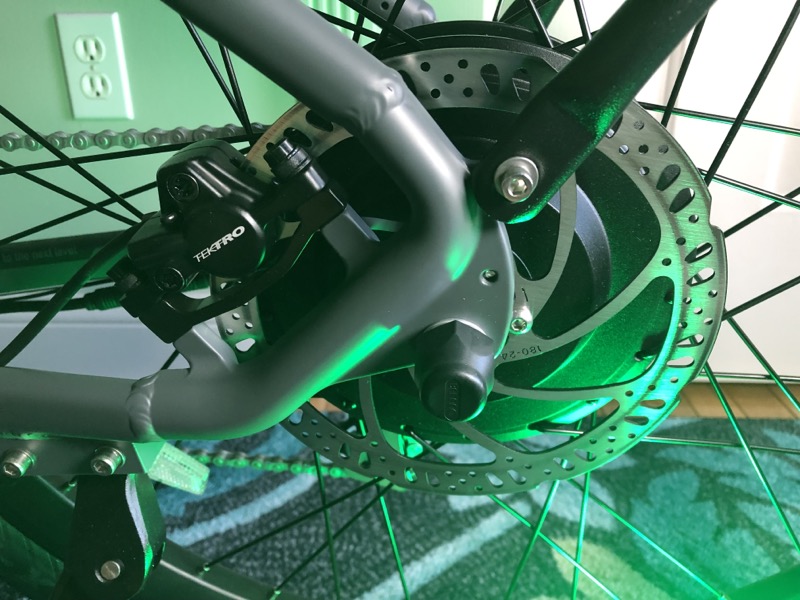
- Brakes – Tektro Dual Piston 180mm Hydraulic Brakes w/ Electric Cut-Off Sensor
- Fork – Mozo Hydraulic Lockout, 100mm Suspension Travel
- Tires – 27.5”x2.4” High Performance rated for ebikes – WTB Groov-E Tires
- Throttle – Left side Thumb Throttle
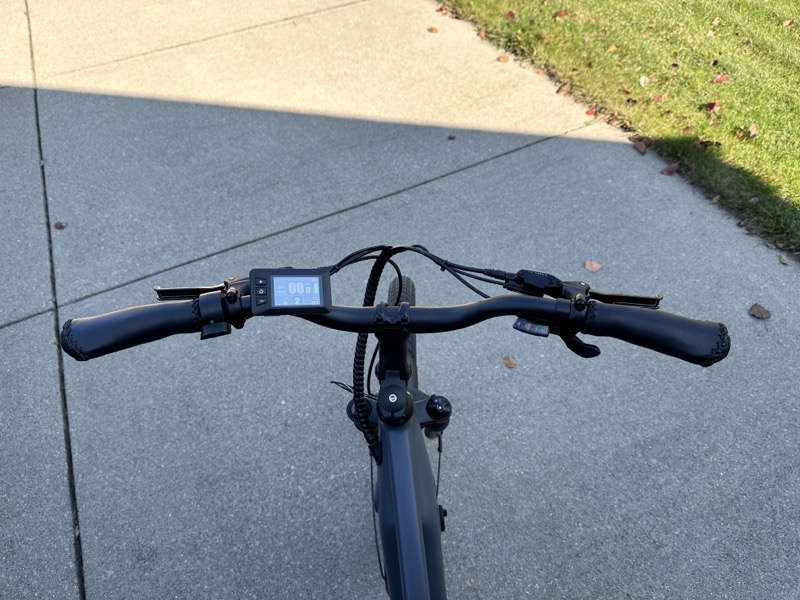
- Handlebar – ST Frame: City/Café Upright Handlebars XR Frame: Riser Bars, 31.8mm Bar, with 25mm Rise
- Grips – VELO Faux-Leather Grips
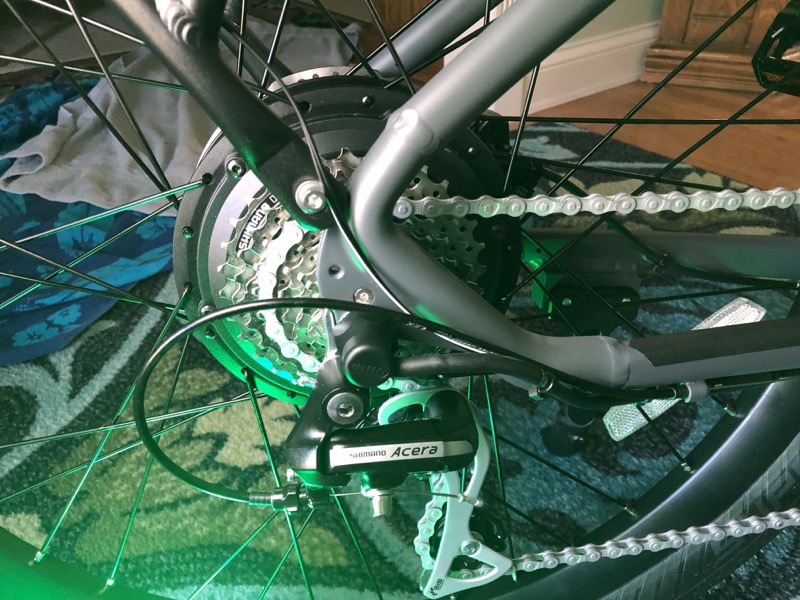
- Shifters – SHIMANO ACERA 8 speed trigger shifter
- Gearing – 45T Front Alloy Chainring
- Cassette – 11-30T Shimano Cassette
- Derailleur – Shimano Acera RD-M3000
- Chain – KMC Professional 8-Speed Chain
- Rims – 3D Double Wall Rim, 33mm Width
- Spokes – Stainless steel, 12G rear, 13G front
- Finders – Hardened Alloy Fenders
- Rear Rack – 50lbs Rated Loading Weight With Pannier Side Mount
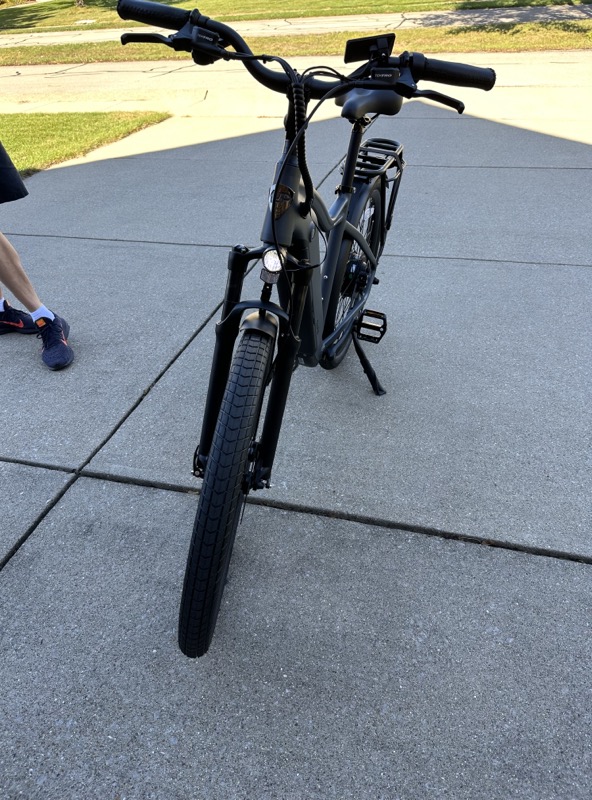
- Front light – Buchel Shiny 80, Ultra-bright 80 lux headlight
- Rear light – Spanninga Luceo rearlight
- Saddle – Selle Royal Freeway Plush Gel
- Seat Post – Promax 31.6mm x 350mm Adjustable Angle
- Pedals – Wellgo Alloy Pedals
- XR Stem – PROMAX Adjustable 0-60° 90mm 31.8mm Bar Clamp
- Water Bottle Bosses and Chainstay Guard
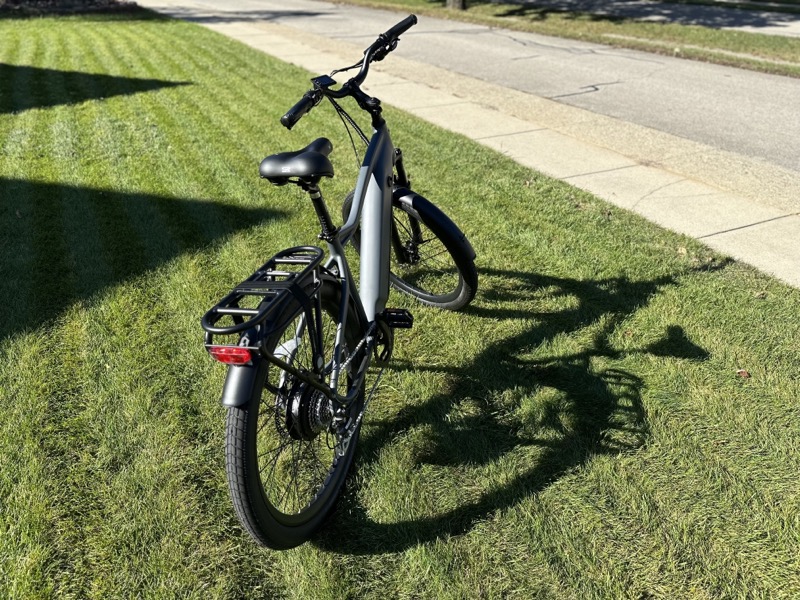
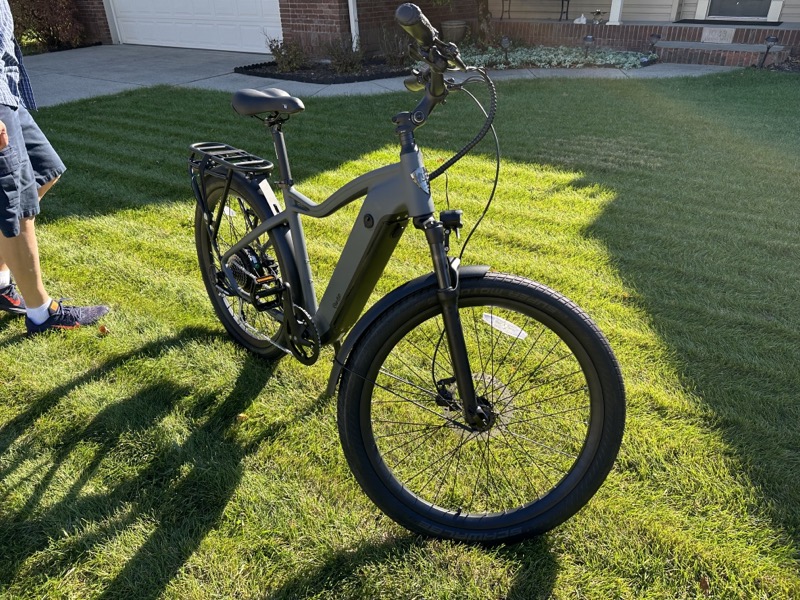
Design and features
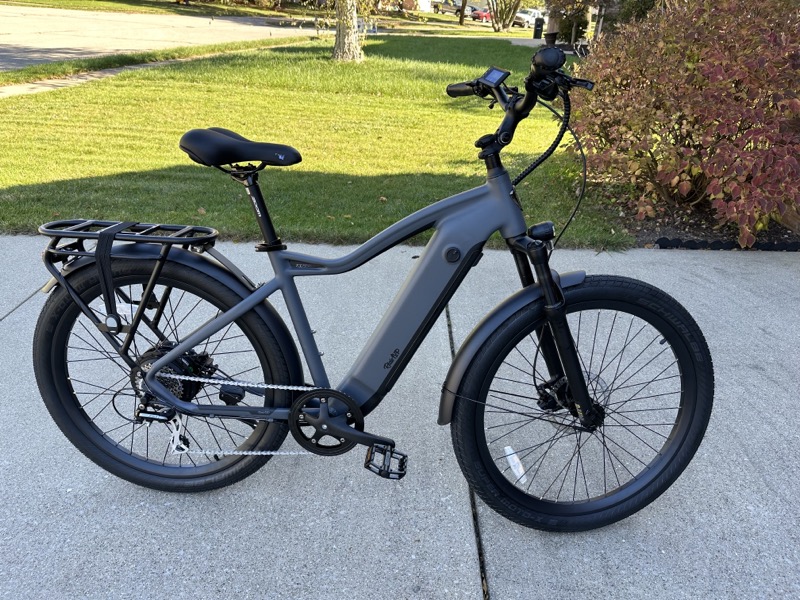
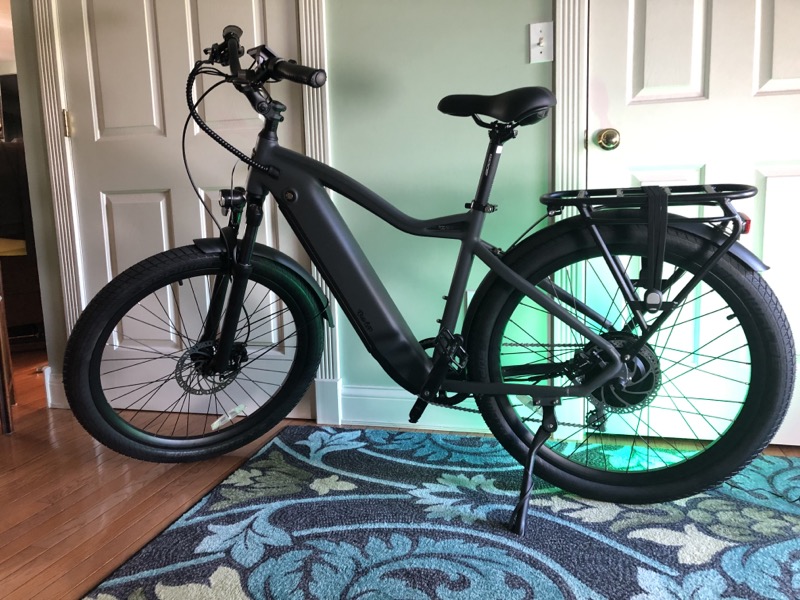
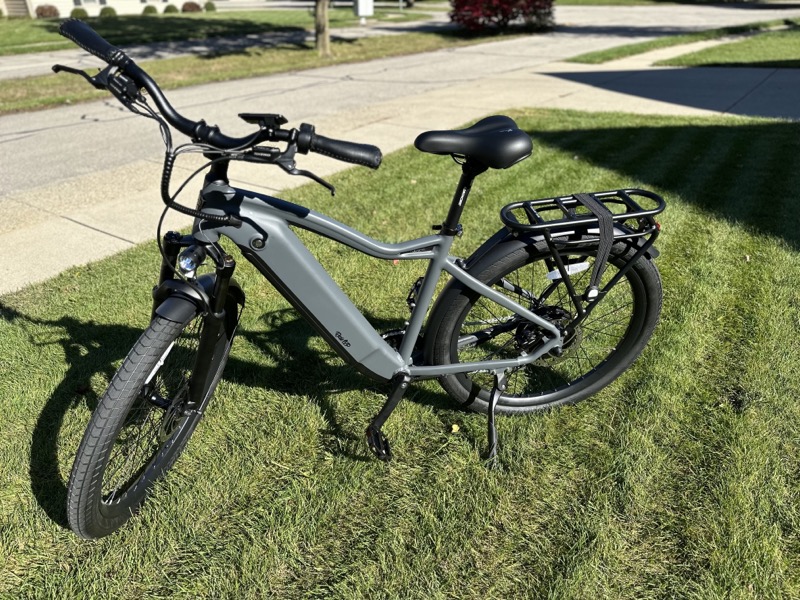
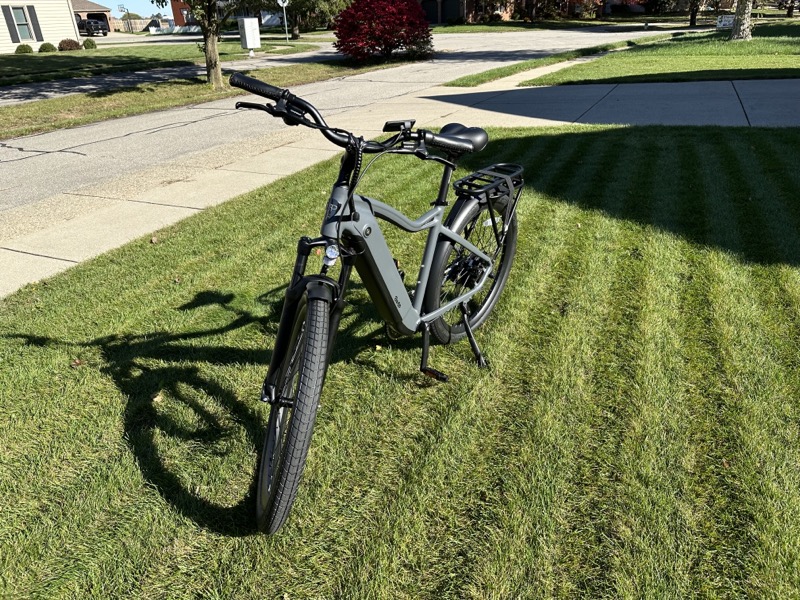
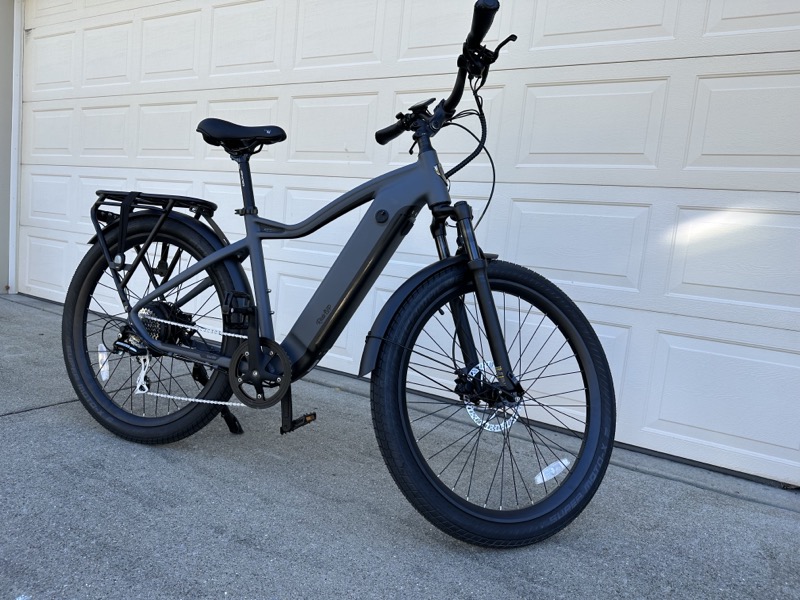
The Ride1Up 700 Series E-Bike that was sent to me by Ride1Up to review/test was the XR-Step Over frame configuration in the Graphite Gray colorway. This bike is a non-folding, conventional framed bike. The bike is also offered in two lighter colors, Indigo Matte and Cloud White. While the Graphite Gray is not designated as a matte finish on the website, it appears to be one, and overall, this bike is visually appealing to the eye in my opinion. As mentioned above in the specifications this E-Bike is sized to accommodate riders from 5’5” – 6’4”. I am 6’6” and I felt the bike fit me just fine.
This E-Bike is also available in a step through version, designated the ST-Step Through. The ST-Step Through has a slightly smaller frame and can accommodate slightly smaller riders from 5’ – 6’2”.
One of the major features of this E-Bike is that it is a class-3 E-Bike, which means that it is capable of Peddle Assist Speeds (PAS) up to 28 mph and a throttle speed of up to 20 mph. Neither of the other two E-Bikes I have experience with provide PAS above 20 mph and you can really feel the difference in what that additional 8 mph feels like on this E-Bike. I am not a big fan of the throttle in general as I find them a little bit dangerous since they can inadvertently be hit and cause the bike to lunge forward. Thankfully the throttle is cut out if either of the brakes are engaged. The fact that the Ride1Up 700 Series throttle completely ignores the current PAS setting is a little unsettling and operating when the PAS level is set to 0 is just not a good design decision in my opinion from a safety standpoint.
The increased speed is provided by a powerful 750 W sustained geared hub electric motor capable of providing up to 60 Nm of torque. Again, more powerful than either of the other two E-Bikes I have experience with, and again, it is definitely noticeable. Coupled with a large 720 Wh battery, the Ride1Up 700 Series E-Bike has an advertised range of 30-50 miles, and this is of course related to many variables, such as PAS setting, %throttle usage, frequency of riding up hills, the angle of said hills, head wind speed, weight of the rider (I approach almost 250 lbs.), etc. For the type of rider that I am there appears to be plenty of range as I can ride from my residence to the farthest restaurant in town and back, a distance of 14 miles over fairly flat terrain and still have plenty (75%) of battery left.
The decision to position the throttle on the lefthand side of the handlebar has seen some controversy in some of the videos I have watched to prepare for this review. The reason given has to do with the location of the trigger shifters on the righthand side of the handlebar. Since I am not a big fan of the throttle anyway, this is a non-issue for me. If you are upgrading/transitioning to this bike from another E-Bike with the throttle on the righthand handlebar side, this might be an issue for you.
The very nice color display is right next to the lefthand side mounted throttle. I have since configured the battery voltage (upper righthand corner) to read out as a percentage instead of the meaningless raw battery voltage value. I think it is nice to have the power output (upper lefthand corner) always displayed. The odometer (lower lefthand corner) can be scrolled through to other trip related values, (time, average, and max speed) with each hit of the power button. I think it is great that the trip distance (lower righthand corner) is also always displayed along with the current speed (00.0 mph) and current PAS level (0) in the middle of the display as one would expect.
I will close with some of the non-glitzy features that I just want to point out here which are, but not limited to, a very nice 50lb pannier ready rear rack with a triple bungie hold down strap, dual piston 180 mm hydraulic disc brakes, high performance Schwalbe Moto-X 27.5 by 2.4 inch tires, 100 mm travel suspension front forks, clean cable management, SHIMANO ACERA 8 speed gearing with trigger shifters to name just some of the nice features the Ride1Up 700 E-Bike ships with.
 The recharge time is stated as requiring somewhere between 3 and 6 hours. I ran the battery down until the motor cut out (mentioned below) and the battery took closer to 7 hours to recharge to a reading of 100%. Probably not a big deal, but I wanted to point that out.
Setup
This is really the only part of the review where the Ride1Up 700 Series does not score at the highest level. This is not to mean that the assembly was bad. I just felt it was much larger than it should have been in my opinion, acknowledging up front that increases in assembly translates into reduced cost. In short, a more assembled Ride1Up 700 Series would cost more.
Loosely keeping track of the time my wife and I had in assembling the bike was at about three hours total. There is no doubt that a more experienced assembler could do it in a much shorter time. Given that I do not own a bike stand there were a few times during the assembly that it was nice to have that extra pair of hands to hold things steady, and to help decipher the instructions. I found the enclosed instruction manual a little lacking, however we used the online video from Ride1Up to primarily guide us in the bike’s assembly. The tools provided, which I felt were very good were all that was needed except for the attachment of the back light to the back rack as I felt a socket, as shown in the online video was much better for this assembly step.
As mentioned above, the Ride1Up 700 Series is shipped in about as compact a package as possible. At the highest level of assembly all one must do is attach the front fork, front tire and axle, front brake, front fender and head light, handlebars, display, seat post and seat, rear rack and taillight, crank and both pedals. I don’t think I missed anything. I do not think the box would have been expanded much to have the components in italics already fully assembled.
When I read something like:
“IT’S VITAL TO TIGHTEN THE BAR CLAMP TO AVOID THE MOVEMENT OF THE HANDLEBARS, AS WELL AS THE COMPRESSION CAP, ENSURING FORK IS INSTALLED CORRECTLY. THIS SHOULD BE COMPLETED BY SOMEONE FAMILIAR WITH BIKE MECHANICS. “,
highlighted in yellow in the manual, I must admit that I was a little concerned as I do not find myself to be familiar with bike mechanics, whatever that is. Additionally, there were other caveats called out throughout the installation, although not in bold and highlighted in yellow as this one was above.
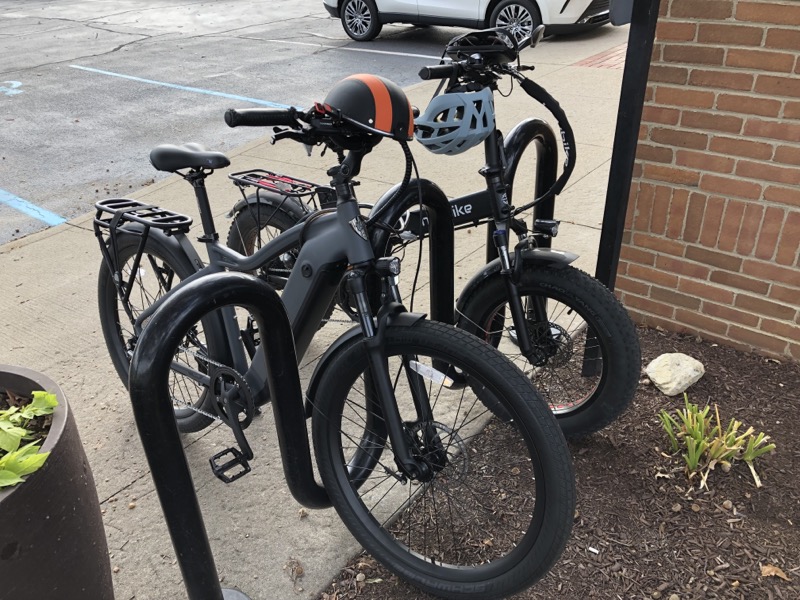
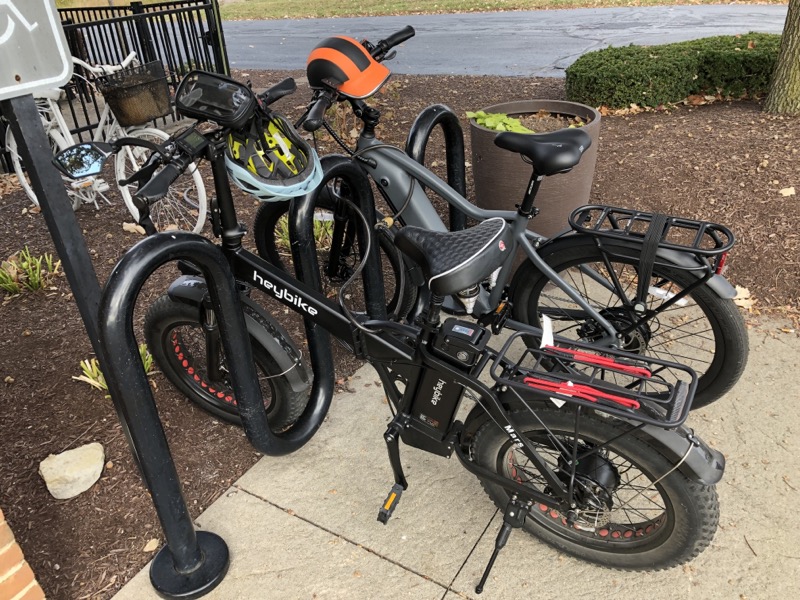
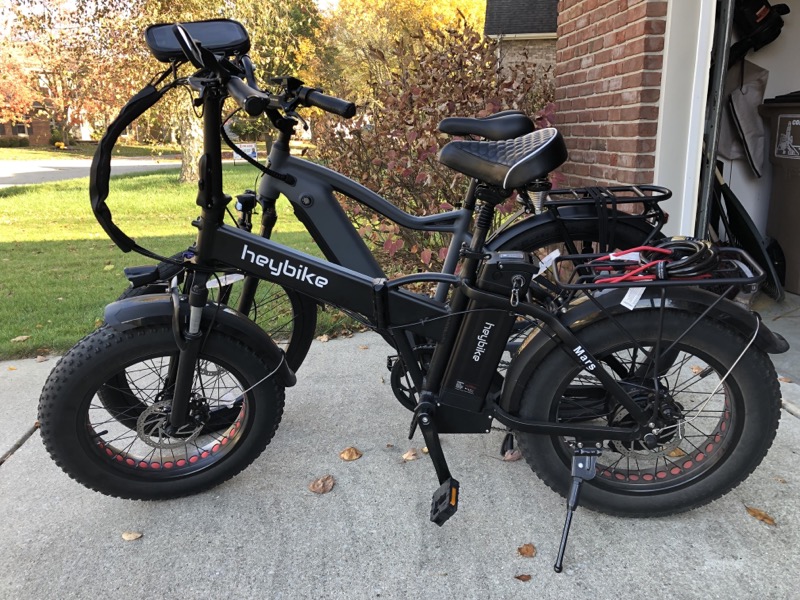
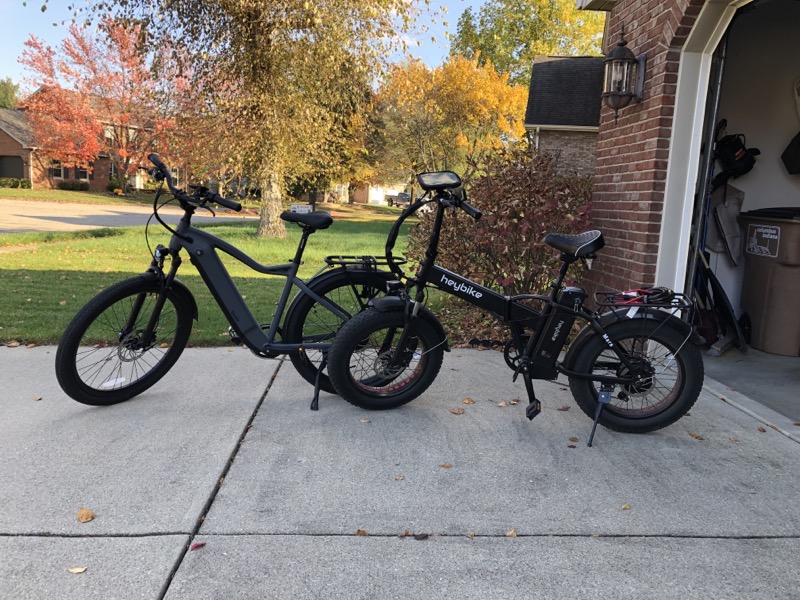
While scouring the internet to increase my knowledge about the Ride1Up 700 Series I stumbled onto Electric Bike Reviews’ review of the 700 Series from some three years back and it was specifically mentioned in that review that the Ride1Up 700 Series E-Bike requires more assembly then is typical in a standard E-Bike assembly. I looked at a similar priced Aventon (Level) E-Bike’s assembly video and found this to appear to be true, at least in this one isolated case. There was a good deal more assembly compared to the effort required to assemble the first E-Bike that I reviewed. In this case, it was the heybike Mars, and you can get a feel of the scope of the magnitude of the assembly by comparing the time lapse video put together by the Original Gadgeteer and Ride1Up’s assembly video linked above.
One thing of note worth mentioning the EBR review of the bike is that Ride1Up is constantly improving their product. So, while the 700 Series design is older, is has been improved from its initial design to where it is at now.
Performance
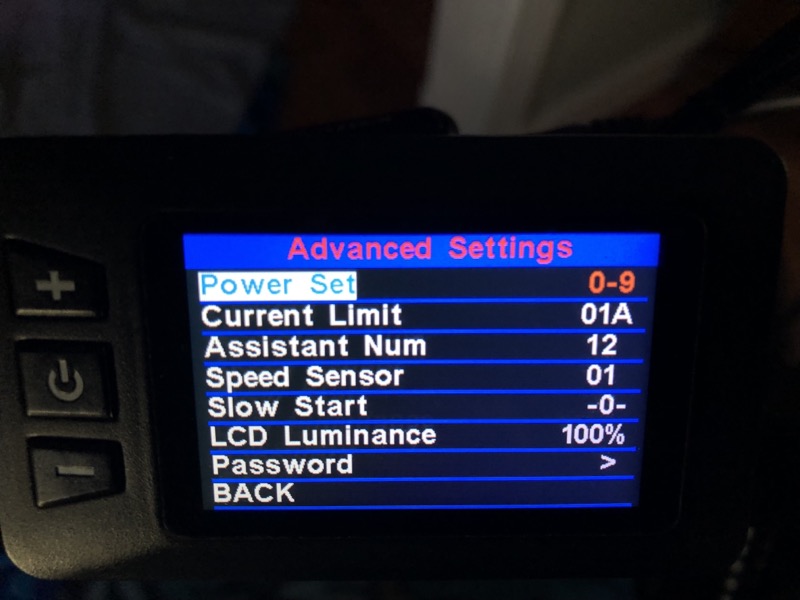
Again, I could not get over how powerful the Ride1Up 700 Series feels when riding. In fact, at first, I thought there might have been something wrong with how the bike performed compared to the other hub-drive E-bike that I had experience with. Let me explain, before riding the Ride1Up 700 Series, as mentioned earlier, I had experience with another hub-drive E-Bike, in this case the heybike Mars fat tire folding E-Bike. My experience with the Mars was the motivation to immediately modify the 700 Series bike’s PAS settings to 0-9 from the system default 0-5. I did this because the original PAS programming of the Mars was to me a little dangerous out of the box as setting 1 would power the bike up to 10 mph upon detection of pedal movement. The Mars’ PAS settings are mapped directly to speeds and to me at least really is not pedal assistance as much as a setting to a preset speed whenever pedal movement is detected by the control system. The fact that the Ride1Up 700 Series did not behave this way incorrectly caused me some initial concern.
Still focused on the operation of the the Mars here, the resulting rapid acceleration experienced by the rider from rest with the PAS set to 1 on the Mars felt too extreme to be safe, which led to me expanding the default number of PAS settings range from 0-5 to 0-9 on the Mars. Upon doing this, I set each PAS value to incrementally increase from 0% to 100% when the PAS is set to 9. Doing this gave the rider more control over low-speed situations when the PAS was engaged as there were many settings which resulted in less than 10 mph. One could argue that having a PAS setting to top out at 2 mph is useless, however in this mode, the bike speed just becomes almost completely under the control of the rider, vs the bike being pushed out of control of the rider whenever the lowest PAS setting is selected and pedal movement is detected.
Given the Ride1Up 700 Series is a hub-driven E-Bike, as mentioned earlier I mistakenly just initially started out setting the bike’s PAS range setting to 0-9 with the help of the Ride1Up 700 Series display video without understanding that for this E-Bike, the PAS setting was not directly associated with a speed, like with the Mars, but the PAS settings are associated with a power limit which limits the amount of current that is applied to the motor. The minute I understood this, I immediately reset the PAS setting range to the default of 0-5 and rode the bike again. In fact, all but the most initial couple of miles of riding described were ridden with the default 0-5 PAS range selected.
Once the Ride1Up’s PAS strategy was understood, I realized just how wonderful the Ride1Up 700 Series bike is to ride. It so closely models the mid-drive feel of my other E-Bike that I can honestly recommend this hub-drive to anyone wanting to make the jump to an E-Bike.
Looking deeper at the range of the Ride1Up 700 Series, I put another 16 miles on the bike from the 14 miles mentioned above and I was still at 60% SOC at the end of a total of 30 miles. To be fair, the 30 miles were pretty mild as I was riding with my wife who was riding the Mars and when we ride together, we do not ride that hard, riding between 10 and 15 mph on average on relatively flat pavement.
After that casual 30 miles I jumped on the 700 Series and rode it hard for another 10 miles on that same starting battery SOC (60%), riding at the highest pass level of 5 most of the time easily reaching speeds in excess of 27 mph on flat pavement, which is very fast on a bike. The SOC dropped to 30% at the end of this ride. Once the SOC drops below 50%, the battery bar turns yellow from green. One thing to point out is that the display’s SOC may shoot up after the bike is turned off. After letting the bike rest for a day, the SOC is sitting back at 45% for my next ride. I jumped back on it again, rode another 5 hard miles, with the SOC going down to 15%, resulting in the battery level bar turning red at 25% SOC. I turned the display off and on, and it was back up at 25%. Rode for another half a mile and the unit was showing 20%, and the motor kicked out, no PAS, no throttle. Rode the rest of the way home without any electrical assist about a half a mile. The Ride1Up 700 Series is not that bad to ride without electric motor assistance, but it is clearly not designed to ride a great distance in that condition. It is worth mentioning that compared to the Mars, the 700 Series is much easier to ride without the aid of the motor. When the SOC drops to a level where the motor kicks out, it was nice to see that the display stayed on for that last half a mile all that time just fine. When I got home, I turned the display (bike) off for about 2 minutes, and turned it back on, picked up the back wheel of the bike, and hit the throttle to see what would happen. The throttle spun the wheel, however I am sure it would not ride very far in that battery state.
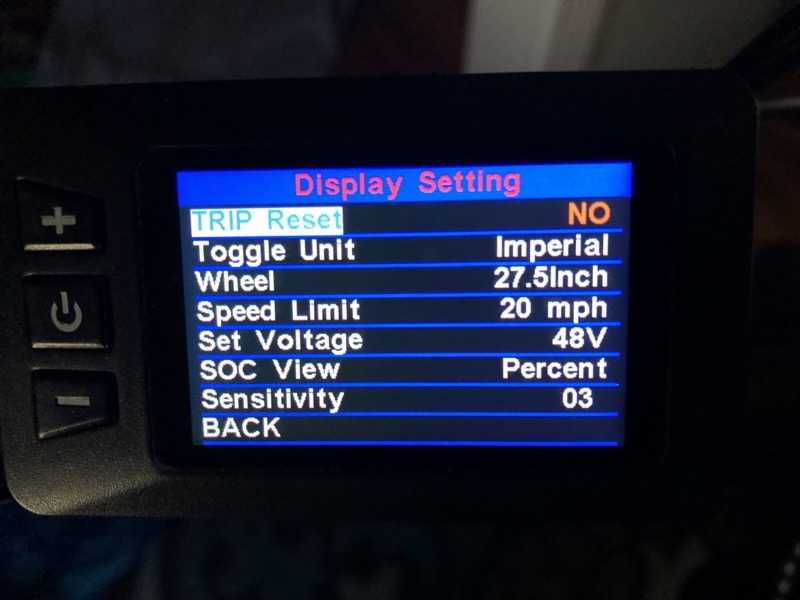
There is a setting in the advanced settings which allows the user to tweak the display of the SOC based on battery voltage settings . I did not mess with these, but assume they are there so that the displayed SOC can be adjusted as the capacity of the battery changes throughout the life cycle of the battery. I am ok with just learning what the display is showing, and making my decisions off of that.
If you are riding the Ride1Up 700 Series with anyone who is riding a typical class 1 (20 mph limited) E-Bike, you will have no trouble riding along side of them in an almost effortless fashion, and in fact will be able to lose them very easily should that be your desire at any point in the ride.
While I did not ride on many different road types, I found the Ride1Up 700 Series E-Bike to be very comfortable on everything I rode it on. The front suspension forks smoothed out the typical bumps that one finds on typical roads and sidewalks, or any non-paved parts that one might find cutting through to round out some of the corners that might exist on connecting sidewalks. The Selle Royal Freeway Plush Gel seat is a nice one, however the inclusion of some kind of suspension seat post would improve the ride as one would expect, and yes increase the cost. The brakes are smooth and comforting. Gear shifting is very easy with the trigger shifters, and with the power focused PAS scheme the Ride1Up 700 Series can be ridden more like a conventional bike than what I thought was possible before with a hub-driven E-Bike. So outside of assembly, and some excessive motor noise, I really do not have anything but the highest praise for the Ride1Up 700 Series.
See it in action
What I like
- Power focused PAS control strategy vs a speed focused one.
- Color Display
- Powerful Motor
- Nice battery size.
What I’d change
- Less assembly needed upon arrival.
- Running light setting should be persistent between power cycles.
- Noisy Motor
- More accurate display with respect to the SOC
Final thoughts
There is a significant difference in my experience with E-Bikes from when I reviewed the heybike Mars over a year ago, where I had no prior E-Bike experience compared to the review with this E-Bike, the Ride1Up 700 Series, where I not only had experience with the Mars, but also have spent over a year with a higher end mid-drive E-Bike from Gazelle. I hope that difference in experience shined through in this review.
So, I want to finish up with this. Before I had the opportunity to review the Ride1Up 700 Series hub-drive bike, I had pretty much made up my mind on the difference between hub-drive E-Bikes and mid-drive E-Bikes and it was not very flattering to hub-drives. In fact, before this review, I would not have even recommended a hub-drive E-Bike to anyone who is new to E-Biking. The Ride1Up 700 Series E-Bike has completely changed my mind. While the 700 Series does come close to the feel of a mid-drive, it is still not quite there in my opinion as I do prefer the drive system of mid-dives over hub-drives. That said, experience with the Ride1Up offering definitely closes the gap significantly. Would I purchase this E-Bike from Ride1Up over my Gazelle Ultimate C8 HMB, costing thousands of dollars more, probably not. This is not solely due to the difference between how the two bike’s drivetrain operates, but more to the other improvements that accompany the much costlier Gazelle, such as the Gates Carbon Drive™, internal Shimano Nexus geared hub, among some other things. If you find those features as important, then you can look at one of Ride1Up’s flagship bikes such as the Prodigy V2, which is still about a $1,000 cheaper than what I purchased from Gazelle.
Again, the Ride1Up 700 Series hub-drive E-Bike just rides so much like my much more expensive Gazelle that I would not hesitate to recommend it to any E-Bike customer. If you are wanting to ride at close to 20-mph, almost regardless of the environment that you are riding in, then the 28-mph limit of the Ride1Up 700 Series E-Bike will not disappoint. One gets an awful lot for their money with Ride1Up’s offering in my opinion.
Price: $1,695 currently discounted to $1,295.
Where to buy: Ride1Up
Source: The sample of this product was provided by Ride1Up.
L39 Ultra Slim UV Protective Filter for Leica Q3 43 Q2 Camera with Moisture-Proof Case & Removal Tool 19 Layers Mulit-Coated UV Ultraviolet Filter 99.3% Light Transmission Water Oil Scratch Resistant
(as of June 20, 2026 03:47 GMT -05:00 - More infoProduct prices and availability are accurate as of the date/time indicated and are subject to change. Any price and availability information displayed on [relevant Amazon Site(s), as applicable] at the time of purchase will apply to the purchase of this product.)
Gadgeteer Comment Policy - Please read before commenting
Wow, excellent review, needs a summary. I bought my series 700 November 2022. Very pleased. A few recommendations: 1. A “Florida edition” (flat terrain) no gears needed, I leave mine in 8th gear always. 2. Improve battery lock, broke mine early on. 3. When the display shows 25% the battery provides no power, so I must charge at 30% to around 85%, 4.as the charger gets super hot.
William, thanks! I’ll address each of your comments below.
I completely agree that rear wheel hub drives can be ridden in one gear, the highest one available on flat terrain.
Sorry to hear that your battery lock broke. I wondered about the under frame battery location. On my Gazelle, the battery is along the frame, but is on the top vs the bottom, so there is no pressure on that lock if that makes sense.
Battery display is interesting as I have mentioned as well. I feel, although I did not have time to really test out in the review time, that in the advanced settings, there is a setting, or group of, can’t remember exactly now, that might be used to correct what you and I saw, which is, empty battery before display reads 0%.
And finally, the charger gets hot, indeed it does. That is also true for another electric bike, that has a similar looking charger, and for that matter, a similar looking charger for one of those solar power generators. I do not recall my Bosch branded charger for the Gazelle, getting as hot during a charging event.
Thanks for your comments.