REVIEW – Over the last year, I’ve discovered that laser engraving is a fascinating and fun hobby. I’ve enjoyed using my Two Trees TTS-55 5W laser engraver but discovered that a more powerful diode laser would be better for cutting through thicker 6mm wood which is my material of choice. The Sculpfun S30 Ultra 22W laser engraver came up for review and I was eager to try it. Not only did it have a more powerful laser than my current engraver, but it also had a much larger frame so I could do larger projects.
What is it?
The Sculpfun S30 Ultra is a 22W do-it-yourself (DIY) diode laser engraver and cutting machine for hobbyists.
Precautions:
- Always wear laser safety glasses!
- For the Sculpfun S30 Ultra 22W laser, you need to have glasses that block 455±5nm light.
- I used my FreeMascot OD 6+ 190nm-490nm Wavelength UV light / Violet & Blue Laser Safety Glasses (CE EN207 certification – European laser eyewear standards for laser safety eyewear) that I purchased from Amazon when I reviewed the TTS-55 laser engraver.
- Although Sculpfun provides you with safety glasses, I have heard some complaints about how those green safety glasses don’t block the 450 nm range (they only block much higher wavelengths).
- Never leave a laser engraver/cutter unattended when it is in use – it is a potential fire hazard.
- Protect your table by placing a sheet of metal, honeycomb laser bed, etc. under your engraving/cutting material to prevent damage to your table.
- Use caution when engraving or cutting on reflective materials – reflected laser light can damage your eyes.
What’s in the box?
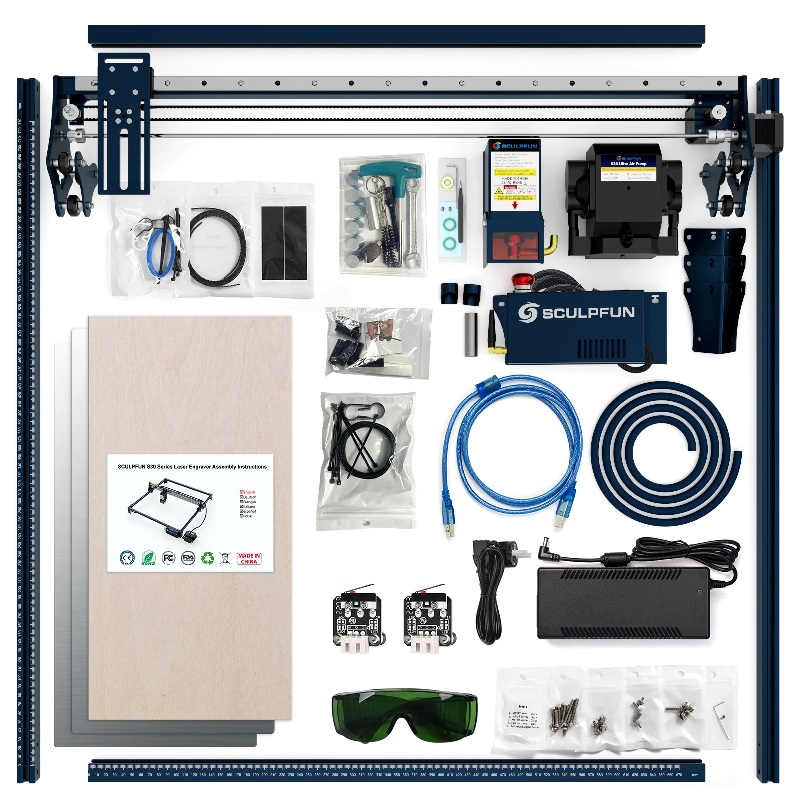
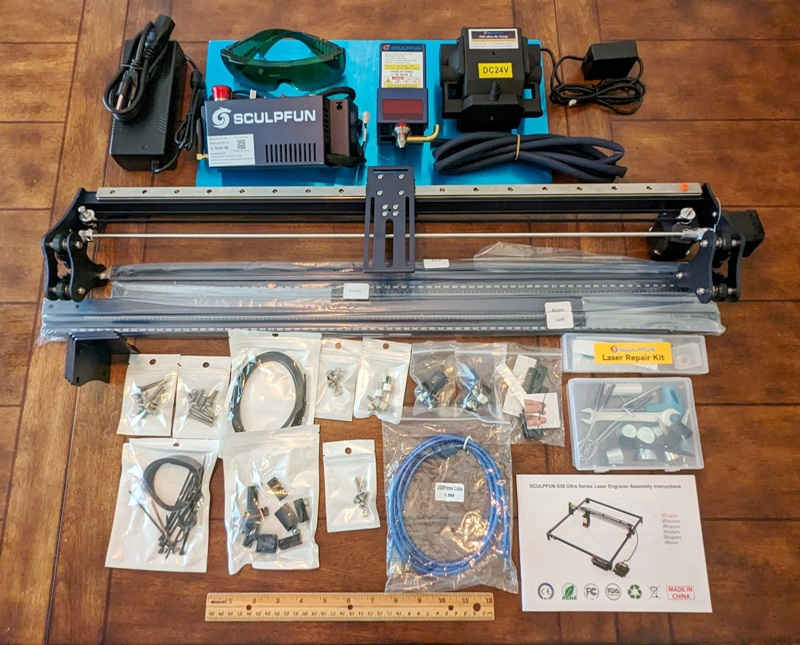
- S30 Ultra Power supply (12V 7A power adapter and power cable)
- Laser glasses (not certified)
- S30 Ultra 22W control box
- S30 Ultra 22W laser module and laser shield
- Automatic air assist pump (24V) and air hose
- Aluminum sheets (to protect work surface) and basswood sheet
- 1×460 x 230 x 3mm wood board
- 2×460 x 230 protective aluminum plate
- S30 Ultra gantry and aluminum frame pieces
- Support legs
- Bags containing parts that are numbered as “Step 1, Step 2,…Step 7”:
- Screws
- Belts
- X and Y limit switches
- Cable clamps
- Wire ties and hook-and-loop fasteners
- Non-slip pads for the support legs
- Fixed-focus column mount
- USB cable (USB-A to USB-B)
- Spare screws
- Tool kit:
- Wenches
- Laser nozzle cleaning brushes
- Small brush
- Metal risers for materials
- Fixed-focus column
- Keys for the control box
- Lens repair kit:
- Pointed-tipped tweezers
- Microfiber cloth
- Spare lens
- O-rings
- Screws for the laser nozzle
- Product Manual
- Kraft paper (rigid)
Hardware specs
Laser Information:
- Diode laser output power: 22W (note that this is light energy, not electrical energy)
- Laser focus: 0.08×0.10mm
- Laser wavelength: 455±5nm
- Focusing method: fixed focus column, manual laser module adjustment up or down using screws
- Laser protection cover: Equipped with a detachable laser protection cover
Machine Information:
- Engraving accuracy: 0.005mm
- Engraving area size: standard version is 600x600mm
- Machine electric power: about 84W
Air pump:
- Type: motherboard-controlled air pump, voltage 24V, flow 30L/min
- Air hose inner diameter: 7.5mm
Motherboard:
- 32-bit air-assisted motherboard (supports Bluetooth wireless connection)
Engraving/cutting materials:
- Engraving materials: all kinds of wood (including walnut, cherry wood, and other high-density wood), MDF, stone, cardboard, plastic, leather, PCB board, aluminum oxide, 304 stainless steel, ceramics, dark stone
- Cutting materials: all kinds of wood (including walnut, cherry wood, and other high-density wood), MDF, acrylic board, cardboard, non-woven fabric, bamboo, leather, some plastic boards, PCB boards
Power supply:
- Power Input: 100-240V AC, 50/60HZ Output: 24V 7A
- Packing weight: 9.9kg
- Packing size: 865 x 247 x 235mm
- Certification: CE FCC RoHS FDA ICE certification
Machine Size:
- External Size: 800 x 840mm (includes the control box and X-axis gantry beam) 750 x 800mm (beam frame)
- Internal Size: 700 x 760mm (inner frame size) 600 x 600mm (working area)
- Height: 80mm (beam frame) 220mm (Include X-axis gantry beam)
Assembly
Assembling the Sculpfun S30 Ultra laser engraver took about an hour. Scuplfun provides a great video that makes it easier to understand the assembly instructions.

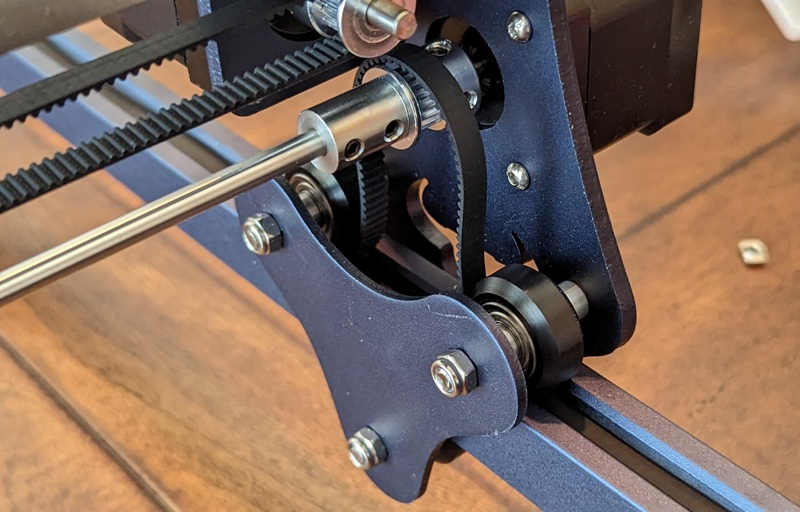
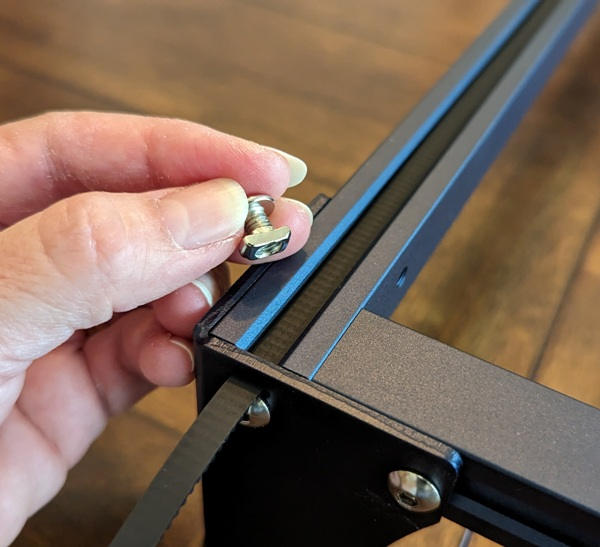

The above shows the stages of the assembly: the frame fully assembled, looping the Y-axis belt over the gears on the gantry, tightening the Y-axis belts, and attaching wire guides to the gantry to secure the air tubing and wiring to the frame.
Design
The following are the parts that make up the Sculpfun S30 Ultra laser engraver:

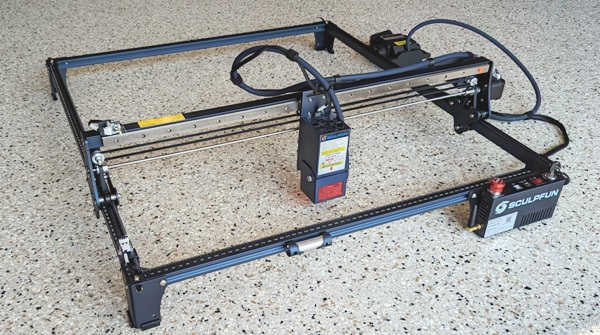
The Sculpfun S30 Ultra laser engraver has a really large aluminum alloy frame with a working area of 600 x 600mm (external dimensions: 800 x 840mm). The frame is lightweight, yet feels robust. The metal legs, X and Y-axis limit switches, and high X-axis gantry make the engraver feel like a higher-end machine. Add to that a 22W laser and a 32-bit motherboard that supports Bluetooth connectivity and automatic air assist and you’ve got the workings of an awesome hobby laser engraver.
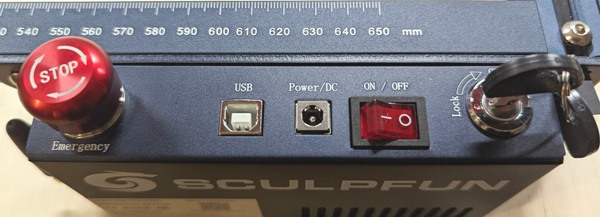
The control box has an emergency stop button, a USB port, a DC power port, an On/Off switch, and a lock. The emergency stop button and the lock that requires a key to power the machine are really nice safety features. I noticed that there isn’t a TF card slot as my TTS-55 engraver has, but with Bluetooth connectivity, I don’t need the slot since I can connect wirelessly to the engraver to send my files.
To activate the emergency stop button, just press down. You’ll need to twist the emergency stop button clockwise to reset the switch and be able to start the machine again.
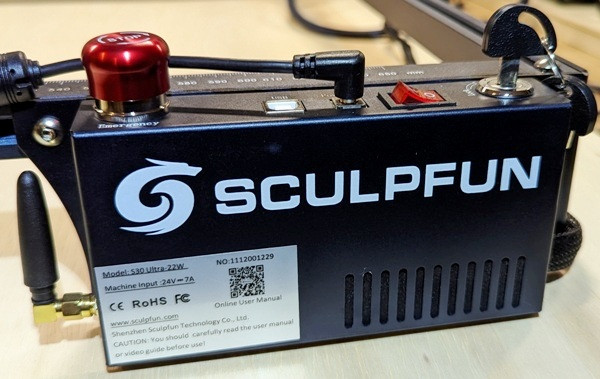
In the above photo, you can see the Bluetooth antenna on the control box.
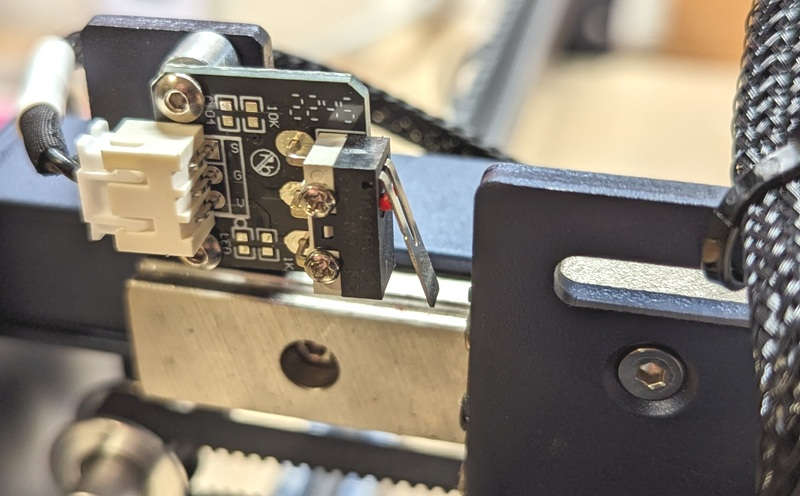
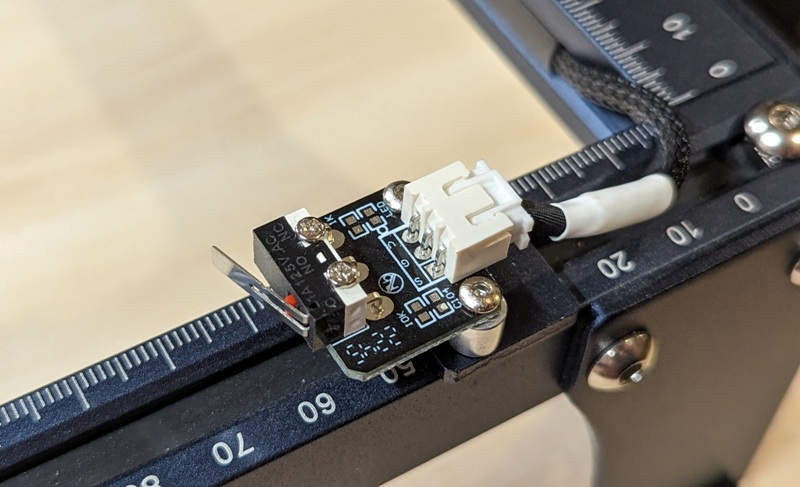
The addition of X and Y limit switches is nice so that the laser module stops when it approaches the frame of the engraver.
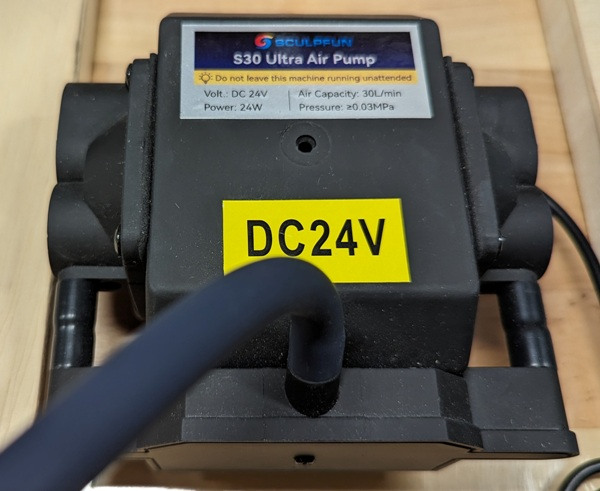
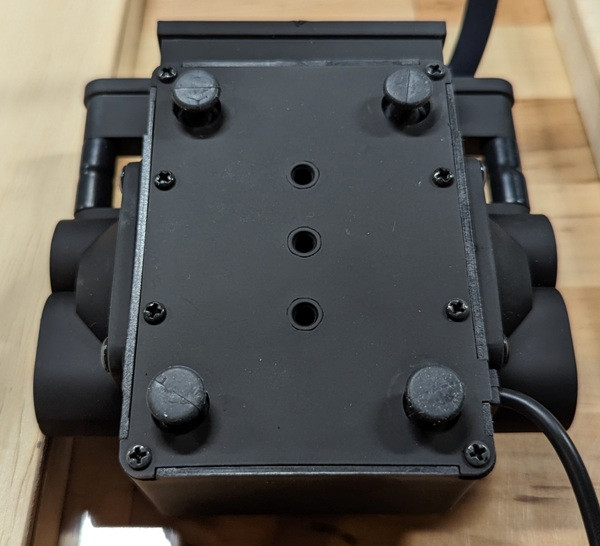
The Sculpfun S30 Ultra laser engraver comes with an automatic air assist which provides 30L/min airflow and has rubber feet to absorb vibrations. The air assist’s power cable is integrated into the power of the engraver so Lightburn can automatically control it for each of the layers of your project. The air assist improves the cutting performance of the laser engraver and also helps to keep the laser’s lens cleaner.
I personally think that all laser engravers should come with an air assist (not all do) because it has a huge impact on the quality and efficiency of the engraver.
When cutting, it helps keep your cuts clean and can help decrease the number of passes required to complete a cut. When engraving, toggle off the air assist in Lightburn for that layer to obtain clearer, more precise details.
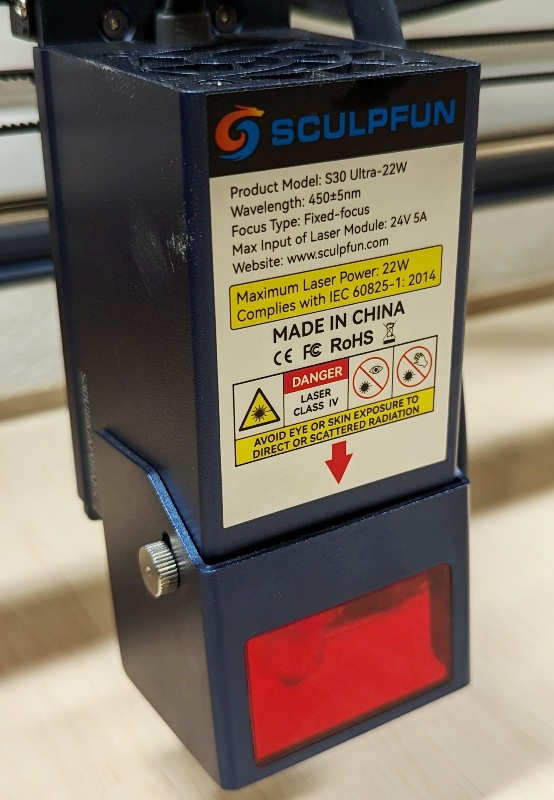

Having a 22W laser on this engraver is a huge plus. The higher power means you can cut thicker materials with fewer passes.
The laser module has an orange acrylic window to help shield your eyes from the laser. I still wear my certified laser safety glasses, just in case. This shield is removable if you’d rather get a clearer view of the laser nozzle’s position over your material.
The four hand screws on the back of the laser module are used to adjust the laser up or down to get the correct laser focus for your project. I thought having to loosen four screws would be a pain, but it’s really not too bad.

To get the correct focal length, Sculpfun provides you with a fixed focus column. Using the four hand screws on the back of the laser module, you can adjust its height to the height of the column while it sits on top of the material that you are engraving or cutting.
Setup
Getting started
After assembly, I connected the Sculpfun S30 Ultra to my laptop using a USB-A to USB-B cable. I also connected it to my laptop using Bluetooth.
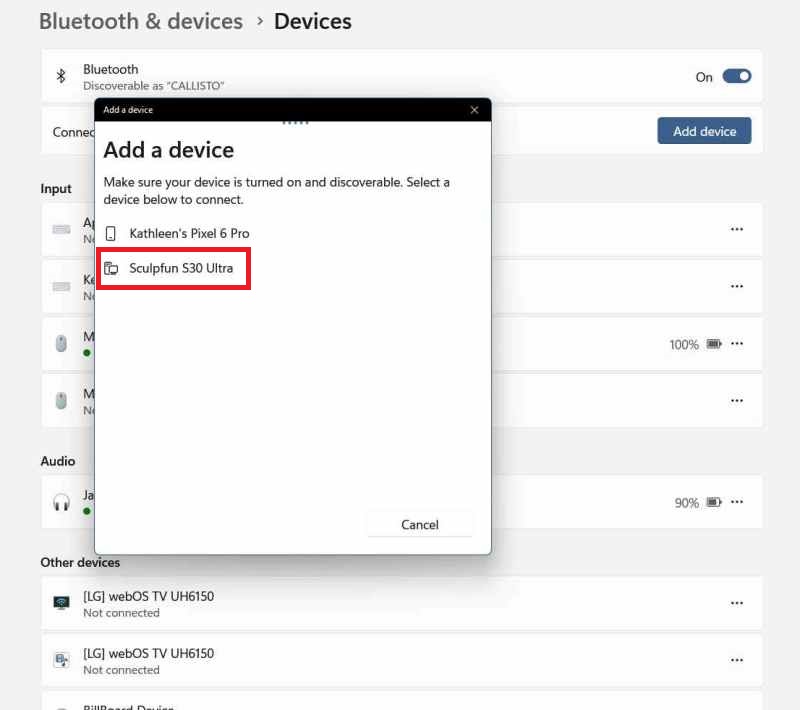
To connect the Sculpfun to Bluetooth, all I had to do was pair the Bluetooth engraver to my laptop. I did this by going into my laptop’s Bluetooth settings, clicking on “Add Device” and looking for “Sculpfun S30 Ultra”.
I already had Lightburn installed on my laptop, so the next step was to add the laser engraver to Lightburn.
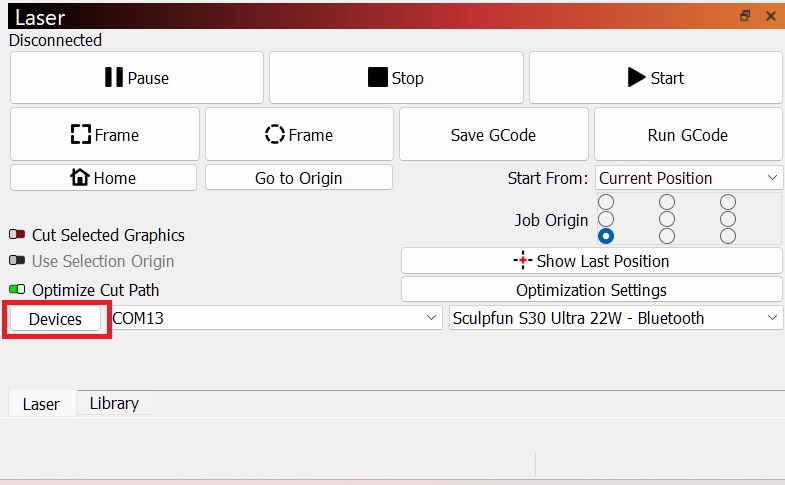
After opening Lightburn, I clicked on “Devices” as shown above, and selected the following:
- (“Devices” >) “Find my laser” >
- Select “GRBL (600 x 600mm) at COM 13 115200 baud, Type: GCode, Connection: Serial/USB” [pay attention to the COM PORT NUMBER here – you’ll need to know this later] >
- Click on “Add Device” >
- I renamed it “Sculpfun S30 Ultra 22W – Bluetooth” when asked what I wanted to call it >
- I left the dimensions of the work area as “600 x 600mm” >
- I left the origin of my laser as the default, and left off the “Auto home on startup” >
- Finish
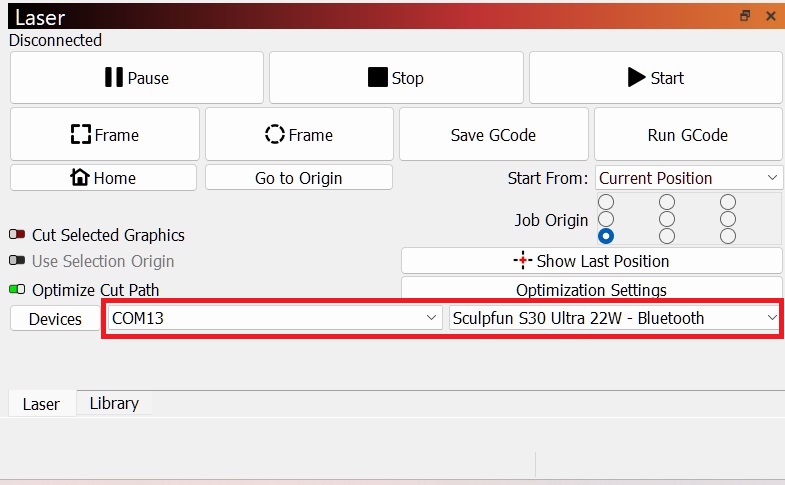
Now whenever I launch Lightburn, I select the “Sculpfun S30 Ultra 22W – Bluetooth” from the dropdown list (next to “Devices” and “COM”) and make sure the correct COM port is selected.
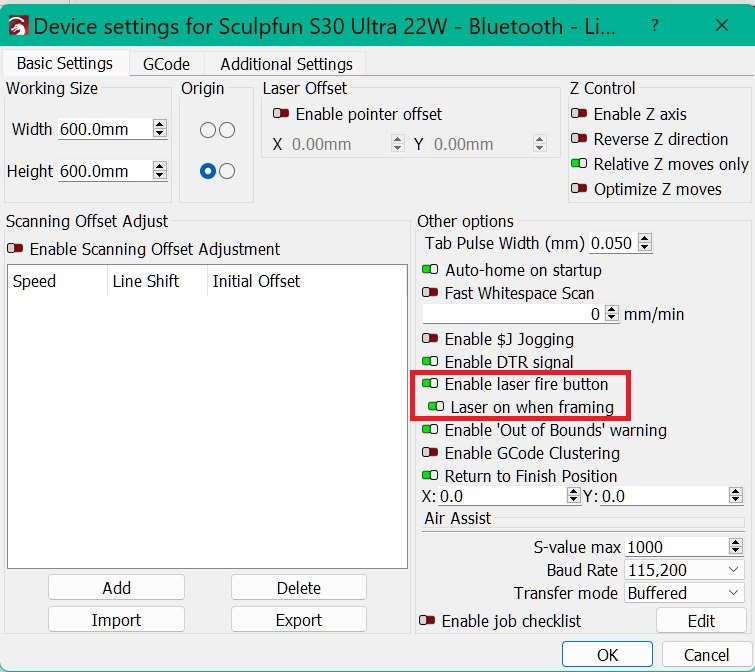
Before engraving or cutting with a diode laser engraver, I make sure that the “Laser fire button” is enabled so I can observe where the laser is on my material to position it correctly.
To do this I went to the “Edit” menu > “Device settings” > toggle on “Laser fire button” > and clicked “OK” (shown in the screenshot above). I also made sure that “Laser on when framing” is toggled on. I use these settings all the time to position my laser correctly over the material.
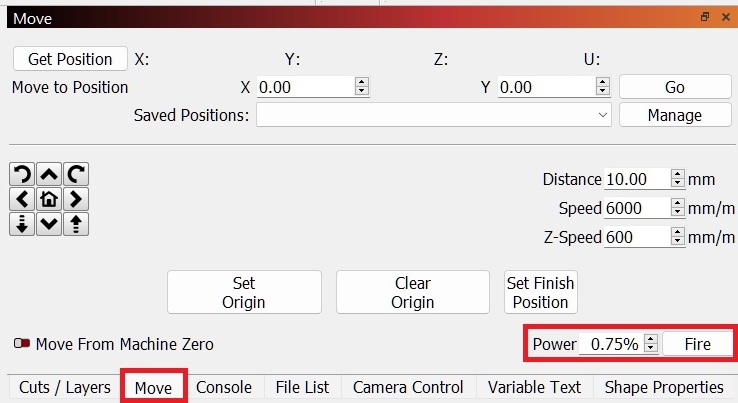
To view the position of the laser on your material, click on the “Move” tab in Lightburn, set the laser to a low-power setting, and click on the “Fire” button (shown in the screenshot above). Now you should be able to see your laser. Click on the “Fire” button again to turn it off.
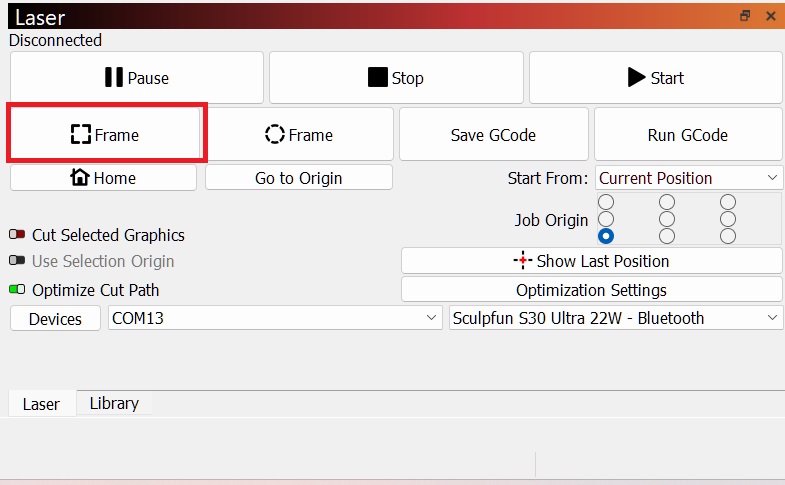
To view the boundaries of your project, click on the “Frame” button, and the laser will trace the outer boundary of the project.
Performance
Laser engraver tests
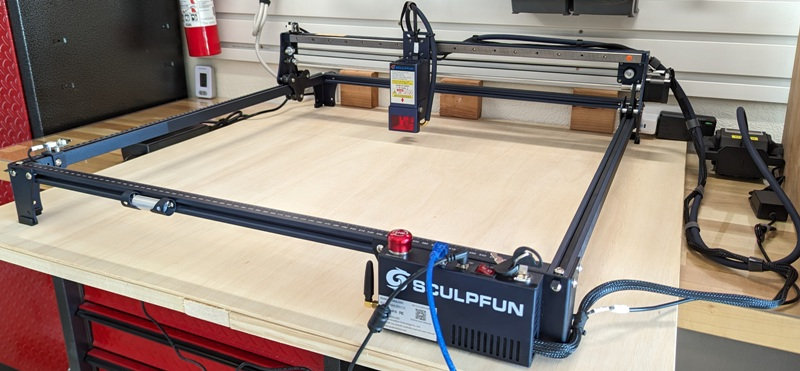
Here is my Sculpfun S30 Ultra setup in the garage. All my laser engravers are in the garage because of the fumes and smoke they create.
As you can see, this laser engraver is big! It’s wider than the table I wanted to place it on, so I had to ask my husband to build me a large platform for it.
Before engraving or cutting, I always put my laser safety glasses on.
I performed several tests when my engraver was connected to my laptop using a USB cable and additional tests when it was connected using Bluetooth. The Sculpfun performed beautifully using both connections – I didn’t see any differences.
Materials Test
I first did a material cut and engraving test with 6mm basswood, because that’s the material I like working with (at the moment). I looked up on YouTube the general power and speed settings for a laser like the one I have (22W) to use on the material I’m working with. This way, I have a good idea of which settings to use for each material so I usually only have to run the material test once.
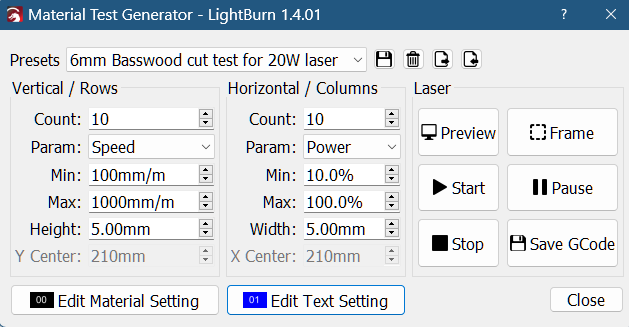
Lightburn makes performing material cut and engraving tests easy. By going to the “Laser Tools” menu > “Material Test”, I can enter the number of rows and columns under “Count” as shown above, which parameters to use (Speed, Power, Interval, and Passes), the minimum and maximum speeds, the height and width of the rectangles you want to cut, the material settings, the text label settings, etc.
To do a cut test, you click on the “Edit Material Setting” button…
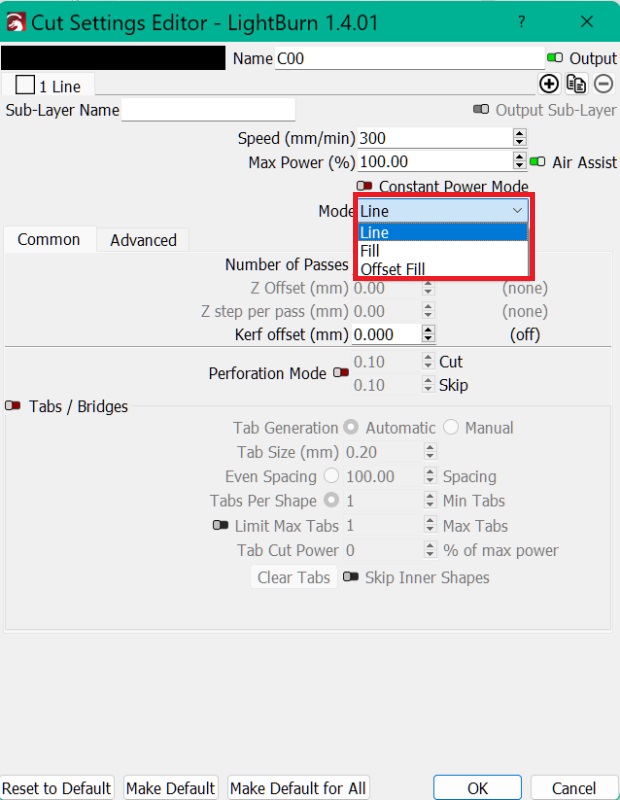
…and make sure you choose “Line” under the “Mode” setting.
To do an engraving test, you would choose the “Fill” selection under the “Mode” setting.
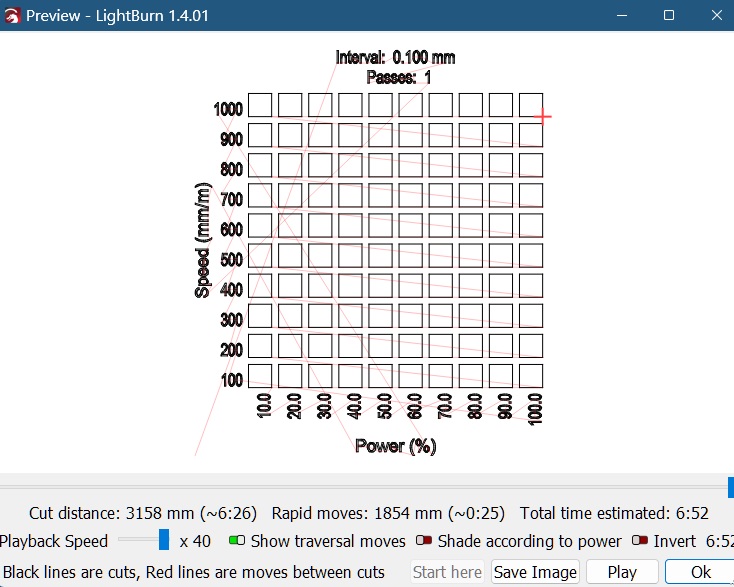
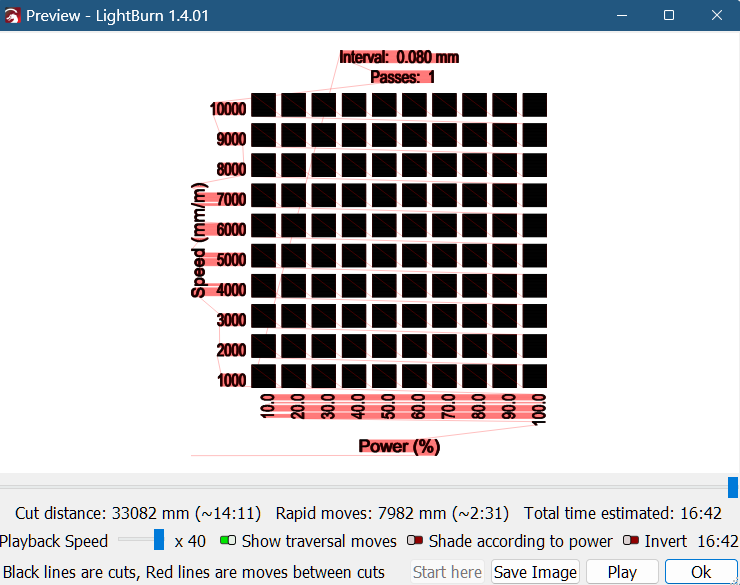
The above is a preview of the cutting and engraving tests.
Engraving and Cutting Results
Image engraving settings
When you open an image file like a PNG, JPG, BMP, etc., (these are raster images made up of a fixed number of pixels), several settings need to be changed for the engraving to look like the image.
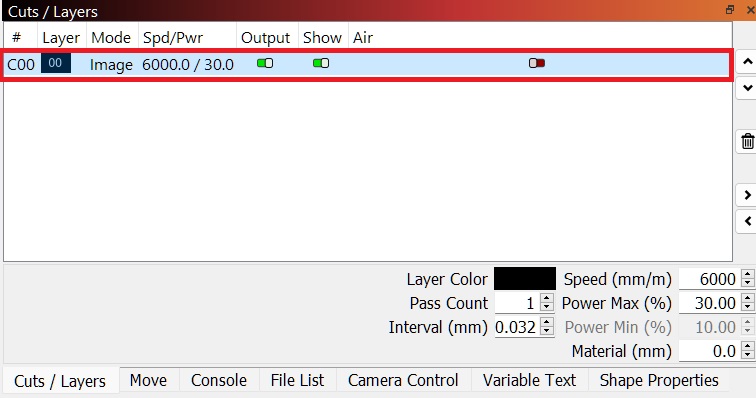
Once you’ve opened up the image file in Lightburn that you want to engrave, go to the “Cuts/Layers” window (make sure you’re in the Cuts/Layers tab) and double-click on the image layer to alter some of those settings.
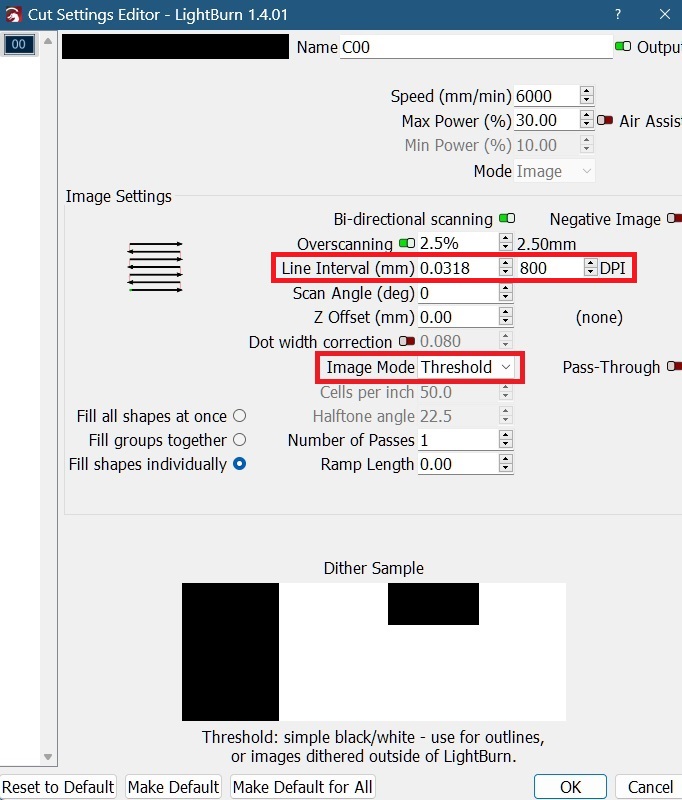
Here, you can alter the image layer settings such as the DPI (which changes the “Line interval” settings) and the “Image mode”. Note that when engraving photos, the higher the DPI does not necessarily mean the better the quality of the engraving. Many times, you’ll need to set this to 300 DPI or less to get the best result.
The image mode also has a great impact on how well the engraved photo turns out. In my experience, the “Jarvis” image mode is the best arrangement of dots that create a more photo-like quality in the engraving.
Several other settings often need changing to get your image to look its best. You can find those settings in the “Shape properties” tab or “Adjust image” settings.
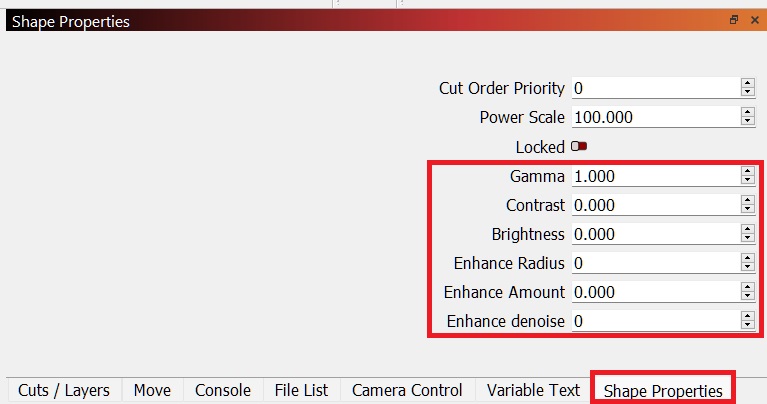
In the “Shape Properties” tab, you can adjust the following:
- Gamma – Adjusts the mid-tone curve for images, 1.0 is normal; lower values lighten, higher values darken
- Contrast – Increase or decrease the contrast of the image
- Brightness – Increase or decrease the brightness of the image
- Enhance radius + Enhancement amount – Affects the sharpness of an image
- Enhance denoise – Reduce noise in smooth areas

You can also change those same settings by going to the “Tools” menu > “Adjust image”. Here you can see how your changes affect the image.
Aluminum business cards
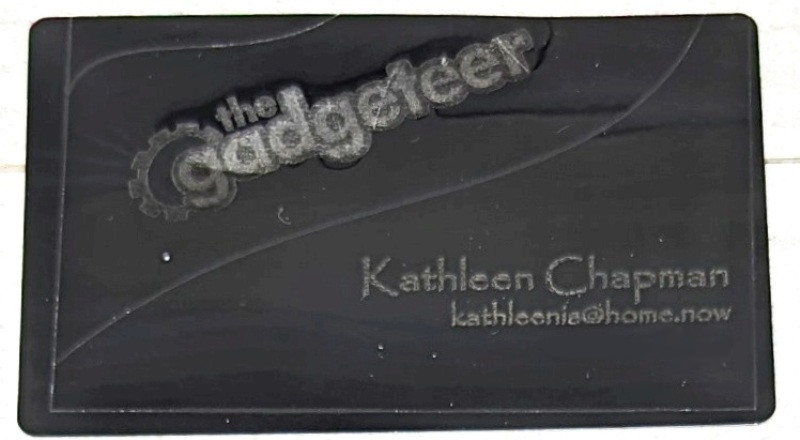
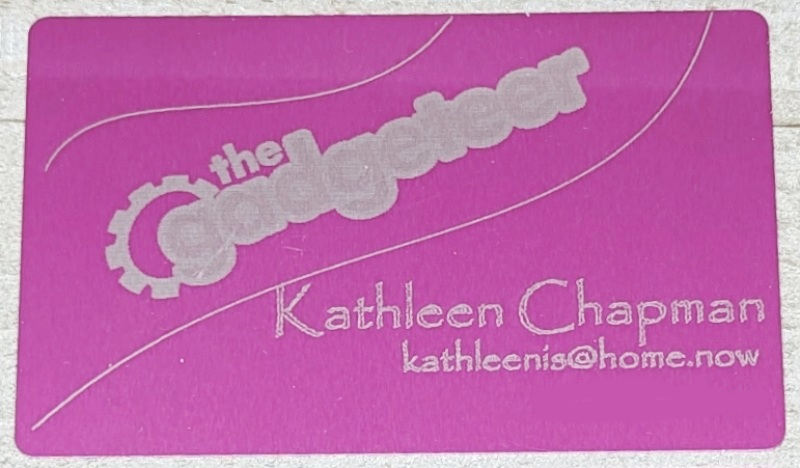
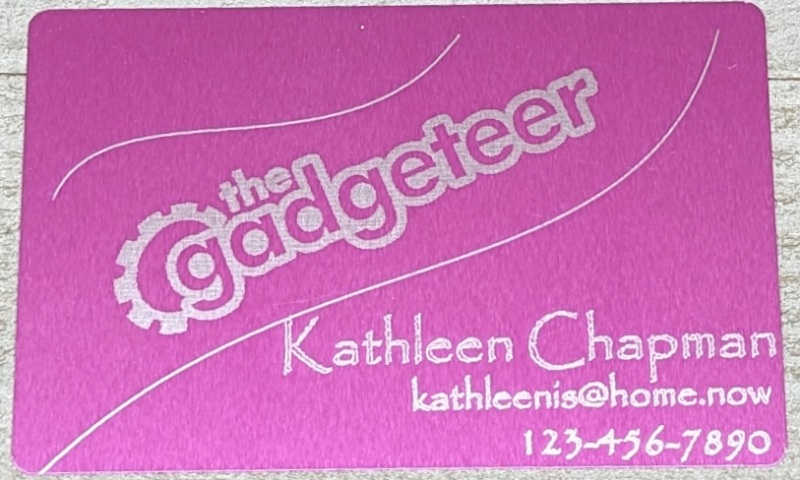
For the first aluminum business card I engraved I had the power set too high and speed set too low so the card started to warp. So, for the second business card, I increased the speed and decreased the power to eliminate the warping, but the image engraving was too faded. So on the last business card, I hit the sweet spot.
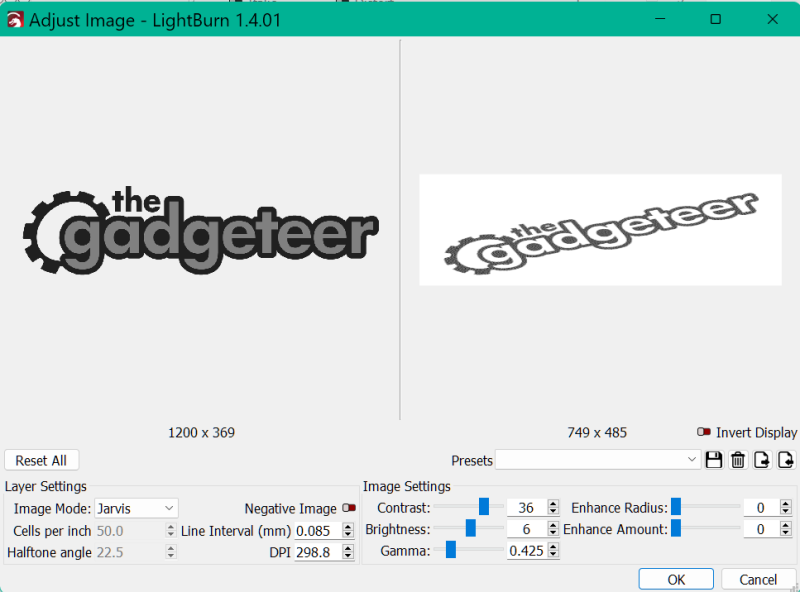
The last business card image settings are shown above. The engraving speed and power settings are as follows:
-
-
- “The Gadgeteer” image engraving speed and power: 4000mm/min., 30% power
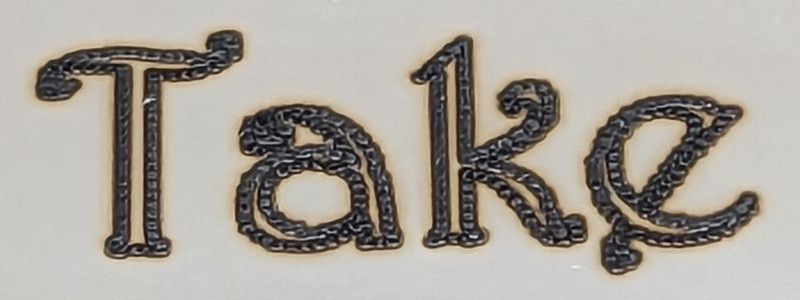
- Line engravings (text) speed and power: 3500mm/min., 60% power
-
Stainless steel
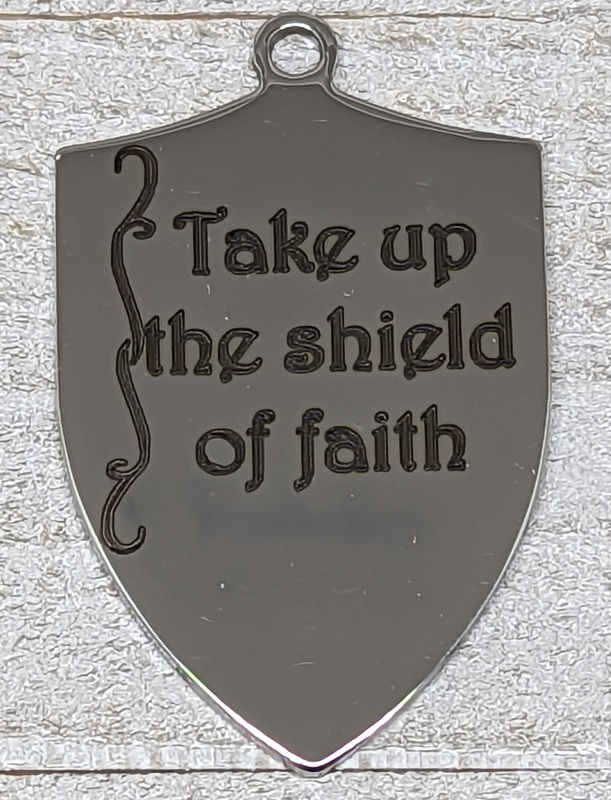
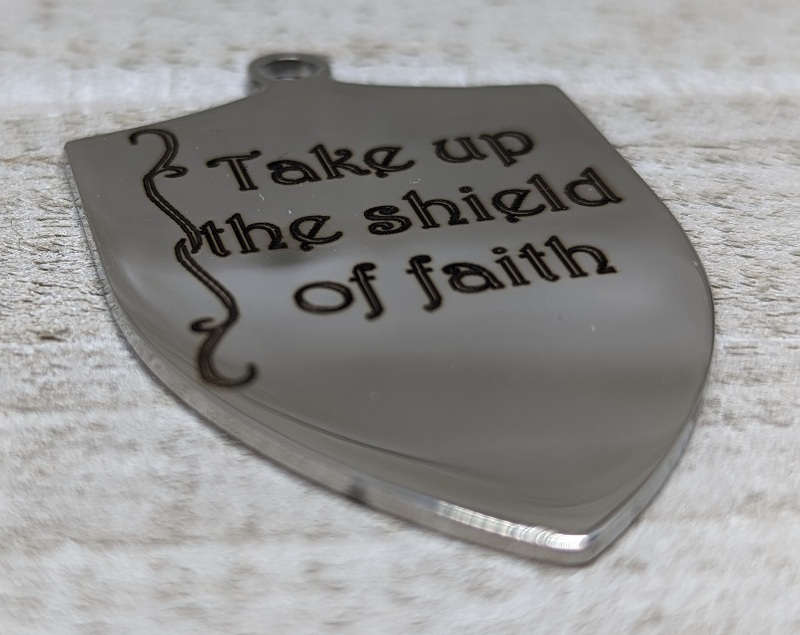
I engraved the stainless steel tag above. I probably could have decreased the power some and increased the speed a little so that the engraving would have been lighter.
I struggled with centering the text on the tag because the tag is small and the laser module is rather large which impedes my view of the laser on the material. I framed it several times, but I still was off. Thus, the design ended up being a little too far to the right. So I added a scroll on the left side of the text. All-in-all, I think it turned out pretty good. I’ll get better over time.
-
- Engraving of text – 500mm/min., 100% power
Basswood results

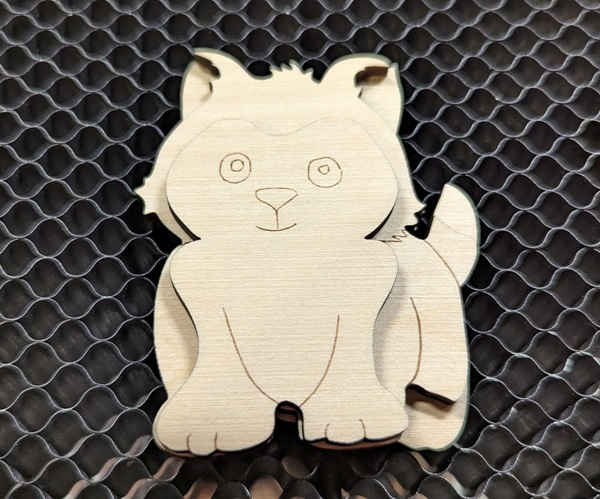
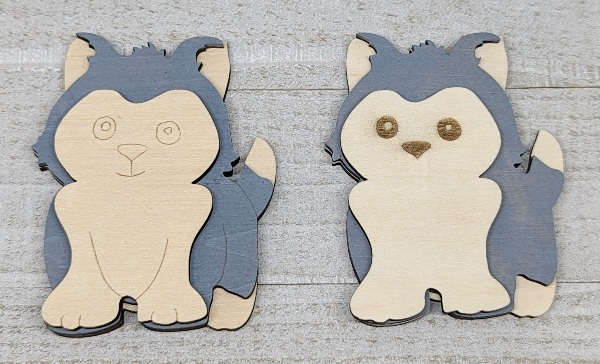
I engraved a cute dog made from three cut layers of 3mm basswood. It was enjoyable to cut layers out of wood and stack them to create a 3D image. I’m looking forward to doing more intricate layered wood designs in the future.
- Cut – 300 mm/min, 100% power
- Engraving (face and legs) – 5500mm/min., 60% power
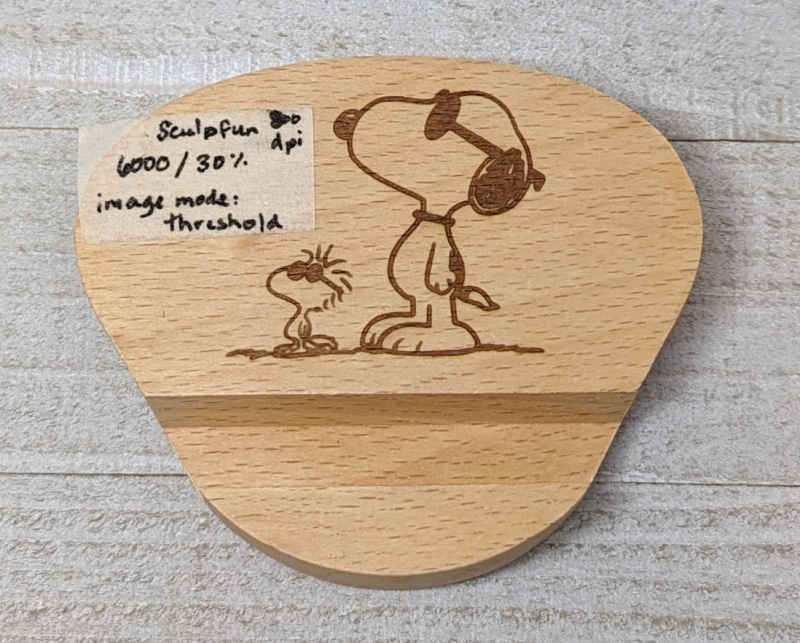
I took a blank phone stand (made of beech wood with a similar hardness as that of oak) and engraved a Snoopy and Woodstock image on it. It turned out a little lighter than I had hoped. I could have decreased the speed or increased the power for a darker engraving of the image.
- Engraving – 6000mm/min., 30% power
Glass
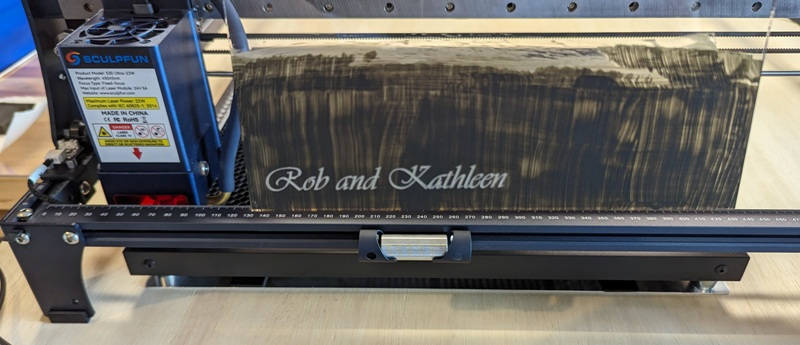
Because glass is transparent, the laser would pass right through it and not do anything to it if I didn’t coat it with something to make it opaque. I used matte black tempera paint and coated the glass using a foam brush. I did two layers. For the first layer, I painted across the glass and let it dry. And for the second layer, I painted perpendicular to the first layer to get the best coating.
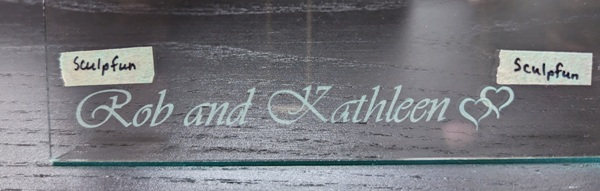
The above photo shows the results after washing the tempera paint off with soap and water.
- Engraved “Rob and Kathleen” image – 1200mm/min., 45% power
Rubber stamp
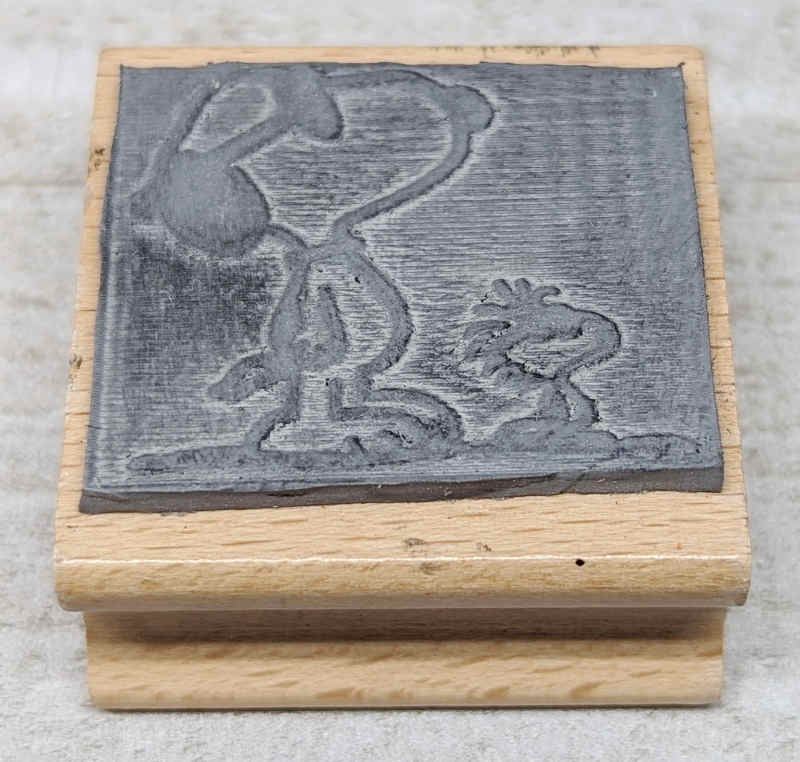
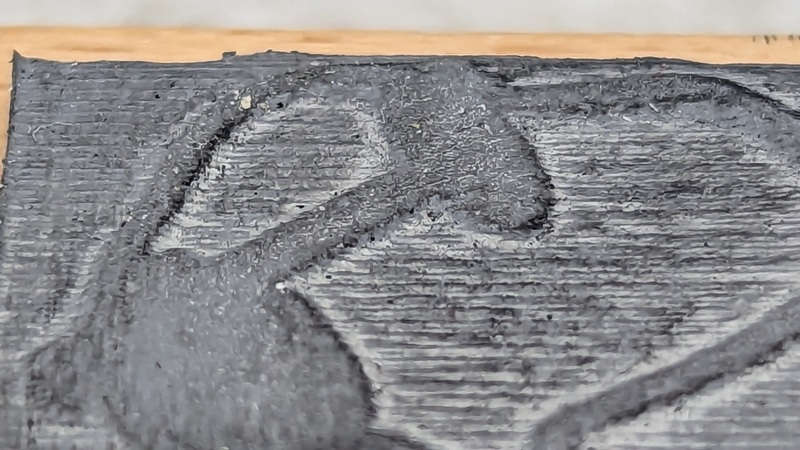
I had to look up on YouTube how to engrave a rubber stamp. It was interesting, but I don’t use stamps much, so I don’t think this is something I will be doing a lot of in the future.
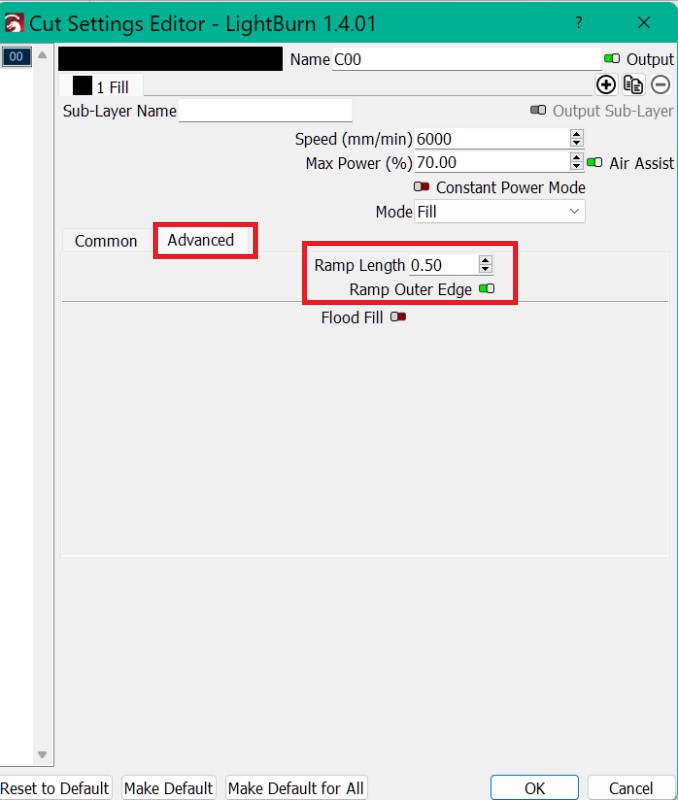
I had to use the above “Ramp length” settings (in the “Cuts/Layers” window, double click on the layer, then click on the “Advanced” tab as shown above) to get the small cuts correct so that the small portions of the stamp wouldn’t bend when using it.

I set it up so that the engraver would remove all the material around the lines of the image. I did this with the help of YouTuber Mellowpine Lasers.
To create the rubber engraving, I did the following:
- Open the image file in Lightburn
- Click on the image, trace it, and delete it leaving just the tracing behind (“Tools” menu > “Trace Image” > toggle on “Delete image after trace” > “OK”)
- Set the image to “Fill”:
- Click on the image and click on a color in the color palette located at the bottom of Lightburn (or leave the default selection)
- In the Cuts/Layers window of Lightburn, select “Fill” from the dropdown menu for that layer
- Flip the image to create a mirror of it (“Arrange” menu > “Flip Horizontal”)
- Create a square (or circle) a little larger than the image and select the same color from the color palette as the image
- Place the image on top of the square (or circle)
- Preview the engraving to make sure that it looks good (“Window” menu > “Preview”; or go to “Edit” menu > “Settings” > toggle on “Filled Rendering” to see how the project will engrave as you work on it)
- Engraving speed and power – 6000mm/min., 70% power
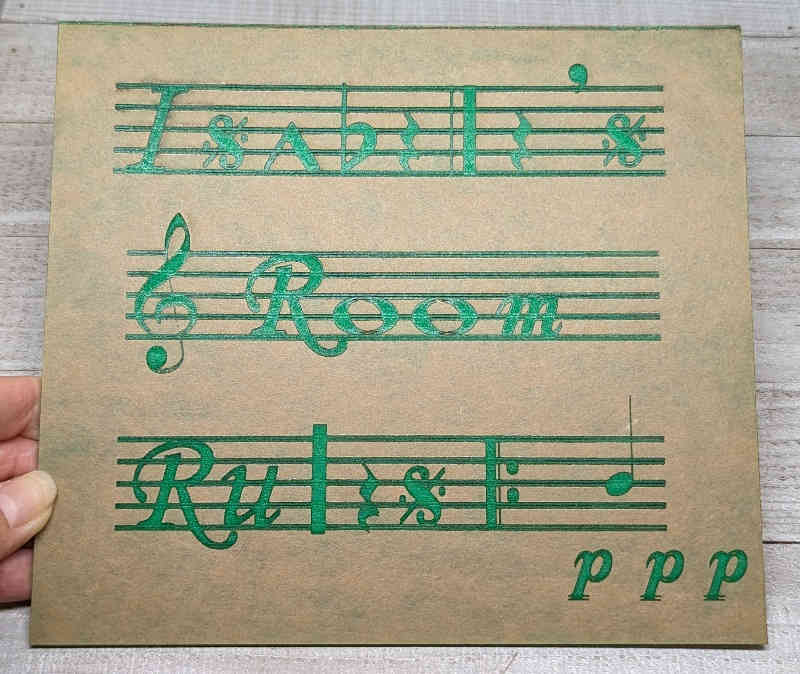
Cardstock
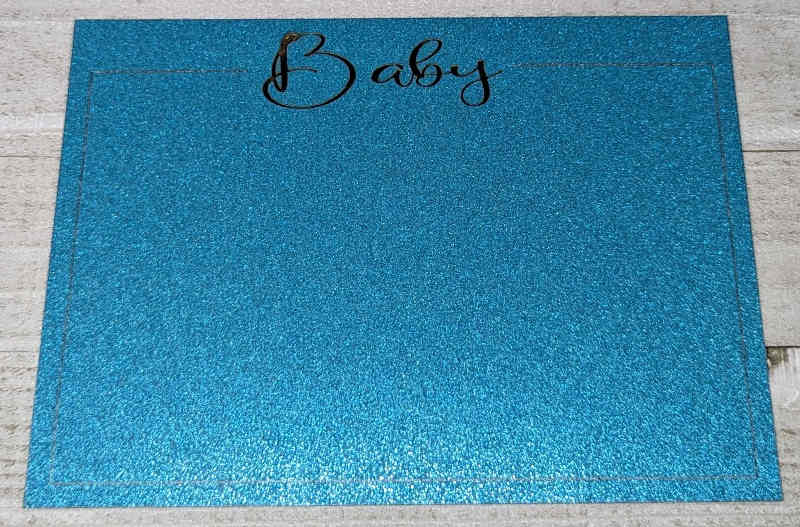
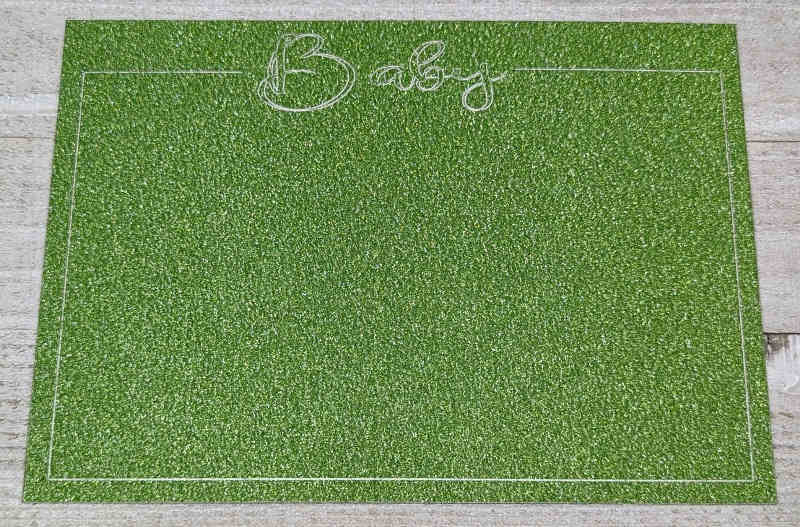
Being able to engrave on cardstock is awesome, though I have to figure out some additional settings to see if I can decrease the amount of charring on the paper. The paper also smells like a campfire. Not sure how to decrease that effect…
- 5″ x 7″ rectangle cut – 2500mm/min., 100% power
- “Baby” engraving – 7000mm/min., 40% power
- Line engraving – 6000mm/min. 40% power
Acrylic
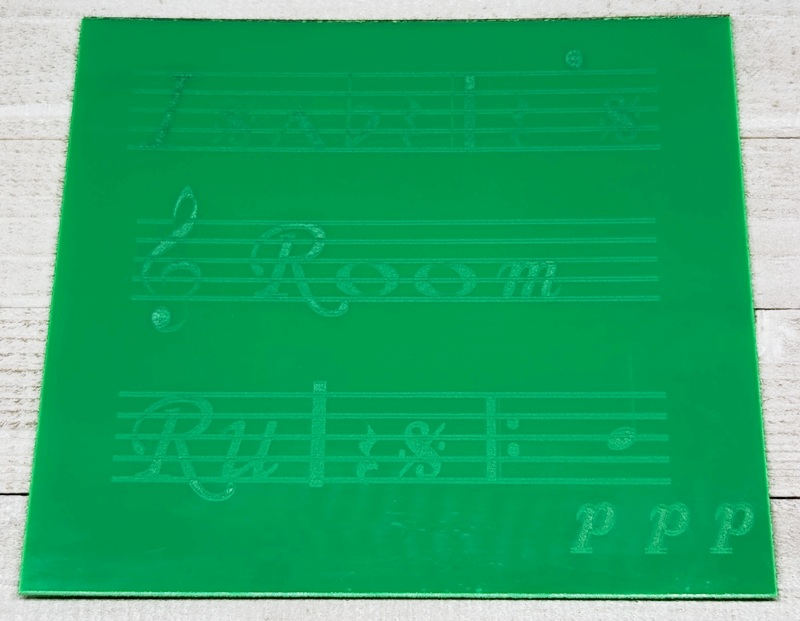
Here is my first attempt to engrave acrylic. I used a sheet of green acrylic for my material. Again, I had to look up the method and approximate settings to figure out how to do this.
The left photo above is the engraving with the protective adhesive paper still on it. The right photo above is what it looks like after the paper is removed.
The results weren’t too bad, but I think I’ll try clear acrylic in the future and sit the engraving on a lighted stand so that light shines through the plastic and illuminates the engraving.
- Image engraving – 6000mm/min., 35% power
- Border cut – 100mm/min., 100% power (I think I need to increase the speed and or decrease the power because the acrylic melted)
What I like
- It has a 22W laser that engraves and cuts much faster than the TTS-55 which has a 5W laser
- It came with an automatic air assist that can be controlled in Lightburn
- It has Bluetooth connectivity to send projects wirelessly to the engraver
- It has a very large working area (600 x 600mm)
- I’ve had beautiful, fast, clean, consistent results every time I’ve used it (if there were any issues, it was me needing to tweak the settings – the machine is great)
What I’d change
- It’s difficult to accurately position the material you wish to engrave or cut (positioning tools would be nice)
- It requires manually adjusting the laser focus using 4 screws (autofocus would be nice)
- It doesn’t come with an enclosure thus (I don’t think any diode laser engravers come with an enclosure, but it would be nice), it should be used in a workshop/garage to avoid getting smoke or dangerous fumes in the house
Final thoughts
I thoroughly enjoyed using the Sculpfun S30 Ultra 22W laser engraver. It produced beautiful, fast, clean, and consistent results every time I used it. It has a wonderful 600 x 600mm working area, a powerful 22W laser, and an automatic air assist, and I can send projects to the engraver wirelessly using Bluetooth.
I didn’t have any problems with the Sculpfun. I was able to engrave on a variety of materials like wood, glass, cardstock, aluminum, stainless steel, and rubber. Cutting 6mm basswood with only one pass was a glorious experience and quite a timesaver when compared to my 5W laser engraver. The laser was even powerful enough to etch my designs onto stainless steel without coating it first.
The biggest “issue” I had was having to spend time positioning the laser on my material, especially on small materials because the laser module is rather large and impedes my view of the material. So adding an automatic positioning tool would be helpful.
The Sculpfun S30 Ultra is an expensive item, but laser engraving in general is an expensive hobby. However, if you have the money, the S30 Ultra is a wonderful laser engraver to create your own personalized items.
Price: $899.99 at Sculpfun or $1049.99 at Amazon (but comes with a honeycomb bed)
Where to buy: Sculpfun and Amazon
Source: The sample of this product was provided by Sculpfun.

Now retrieving an image set.
2-Pack LED Video Light Kit, NiceVeedi Studio Light, 2800-6500K Dimmable Photography Lighting Kit with Tripod Stand&Phone Holder, 73" Stream Light for Video Recording, Game Streaming, YouTube
(as of July 14, 2026 14:09 GMT -05:00 - More infoProduct prices and availability are accurate as of the date/time indicated and are subject to change. Any price and availability information displayed on [relevant Amazon Site(s), as applicable] at the time of purchase will apply to the purchase of this product.)
Gadgeteer Comment Policy - Please read before commenting
Thank you Kathleen that was a wonderful read and learned a bit more, I’m waiting for my S30 Ultra 22 watt laser to arrive and have saved this site for future reference…
Thanks again…
Cheers for now Merlin… from NZ
Merlin – I’m glad to hear that you found the review helpful! I hope you enjoy your S30 Ultra as much as I do mine – it’s so much fun to use! And thanks for taking the time to leave a comment. It’s so cool to hear from readers from across the globe!