REVIEW – In my ongoing quest for a robotic companion to reside on my desk, I have found few worthy contenders. While the ClicBot (reviewed in June 2022) and the Petoi Bittle (reviewed in November 2022) came close, neither of them quite fit the bill. Taking my search to the next level, I have been sharing my workspace with the Elephant Robotics myCobot 280. The myCobot 280 is a significant step up in both complexity and functionality from the bots I’ve tried before, which is clearly reflected in its price. The myCobot 280 kit that I reviewed costs $638, and additional accessories range from $100 to $1000. With that significant increase in price, though, comes a big jump in what’s possible with this amazing, albeit complex, robotic arm.
What is it?
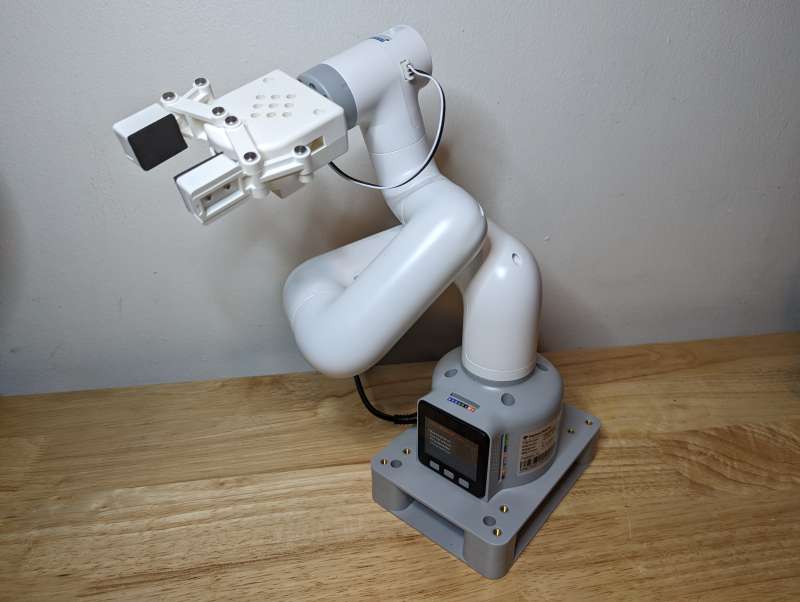
The Elephant Robotics myCobot 280 is a six-axis robotic arm that offers multiple control methods and is designed for both research and education. It supports various popular programming languages such as Python, myBlockly, C++, and Arduino. The myCobot 280 is built on the M5Stack, which is a modular and stackable developer kit running on an ESP32 core processor. The myCobot 280 kit that I reviewed came with an Adaptive Gripper, Base Plate, and Gamepad controller.
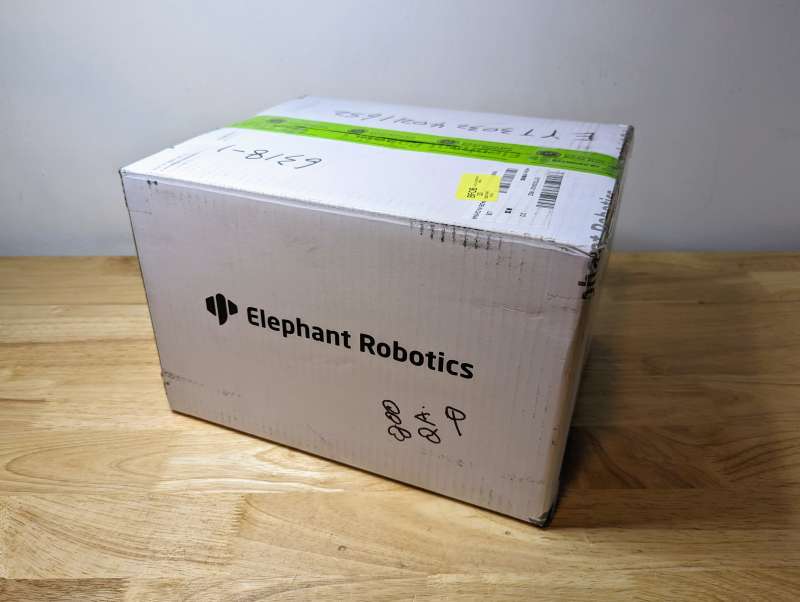
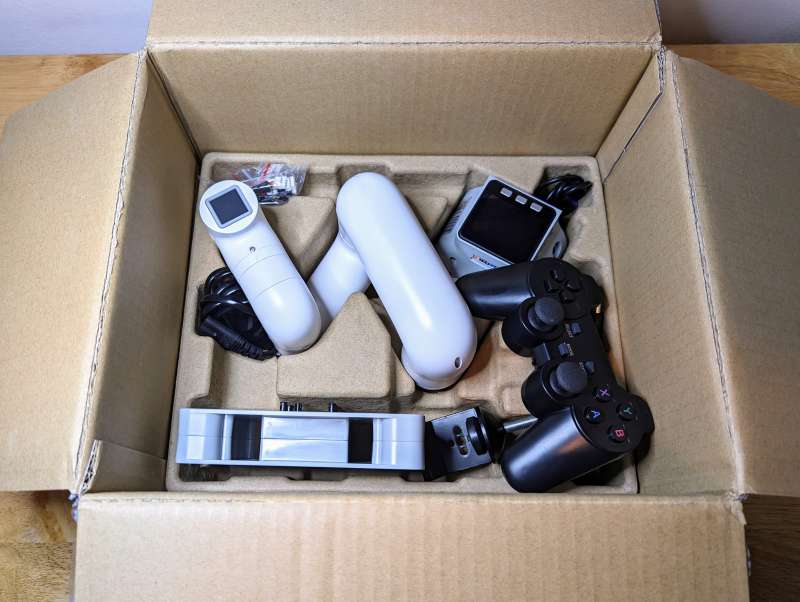
The myCobot 280 comes in a plain white box with only the Elephant Robotics name and logo printed on the outside. Inside the box, the components are safely packed in molded cardboard. The Adaptive Gripper for the myCobot shipped separately.
What’s in the box?
- myCobot 280 M5 Robotic Arm
- Power Supply
- GPIO Jumper Wires
- USB-A to USB-C Cable
- LEGO Connectors
- G-Base and Clamp
- myCobot Gamepad
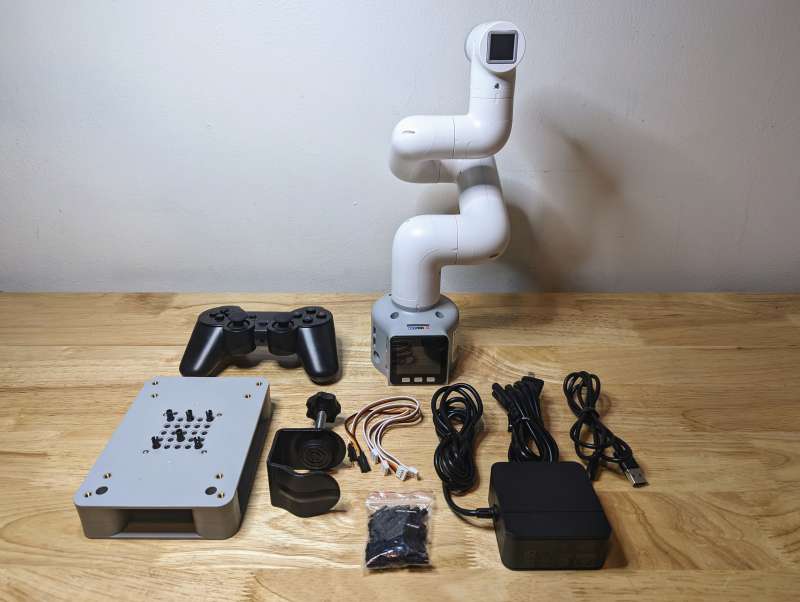
- Adaptive Gripper
Hardware specs
- Degree of Freedom: 6
- Payload: 250g
- Arm span: 350mm
- Working radius: 280mm
- Repeatability: ±0.5mm
- Weight: 850g
- Power Input: 8V, 5A
- Material Industrial: Nylon
- Working Condition: -5°C to 45°C
- Communication: USB Type-C
- M5STACK Basic:
- ESP32-D0WDQ6: 240MHz dual-core, 600 DMIPS, 520KB SRAM, Wi-Fi, dual-mode Bluetooth
- Flash: 16MB
- Power Input: 5V @ 500mA
- Port: USB Type C x 1, GROVE (I2C+I/0+UART) x 1
- Core Bottom Port: PIN (G1, G2, G3, G16, G17, G18, G19, G21, G22, G23, G25, G26, G35, G36)
- IPS Screen:
- Size: 2 inch
- Resolution: 320×240
- Color: Colorful TFT LCD, ILI9342C
- Brightness: 853nit
- Speaker: 1W-0928
- Button: Custom x 3
- Battery: 110mAh @ 3.7V
- Antenna: 2.4G 3D Antenna
- Operating Temperature: 0°C to 40°C
- M5STACK Atom:
- ESP32: 240MHz dual-core, 600 DMIPS, 520KB SRAM, Wi-Fi, dual-mode Bluetooth
- Flash: 4MB
- Power Input: 5V @ 500mA
- Port: USB Type C x 1, GROVE (I2C+I/0+UART) x 1
- PIN Interface: G19, G21, G22, G23, G25, G33
- RGB LED: WS2812C 2020 x 25
- MEMS: MPU6886
- IR: Infrared transmission
- Button: Custom x 1
- Antenna: 2.4G 3D Antenna
- Operating Temperature: 0°C to 40°C
Design and features
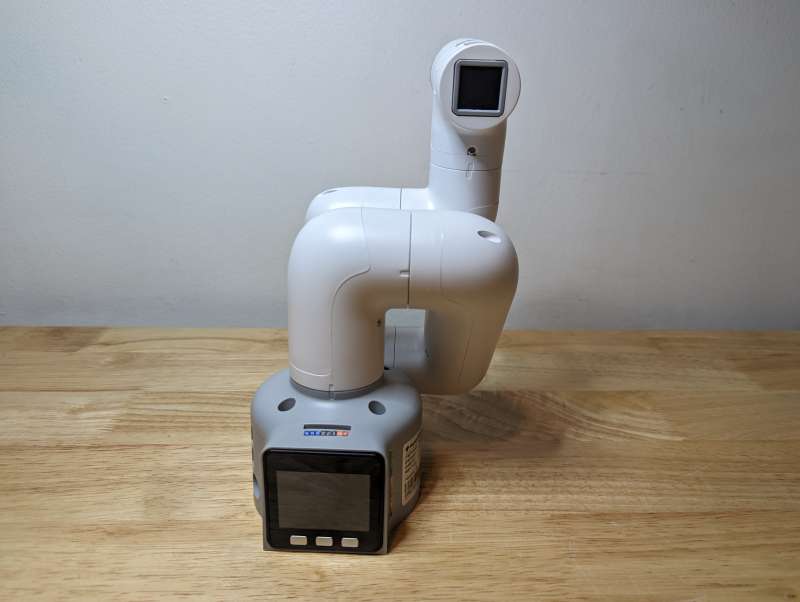
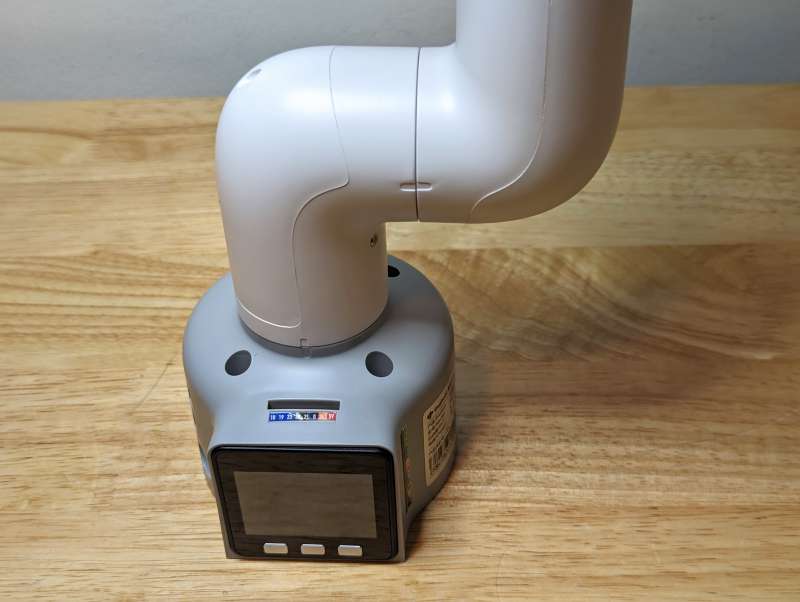
At its most basic configuration the myCobot 280 consists of a “brain” with a small LED screen, six movable sections with individual servo motors, and a 5×5 RGB LED Matrix.
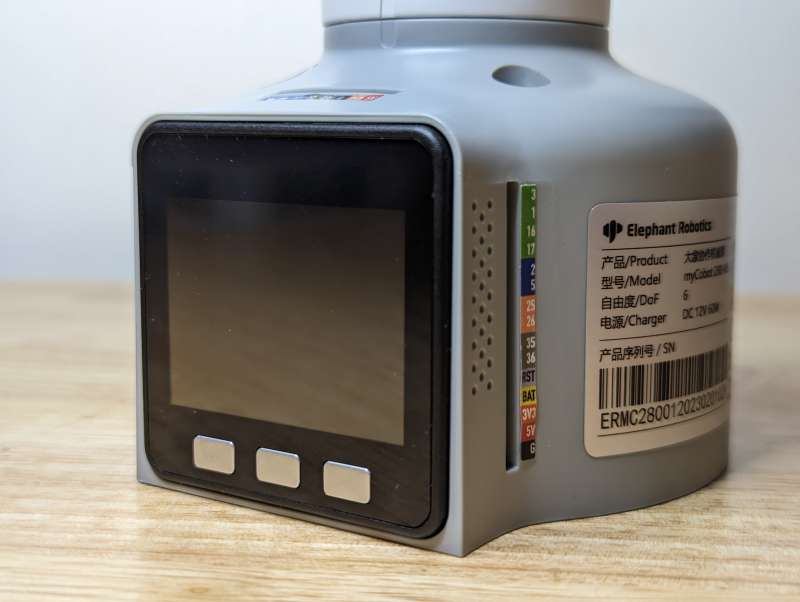
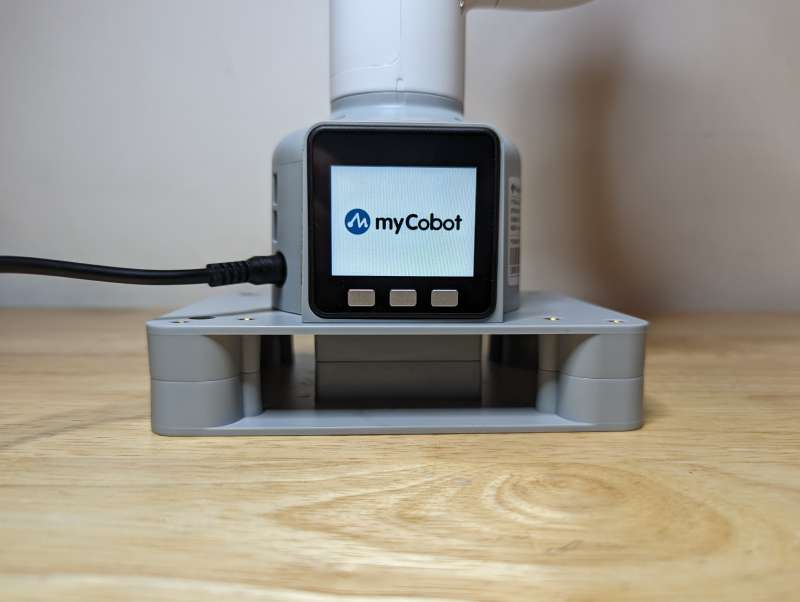
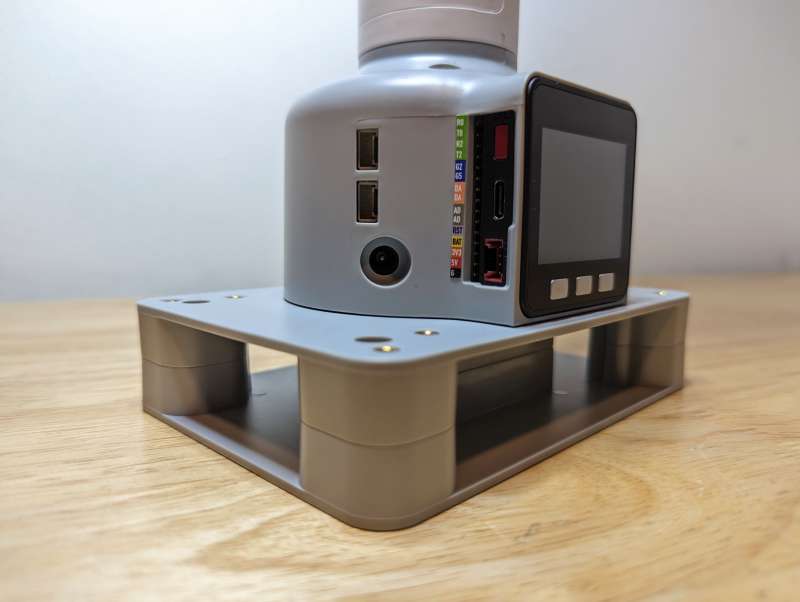
The “brain” or controller of the myCobot 280 is based on the M5Stack BASIC which is a modular, stackable development kit used for building more complex electronic devices. The controller has a two inch LED screen, three buttons, and various different inputs and ports. Using the basic menus of the controller a user can access primary functions of the myCobot 280 like calibration or configuring the communication protocols.
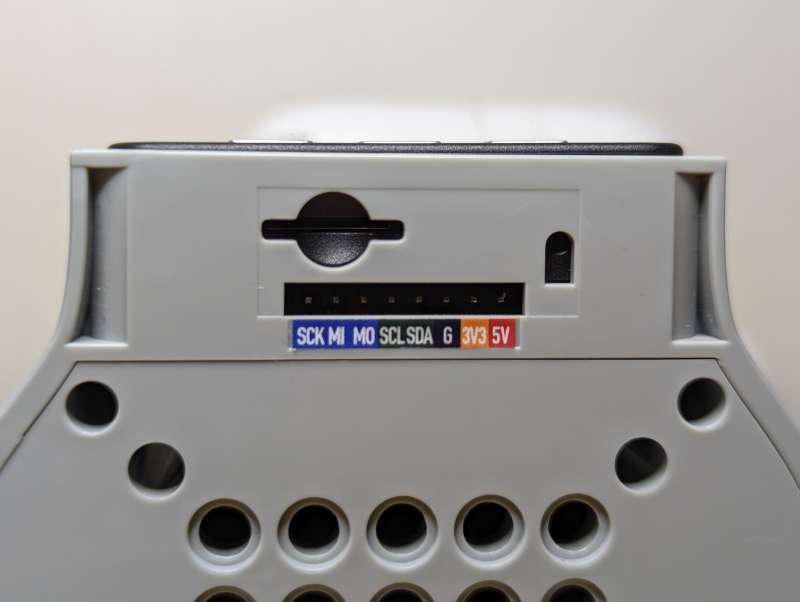
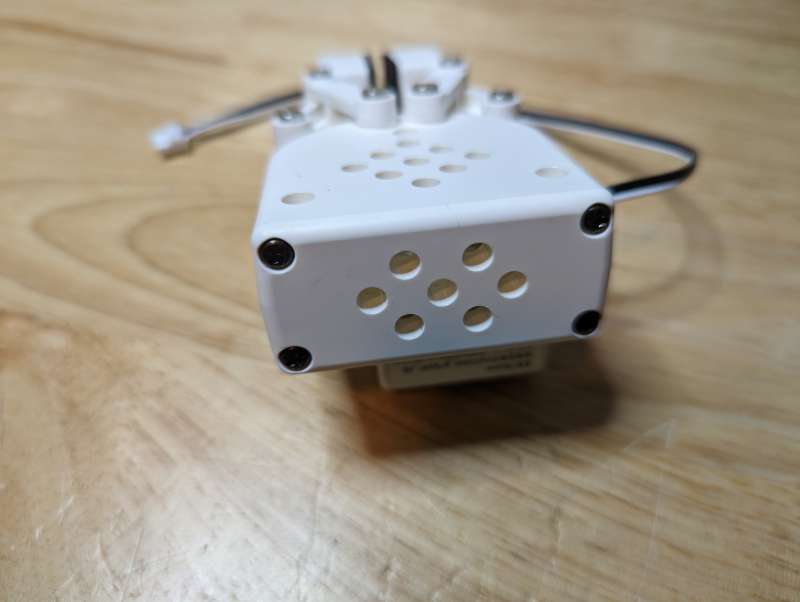
On the bottom of the controller is a Micro SD slot along with GPIO connectors. A GPIO (General Purpose Input/Output) connector allows the device to interface with external electronic components like sensors or motors.
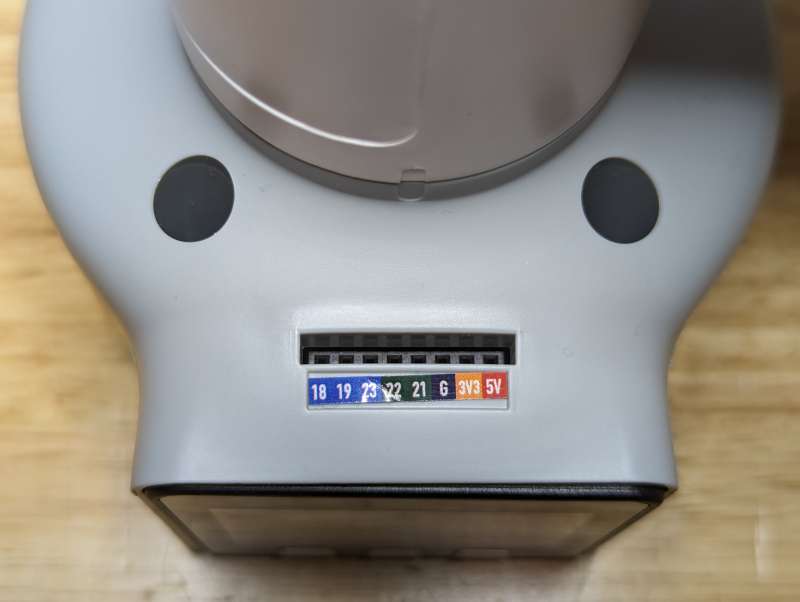
There are more GPIO connectors on top of the controller.
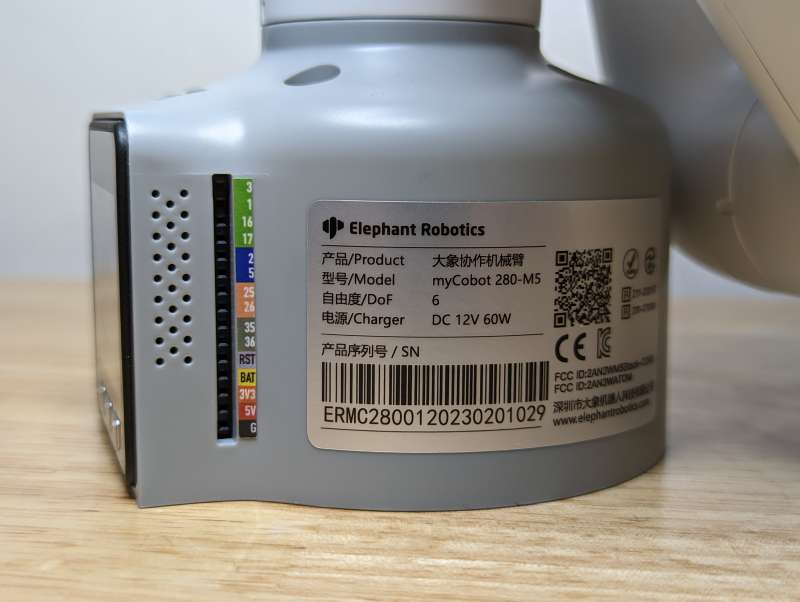
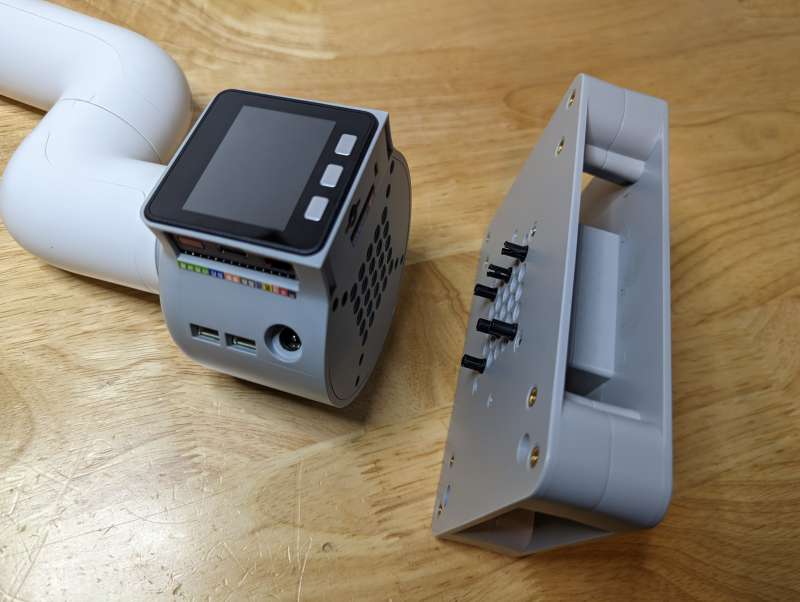
The right side of the controller holds the unit’s speaker and another set of GPIO connections.
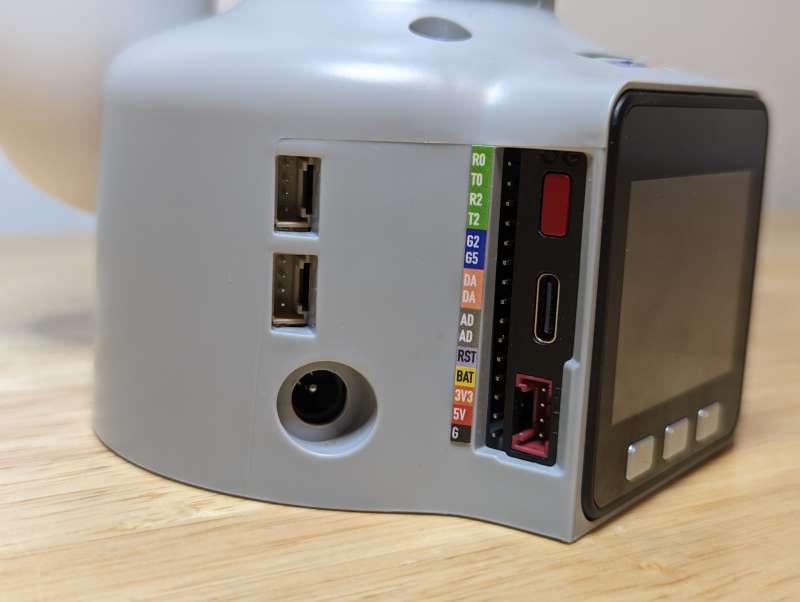
The left side has a power port, a USB-C port, more GPIO connections, a small power/reset button and three Grove connectors. Grove connectors are 4-pin plugs similar to GPIO connections used to connect different sensors, actuators, or modules.
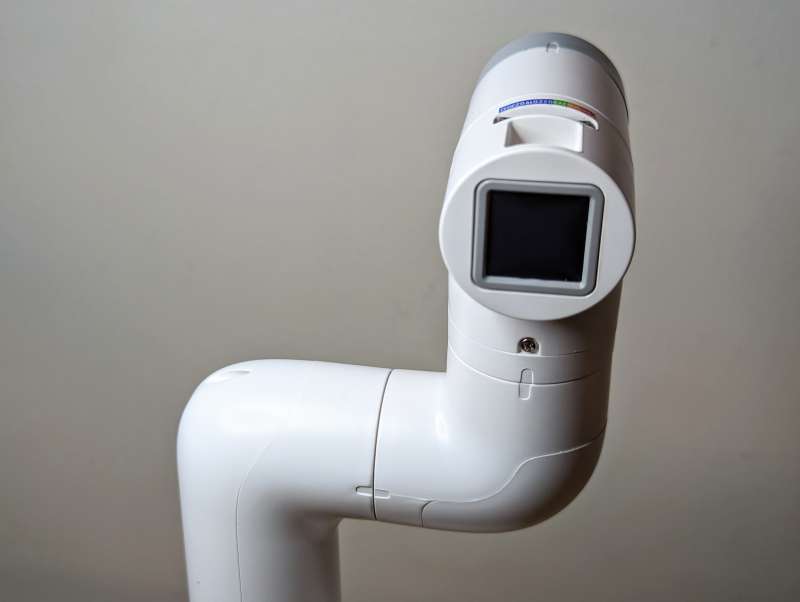
The “head” of the myCobot 280 is equipped with an additional M5Stack, specifically the M5Stack ATOM Matrix.
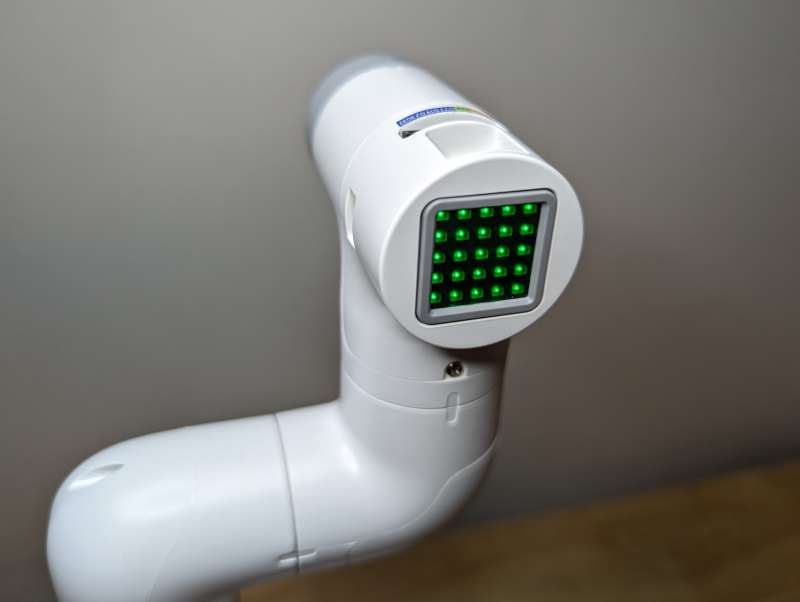
The RGB LEDs are programmable and the smaller controller has several input ports similar to the main unit’s.
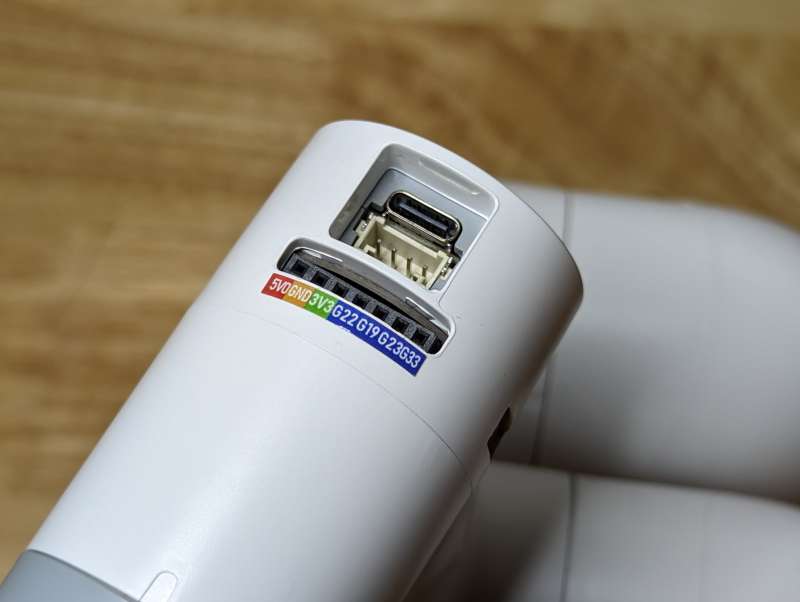
On top of the controller are GPIO connections, a Grove connector, and a USB-C port.
The left side of the top controller has an additional Grove connector.
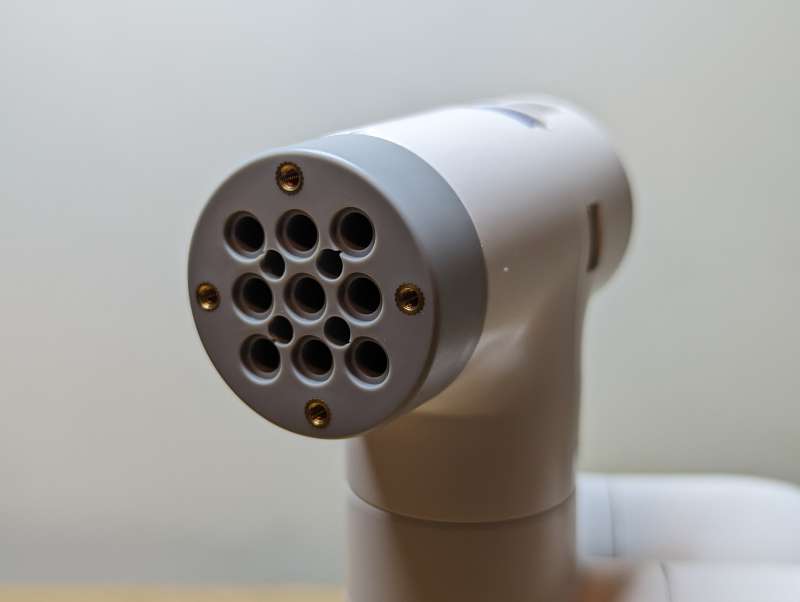
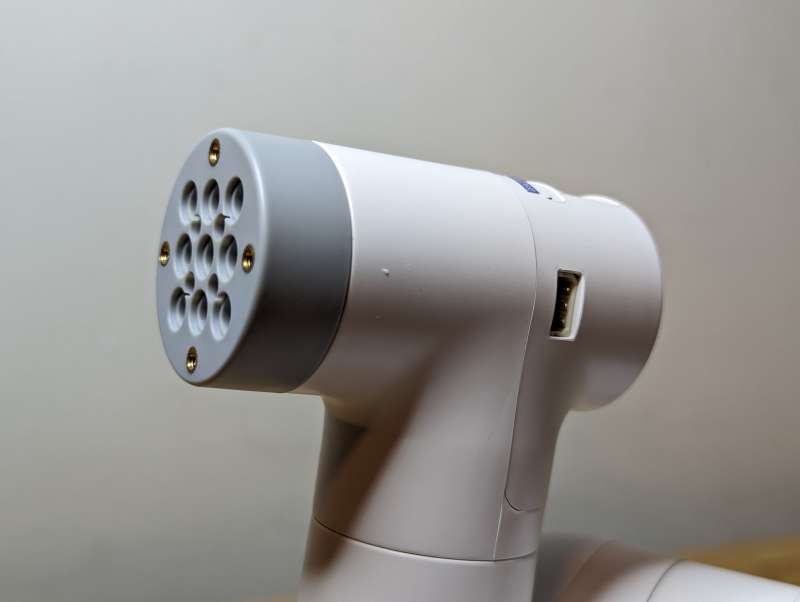
The back of the “head” has a rotatable servo with a 3 x 3 grid of holes for LEGO connectors.
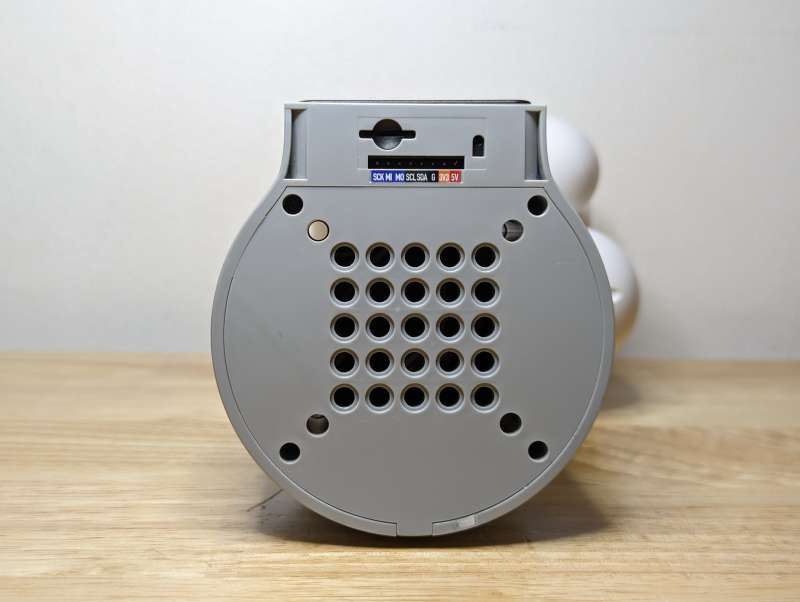
The bottom of the base also has holes for LEGO connectors arranged in a 5 x 5 grid.

LEGO connector pins are used to connect the myCobot 280 to many of its accessories including the G-Base. The G-Base helps to keep the unit stable while moving through its full range of motion.
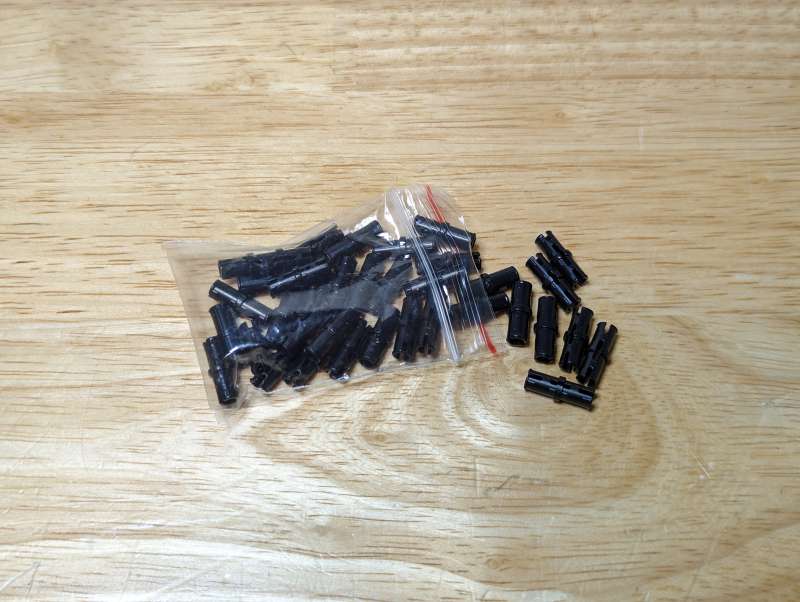
Elephant Robotics provides a bag of about 30-40 LEGO connectors to use for accessories or for securing the myCobot 280 to its base.

The G-Base itself is secured from moving with an included adjustable clamp.

Powering the myCobot 280 is a 12V power brick and cable.
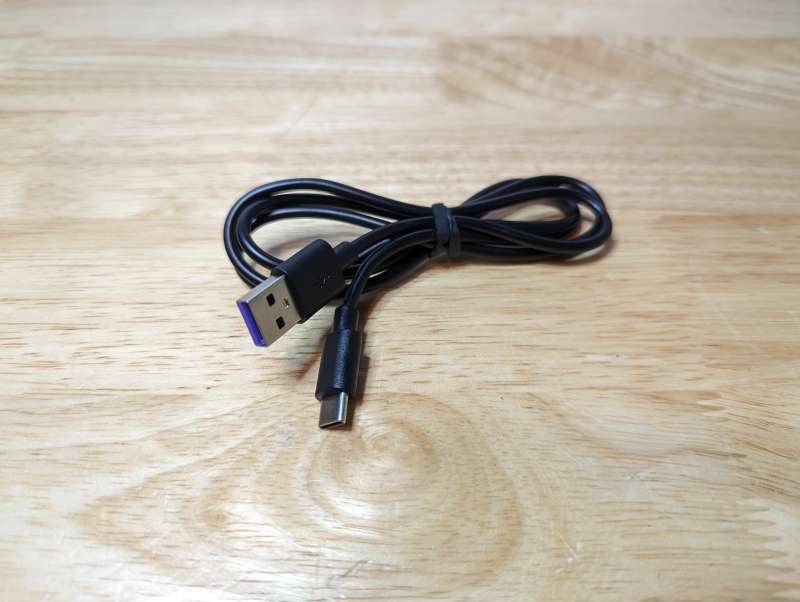
There’s a USB-C to USB-A cable included for connecting the myCobot 280 to a computer for programming.
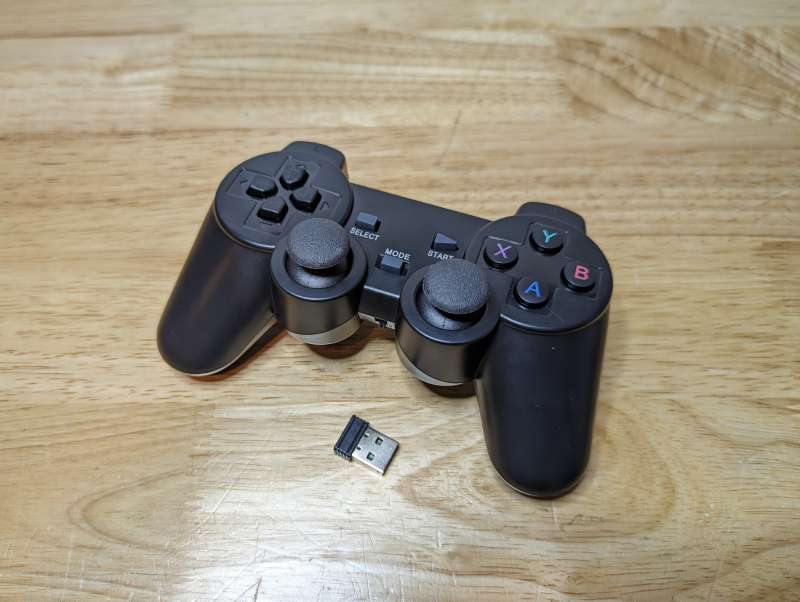
The myCobot can even be controlled via a Gamepad controller that comes with a dongle for connecting to a PC.
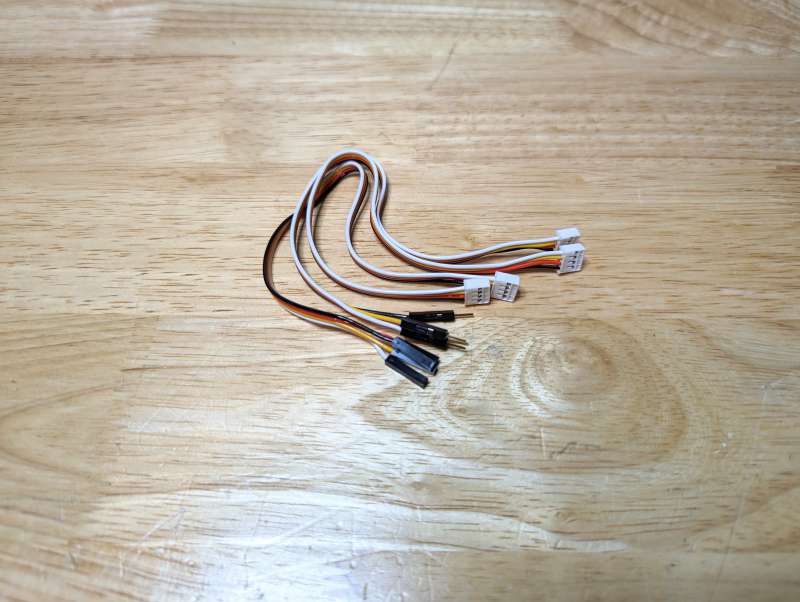
Several jumper wires are included for connecting the unit via the GPIO or Grove ports to other sensors or modules.
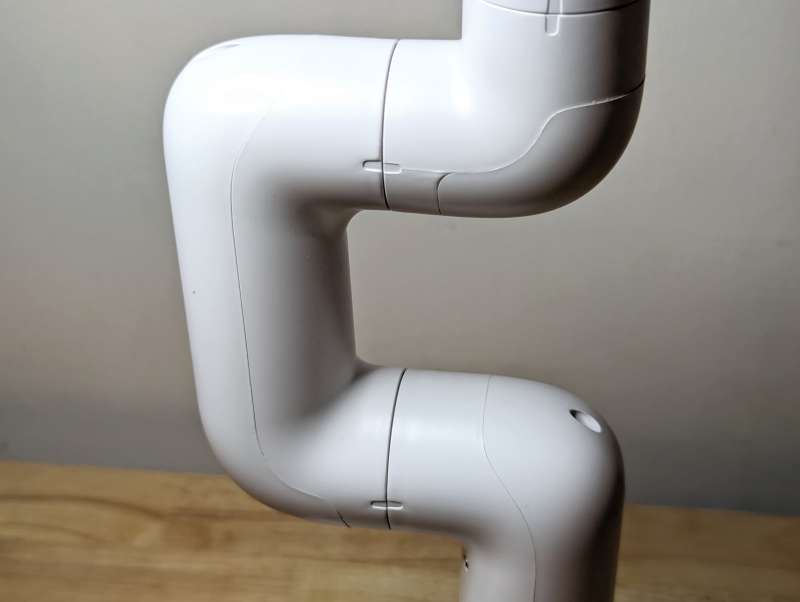
The six segments of the myCobot 280 are made of sturdy ABS plastic and fit together at 90-degree angles.
The unit ships pre-assembled with all of the segments and head connected to the base.
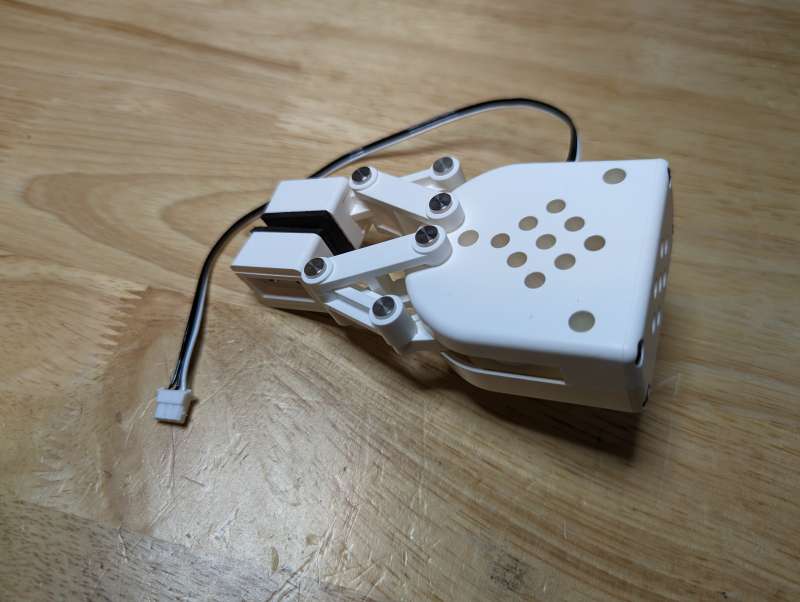
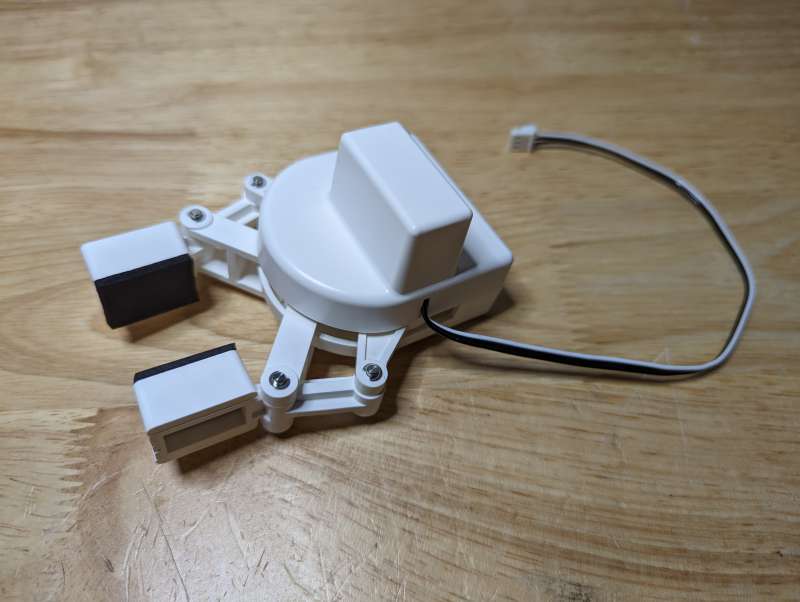
The Adaptive Gripper for the myCobot 280 is sold and shipped separately. It is a pincer-like attachment that can be connected to the top part of the robot arm, or “head”, of the myCobot 280 via a small wire. The Gripper communicates with the main unit through a Grove connector plugged into an open port.
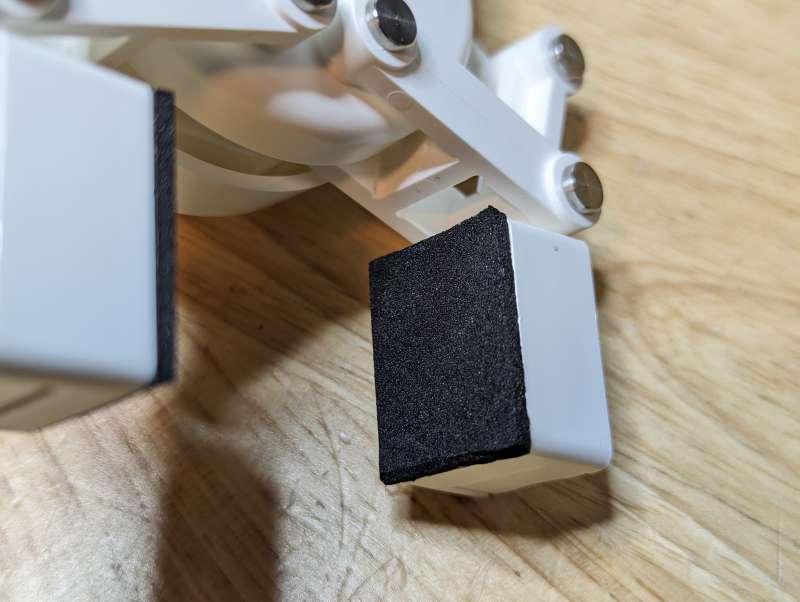
The two fingers of the Gripper have soft foam pads adhered to them to increase grip.
There are LEGO connector holes on the bottom and back of the Adaptive Gripper to connect it to the unit.
Setup
Luckily, the myCobot 280 doesn’t require very much physical setup. The main unit arrives preassembled, so all that remains is to connect the base and accessories.
By using LEGO connectors it’s easy to attach the base, and any other similar accessories.
Not surprisingly, the LEGO connectors do a great job keeping the main unit tightly secured to the base.

A simple clamp is provided to hold the base in place on the edge of a table or desk.

There are five holes in the clamp that could be used to secure the clamp more permanently using screws.
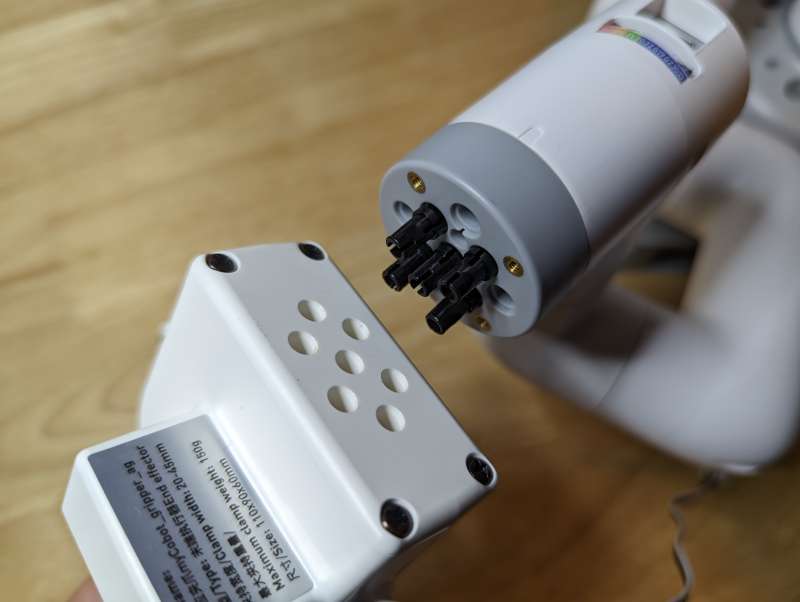
If you’re using the Adaptive Gripper, it needs to be connected to the head of the myCobot 280 using LEGO connectors as well.
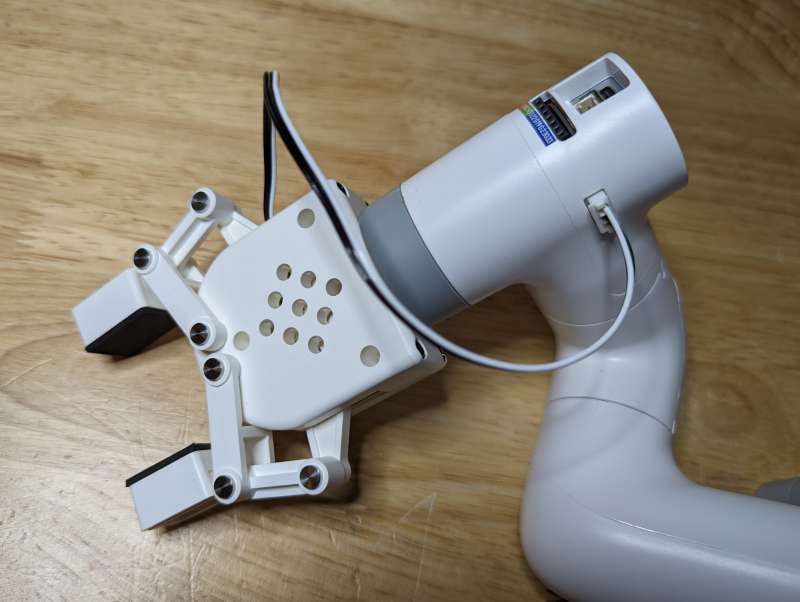
The Gripper can be connected two different ways, but both configurations require that its wire is plugged into the Grove port on the side of the main unit.
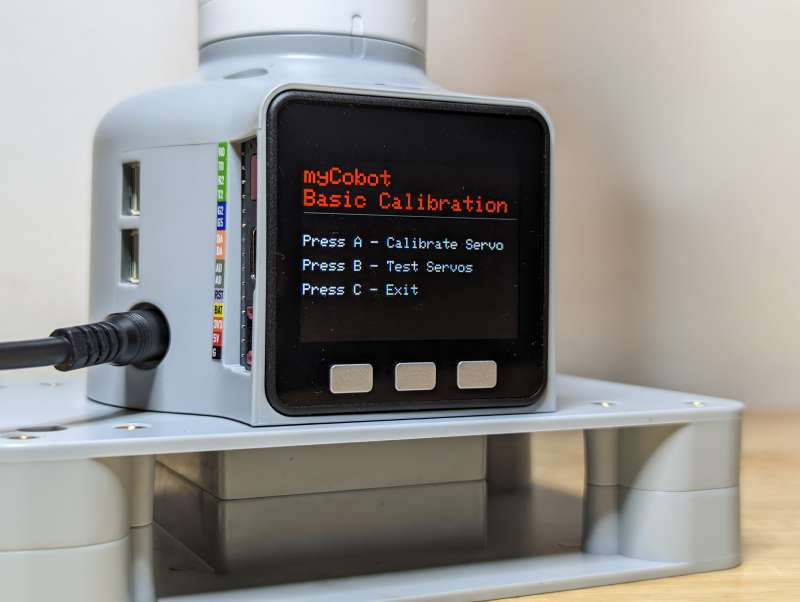
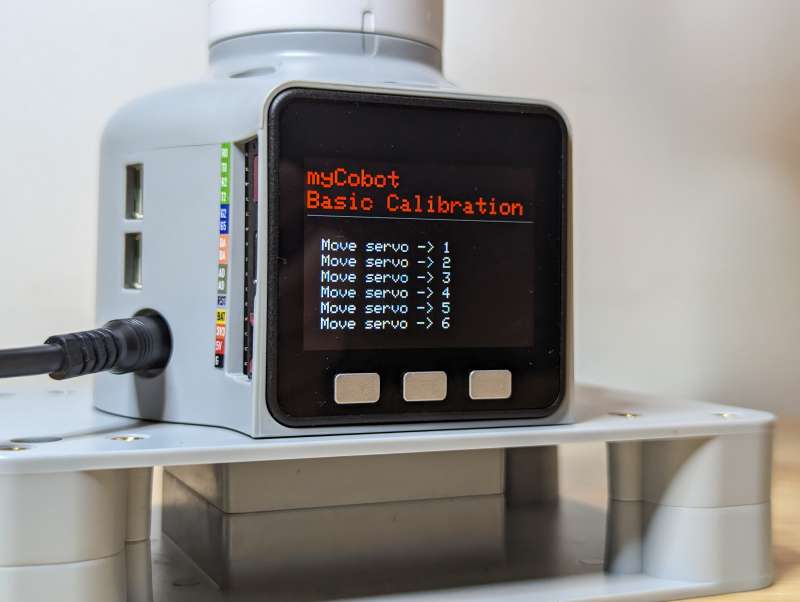
Once the myCobot 280 is secured to the base and has any accessories attached, connecting the power cable will automatically turn on the unit. To make sure the controller knows the exact position of each segment, it’s important to calibrate the servos before proceeding. Navigating the menus of the myCobot 280 is very simple and choosing Basic Calibration will start the process.
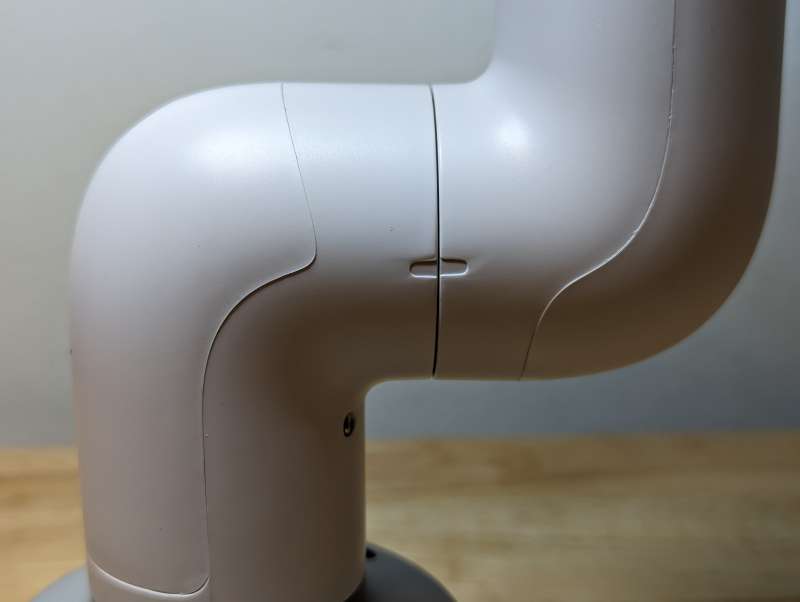
Each segment has a small notch on it, to calibrate the servos all of these notches need to line up. When running through the calibration sequence, each servo will release while the segments are aligned by hand and then lock when the next servo is being calibrated.
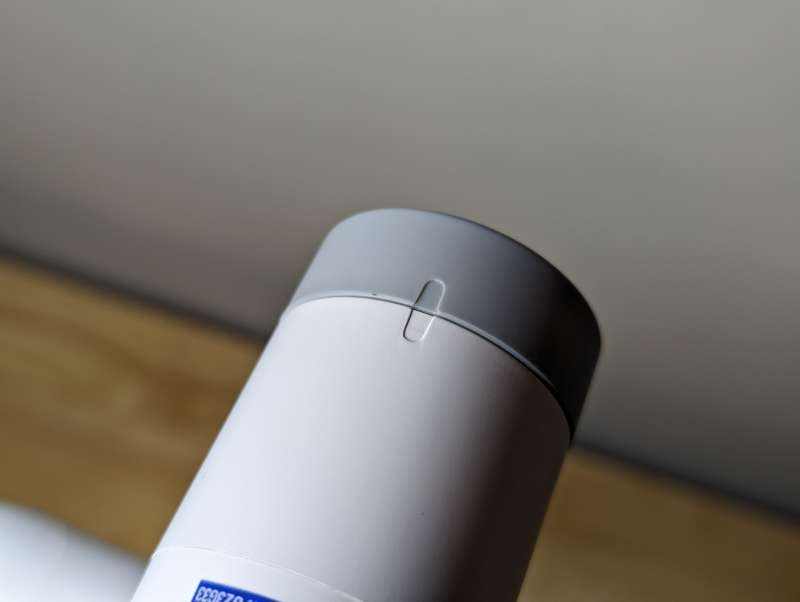
There’s even a notch on the rotating segment on the head of the myCobot that needs to be aligned properly.
After calibrating the servos, running a test will have the myCobot 280 check each servo by moving it slightly and then returning it to the correct position.
With the myCobot 280 powered up, servos calibrated, and accessories attached it’s finally time to have some fun.
Performance
The myCobot 280 has a steep learning curve if you plan on doing anything more advanced than trying out the built-in Record and Playback function.
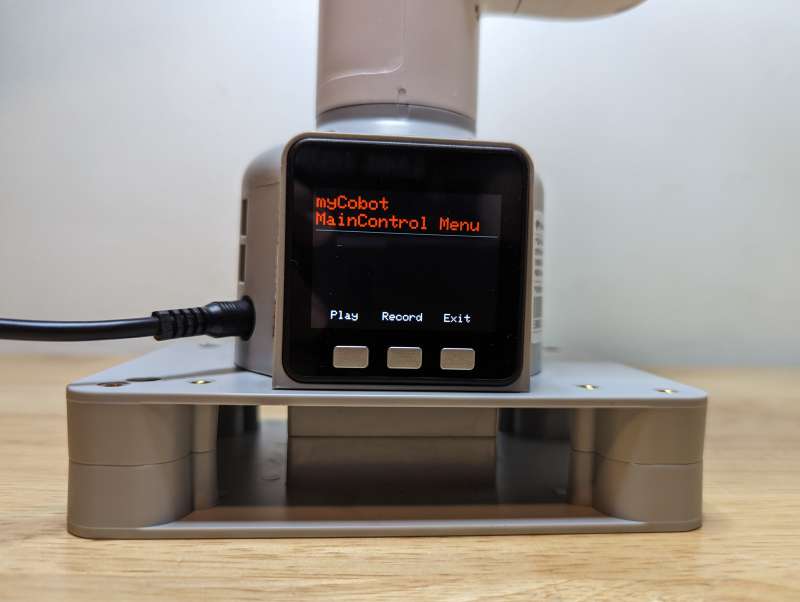
The Record and Play function of the myCobot 280 is a feature that allows users to record the movements of the robot arm, save them, and play them back again.
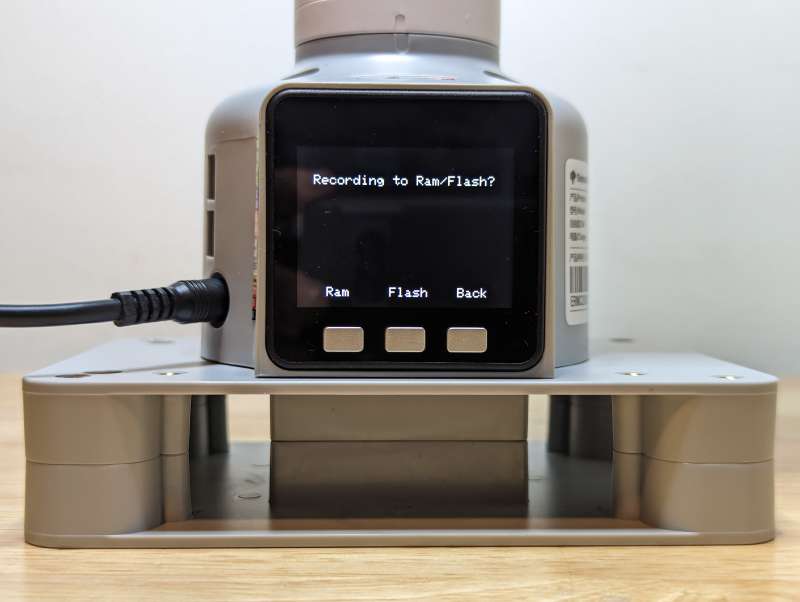
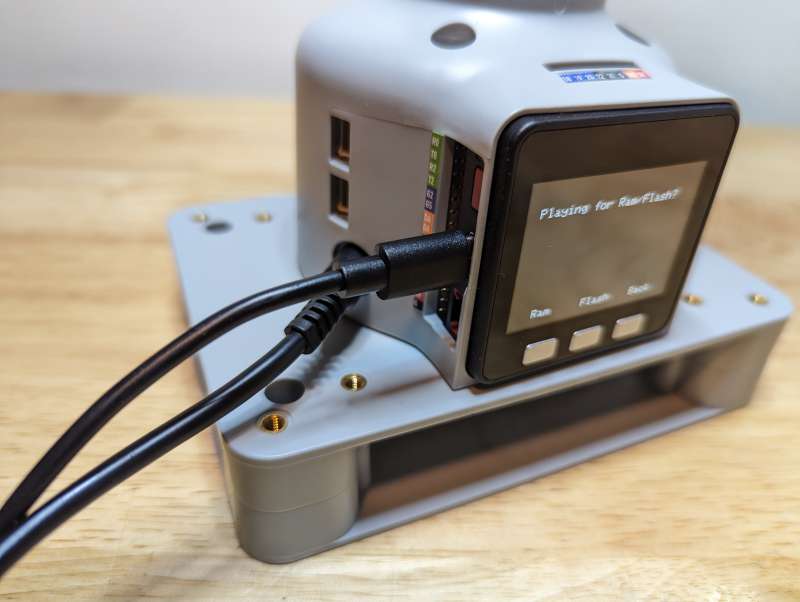
To record a motion sequence, first, put the robot arm in the starting position you want it to begin from. Then, press the “Record” button on the control panel. Choose where to save the recording, either on internal RAM or its 16MB of Flash memory. After choosing, you can manipulate the arm manually through any series of movements and the myCobot 280 will record them, the default recording time is 100 seconds. Once you’ve reached the end press “Stop Recording and Save”. The myCobot 280 will then automatically save the recorded motion sequence. To play back a saved motion sequence press the “Play” button and the myCobot will automatically move through the recorded sequence infinitely on a loop.

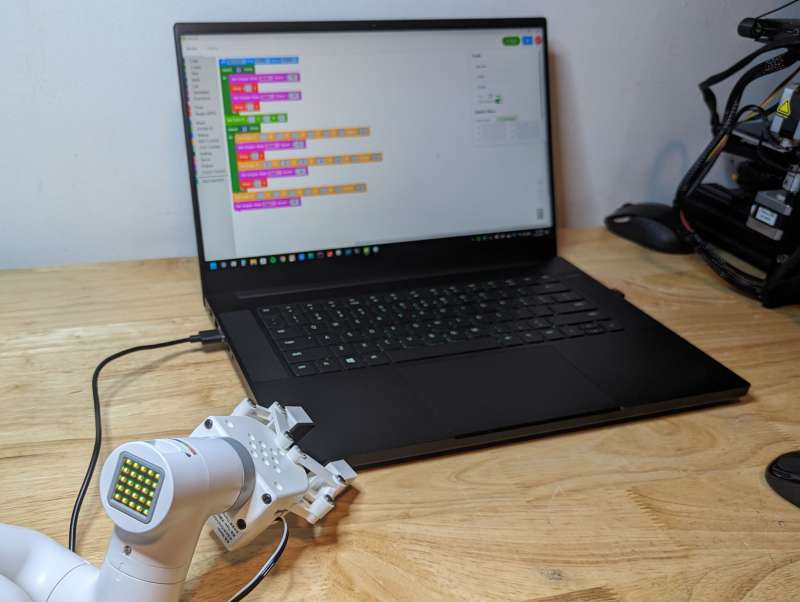
It’s fun using the Record and Play function, but it barely scratches the surface of what the myCobot 280 is capable of. To really explore its functionality the unit needs to be connected to a computer and programmed using one of the many coding languages the myCobot 280 understands. The best way to connect the unit to a computer is through the USB interface. The USB option needs to be chosen in the myCobot 280 menu to enable the connection.
The included USB-A to USB-C cable provides the connection to a computer.
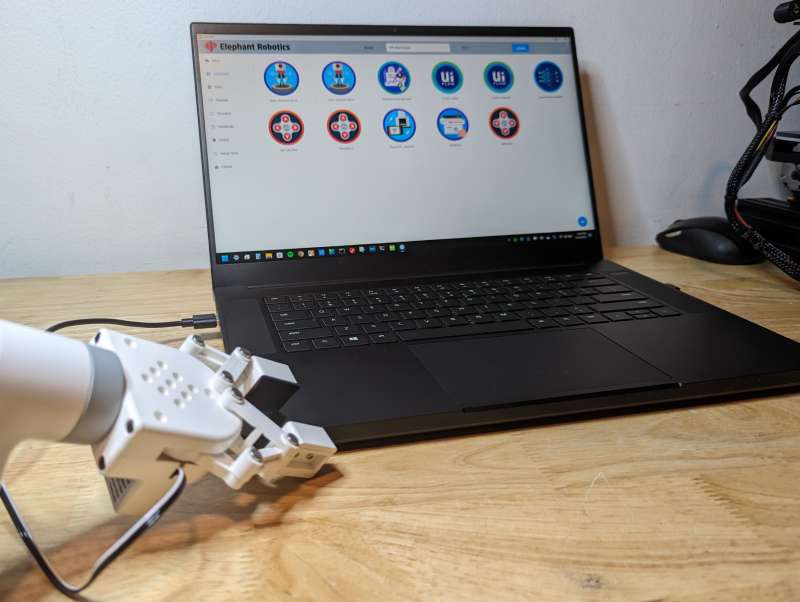
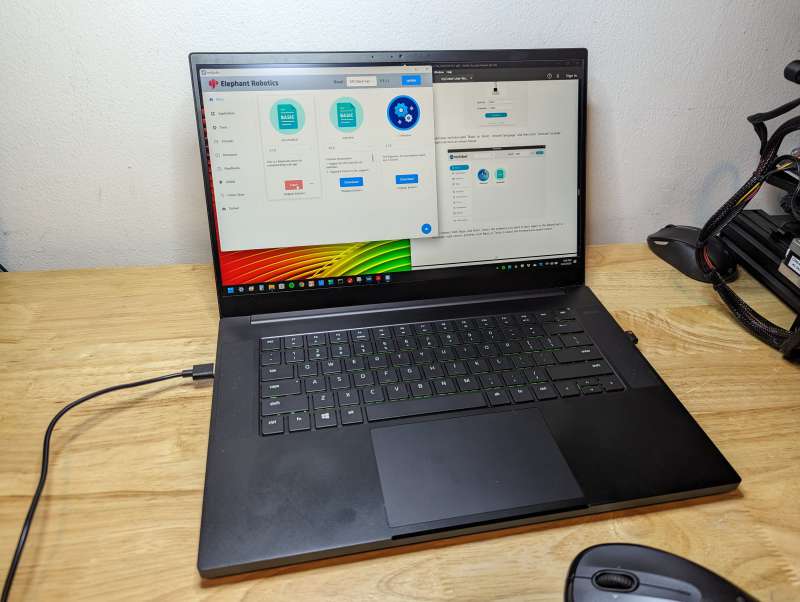
I used a Windows 11 laptop running the myBlockly programming language. As a visual programming language, myBlockly was designed for beginners to learn coding concepts. It uses blocks that snap together to form programs instead of typing out code.
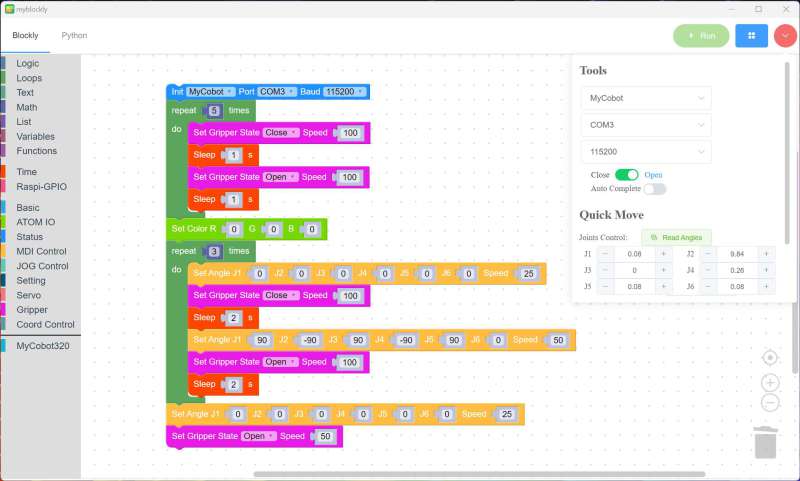
The version of myBlockly used with the myCobot 280 has all of its functions as blocks that can be arranged in simple or complex sequences. Once completed the sequences can be run on the myCobot and the unit will execute the movements.
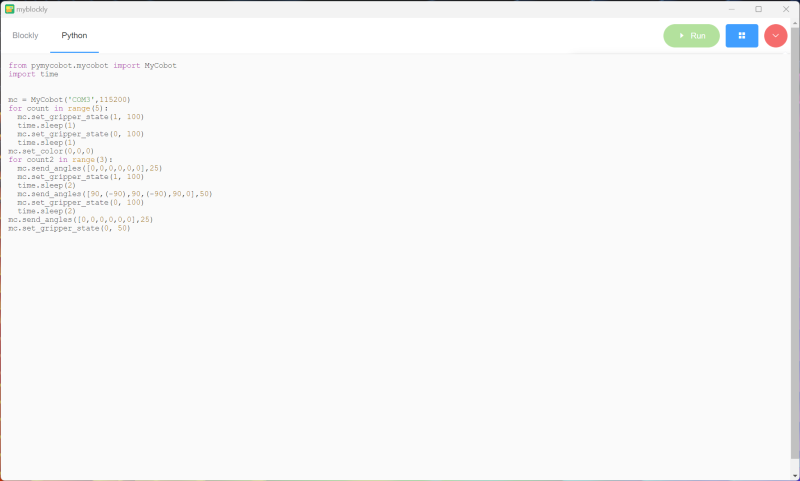
The interface even shows you the Python translation of the myBlockly sequence which is great for teaching or learning Python.
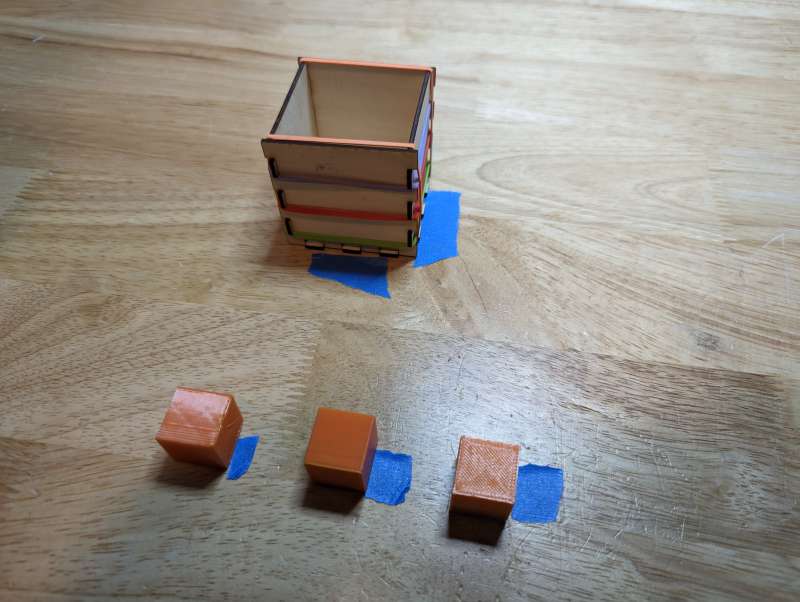
To test my programming skills along with the dexterity of the myCobot, I set up three small cubes and a box. I marked the locations of each item for repeatability and then tried a number of different ways to program the myCobot 280 to move the cubes into the box.
The exercise was equally rewarding, frustrating, and eye-opening. Whether using myBlockly, Python, or the Record and Play function it was quite a task to finally complete my goal.
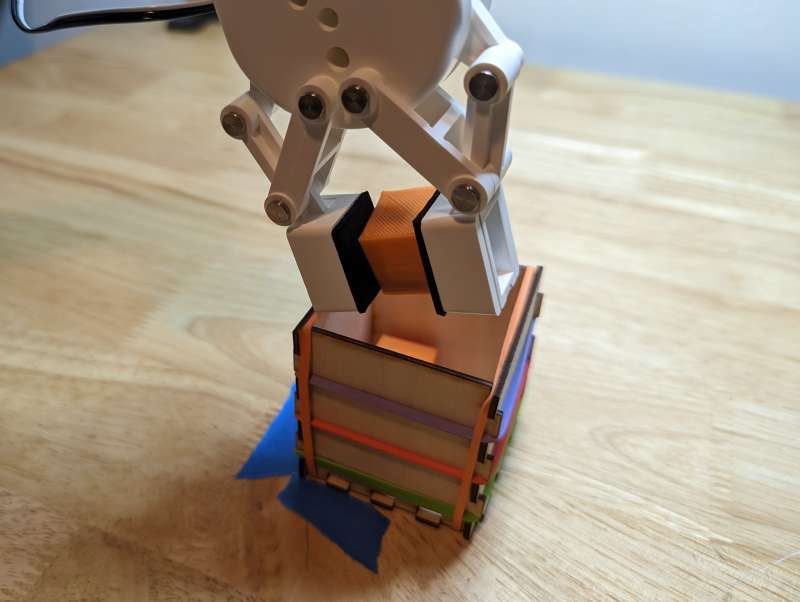
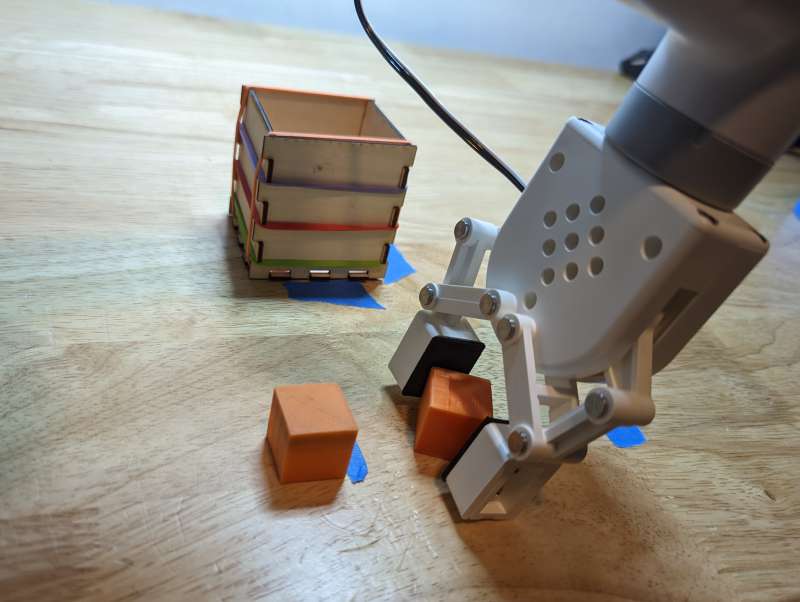
Ultimately, the only way I was able to successfully get the cubes in the box repeatedly was with the Record and Play function.
It took a lot of trial and error, and I mean A LOT, but I was finally able to record a series of specific maneuvers to move the three cubes into the box and successfully have the myCobot 280 play it back repeatedly. The results obviously weren’t perfect, but at least all of the cubes ended up in the box.
Overall, I enjoy programming the myCobot 280 and working with it has significantly improved my coding skills. Out of the box this complex robotic arm won’t immediately function as a standalone autonomous desktop companion, but I never really expected it to. The joy and power of the myCobot 280 is in the multitude of ways it can be programmed and utilized.
What I like
- Great way to teach or learn programming with tools like Blocky or Python
- Sturdy industrial construction
- Ships pre-assembled
What I’d change
- Expensive
- Instructions are confusing
- Geared more for advanced users
Final thoughts
The Elephant Robotics myCobot 280 is an innovative piece of technology that is endlessly customizable and expertly designed. With kits priced between $600 and $800, it may seem steep for all but the most devoted robot enthusiasts, especially when factoring in additional accessories. However, the myCobot 280 justifies its high cost through its exceptional functionality, sturdy industrial design, and professional applications. The instructions are lacking and the kit is definitely not beginner-friendly, so this might be technology better suited for advanced users or those willing to invest significant time into training. This makes sense as research and education were some of the driving factors behind the myCobot 280’s design. If you can afford the significant investment in time and money, the myCobot 280 could be your next cool robotic desktop companion.
Price: $638.89 for the myCobot 280 Robotic Arm with G-Base and Clamp, $129.99 for the Adaptive Gripper, $129.99 for the Gamepad controller
Where to buy: Elephant Robotics and Amazon
Source: The sample of this product was provided by Elephant Robotics.

Now retrieving an image set.
Google Review Tap Cards (3-Pack) by TapFive - Tap for Instant Reviews - All Phones Compatible - Reusable Smart Tap NFC & QR - Boost Business Reviews - Powered by TapFive (3 Card Pack)
(as of July 13, 2026 18:55 GMT -05:00 - More infoProduct prices and availability are accurate as of the date/time indicated and are subject to change. Any price and availability information displayed on [relevant Amazon Site(s), as applicable] at the time of purchase will apply to the purchase of this product.)
Now retrieving an image set.