REVIEW – I grew up skateboarding and loved bombing down hills. Stopping was accomplished by… dragging one foot as a brake, a power slide (if you could control it), running off the front (trying to keep your feet under yourself), or unceremoniously hitting a small stone or crack and having the ground come up at you HARD. I spent most of my time skating street and launch ramps, but long boards were always fun. Now that the years (of ankle and knee abuse) have caught up with me, I’ve got a much more measured approach and a long board just feels stable and fun. Enter an opportunity to review a new longboard; the Vokboard Riot Electric Skateboard from Vokboard. Get up to cruising speed by rolling a dial with your thumb? Hills easily conquered up and down thanks to motors and a brake? LET’S GOOOOOO!
What is it?
The Vokboard Riot is a long board style electric skateboard with motor-driven rear wheels. The battery and motor controller are mounted underneath and a handheld remote puts speed and braking right at your thumb tip.
What’s in the box?
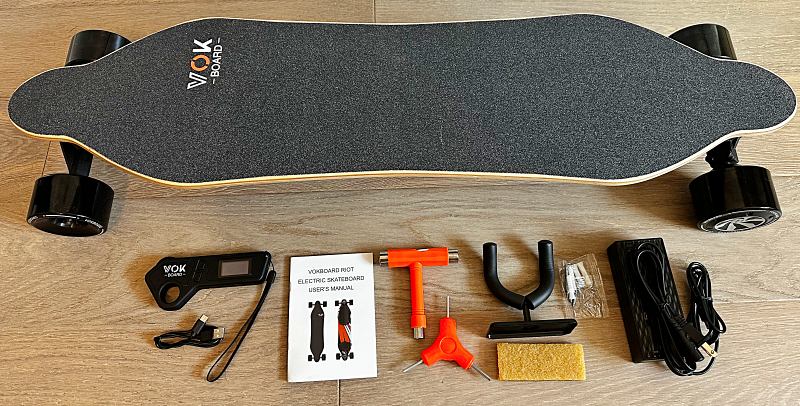
- Vokboard Riot Electric Skateboard
- Handheld Controller
- Controller Charging Cable (USB-A to USB-C)
- Charger Block for Skateboard (Barrel plug)
- Skateboard Tools (Truck/Axle wrench, Tri-Allen key)
- Wall hanger and mounting screws
- Skateboard eraser
- Instruction manual
Hardware specs
Battery: 42V 288Wh battery (uses 21700 cells)
Motor: (2) 200W wheel motors
Motor Controller: LY-FOC ESC
Board: 8 layer – 7 layers Canadian Maple + 1 layer of Bamboo
Wheels: 90 x 62 – 78A hardness
Trucks: Diecast
IP Rating: IPX6 Water Resistant
Range: 30-35km
Speed: Max 28mph – Mode Limits | Slow 6mph | Normal 12mph | Fast 28mph | Turbo 28mph
Dimensions: 17.7lbs | 37″ long x 9″ wide
Design and features
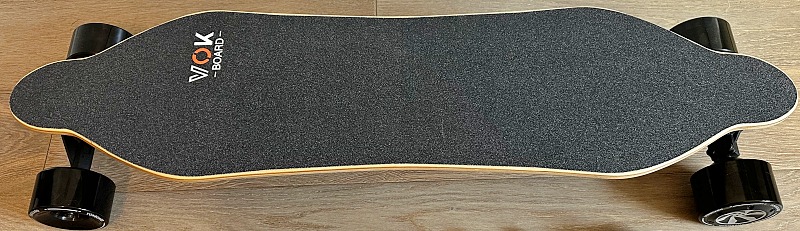
Looking at the Vokboard Riot Electric Skateboard from the top, you might not even know that it’s an electric skateboard.

From the side, it’s clear there’s something different. Two large enclosures are suspended underneath. The front enclosure (left) holds the battery and charging port. The rear enclosure (right) houses the motor controllers and power switch.
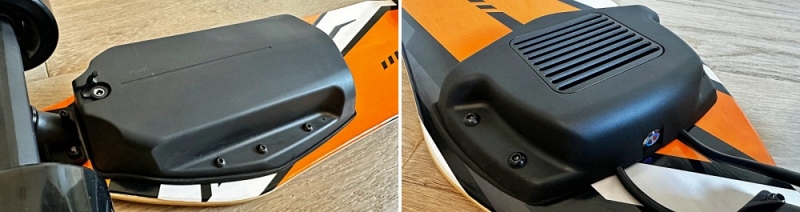
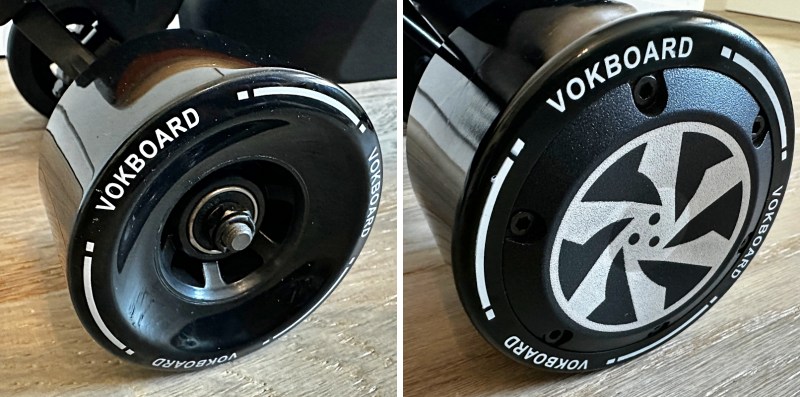
The front wheels (left) are traditional while the rear wheels (right) don’t have a visible axle and nut because the hubcap hides and protects the internal motor.
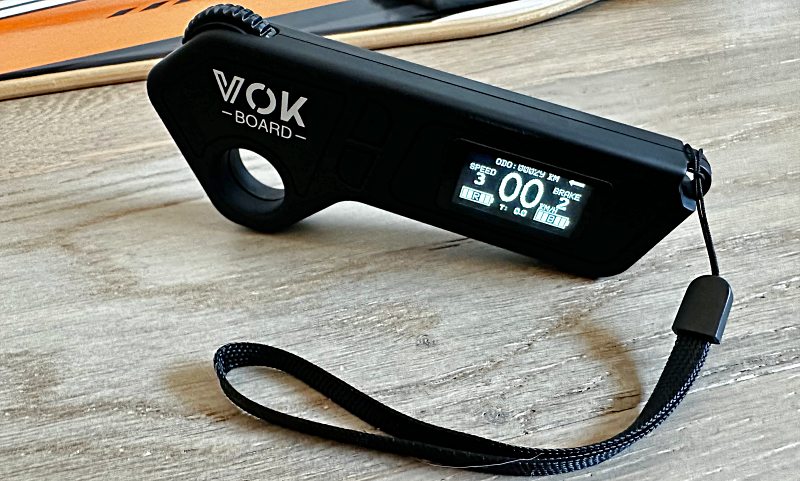
The handheld remote is small enough to be unnoticeable in some hands. There’s a finger loop for a good stable hold and a thumb wheel that you roll forward to go and backward to brake. A wrist leash keeps things secure.
Setup
The Vokboard Riot Electric Skateboard arrives well packaged and fully assembled. Setup is simply making sure to top off the batteries. Connect the big charging block to the wall and the barrel to the port on the battery pack. The charger shows a red light while charging or a green light when finished (or not connected). For the remote, you’ll need to provide your own USB-A power adapter and then connect the cable. The remote’s display shows the charge level.
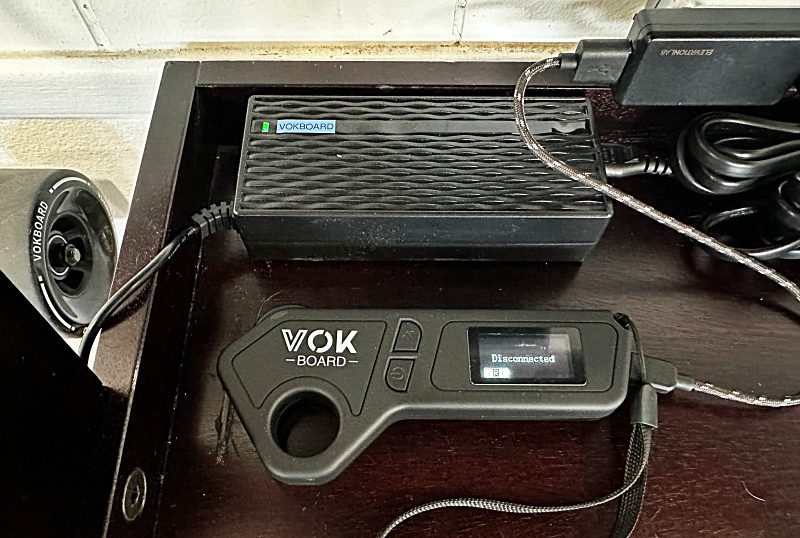
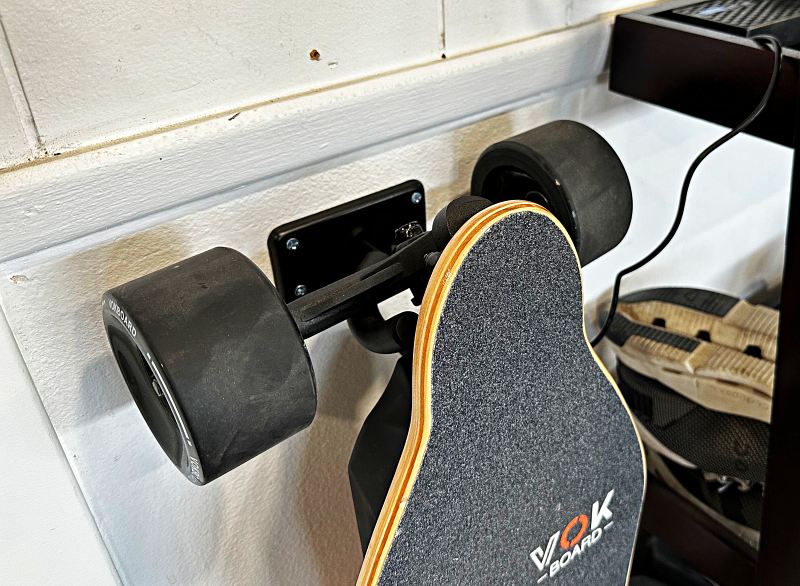
I used a slim wall adapter (and a shorter cable)for the remote. I set up a small charging station in the garage by mounting the included wall hanger to support the front wheels without taking the full weight of the board.
Very cool that they included this. When both are fully charged you’re ready to hit the streets. Wear a helmet and depending on your ability you might want to consider knee pads or more.
Here are the operating basics…
Press the power button on the skateboard. It will make a quiet chime and the LED will turn blue to let you know it’s on. Now press and hold the power button on the remote. The screen will show a skateboard and then the following stats screen letting you know it’s connected to the skateboard.
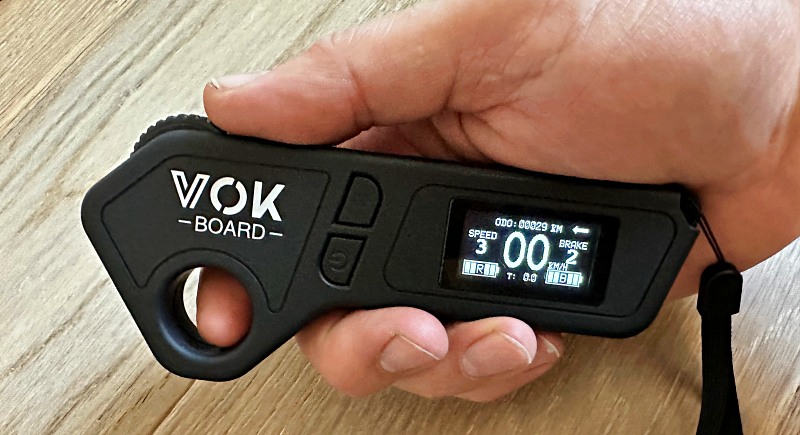
The Vokboard Riot Electric Skateboard’s LED will also be blinking blue, and the transmission icon in the top left of the remote screen will be blinking (the above photo is between blinks on that icon which would appear just above the word speed). If you turned on the remote but not the skateboard, the remote just says ‘DISCONNECTED’.
Both time out and power off in around 5 minutes of no activity. If you only power off the remote, the skateboard will time out in 5 minutes.
The mode button on the remote lets you adjust a few parameters.
- Press and release to increment speed modes 1-4 (it wraps back from 4 to 1 if you keep pressing)
- To adjust the braking strength (1-4), roll the thumb wheel backward and hold, then press the mode button
Here’s a video showing all those details…
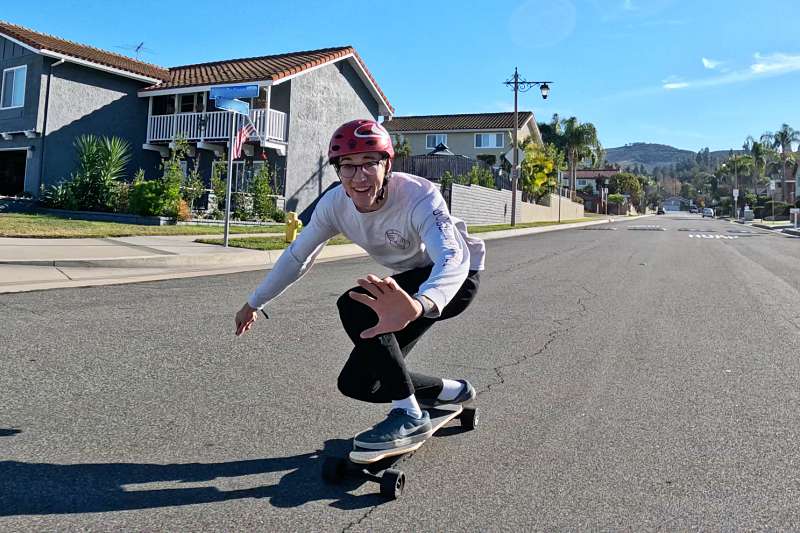
Now it’s time for a test ride. We’re going to start easy because there’s a ton of torque available and the power can be surprising even if you’re an experienced skater. I started on Speed 3 / Brake 2 and almost came off the board on acceleration and stopping. So I recommend setting both the speed and brake modes to 1. This limits the speed to 8 mph as well as lowering the torque.
Hopefully, you’re already confident on a regular skateboard (of any kind), or at least at ease surfing or snowboarding. If not, I’d suggest spending some time getting comfortable on Riot Electric Skateboard before hopping on the Vokboard Riot. I’ll assume this is the case and that you know which foot you want forward and which you like to push with (all preferences welcome).
Here we go…
- Place your front foot just behind the narrow area on the front of the skateboard.
- Step up and place your back foot just in front of the rear narrow area.
- Take an athletic stance with bent knees and more of your weight on your rear foot.
- Slowly roll the remote wheel forward to start moving, then you can lean and turn the way you normally would.
- Before you go to slow down, keep your weight shifted back but push against your front foot like you’re about to slide on ice.
- Roll the remote wheel backward to come to a stop.
Once you’re feeling comfortable you can try increasing the speed and braking modes. Play with the modulation to find what works for you.
Depending on the rider’s weight, turning preferences or stability at speed, you may need to tighten the trucks. Use the included wrench on the center nut. Righty-tighty, lefty-loosey. I definitely had to tighten them up a bit for my size.
Performance
All I really need to say is that this product was named appropriately. It really is a Riot to ride.
If you’ve spent any amount of time on a long board, all the feels will come flying back to you quickly. The biggest change in the way you ride is learning to brace yourself on acceleration and braking. Other than that you’ll be grinning up the hills and marveling that you can come to a stop without taking your feet off the board. I’ll let this video communicate some of the fun. There’s some hill climbing, a good example of a full stop on a hill and acceleration from zero that caught my son off guard in this one.
He then decided he wanted a different video angle and got to work in CAD and 3D printed mount to bolt on the top of the front truck bolts. It uses the folding arm section from GoPro’s older 3-way Grip pole accessory. Here’s a link to that file on Thingiverse if any of you want to try adapting it for similar purposes.
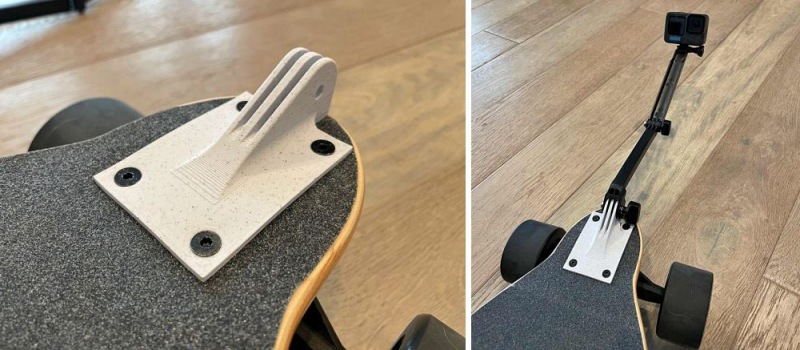
The resulting video showcases how even smooth roads can feel rough and also how incredibly smooth GoPro’s new horizon lock is on the new Hero 11s. You can also see a bit more of the handheld remote in use.
And for any of you wondering about turning, I had a blast carving on the Riot Electric Skateboard. In this one, I strapped the GoPro to my rear calf so it’s a funky angle but you get to see more of the ankle motion needed for deep curves. The trucks have a reverse pivot compared to traditional skateboards which definitely provides a more surfy feel.
The only thing missing is that I could not find a way to switch the remote display to show MPH instead of KPH. Small gripe in that you are too busy riding to bother looking at the display screen.
Oh and if you’re wondering what a skateboard eraser is, so was I. It’s basically a compressed rubber brick for cleaning grip tape. I had no idea that was a thing.
What I like
- Push-free skateboarding FUN!
- Awesome quality and ease of use
- Natural, intuitive remote operation
What I’d change
- A way to change the remote to display MPH instead of KPH
- Nothing else
Final thoughts
After using the Vokboard Riot Electric Skateboard for a solid month, I’m kicking myself for not trying an electric skateboard sooner. It’s an absolute blast to ride and easy to use with a very quick learning curve for anyone with experience in any of the sideways sports. If you’ve got good weather and smooth roads, this might just be the most fun way to get around.
Price:
Vokboard Riot – $649 $449 (currently on sale through Jan. 31st)
Vokboard Riot ER – $749 $489 (Extended Range version)
Where to buy: Vokboard (Save $20 with coupon code: GADGETEER )
Source: The sample of this product was provided by Vokboard.

Zip Ties Assorted Sizes(4”+6”+8”+12”), 400 Pack, Black Cable Ties, UV Resistant Wire Ties by ANOSON
(as of June 30, 2026 23:03 GMT -05:00 - More infoProduct prices and availability are accurate as of the date/time indicated and are subject to change. Any price and availability information displayed on [relevant Amazon Site(s), as applicable] at the time of purchase will apply to the purchase of this product.)
Gadgeteer Comment Policy - Please read before commenting
Hi Alex
Thank you so much for taking the Riot on a ride, the words and videos are awesome.
Here I want to show you how to change from KPH to MPH, here is the video to teach you how: https://www.youtube.com/watch?v=vXfc6wyJyKk&ab_channel=Vokboard
Thank you again!
Will
Marketing Manager from Vokboard