REVIEW – I’ve been working with 3D prints in and around creating consumer products for a very long time. They’ve been invaluable in development, realization of ergonomic and manufacturing issues and just getting something in your hands where everyone can see and hold the same thing in order to facilitate good decision making. But, confession time here… I’ve never owned a 3D printer or even run my own 3D prints; until now that is. I finally got the chance to dive in when Creality sent over their Ender 7 3D printer.
What is it?
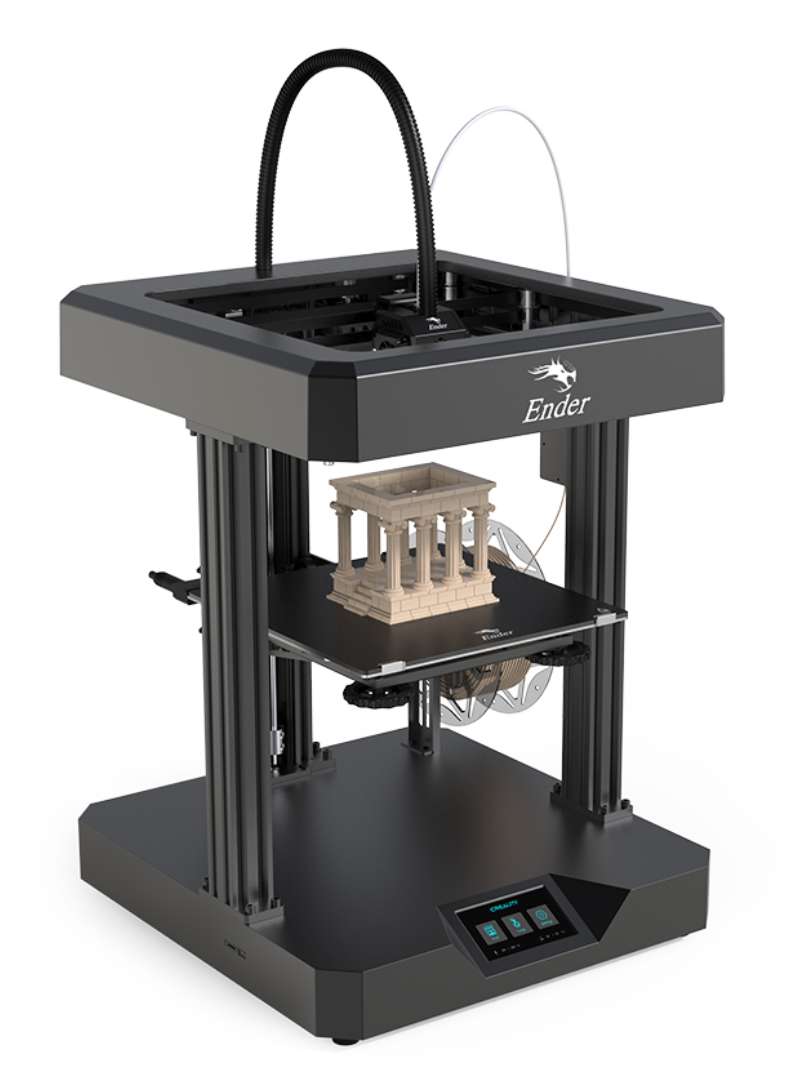
The Creality Ender 7 is a 3D printer that is capable of increased speeds up to 250mm/s and build dimensions up to 250 x 250 x 350mm. It uses Fused Deposition Modeling (FDM), supports PLA, ABS and PETG filaments and can start prints from the included MicroSD card or a USB connected computer.
What’s in the crate?
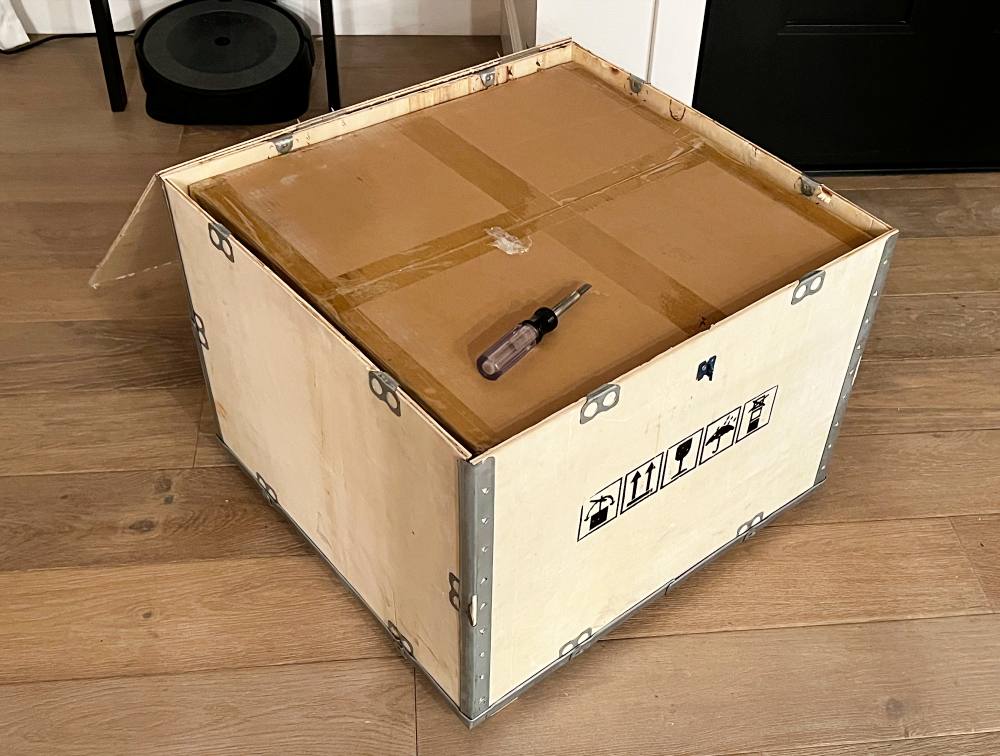
The Creality Ender 7 3D Printer I received came in a wooden crate which kept it well protected but was a pain to open. Hopefully, if any of you order one locally it arrives in just the cardboard enclosure.
Plenty of packing styrofoam should mean that it arrives intact.
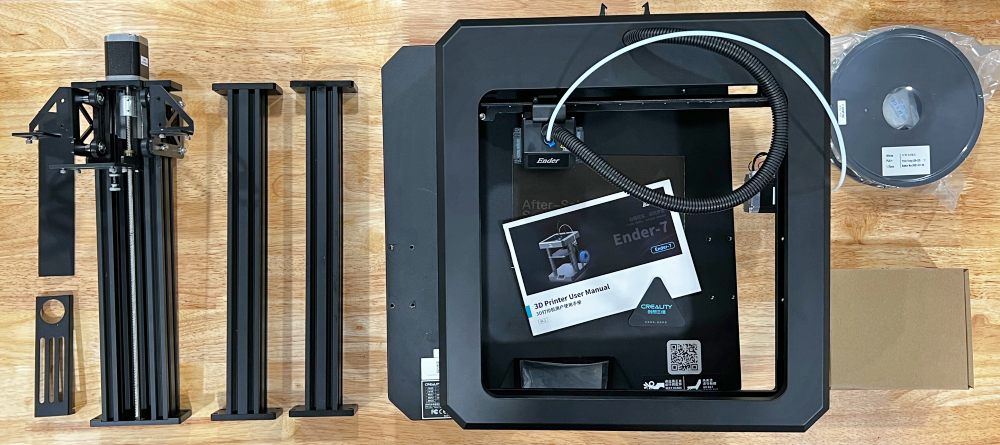
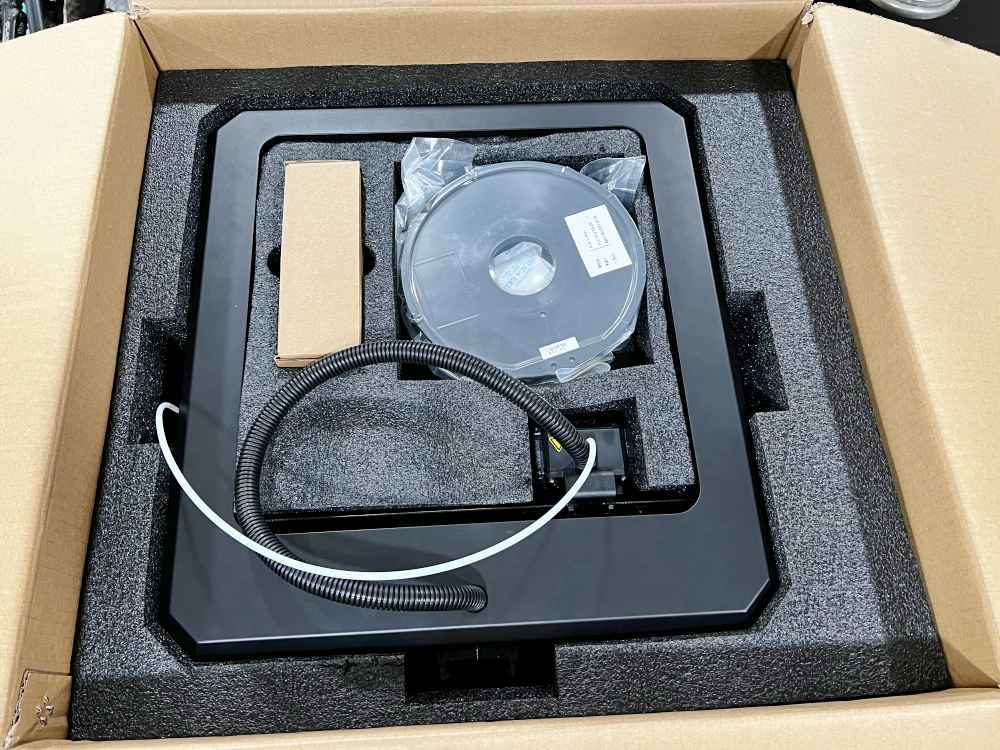
- Ender 7 Kit (Assembly required)
- Base, rear motorized and side static uprights, top frame with print-head, spool mount, print bed (not shown above)
- PLA spool (White filament)
- MicroSD card and USB-A reader
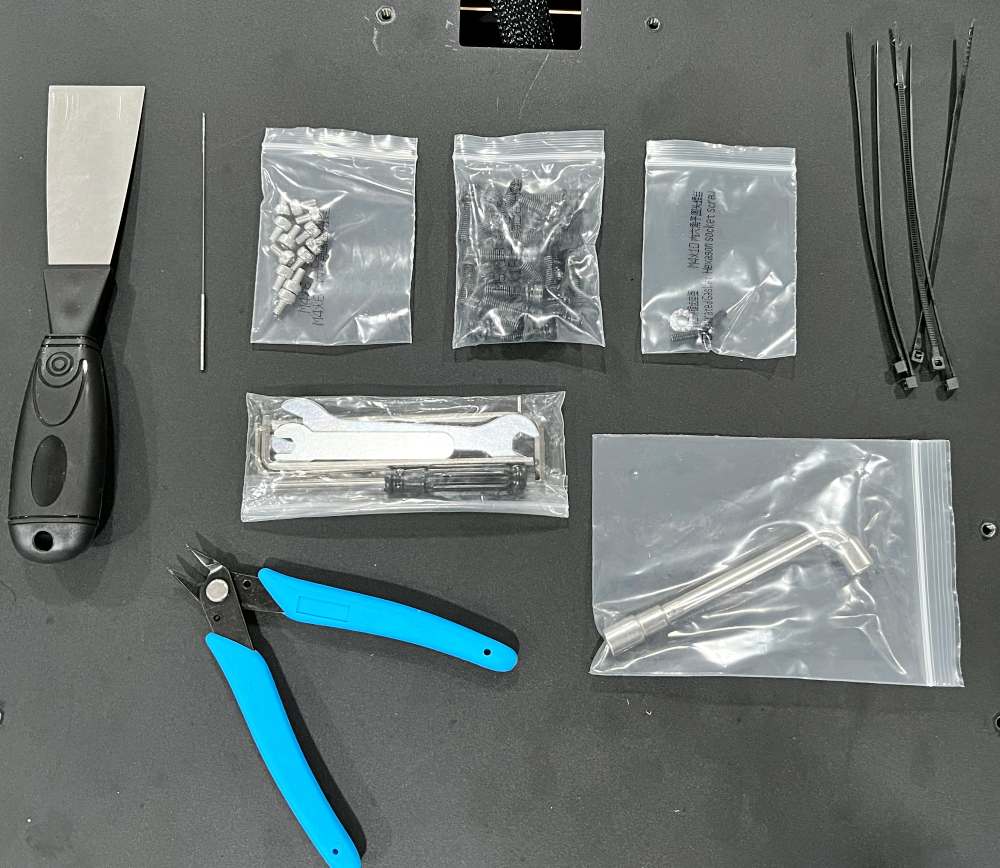
- Assembly tools
- Scraper, snips and nozzle tool
- Power cable
Hardware specs
- 250 mm/s High-speed printing
- High precision linear rail
- Core-XY Structure
- High-efficiency operational control algorithm
- Customized high volume nozzle for smooth printing and reliable feeding
- Printing precision: ±0.1 mm | Nozzle diameter: 0.4 mm
- High-power stepper motors with cooling fans
- Temperature controls: Hotbed ≤ 100℃ | Nozzle ≤ 260℃
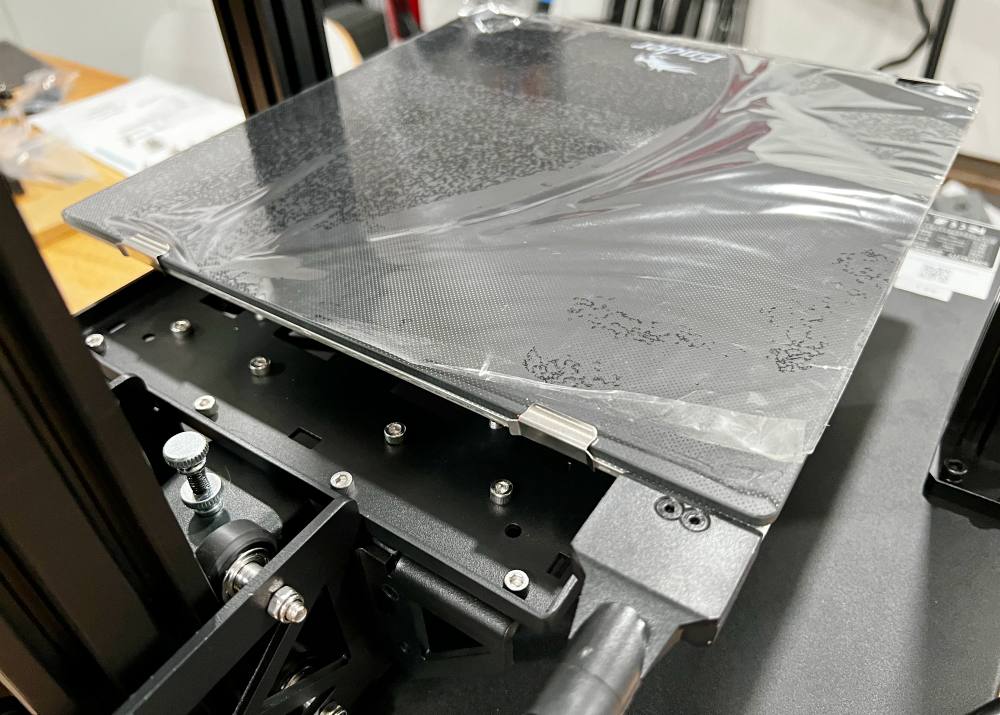
- Dual surface, heated print bed: Carborundum glass and
- Manual bed leveling with fine control
- Touch screen controls
- Integrated filament spool holder
Design and features
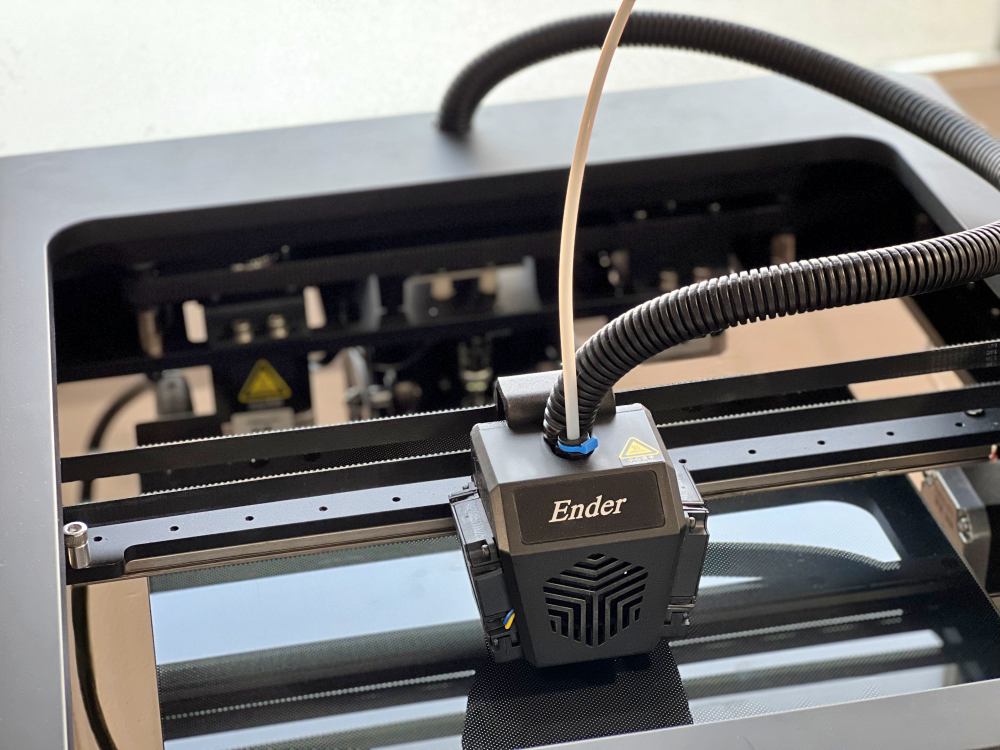
The Ender 7’s key selling point is printing speed (up to 250 mm/s). It uses a Core-XY structure with dual motors meaning that the print head moves in both the X and Y axises simultaneously, while the bed only needs to move in the Z dimension.
Construction is very solid and stable, adding to the precision of prints. It uses 1.75mm filament and can use PLA, PETG and ABS materials. A touch screen makes initiating prints and midstream adjustments like speed, temps and cooling easy.
Setup
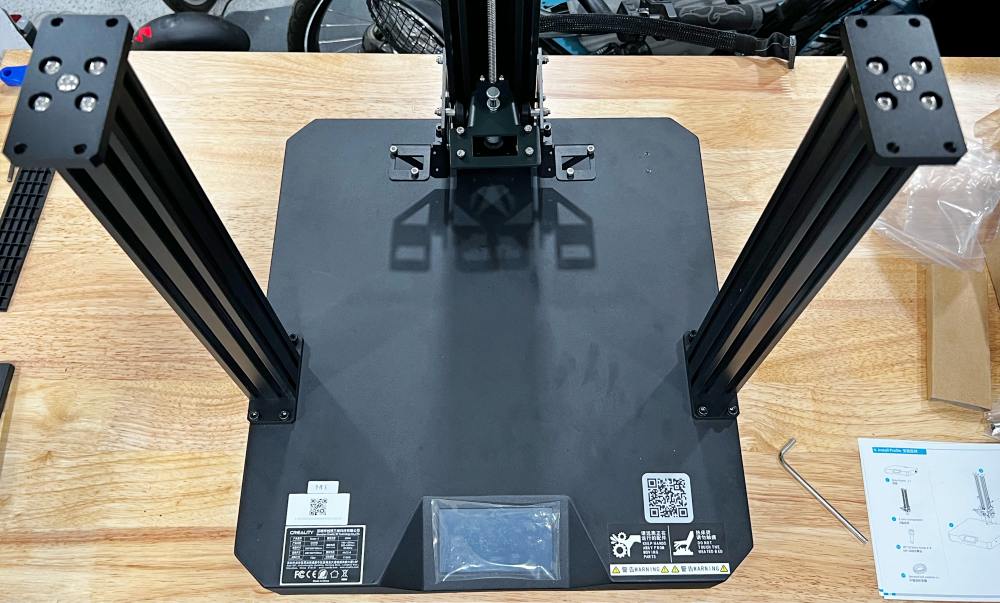
While the Creality Ender 7 3D Printer is a complete printer, it is a kit that needs assembly. Once free of the wooden shipping crate, open up the box, extract the manual and follow the step-by-step assembly instructions. All in all, there were no real tricky parts. Here’s the short version in pictures…
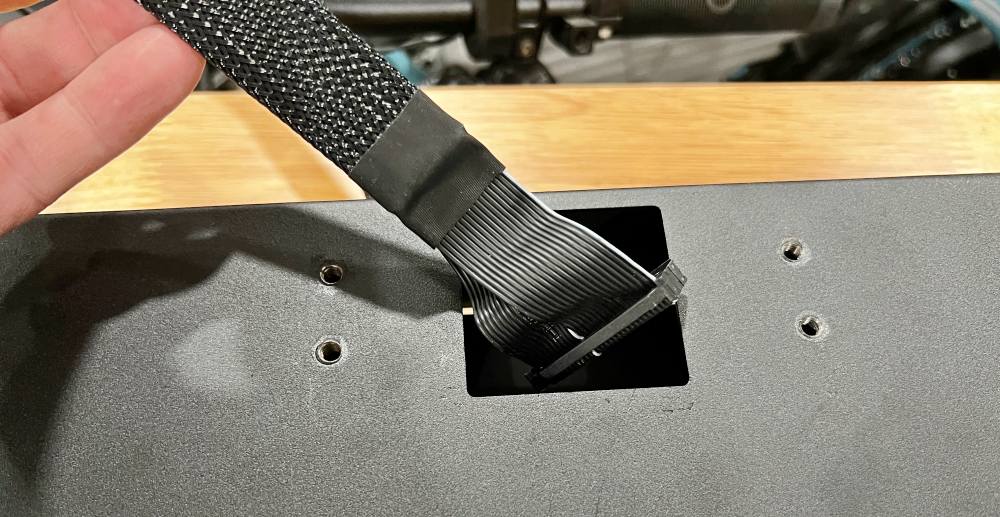
Untuck the cable from the hole on the rear of the base.
Install the rear upright to the base with 4 screws and the corresponding hex wrench.
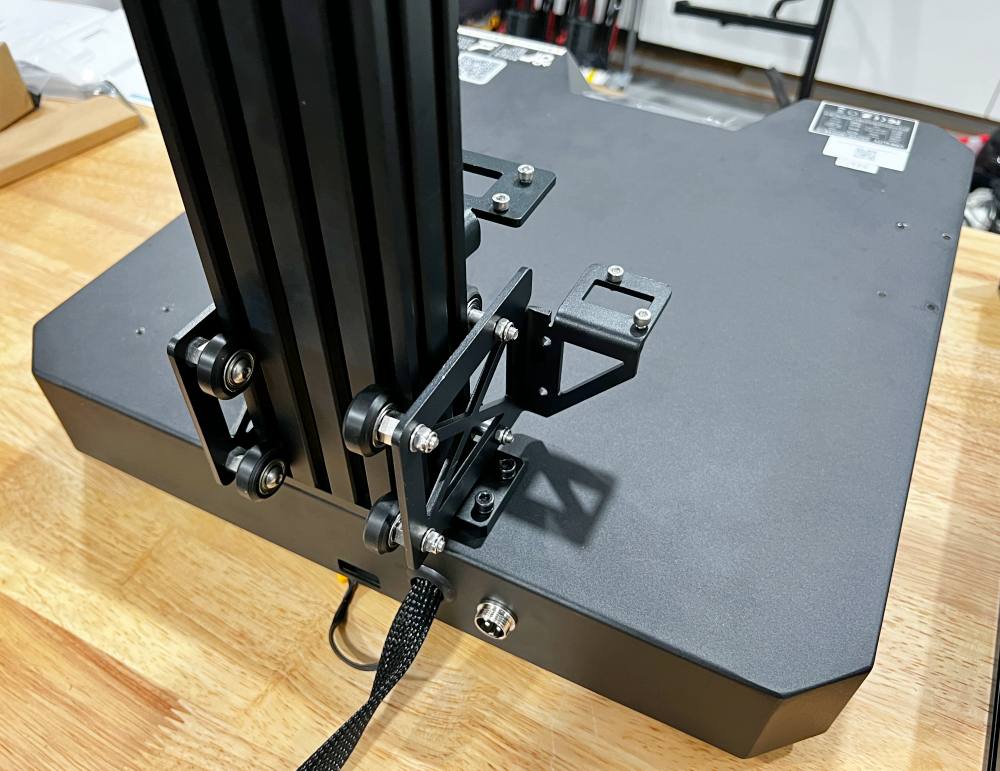
Then install the side uprights. Some of the hex screws were a pain to install with the included small wrenches. I had much better luck with my own ball-end hex set.
Install the print bed to the brackets on the rear upright with 4 screws across the top edge…
And these screws on each side of the tray.
Next, install the top frame and secure with screws on each side of each upright.
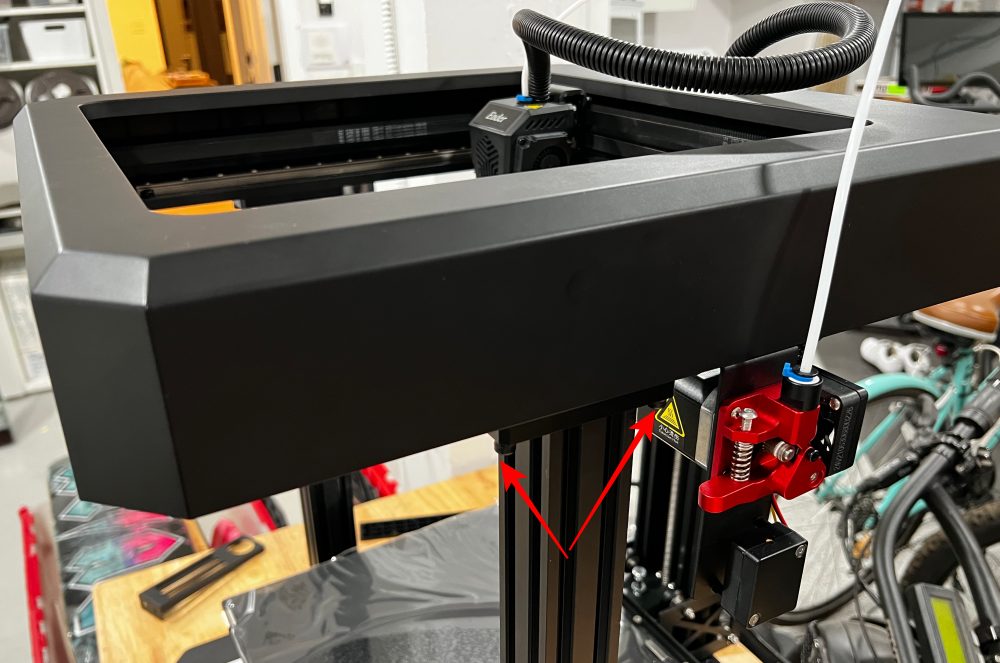
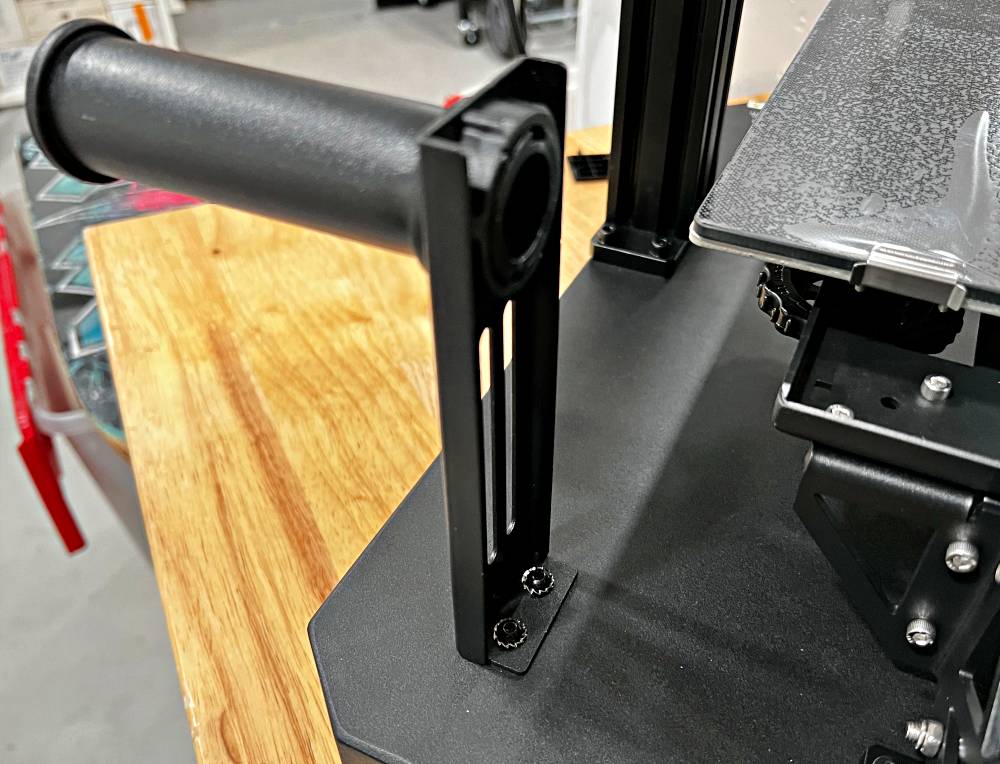
The last assembly step is installing the filament spool holder.
Make sure you check this switch and set it correctly for your region or else the unit will not work properly. After that, make any remaining cable connections and plug in the power cord.

If you aren’t versed in 3D CAD and building your own files, you’ll want to head on over to Thingiverse or one of the many other places to browse and acquire files for something you want to print.
A slicer program is also required to set up any files and get them ready to print on your specific machine. If you have a favorite, go ahead and give it a shot. Creality’s own is called Creality Slicer and it’s actually based on Cura. It’s worth a download if only to pull the settings from the Ender 7 which are preloaded as one of the options.
Load the file into the Slicer, select Ender 7 as your machine, PLA as the material (unless you’ve already chosen a different material) and then make any additional changes you might need for the specific print you’ve chosen. Most files have some notes about what settings to use.
Performance
So as mentioned before, this is my first time operating a 3D printer. The main things to convey is that I can’t compare and contrast with other consumer models (as I haven’t used anything else), and that all of the info in this review is based on figuring it out as I went along. There are a myriad of resources online where you can troubleshoot issues, find recommendations, and browse files that are ready to print and I spent a good deal of time doing just that. I definitely know more now than I did at the start, and there seems to be no bottom to how far down the rabbit hole you can go.
Let’s start with patience and frustration. These two go hand in hand and they’re part of the journey. With as many moving parts as a 3D printer has, you can quickly understand that there is no magic setting that just makes it all work, but if things feel like they’re going sideways, there are a few common things to check that may or may not apply to other brands/models of 3D printers.
- Is the printing bed level?
- Is the print surface clean?
- Are the bed and nozzle temperatures correct for the material you’re using?
- Finally, be ready to embrace the learning curve. Watch your prints, learn to spot trouble signs and keep experimenting.
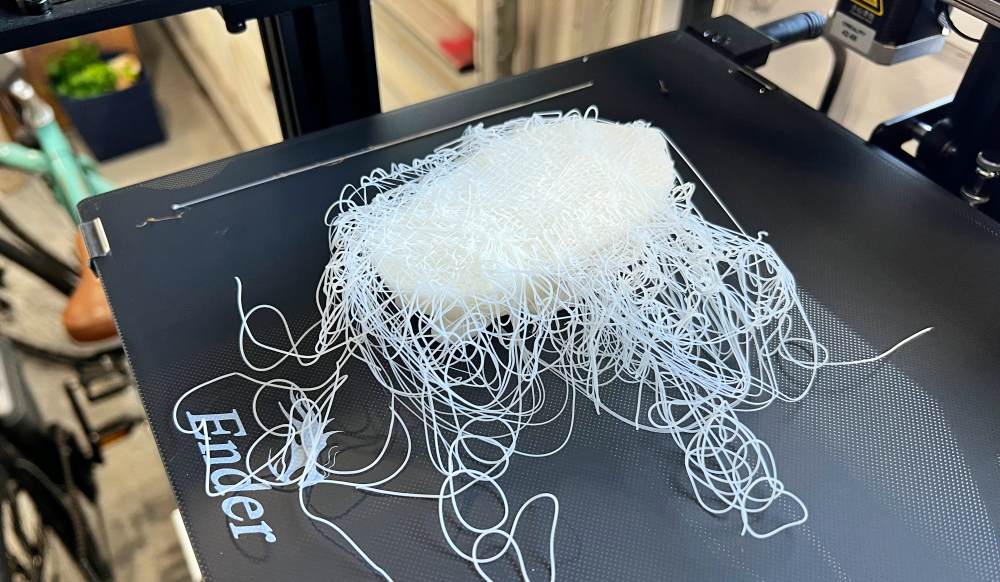
The two biggest issues (and sources of frustration) I encountered, were (1) print adhesion and (2) bed leveling/distance of the print head to the bed.
Print Adhesion: The Ender 7 has a reversible print bed with two different print surfaces and out of the box it’s set to the ‘cat-tongue’ textured material side. I had one job print successfully using this side of the bed and many, MANY failures. I don’t know if it was bed temperature, ambient temperature, filament moisture or what, but I would either have adhesion issues immediately from the start of the print where nothing would stick at all, or the print would proceed for a while and one stray extrusion would catch and drag the entire print out of its location and spaghetti print would ensue like this.
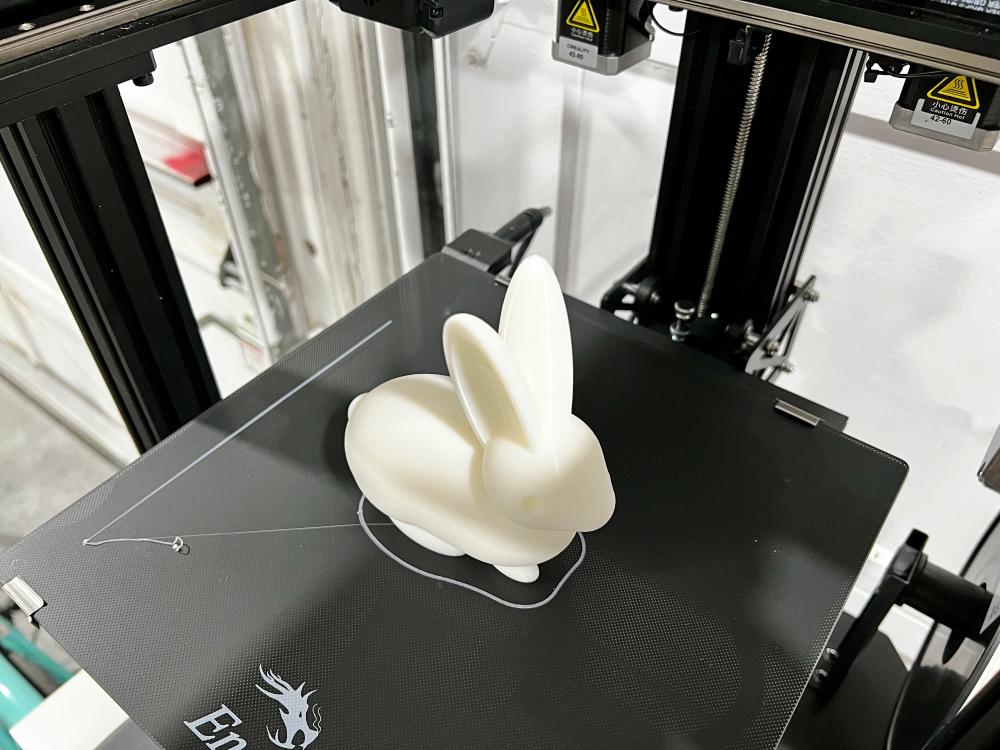
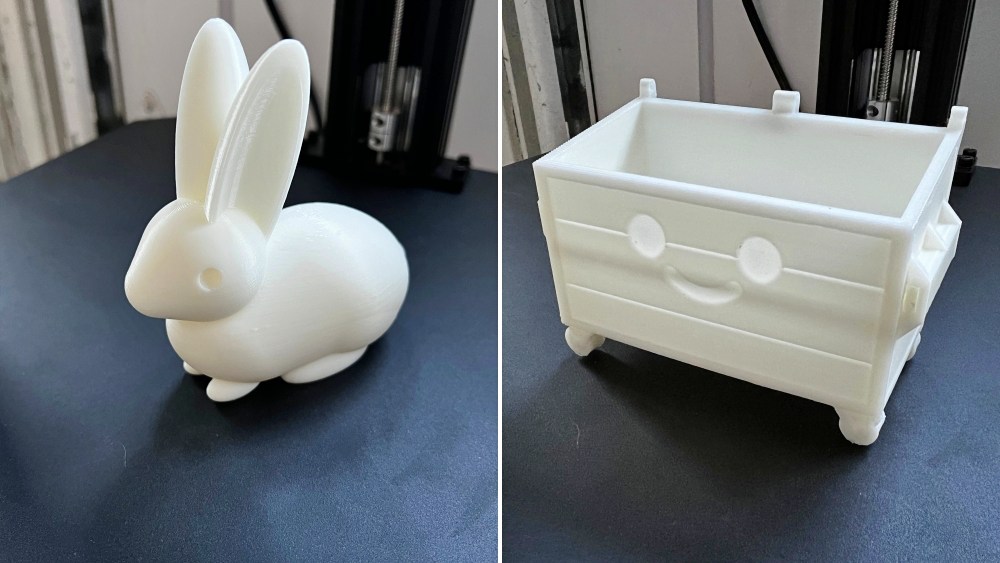
After adjusting temperatures and trying again this bunny (file included on the MicroSD card) was the one good print on that side of the bed.
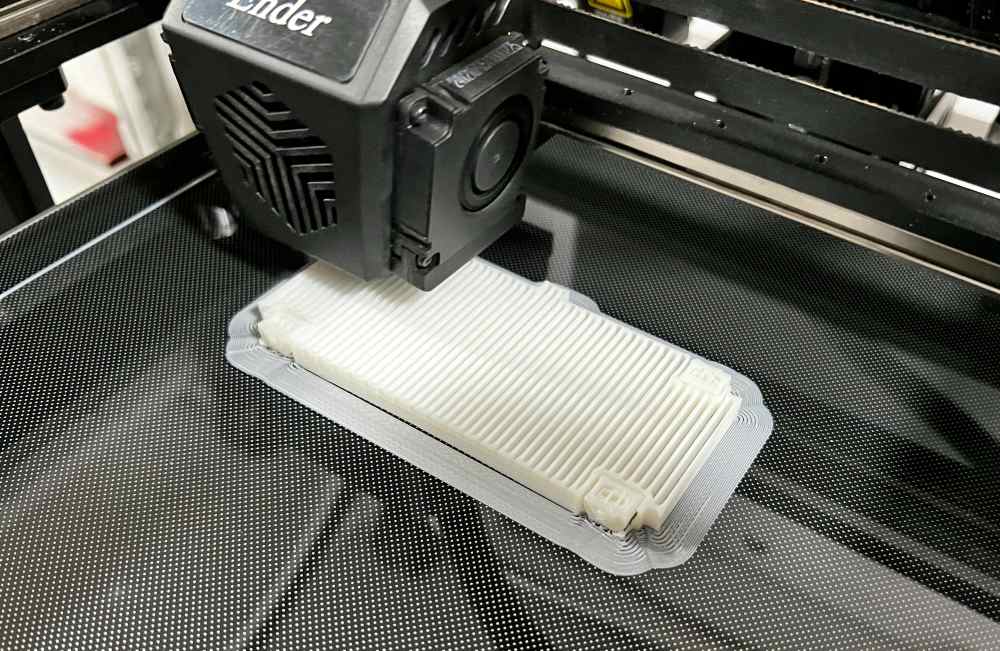
The good news is flipping the surface over is really easy to do. First, make sure the machine is off and the bed has cooled completely. Rotate open the two metal clips at the front corners of the bed and then wiggle the bed plate towards you until free. Flip the plate over and reverse the process to install it. For me, the glass surface solved all the adhesion issues. No reason to even try the other side again. Here’s a shot early on in a print where the adhesion was greatly improved.
And here’s the finished “Little Happy Dumpster” (thanks @ddunmire !!) next to a better shot of the bunny.
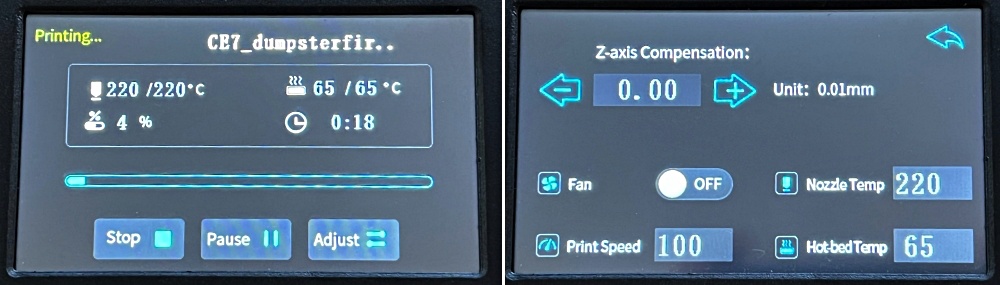
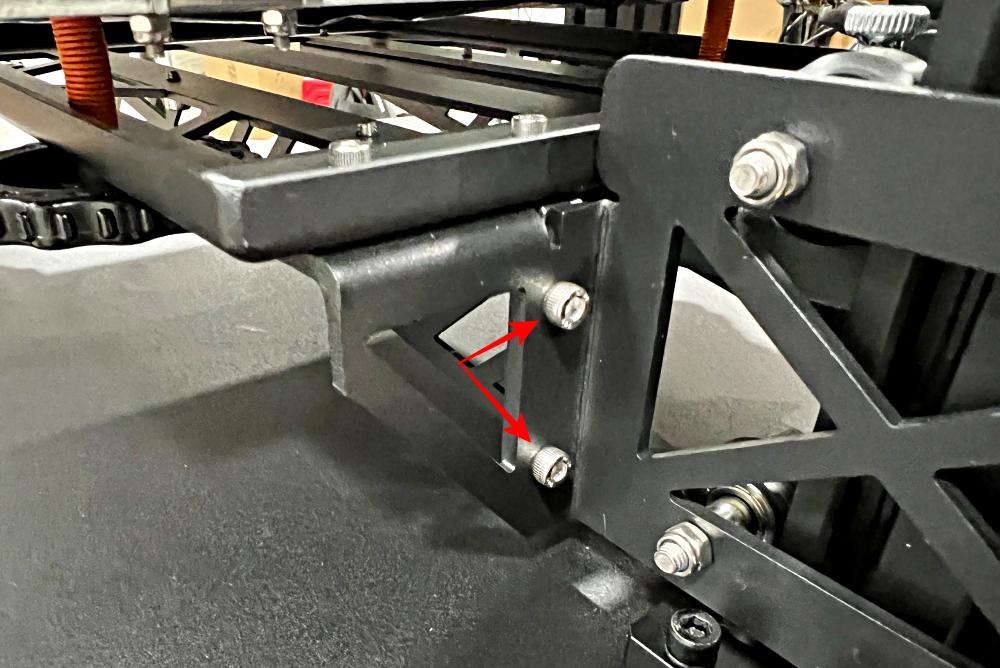
Bed leveling: This is necessary to make sure the Creality Ender 7 3D Printer’s print head is the exact same distance from the bed anywhere in the X/Y coordinates of its print travel. To do this, you’ll move the print head to each corner of the print bed via the touch screen controls and then use the corresponding manual dial underneath to adjust the height of the print bed from the print head to where it just touches the sheet of paper. The paper acts as a feeler gauge, and after adjusting each corner, you move to the next until you have done all four at least 4 times because each corner affects the other 3 (hopefully with decreasing amounts each time). I found it worked best when I could just feel the nozzle scratching a little like a rollerball pen feels, but it’s subjective and the resulting print may result in you adjusting feel. For the price I would have expected auto-bed leveling considering that it’s included on some of Creality’s lower priced Ender models.
Once set, you can use the on-screen adjustment area to further adjust distance up or down as a whole. If you hear your print head start to drag on one of the corner extremes of your print, you’ll need to use the corresponding wheel to make an adjustment if you only want to adjust for that corner. To be clear, I didn’t expect the Ender 7 to just work straight out of the box and then remain so, but I also wasn’t expecting the amount of patience and troubleshooting I’ve had to employ. For example, one of the recent prints I ran needed to have the Z axis raised around 0.03mm every couple layers. By the time the print was finished the print head was adjusted almost a full 1mm higher than at the beginning. I’ve yet to find where I can adjust the amount the Z moves with each step.
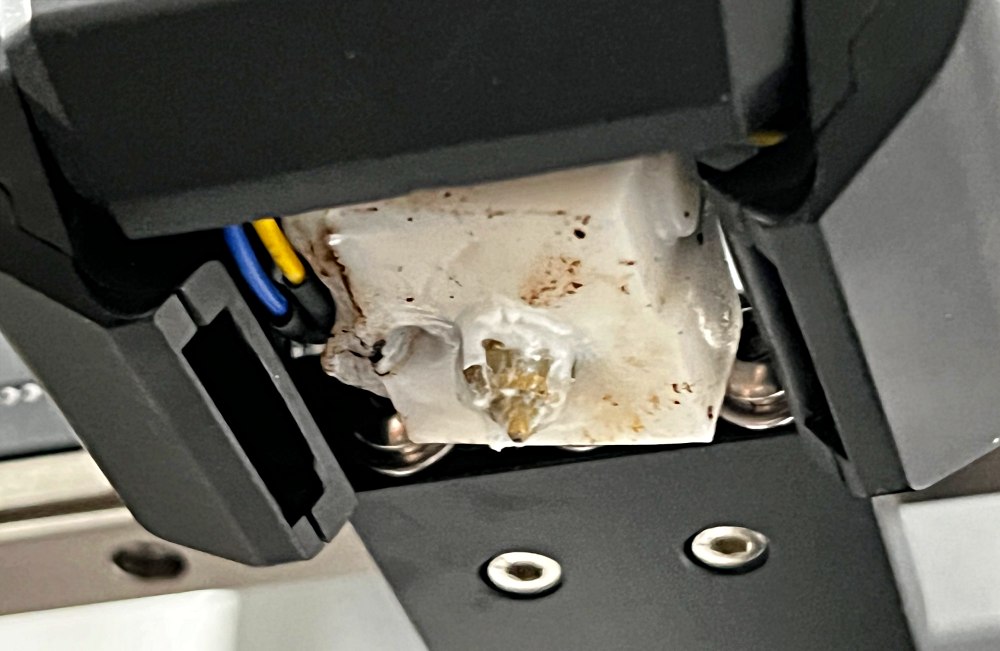
I had one print that clearly needed that type of adjustment before I realized what was happening. The filament backed up so badly that it actually started filling up inside the silicone boot around the print nozzle. When I figured it out I was able to disassemble some of the print head, turn on the unit to preheat the nozzle and then remove this huge chunk of material. Good as new when finished, but worth a note that there is no alarm or monitoring to let you know something has gone sideways.
When you run out of the included PLA material, make sure you look closely at the recommended temperature settings for whatever material you do order. I ordered some PETG spools since my son had been using PETG at school for a project he’s been working on. It felt like we were starting over as we went through all the adhesion and print problems all over again. Finally got it mostly figured out, but it’s a regimented process of making sure everything is clean, all the settings are correct in the Slicer before you prep the file, the machine is properly up to temp, etc. The maker in me loves the tinkering, but I can easily see some parent among you having to troubleshoot every issue for a youngster and getting insanely frustrated.
The faster speed promised by Creality is elusive. The Ender 7 will print slower on the initial layers along with some infill or technical areas. Take a look at this video showing just that.
You might be able to crank up the speed in the slicer settings, or with the touch screen, but go for small increases until you can learn where it does well and where it doesn’t. Unless you’re printing long straight runs, the print head is unlikely to get up to full speed. You will gain some time over slower printers in that the acceleration of the print head can be quicker, just don’t expect the entire print to be at 250mm/s because that’s unlikely. It will print faster though and routinely finished faster than the estimated time shown in the Slicer. Here’s a video of the bunny being printed where you can get a feel for the increased speed.
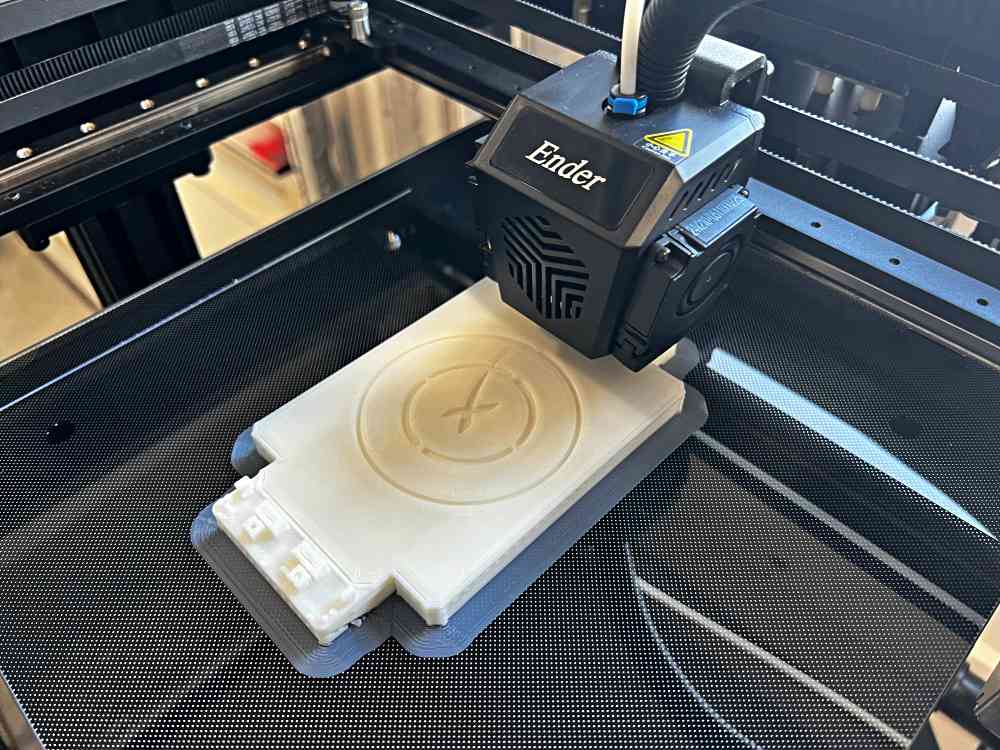
All that said, I’ve had a blast finding files, printing, troubleshooting and printing again. I was able to print a prototype design for my day job to troubleshoot some fit and function issues. (Sorry, can’t share). Also found this awesome SpaceX Coaster which looks like their drone barge but for landing your coffee mug instead. (Thanks @DragonflyFabrication !!)
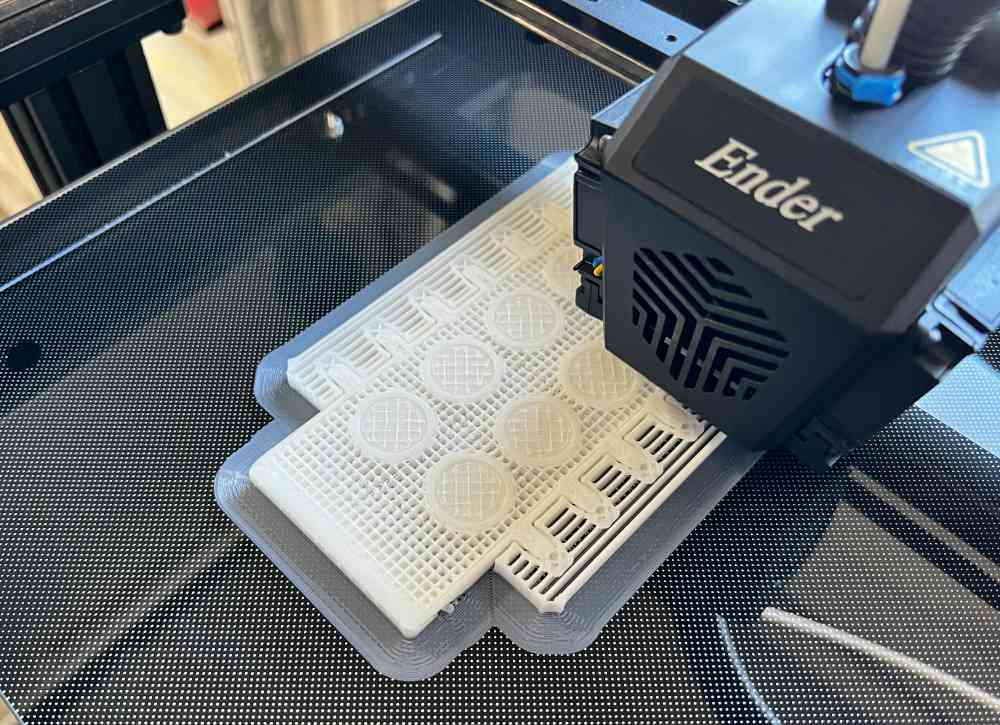
Some of the side support and internal infill structures in this design show the precision that the Ender 7 is capable of.
A couple of days ago Creality posted a firmware file specific to using the BL Touch automatic bed sensor which is available separately. I’ve gone ahead and ordered one even though there’s no description saying it supports Ender 7 (other than this firmware file on Creality’s site). I also suspect that it will likely need a different mounting bracket than what ships with the BL Touch. I’ll let you know how this goes.
What I like
- Watching a print in progress. My new favorite thing.
- Large enough print area to tackle almost anything I’d want to print.
What I’d change
- Auto-bed leveling should be included at this price
- I’d like to be able to update motherboard firmware without needing to open up the unit
- Better instructions for first time 3D printer owners
Final thoughts
I get the sense the 3D printer owners are pretty brand loyal, but also very specific to individual models. Creality’s Ender line of printers has been around for a while and the Ender 3 series has a ton of generally positive reviews. The Creality Ender 7 3D Printer is very capable but I found it a little hard to dial in and the touted speed while noticeable is very dependent on your print having longer smooth runs where the print head can get up to speed. I’m not sure it carries the value over some of the other lower priced Ender models, especially those with auto-leveling.
Price: $729
Where to buy: Creality.com and Amazon
Source: The sample of this product was provided by Creality

Now retrieving an image set.
Google Review Tap Cards (3-Pack) by TapFive - Tap for Instant Reviews - All Phones Compatible - Reusable Smart Tap NFC & QR - Boost Business Reviews - Powered by TapFive (3 Card Pack)
(as of July 13, 2026 18:55 GMT -05:00 - More infoProduct prices and availability are accurate as of the date/time indicated and are subject to change. Any price and availability information displayed on [relevant Amazon Site(s), as applicable] at the time of purchase will apply to the purchase of this product.)
Now retrieving an image set.
Gadgeteer Comment Policy - Please read before commenting
I received an Ender 3 V2 for Christmas. Like you, I quickly learned working out those micro details for adhesion and bed leveling can be tricky. I ended up using hair spray on the bed to get the best adhesion. Creality sells an auto bed leveler you can add to your machine. I would have thought like you that at that level of the cost your machine would have included an auto bed leveler.