REVIEW – If you’re like me you have a lot of photos. Also if you’re like me you’re not very good at organizing or editing them. Over the past 6 months or so I’ve been gathering all my photos and organizing them in Photos on my Mac. That’s great but our family computer is a Windows PC so I need a different solution for all our family photos. I needed a Windows app for this task and knew ACDSee was a viable option. Today I’m reviewing ACDSee Photo Studio Ultimate 2022. Can it do all Photos can on a Mac and can it be a substitute for Photoshop? Read on to find out.
What is it?
ACDSee calls Photo Studio Ultimate “The Photographer’s Secret Weapon.” At its most basic level, it is an image organizer, photo editing software, and creation application. ACDSee refers to it as Ultimate 2022 on their site so I’ll refer to it that way for brevity. There are a lot of applications that can do one or even all of those so what sets Ultimate 2022 apart from the rest? One thing is ACDSee’s history – they’ve been creating creative software since 1994. Ultimate 2022 is version 15, which means it’s had a lot of time to mature.
What’s in the box?
Because this is downloadable software there is no box. Ultimate 2022 is available in three configurations – Lifetime License, which includes their Luxea Video Editor 6; Home Pack, which includes Luxea Video Editor 6, Photo Studio for Mac 8, and Video Converter Pro 5; and subscription Personal Plan or Home Plan, which includes the same apps as well as up to 200 GB cloud storage, and ACDSee Web for accessing your database from anywhere with a web connection.
Hardware & Software Requirements
Intel® or AMD® processor with 64-bit support (Intel i5 or better processor recommended)
4 GB RAM (8 GB RAM or more recommended)
512 MB Video RAM (VRAM)
DirectX 10 compatible graphics adapter
1280 x 800 display resolution (1920 x 1080 recommended)
2 GB of available hard disk space
Microsoft® Windows® 7 (SP1), Windows® 8, Windows® 8.1, & Windows® 10 (64-bit editions only)
Microsoft® Internet Explorer® 9+
Microsoft® DirectX® 10 or higher
Windows Media® Player 9.0
Microsoft® Office 2010 or above
Design and features
Ultimate 2022 is a full-featured photo organizing, editing, and creation tool. As a digital asset management tool, it supports a wide range of image and video file formats, including SVG support, new in Ultimate 2022. In addition to image file formats it also supports Microsoft Office documents as well as PDF files.
New and improved editing features include Channel Selection, Channel Filtering, Selection Basket, Improved High-Dynamic Range, Pixel Targeting within Color Wheels, Improved Noise Reduction, High ISO Support, and many others. The usual editing features are here as well, including red eye reduction, photo repair and smart erase tools, skin tuning, chromatic aberration correction, borders & vignettes, tilt shift, and many more.
Creation tools include the ability to create, view, and export slideshows as well as PDF files, HTML albums, and contact sheets, for a diverse array of creative projects.

Installation and setup
ACDSee provided me with a license key for the software. I went to their website and downloaded the installation file. When I opened that file it connected to ACDSee’s servers to download and install the full application, which took probably about 5 minutes on a decent internet connection. Once that process was finished I pressed the Finish button, which took me to their website to a page for training materials, including some videos and information about their other apps.
The installation process placed two icons on my desktop – ACDSee Photo Studio Ultimate 2022 and ACDSee Photo Studio Ultimate 2022 What’s New. The What’s New icon is presumably for people coming from a previous version but since I didn’t have a previous version everything is new to me. 🙂
Launching the app presented me with a window where I could sign in with my ACDSee user name and password, an option to sign up for updates from the company, as well as the option to sign up for a new account, a link to reset my password if I had forgotten it, and an offline activation option for installing on a computer that doesn’t have an internet connection. Since I didn’t already have an account I chose Offline Activation, assuming I could just enter the license key I had been given. I entered the license key and it popped up a window with a Request Code and stated that I needed to log in to acdid.acdsee.com and sign in to get an Unlock Code. After signing up I had to confirm a verification email to activate my account. After verifying my account I went to My Account > Offline Application Unlock Code, which loaded a page that told me the activation was successful and had the unlock code below. I copied and pasted that into the application and was able to proceed. This is a more involved process than I would prefer but this is the price to pay for some types of software to be sure it’s not being pirated or used on more machines than it’s licensed for.
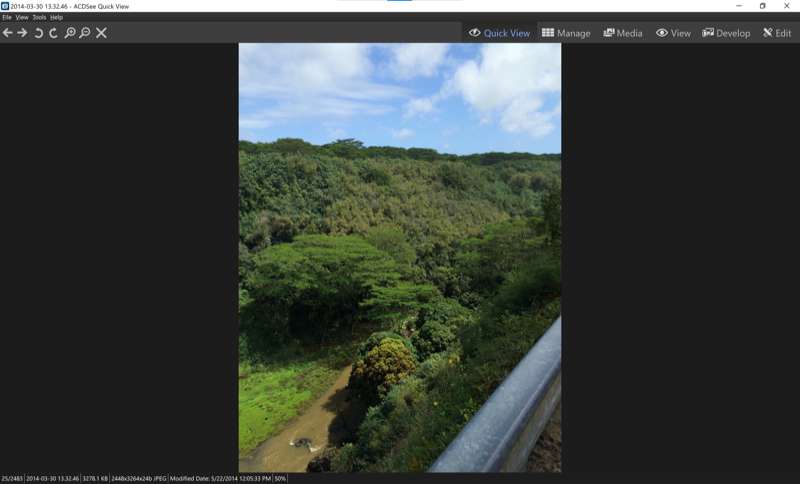
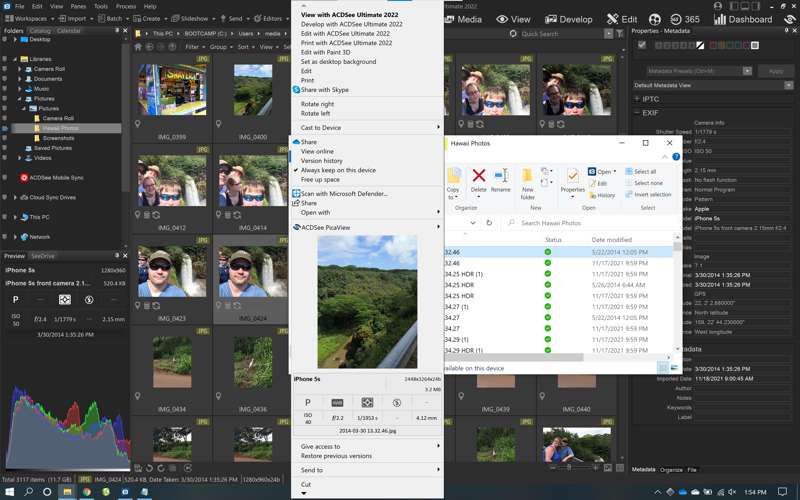
The installation process placed 9 different applications in its folder in Programs in addition to all the other support files it installed. I’m sure the majority of them are meant to run in the background as I use different parts of the main application. Two of these applications that you might interact with outside of the main application are PicaView and Quick View. PicaView adds a set of options to the right-click contextual menu in File Explorer including a small preview of the selected image as well as the image size and other metadata. Quick View becomes the default application for opening images and includes a way to quickly move through any images in the same folder as well as options to rotate or delete images. From within Quick View you can also open Ultimate 2022 directly to the Manage, Media, View, Develop, or Edit modes for further editing and organizing.
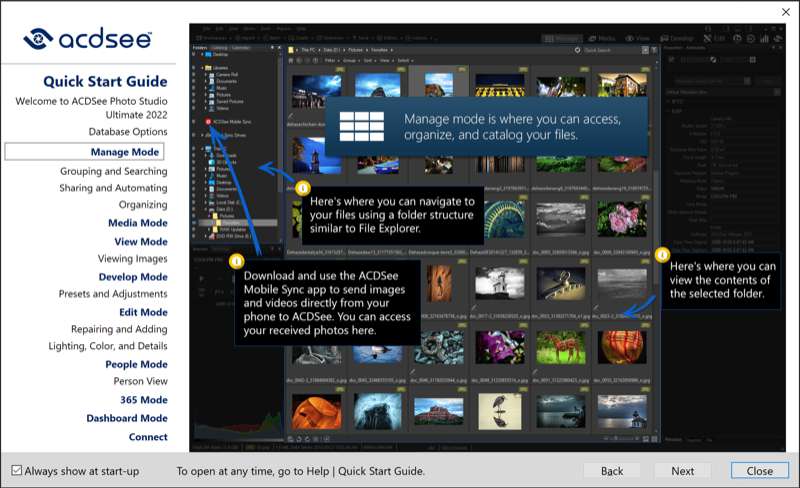
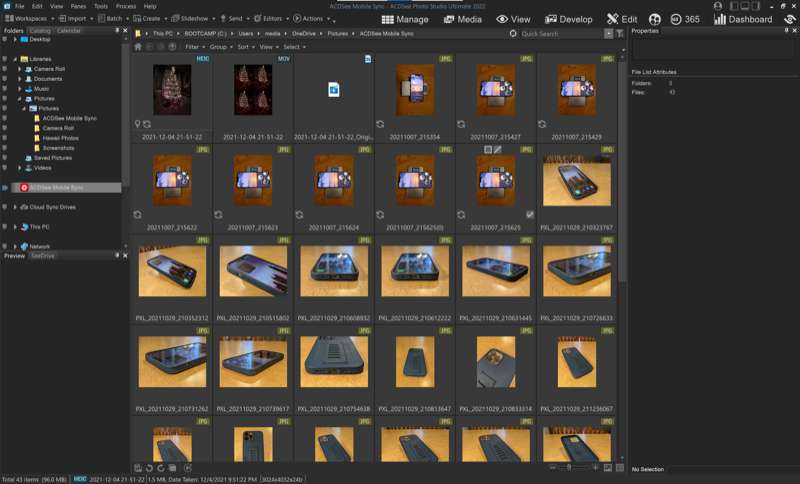
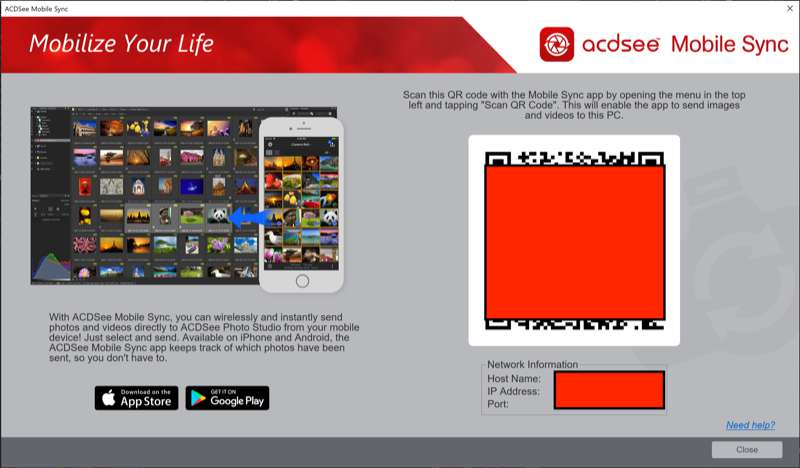
There is one more app I’ll mention here and that is ACDSee Mobile Sync, which is available for both iOS and Android. This free app gives you the ability to sync photos and videos from your device directly to a folder called ACDSee Mobile Sync in the Manage mode of Ultimate 2022. If you’re logged in to both the mobile app and the desktop app and they’re on the same network it’s easy to transfer files by selecting them and pressing the transfer button at the top right of the screen. If you’re not logged in or the mobile app isn’t seeing the desktop app there is a QR code that can be brought up to connect the two apps for transferring.
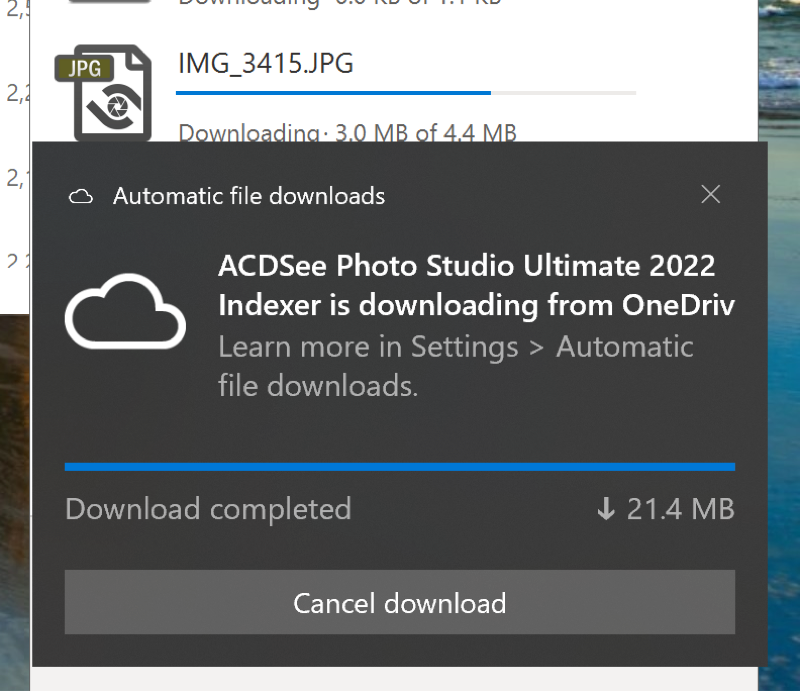
One convenient part of this process is that the main ACDSee app doesn’t have to be running on your desktop to make these transfers as long as you’re logged in on both devices. The transfers can happen behind the scenes with a small notification popping up in the bottom right corner of the Windows desktop to show progress. If the mobile app can’t see the desktop app then you’ll have to open the app to scan the QR code.
Layout
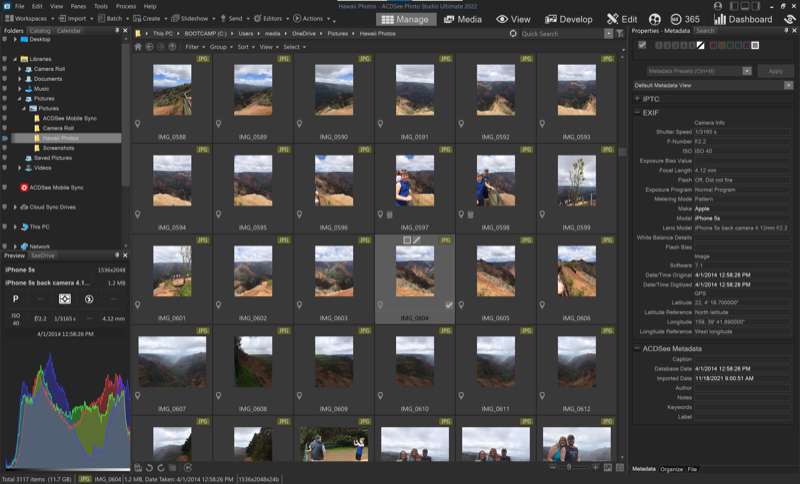
The interface of Ultimate 2022 is very configurable. I can’t even begin to go through every available option but I’ll try to give a good overview. In the main view there are three columns which are split into multiple panes. The top left shows Folders, Catalog, and Calendar. Bottom left is Preview and SeeDrive. The middle column shows image thumbnails for whatever you have selected in the left set of panes as well as the path to the selected folder and a Quick Search box. The right column shows Properties and Search panes. Properties shows all the metadata and other information about the file selected and Search allows you to search for files or folders based on the file name or with text in a caption, a keyword, in the people section, etc. You can also search for files based on certain properties within the file such as the type of camera used, the ISO settings of the camera, the image size, date, GPS location, etc. There are more panes that can be opened including a map view, Shortcuts, Keywords, and Categories.
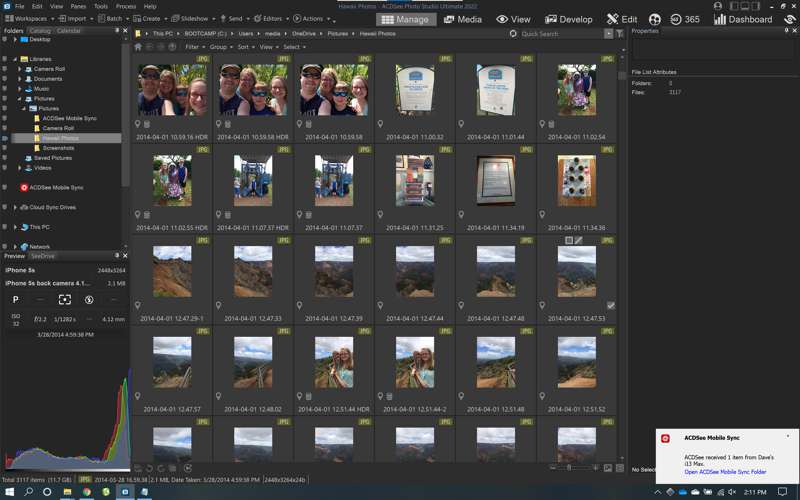
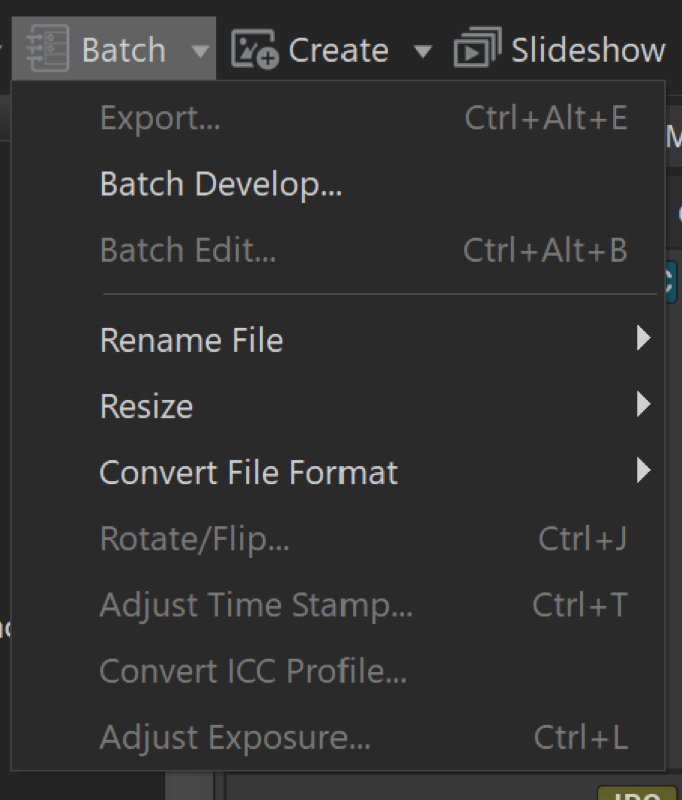
Across the top, below the normal File, Edit, View, and other menus, there’s a toolbar with 7 main options: Workspaces, Import, Batch, Create, Slideshow, Send, Editors, and Actions. Workspaces gives options for saving layouts of the columns, panes, and tabs mentioned above. If you want the interface to look a certain way for organizing photos vs. editing them then you can save a workspace for each and switch between them easily here. Import has options for getting photos or videos from an attached device, a scanner, a disk location, or a CD or DVD. Batch allows you to apply the same processing to a selection of images at the same time. Batch options include export, develop, edit, rename, resize, convert file format, and rotate/flip. The Create tab gives options for creating a slideshow file, a PDF of selected images, a PowerPoint file, and an ACDSee Showroom, which is a way to view a slideshow on your computer in a floating window. Slideshow creates a fullscreen slideshow with the selected images or videos with configurable options for length of time a photo is shown, transition, background color, looping mode, etc. Send allows you to share the images via email, FTP, to Flickr, Smugmug, or Zenfolio, and extra ADCSee 365 sharing options if you’re a subscriber to that service. Editors allows you to specify another application for editing photos if you prefer to edit RAW files in Lightroom for instance. Finally, Actions allows you to record all of the Edit mode adjustments you make to one file and “play them back”, applying them to other images later. If you always do the same processing to a certain type of image this can be a real time saver vs. having to repeat the process the same way every time. It can also help make sure you don’t forget any steps or the order in which they are done.
Modes
To the right of the main toolbar, with larger text and icons, are various mode buttons – Manage, Media, View, Develop, Edit, People, 365, Dashboard, and Message Center. Manage is the mode for browsing and managing all your media assets. This is the main view that launches when ACDSee os opened. In Manage mode you can see your folder and file structure to find all the images on your hard drives or attached devices, use the tools mentioned above, and do other functions related to managing your Ultimate 2022 database.
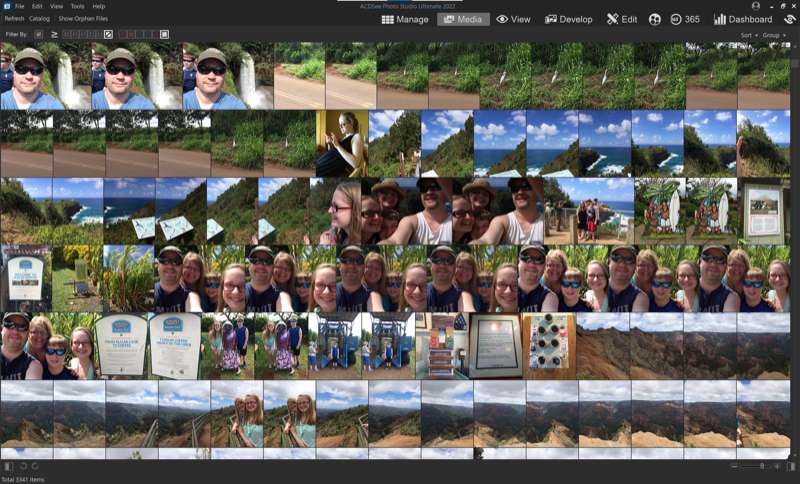
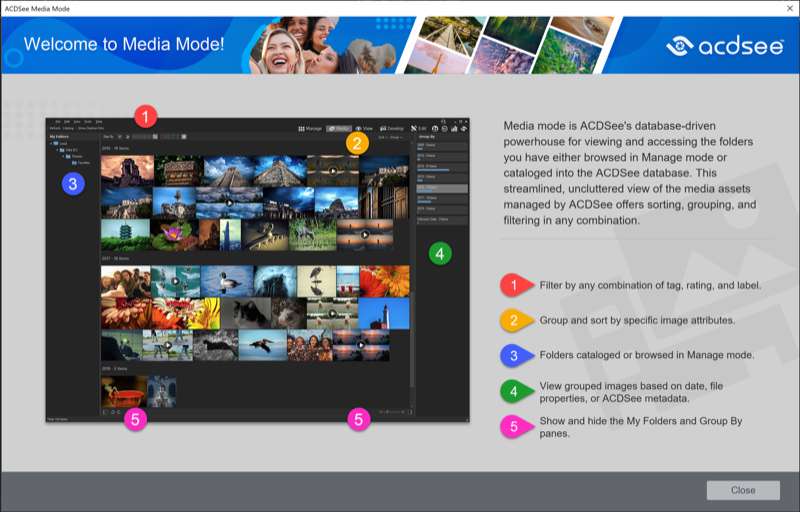
Media mode takes away most of the toolbars and panes from Manage mode and allows you to see only the folders that have been cataloged in the database, showing you the images you want to see without all the clutter of the rest of the application.
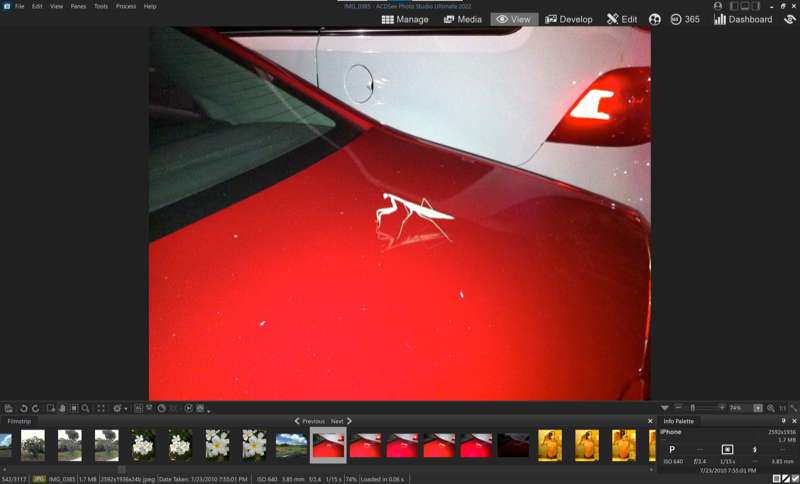
View mode gives an up-close view of a selected image, with the option of moving through several images that were selected before switching to view mode. Here you can zoom in and pan around large images; play video and audio files and even add audio to image files; add captions; add categories, keywords, and other metadata; assign names to detected faces, and view adjustments you’ve made in Develop mode.
Develop mode is where you make adjustments to images such as white balance, Light EQ and Color EQ, add effects, add vignettes, correct the geometry of an image, and use repair tools such as heal, clone, and red eye reduction. These adjustments are non-destructive, meaning they don’t permanently change the original file and can be undone or re-adjusted at any time. It’s possible to save any of these adjustments as a preset to be applied to other photos. There is an extensive undo history which allows you to go back to a previous step or all the way to the beginning of the developing process. You can also save a snapshot if you get to a spot you want to return to after experimenting further.
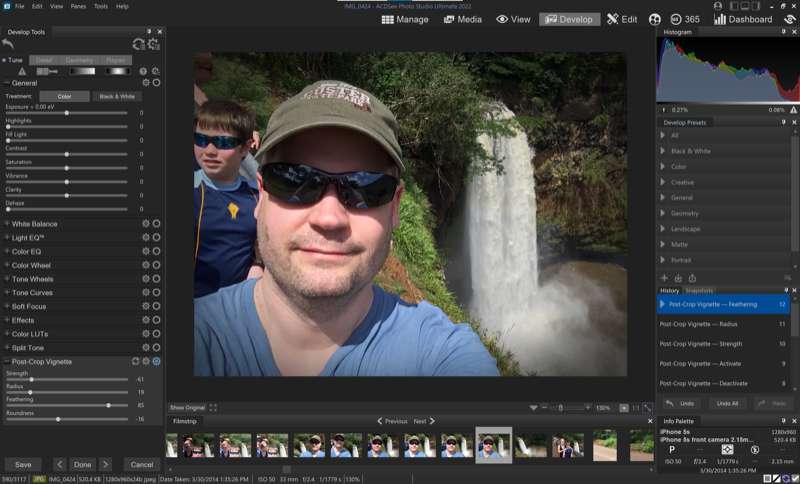
Edit mode is for final tweaking of your image files, including some of the same tools available in Develop mode, but ACDSee says it’s for “applying fine-tuned adjustments on the more limited RGB data.” Here you can select parts of an image to limit where the adjustments are made, use an edit brush, add layers for adjustments or to blend multiple images, add text, adjust lighting effects, sharpen, blur, remove or add noise, etc. This mode reminds me a lot of Photoshop because of the layers panel and the way the tools are presented.
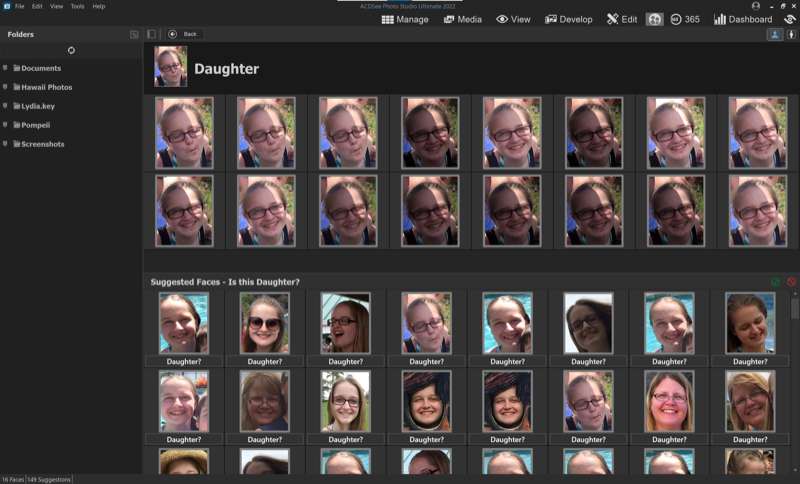
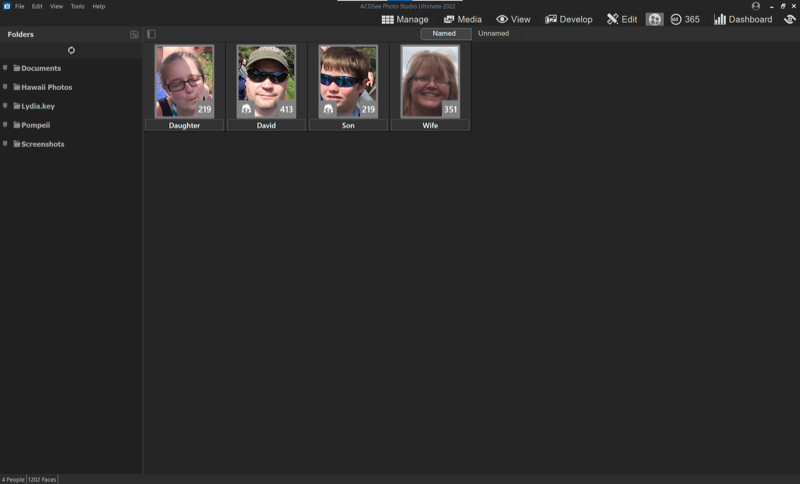
People mode shows any images that include people’s faces. The interface has two main tabs, Named and Unnamed. When you first open People the Named section is blank. Unnamed shows you all the photos that don’t have and assigned name yet. Double clicking an image in Unnamed view opens up a panel at the bottom that shows what it thinks are the same person. A green check mark and a red circle with a line through it allow you to confirm or reject images as necessary. Once you’re finished with that set of images, pressing the back button takes you back to the Unnamed section where you can work on other sets of images. Once you’ve started working through this process, going to the Named tab will show you just the people you have named as well as how many images there are of each person and an icon with a question mark which indicates that there are more images of the same person to be confirmed.
365 mode gives you access to the sharing and storage service for ACDSee 365 subscribers without needing to open a separate browser.
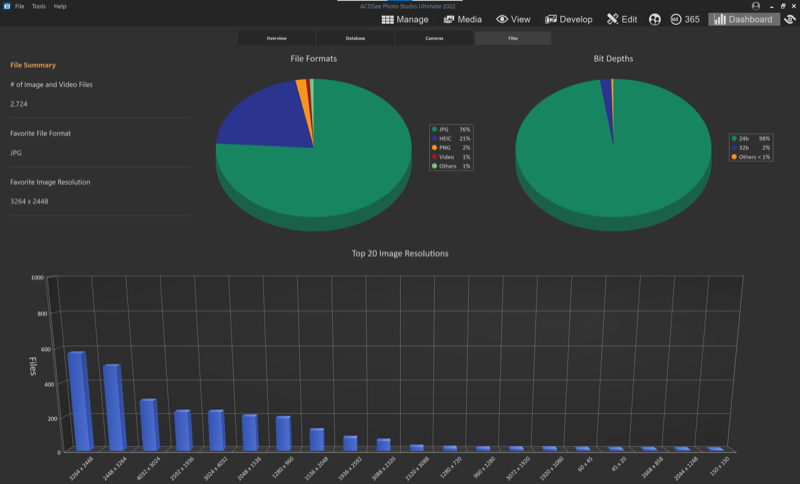
Dashboard mode gives a great overview of all the image and video formats in your database. Using colorful 3D pie charts and bar charts this mode gives you information like how many photos you’ve taken in a certain month, your most used cameras, your favorite file formats and image resolutions, the most used bit depths, and more.
The last “mode” is Message Center, which is represented by the ACDSee logo, giving the user information about the ACDSee community and other messages from the company. I did find it interesting that on a relatively new installation of Windows 10 the Learn More link in Message Center opened up in Internet Explorer 11 instead of Microsoft Edge or Chrome (which is set as my default browser).
In Use
As you can probably already tell this is a deep application. There are a lot of options, a lot of panes and tabs you can open and customize to meet your needs, and a lot of tools and features to do just about anything required for photo management, organization, and editing. I can’t go in-depth on every aspect of this program so I thought I’d highlight a few things I found fun and interesting, and a few things that didn’t work so well as I was testing Ultimate 2022.
I decided to use a selection of images from some of my family’s trips to Hawaii over the years. I exported about 2,600 image and video files from my Apple Photos database and imported them into Ultimate 2022. I decided to sync them on my MacBook Pro using my OneDrive account. When I logged in to the Windows installation through Boot Camp, as OneDrive was syncing the files from the cloud, Ultimate 2022 started importing them into its database even before I had opened the application. This made the import process pretty seamless.
I knew there were some duplicate images in this group because I’ve only recently started using Apple Photos to organize my library and I haven’t fully worked through that process yet. I decided to give Ultimate 2022’s duplicate finder a try and I was impressed. Out of my 2,500 plus images it found 75 duplicates. I chose the option to find exact duplicates, which finds files that are identical, but there is also the option to find files where just the file name is the same.
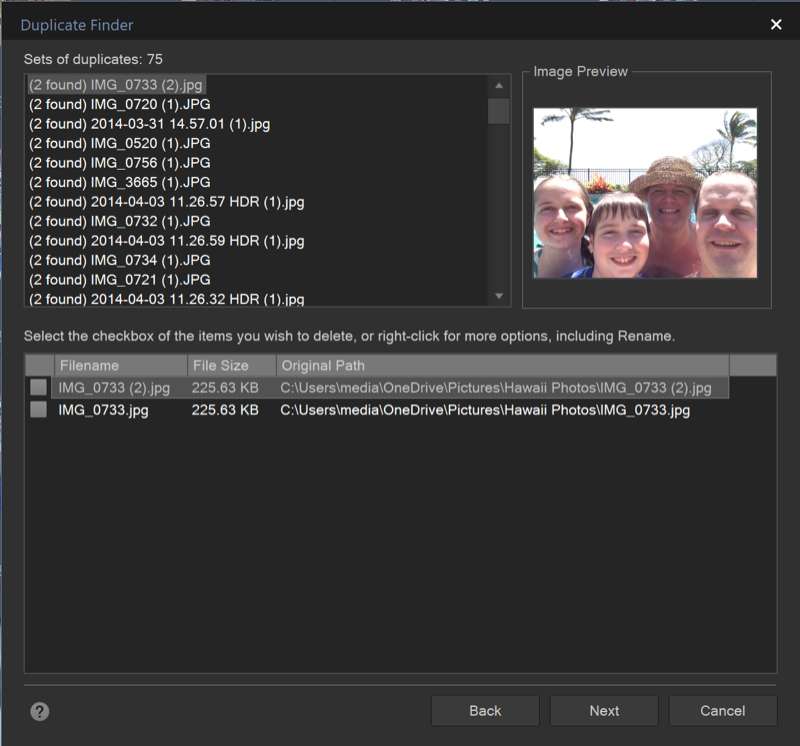
I will say that the interface for going through duplicate images could use a little work. As I went through them I had to click on each set of duplicates, then click a small checkbox below that for each image I wanted to delete. This isn’t too bad for a few images but if you have to do this process more than a couple dozen times it can get pretty tedious. Some way to navigate through this process with keyboard shortcuts would be a welcome addition.
Another thing I like to do when I’m organizing photos is people recognition. Ultimate 2022’s People mode makes this an easy process. In under 10 minutes I was able to find and tag 1,202 pictures of myself, my wife, and my kids. As I went through this process it initially tagged quite a few pictures of my wife and son as being my daughter (understandable and expected for family members, especially the first time going through this process) but as I confirmed the correct photos of my daughter and rejected the ones that weren’t her, it narrowed things down and became more accurate.
I like to be able to search my photos for pictures of myself and other family members together and Ultimate 2022 makes this easy. In the Quick Search field in the center section of the Manage mode I typed in “David + wife” and found photos that included both my wife and myself. I tried the same thing with myself and both of my children and received similar results. Search didn’t take any time, either. It didn’t have to sit and churn through thousands of photos and slowly show me the results; it was instant, as was scrolling through the thumbnails of the resulting images.
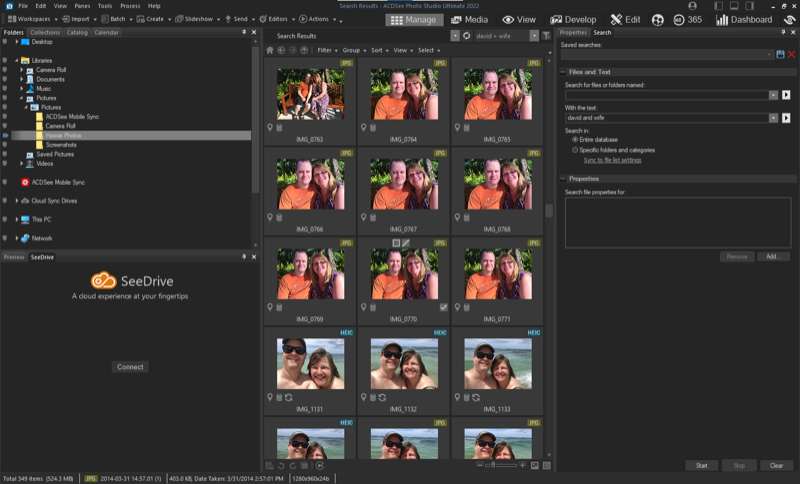
The sheer amount of tools in Develop and Edit mode could take several review articles to go over so I’m not going to delve into them very deeply here but from the perspective of an amateur photographer who has spent quite a bit of time in Photoshop over the years as well as Apple’s Photos more recently I think this is a great combination of the strengths of those two different photo applications. Most of my photo editing has been brightness and contrast adjustments as well as some white balance and general color correction but I’ve also done quite a bit of touchup work to photos that end up with dust on them from the scanning process or that have faded or been damaged due to the elements or less than ideal storage. This application can do all of that and so much more.
As I mentioned in the section about finding duplicate images, keyboard navigation is important to me. I’m happy to say that there are a lot of keyboard shortcuts in this application with the option to customize them to your liking, with different options for different modes within the app.
Two other highlights of this application for me are the help system and the online training that are available. Learning how to use a program of this depth, no matter how much experience you have, can be daunting. ADCSee has created well-organized documentation that goes into every mode and feature and includes a glossary for terms you might not be familiar with yet. Its search feature was great when I wanted to find out more about a feature I knew by name but not exactly where in the help section it would be explained.
The online community and video tutorials available (many of them free) give more options to learn about how to do anything you’re looking to do in Ultimate 2022.
I will say I found the Smart Erase tool a little disappointing, at least when used on a larger section of an image. If it’s being used in small sections like trying to paint out dust or small imperfections I think it would be pretty good but for trying to remove an undesired object from a photo it ended up filling the area in with too much of the surrounding image. Maybe I’m expecting too much from it but it just didn’t work as well as I had hoped. I tried to remove a sign from the background of a photo of my wife and me at Iao Valley on Maui and the results were less than ideal. It was more like it’s just trying to clone the area around the object and going a little too far. Again, this is probably great in small sections but for something like I was trying to do it didn’t do the job.
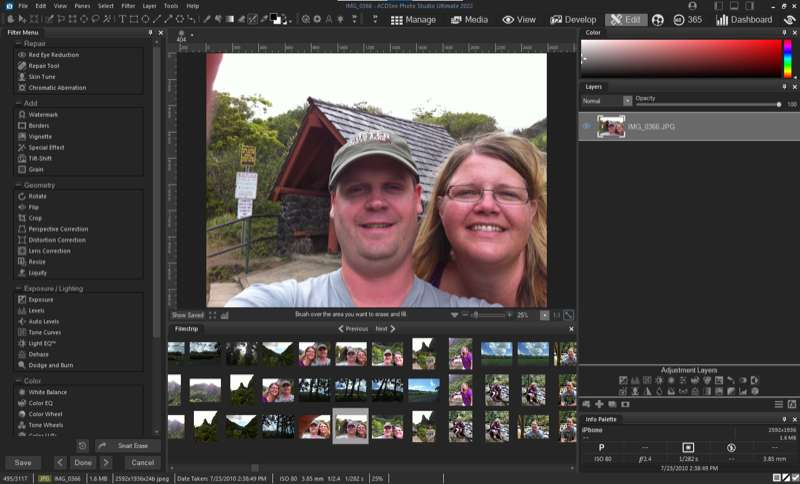
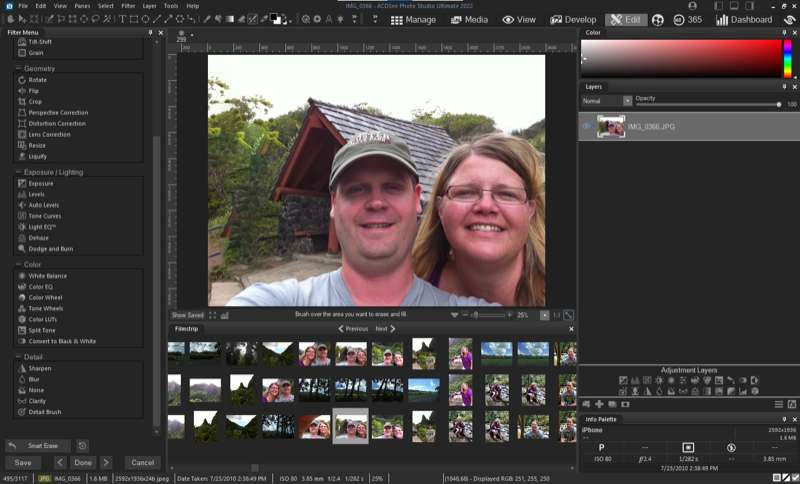
One other frustration I had was when I tried to email a few images. The Send feature has an email option, which is supposed to use the default mail application to send the selected images as attachments. I use Kiwi for Gmail as my default mail application on Windows (and confirmed that’s how it’s set in Windows’ settings) but Ultimate 2022 told me I didn’t have a default mail application selected. I decided to change it to Windows Mail for testing purposes but that didn’t work either.
What I like
I like the depth of this application. As an amateur photographer, I don’t need (and don’t want to pay for) the Adobe suite of applications, especially with ongoing monthly fees. For the cost of less than a year of that service I can have a full-featured photo solution that meets all my needs now and for many years to come. While not every feature is perfect, and in some ways it’s too much for most of what I do, I’m glad to know I have all these tools available for when the need arises.
What I’d change
- Add option to export a slideshow as a video file
- Fix email sharing of images
- Smart Erase tool could be a little smarter
Final thoughts
If you’re an amateur photographer or even a professional who wants to explore other options out there, you can’t go wrong with ACDSee Photo Studio Ultimate 2022. The capabilities, price, and learning opportunities make it an easy sell in my book.
Price: $109.95 through December 15; Home Pack: $149; Home Subscription Plan: $89/year.
Where to buy: acdsee.com
Source: The sample for this review was provided by ACDSee. For more information visit their site.


