REVIEW – My son and I discovered Keychron about a year ago. We’re both Mac users and were looking to see what all the fuss was about with mechanical keyboards. We bought him the K1 model (104 key with brown Gateron switches) and were almost immediately obsessed. I picked up a K1 and then a K4 from eBay before backing the K3 and then ultimately the K7 I’m using today. Needless to say, when the Q1 came up for review, we got really excited, but nothing could have prepared us for the awesomeness that arrived.
What is it?
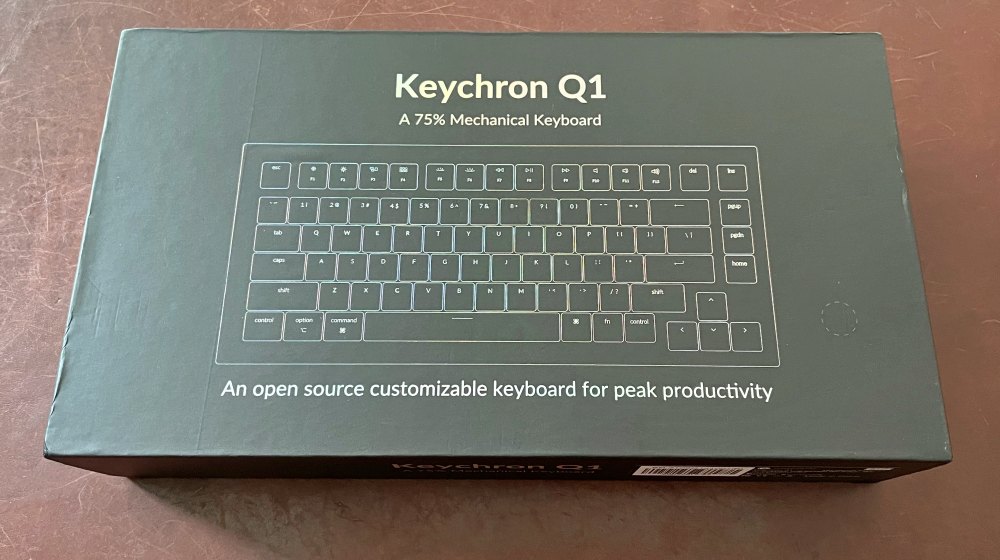
The Q1 from Keychron is a 75% layout, Quantum Mechanical Keyboard, hence the QMK in the name. QMK keyboards have special firmware that makes remapping the keys possible. The Q1 also supports Via which is an app that works with QMK to simplify the process. Just download and go. All of that is on top of the fact that the Q1 is fully customizable with color options for the aluminum base, choice of switches, keycaps and much more.
What’s in the box?
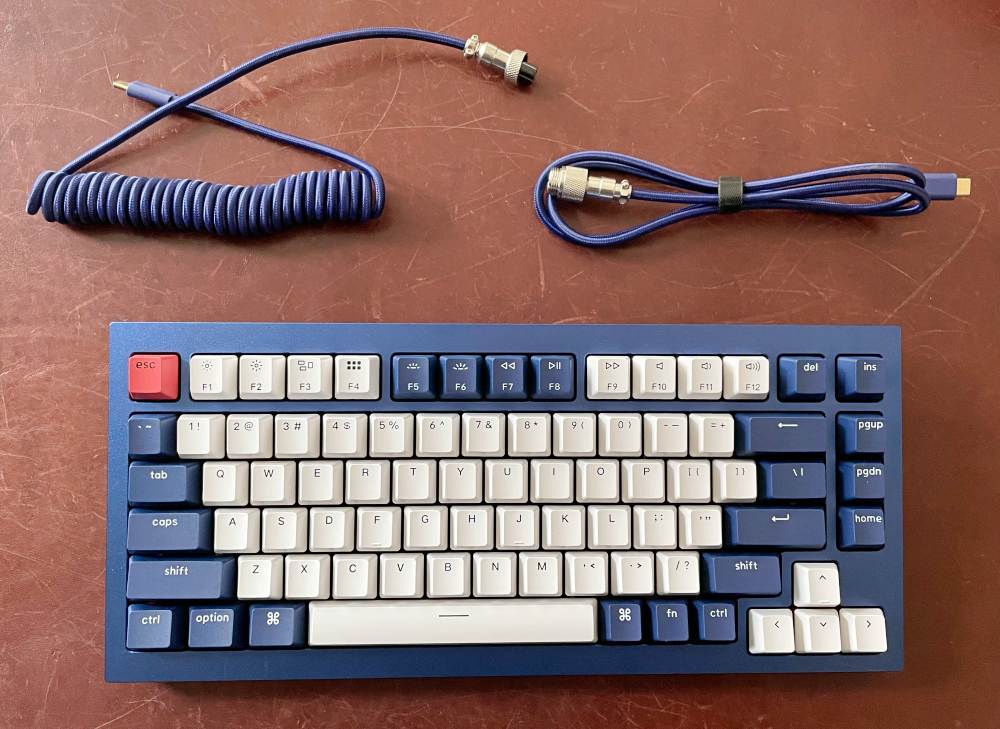
- Q1 Keyboard
- Custom 2-piece coiled aviator USB-C cable
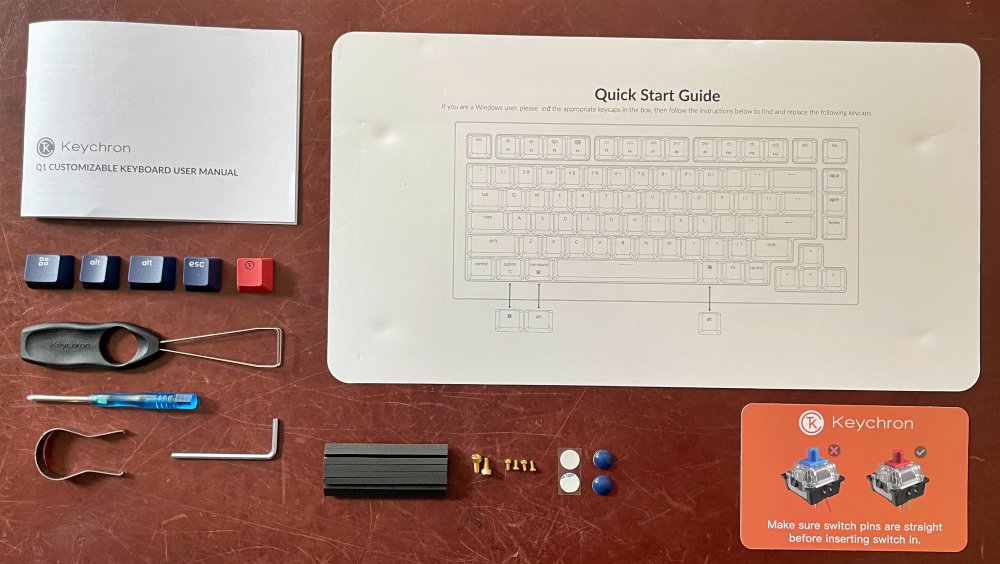
- Mac and Windows specific keycaps (Mac pre-installed)
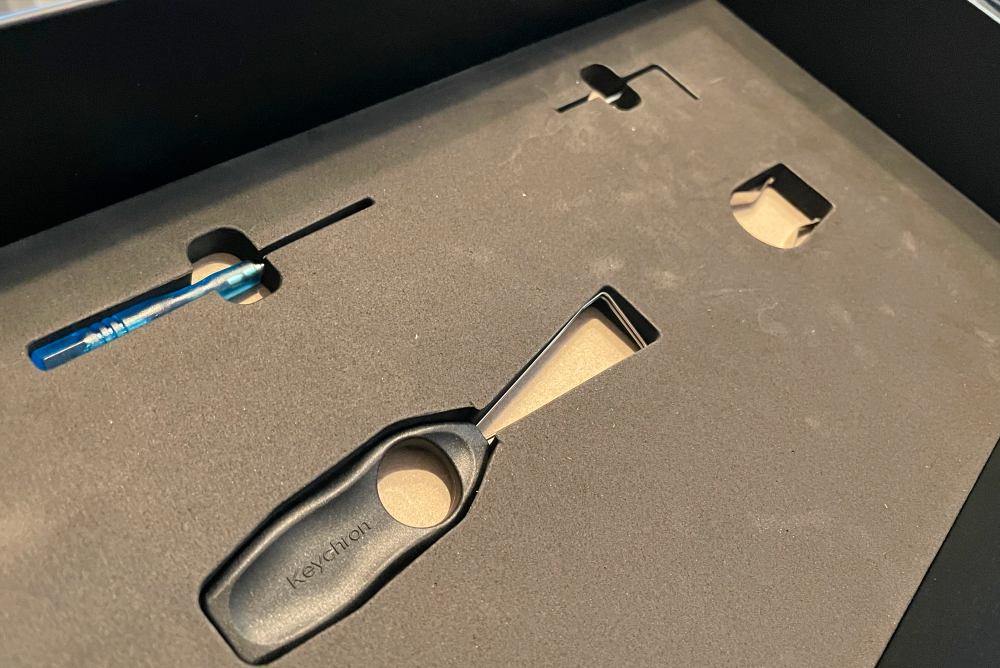
- Toolset: Keycap puller, Switch puller, Screwdriver, Hex wrench
- Parts: Foam dampeners, Stabilizer screws, Extra case screws, Extra adhesive base feet
- Quick start guide, User manual, Switch info card
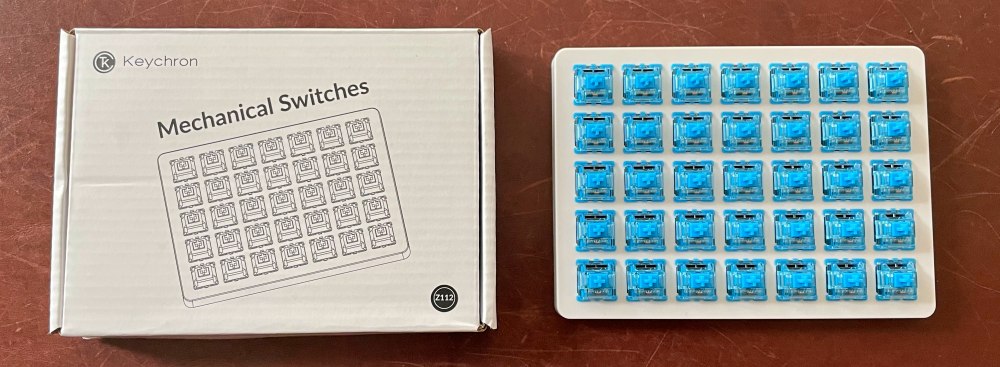
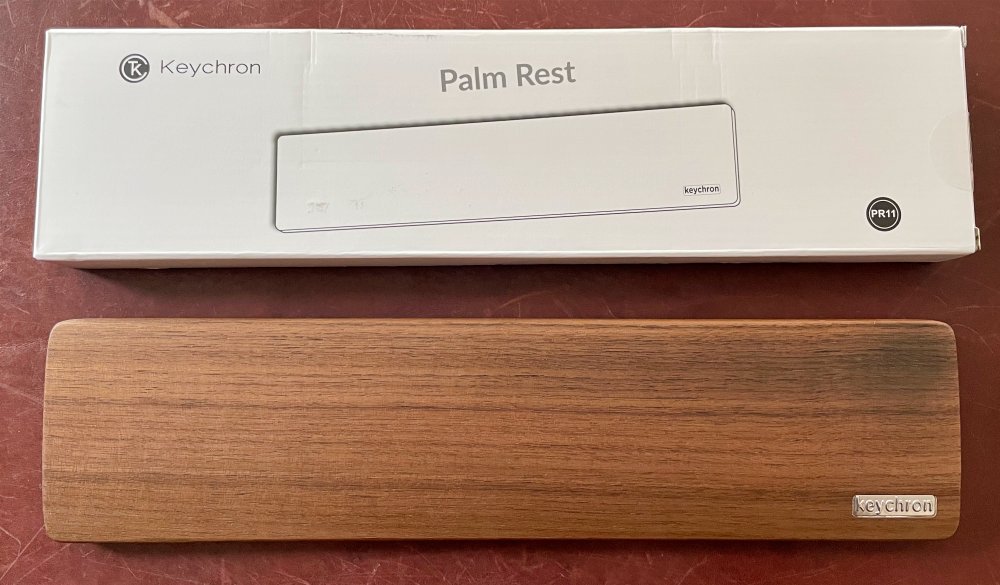
How about those extra boxes?
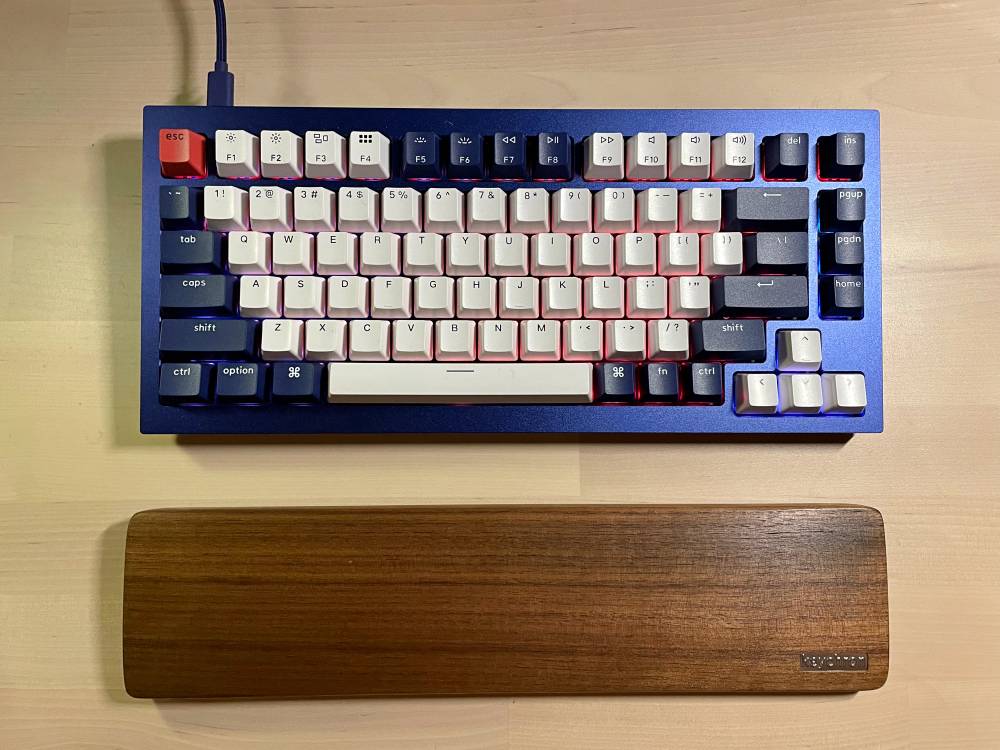
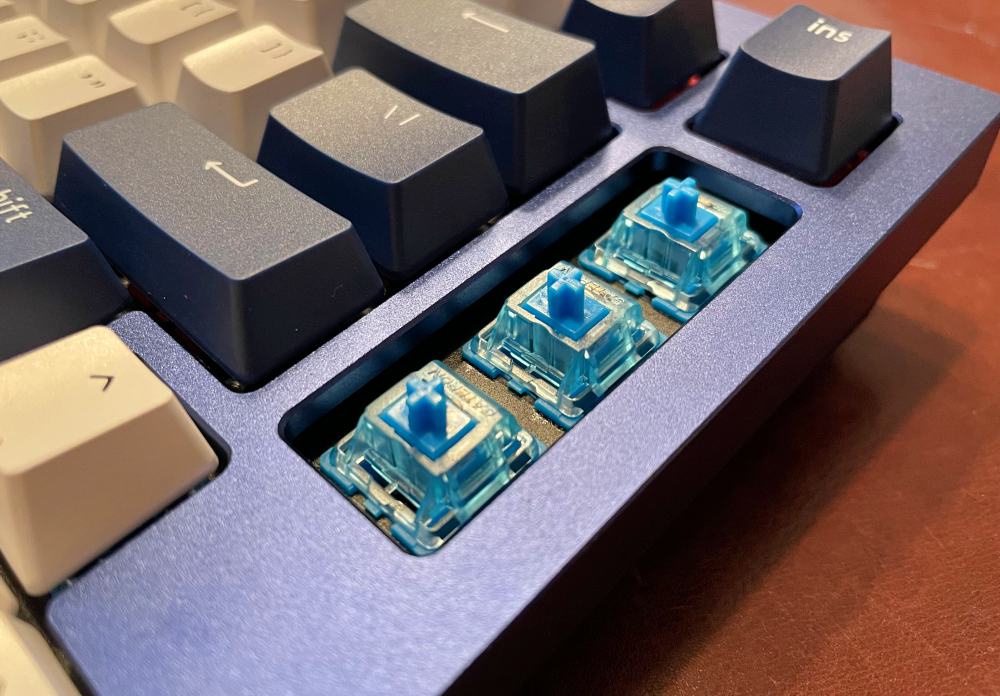
Keychron was nice enough to send us a full set of blue switches along with their wooden palm rest, both of which are available separately.
Hardware specs
Dimensions: 327.5mm wide, 145mm deep, 5.2º angle (21.6mm tall in front, 34.8mm in back (both measured without keycaps), 2.4mm feet
Weight: ~1600g! (yes that’s 3.5lbs!)
Materials: Body – CNC machined aluminum, Plate – aluminum, Keycaps – double-shot ABS (not shine-through)
Switches: Gateron Phantom G (on the fully assembled version) – switches are hot-swappable with support for 3 and 5 pin switches
Lighting: South facing RGB LEDs (LEDs face the user)
Compatibility: Supports Mac and Windows (physical selector switch) – Linux also supported – Wired connection only via USB-C port
Design and features
The Keychron Q1 is a looker. Precision machined from aluminum, it’s designed to be customized from the ground up.
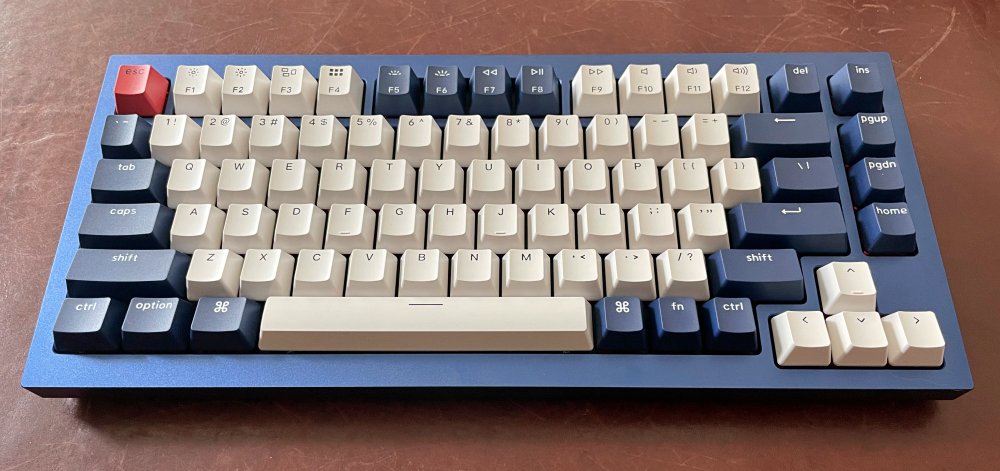
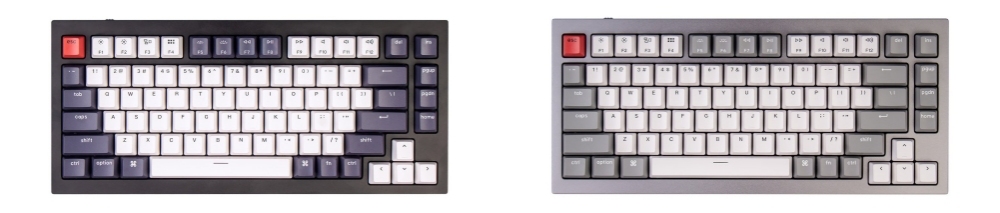
It’s available as a complete keyboard in Carbon Black, Navy Blue (above) or Space Grey. Switches are Gateron Phantom in Red, Blue or Brown. It’s also available as a barebone chassis (regular or ISO) without switches or keycaps for you to build exactly the way you want it.
The material selections and finishes are as good as they get.
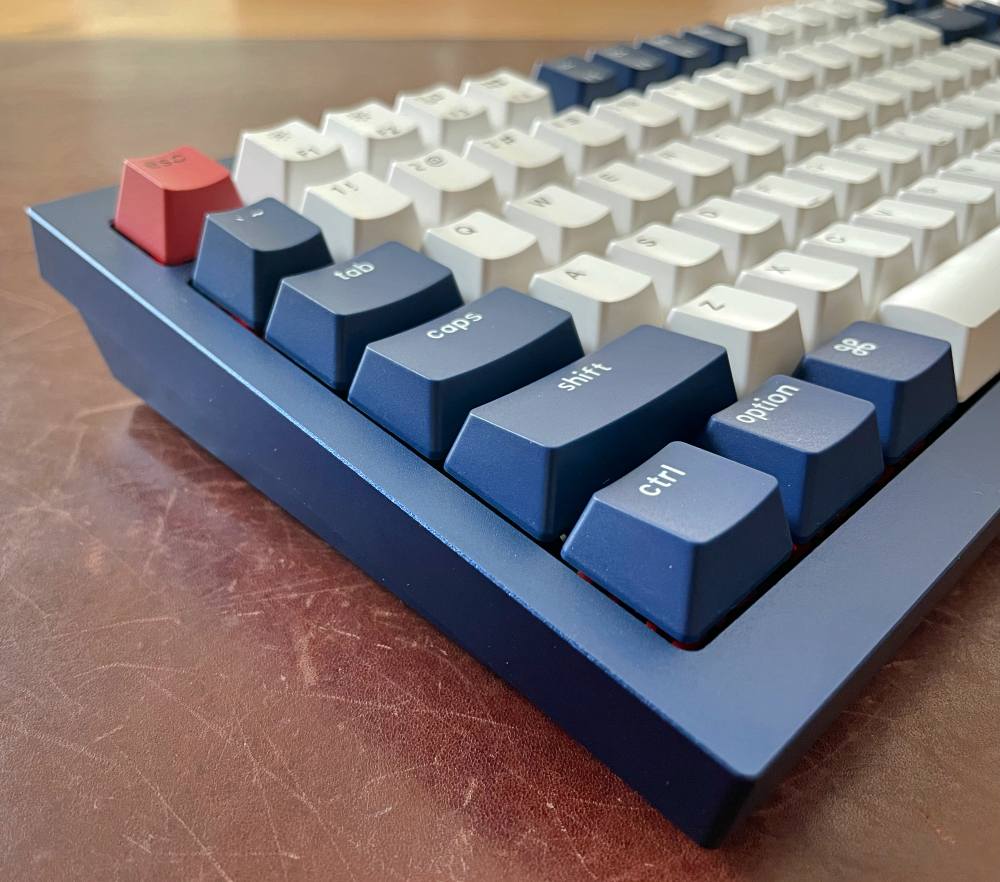
A switch on the back next to the USB-C port lets you quickly choose between Mac or Windows compatibility.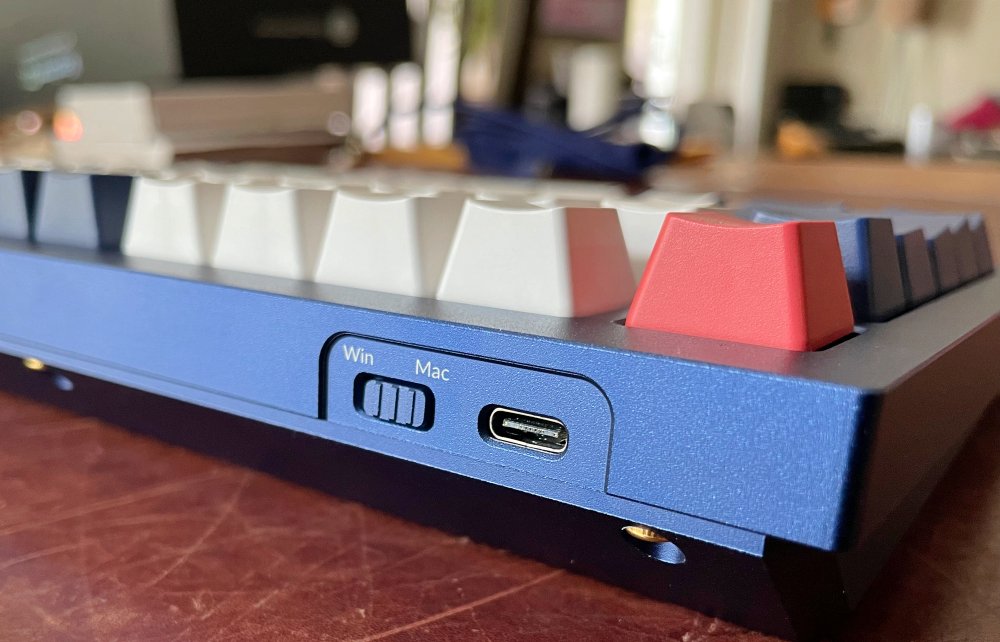
Setup
The hardest part in setting up this keyboard for us was to stop gawking at it long enough to actually plug it into a computer.
First, you’ll want to eat your Wheaties so you’re ready to lift this 3.5lb behemoth to its final resting place. It won’t move unless you want it to. Don’t forget to flip the switch on the back of the keyboard to match your computer OS preference, Mac or Windows.
Next, connect the two halves of the cable with the screw connector and then connect the ends to the USB-C connectors to the keyboard and to your computer. That’s it! No Bluetooth, no batteries, just instant response and very precise typing.
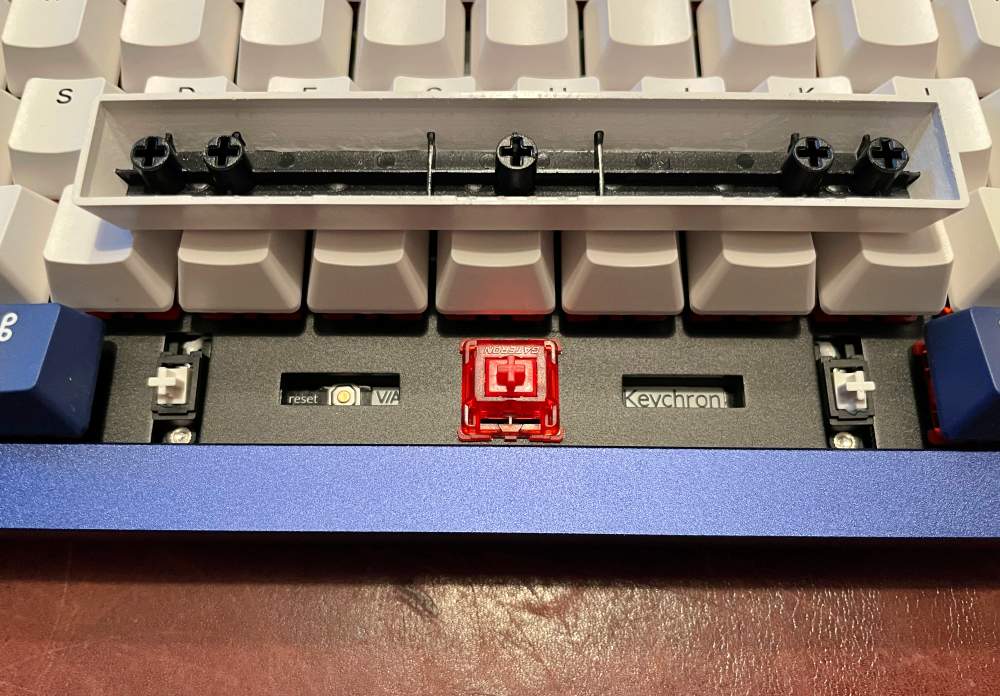
As for customization, if you want to swap out some of the specific keycaps, or want to change out switches for a different keystroke, that’s easy to do and works like this. Oh, you’ll need tools for this step and you’ll find them hiding underneath the Quick Start Guide in the bottom of the box.
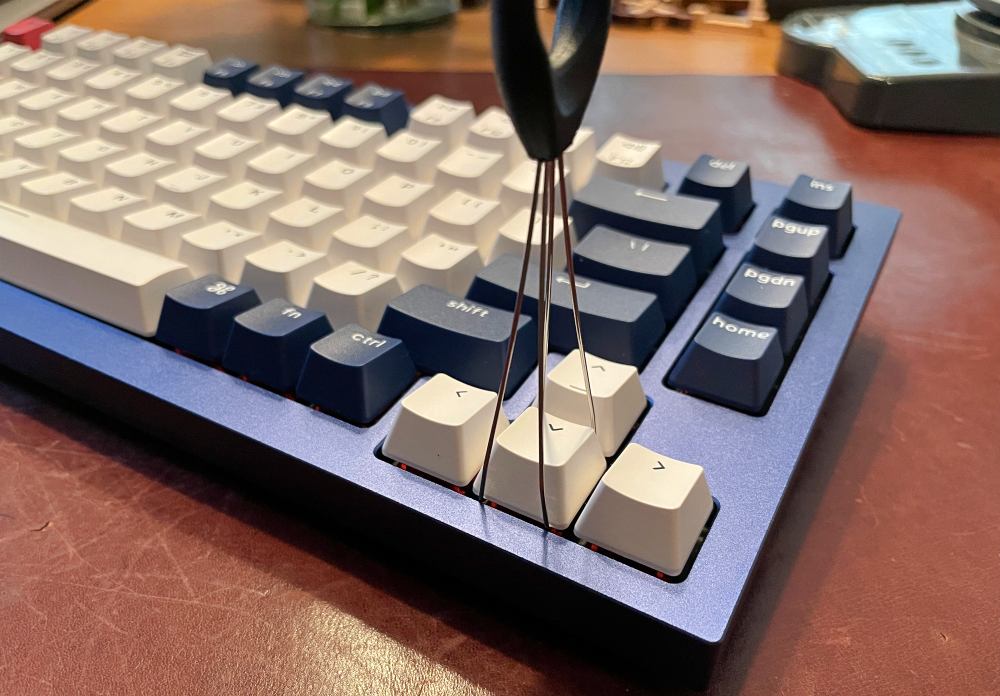
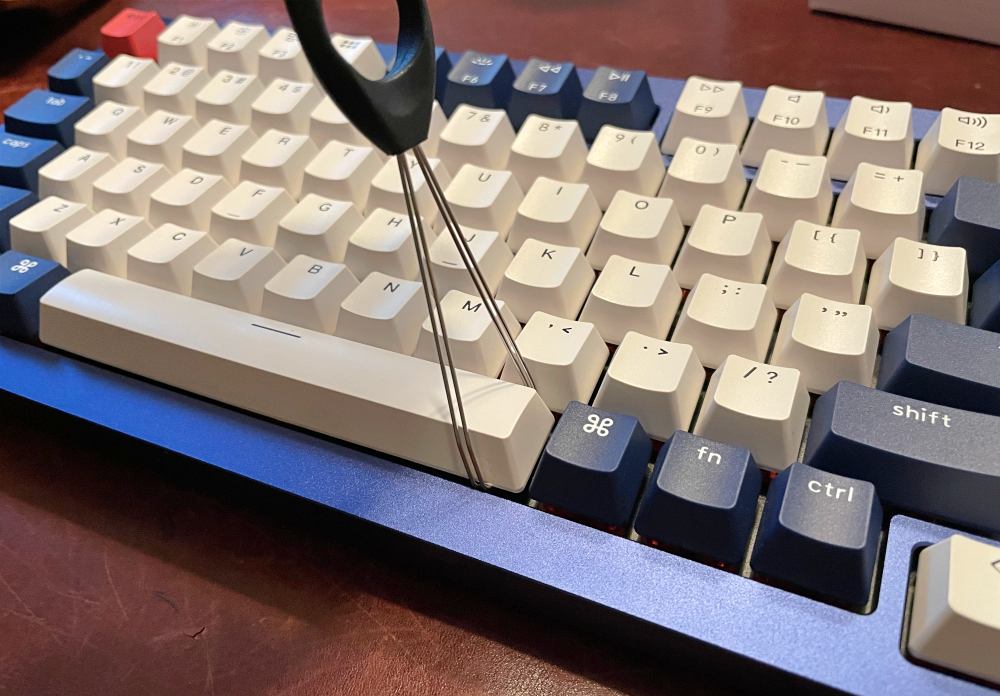
To remove a keycap, use the puller by spreading the wires over each side of a key until they slide underneath and then pull straight up. The key will pull off smoothly with just a little resistance. Install a new keycap by aligning the cap over the key and pushing straight down.
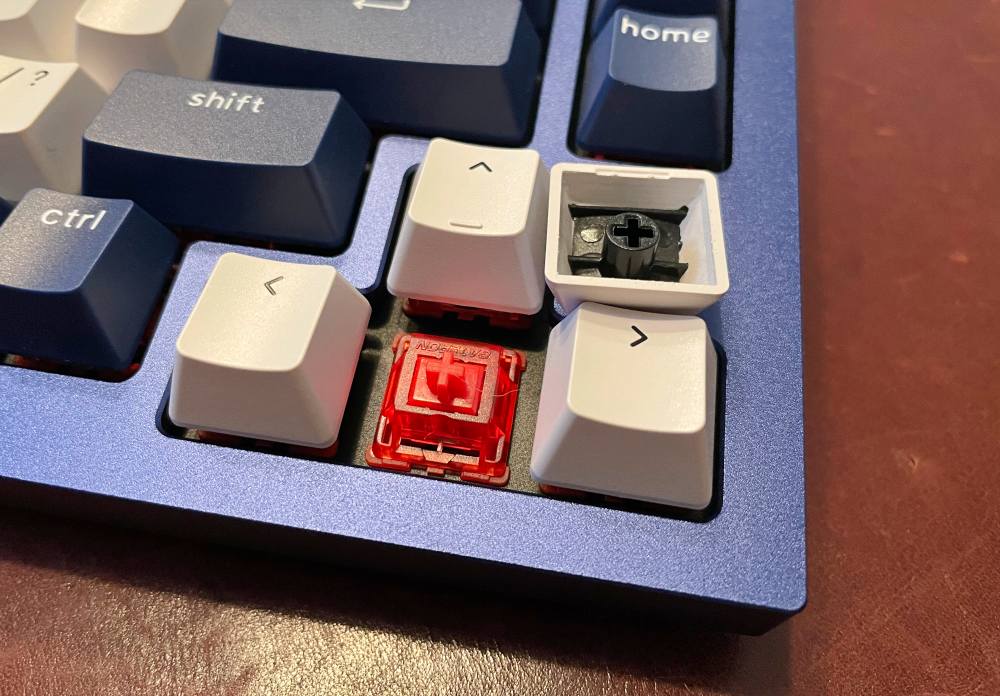
To swap out a switch, first remove the keycap as described above. Keychron’s switch sets come on a cool plastic carrier which aside from keeping them organized serves as a great intro into how to use the switch puller tool as the resistance is lower here. It’s good to practice on a couple here first before trying to remove a switch from the keyboard which has a tighter fit.
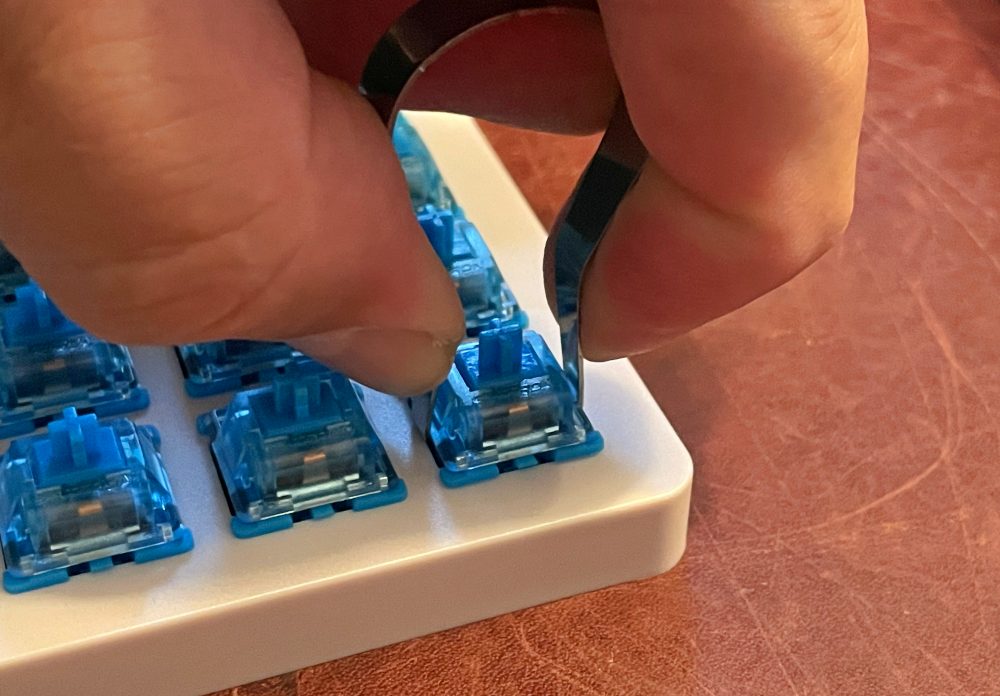
I found it useful to use one hand to hold the sides of the tool against the key and my other hand to lift the tool with my index finger while using my thumb against the keyboard for leverage. Make sure you pull straight up to avoid bending the two pins on removal.
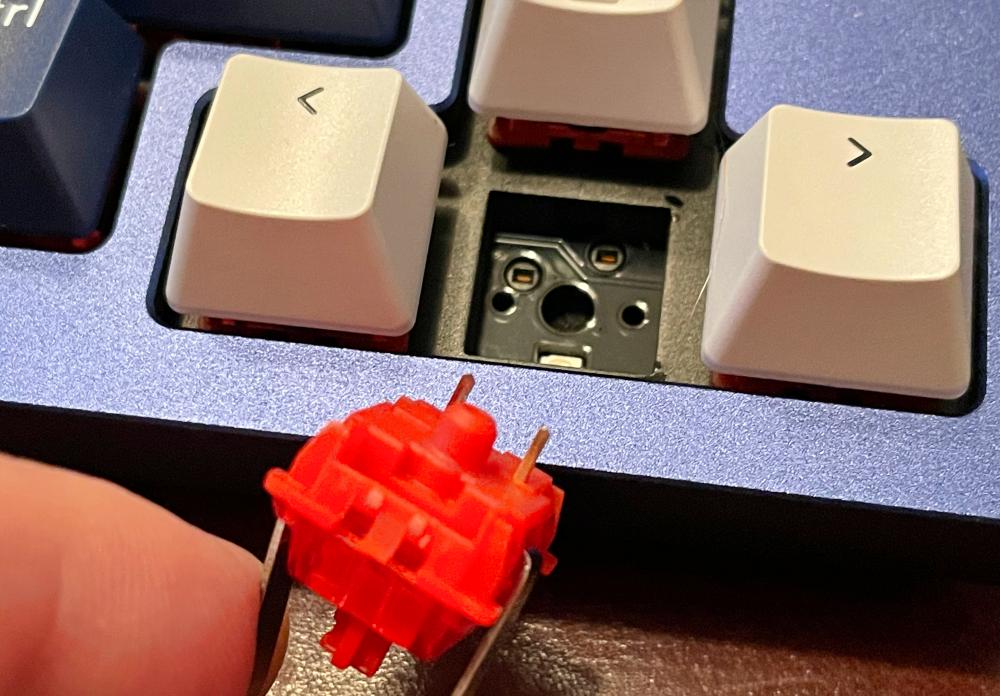
To install a new switch, make sure your orientation is correct and you have the switch aligned properly with the holes before pressing the switch into place. Finish by installing the keycap.
To remove a longer key like the space bar, it helps to use both wires on the puller to loosen each side first.
You can see just how much attention Keychron put on the design here with access to a reset switch (for the Via App) and their logo showing through the layers underneath the space bar.
Performance
Okay. When I first lifted the box I was sure the box had been highjacked somewhere along the shipping path and the contents had been replaced with steel bolts or something. Keyboards don’t weigh this much. After opening the box and seeing that yes, this keyboard is that heavy, I busted out the scale to confirm that it does indeed weigh 3.5 lbs (more than my 13″ MacBook Pro). Woah.
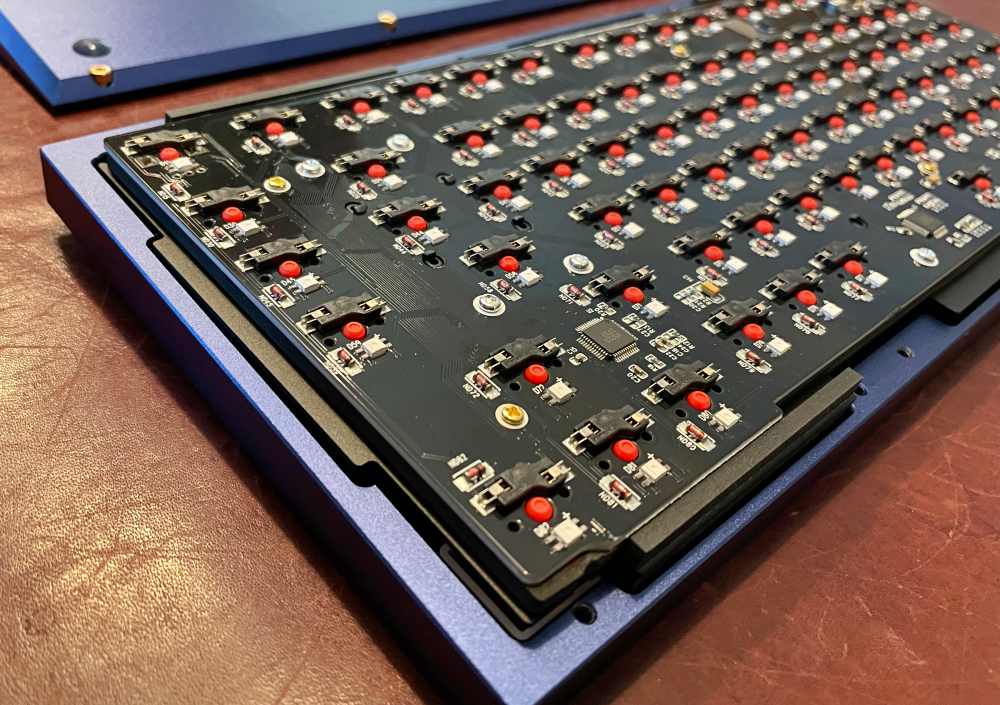
I then just had to unscrew the thing to look inside. It’s assembled beautifully with gold hardware just begging to be undone. The machined aluminum base is around 2 lbs by itself!

The PCB is a work of art and rides on gaskets meaning the whole think kinda floats in the center of the keyboard.
At this point, I just reassembled it so we could connect it to a Mac and hit up Monkeytype for some high speed typing. Our Q1 came equipped with the Red Gateron Switches which are buttery smooth, have a linear profile and seem really quiet. These are not your clicky switches, those are Blue, and the Brown switches are tactile which sits in between the two from a feel standpoint. After trying out both the Red and Blue we ended up sticking with the Red switches and swapping out some lesser-used keys for Blue switches to give them that satisfying click feel.
Here’s a quick video where you can hear the sound of this stock keyboard. Note the difference in the sound of the arrow keys (with the Blue switches) versus the others (with the Red). Both sound much louder in this video than they sounded to us while using the keyboard.
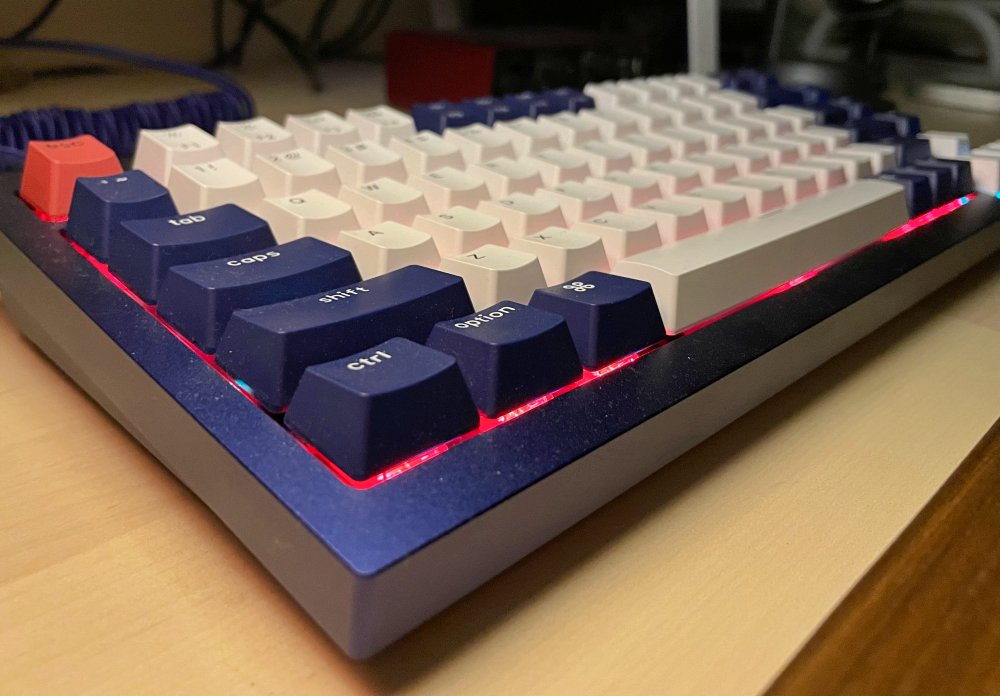
As for the lighting, Keychron made a great choice in having the LEDs aimed at the keyboard’s user. Here’s a photo of what that looks like.
A looping video from Keychron’s site does the best job of showing just how dynamic the RGB lighting can be. (All keycaps are removed).
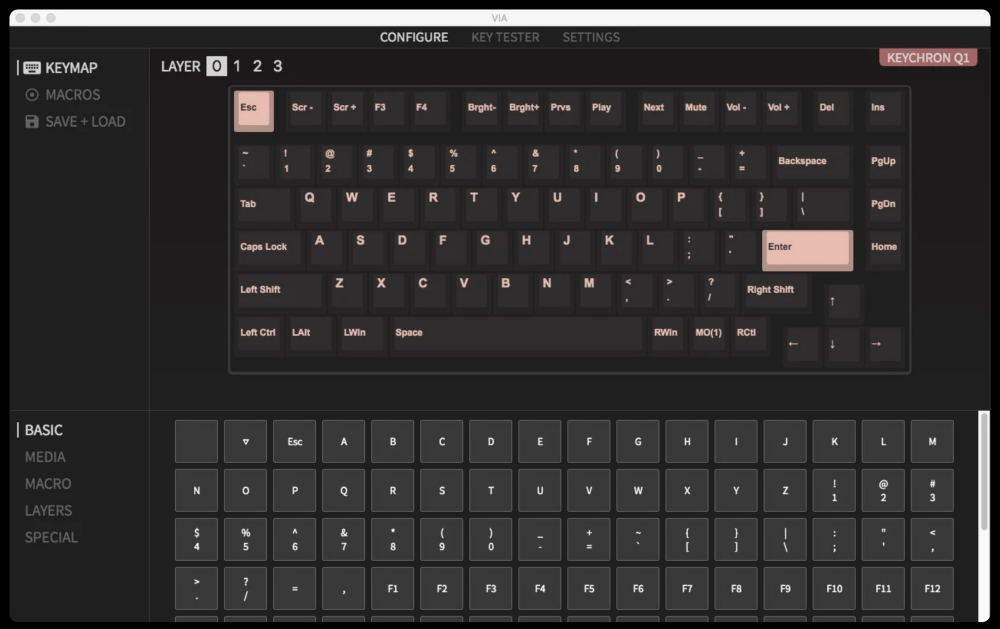
Neither my son nor I need any key mapping (yet) so we didn’t even get into what’s possible with the Via App and the whole QMK side of the keyboard. I realize that’s a major draw for this model and encourage you to dig into Keychron’s site for more info as it does look really cool. Here’s a snapshot of what the Via App interface looks like.
My son has since vanished off to college again taking the Q1 with him. It suits him perfectly and as a mechanical engineering student, it’s super handy to be able to flip a switch on the back when he bounces between the Mac OS and Windows in Bootcamp when he’s running SolidWorks.
What I like
- Everything! (I know that’s a cop out)
- Heft and aesthetics are awesome
- No Bluetooth, no batteries, instant response and great typing experience
- Worth every penny!
What I’d change
- You’ll definitely want a palm rest as it does sit up off the desk a bit
Final thoughts
I can’t say enough about the build quality of this keyboard, not to mention the performance and the value as a result. As I mentioned at the top of the review, we were already Keychron fans, but the Q1 is on an entirely different level than any of their other keyboards. Bravo!
Price: $179.00 $169.00 at time of publishing
Where to buy: Keychron
Source: The sample of this product was provided by Keychron

Now retrieving an image set.
Google Review Tap Cards (3-Pack) by TapFive - Tap for Instant Reviews - All Phones Compatible - Reusable Smart Tap NFC & QR - Boost Business Reviews - Powered by TapFive (3 Card Pack)
(as of July 13, 2026 18:55 GMT -05:00 - More infoProduct prices and availability are accurate as of the date/time indicated and are subject to change. Any price and availability information displayed on [relevant Amazon Site(s), as applicable] at the time of purchase will apply to the purchase of this product.)
Now retrieving an image set.
Gadgeteer Comment Policy - Please read before commenting
But no number pad!