REVIEW – I’ve been looking for backup camera solutions for my Suburban and for our Subaru Forrester for many months and had been looking for something that didn’t require yet another wiring project (even a minor one). I am hoping that the Auto-Vox Solar Wireless Digital Reversing System will be the perfect solution.
What is it?
The Auto-Vox Solar Wireless Digital Reversing System is a license plate frame-style wireless backup camera that requires no wiring modifications at the back of the car and only a cigarette lighter power plug to power the display. While it is not as sophisticated as the built-in cameras and displays on modern vehicles, it provides a turn-key, easy-install solution for older vehicles.
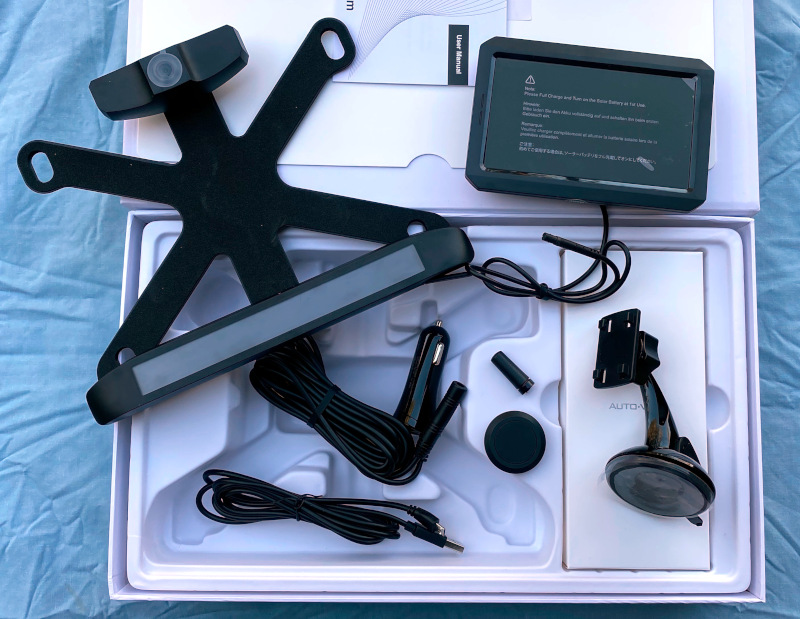
What’s in the box?
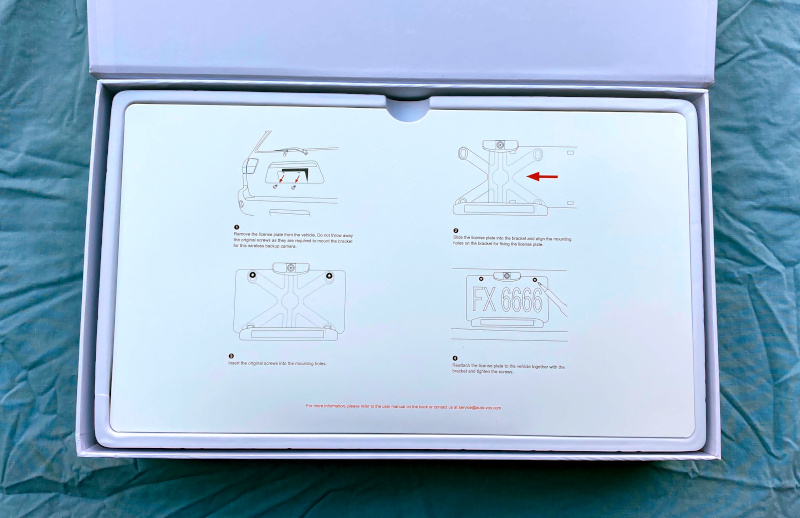
The kit is packed in a box that is reminiscent of an Apple product. Opening the lid reveals an overview card and then a well-packaged system.
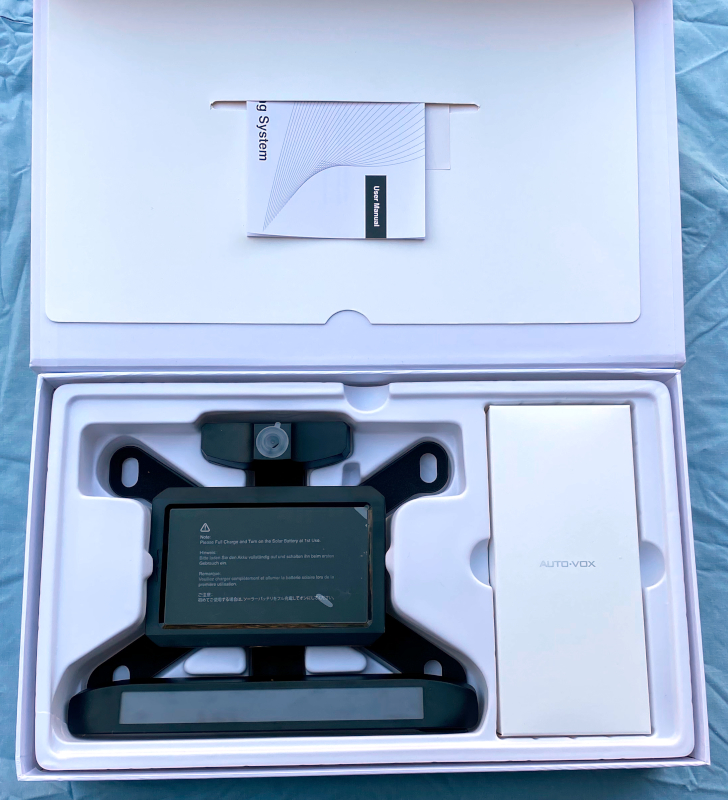
The system consists of
- Camera / battery / video sending unit
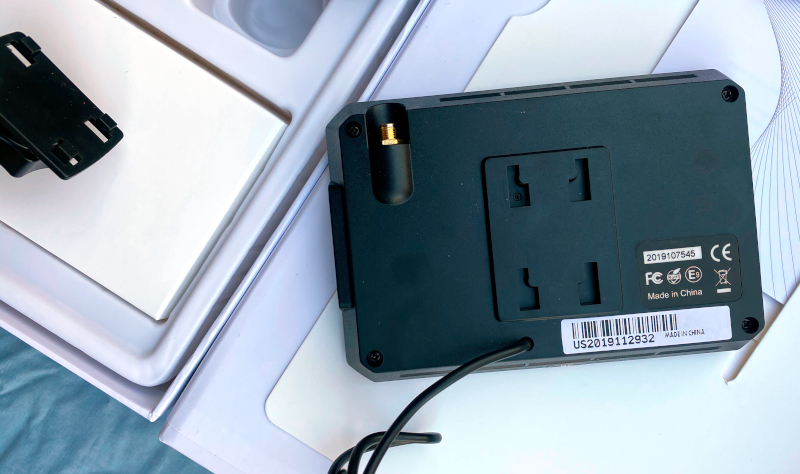
- Receiver with 5-inch display, detachable antenna, and attached power lead
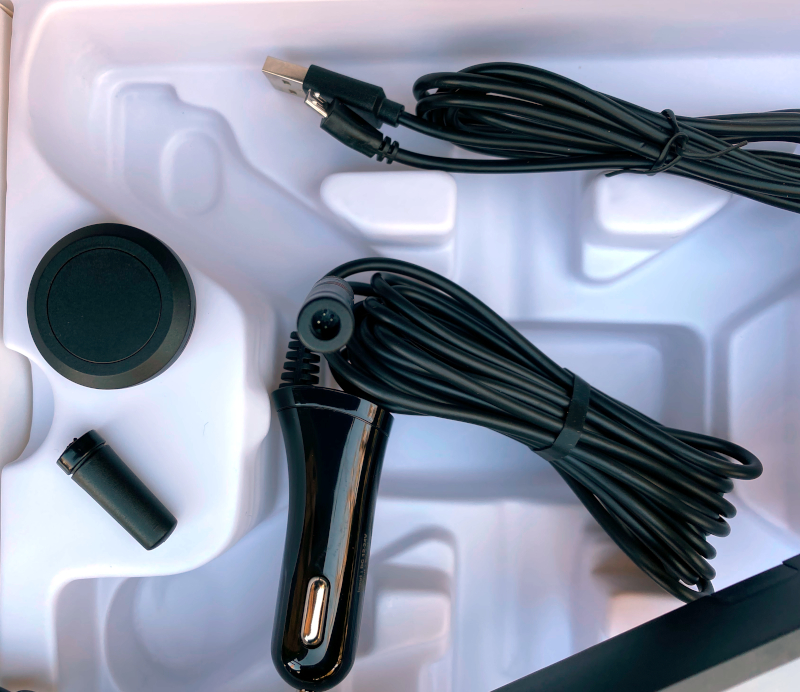
- Cigarette-lighter socket power plug with attached power cable
- Camera activation system (wireless button)
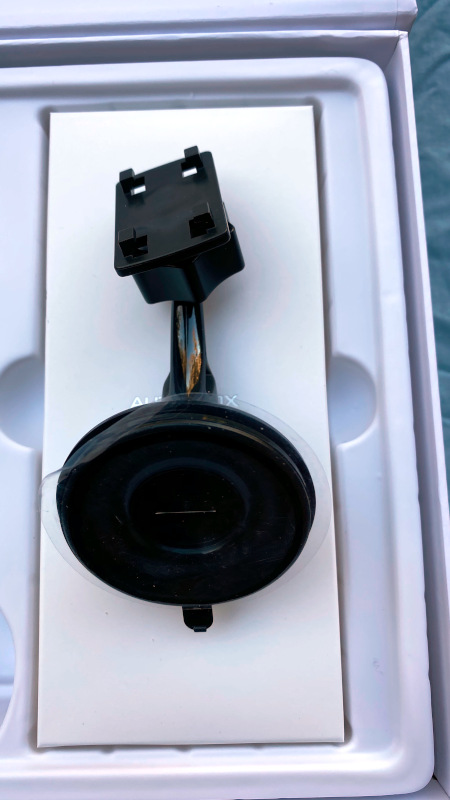
- Suction-cup arm which hold the receiver to the windscreen
- USB data / charging cable
Design and features
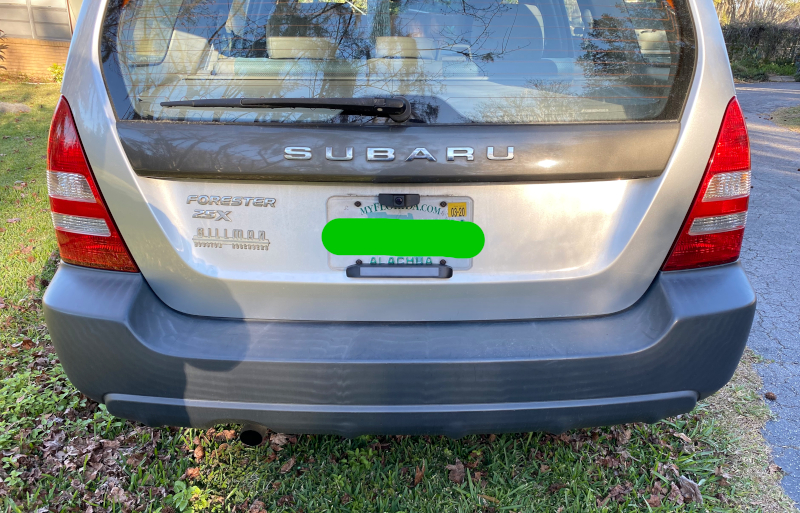
I was originally going to review the Auto-Vox Solar Wireless Digital Reversing System with my Suburban which is often loaded to the gills with camping gear for scout outings or schlepping LEGO displays to regional / national shows which required a helper to hook up trailers or back in to parking spaces. However, the design of my Suburban with the license plate positioned in the step portion of the bumper blocks the solar panel. So my wife’s Subaru Forrester became the test vehicle.
Setup
The setup process is simple, but it is important to complete the first step before installing the unit. Setup consists of
- charging the battery in the license plate frame camera unit
- installing the camera
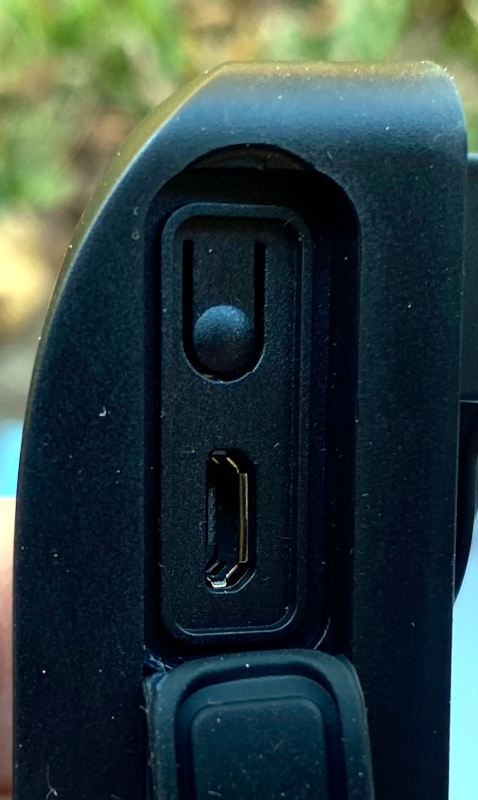
- screwing the antenna into the receiver
- plugging the power pigtail from the receiver into the power cord and then plugging in the power cord
- attaching the mounting arm to the back of the receiver and to the windscreen
- setting the various parameters in the receiver
- adjusting the vertical angle of the camera
- mounting the activation button (adhesive disc)
Once the battery is charged (1-2 hours using the included cable and a USB power source), exposure to a few hours of sunlight daily will keep the battery topped up for routine use. This may be a problem over time if your vehicle is garaged at home or work or both or is stored for long periods. The documentation claims that a fully charged camera battery is capable of powering the system for several months with no sunlight, but this was not verified.
Before installation, the camera unit must be turned on by pressing the power button adjacent to the charging port on the bottom of the unit. During use these are protected by a rubber flap.
Installation of the license plate frame should only take 10-15 minutes (longer if you drop one of the screws in the grass like I did). This process involves removing the license plate from the vehicle and sliding it into the camera frame and then reattaching the paired frame and plate to the vehicle.
The receiver unit and mounting arm are connected using a slide fit system of pins and slots.
Once the camera is installed, the plug-and-play nature of the rest of the system means that physically setting it up takes 5 – 30 minutes. The amount of time will be determined by how elaborate you want to get with the wires. For my test, I simply let them lay on the dash. You also need to mount the camera activation button.
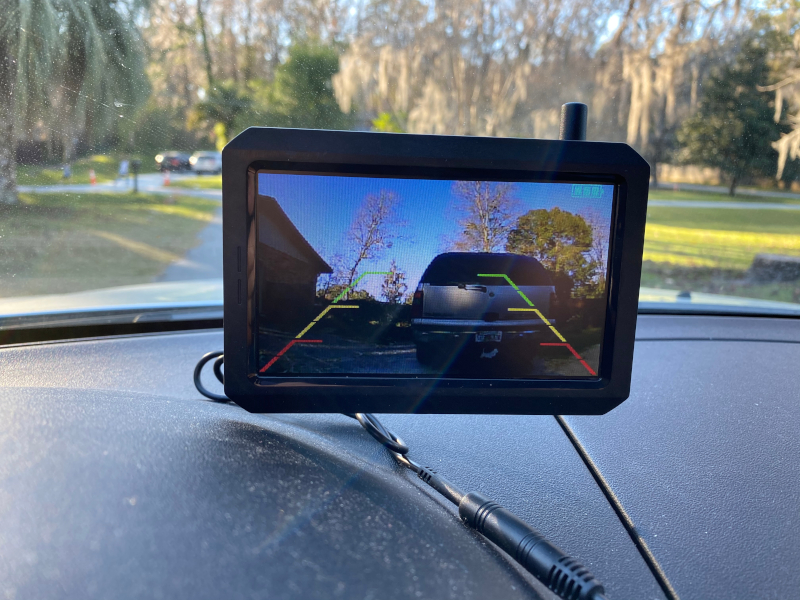
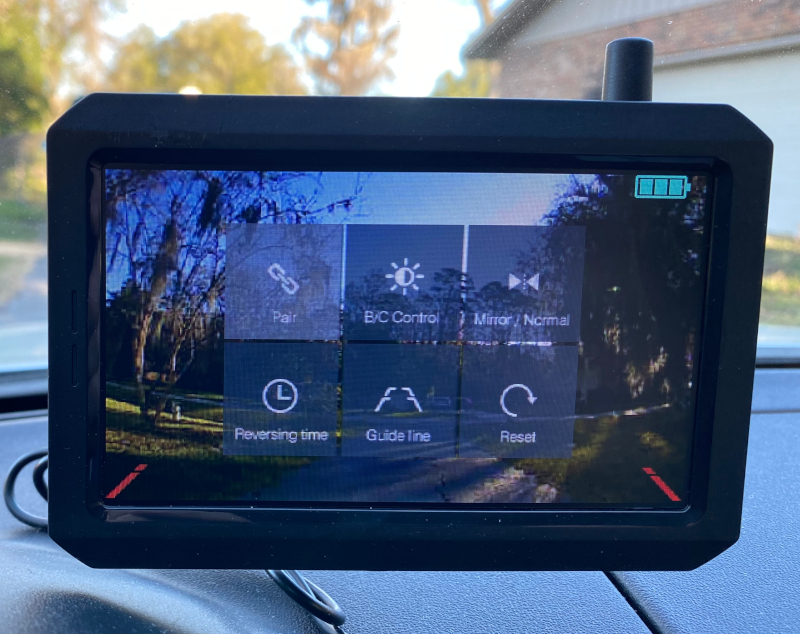
Once the system is installed, the camera and receiver functions can be customized using the on-screen menus. The menus are accessed and navigated using the buttons on the side of the receiver.
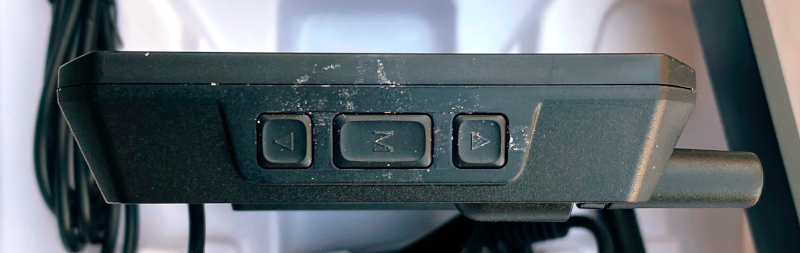
The menus allow for the following adjustments:
- pairing new camera (system comes already paired)
- brightness / contrast
- mirror / normal image display
- reversing time (how long the display stays on after pressing the activation button)
- turn the guide lines on / off and select the size of the guidelines
- reset to factory settings
Performance
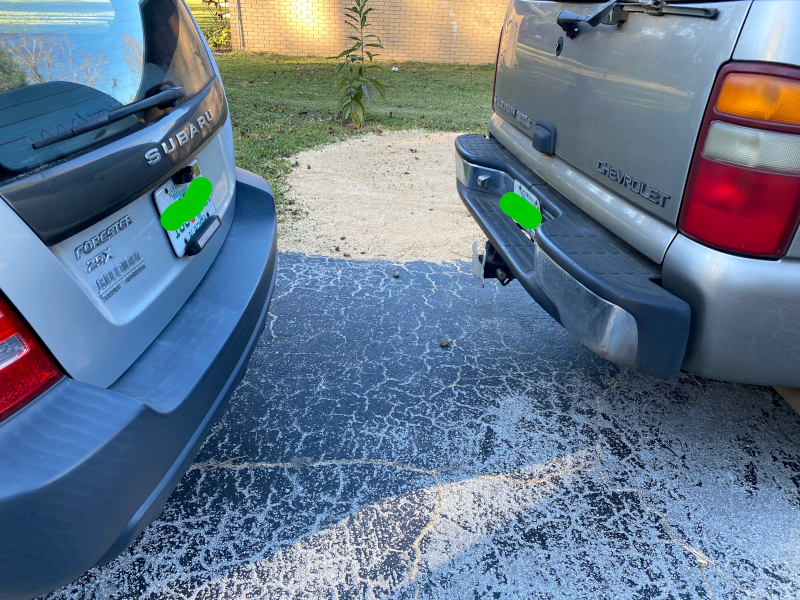
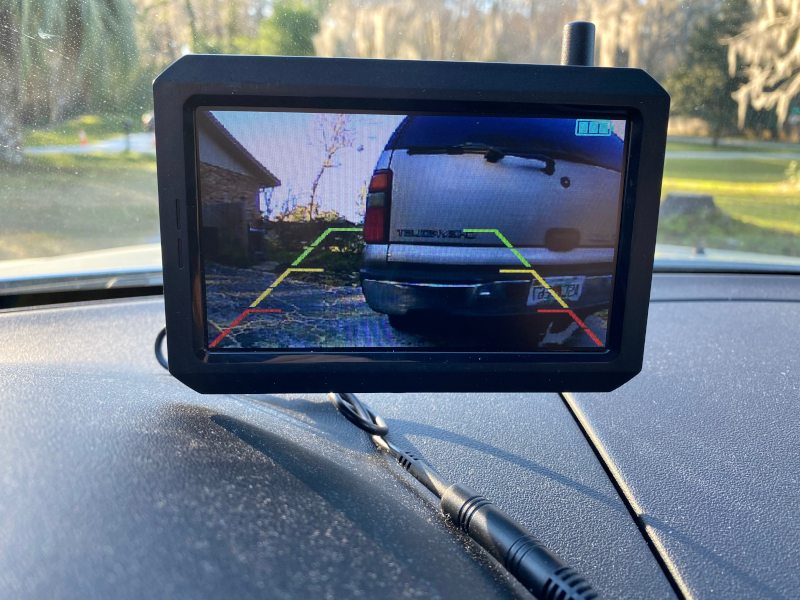
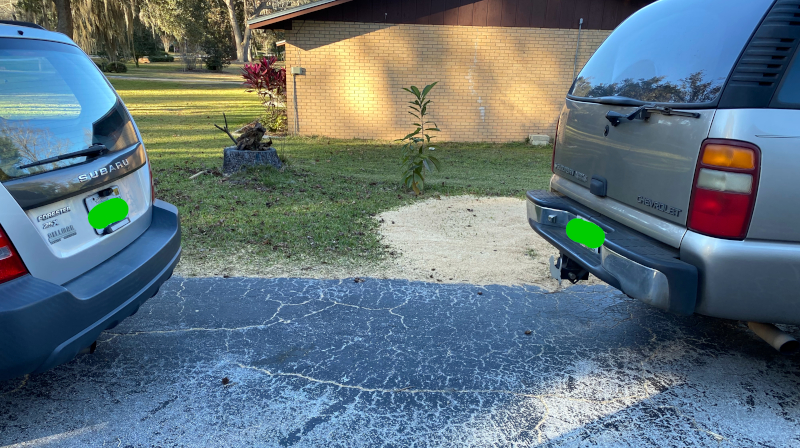
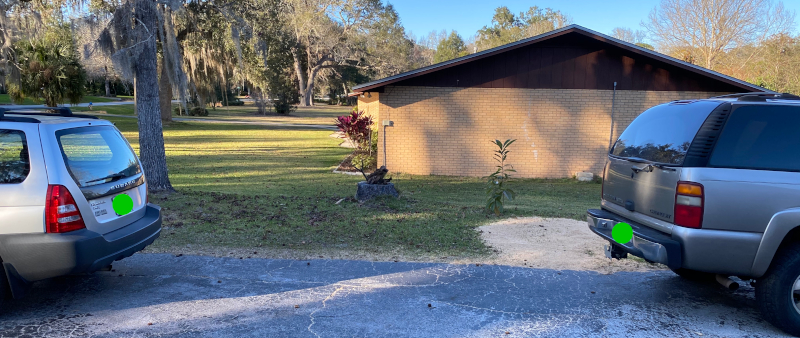
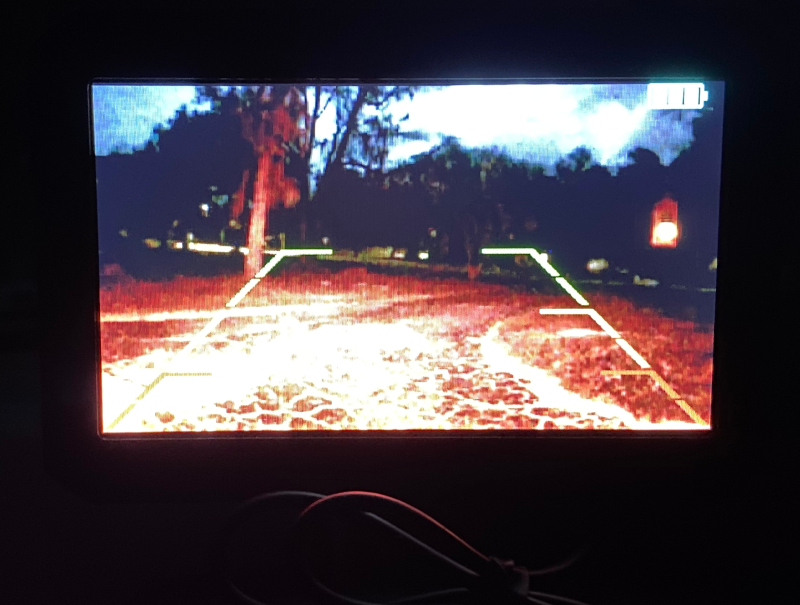
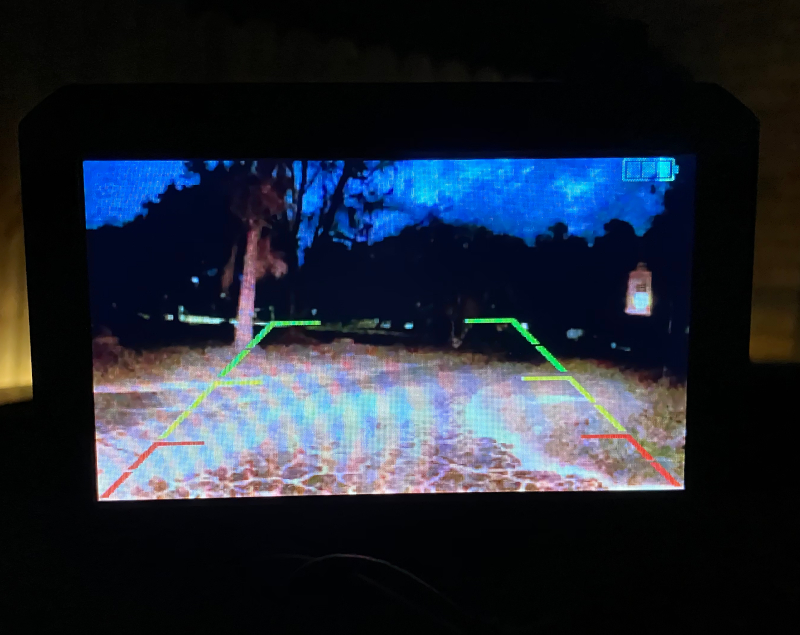
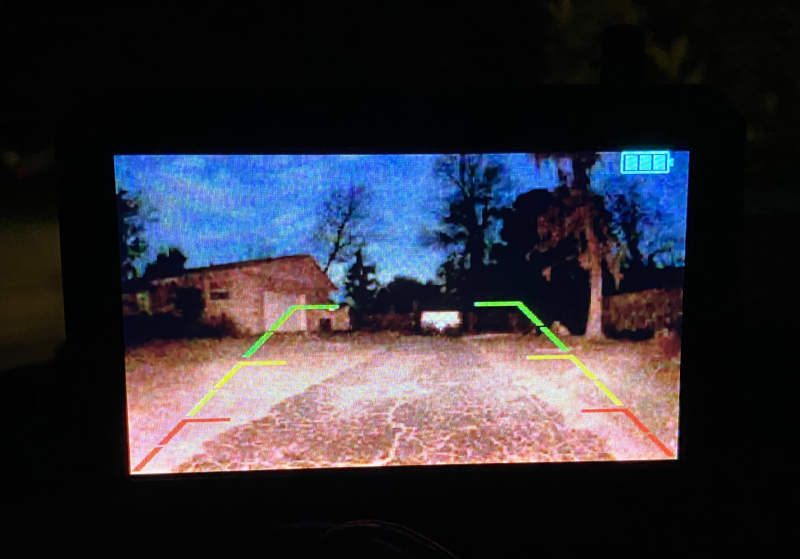
We used the Auto-Vox system for several weeks and found that it was a convenient adjunct to the car’s mirrors. I’m old school and prefer properly adjusted mirrors to reliance on cameras, but it was very helpful when trying to back into parking spaces and when carrying tall cargo that obstructs sight lines. We performed some field calibration measurements to see what different distance between vehicles looked like on the monitor so we would have references when using the system. Some of the pairs of images are shown below.

We also tested nighttime performance. Overall, the camera produced a usable image as long as there was illumination from either the brake lights or backup lights.

The only negative thing we found during our testing is that the camera pod above the license plate impedes access to the lift gate release handle on the back of the Subaru.
What I like
- Easy to install
- Easy to use
- Clear display
- Good night performance (with back-up lights illuminating scene)
What could be improved
- Moving the solar panel to the top of the unit to allow for use on older trucks
Final thoughts
Overall the Auto-Vox Solar Wireless Digital Reversing System works well. It delivers on its promise of being a very-easy-to-install system for providing a rear camera for vehicles not equipped with an OEM solution.
Price: $189.99
Where to buy: Amazon Use the coupon code: L8323RX5 End date : 12/31/202111:59 PMPDT
Source: The sample of this product was provided by Auto-Vox.
Gerber Gear 22-47162N Fast Draw Folding Assisted Opening Pocket Knife, Fine Edge, Black
(as of June 16, 2026 18:51 GMT -05:00 - More infoProduct prices and availability are accurate as of the date/time indicated and are subject to change. Any price and availability information displayed on [relevant Amazon Site(s), as applicable] at the time of purchase will apply to the purchase of this product.)
Gadgeteer Comment Policy - Please read before commenting
Looks like the price dropped for this. It was quite a bit more expensive when I looked at it a year or so ago. I like the “don’t need to hook in the wires” bit. I put the version in to one car that had a need to wire it to your backup light to provide power, which worked, but was more involved. Not needing to do that would make this much more convenient and I’d consider adding to my wife’s car as long as it would fit.
BE CAREFUL!!! THE LINK ABOVE IS NOT FOR THE PRODUCT DESCRIBED. The associated link will take you to a product that requires basic wiring requirements!
Hmmm. That was changed on the back end then. The link was correct when the review was submitted.
I’ve noticed that Amazon will redirect their own links when a specific product is either out of stock or no longer available.
I’d like to use this on the back of my 20-foot camper trailer. Do you know it the signal would transmit to the dash of our Subaru, about 30 feet from the camera?
Sorry Eric, but I didn’t test that distance.
Nice idea for adding a camera. Could the display be used in a cupholder or magnetic vent phone mount as an alternative?