REVIEW – I’ll admit that I am a novice when it comes to 3D printing, but I do have an expert on call in my teenager (he built his own printer). We’ve been playing with the Longer Home 3D Printer Cube, which Longer says is an ideal starter printer for kids and adults. How does it measure up to my expert’s standards? To the review!
What is it?
It’s a starter 3D printer for kids, designed to be cost-effective and easy to use.
What’s in the box?
You’ve got everything you need to get started in the package, including:
- The printer, pre-assembled and ready for work
- A stand/spool for the filament roll
- A small roll of starter filament
- Some tools to make adjustments
- An SD card pre-loaded with the software
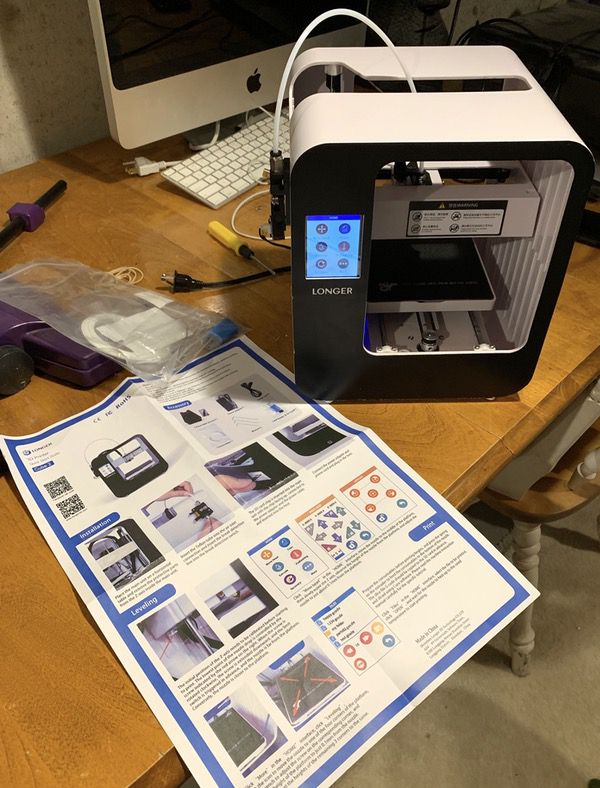
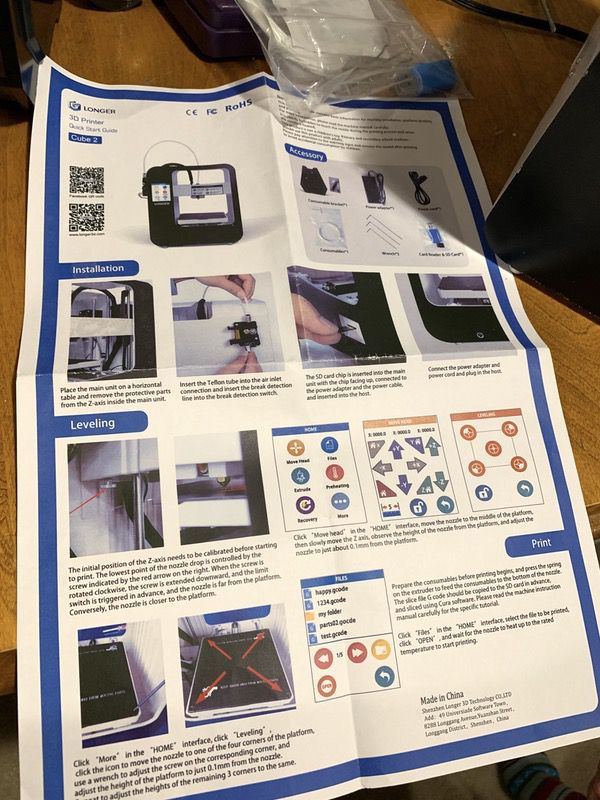
An instruction sheet is also included in the package.
Hardware specs
- Base unit is 9.5″ by 9″ by 10.5″, with a weight of about 8 pounds
- Operating Temperature:5℃-35℃; Relative Humidity:30%-90%
- Electricity:Input:110-240VAC 50-60Hz; Output:24V 3A. MaxPower:72W
- Build Volume:140mm(L)*120mm(W)*105mm(H)
- Layer Thickness:0.1-0.3mm. Printing Speed: 30-60mm/s
- Heated Bed: NO
- Filament Diameter:1.75mm.Filament Type:PLA
- Compatible Software:Cura, Repetier,etc
- Operating Systems:Windows/Mac/Linux
- File Format: Gcode,STL
- Connection:SD card
Design and features
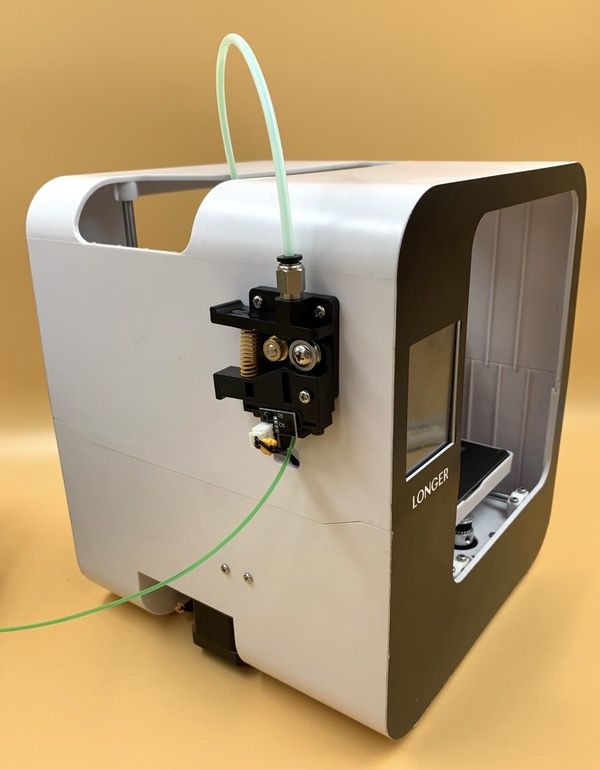
The Longer Home 3D Printer Cube is designed for ease of use. The footprint is about 9″ by 9.5″ by 10.5″ deep, so it fits neatly on the corner of a desktop or counter. It also comes pre-assembled in a complete unit. Here’s the front face:
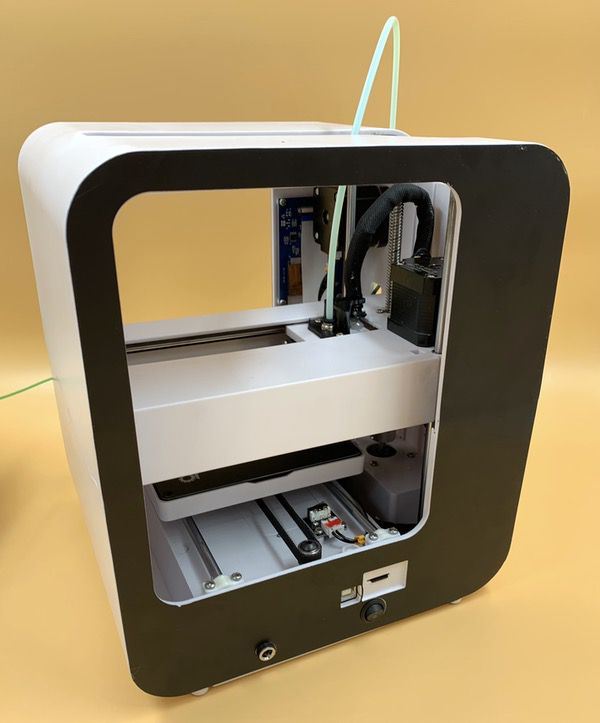
The rear face of the unit is where your power cord goes, and where the SD card port is to upload your models:
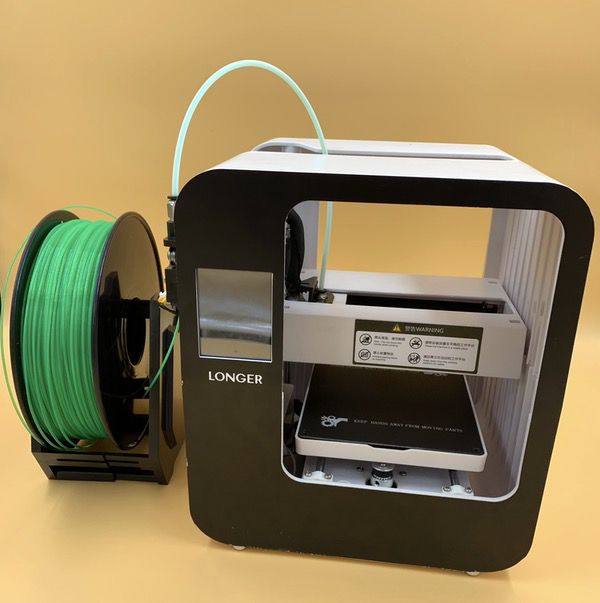
The left side of the unit is where you’ll find the filament feeder:
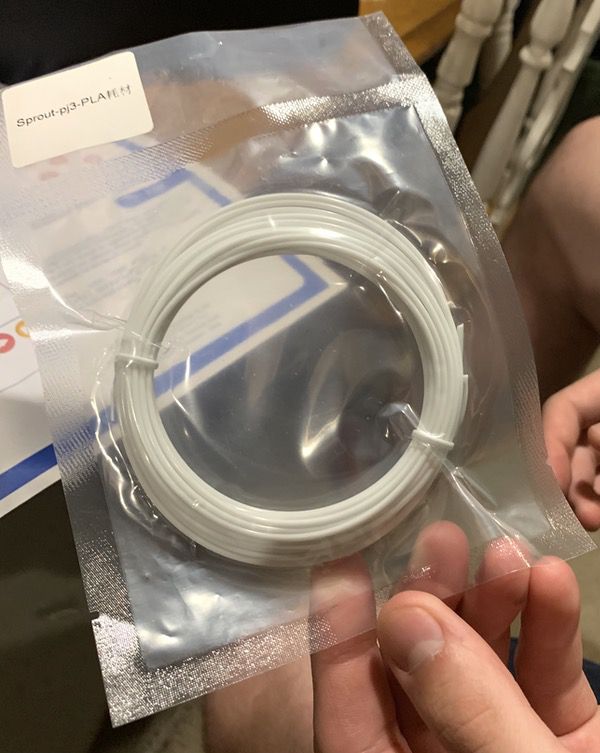
Longer also does a nice job of supplying everything you need to get going on your first printing projects. You need filament to print, and they give you a small sample roll to get going.
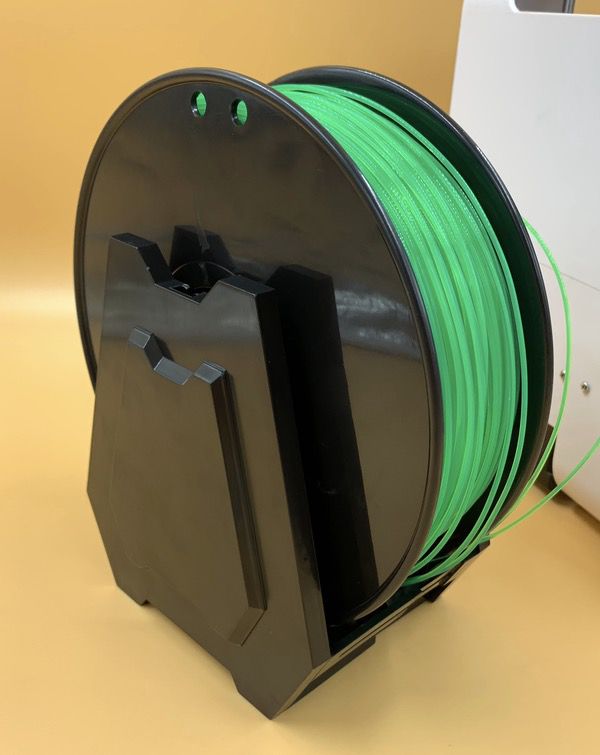
One of the things that you’ll find out quickly when doing 3D printing is that you’ll need lots of filament. You can buy all kinds of colors and types in larger spools, and Longer provides a spool stand that ensures your filament wont get tangled while the printer is doing its work. It takes big rolls too, as shown with the roll my son provided for some of our tests:
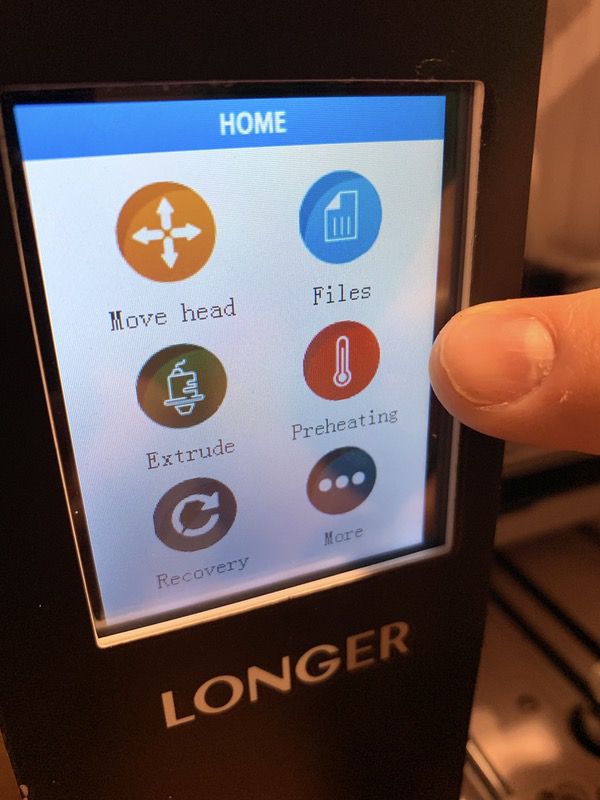
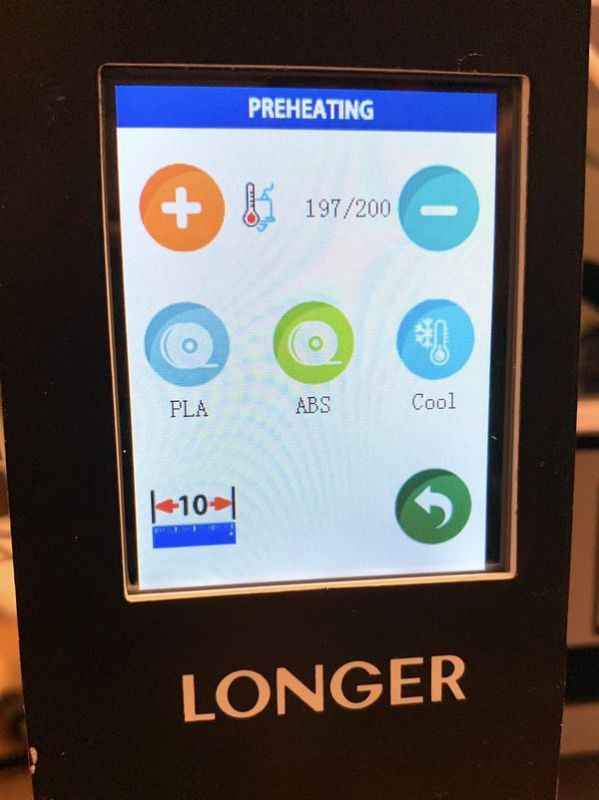
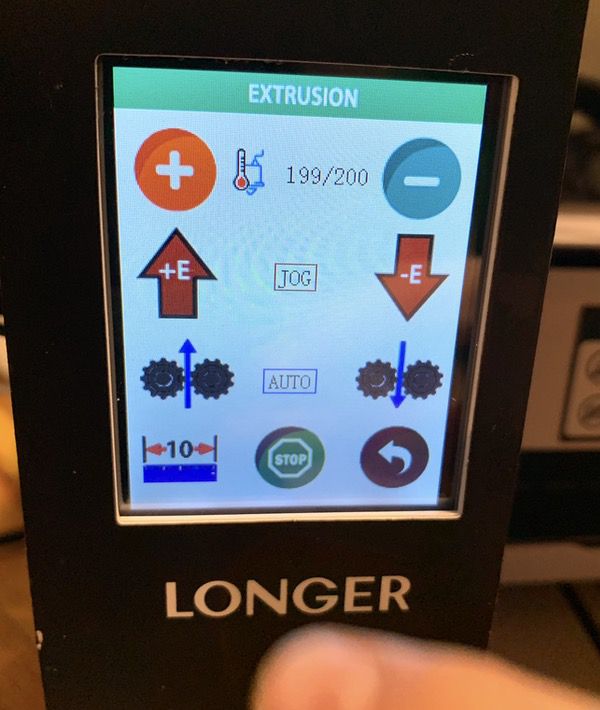
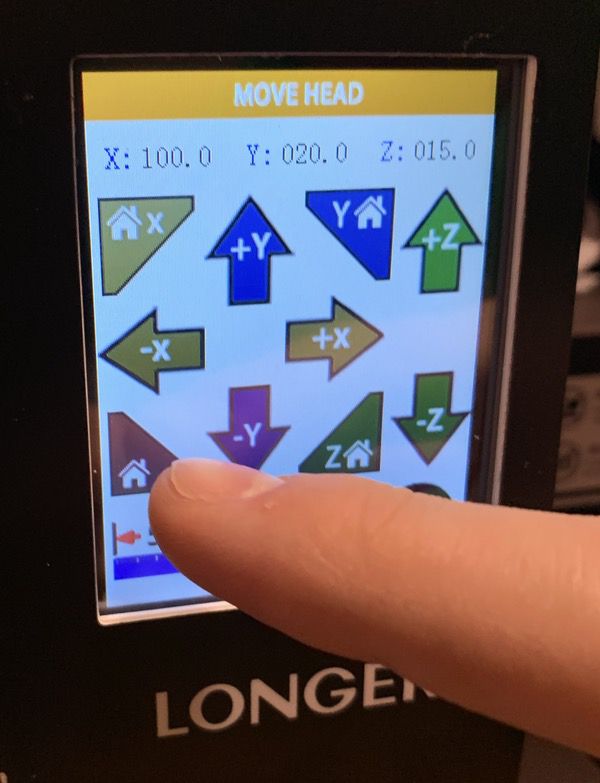
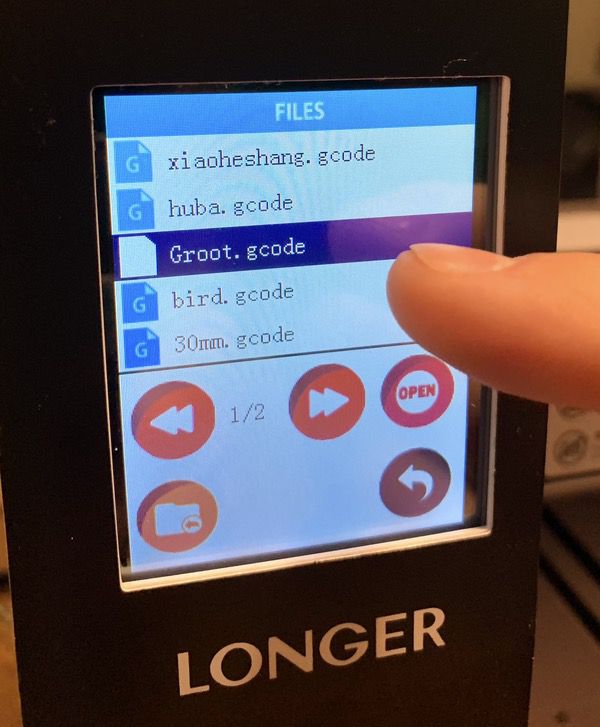
A bright color touch screen display is used for all functions. The interface is friendly and easy to follow for beginners and experts, and the touch screen interface responds well to even the clumsiest of fingers. Some sample shots follow:
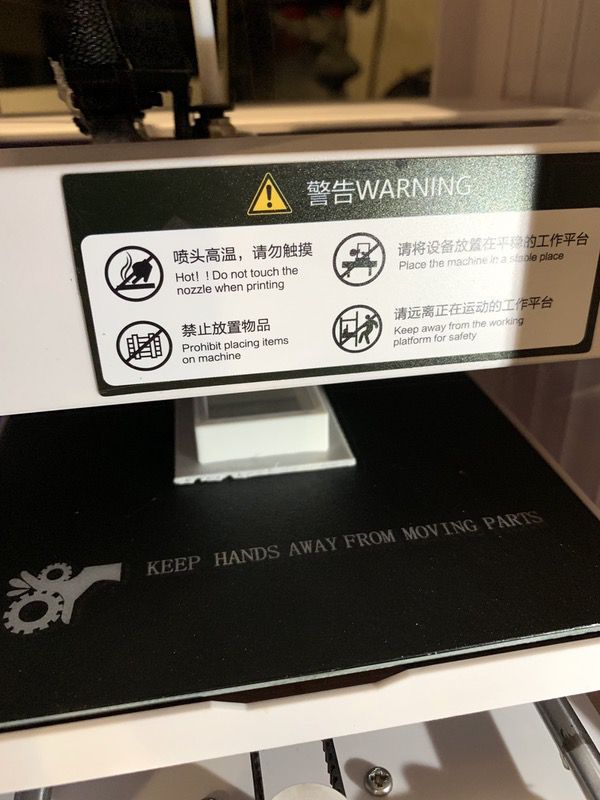
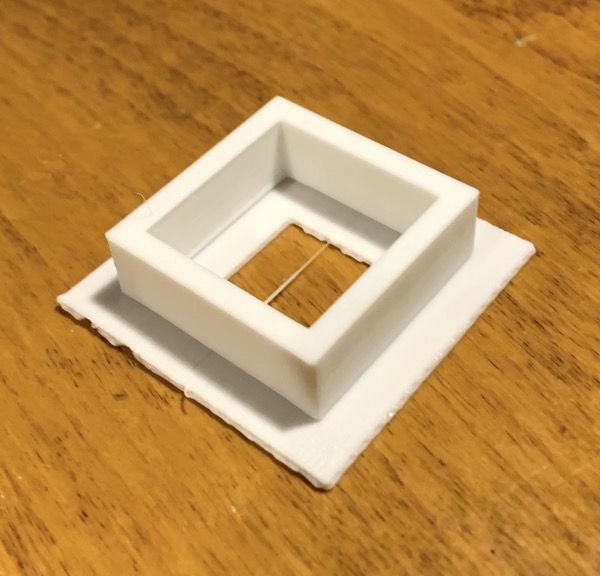
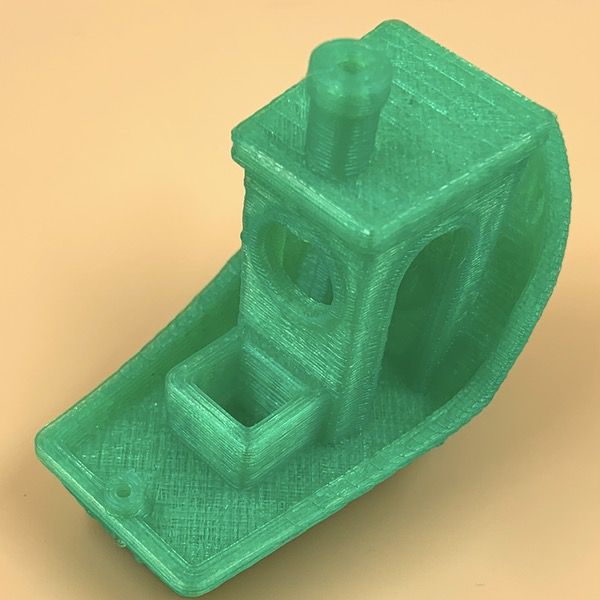
The printing surface is magnetic, flexible, and removable. This is a very good thing for a 3D printer, as you typically have to separate the finished product from the print surface. Here you can just pop off the plate, and remove your finished product. Here’s a geometric test sample we printed on the unit in progress:
When it was completed, we popped the printing surface out so that we could easily remove the finished piece. Simple and convenient.

You’ve also got a SD thumb drive that includes modeling software, the full documentation, and some sample models that you can start with.
From a basic configuration standpoint, my in-house expert is impressed. You’ll often find 3D printer kids that require some modification or upgraded parts to be reasonably functional. This unit comes with quality components right out of the box. Let’s have a look at getting ready for your first print job.
Setup & Operation
The first thing we found out when we started the setup was that the instruction sheet isn’t great. It covers all the bases, but the English translation of the instructions is a bit unclear. The full docs are on the SD card and are excellent, however. I’d suggest orienting yourself to the setup process with the card, but go to the digital docs for the details.
You’ll start by removing the packing material that stabilizes the unit for shipping. You can see them in this pic in the middle of frame, connected to the rods by zip ties. The pop off with a few quick snips.

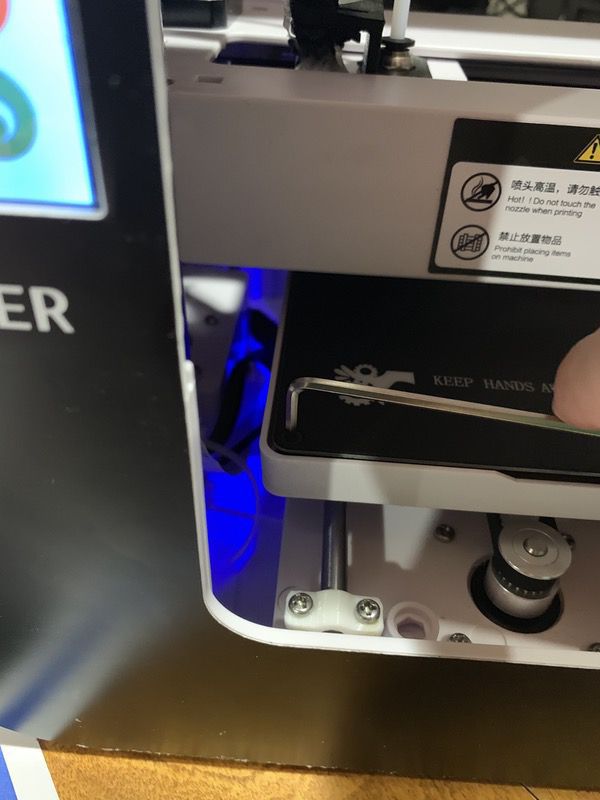
Next up is leveling the base. You’ll use the Alan wrenches included in the kit along with the leveling screen on the device to lock your settings. The instructions walk you through the process.
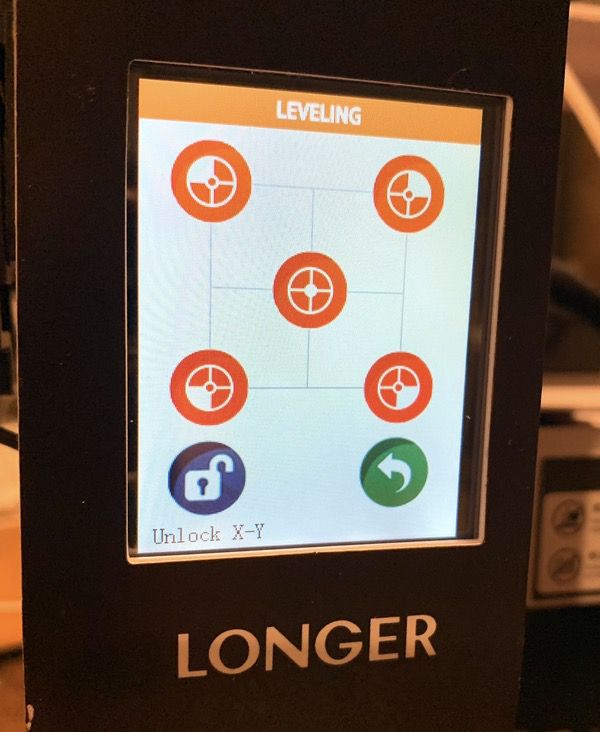
You’ll also need to orient the printing head to the the four corners of the printing pad. Again, the instructions get you there pretty efficiently.
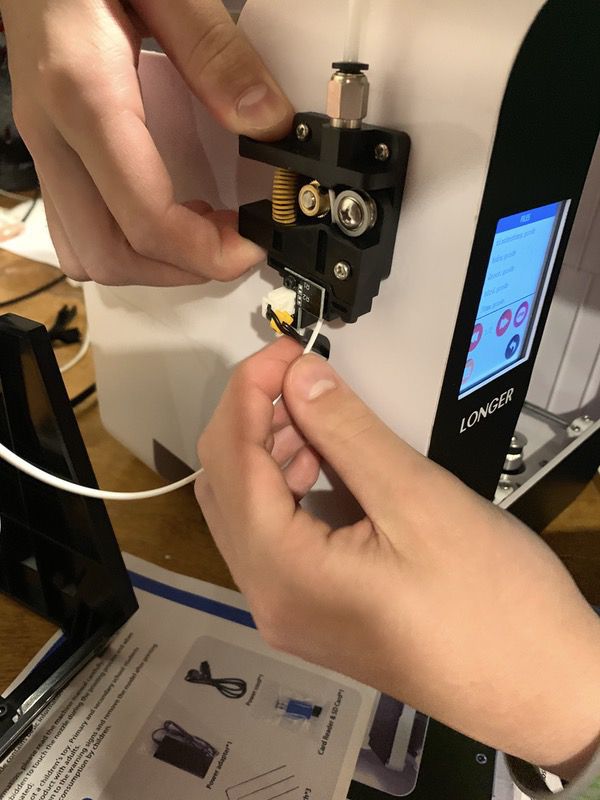
The next step is to insert the filament into the feeder on the side of the device. Follow the instructions to load it and run some test material, and you’re good to go.
The printing process is all about uploading the desired model. The included software on the SD card allows you to convert 3D computer models you’ve made or acquired into the GCode format for printing. It also has some preloaded models to play with. You select the model from the card with the settings desired (such as printing speed; see the instructions for details), and off it goes!
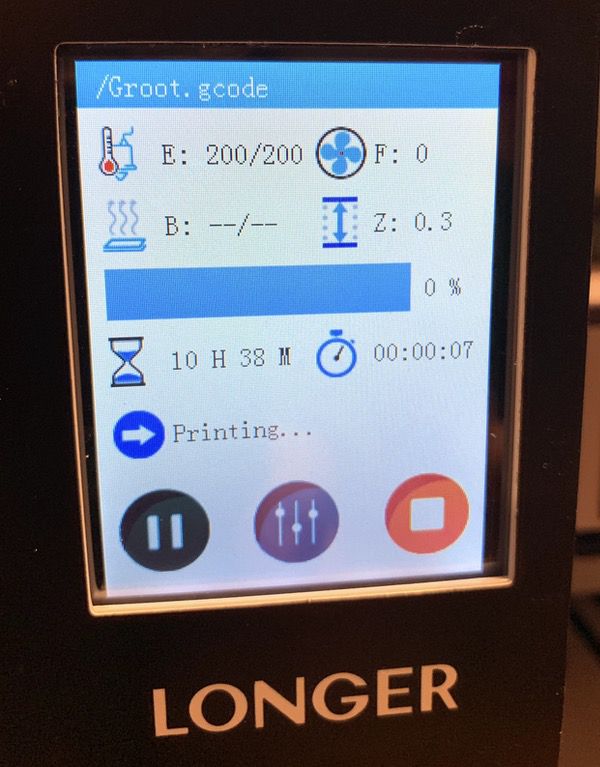
A status screen keeps you up-to-date on the printing process, time remaining, and all of that good stuff. It’s got some nice features like the ability to resume printing if you run out of filament or lose power. But once it gets going, you’ll pretty much let it do its thing until the job is done.
Note that there is no modeling software included in the package; the software converts other 3D models to the GCode format. The included software is PC-only, but you could get your own software to create/convert models to the GCode format on Mac or PC. Note that the version of the software included is outdated, but an update is available online for download once you install it.
Performance
My son is a 3D printing veteran, having built his own printer and modded it a number of times. He’s been very impressed with the overall quality of the unit. For a beginners model, the printing space is quite generous. The removable base plate is a nice feature for removing models after printing. The color touch screen controls are also a nice plus from what you’ll find in many inexpensive printers, with full control over all aspects of the printing process like filament flow rates, temperature control, etc.
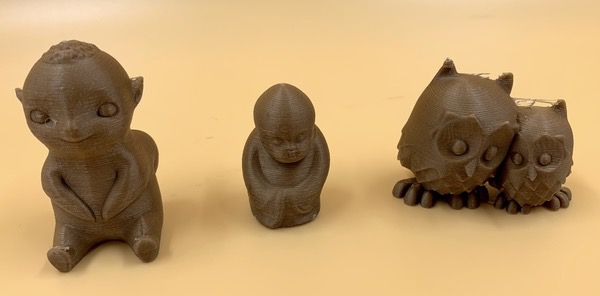
Printing quality is outstanding for a beginner’s model. You’ll find some cute little models to play with on the SD card to warm up:
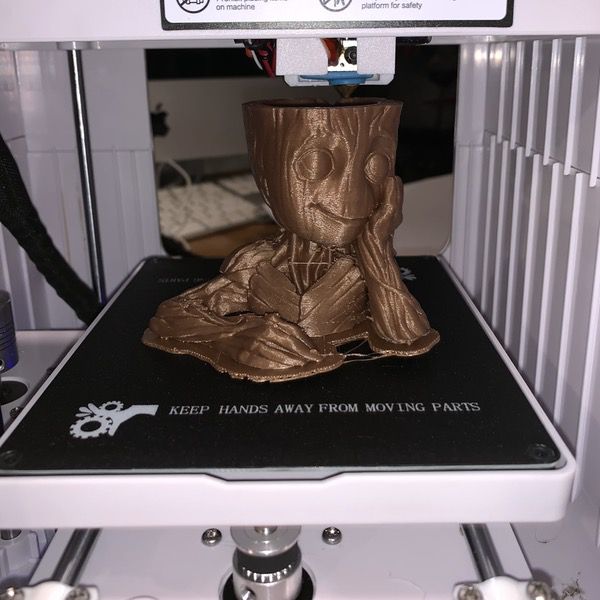
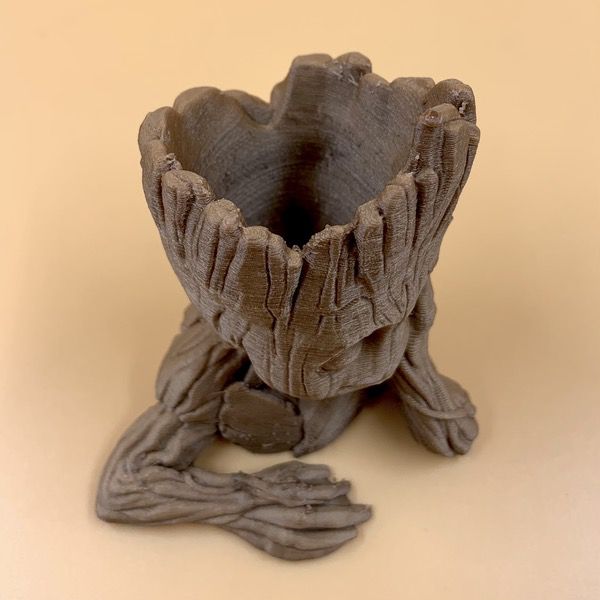
Bu the real ability of the printer to handle detail work starts to shine with more complex models. Check out our little tree-friend from a galaxy far away. The detail in the wood & facial features is excellent.

And have a look at this close up on the top of his head. All those little nooks and crannies come out super clean with very little residue:
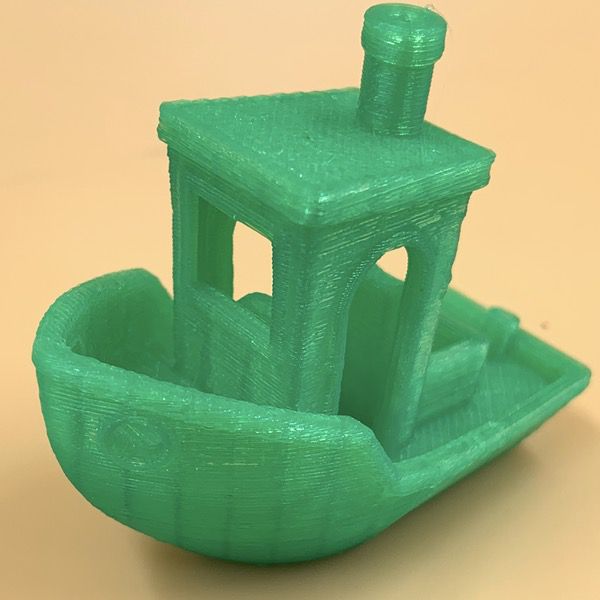
After the initial tests, my son queued up a few models specifically designed to test the printer’s ability to handle fine detail like textures, overhangs, and layer/edge transitions. This boat is one common model used for testing. Have a look at the edging detail around the windows, the side arch, and the rails!
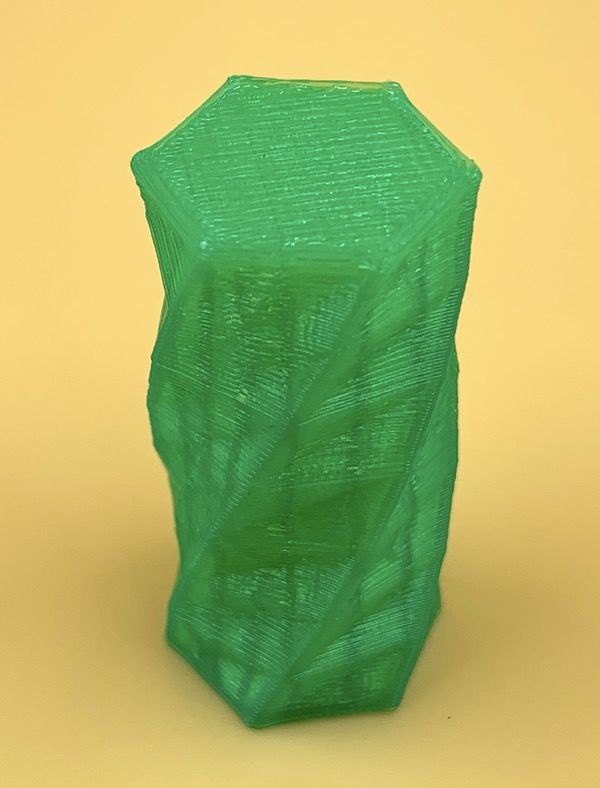
Next up was a texture test that shows how the printer handles gentle curves and detail. Again, I’m told this is a really good demonstration of rendering those little elements that can show up as clumsy on lower quality printing units.
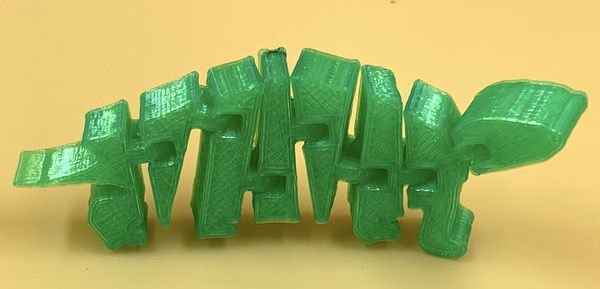
Finally, we have this articulated dinosaur model. The initial print is one solid piece. The rods and holes that allow the pieces to swivel are all printed together with the pieces as a single unit, with little strands of plastic between the pieces that allow the printer to run the whole thing in one job. If the detail capability of the printer is good, you should just be able to twist and crack those little tabs and end up with a model that allows free movement of each piece, so additional assembly required. The Longer Home 3D Printer Cube nailed it:
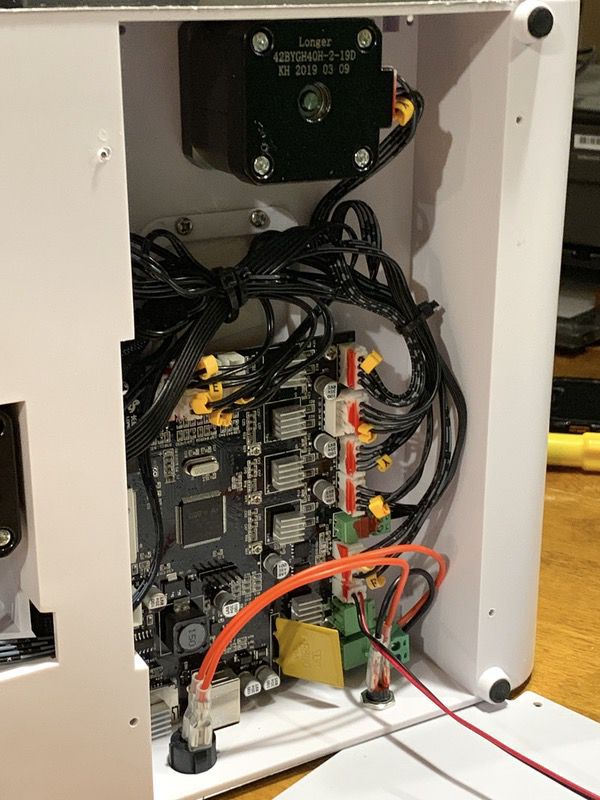
We did have a few issues we identified during the testing process. We encountered a weird buzzing noise from the cooling fan during setup & testing. It looks like an adhesive bit that keeps the wires from sitting on the fan had come loose in shipping. The good news is that you just unscrew one panel on the bottom to get to the innards, and everything is neatly organized. It was a one-minute adjustment.
We also noted some dings in the housing that you can see in the pictures. It’s entirely possible that these were the result of our tester being an evaluation unit.
What I like
- Nice desktop-friendly footprint
- Very easy to operate out of the box
- Excellent quality for a starter 3D printer
What needs to be improved
- Setup could be easier; don’t rely on the printed instructions
Final thoughts
I think that the Longer Home 3D Printer Cube mostly lives up to the promise of being a great starter kit if you and your kids want to get into 3D printing. It’s fairly easy to set up and operate, and is perfectly sized for most desktop surfaces. Just keep in mind that there is a learning curve around the technologies and tricks associated with any 3D printer kit. As far as most options go, however, it’s a good one with high quality components at a very good price for a pre-assembled unit.
Price: Under $200
Where to buy: Amazon, Amazon France, Amazon UK, Aliexpress
Source: The sample of this product was provided by Longer.

GMKtec G3 Pro Mini PC, Intel Core i3-10110U (Beats 4300U/N150) 16GB DDR4 (Dual Channel) 512GB PCIe M.2 SSD, Desktop Computer 4K Dual HDMI/USB3.2/WiFi 6/BT5.2/2.5GbE for Office, Business
(as of June 17, 2026 14:04 GMT -05:00 - More infoProduct prices and availability are accurate as of the date/time indicated and are subject to change. Any price and availability information displayed on [relevant Amazon Site(s), as applicable] at the time of purchase will apply to the purchase of this product.)
Gadgeteer Comment Policy - Please read before commenting
Hey Bob, Great review!
Can you tell me the noise level?
Can I sleep with it working?
Do you know if the drivers are the quite ones or the cheap Chinese option?
Thanks ALO!!!
hello, nice review. I bought this printer, the example models already loaded prints them in a fantastic way but I can’t print the files that I export with Cura. obviously it’s a problem with my file. Can you tell me what settings to use in Cura? thank you very much
Alex
Hi Alex, I had bought also this printer, and at the beginning it has happened the same wit “Cura”, after trying many set ups of the program, my solution was to format the SD Card given with the printer.
Best Regards,
Gorka
what cura or any 3d printer software and if so what. and what settings did you use for the longer cube 2 prints thanks.
Hello,
The big question everyone keeps asking is “Can it be upgraded with a heated bed/build plate?
That I don’t know. I’ll have to look around and find out.
I’m having trouble with my new cube 2. The filament doesn’t feed during a print, but it does feed if I use the extrude test. I’m using Cura 4.7.1 as my slicer. I’ve tried getting help from Longer, with no results yet.
My prints will lift up from the bottom print and will disconnect from the lower layer, and the print will get stringy.