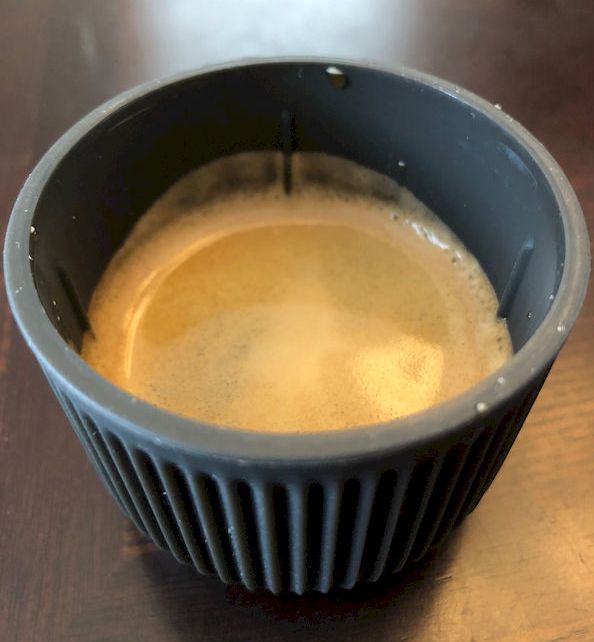
REVIEW – Espresso coffee is a rich full-bodied drink made by forcing water over coffee grinds under high pressure. Preparing the coffee usually requires a large and expensive machine to build sufficient pressure. In contrast, the Nanopresso by Wacaco is small and relatively inexpensive espresso machine but provides up to 18 bar of pressure. Read on to see what I think!
What is it?
The Nanopresso is a hand-powered espresso machine that uses a piston pump to pressurize water against coffee grinds. The base model comes with everything you need to brew your own grinds. Additional features include an attachment to brew Nescafé Nespresso pods, an attachment to brew a double shot, and an attachment to carry hot water in a vacuum insulated reservoir prior to brewing. Because the Nanopresso is compact and does not require electricity for operation, it can be used at home, while traveling, and even at the campground. What you do with the espresso after it is brewed is your choice; Espresso can be enjoyed as a shot, or combined with milk or chocolate or both to create caffè latte, cappuccino, caffè macchiato, caffè mocha, flat white, or caffè Americano.
What’s in the box?
The Nanopresso espresso machine comes with the following:
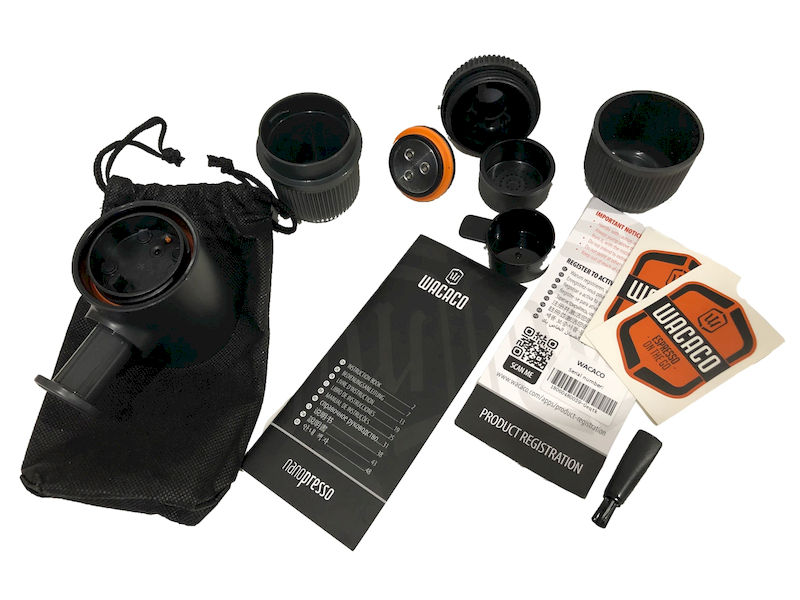
built-in espresso cup
filter basket
measuring cup
brush
pouch
warranty card
stickers
multi-language instruction book
I was also sent an adapter for Nescafe espresso pods. This box comes with:
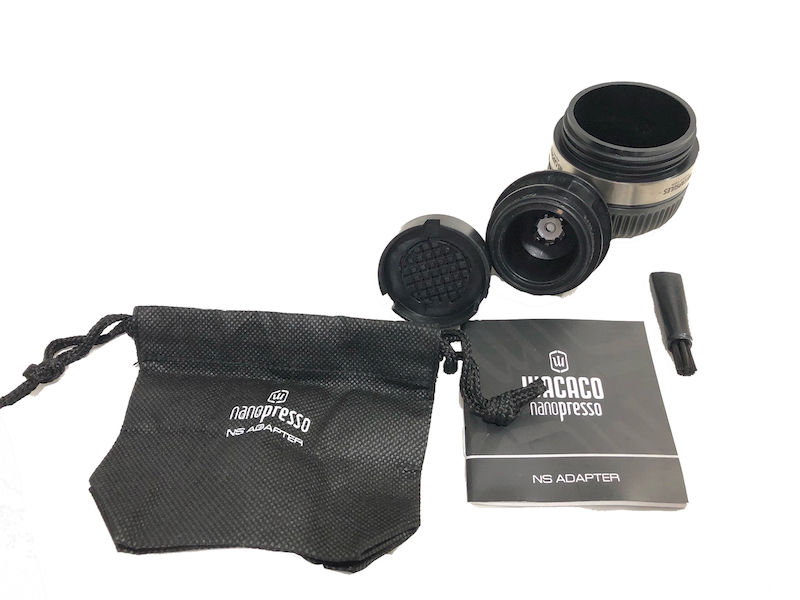
NS Adapter
brush
pouch
instruction book (English and Chinese)
Design and features
Specifications
The Nanopresso has the following characteristics:
| Dimension | 156x71x62 mm | 6.14×2.8×2.44 in |
| Weight | 336 g | 0.74 lb |
| Water capacity | 80 ml | 2.70 fl oz |
| Ground capacity | 8 g | 0.28 oz |
| Max. pressure | 18 bar | 261 psi |
The technical parameters outlined by the Italian Espresso National Institute for making a “certified Italian espresso” are:
| Parameter | Value |
| Portion of ground coffee | 7 ± 0.5 g (0.25 ± 0.02 oz) |
| Exit temperature of water from unit | 88 ± 2 °C (190 ± 4 °F) |
| Temperature in cup | 67 ± 3 °C (153 ± 5 °F) |
| Entry water pressure | 9 ± 1 bar (131 ± 15 psi) |
| Percolation time | 25 ± 5 seconds |
| Volume in cup (including crema) | 25 ± 2.5 ml (0.85 ± 0.08 US fl oz) |
The fact that the characteristics of the Nanopresso do not fall within the exact ranges of the “certified Italian espresso” does not diminish my opinion of the gadget. These parameters may have been established and promulgated by persons who own rights to espresso machines with these exact specifications. Also, note that the portion of ground coffee is very close and while the Nanopresso can operate up to 18 bar it may produce coffee at lower pressures.
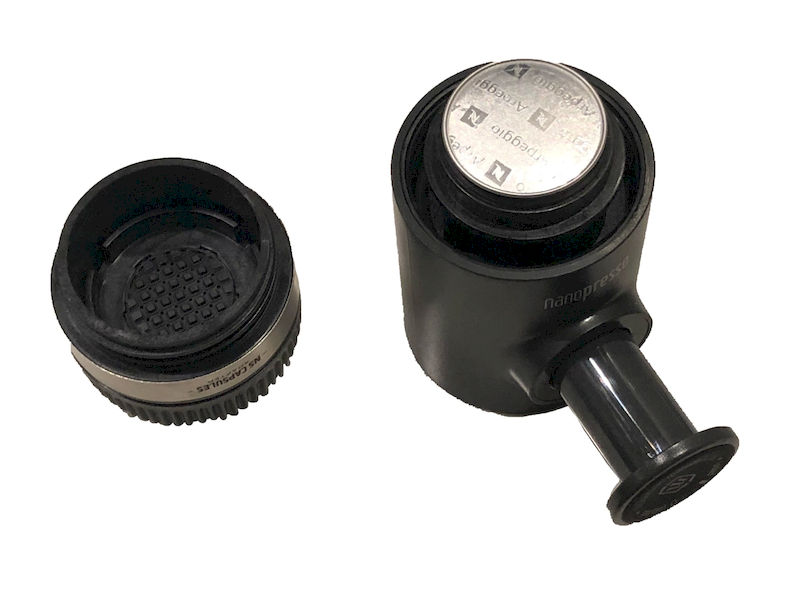
The NS Adaptor allows the Nanopresso espresso machine to use Nescafé espresso pods to prepare espresso. The advantage of using capsules is that the coffee is mechanically ground, measured, and tamped with higher precision than can typically be achieved by a casual user. A more uniform preparation of the grinds results in a more consistent espresso. Additionally, the pods are convenient, mess-free and easier to clean after use. I found that the pods require more hand pressure to brew, so this option may not be preferred if you feel pumping strength may be an issue.
The NS Adaptor has the following characteristics:
| Dimension | 66x62x62 mm | 2.60×2.44×2.44 in |
| Weight | 130 g | 0.29 lbs |
| Remark | NS Adapter can only be used on Nanopresso. | |
Unboxing
The Nanopresso comes neatly packaged in a printed box with a tab closure.
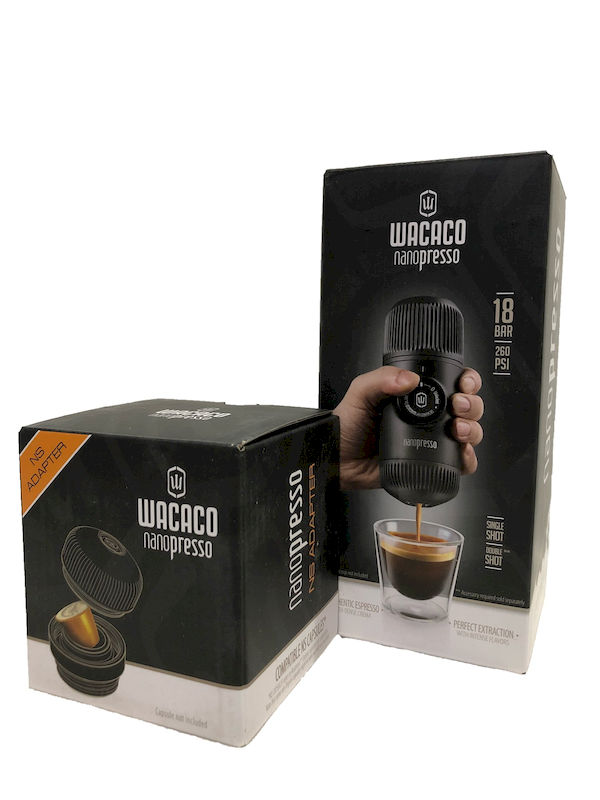
The Nanopresso, model’s hand, and the espresso cup (not included) is pictured with a glossy finish to stand out against the matte background of the rest of the box. Overall, it is very nice looking and appropriate for gift giving. The NS adapter box has a similar theme but does not include the glossy finish. The rear of each box includes abbreviated operating instructions.
Design and features
Hardware
The design of the Nanopresso feels very solid. Although the gadget is made entirely of plastic and elastomer (except for the filter mesh) it feels incredibly robust.
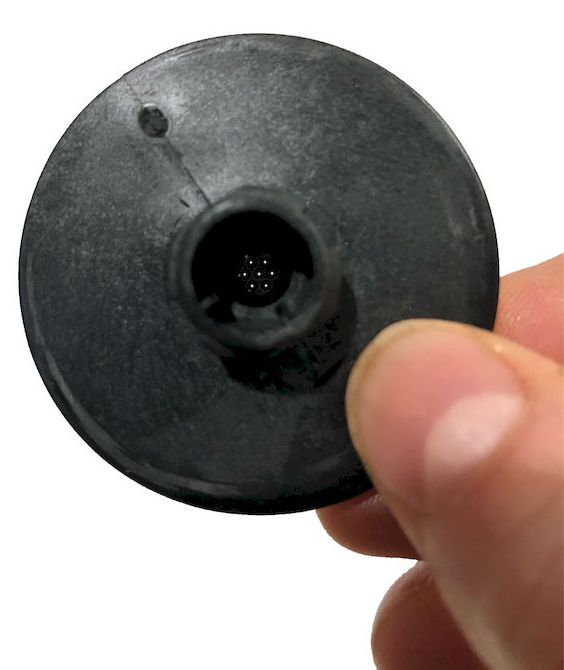 The design and build quality must endure extremely high pressures at elevated temperatures. Other design features are for the user’s comfort, including the fluted espresso cup and water reservoir (so that the outside of the plastic is not hot to the touch) and the scalloped pump piston handle. The step of filling the grind basket is simplified by using the customized measuring cup. The cup fits just inside of the filter basket and has tabs on it to allow easy transfer of the grinds into the basket. The size of the basket is just right so that the filter mesh support accomplishes all of the necessary tamping. Also, for convenience, the filter basket and the cleaning brush fit inside of the water reservoir when it is not in use.
the Nanopresso has two halves separated by a pump. When in use, the top half is the water reservoir and the bottom is where the coffee is made. Nearly every part of the bottom half may be disassembled for cleaning. The flow adapter gasket on the pump, the flat gasket on the filter mesh support, and the pressure head spring may all be disassembled. Unscrewing the mesh is only required after every 20 shots or so. Note, it would be great if the Nanopresso included a hex key for the filter mesh screws – 3/32″ works but 2.5 mm is better. The image below is the reverse of the mesh.
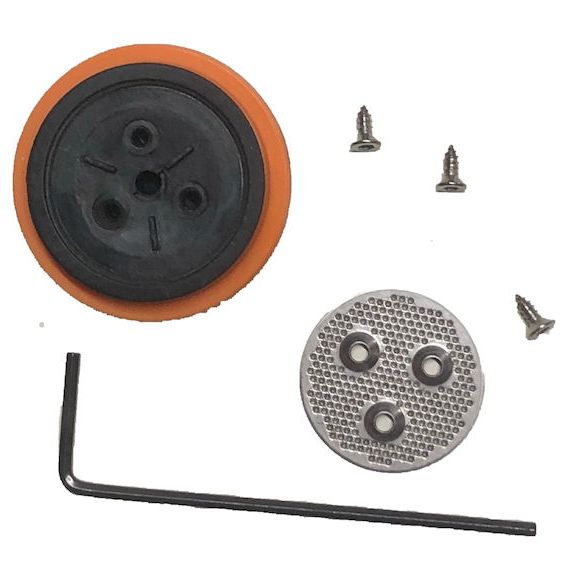
The NS adapter has the same level of build quality and matches the design aesthetic of the main Nanopresso unit. This unit also has the same level of disassembly available on the bottom half of the unit – the location that is in contact with coffee and coffee grinds.
The design is backed by a one year warranty, which is typical for espresso machines and is equal in length to the warranty on the Handpresso, a competing product.
Operation
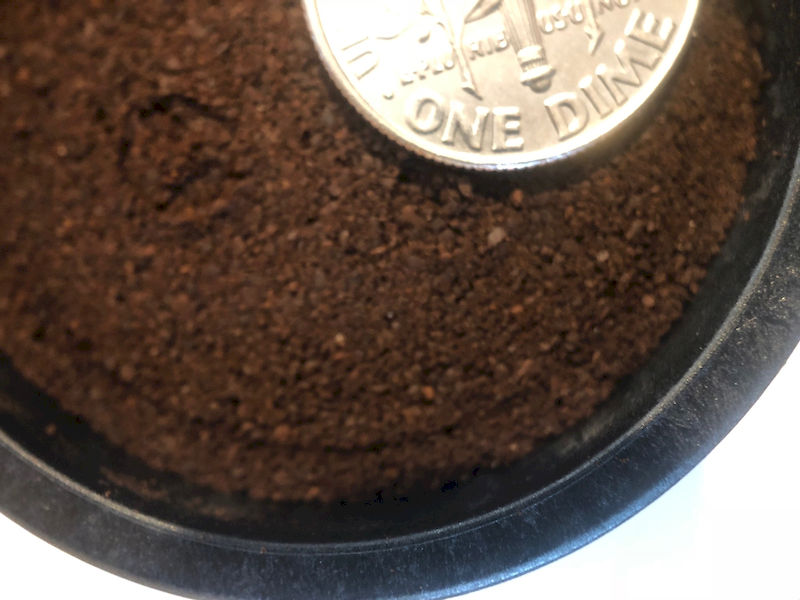
Making espresso generally involves some level of a manual operating procedure, and this is also true of the Nanopresso espresso machine. However, after a couple of preparations, the operation becomes second nature. The instruction manual is very detailed but Wacaco has included some extra instructions on the site here which they call Hacks. I feel that the pre-heat hack (running hot water through your Nano to heat up the insides before you brew) and the giant crema hack (spritzing carbonated water into your espresso to get a nice extra frothy head) are neat tricks but I didn’t enjoy the cold brew hack (using colder water instead of hot). I have a hack of my own! I recommend filling the grind basket as instructed but then popping the filter mesh out of the base of the unit and covering the grinds while the basket and filter mesh is outside of the Nanopresso. This allows better control of mating the filter mesh and basket. Using this method also simplifies weighing the basket if you choose to verify the weight of the grinds used. My basket and mesh assembly weigh 47 grams. A completely full basket should have a total weight of 55 grams. The picture below shows the tamped grinds inside of the basket after the filter mesh has been applied and removed. The dime is added for scale. I feel this hack makes the preparation easier, more consistent, and less prone to failure.
One of the hacks recommended waiting a few minutes after extraction to let the espresso puck dry out. I noticed that the puck was rather wet and discovered that the Nanopresso uses a head valve at the base of the filter mesh assembly.
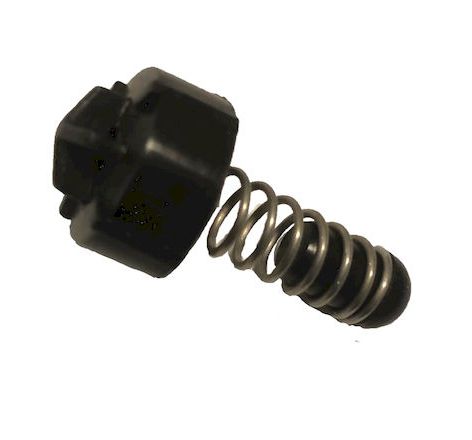
This portion of the assembly may be removed to cause the grinds to be almost completely dry immediately after the reservoir is empty. The picture below is of the grinds after brewing.
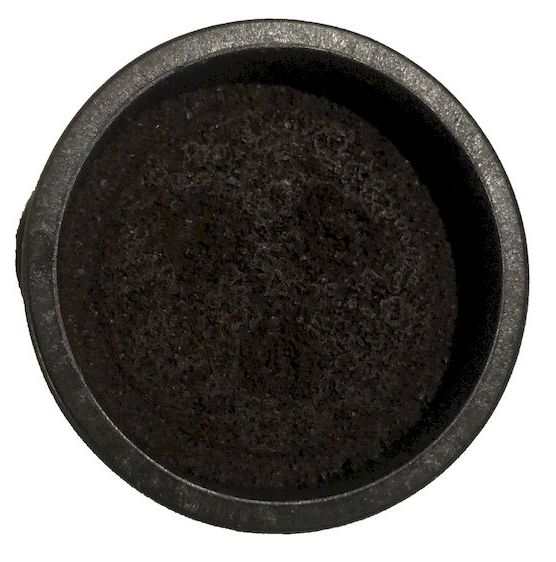 See the video here for instructions. I found that the taste without the valve wasn’t noticeably different but that the crema was a lot less defined. The rapid change from high pressure to atmospheric pressure is one of the mechanisms for releaseing more carbon dioxide in order to create a good crema.
Performance
The Nanopresso can make a really good cup of espresso under the right condition.
- I appreciate that the system includes a plastic drinking cup, but a ceramic espresso cup that can be preheated is preferable.
- The Nanopresso should be preheated as well. Running some water through the system prior to measuring the grinds will help.
- weighing the grinds helps with consistency. It is difficult to get 8 grams of grinds in the cup but using a balance will help ensure that the correct amount of grinds are included.
- After the first 6 pumps, continue to pump very slowly. A full reservoir should take about 30 seconds to empty.
Following these recommendations resulted in a hot, enjoyably bitter espresso with a rich, full crema.
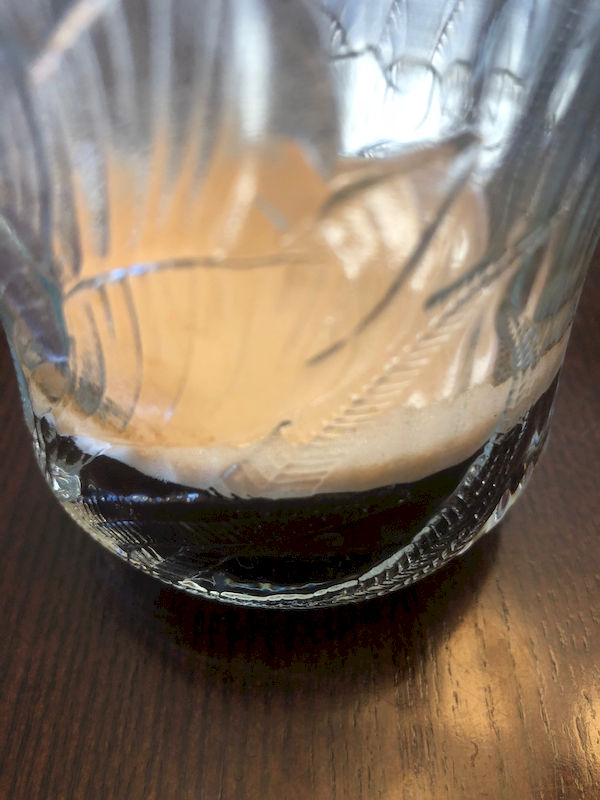
The amount of pressure required isn’t negligible, and more pressure is required for the Nespresso pods than for the loose grinds. (I used authentic Nespresso pods to test this system.) I feel that pumping to make the coffee allows for more appreciation of the time and craft that goes into the drink. Rhythmically pressing a plunger has to be more enjoyable than listening to the mechanics of an espresso machine.
I found that the cleanup may be difficult to do effectively if there isn’t running water or a way to submerge the parts. Since there isn’t a way to disassemble the pump there isn’t a foolproof way to dry it out. I would avoid putting the unit back together and sealed while it is wet. The head valve will keep the inside completely sealed and not permit evaporation.
What I like
- great tasting brew
- portable
- inexpensive
- quiet
What needs to be improved
- include a hex key
Final thoughts
The Wacaco Nanopresso espresso machine will let you enjoy your espresso without having to break your bank on buying a machine or break your back carrying it around.
Price: $64.90
Where to buy: Wacaco and Amazon
Source: The sample for this review was provided by Wacaco.


Gadgeteer Comment Policy - Please read before commenting
Hi, i don’t understand your mesh hack, could you elaborate more on that?
In the picture below the “what is in the box” caption, there is a part with an orange gasket that is usually installed in the base of the unit. I recommend pushing this out by pressing on the valve at the base of the unit. Once this part is released fill the grind basket and cover with the removed part. Then install the combined pieces with grinds back into the base of the unit. I feel this is easier to handle than trying to assemble the pieces when the mesh is installed in the base of the unit.
Hi, does your NS adapter have a head valve?
Cherrie,
yes, it does.