What is it?
Remember watching the Jetsons as a kid, with their video phone, video doorbell, and flying car? Well, of those three, the flying car is the only one that’s not already sitting on store shelves waiting for you to take one home. Anyone with a smartphone has a raft of video chat clients at hand. There are several video doorbells on the market. In fact, we were offered one from Wisenet, née Samsung Security. It’s called the SmartCam D1 and is installed in place of your existing wired doorbell. Follow along on my adventure to the future.
Note: Photos may be tapped or clicked for a larger image.
Hardware specs
System Requirements
- Internet Connection: High Speed Internet, Wi-Fi 802.11 b/g/n
- Mobile: iOS 8 or higher, Android OS 5.0 or higher
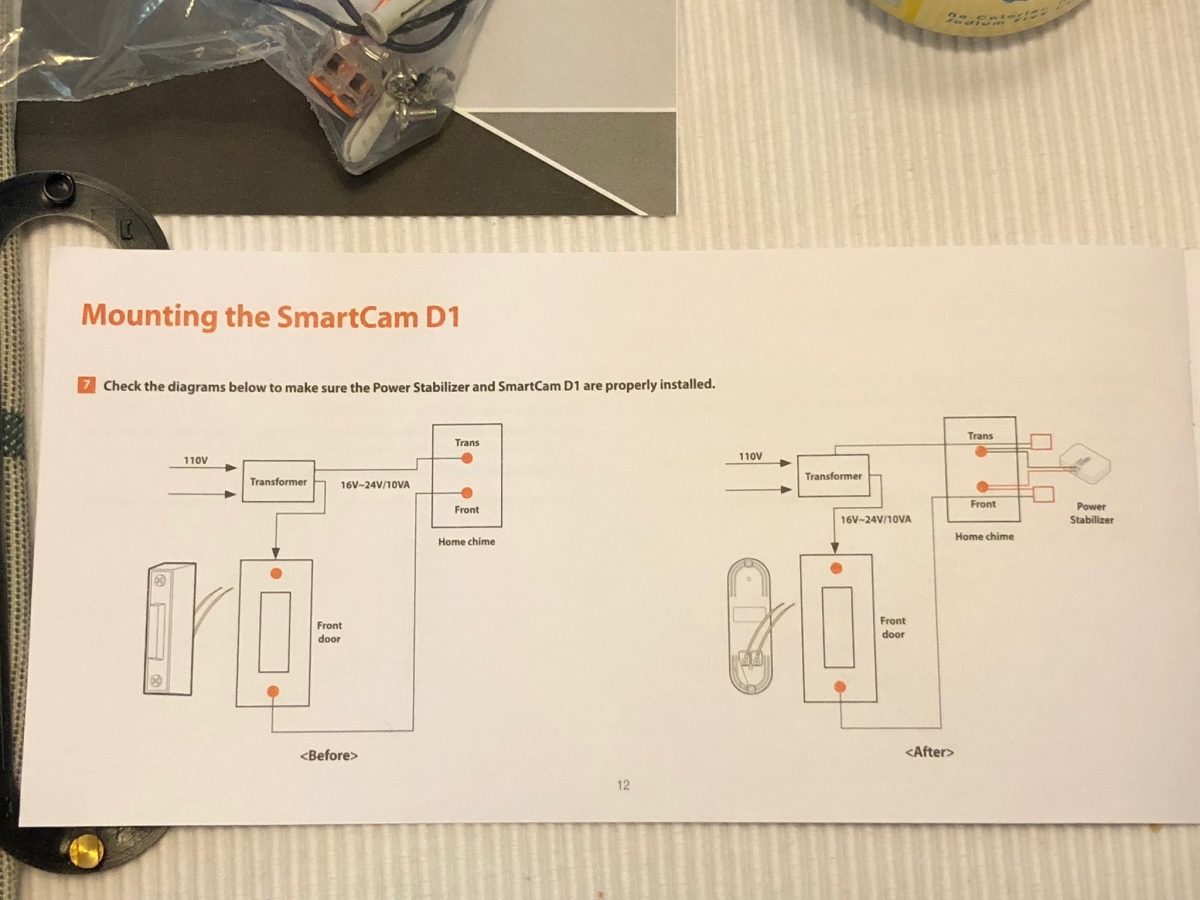
- Requires an existing hard-wired doorbell
- Requires wiring to a 16-24 VAC doorbell and transformer

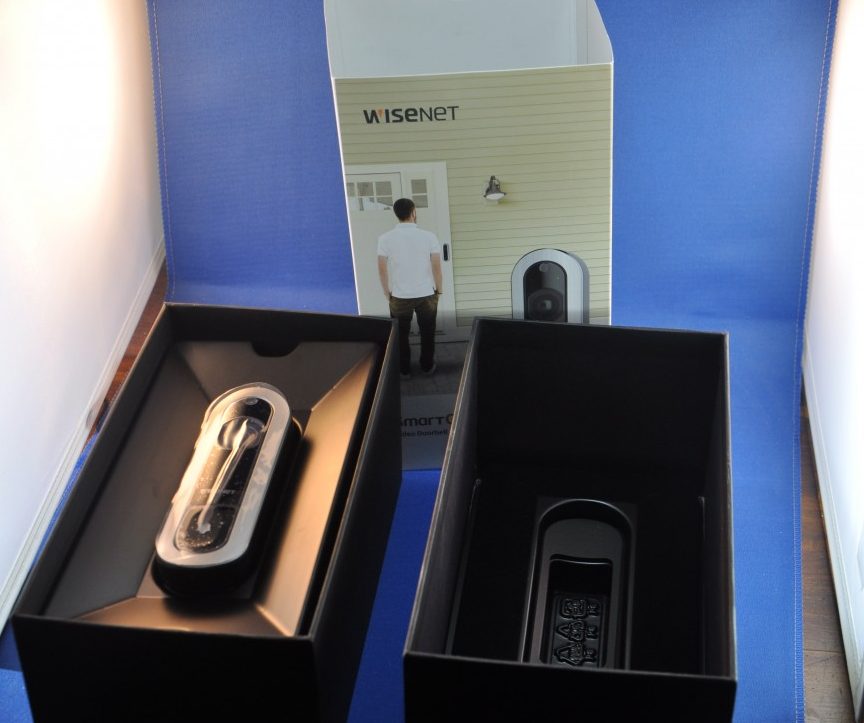
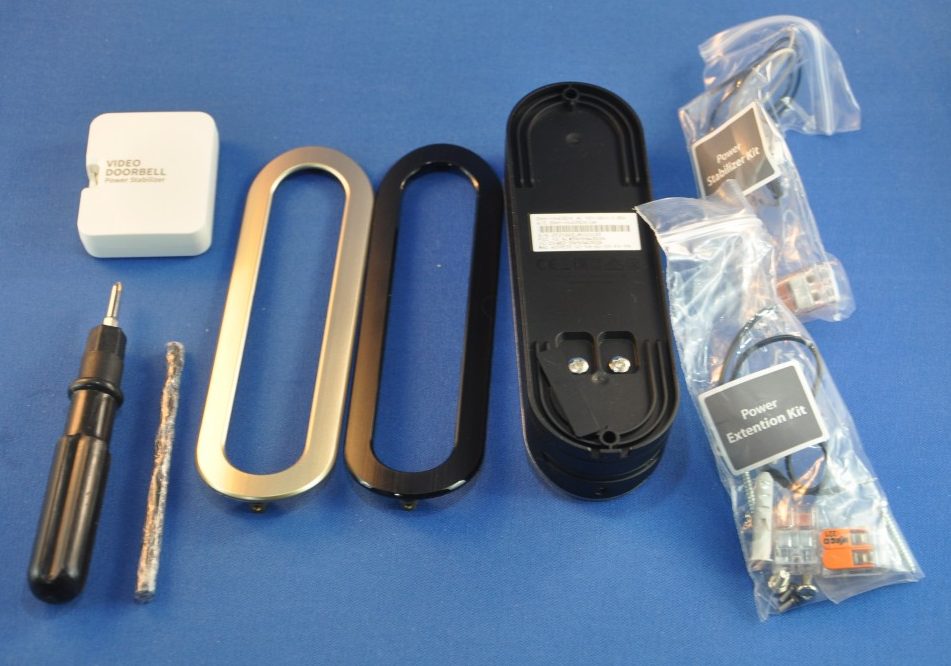
What’s in the box?
- SmartCam D1 Video Doorbell Camera
- 3 Interchangeable Faceplates
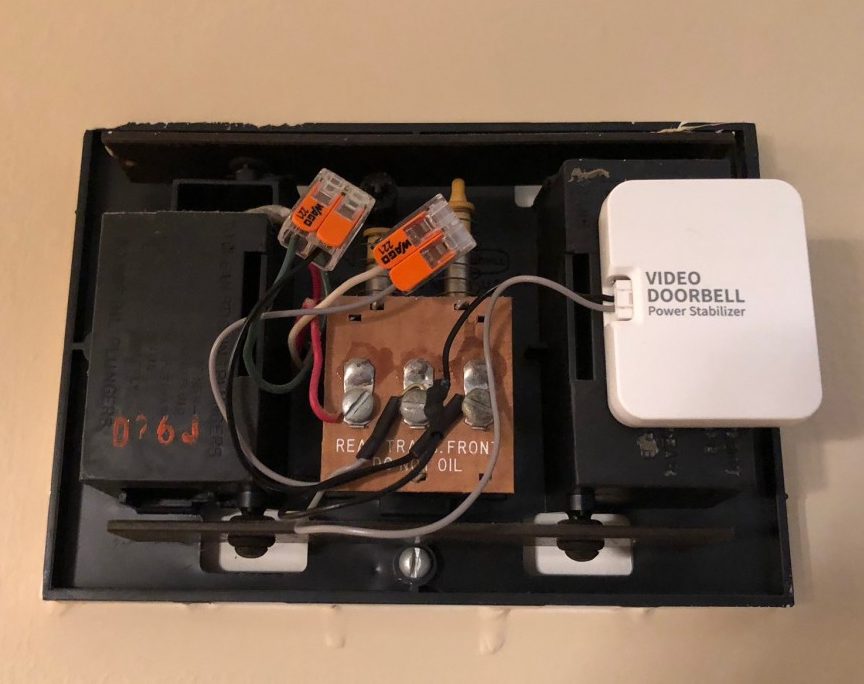
- Power Stabilizer Kit (For existing chimes)
- Power Extension Kit
- Screws and Anchors
- Screw Driver
- Quick Start Guide
- Warranty Card
Design and features
This item had come into the queue and I had taken possession of it just around Halloween. I was procrastinating installing it, after skimming through the instructions. All it took was a break-in at our home two weeks before Thanksgiving to put it on the front burner. After getting into the specifics, it’s far easier than I was imagining.
Setup
The kit itself comes with everything you will need except a drill and a ladder, and the drill is optional. There is a power stabilizer that attaches onto your existing chime, and three trim rings (silver, black, and brass) to best match your door, and all manner of screws and terminal clips. Let’s take a look at how it worked.
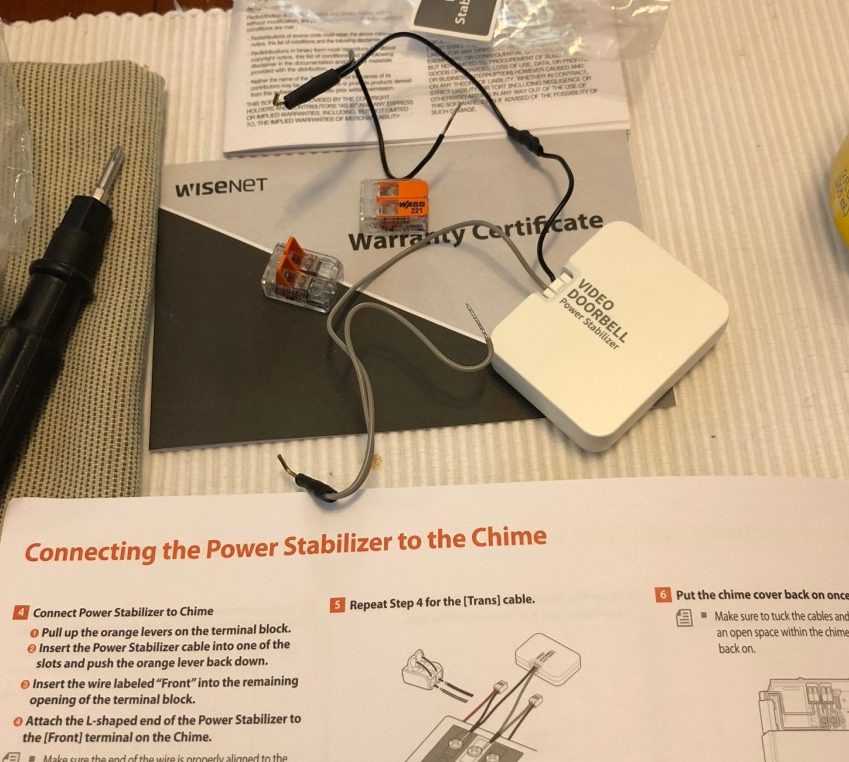
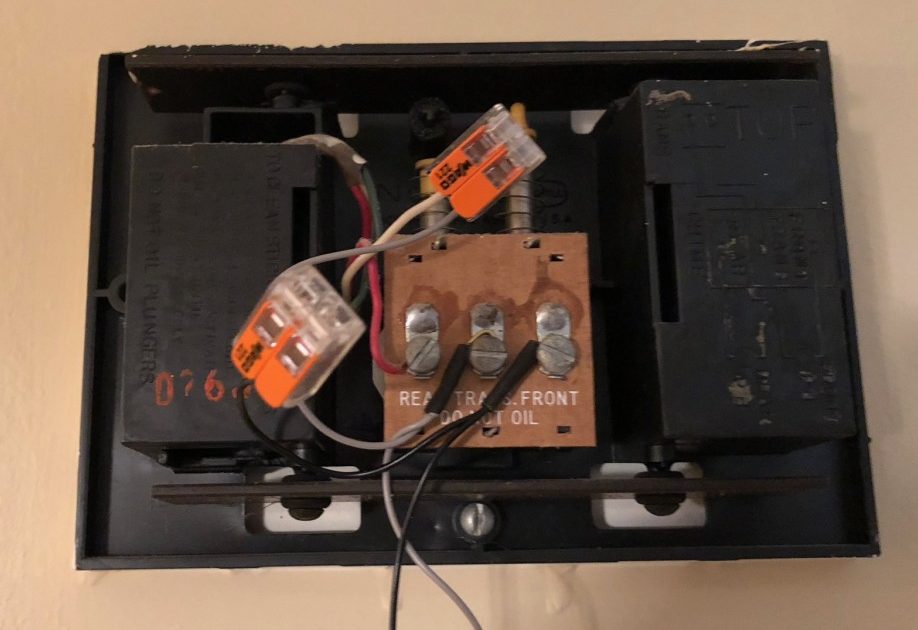
According to the manual, the first thing is to cut power. With a light-enabled doorbell, this is pretty easy – have someone watch the doorbell light while you flip breakers until the light goes out. “That’s the one!”
The next step is to unhook two leads from your chime and connect the little harness for the power stabilizer. This is as simple as it sounds: disconnect two wires, connect them into single terminal blocks from the kit, and screw the other wire back to the chime terminals. It took me longer to compose and type out that sentence than it took to do it.

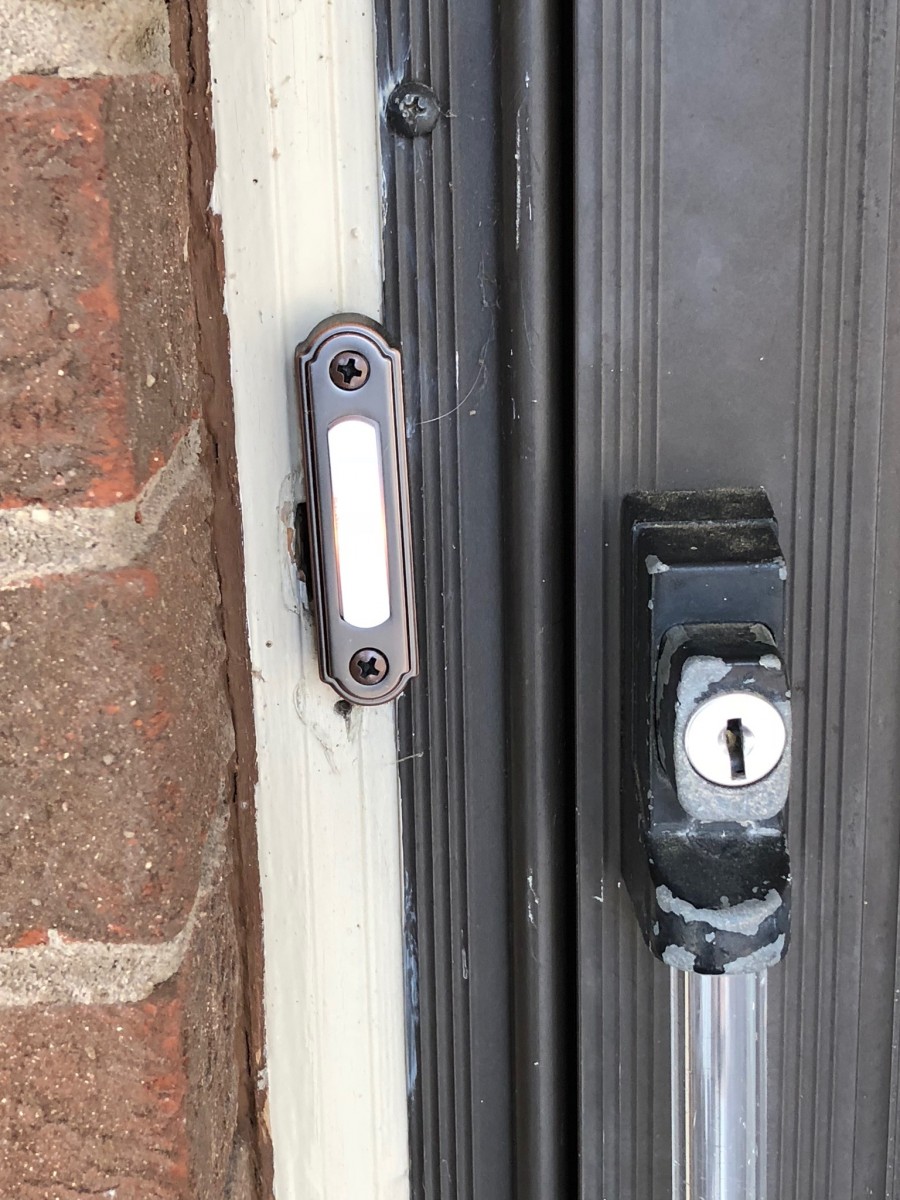
Next, disconnect the existing doorbell, and attach the SmartCam. Then, ask the person in the house who will care which trim ring they prefer. Acknowledge the importance of their contribution, and put the other two rings in the box. (This most likely applies only to those in a long-term, committed domestic partnership, but I do my best in that “ensure domestic tranquility” thing the Constitution talks about.)
The instructions at this point say to put everything into place, but I opted to test before buttoning it all up. Your confidence in your ability to follow instructions will determine your path at this point.
Download the SmartHome software, create an account and get to the authentication screen. Flip the breaker back on, and make sure your doorbell is getting power, sign it into your WiFi, and test it. While this sounds simple, this is probably the most tedious part of the whole process.
Once everything is working as expected, screw the SmartCam over the place your old doorbell was and test again. There is a reset button to the upper left of the unit before you install the trim ring, so be sure everything is working before installing the trim ring. There is a small brass set screw that goes into the lower side of the SmartCam tightened with an Allen wrench that is the final piece. This finishes the doorbell and covers all the attachment points and reset buttons. The Allen screw is recessed, and a pain to get to, which is what you want in the link to bypassing your video security doorbell, right?
At this point, you can stick down the power stabilizer and put the cover back on the chime unit. This was the second hardest part to me, because while it’s the size of a book of matches, there isn’t a lot of spare space inside that chime box, and you have to allow the chimes to vibrate, so nothing can touch them.
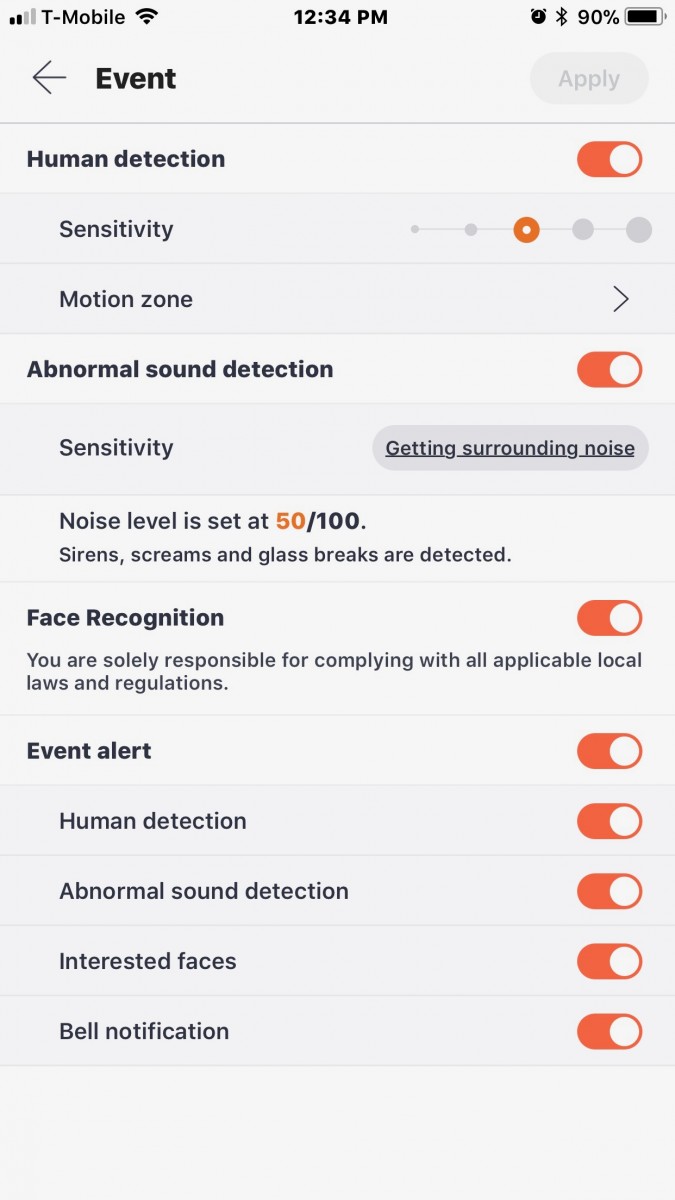
Once it’s all installed, you can go into the settings and set the notification preferences, sounds, etc. You can also install it on the phones of your housemates, so that they can participate in the joy of remote door answerage. This is left as a challenge to the installer and their communication skill, as well as the depth of commitment in the earlier mentioned long-term domestic partnership…
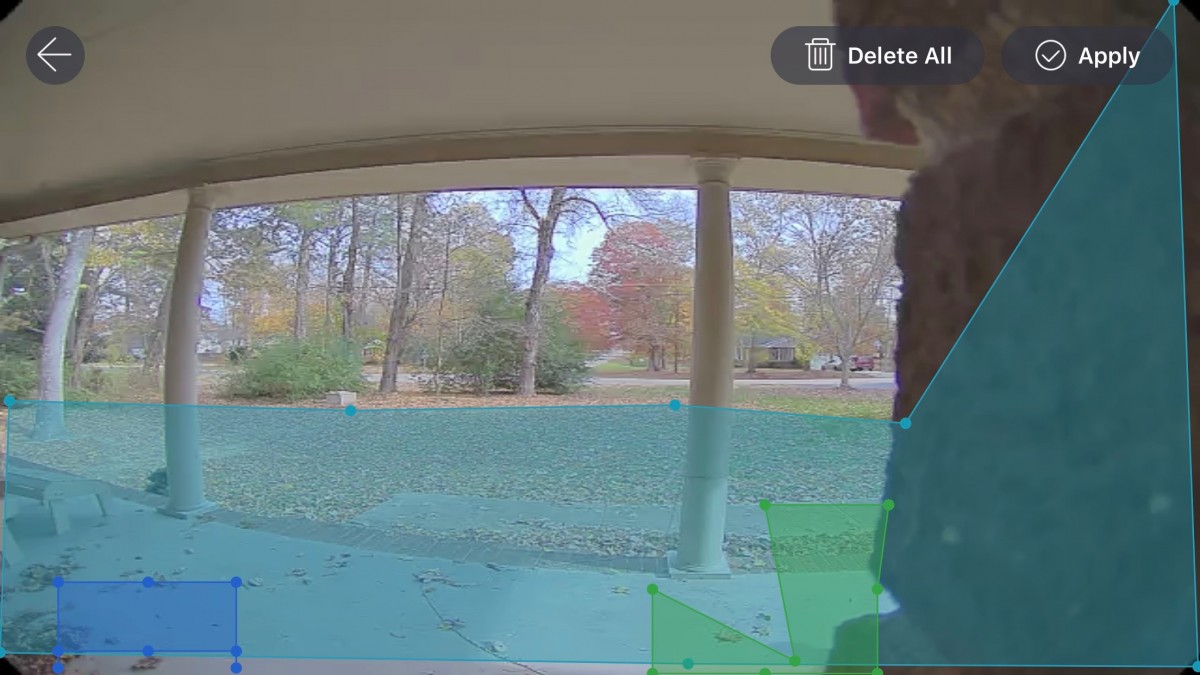
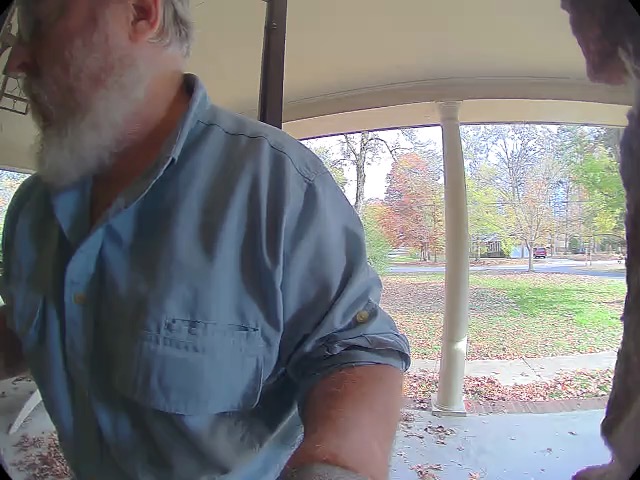
So, the doorbell was installed, I freaked the dog out sufficiently by ringing the bell and talking to him through the SmartCam, and felt pretty good about it. Having previously been notified from test security camera systems by every single car that passed on the street, I was happy that there are multiple activity areas that can be set up, and thus am spared my neighbors leaving for work at 4 AM causing my alert to activate. The next day at work, however, I got an alert to a human activity at the door. I pulled up the SmartHome software and activated the live view, just in time to watch the UPS truck drive off.

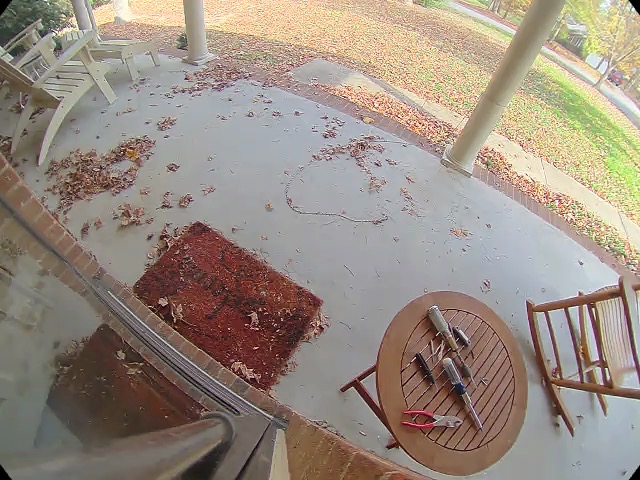
The video record of the delivery showed the entire process, with the delivery person walking up while talking on their phone, placing the boxes on the porch, and trudging off through the leaves back to their truck. I now enjoy hearing that alert, knowing that something has been dropped off. Should a second alert sound, I can immediately check to see if it’s a second delivery, someone wanting to rake my yard, or someone snooping around my deliveries. And I can speak to them, just like Jane and George or the kids, and they don’t know if I’m inside or at Spacely Industries.
Now, about those flying cars….
Performance
I found that the performance is very fast. While raking the leaves last weekend, I finally had to turn off notifications before being vibrated to death. I have been in a neighbor’s yard, showing them the system, and could scream and activate the “human detection” signal. That’s pretty cool.
Positives
- Much easier to do install and use than to read directions about
- Everything is provided and explained in detail
- Software is friendly, has many options, and works as expected
Negatives
- There is a registration and on-going fee for video storage. Granted, this is fast becoming an expected thing, but it’s just one more “only $5 a month” service.
Once it was installed and I got a few notices at work, I found it fits into my lifestyle very easily. I get a message on my Apple Watch, check the video, and make sure it’s something I am expecting or need to handle, all without disengaging from a customer on the phone. If my Lovely Bride calls to ask, I am ready to let her know, after checking our expected deliveries and the doorbell video. I’m actually looking forward to salespeople coming by this spring, just so I can turn them away!
Oh, and one last fun thing. You start to really wonder about the attitude of delivery folks. I’ll leave these videos right here without further comment.
Updates 09/11/18
I can’t explain how much I enjoy seeing all the things that set off my doorbell video camera. We’ve had a team over painting the house for the past week, and I did turn off the alarms, but I still kept up with what was going on through my WiseNet. And just today, I watched the DHL driver use one of the products I’m currently testing: a lock to deter porch pirates!
Price: $249.99
Where to buy: Amazon
Source: The sample of this product was provided by Wisenet.

Now retrieving an image set.
Google Review Tap Cards (3-Pack) by TapFive - Tap for Instant Reviews - All Phones Compatible - Reusable Smart Tap NFC & QR - Boost Business Reviews - Powered by TapFive (3 Card Pack)
(as of July 13, 2026 18:55 GMT -05:00 - More infoProduct prices and availability are accurate as of the date/time indicated and are subject to change. Any price and availability information displayed on [relevant Amazon Site(s), as applicable] at the time of purchase will apply to the purchase of this product.)
Now retrieving an image set.
Gadgeteer Comment Policy - Please read before commenting
Smythe, nice review. Love the dry humor and sarcasm, too!
Thanks! Always happy to oblige…
Enjoyed the review Smythe. The FedEx and Postal guy videos were a nice addition.
Thanks, I’ve shown them to quite a few folks. Always good for a laugh.
How long have you been on the-gadgeteer?
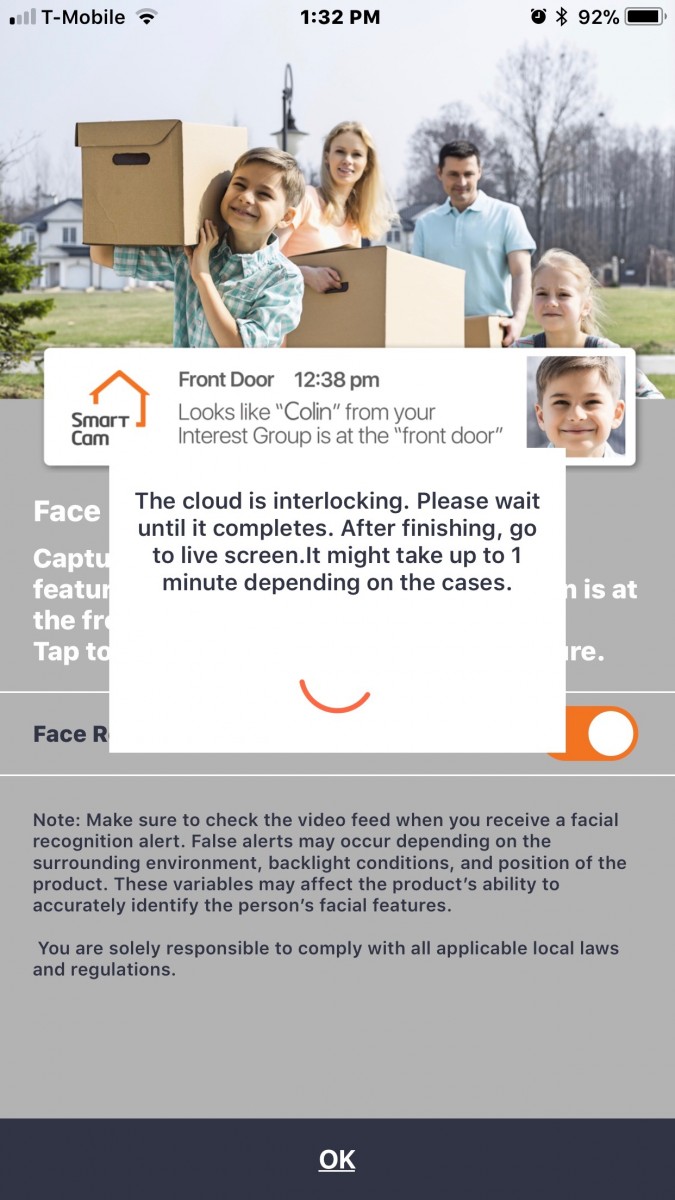
A word of warning … setting this up on multiple phones is a PIA. You have to go through the install process again, you can’t just sign in and use the doorbell’s password to access it.
Which is when I discovered if you like all of that motion detection/human activity/abnormal sound features, from what I’ve read the user will have to spend $4.99 a month for the life of the doorbell. The docs suggest that those all go away if you don’t subscribe to the cloud service, all you get is an email notification that the bell was rung. This got disabled when I added it to my wife’s phone, but I was able to get notifications back today somehow.
I did discover a great unintended feature. The driveway is in view of the doorbell and I get a notice when my wife, or anyone, drives into the driveway.
I’ll keep the doorbell because I work from home and like the speaker function. But once I verify all the cool features go away if you don’t subscribe, I’ll be sure to write the appropriate review.
My dogs are pretty good human detectors anyway and proudly announce any delivery.