Security cameras are nothing new. Even internet connectable cameras are pretty easy to find at this point. What can a new company bring to the table? Vimtag has put together a handsome weatherproof cloud-based IP camera that can be set up by most anyone. It offers 2-way voice, compatibility with a private cloud server, and wifi or wired installation. I was sent one of the outdoor cameras and a S1 Storage CloudBox with 1 TB storage to test. Let’s see how things worked out.
Note: Photos may be tapped or clicked for a larger image.
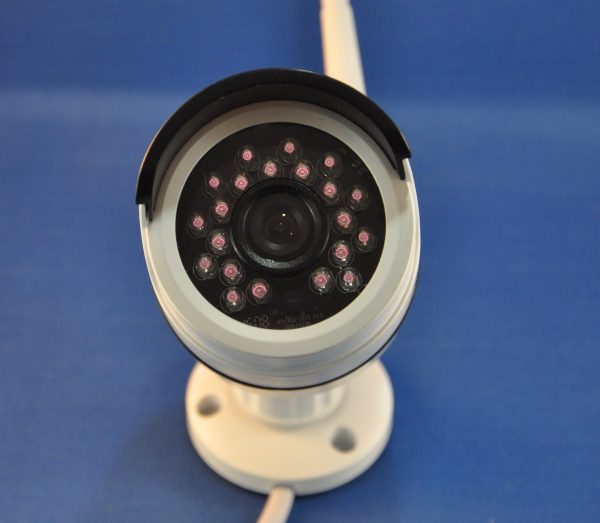
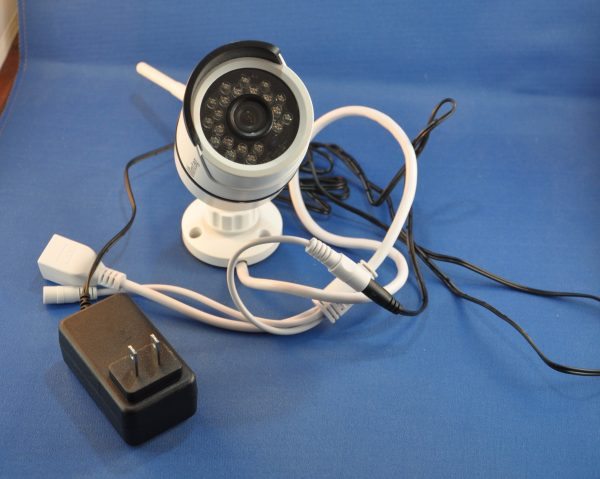
The camera itself is a white cylinder 3″ long and 2.5″ in diameter. One end has a ball joint to attach to a surface, and the other is a flat glass lens. The camera lens is in the center of this, and 21 IR diodes are arrayed around it. There is a half-inch sunshade over the top half of the camera.
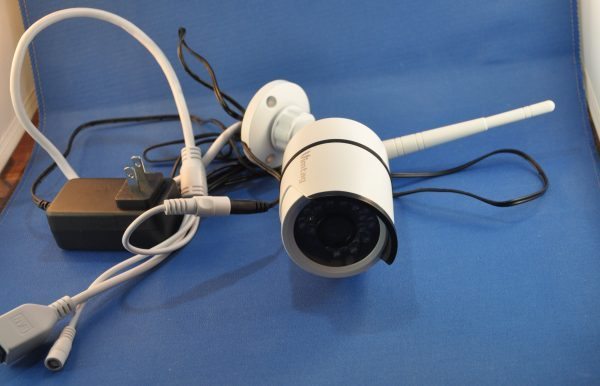
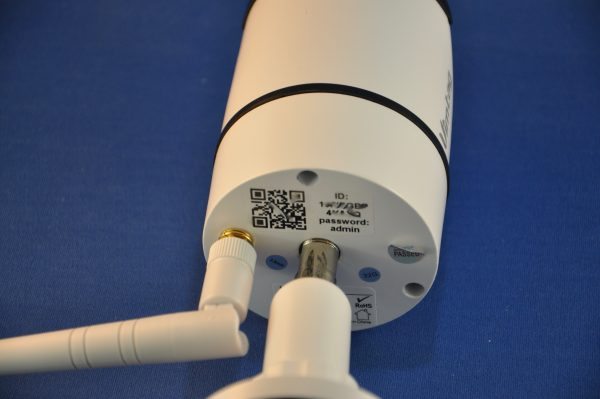
Coming out of the ball joint there is a wiring harness with three connectors: a power coupling, an RJ 45 Ethernet connector, and a reset button. The bracket to hold the ball joint is attached around this wire, and the plugs are nicely molded. There is about 24″ from the end of the bracket to the end of the harness. It’s only one medium-gauge (.25″) wire until the last 6.5″. From there on to the jacks, there are three slightly lighter (.125″) gauge wires. There is a cutout for the cable, if you don’t want to attach it directly over the mounting hole. There are three screw holes, and the whole unit is pretty heavy-duty, so it should withstand most weather or squirt-gun attacks. On the back of the cylinder, there is a BNC connector for a wireless antenna, and one is included. There is also a QR code that has the serial number and default password encoded for easy entry. (It’s also printed on the rear of the camera beside the QR code.)
Setup is fairly straightforward. You download the app from your device’s app store, install it, and create an account. Then, you’ll get a message to add a device to your setup. If you add the camera, you’ll have connection to only this camera. I tried this at first, and could not get the wifi setup to work. I reset and played around with it for maybe an hour. Then, I tried plugging in Ethernet. BAM! It connected right away, and I could see the view of my camera from any internet source.
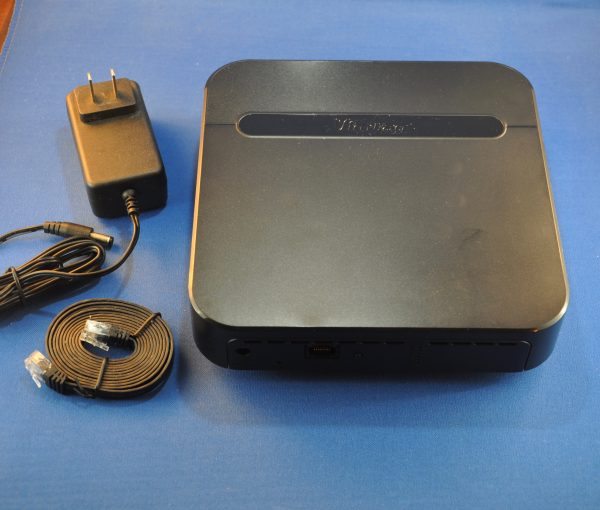
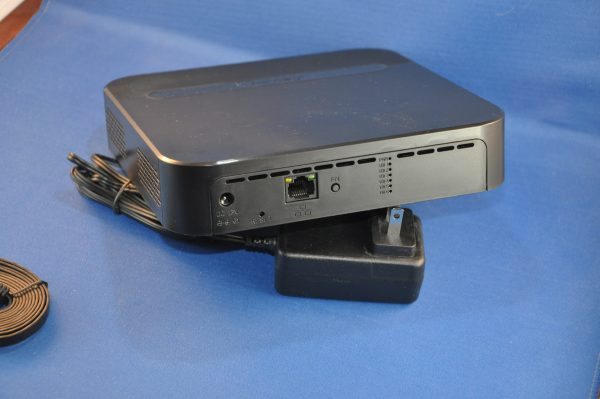
Then, I decided to add the Storage CloudBox. It, too, has a QR code to scan, which allowed me to instantly add it to my network. (The box connects over Ethernet only.) I deleted the camera connection, and added it back with the box being in the app first. This time, wifi setup worked as expected, and I was able to once again see the camera’s view through the app.
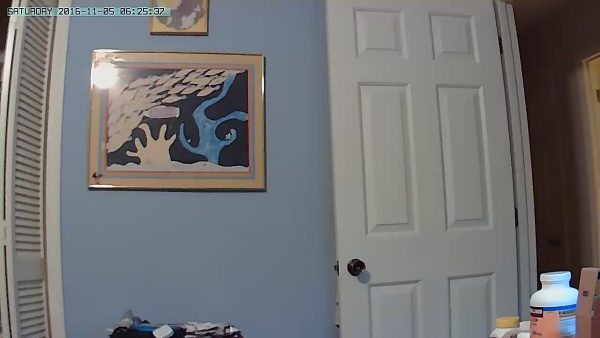
The benefit of the box is that you can turn on recording or take a snapshot, and save the result to the storage box at no cost. There are no monthly fees or other costs involved. This is quite a contrast from all the online services that want you to pay to store more than a certain amount of data. Even without the box, however, I could take snapshots and email them immediately. (The sample below was emailed with no CloudBox.)
Here are the benefits I noticed immediately, compared to other cameras I’ve set up or used. First, the color is much better. If there’s enough light, the color is clear and true to life. If the lights go out or the sun goes down, the camera turns on it’s IR flood (see second picture in article, above), and gives you a black & white view of the world. I found this to be very clear, no matter how dark or hazy it was. Once the sensor decides it can’t get a good full frame picture with the regular cam, you’ll see a slight blip, and the scene goes immediately to night-view mode. Pretty slick.
The mounting bracket is much more substantial (metal and foam weather guard) than many other outdoor-rated cameras. And you have the option of mounting it flush over the hole that the power/ethernet feed comes through, or offsetting it.
With the threaded collar and ball joint, the camera can be adjusted almost infinitely, within the 90º of the joint’s angle. You can also twist and spin the whole camera unit, as well as the 90º holder. The antenna is limited to a right angle from the rear of the camera, to going back as far and the mounting surface will allow. It rotates in place about 250º, so you should be able to tune it to your wifi antenna easily.
The next benefit I noticed is that you have complete control over how sensitive it is, when or if it sends you notifications and such. So many activity-triggered cameras grab a passing auto or deer, and burn up storage recording nothing. Or they give you a false positive every time someone walks by on the street.
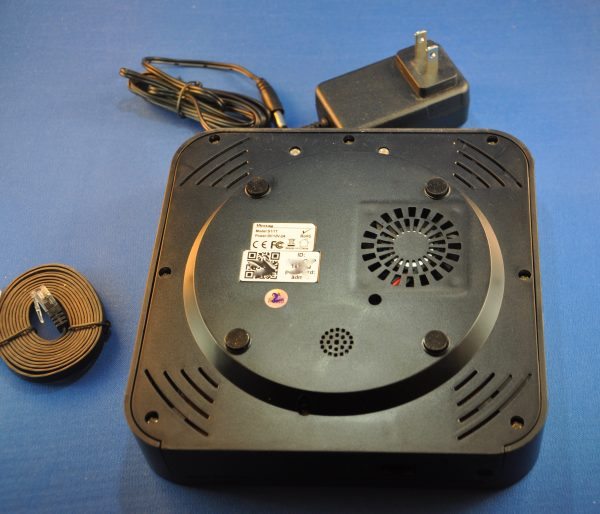
So, what are the drawbacks? First off, the CloudBox has a fan. (See photo above.) It emits a high-pitched whine all the time, so you’d want to put it in a server closet, not in the corner of your TV room or office. Secondly, the power cable to the camera is in two pieces. If you’re placing it within conduit or new construction, this probably isn’t going to be an issue. But if you’re retrofitting it to an existing structure, especially if it’s an area where you expect it to be possibly compromised, this could be an issue. Also, with the serial number and admin password printed on the unit, it’s going to be vulnerable to anyone who can get a glance at it. Fortunately, the software is smart enough to force you to enter a more complex password, so you don’t contribute to the next DDOS. But, as most hackers know, getting one part of a username/password combo makes eventual compromise much more likely.
Overall, I think it’s a nice package. It’s flexible enough to expand with interior cameras as well, and having the unlimited (well, almost) storage of the CloudBox with no monthly fees is great. If I needed a security setup at my home or office, it’s certainly a system I’d consider.
Source: The sample for this review was provided by Vimtag. Please visit for more info.
INIU Mini Portable Charger, Small 45W PD Power Bank, 10000mAh USB C in&Out Fast Charging Pocket Size Battery Pack, Travel Essentials Powerbank for iPhone 17 16 15 14 Pro Air, Xiaomi, Samsung S24 etc
(as of February 4, 2026 19:48 GMT -06:00 - More infoProduct prices and availability are accurate as of the date/time indicated and are subject to change. Any price and availability information displayed on [relevant Amazon Site(s), as applicable] at the time of purchase will apply to the purchase of this product.)DEWALT Heavy Duty 3-in-1 Mini Stylus Pocket Pen, Tablet Pens for iPad, EDC Touch Screen Pens, Ballpoint w/Touchscreen Tip, Keypad Tip, Compatible iPhone Stylus Pen, Extra Ink Cartridge, Gifts for Dad
(as of February 4, 2026 17:25 GMT -06:00 - More infoProduct prices and availability are accurate as of the date/time indicated and are subject to change. Any price and availability information displayed on [relevant Amazon Site(s), as applicable] at the time of purchase will apply to the purchase of this product.)Product Information
| Price: | Camera, $110; CloudBox, $150. Bundle pricing available. |
| Manufacturer: | Vimtag |
| Retailer: | Amazon |
| Requirements: |
|
| Pros: |
|
| Cons: |
|

