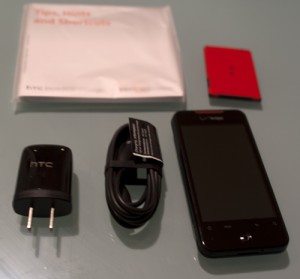
 Monday morning I received an HTC Incredible for review. I quickly determined this is going to be the hardest thing for me to return yet. I am going to take a cue from Julie and do a “Week With” review of the phone.
This first post is going to focus on first impressions and setup. When you open the box, you get the manual, a bright red battery, an AC adapter, and a Micro-USB adapter that fits into the adapter or a standard USB port. Of course the first thing you need to do is insert the battery and charge it up. The case opens fairly easily, though I am not a fan of snap-on cases. I am just nervous about breaking them. When you open it you get to see the bright red interior:

After installing the battery, and replacing the back I immediately plugged in the adapter and patiently waited for it to charge. And by patiently, I meant tried to find things to do to distract me from the wait. I did also check the connector with an existing Micro-USB cable to confirm that it would work. As I mentioned in the First Looks post, the port looks a little different from the standard micro-USB port, but it worked fine.
Setting up the Phone
One of the things I have grown to like about Android phones is how easy they are to set up. This is especially true if you already have a Gmail account with contacts in it. I wanted to try something different with this post, so I decided to do an unrehearsed, unedited, first-time video of the setup. Despite waiting to activate the phone on the Verizon network, some fat-fingering of my Gmail password, and some yammering at the end, the video came in under 8 minutes. The actual time from activated phone to downloading contacts was just over 3 minutes. Here you can watch the video:
The setup wizard included with the phone is also accessible after setup. So if you want to go back and setup accounts, and don’t want to figure out where the Flickr account setup is, you can just re-run setup. Here is a screen capture of all the setup screens:

I like the fact that it integrates with Flickr, standard Android does not do that. It also does a great job of linking your contacts together. Suddenly my favorites have avatars that it found on those folk’s Facebook page.
As I worked with the phone I discovered that it did not ship with an SD card. Instead it has 8 GB of internal memory without the SD card. This is great, because if you do decide to upgrade the memory, you don’t remove the existing 8 GB SD card, you just add the new one. The only issue I encountered is that some applications require an SD card, and do not accept the 8 GB of memory as an SD card. One example of that was QIK. Until I added an SD card, I could not use it.
These are very preliminary impressions, but the reception doesn’t seem quite as good as other Verizon phones. At one point I was not getting any data connection, but after I rebooted the phone, it worked fine. I am somewhat disappointed in battery life. It is on par with the other App phones I have used, which means if you use it a lot, it won’t last a day. Typically it will last the day, but I wish manufacturers would sacrifice a little slimness for a longer-lasting battery.
Tomorrow I will share more details, including a quick side by side look at the Nexus. I also plan on a post focusing on the Sense UI, and finally the review. At this point I am really pleased with this phone. It is light, sleek and very responsive.


Gadgeteer Comment Policy - Please read before commenting
That video made it all look very simple!
how did you get the screen grabs?
It’s kind of a pain actually. You install the Android SDK kit on your PC (win/mac/linux) connect your phone with USB and put it into USB Debugging mode.
I followed directions here I think (been a while): http://skilltech.blogspot.com/2008/11/how-to-capture-screen-of-android-device.html
Once setup you are good to go. I have to update for new releases periodically.