This is a story that does not end well…
A webcam with a telescope lens attachment! How could I, an aficionado of webcams, resist the opportunity to try one of these?
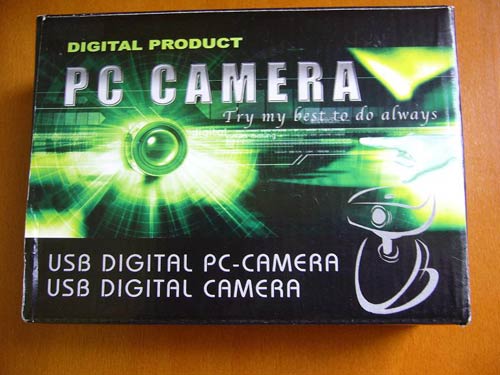
I knew I was in for an adventure with a non-brand product with the intriguing name on the box of “Digital Product PC Camera”.
“Try my best to do always”: good advice! I tried my best to do with this unusual product.
Hardware Specs
Image sensor: CMOS sensor 480K
Resolution: VGA 800 x 600
Frame Rates: up to 30fps@320×240, up to 15fps@640×480
Focus: 50mm to infinity adjustable
Video digit format: 24 bits
Built-in image e-mail
Manual focus
Snapshot button for image capture
Auto white balance
Auto electronic exposure
Features:
7*18 telescope
Use telescope to magnify for near views
Lens rotation for adjusting clear image
Easy adjust the angle by mini tripod
Excellent still image capture
Video Conferencing
Snap shot button
LED indicator
Interface: USB 1.1, USB 2.0 compliant
Telescope dimension: 69x28x33mm
Web cam dimension: 80x32x33mm
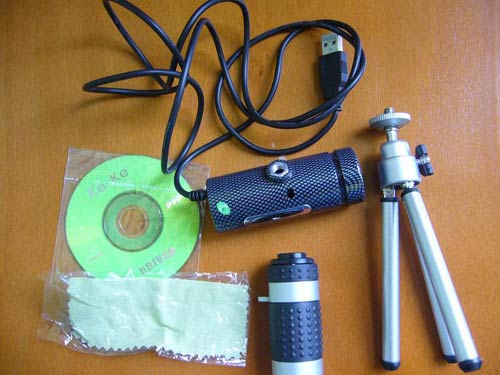
Package Contents
Webcam with connected USB cable
Small vinyl case with the 7×18 telescope lens
Desktop tripod with extending legs and a ball swivel
Driver mini-CD
Instructions in Chinese and English (but without any company name or contact info)
Lens cleaning cloth (a nice touch!)
My first thought is… the telescope is solid, metal and rubber, but the webcam itself feels like it’s made from some kind of laminated paper. Very lightweight, possibly flimsy. More on that later.
First hurdle… how does the telescope lens attach to the webcam? The limited instructions say nothing about it. Fortunately, the Brando website lists this essential instruction: “Please remove the plastic band of the telescope before attached to the web cam.” Once you do that, you can easily screw the lens into the webcam.
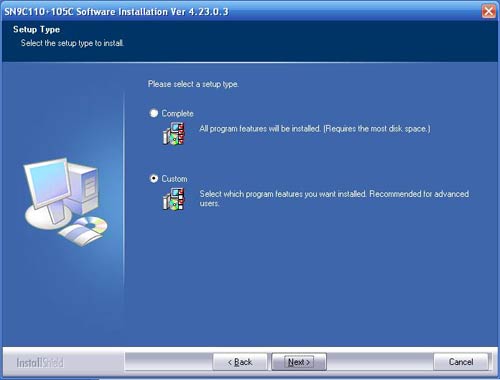
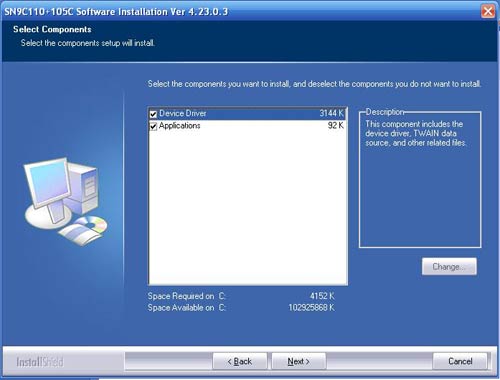
Now it’s time for the driver install. The instructions say to run the Setup file on the CD. Fair enough. I open the CD, and…

Yaaah! What are all of these? Which one is my webcam’s driver?
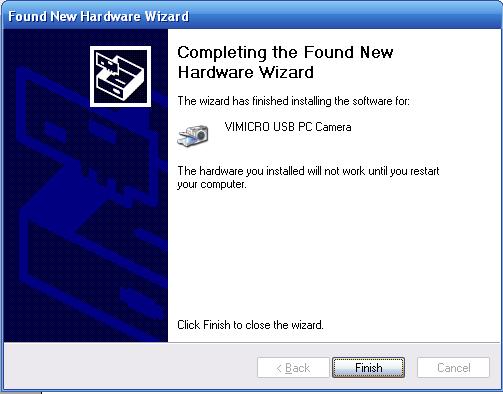
I decide to plug in the camera in the hopes that it’ll know which driver to install. I immediately hear the “di-ding” of a USB device being recognized. And the automated software search finds the drivers. Success! Installshield kicks off and shortly I learn the name of this device: VIMICRO.
Shortly, my old friend AMCAP (Microsoft software, circa 1998) is up and running, and I’m seeing my first webcam image! Woot!
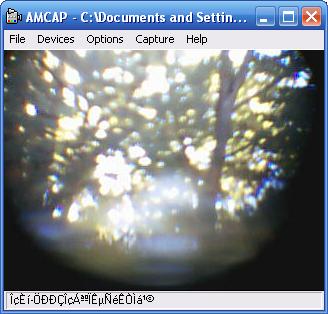
Okay, so it’s a blurry image with edges of the telescope showing, but it’s an image.
Before I try anything else, I feel strangely compelled to push the image capture button on top of the webcam, next to the red LCD that shows that the device is in operation.
Kaboom! AMCAP dies in a flurry of electrons, and I see this familiar screen.

Maybe I shouldn’t press that button? Can’t… resist… KABOOM!
Okay, enough fun of crashing AMCAP. I try AMCAP’s video capture, and that works just fine, capturing to .avi format and playing back in WMP.
Time to test the telescope’s capabilities, focusing on the trees across the street, about 50 feet away. It takes me a few seconds to focus the telescope lens, using the built-in webcam focus to fine-tune it.
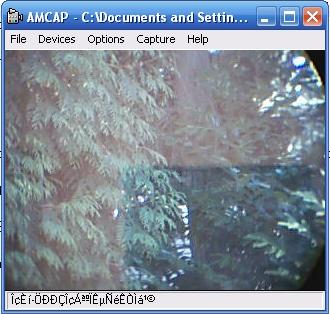
Image quality is reasonable but not great. I decide to take this on the road and find some more interesting images than the trees outside my house.
And then… disaster strikes! On my second attempt to use the webcam, it breaks. The focus mechanism of the webcam is now loose and floppy, unable to be adjusted to produce any kind of good image. The device can no longer be focused. And that ends the experiment with this intriguing new device.
Can I recommend this device? It is, obviously, very flimsy, and prone to breakage. I could see some people having a use for this, but not most webcam users, even webcam aficionados. And realistically, focusing the device takes a fair amount of work… this is the sort of device you’re going to want to set up and focus once at a specific image target and then never adjust again. I could see using this for a specific webcam target, such as a garden, a bird feeder, a busy traffic intersection, your neighbor’s apartment window… that sort of thing. But the webcam breaking was a sad, sad moment. Even if you set it up once and take the utmost care in doing so, it is too fragile.
Overall, I think it’s a great concept for a niche market, but this specific device is not sturdy enough to recommend.

2-Pack LED Video Light Kit, NiceVeedi Studio Light, 2800-6500K Dimmable Photography Lighting Kit with Tripod Stand&Phone Holder, 73" Stream Light for Video Recording, Game Streaming, YouTube
(as of April 24, 2026 11:40 GMT -05:00 - More infoProduct prices and availability are accurate as of the date/time indicated and are subject to change. Any price and availability information displayed on [relevant Amazon Site(s), as applicable] at the time of purchase will apply to the purchase of this product.)
ALTSON 60 LED Portable Selfie Light Video Conference Lighting with Clip & Camera Tripod Adapter Rechargeable 2200mAh CRI 97+, 3 Light Modes for Phone iPhone Webcam Laptop Photo Makeup
(as of April 24, 2026 11:40 GMT -05:00 - More infoProduct prices and availability are accurate as of the date/time indicated and are subject to change. Any price and availability information displayed on [relevant Amazon Site(s), as applicable] at the time of purchase will apply to the purchase of this product.)Product Information
| Price: | 26.0 |
| Manufacturer: | Brando USB |
| Retailer: | Brando USB |
| Requirements: |
|
| Pros: |
|
| Cons: |
|
Gadgeteer Comment Policy - Please read before commenting
Post your comments on the Brando USB Webcam with Telescope review.
http://www.the-gadgeteer.com/review/brando_usb_webcam_with_telescope
Just click the POST REPLY button on this page.
I just received this product before reading the review. How did you manage to get the telescope connected to the webcam? I have absolutely no documentation and the company I ordered it from is of no use as they don’t even know how. I would appreciate any hlep. Thanks.
There’s a small cap on the telescope, which if you remove it, you’ll see the threading to screw it into the front of the webcam. It’s not obvious!
—Ellen
can u upload the driver please ?
i lost my cd driver
thanks
I need the driver please… thx [email protected]
oie un favorsote mandame el controlador se me perdio el cd para
instalarla como le hago pliss ayudamee la necesito