I bought a used CLIE NX70v
on eBay a few weeks ago for AU$200 because I wanted a PDA that I
could use at school to enter data with. I recently trimmed down to
just carrying an imate SP5 smartphone (very similar to the SP5m
reviewed on The-Gadgeteer) which is fantastic as a phone and
read-only PDA, but it was terrible for text entry. The first week
back at school had me longing for my touch-screened, keyboarded PDA
(previously the imate KJAM) for entering homework and other stuff
into my PDA.
I got the NX70 because of
its high-res screen, keyboard and reasonable price. I also secretly
got it because a flip CLIE is something that I had wanted since the
day they came out 😀
When I received it I loaded
up everything onto it, bought a few accessories (USB sync/charge
cable, AAA battery extender), as well as a Sony WL110 CF WiFi card
(still to receive). After a few days I found the NX70 really
sucked. The eBay seller hadn’t stated battery performance, so I
didn’t really have any recourse with him. I knew that the life I
was getting was not near-new, as only about 1hr of standard use
(and max of 30-40mins music) would have battery warnings going off
everywhere. I knew this would be even worse when I stated to use
the WiFi card, which made me start looking around for a replacement
battery.
I initially thought that it
would be reasonably difficult to do, replacing the battery. After a
few Google searches I found some very rudimentary instructions on
how to do it. It seemed that all I needed to do was undo 5 screws
on the back/side and I would have access. Sounds easy? Read on to
find out just how easy it was. This procedure will be identical for
the NX60 as it is the NX70 without the camera.
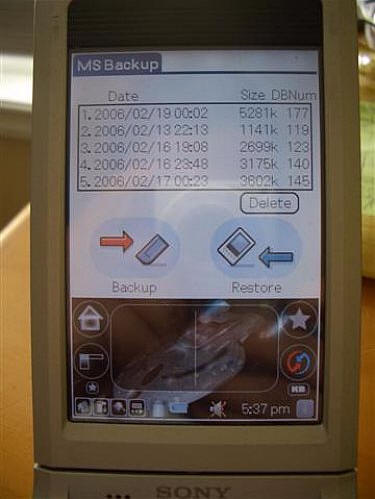
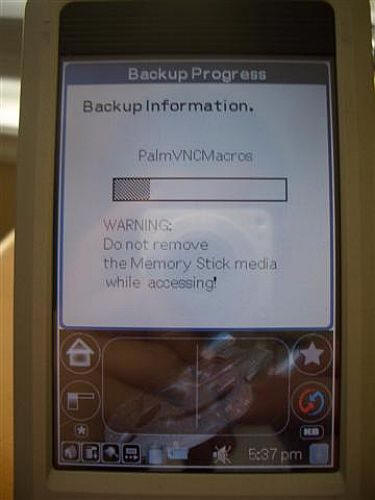
First thing I did was use
the built-in backup utility to backup my device. By disconnecting
the old battery, all RAM will be cleared (aka.
Hard-reset).
One thing to remember is
that if you use a Memory Stick Pro (or Pro Duo in a MS adaptor) is
that it won’t be accessible after the hard-reset because it
requires an update. To use it again, I created a new Hotsync ID to
just install the MS Pro Update. Once that is installed the card is
readable again in your NX70 and you can restore your backup. You
can then delete the new Hotsync ID from your computer.
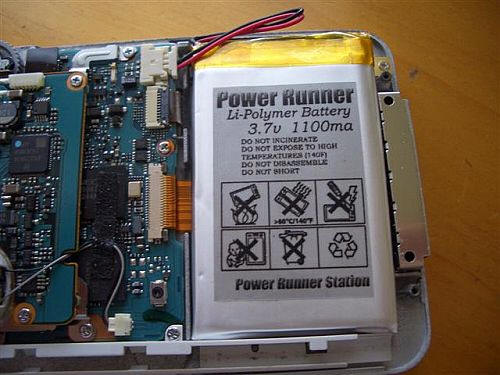
The battery I bought
generic one branded “Power Runner” and rated at 1100mAh. It was
quite cheap, only costing me AU$19 (about US$14).
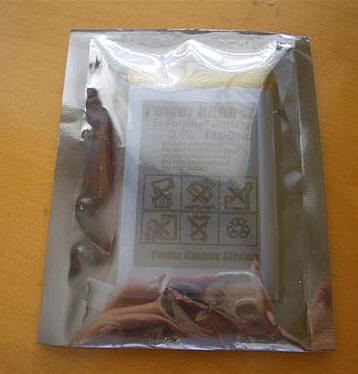

It arrived quite quickly
and in a sealed (not sticky-taped) anti-static bag.
The back screws on the NX70
are star-shaped, but I found my small Phillips (not flathead)
screwdriver worked perfectly and griped the screw without any
slipping.
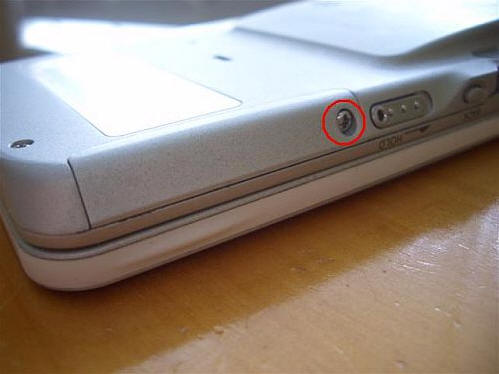
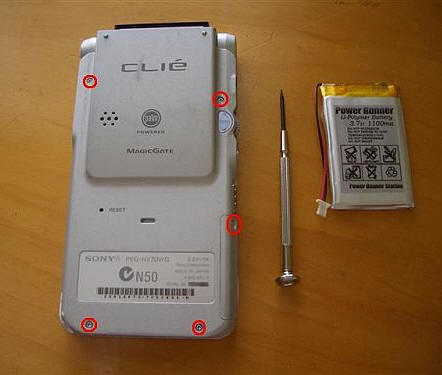
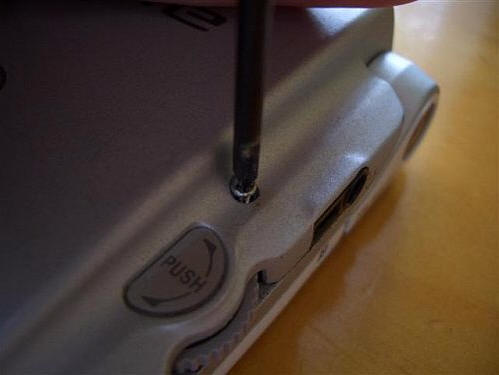
First thing to do is remove
the five screws. There are 4 on the back and one on the left side
below the hold button. When removing the screw on the side it will
release a small panel. Unfortunately this does not let you remove
the battery like I first thought it might. Continue to remove the 4
back screws.

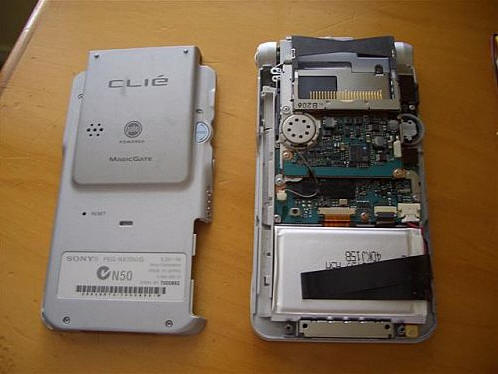
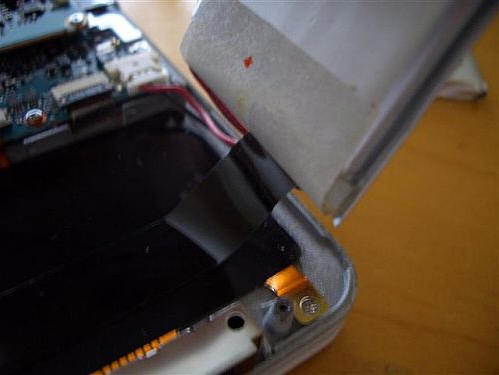
When all the screws are out
you will be able to remove the back in a simple vertical manoeuvre
(aka. Lift it straight up :P). You will be presented with the
motherboard, CF slot and our target: the battery.
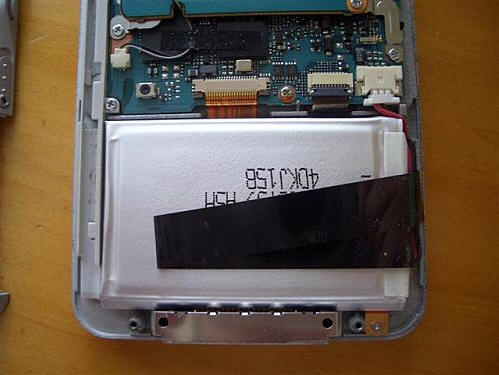
The battery is basically
just sitting there, but it is attached to a piece of tape. This is
just plastic, and not anything functional like a ribbon cable.
Rather than try to put it off with force in such a delicate space,
I just snipped it with a pair of scissors. My tape was affixed very
well to the battery, but yours may not be.
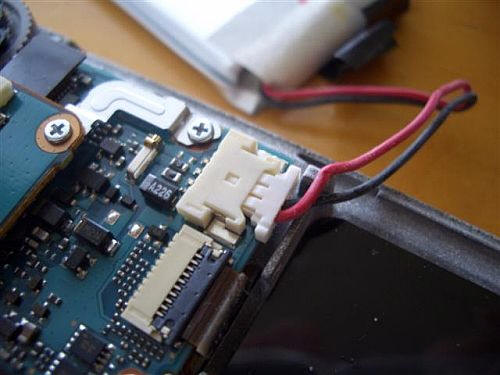
Once you have cut/unstuck
the tape you will be able to lift the battery out. Disconnect the
cable connecting the battery to the motherboard.
NOTE: At this point your
device will loose ALL power and will be hard-reset (all
settings/programs/data erased).
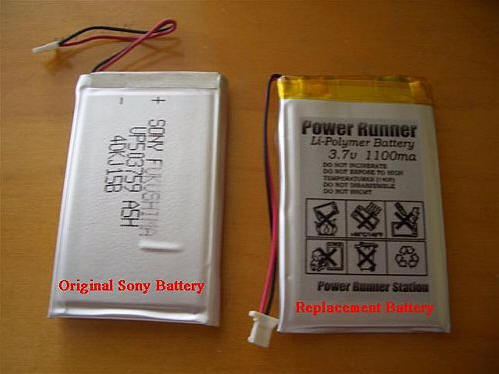
The replacement battery is
the same size and shape as the original.
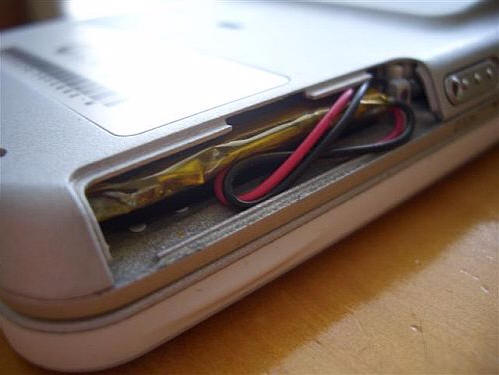
Before connecting the new
battery, make a crease in the cable about halfway along (as shown
in the picture below). The new battery’s cable was straight, but to
fit it must have a crease in the middle and be stacked at the top
of the battery.
Connect the new battery to
the motherboard with the contacts FACE UP. I believe it to only go
in one way (slight force did not allow it to go in upside-down for
me) so you shouldn’t have too much problem trying to insert it the
correct way. When I connected it my device turned on straight away
(you will here the CLIE boot sounds). Just press the power button
to turn it off.
Once the cable is
connected, seat the battery in about the sync connector. Make sure
that the cable is folded above the battery like the original
was.
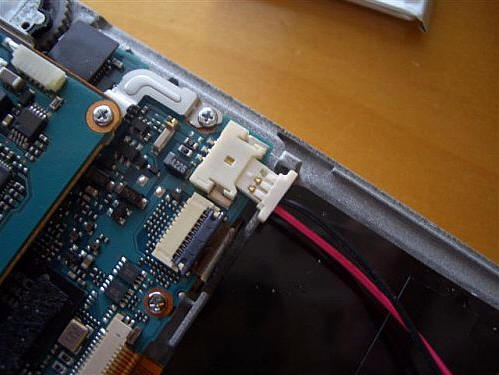
Once the battery is seated
you can put the back case back on. Screw the 4 screws in, but don’t
do them too tightly as it could break something. Make sure they are
firm, but don’t over do it. Then attach the battery door on the
left side. I had to reseat the battery cable as it was poking out a
bit. I used the battery door to push it back in when tightening the
screw.
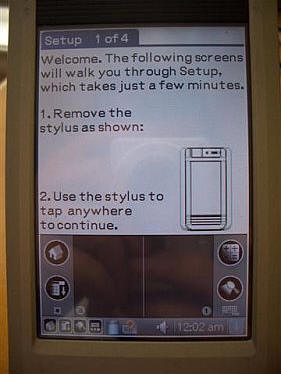
When you turn it on you
should be presented with the Palm OS welcome screen. After you
complete this, you can restore your MS Backup. If you have a MS Pro
or Pro Duo follow my instructions above (when you were creating the
backup).
Make sure you dispose of
the old battery properly according to whatever procedures your
local area has regarding that sort of thing. I am going to keep my
original battery in case I ever need it.
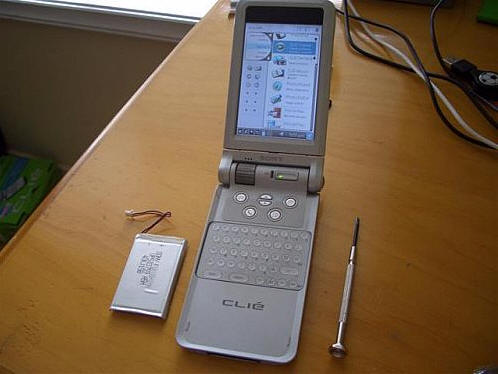
And there you have it, a
CLIE with a brand new battery! My CLIE has been functioning great
with the new battery. Today I used it as much as I had previously,
and where my old battery showed 60% the new battery still shows
100%! I will update this when I have used the battery a bit
more.
I highly recommend this
replacement to anyone who has a CLIE with a dying battery who wants
to keep their current model. This procedure should work fairly
similarly for other NR/NX CLIEs too. My replacement was bought off
eBay and is compatible with the
NR70/NX60/NX70/NX73/NX80.
UPDATE 3/2/2006: I
have been using the new battery for several days now and it is
excellent. I can get several days of use from the CLIE without a
problem. That includes use of the PIM functions, several games and
other playing around. Using WiFi I get about 2.5hrs of use. It has
definitely improved the usability of the CLIE, as now I don’t have
to constantly check the battery level.

Zip Ties Assorted Sizes(4”+6”+8”+12”), 400 Pack, Black Cable Ties, UV Resistant Wire Ties by ANOSON
(as of June 11, 2026 13:58 GMT -05:00 - More infoProduct prices and availability are accurate as of the date/time indicated and are subject to change. Any price and availability information displayed on [relevant Amazon Site(s), as applicable] at the time of purchase will apply to the purchase of this product.)
Gadgeteer Comment Policy - Please read before commenting
Post your comments on the Installing a CLIE NX70v Replacement Battery article.
http://www.the-gadgeteer.com/review/installing_a_clie_nx70v_replacement_battery
Just click the POST REPLY button on this page.
Interesting article, but does anybody know where can I find a replacment screen for my NX70 that broke due to a fall?
Still having problems finding a way to remove the four tiny star screws, small Phillip head does not work for me, any other means to remove screws?
Just received my new aftermarket battery for my clie nx70 and I installed it carefully from the side compartment, however the thing worked as soon as I plugged it in, but once I tried to put the battery back into the sleeve it doesn’t power on. Any answers would be helpful. Thanks Brian
Come to think of it the original battery did the same thing. Please help me. Bri.
here in 2026, i’m using this article for my NX70V i just found in my storage locker! new battery enroute and 2000 era memories incoming!! even got all the software, disks and a windows xp laptop ready to go.
thanks for leaving this article up! it is only 20 years old 😉