
REVIEW – About a month ago, I was involved in a car accident where my car ended up getting totaled. I was fortunate that I only ended up suffering from a good knock to the side of my head from side airbags and a bruise on my chest from the seatbelt. Fortunately, I had the last dash camera I reviewed, the Viofo A229, installed and running in my car. Thanks to the video from the front camera, I was easily able to show both my insurance and the person who caused the accident insurance that I was not at fault. I am a big believer in-car dash cameras and will always have one installed in my car and any other car in my household from now on. So when the 70mai A510 dash camera came up for review, I jumped on it because I had moved my old dash camera into my husband’s car.
What is it?
The 70mai 510 is a 1944P Sony Starvis 2 dual-channel car dash camera with a small display that lets you see what the camera is recording. It can be purchased as a single front-facing A510 unit, the A510 plus the RC11 rear camera, or a complete package with the A510, RC11, circular polarizer, hardwire kit, and 128 GB memory card. I was given the A510 with the RC11 rear camera, plus a 64 GB card, hardwire kit, and the newer RC12 HDR rear camera.
What’s included?
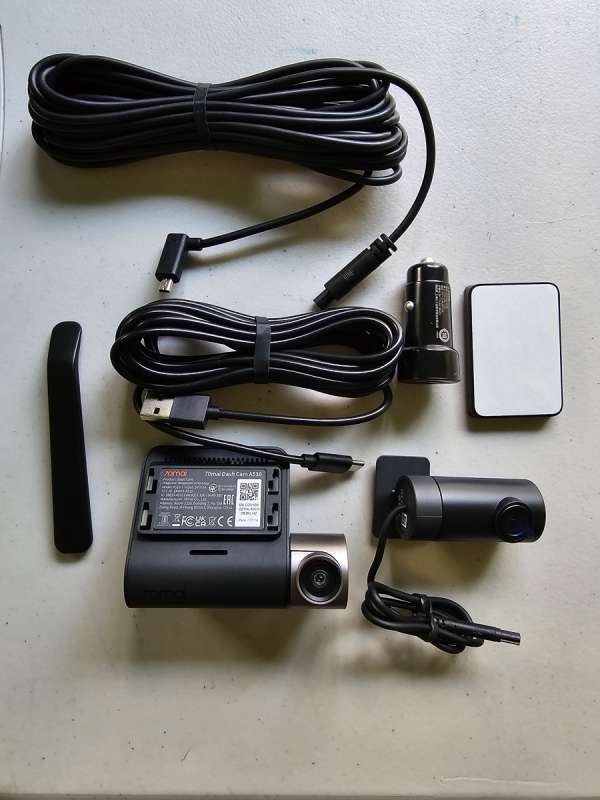
- Static windshield clings for both the front and rear cameras
- A510 main camera
- RC11 rear non HDR camera
- Power cord
- Cigarette socket power adapter
- Cord to connect rear camera to main camera
- Wiring crowbar
- Mount for main camera
- Extra 3M tape to mount main camera
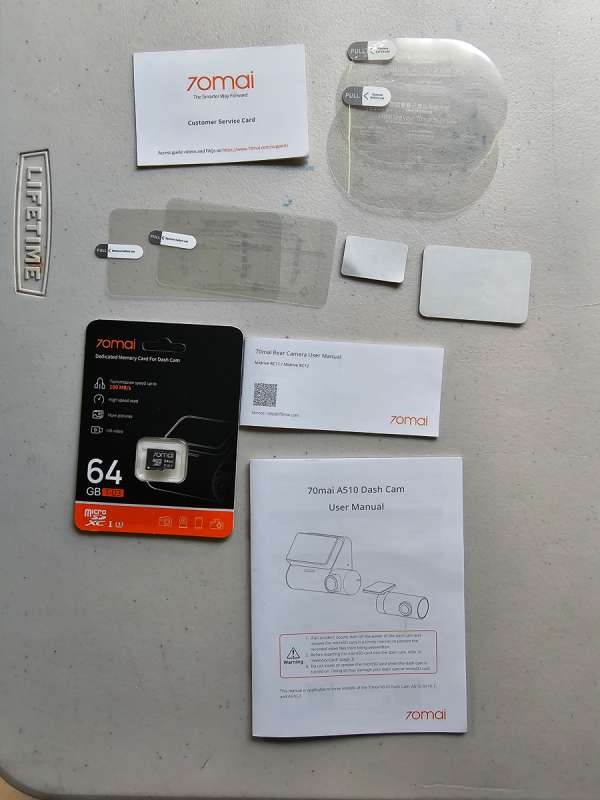
- User manuals for the front and the rear cameras
- Customer service card
- 64 Gig microSD card – this was extra and does not normally come with the camera
- Not pictured because I did not install it was the hardwire kit, and a 4g cellular accessory. The 4g accessory does not currently work in the United States.
I was also sent the upgraded RC12 HDR rear camera, which I installed in my car. It had the following items.
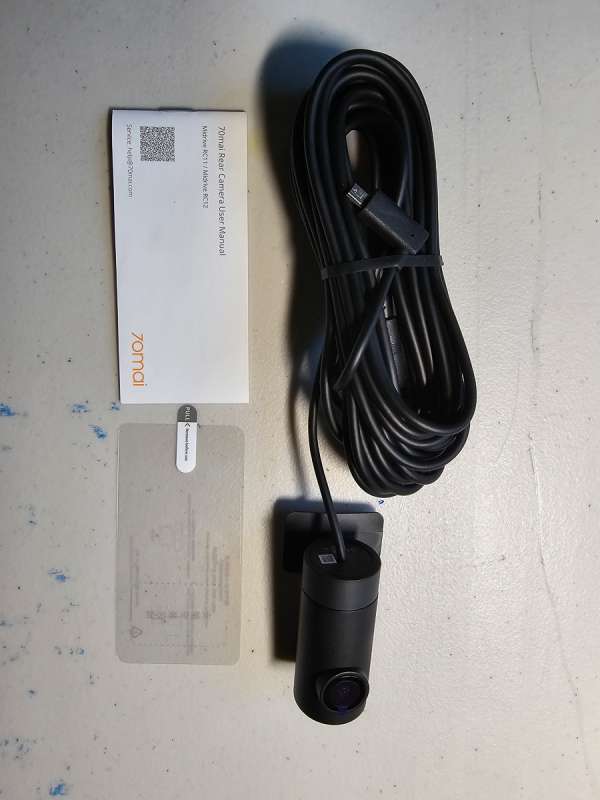
- RC12 HDR rear camera
- Electrostatic mounting stickers
- User manual
Tech specs
Click to expand
- Video Resolution: 2592x1944P/ 2560×1440
- Screen Resolution: 480×360
- Product size: 83×60.5×37.9mm
- Battery: 500mAh Li-ion
- Working Temperature: -20°C – 70°C
- Screen Size: 2-Inch IPS
- Image sensor: Sony STARVIS 2 IMX675
- Lens/Aperture: 2G4P/F1.8
- Frame Rate: 60FPS/ 30FPS
- Field of View: 140°
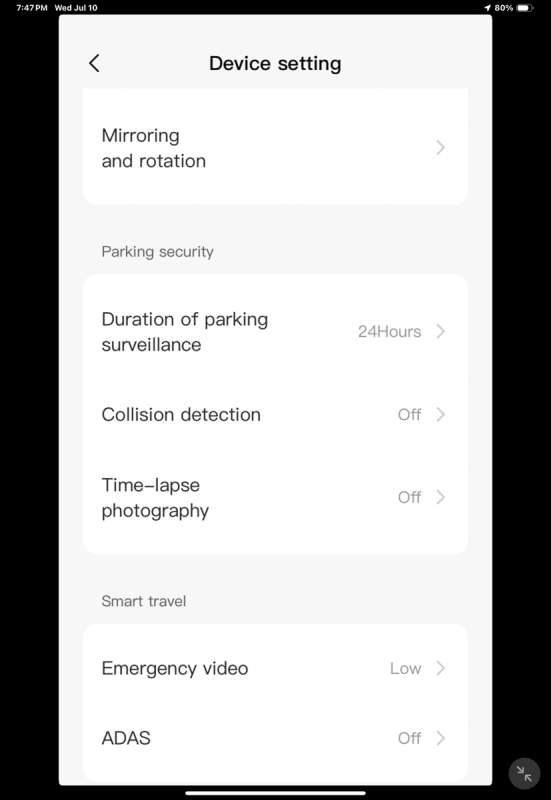
Design and features
The back of the main 70mai A510 dash cam body has the display screen and four buttons. There is no writing on the camera itself to describe how the buttons work. That is displayed on the screen depending on what the screen is showing. To the left of the logo on the camera housing, there is an LED light. The light will be in various colors and steady or flashing depending on the camera status.
| Solid green | Recording normally Recording parking surveillance video |
| Flashing green | Recording emergency video |
| Solid red | Encountering a recording exception, for example, the memory card is removed, damaged, or not qualified. |
| Solid blue | 1. During the beginner’s guide 2. Entering the album (whether in the app or the dash cam) 3. The whole process of updating firmware |
| Flashing blue | 1. Formatting memory card 2. Restoring factory settings 3. Waiting for authorization when dash cam is connected to the phone |
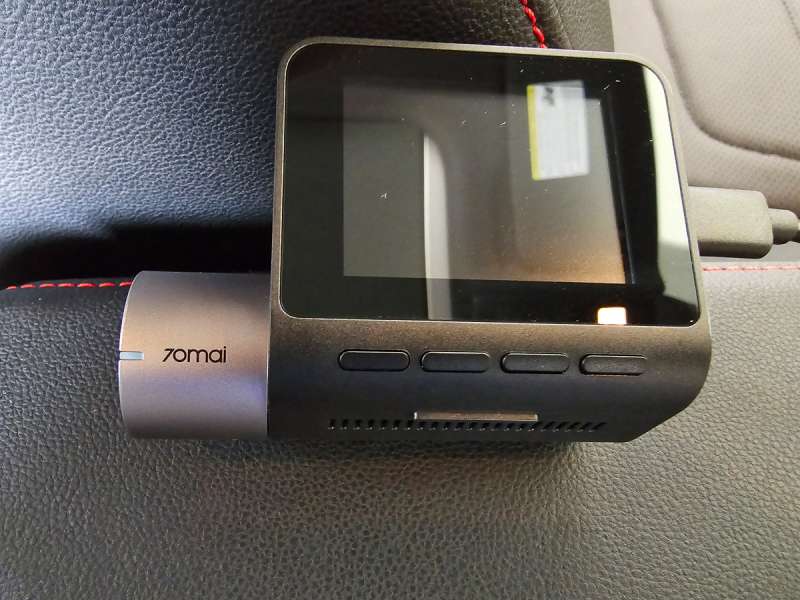
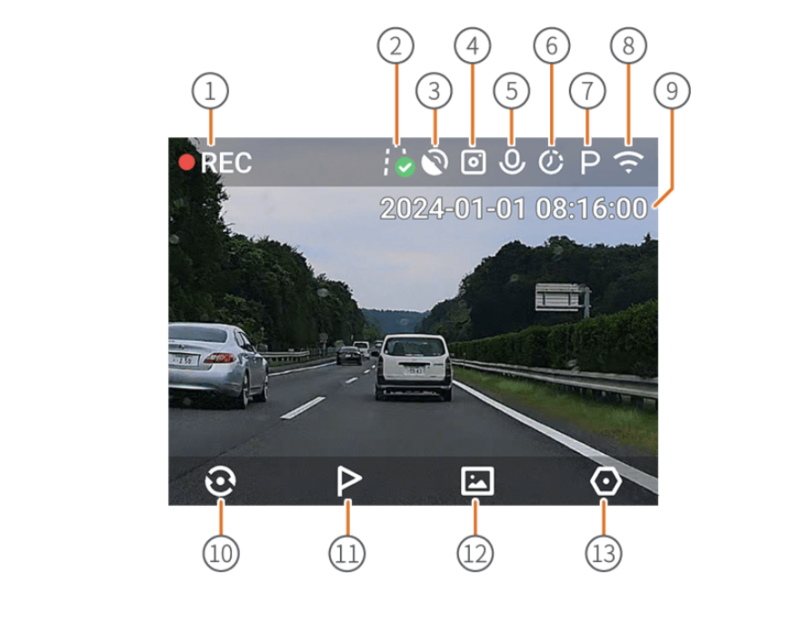
If the camera currently displays the video from the camera, the display looks like the following picture below.
①. Indicates that dash cam is in normal recording. In case of abnormal recording, the red dot will change to white dot and ![]() displays.
displays.
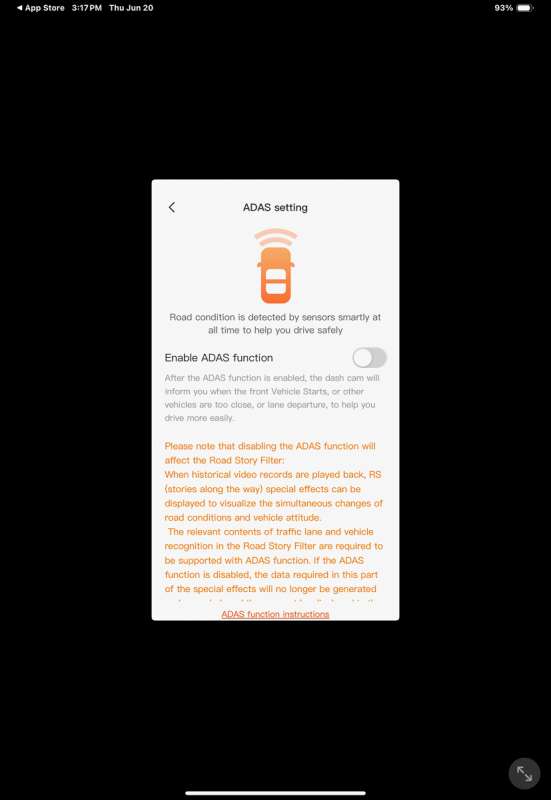
②. Indicates that ADAS calibration succeed. During the calibration process, the icon![]() will be displayed. If calibration fails, this icon will change to
will be displayed. If calibration fails, this icon will change to ![]() .
.
③. Indicates that location information has been obtained.
④. Indicates that the external camera is installed.
⑤. Indicates that audio recording is enabled.
⑥. Indicates that time-lapse recording function is enabled.
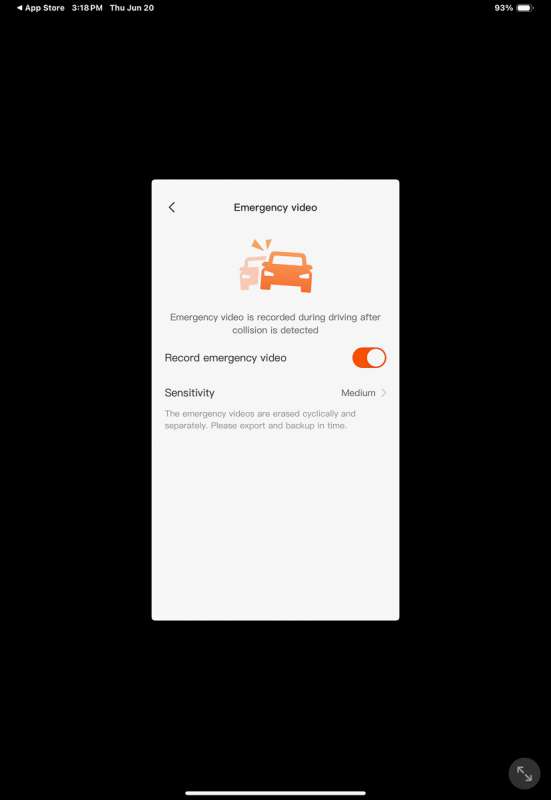
⑦. Indicates that parking surveillance (collision detection) function is enabled.
⑧. Indicates that Wi-Fi hotspot is enabled. If it is disabled, icon ![]() displays.
displays.
⑨. Indicates the current date and time.
⑩. Press the function button below to switch between the front and external camera screen. When an external camera is removed, the icon will be replaced by ![]() or
or ![]() .
.
⑪. Press the function button below to record emergency video.
⑫. Press the function button below to enter album.
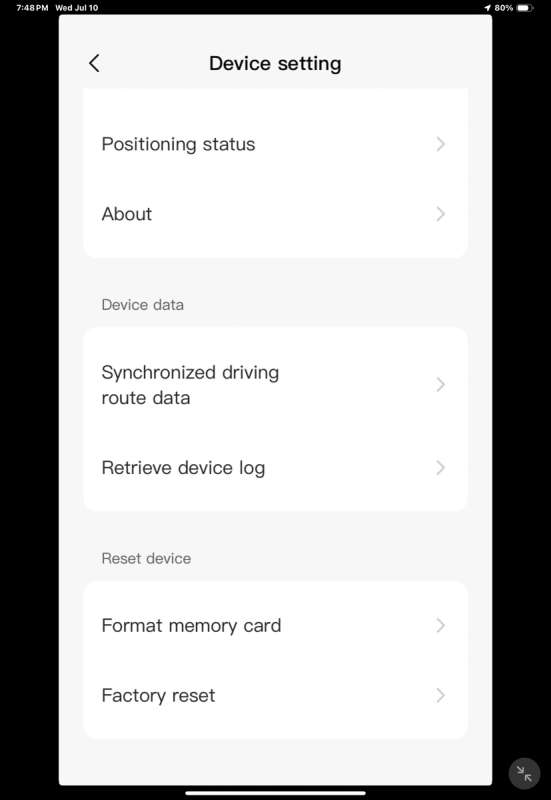
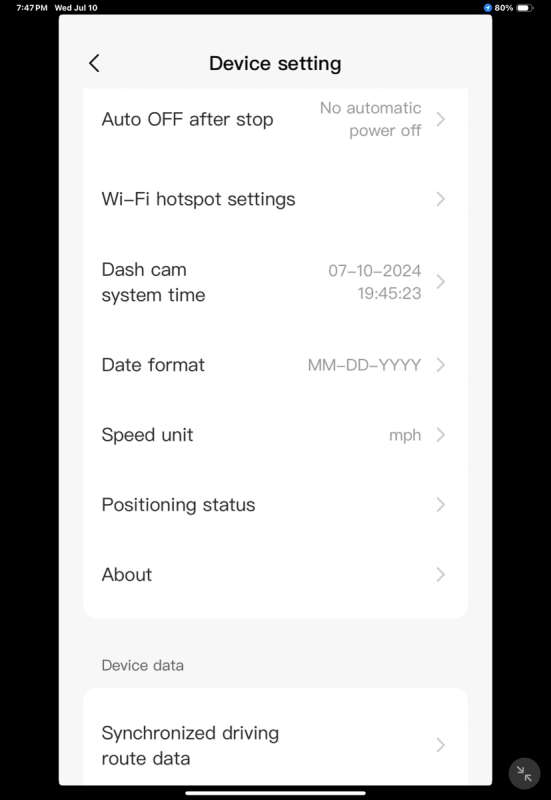
⑬. Press the function button below to enter settings.
When you enter settings, the four buttons on the bottom change to the following options:
10 – Displays a left arrow. Pushing this returns the display to the camera view.
11 – Displays a less-than symbol. Pushing this, scrolls through the settings menu to the left.
12 – Displays a greater-than symbol. Pushing this, scrolls through the settings menu to the right.
13 – Displays a checkmark. This is the accept/OK button.

On the right side of the 70mai A510 are three ports. One is for the micro SD card, which must be at least type 3 for fast, accurate recording. The middle slot is for the cord from the rear camera if you are using one. The port to the right is for the power cord.
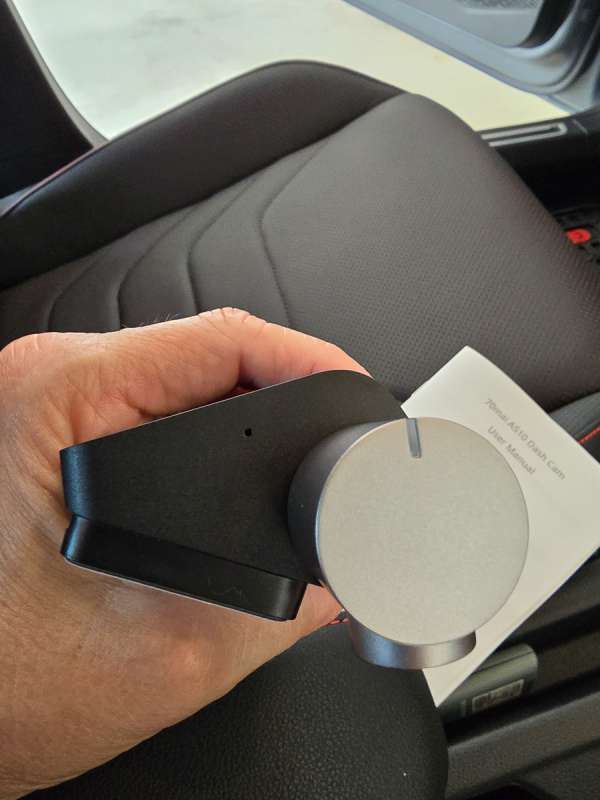
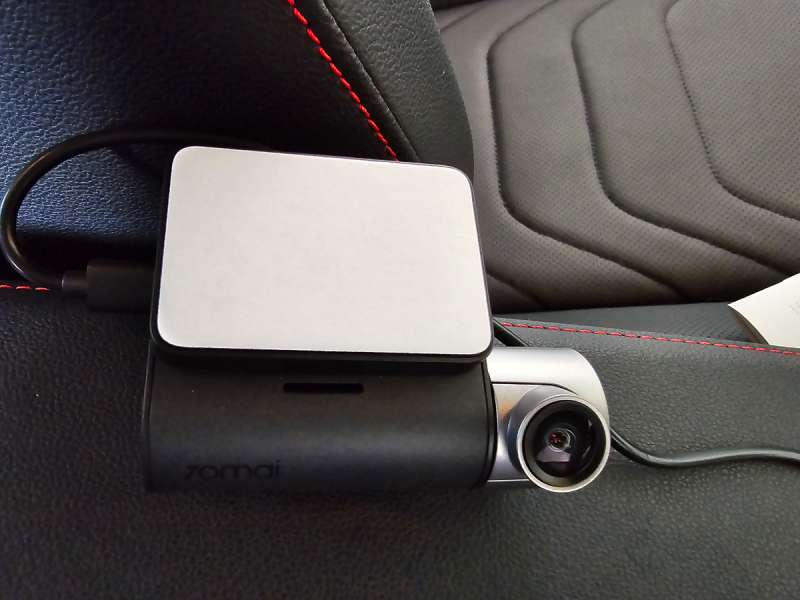
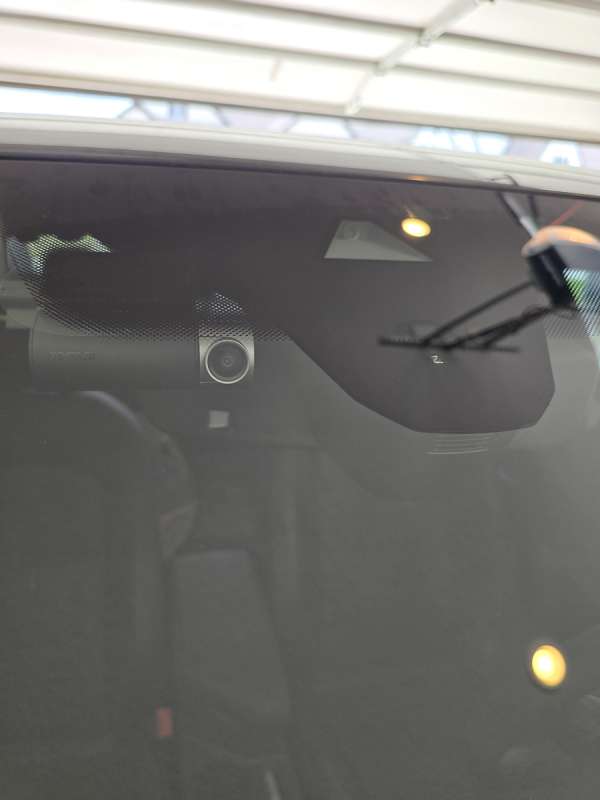
The lens and LED light are on the left side of the camera. The camera lens can rotate to accommodate most windscreens. On the back of the display unit, you will find the camera mount. It is separate from the main body, which allows you to detach the camera from the window quickly if need be. I have found that every dash camera that I have reviewed has the mount that goes on the windshield separate from the camera body. This allows you to detach the camera quickly if you need to (say at the scene of an accident) or pull the camera to review footage outside of the car if you don’t have a computer handy.
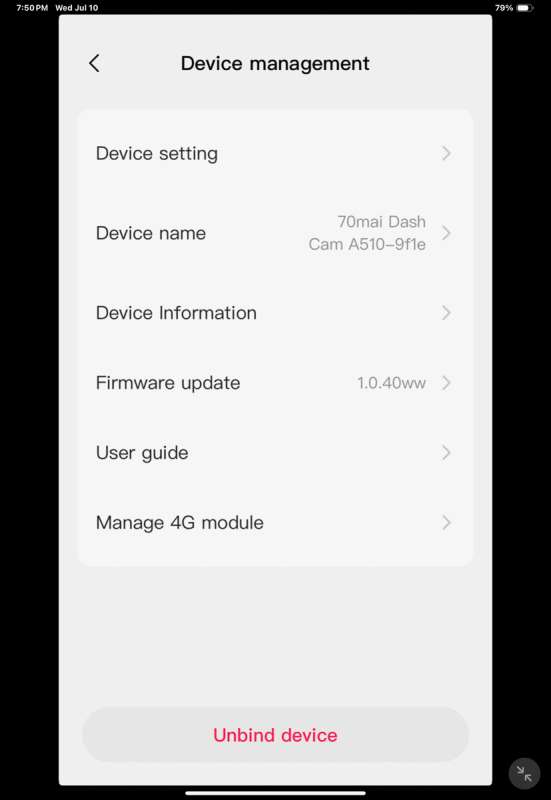
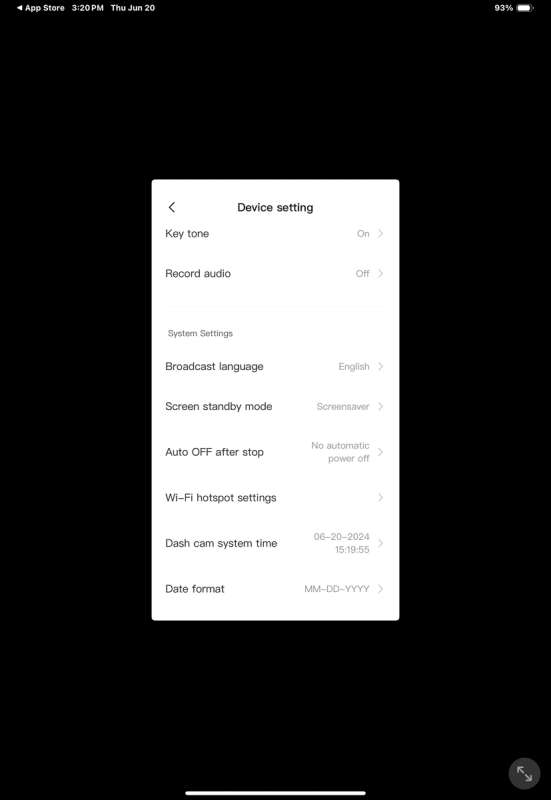
70mai also provides an app for the camera. All of the settings in the app are also available in the camera itself. I will remove the card and insert it into my home computer to view and download videos. You can also view the videos on the app. If you have a car and connect your phone via Apple CarPlay or Android Auto, I highly recommend using a separate tablet or another phone to install the app. The A510, like every dash camera out there, connects to the app via WiFi. So if your phone is already connected to your car, it won’t connect properly to the A510. In my experience, the CarPlay and Auto connections always take precedence. You would have to forget the connection to the car to keep your connection on the phone. So unless the camera is hardwired and running while the car is not on, connecting to your phone’s Wifi can be problematic. I want to emphasize this is an issue with every dash camera I have reviewed.
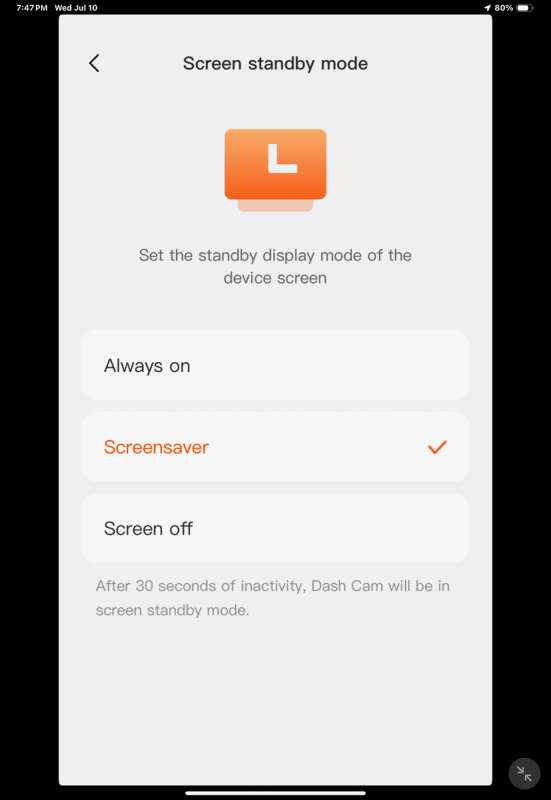
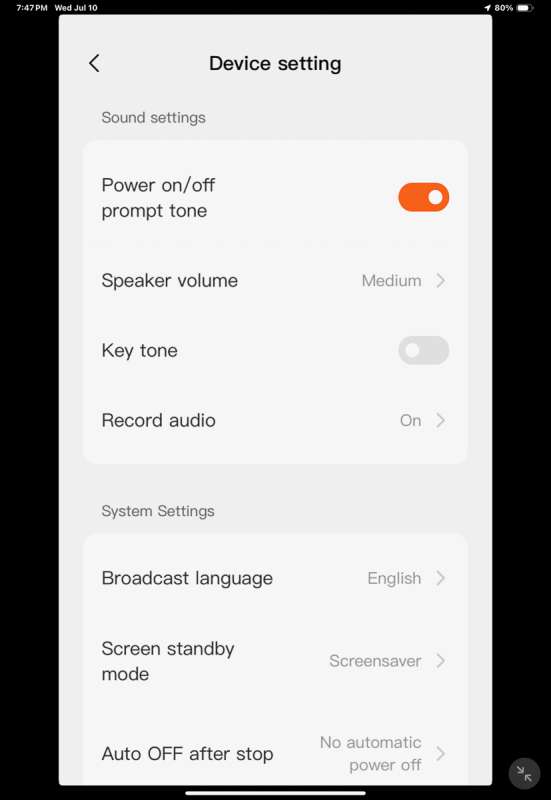
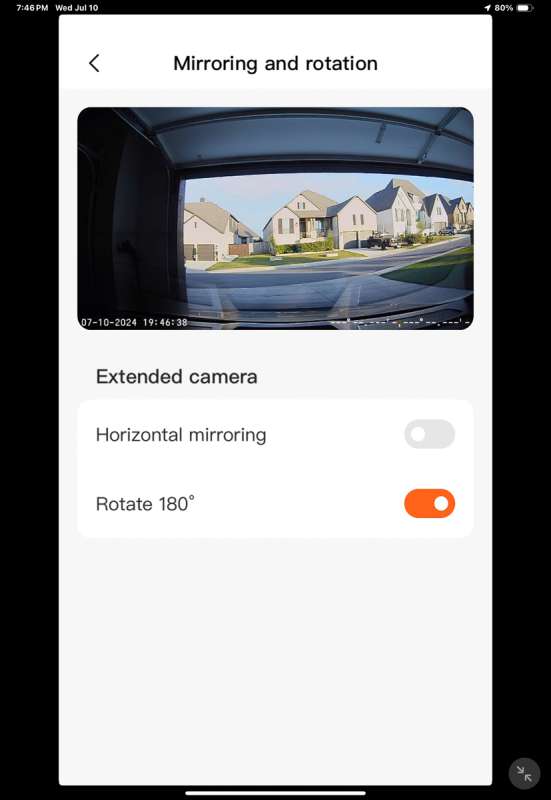
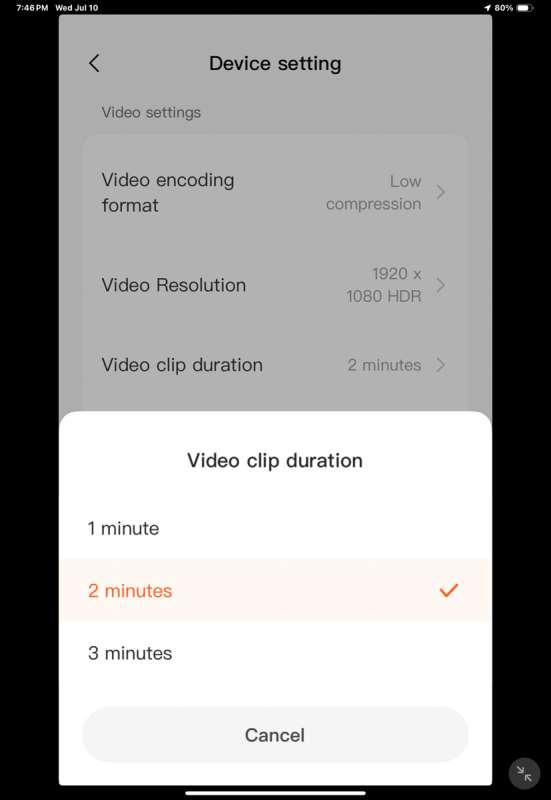
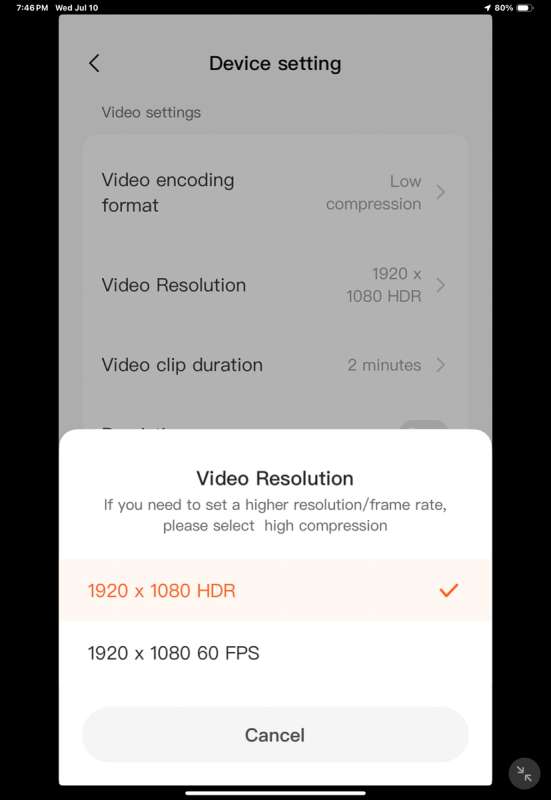
Now that I got that off my chest, let me say the app is very easy and well-designed. I put some screenshots below of the various settings that are available. A nice feature that is available is the ability to rotate the rear camera display. The camera could be upside down depending on how you run the wiring to the back of the car. I ran my camera along the passenger side so the picture was upside down until I changed the rotation to 180 degrees. The display also has a full off or screensaver mode. The screensaver will display the time of day.
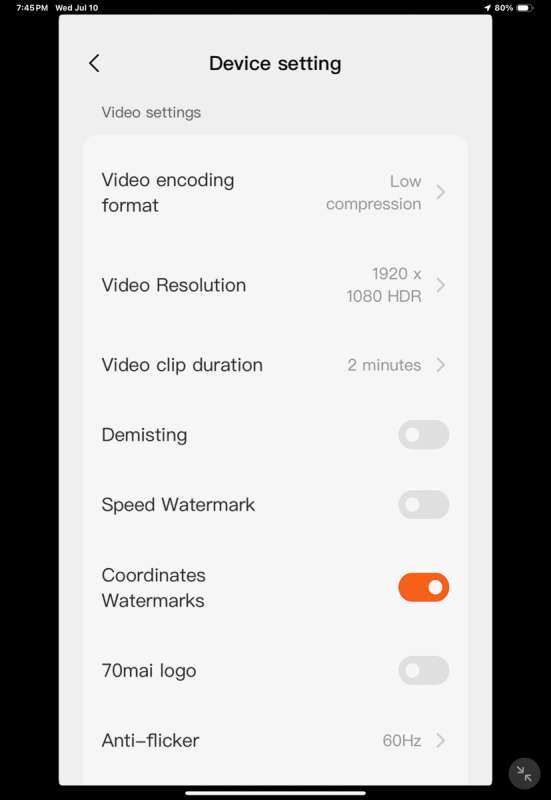
You can see the live video stream on the camera’s main screen. There is a microphone button to turn the microphone off and on, a camera button to take a quick snapshot, and a reverse button to switch between the main and rear camera views.
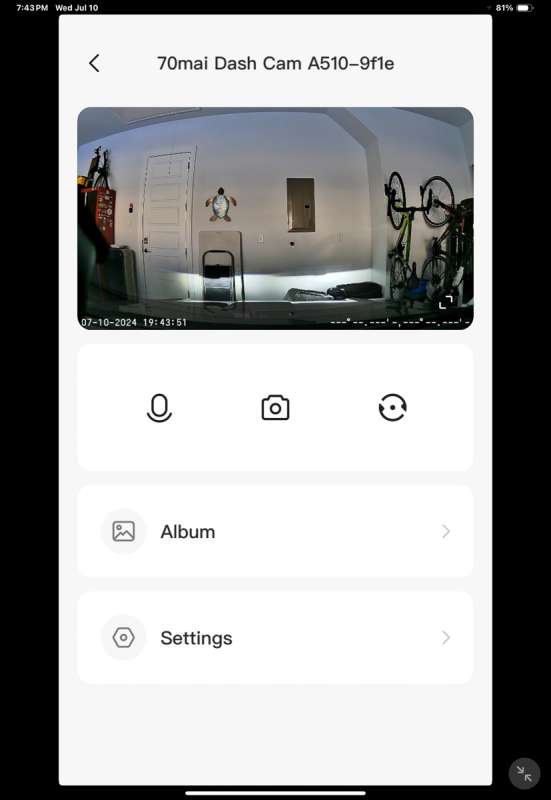
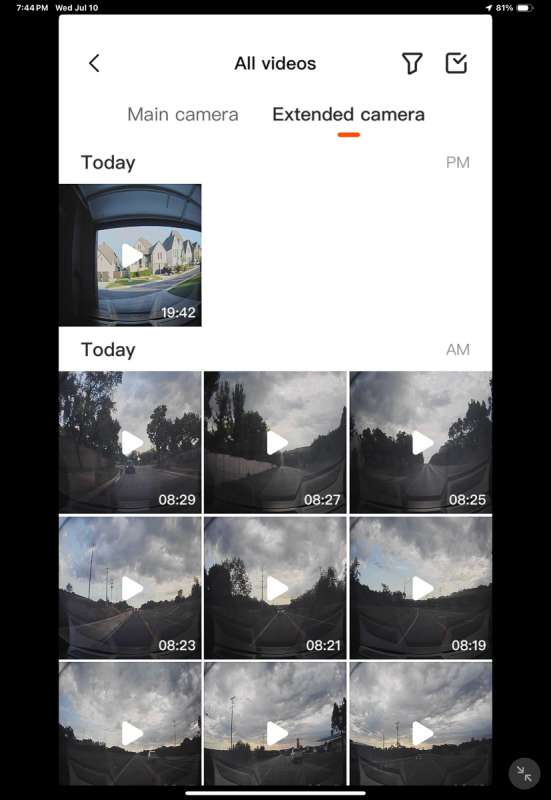
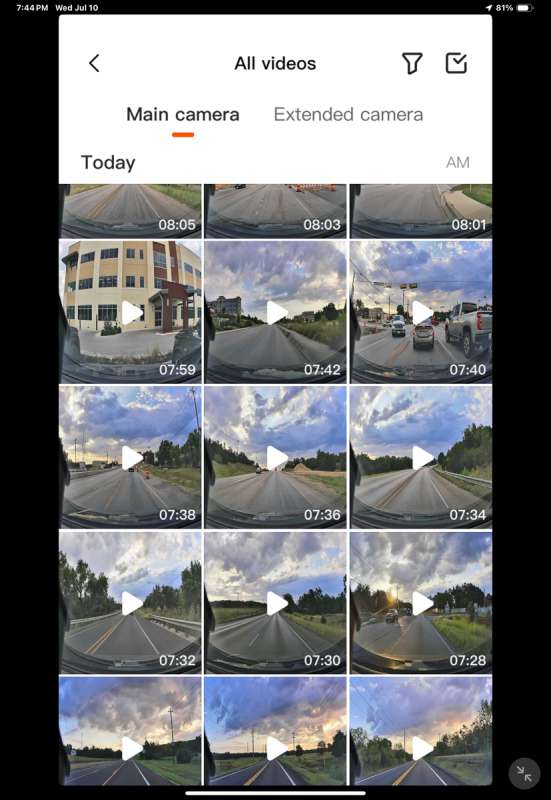
Clicking on the Album link gives you two options. The main camera or extended camera videos are available.
Assembly, Installation, Setup
This is the fourth dash camera I have reviewed and installed in a car. It was my first time installing a dash camera in my new VW Jetta GLI. I want to note that the previous installations have all been in cars with hatchbacks. The Jetta is a sedan with a trunk. I found running the cable back to the rear window in a sedan much easier than in my previous Bolt hatchback. I was able to run the wires all under the rubber molding that ran along the door seals. The only place you see the wires is in the back corner behind the rear passenger seat and a bit just before it goes under the floor mat of the front passenger. I have a picture of the wire in the back below. I will go back and try to clean that up a bit. I will wait until it is cooler outside. I don’t enjoy crawling around in that back corner running wires when it is 100 degrees outside! The important thing is the cables are not in anyone’s way.
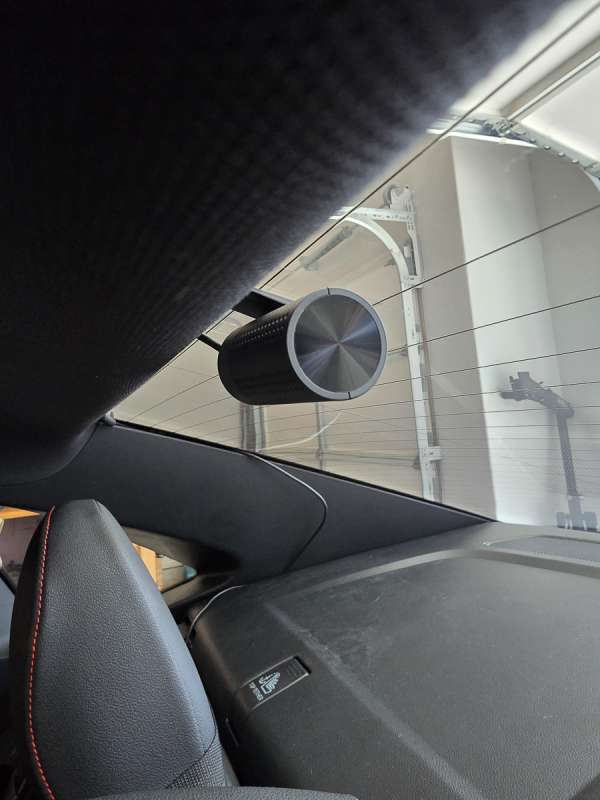
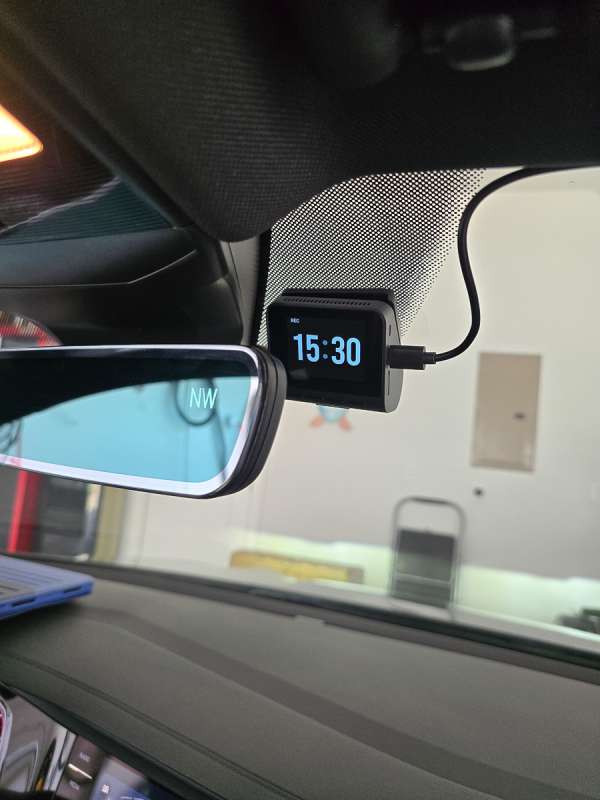
Here are a couple of pictures of the 70mai A510’s front camera. One shows the screensaver clock. You can see that I installed it right next to my rearview mirror.

Performance
Here are some videos. I took a daytime and a nighttime video of the 70mai A510 front and rear cameras. I will note that the rear camera is unusable when reading license plates at night. This is due to the very dark ceramic tint on my back window. (Yay Texas heat!). I also think the video has a lot of reflection at night because my car is a sedan, and my back window has a higher slope than a hatchback. I think the rear video could still be helpful in an accident to show proof of fault.
The sun was on the driver’s side of the car, which, along with the slope of the rear window, contributed to the reflection in the video.
What I like about 70mai A510 dash cam
- Simple camera and easy setup.
- They offer an HDR camera for the rear camera.
- The app is easy to use and very responsive.
- Good price
What needs to be improved?
- Since the A510 is HDR they should include the RC12 HDR rear camera instead of the RC11
- I wish it were 4k video.
- Nighttime license plates were a bit hard to read in the front camera.
Final thoughts
If you are looking for a dash cam to cover your bases in a car accident, I think the 70mai A510 would work nicely. I am a bit concerned about being able to read license plates at night, but I feel if the car were right in front of you, it would be readable. It will have 4G connectivity in the United States soon, but they don’t say when. That, with a hardwire kit, would let you get notifications in real time from the camera when it is parked.
Price: $98.99 A510 only, $116.99 A510 and RC11 rear camera, Full kit described at the front of the article $145.47
Where to buy: 70mai and Amazon
Source: The sample of this product was provided for free by 70mai. 70mai did not have a final say on the review and did not preview the review before it was published.

Now retrieving an image set.
Google Review Tap Cards (3-Pack) by TapFive - Tap for Instant Reviews - All Phones Compatible - Reusable Smart Tap NFC & QR - Boost Business Reviews - Powered by TapFive (3 Card Pack)
(as of July 13, 2026 18:55 GMT -05:00 - More infoProduct prices and availability are accurate as of the date/time indicated and are subject to change. Any price and availability information displayed on [relevant Amazon Site(s), as applicable] at the time of purchase will apply to the purchase of this product.)
Now retrieving an image set.
Gadgeteer Comment Policy - Please read before commenting
Simply DO NOT buy ANY product from 70mai! The battery is not sold separately after dying and yes it will die as it is a minimal 500mAhp and in hot countries like Europe south Italy Greece etc they die in a years time! the company WONT recognise it and they will reply to you (I do have emails if needed) as “We apologize that the product you are using malfunctioned. We don’t sell battery separately.
We suggest you contact your original seller for the warranty service if your device is still under the warranty period.
We appreciate your understanding.”
Which means ZERO as ALL shops selling it to you are NOT offering replacement but they point you to the monther company who doesnt give a sh*t about it…. STAY AWAY from it!
PS: I DID open it myself and replace the battery with third party BUT this is not suggested as WHAT IF this battery doesnt work well or explodes under my wind screen under sun and burns down my car? what if?