REVIEW – Remember the movie Predator and how that extraterrestrial hunter could search the jungle for Ah-Nuld with some kind of heat vision in a palette of colors? That same power now comes to your smartphone with the pocketable Thermal Master P3.
⬇︎ Jump to summary (pros/cons)
Price: $349.00
Where to buy: ThermalMaster and Amazon (Save 5% with code TMAMZPD5)
What is it?
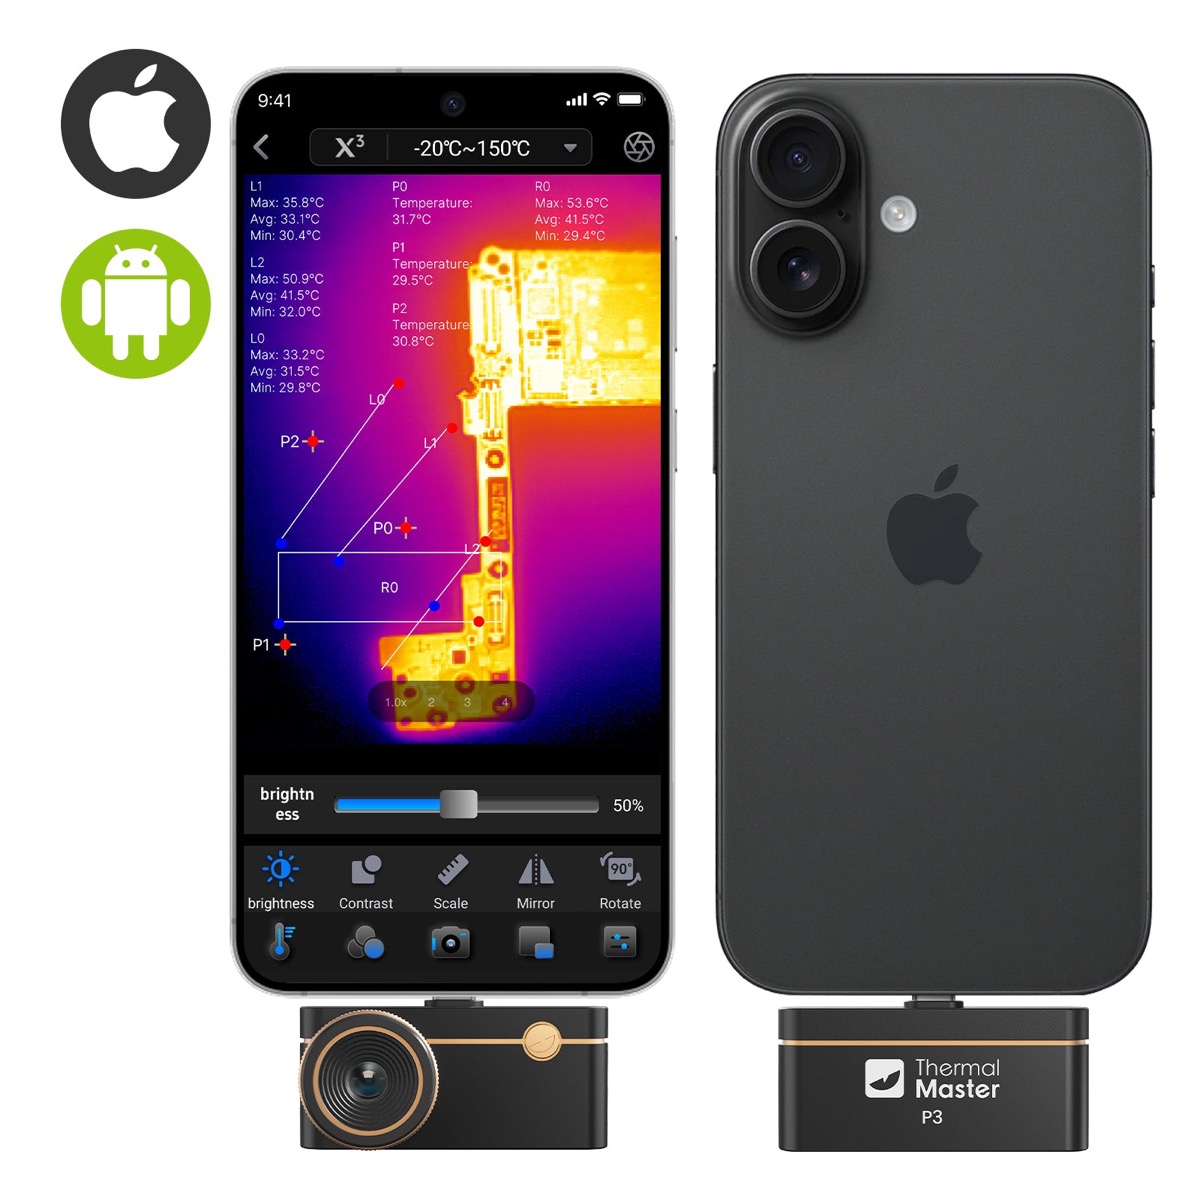
The Thermal Master P3 is an infrared imaging device with 512×384 resolution, 8mm Macro Focus Lens, Range: -20~600℃/ ±2℃ Accuracy, Compatible with iPhone and Android Series. Flexible 15x digital zoom, Durable aerospace alloy body.
What’s included?
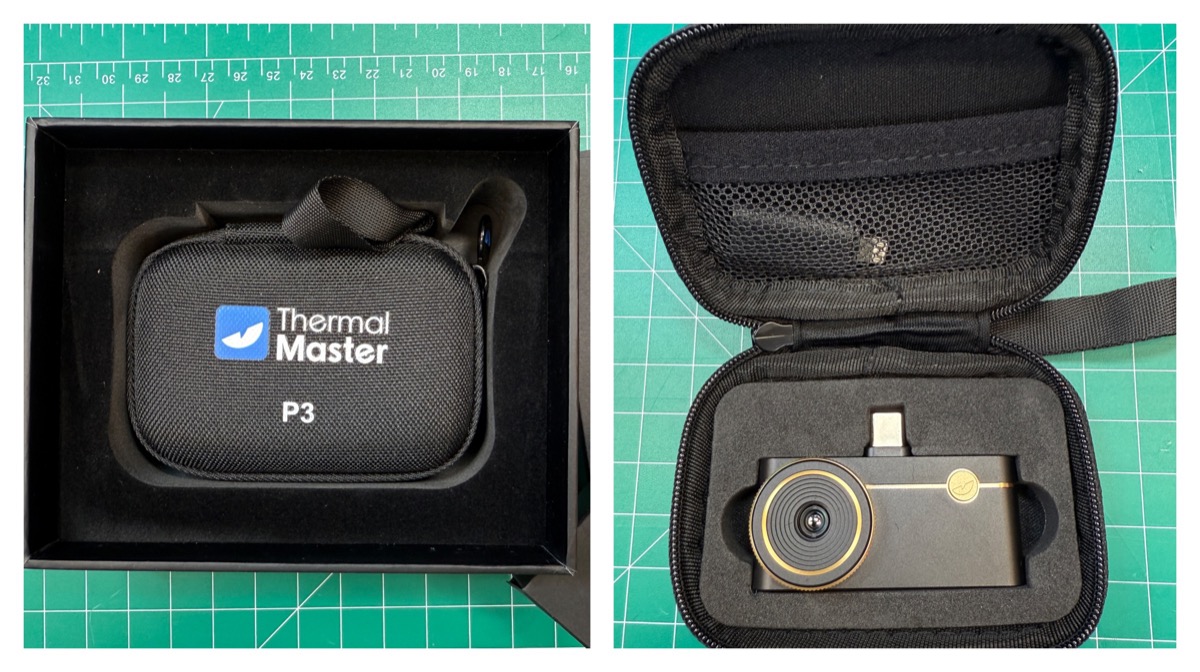
- Thermal Master P3 camera
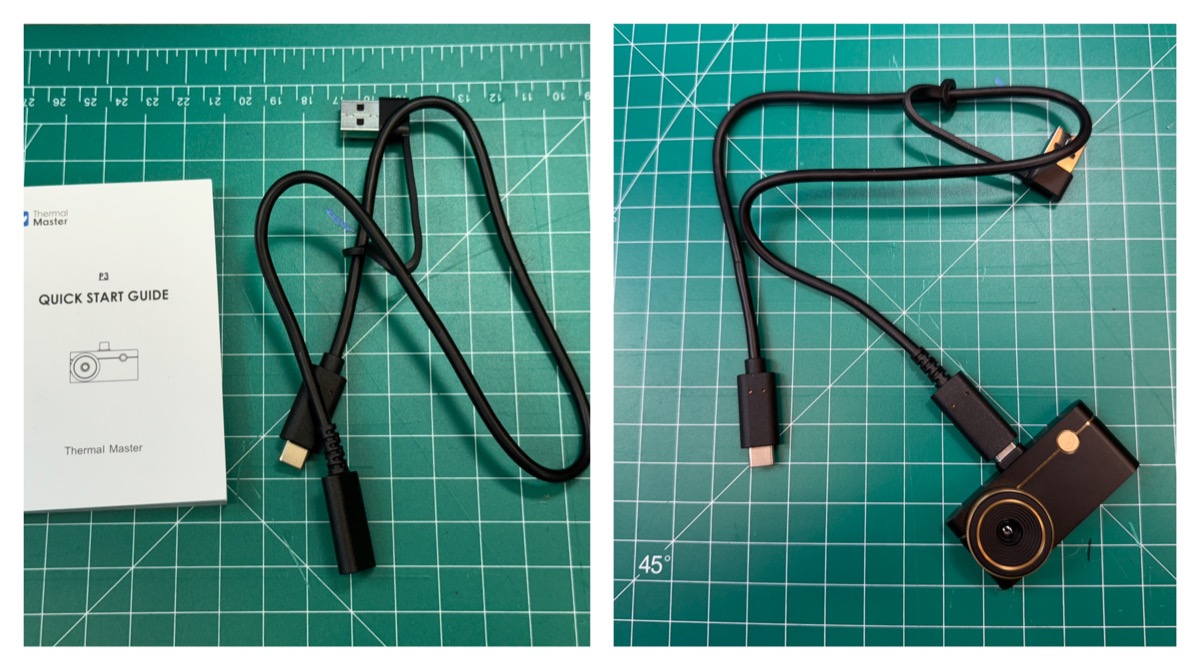
- USB-C cable
- Carry case
- Instructions
Tech specs
Model: P3
Detector: Vox 256×192 @12μm
X³IR™ Resolution: 512×384
Measurement Range: -4℉~1122℉(-20℃~600℃)
Temp Accuracy: ±2℃ or ±2% of the reading
NETD: <35mk@25℃
Focal Length: 4.3mm
Focusing Mode: Macro & Manual Focus Lens
Curcuit board testing: Detect 1mA PCB leakage
Application Scenarios: Circuit board/Electrical/ Industrial/HVAC/ Home/ Automotive Inspections
Compatibility: Connect to iPhone®, iPad®, Android™ Phones and PCs
Digital Zoom: 15×
Frame Rate: 25Hz
Infrared Core: Thermal Master High-Sensitivity Sensor
RazorX™: Ultra-Clear algorithm
IQ+ Precision Temp: Dynamic compensation algorithm for temperature drift with intelligent sensing of ambient temperature
Isotherm: A setting that highlights a specific range of temperatures within the thermal image, making them stand out with a distinct color.
Power Consumption: 0.32W
FOV: 40°x30.2°
Size (LxWxH): 59*27*17.2 mm
Material: Aerospace Alloy Body
Plug: Plug extended by 2mm, compatible with most phone cases
Design and features
The attachment is designed to plug directly into the USB-C port of your smartphone. Because it’s USB-C, you can have the camera point either way. The lens bezel can be adjusted to fine-tune focusing, but since the resolution is fairly low, I didn’t really need to fiddle with it.
Other than the focus ring, there are no other physical controls.
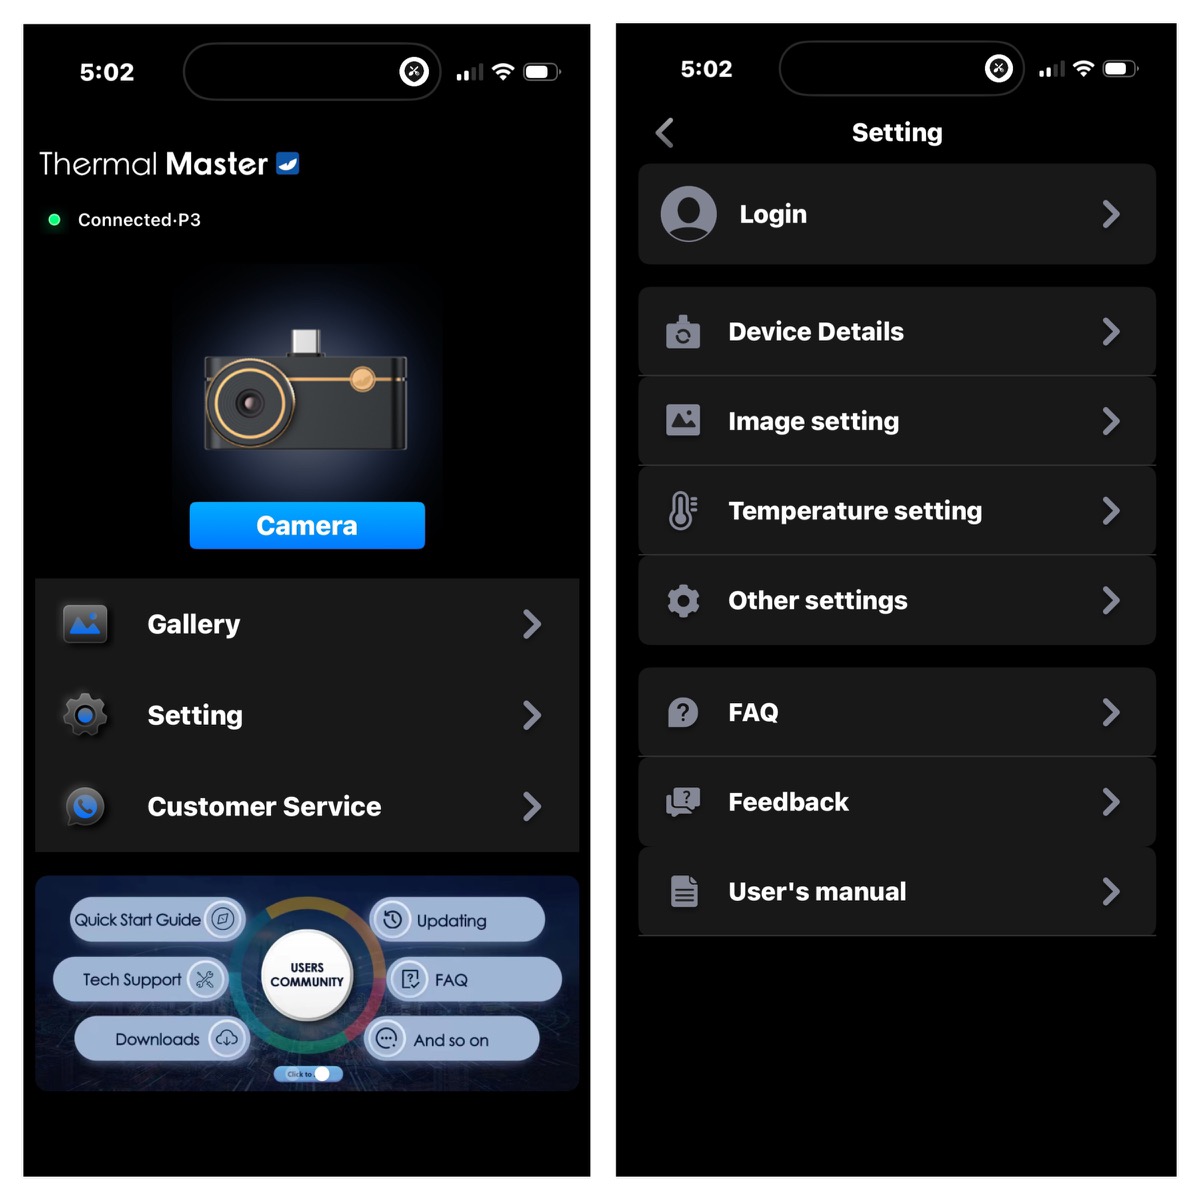
Assembly, Installation, Setup
You’ll need to install the iOS or Android app. The interface is nothing surprising except the alternating banner at the bottom that isn’t quite an ad, but it’s a browser link to other features.
To start, simply press the blue Camera button. No other setup necessary. Sometimes you’ll hear a faint clicking coming from the P3.
Performance
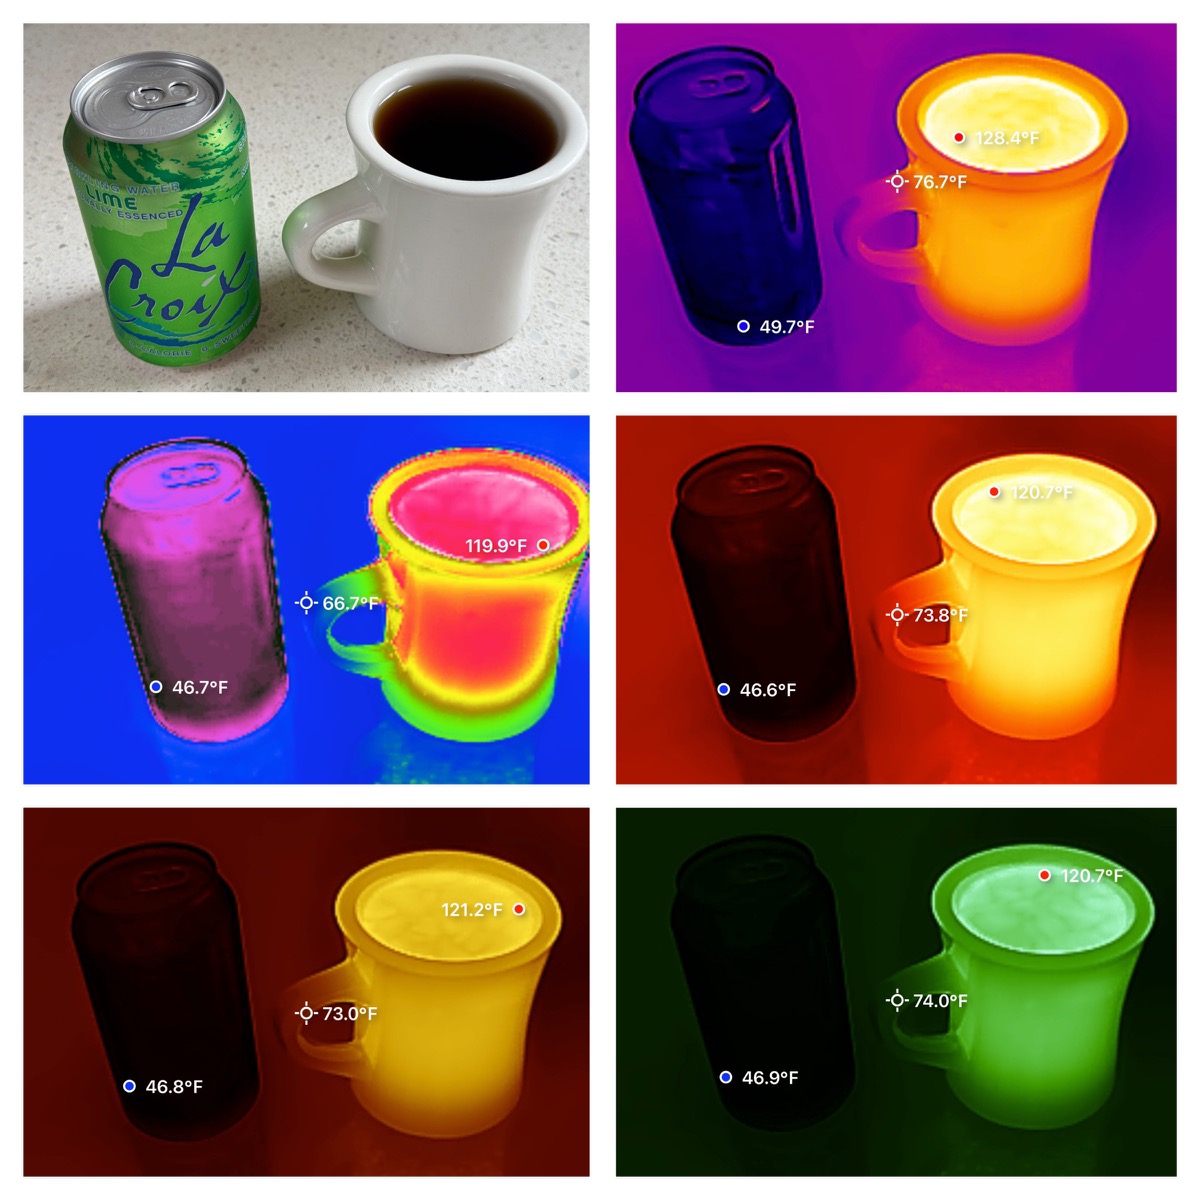
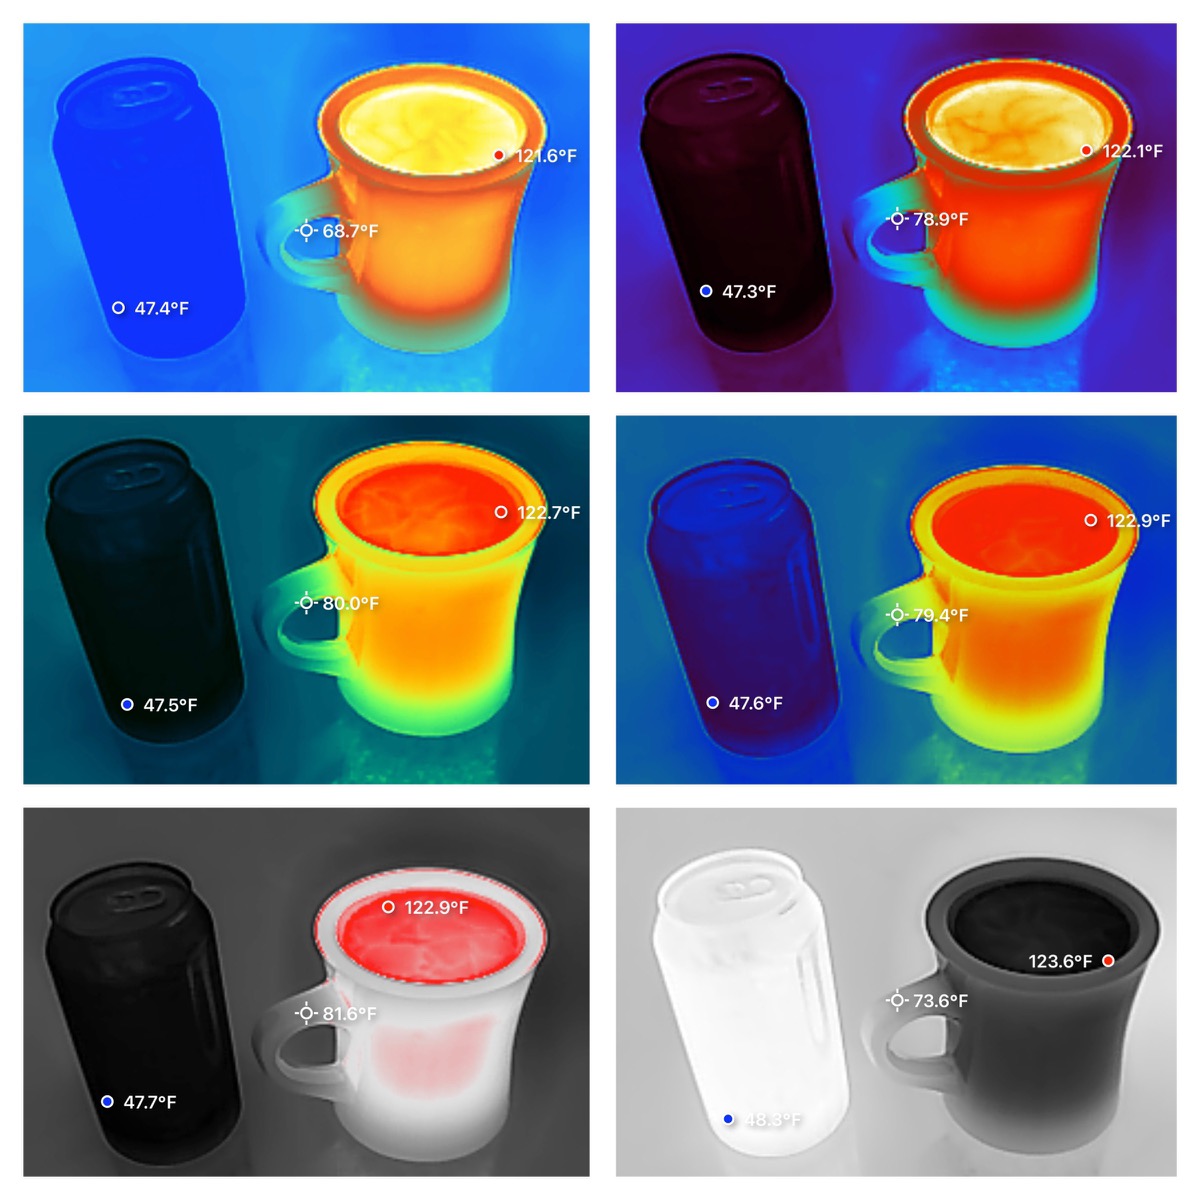
It turns out the P3 has a dozen different color “themes” to choose from. There’s probably one to your liking. Here is a cold can next to a warm cup of coffee. Fortunately, the app has the ability to take snapshots or video clips.
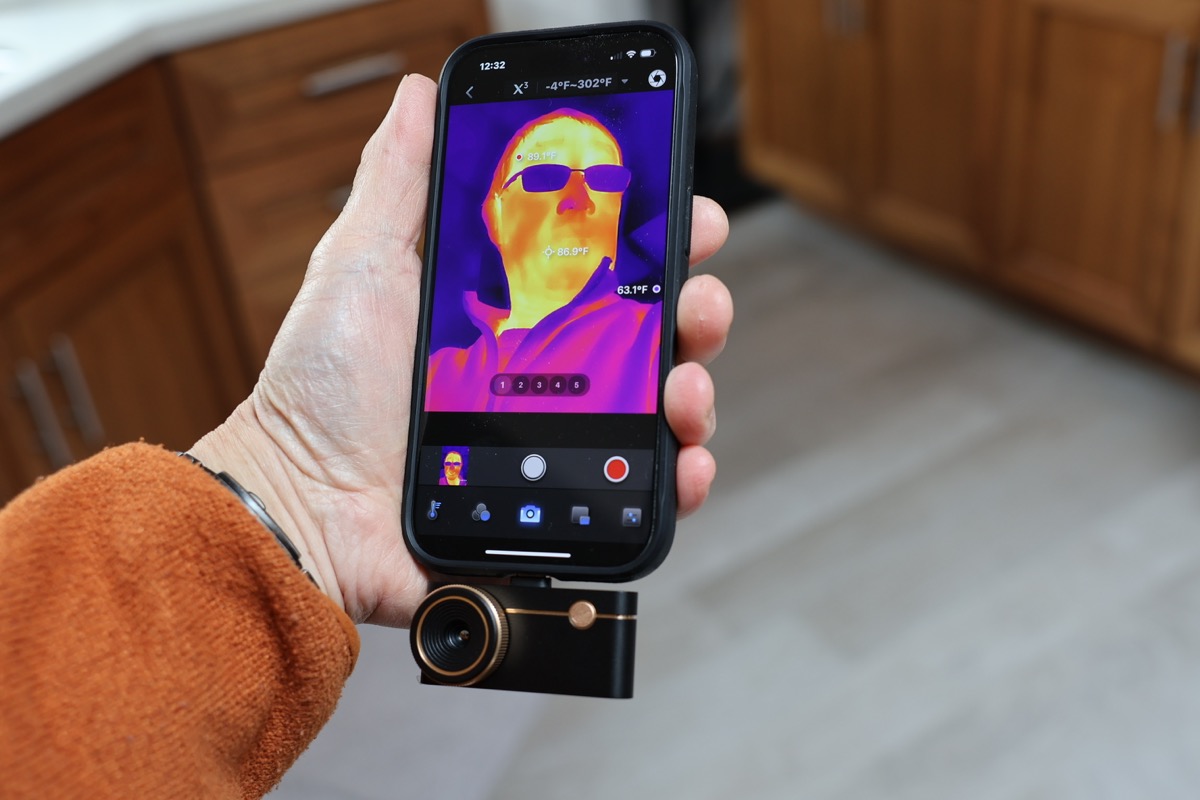
The center open circle with crosshairs is the center of the image, so you can point to what you wish to measure. The blue and red dots jump around the screen in real-time, identifying the coldest and hottest spot in the image.
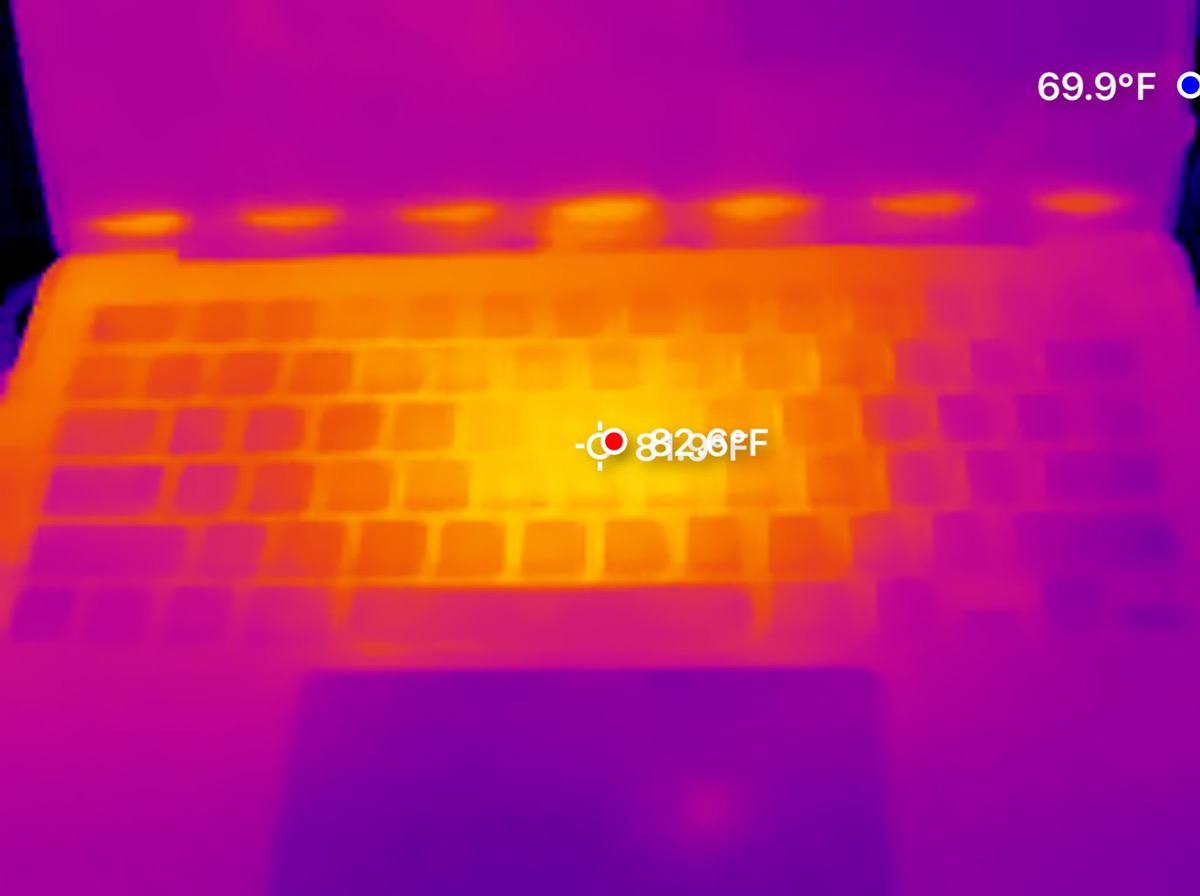
 Does your laptop get excessively hot? Now you can see how much, and exactly where. This is my Macbook Pro at idle. It’s warmest pretty much where i’ve pointed it, and coldest somewhere behind the laptop, in the room itself.
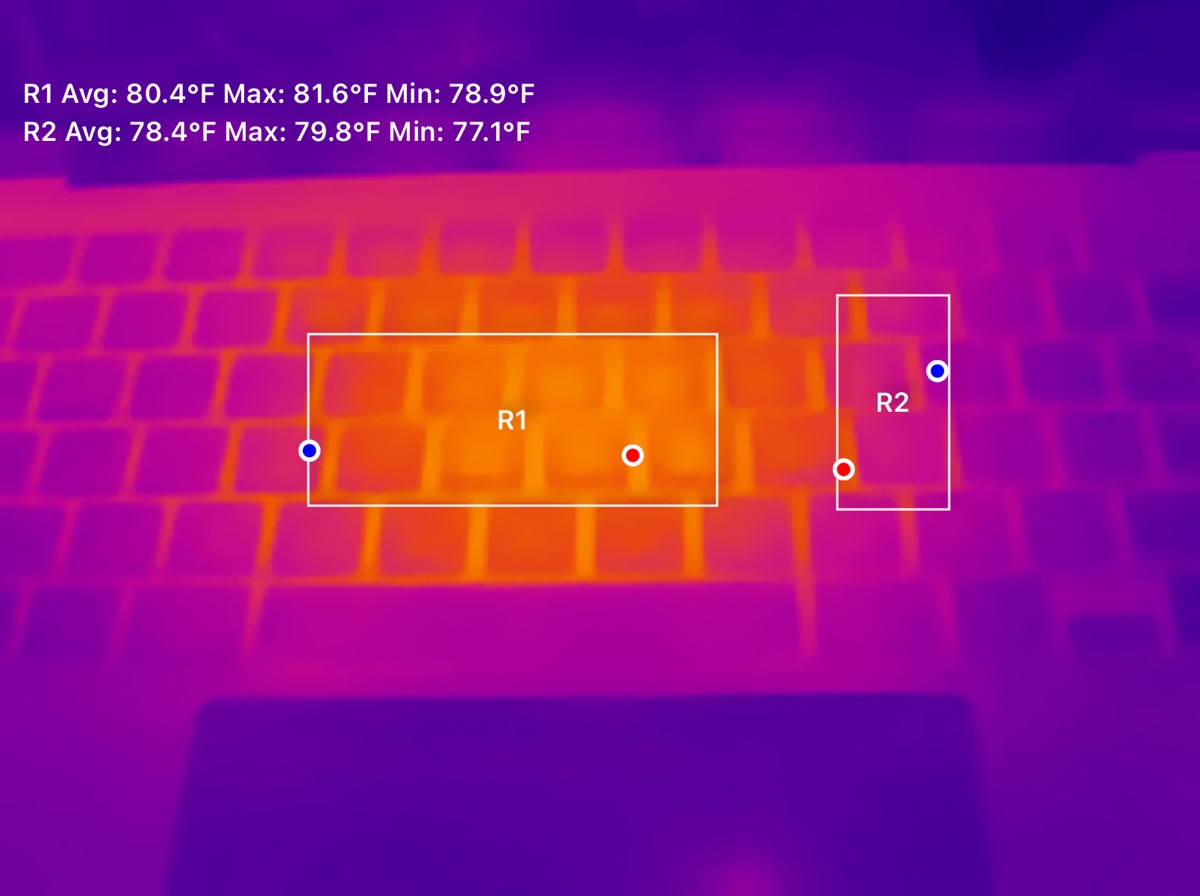
You can measure zones in the shape of straight lines, rectangles or squares. In this example, I’ve drawn two. Each zone has a cold and hot “dot”, and the readings on the top of the screen. Great if you want to measure more than one spot.
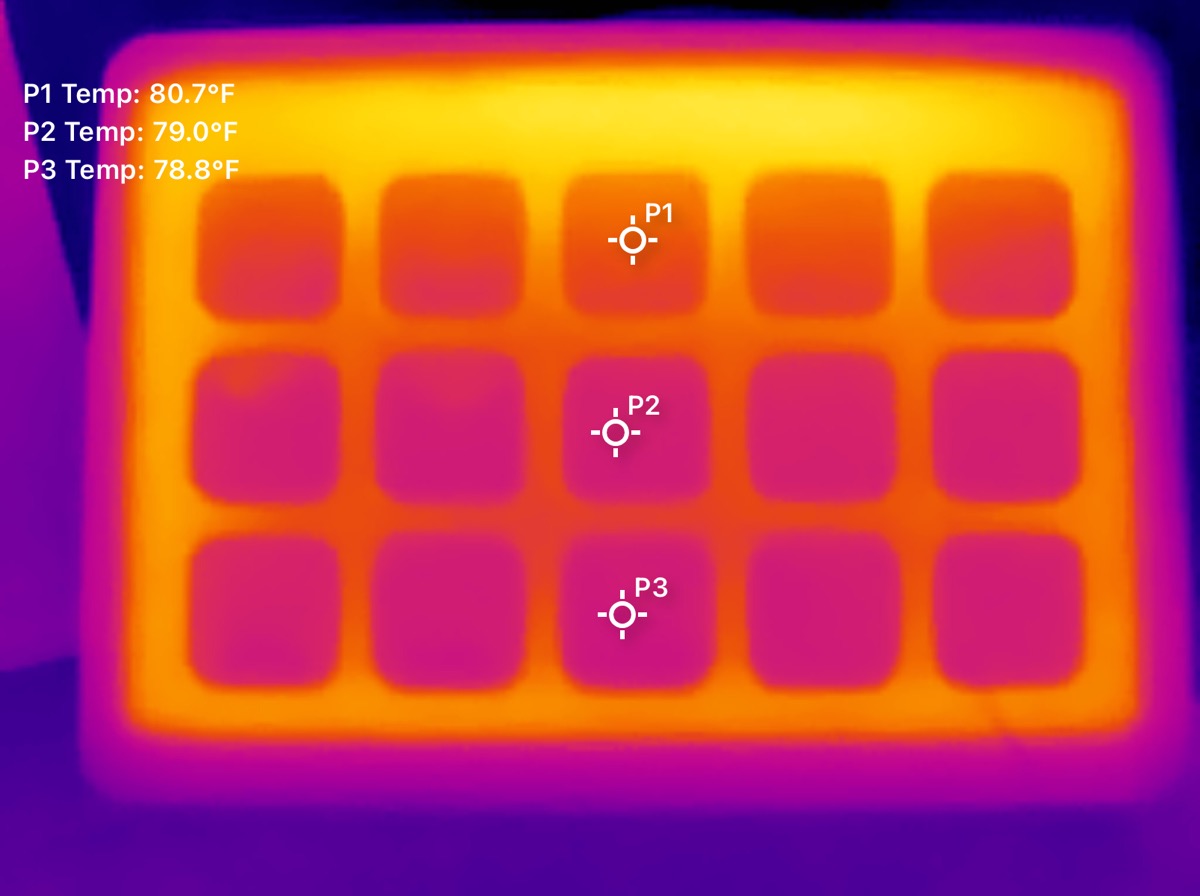
You can also pinpoint more than one spot at a time. Here’s my Elgato Stream Deck. The three points are three buttons.
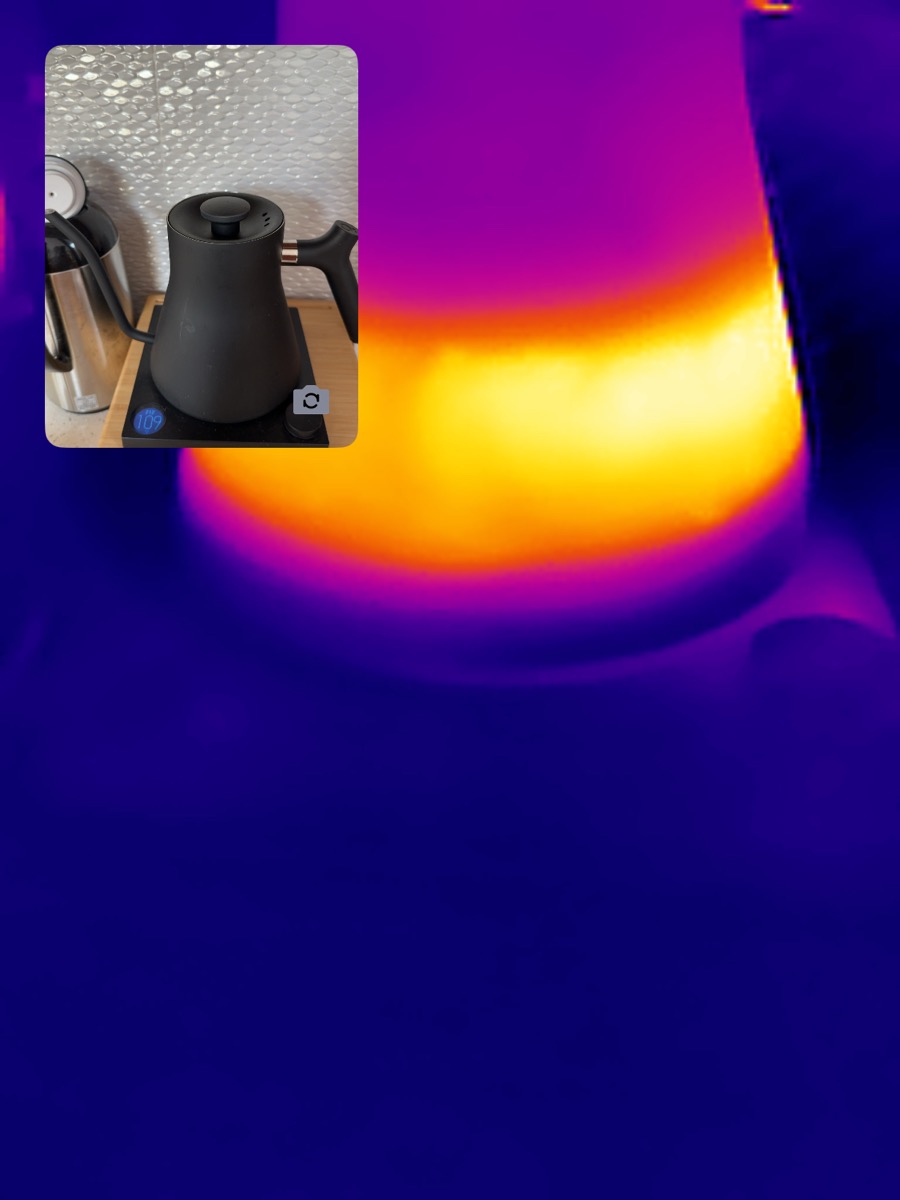
There’s also a feature where you can “picture in picture” what the phone’s normal camera sees. Here’s an electric water kettle. The obvious problem is the parallax error, where the two cameras are just off a little, since they’re placed further apart. This effect is most apparent when shooting objects close up.
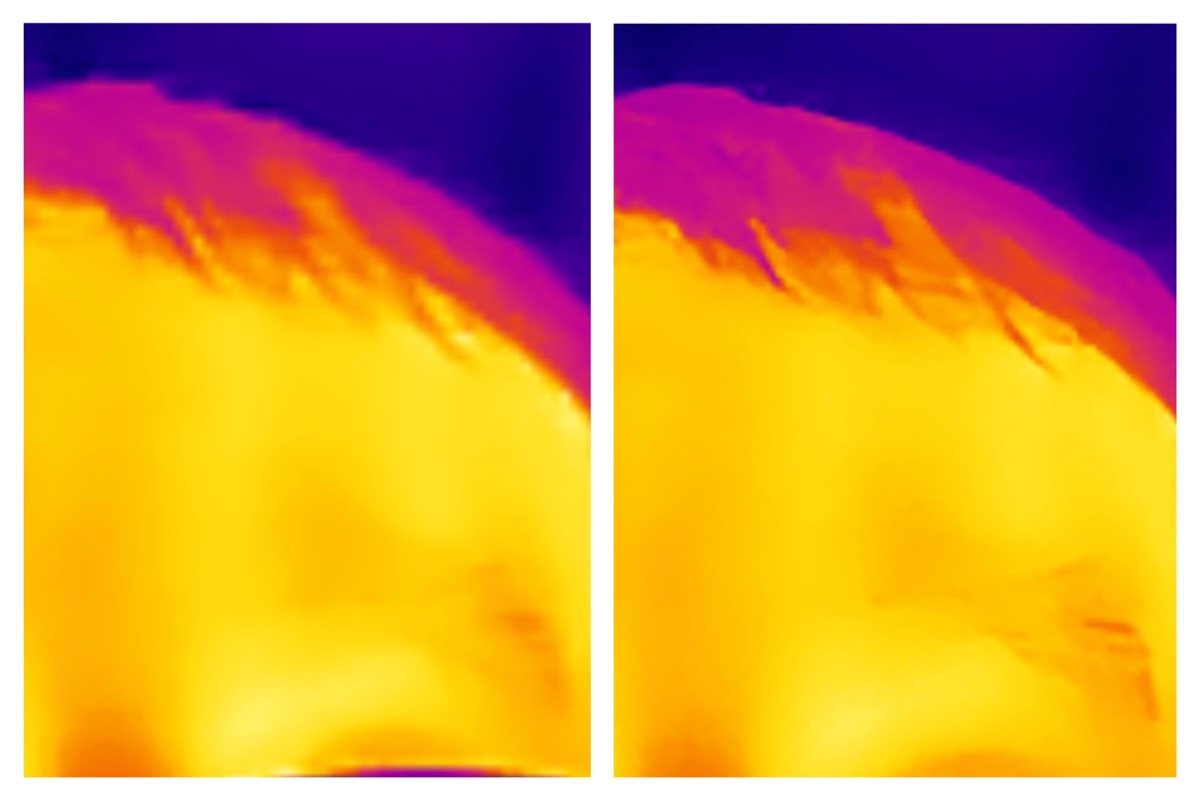
At the top of the screen is a mysterious icon: “X3”. It’s the closest thing to shouting “ENHANCE!” Here’s a creepy selfie of yours truly. Normal is on the left, “X3” on the right. Can you see the difference?
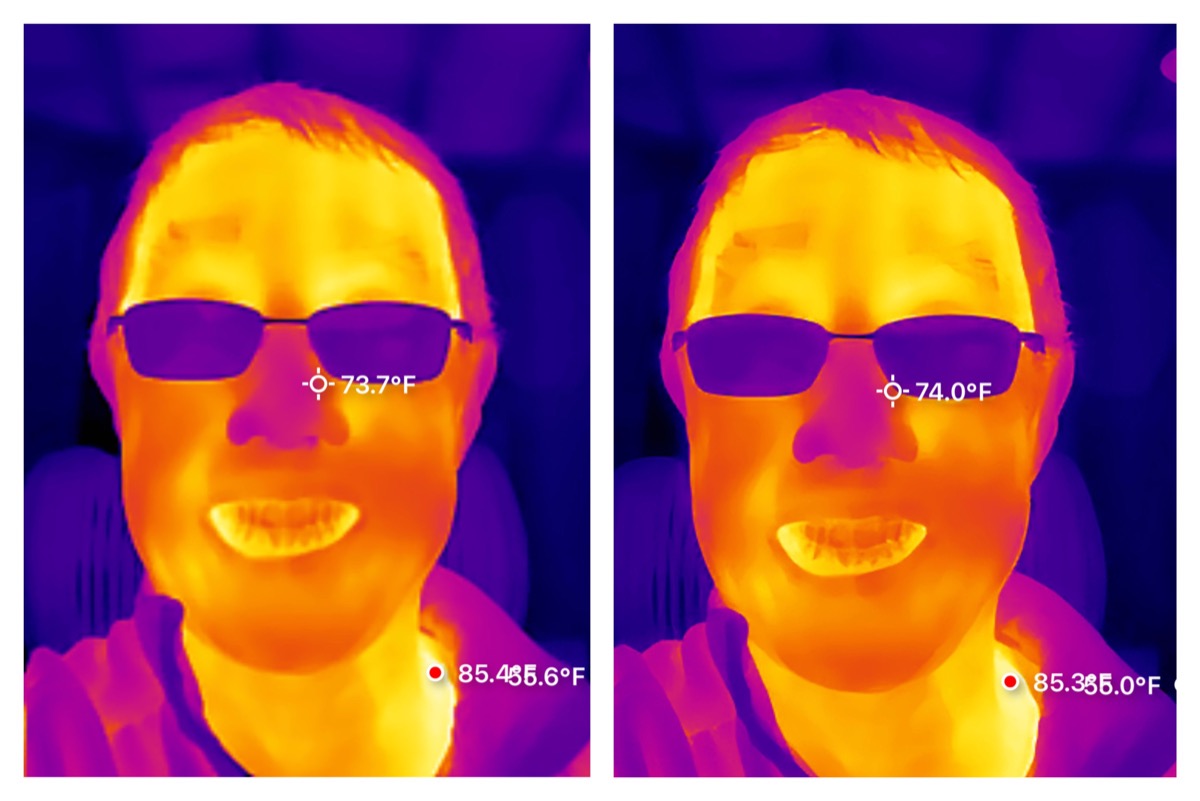
“ZOOM IN!” The effect is more apparent in the finer details, which are just slightly sharper which may be helpful if you’re a pixel peeper.
Final thoughts
I found the Thermal Master P3 very easy to use, in a compact, sturdy package. The zippered case is a nice extra. I did not expect the ability to measure different points or zones at the same time. But let’s face it: In the end, we just all want to see beyond the visible spectrum and pretend to be “Predator”.
What I like about Thermal Master P3
- Compact
- USB-C!
- Fast startup
What needs to be improved?
- The normal camera picture-in-picture overlay could be cool, but the physical distance between the P3 and your phone’s camera can’t be helped.
Price: $349.00
Where to buy: ThermalMaster and Amazon (Save 5% with code TMAMZPD5)
Source: The sample of this product was provided for free by ThermalMaster. ThermalMaster did not have a final say on the review and did not preview the review before it was published.
Check out these other thermal reviews!
- TOPDON TC002C Duo thermal camera review – Turn your smartphone into a thermal camera
- Xinfrared One XH09 thermal camera review – see like an enhanced ninja!

Zip Ties Assorted Sizes(4”+6”+8”+12”), 400 Pack, Black Cable Ties, UV Resistant Wire Ties by ANOSON
(as of March 30, 2026 19:30 GMT -05:00 - More infoProduct prices and availability are accurate as of the date/time indicated and are subject to change. Any price and availability information displayed on [relevant Amazon Site(s), as applicable] at the time of purchase will apply to the purchase of this product.)
Gadgeteer Comment Policy - Please read before commenting
Thermal master store link is inactive
It’s fixed now: https://thermalmaster.com/products/thermal-master-p3-pcb-master
Thought there might be a slow leak behind the wall, but the surface looked dry. Checked the area with the P3 and spotted one short section of pipe running just a few degrees cooler than the rest. It was a subtle drop, but the readings were steady and clear enough to trust. Took the panel off, and sure enough, the insulation had slipped down. Glad the camera picked up on it, because you’d never feel that kind of difference by hand.
I used to borrow a FLIR One Pro from a coworker whenever I needed to check PCB heat issues, but the image was always too fuzzy for tiny stuff. You could tell something was warm, but not which component exactly.
Got the P3 recently and gave it a try on the same kind of job. I was actually able to tell which resistor was heating first, and even saw a thin line of heat leading to a bad cap. I didn’t expect this much detail from a phone thermal camera, but the image is just sharper, no question.
For me, the P3’s usability is definitely a plus. The interface is very straightforward, I barely had to look at the manual, and adjusting the temperature range or switching modes is really simple. I’m usually not the type who likes to mess around with devices, but this one feels effortless to use and the design comes across as very user-friendly.
USB kept cutting out on a COMe board during file transfers. Scanned it with the P3 and noticed a small hot spot on one corner of the USB controller. Dialed in the focus and saw a thin thermal line pointing right to one BGA pad. You don’t usually catch that kind of detail unless you’re using something with over 500 IR resolution. Reflowed that area and it’s been solid since.