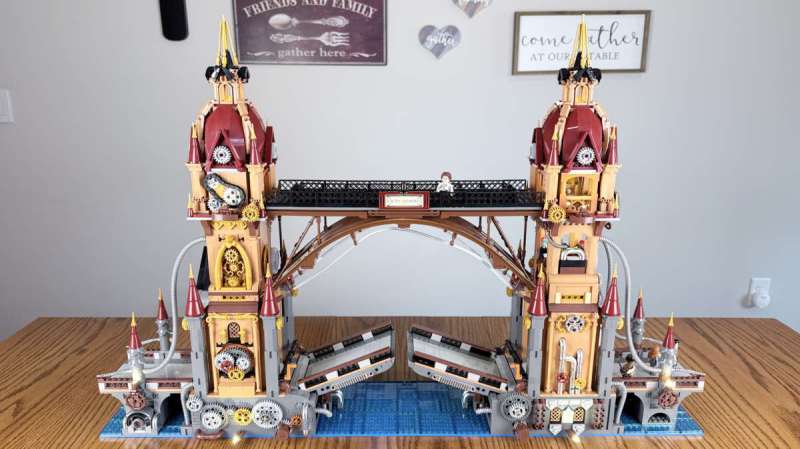
REVIEW – Funwhole has been on a tear lately, recently releasing a wide variety of building block sets with lights. In my personal opinion, they are the #1 competitor to LEGO, and they continue to release great sets in a variety of themes. One of the newest sets in their Steampunk series is the City Bridge.
What is it?
The City Bridge is a massive, 3170-piece bridge that looks like London’s famous London Bridge but re-imagined for a steampunk world. It is currently Funwhole’s largest set — it’s over 32 inches wide – and the pieces are mostly in tones of brown, red, and gray. It features their trademark lights and has a working drawbridge that can be manually raised and lowered; there are also 9 little pot-bellied mini figures.
What’s included?
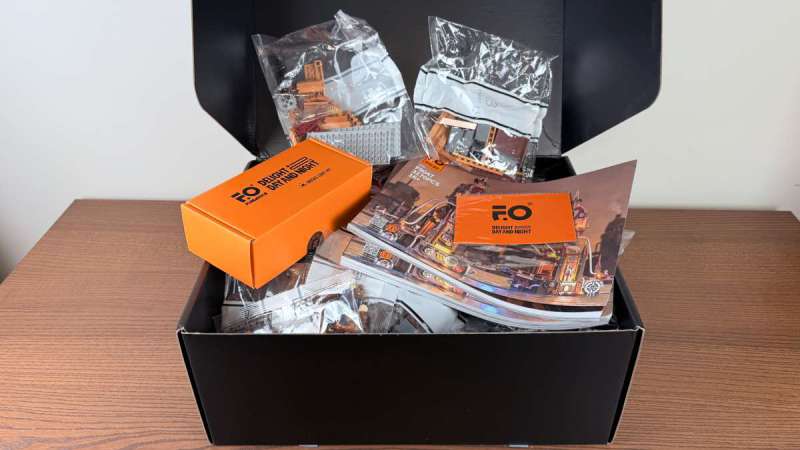
The following items are included:
- 3170 pieces
- 27 LED lights
- Power box and USB connector
- 2 manuals
- Brick separator
- Tweezers for the lights
- Support card
Design and features
When it comes to the design of LEGO alternatives, there are a handful of questions that always need to be answered:
Are they compatible with LEGO? The building blocks are absolutely compatible with LEGOs.
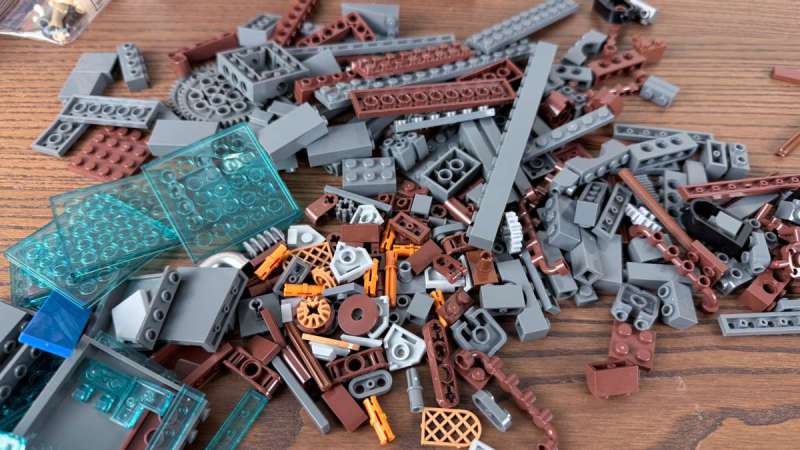
Are they of the same build quality? These pieces are very good. I did not see any ways in which they were substantially different from LEGO pieces.
Do they fit tightly, or do they come apart easily? These pieces consistently fit together perfectly; nothing was loose or fell apart.
Are they cheaper in cost than LEGO? Lower cost is one of the best reasons to buy building blocks from someone other than LEGO. I did a quick search on LEGO’s website to find similar-sized buildings and calculated their cost per brick:
- The X-Men Mansion is 10.7 cents/brick.
- The Sanctum Sanctorum is 6.6 cents/brick.
- The Sanderson Sisters’ Cottage is 7.5 cents/brick.
Funwhole’s set is only 6.3 cents/brick, anywhere from 16 to 41% cheaper. This comparison shows that this set is another good deal, especially since it includes lights, something LEGO has only recently started to include.
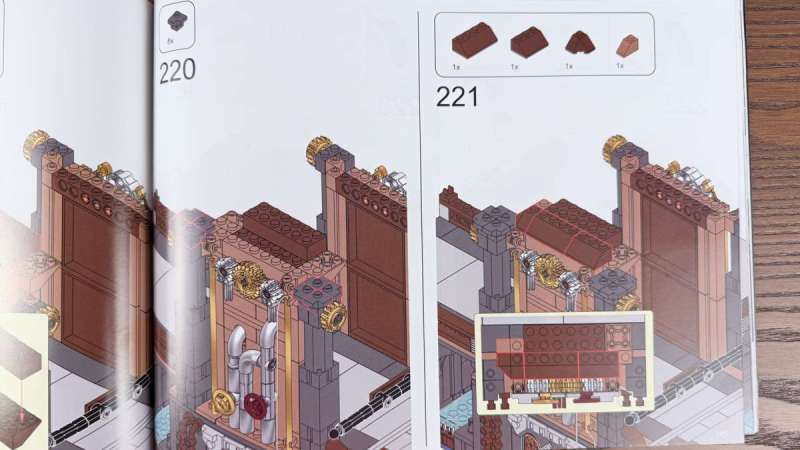
How do the instructions compare? Like all of Funwhole’s manuals, this one is well-written and easy to follow. As there are so many pieces, Funwhole split the instructions into two books. Funwhole is careful to limit the number of bricks added on each page, and new additions are highlighted in red to make them easy to find. I appreciate that they are especially careful when it comes to adding the lights and wires. In some pages, such as the one above, Funwhole uses a top-down view to make it easy to see where some pieces go. LEGO fans will find it easy to build this set with these instructions.
Assembly, installation, and setup
This set arrived in a mammoth-sized box filled with so many little plastic bags. Most of them were labeled from 1 to 15, matching the major sections in the manuals. There were also separate bags for the minis, the lights, the larger baseplates, and some of the tubing.
The first manual began with a backstory about the Industrial Revolution. It recommended that I test the lights before building and showed me how to use the tweezers to connect the lights together. Like all of Funwhole’s lights, the connectors are very small and the wires quite fragile. Sets like this, or at least the steps with lights, are not for young builders.
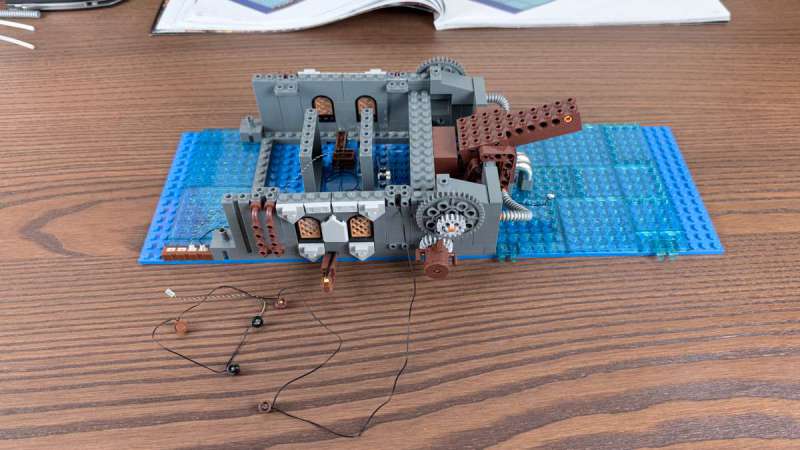
Section 1 is the river and bottom floor of the first tower. I was pleased to find that the base plates were all flat, thus avoiding a problem that I found with Funwhole’s Ski Lodge. The wiring for lights is part of this foundational section, and I was reminded again of how thin and fragile the wires are. Though the designer of this set does a great job using conduits of various types to run the wires, they do pinch the wires with bricks in a few sections, including this one, something of which I am not a fan. A large portion of this section is using some interesting Techniq pieces to build out the drawbridge mechanism, which can be used to raise and lower the bridge.
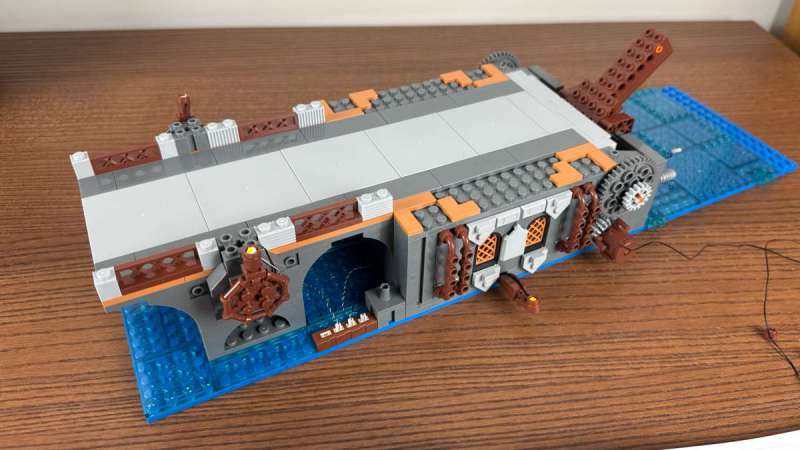
Section 2 is the road for the first tower. There are a lot of hollow spaces under the road, but the base was still very solid and sturdy. The wires were well hidden. For the first time, some of the steampunk look began to show.
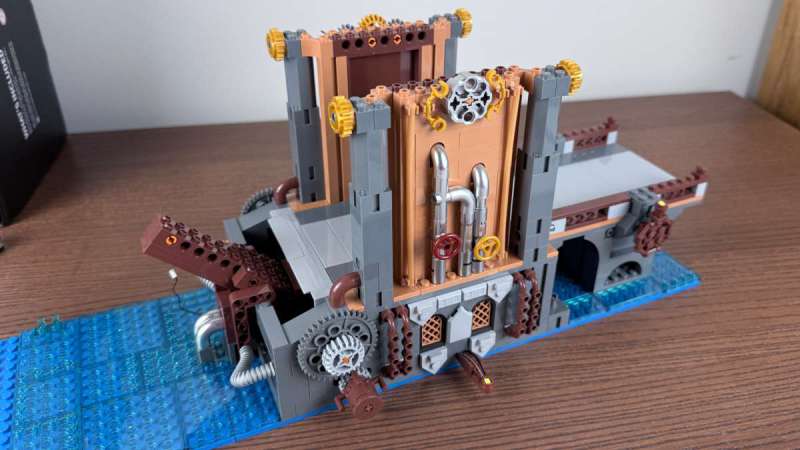
Section 3 is the walls for the first tower. The designer used one of the hollow tubes running up the sides to hide the wires, a very clever trick. In this section I found a 1×2 piece with a hole to be missing, the only piece that I missed in the set; it’s a fairly common piece, so I substituted one from my own collection and moved on. Even at this point in the build, I can begin to see how tall it will be.
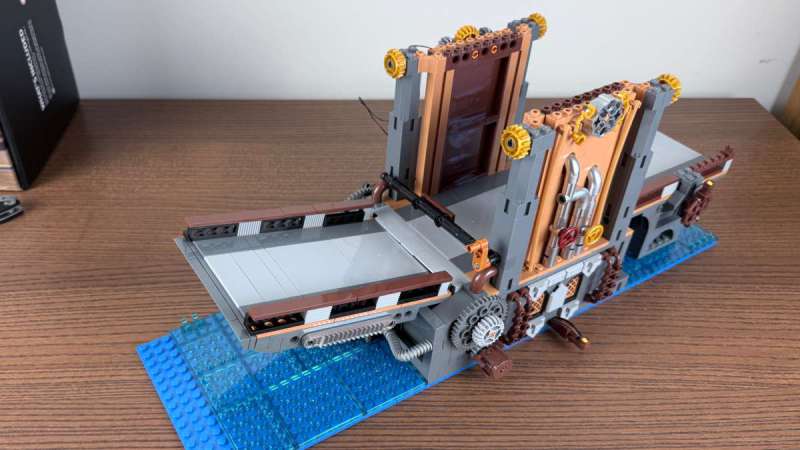
Section 4 is the drawbridge for the first tower. I like the roadblock that stops cars from driving onto the bridge; like the drawbridge itself, it is manually operated and can be raised or lowered. The drawbridge is well built and won’t come apart even when played with by kids.
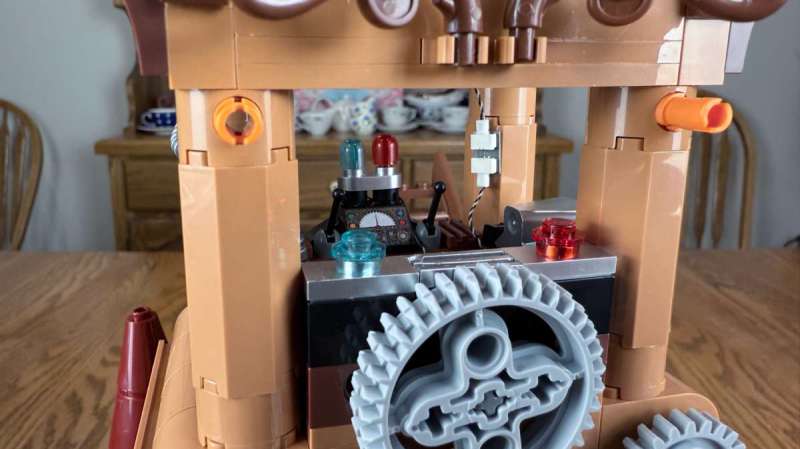
Section 5 is the second level of the tower. I love the controls in the small chamber here, some of which will light up. It’s the perfect place to put a minifig whose job it is to raise and lower the bridge.
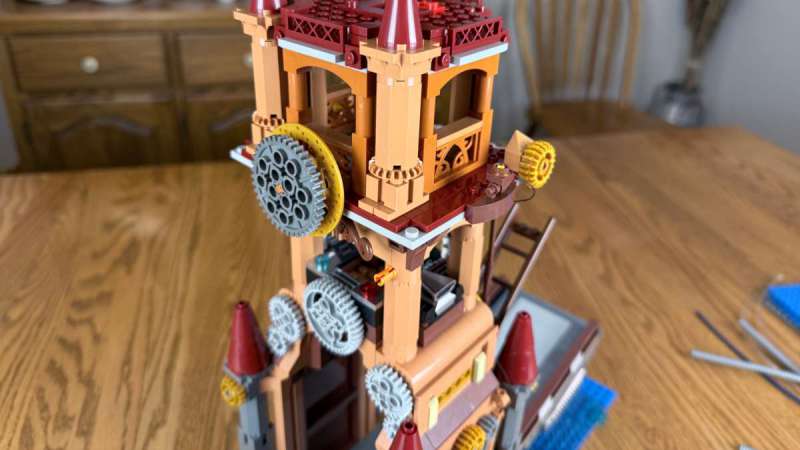
Section 6 is the third level of the tower. Funwhole did a great job planning ahead on how to run the wires all the way up here for the lights. The steampunk decorations on the outside of the wall are looking ornate, and I can’t wait to see how the lights look on all these gears.
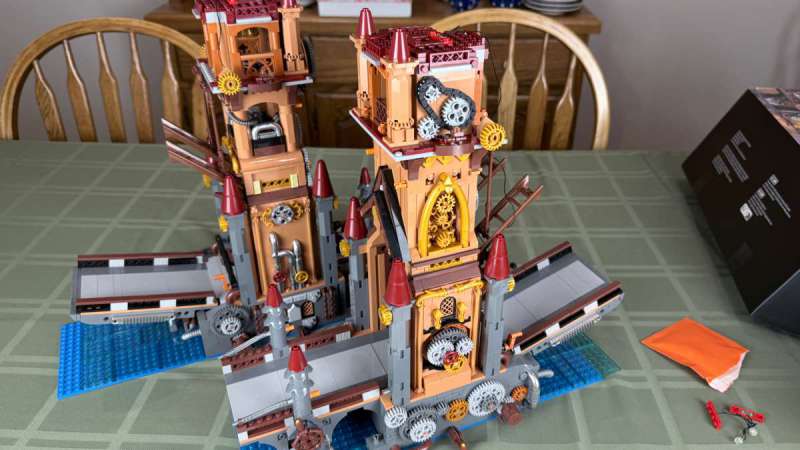
Sections 7 through 12 worked on the second tower. At this point a lot of the building for the core structure was repetitive from the first tower, as I would expect. I was pleased to see, however, the steampunk additions to the outside of the tower were different from the first one. At this point I had two towers with drawbridges that were ready to be connected together and to have their top level completed.
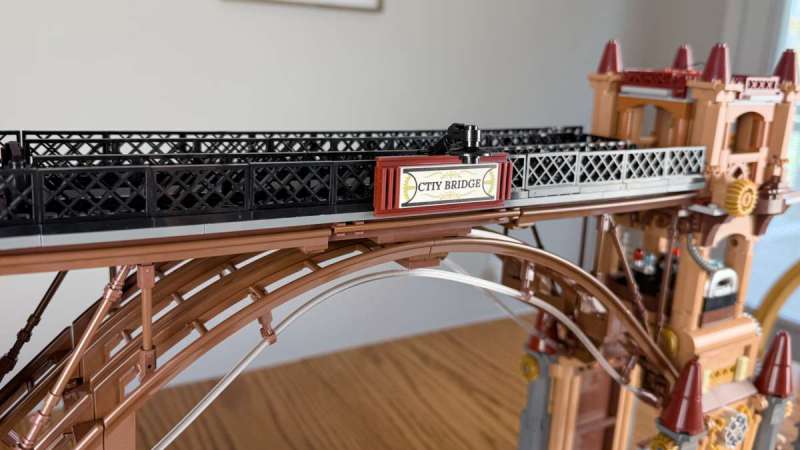
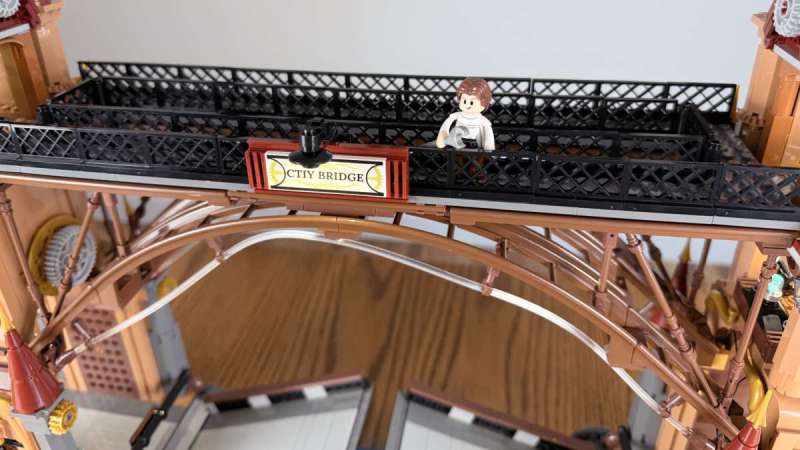
Section 13 connected the two towers and built the walking bridge across the top. I love the arched span that holds up the middle of the bridge. The whole thing is very well supported, and there’s no chance of it collapsing. Though I don’t have a picture of it, the designer connected the wires from the first to the second tower via a blue conduit that runs along the back down by the river, a clever design.
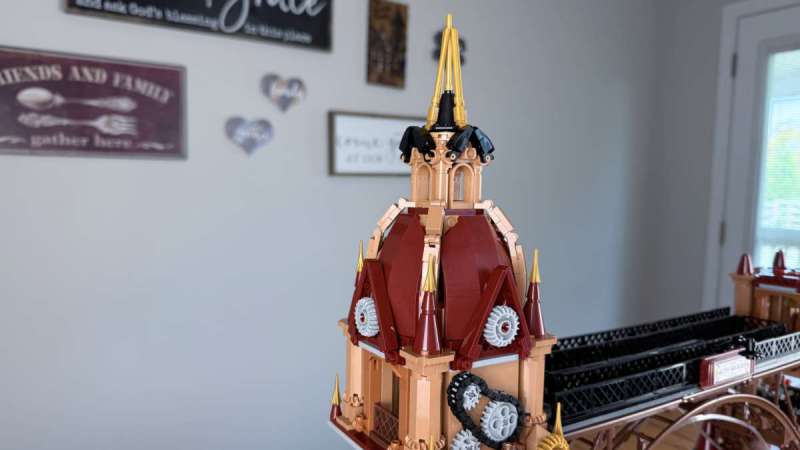
Sections 14 and 15 finished the tops of the towers and added a few more details. I was expecting a much simpler roof, but the designer went all out with the fancy details.
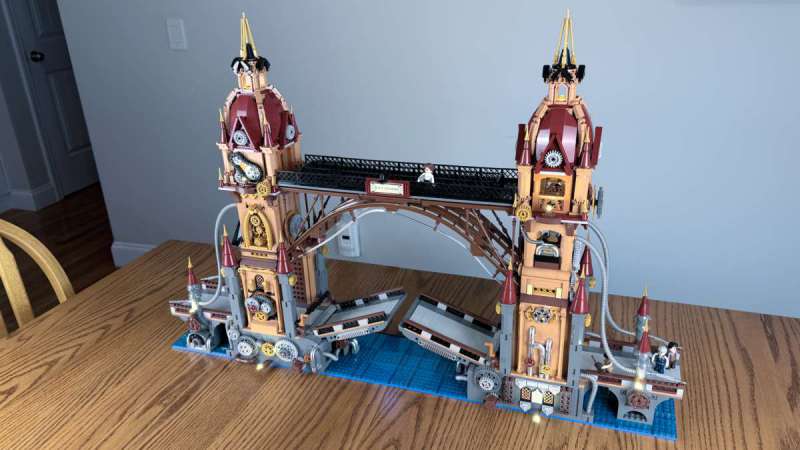
At this point, the Funwhole Steampunk City Bridge is done. It is a large set with lots of details that wants to be connected to other steampunk and town sets.
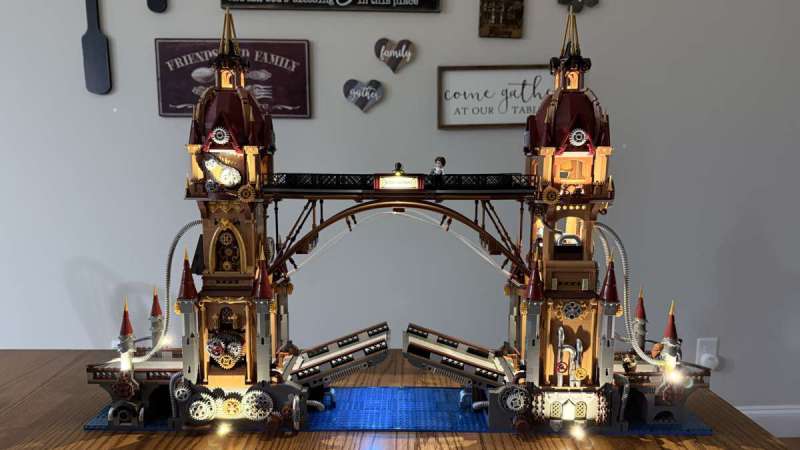
The lights look amazing. Every part of the bridge, inside and out, have lights. I especially love all the lights that are pointed up on the exterior walls, something that is commonly done for buildings in big cities. The only lighting feature that didn’t really work was the clear tubing that runs underneath the arch of the top bridge, which can be seen in the picture above. There are four lights, two on each side, that shine into the tubes in order to light them up, but the resulting effect was minimal. I wound up removing the tubes and the connectors that hold them and simply pointing the lights upward to the bottom of the bridge, and I think that looks a lot better.
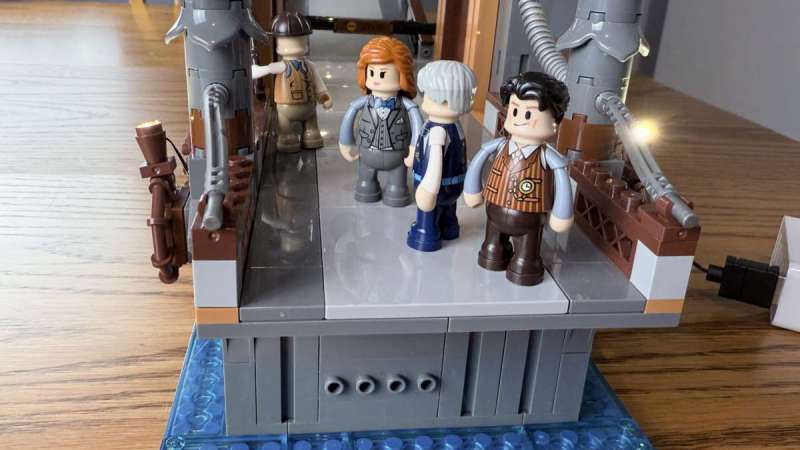
I really like this set, but there are a couple things to be aware of. One, the ends of the bridge do not connect to the ground; they sit about 2.5 inches up in the air. If you want to use this set as part of a bigger town, you’ll need to build some sort of ramp to get up there. Two, even though the set is designed to drive a small car across the drawbridge, there are no vehicles in this set. Funwhole does have a Steampunk Hot Rod that would be good for this purpose.
What I like about the Funwhole Steampunk City Bridge
- Massive set
- Great construction
- Lots of details and lights
- Working drawbridge
- Excellent manual
What needs to be improved
- Nothing
Final thoughts
The Funwhole Steampunk City Bridge is a large building block set that recreates the London Bridge for a steampunk world. It has two towers and both a drawbridge and a walking bridge that connect them. In typical Funwhole style, there are a lot of LEDs that light everything up. If you’re looking for a large bridge to add to your city, I highly recommend taking a look at this fabulous set.
Price: $199.99
Where to buy: Funwhole (Save 10% with code: GADGETEER)
Source: The sample for this review was provided free of charge by Funwhole. Funwhole did not have a final say on the review and did not preview the review before it was published.


