REVIEW – My vehicle doesn’t support CarPlay or Android Auto and it doesn’t support aftermarket systems because the built-in display is so integrated into the rest of the vehicle. I thought I’d just have to wait until I purchased another vehicle to be able to use CarPlay until I was given the opportunity to review the Aoocci V30(S) Smart Portable Apple CarPlay Display. If you can’t add an aftermarket CarPlay or Android Auto unit to your vehicle (or don’t want to go through the hassle), you might want to consider this display as an alternative.
What is it?
The Aoocci V30(S) is a dash-mountable display that supports Apple’s CarPlay or Google’s Android Auto for displaying maps, controlling music or podcast audio, and make and receive phone calls. In addition, it has a built-in dash cam and comes with a second camera for mounting at the rear of your vehicle. It also supports ADAS Warning Systems for warning about lane departure or potential collisions.
What’s included?
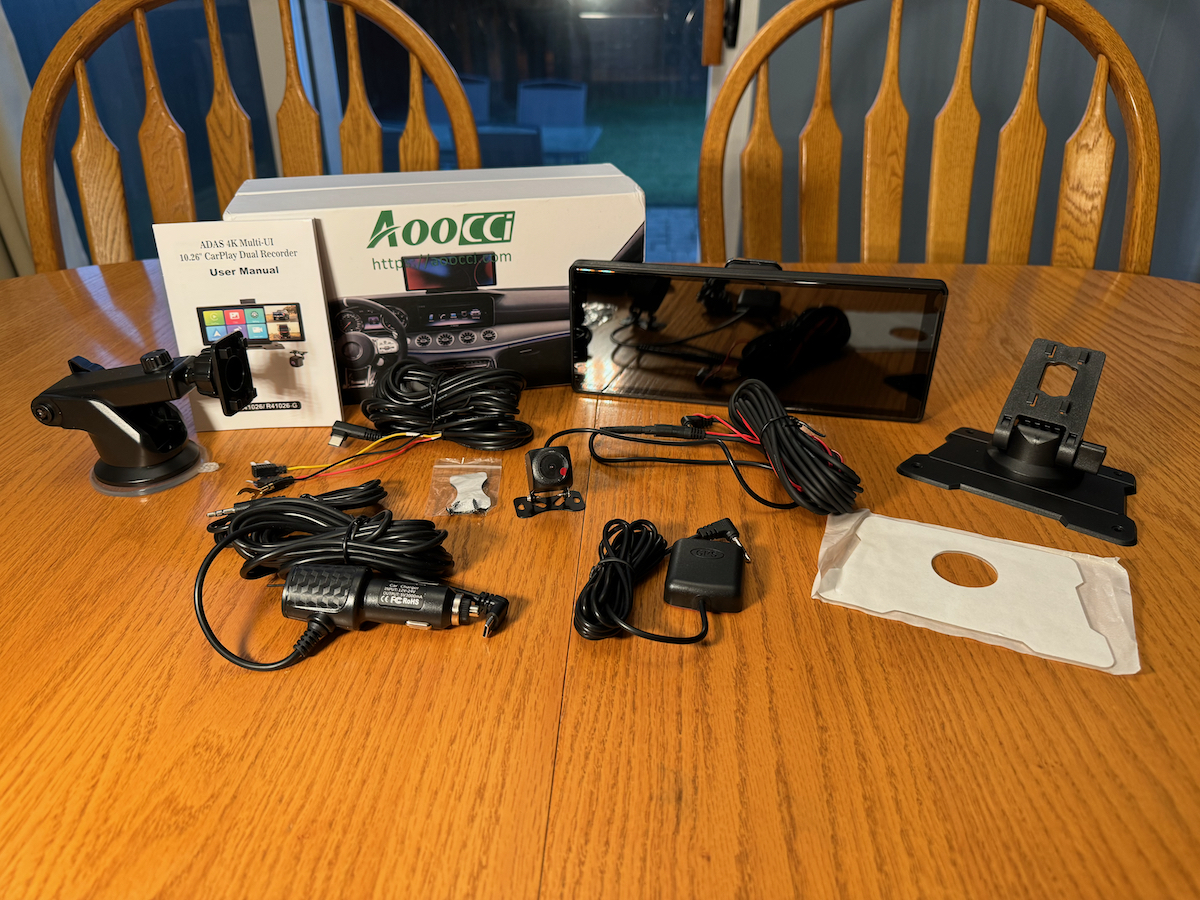
V30S Package
- Display with Built-in Camera
- Car Charger
- Stand Bracket with Double Sided Adhesive
- Suction Cup Telescoping Mount
- GPS cable
- AUX cable
- ACC cable
- Rear Camera with Cable
- User Manual
- Pair of Screws
- (TF/MicroSD card not included)
Tech specs
Click to expand
- Software: Linux
- Language: Simplified Chinese / Traditional Chinese / English / Russian / Spanish / French / German / Japanese / Korean / Arabic / Italian / Portuguese
- Video Display: 10.26 inch HD IPS touchscreen, 1600*600
- Screen saver: Can be set off / 10 seconds / 30 seconds / 1 minute
- Smart connection:
- Wi-Fi: Supports Apple CarPlay / Android Auto / Apple AirPlay / Miracast
- Bluetooth: Bluetooth audio
- Audio
- Microphone: Supports voice control, menu can be set to turn off
- Output: Three modes: built-in speaker / Bluetooth / FM transmission
- Power Input: Type-C power cord / 12-24V input / 5V output integrated line/cigarette lighter
- Dimensions:
- Height: 3 3/4 in (9.5 cm) (additional 3/4 in / 1.9 cm for the pop-up camera)
- Width: 9 5/8 in (24.45 cm)
- Depth: 1 in (additional 7/8 in / 2.2 cm for the camera bump)
- Working temperature: -4-149° F (-20°-65° C)
Design and features
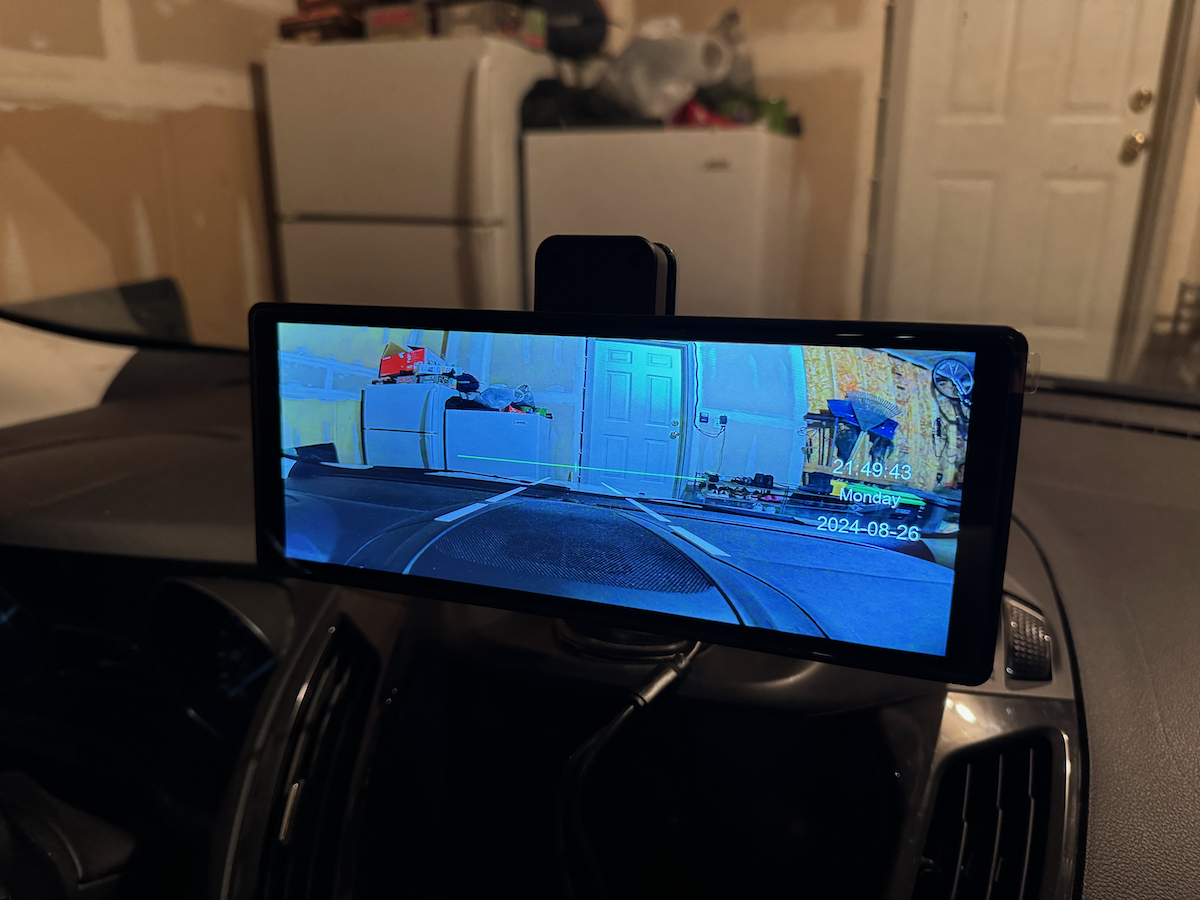
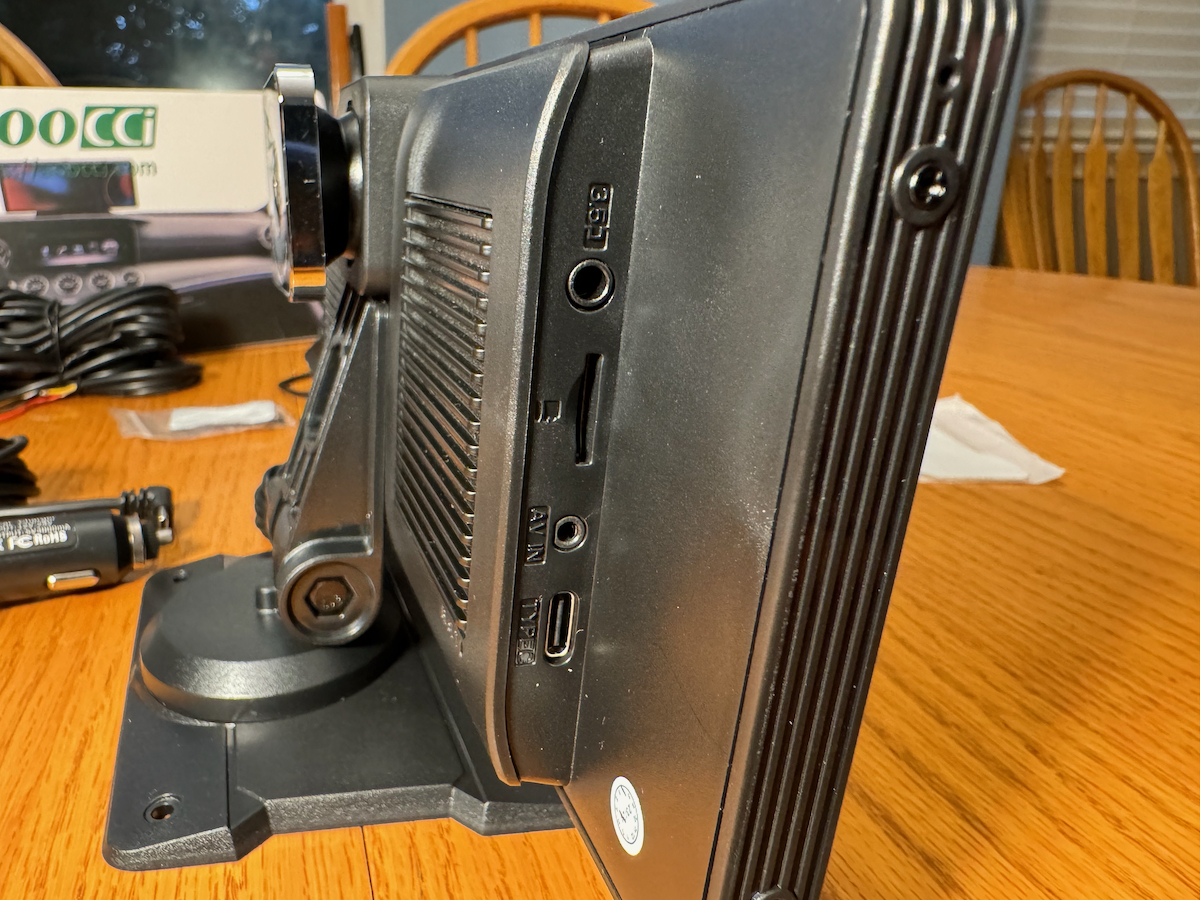
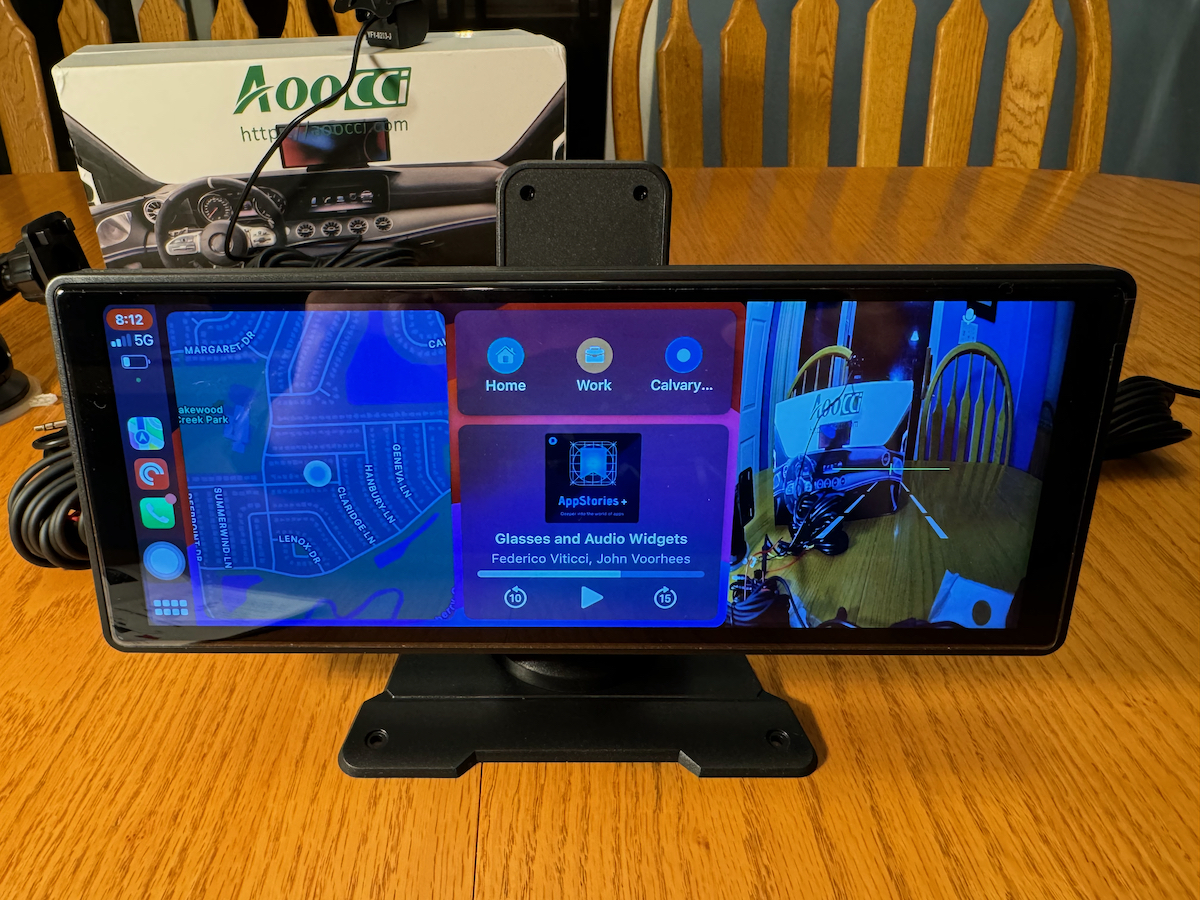
The Aoocci V30(S) Smart Portable Apple CarPlay Display is a widescreen display, approximately 10 x 4 x 1 inches. The display ratio is more similar to an ultrawide computer monitor vs an HD 16×9 display. The map or other apps can fill the whole screen or it can be put in split mode with the map display on the left (or right, depending on your country) 3/4 of the screen, and one or two camera feeds on the rest of the display. The rear left of the display has connectors for USB-C power input, AV In (for the rear camera), a TF/MicroSD card slot, and a 3.5mm aux output jack. Around the back on the same side is a small Reset hole, which presumably resets the display back to factory default settings, although that’s not specified in the manual. On the top rear there is a power button – a 3 second press will turn the power on or off; a short press while the display is powered on will turn the screen off but not fully shut it down.
The top center of the back of the display holds the front camera. By default it sits flush with the top of the display but it can be raised up by about 3/4” to raise the perspective just a little bit. The camera also rotates on its mount, allowing you to adjust the point of view including the height, the left-to-right rotation, and vertical tilt.
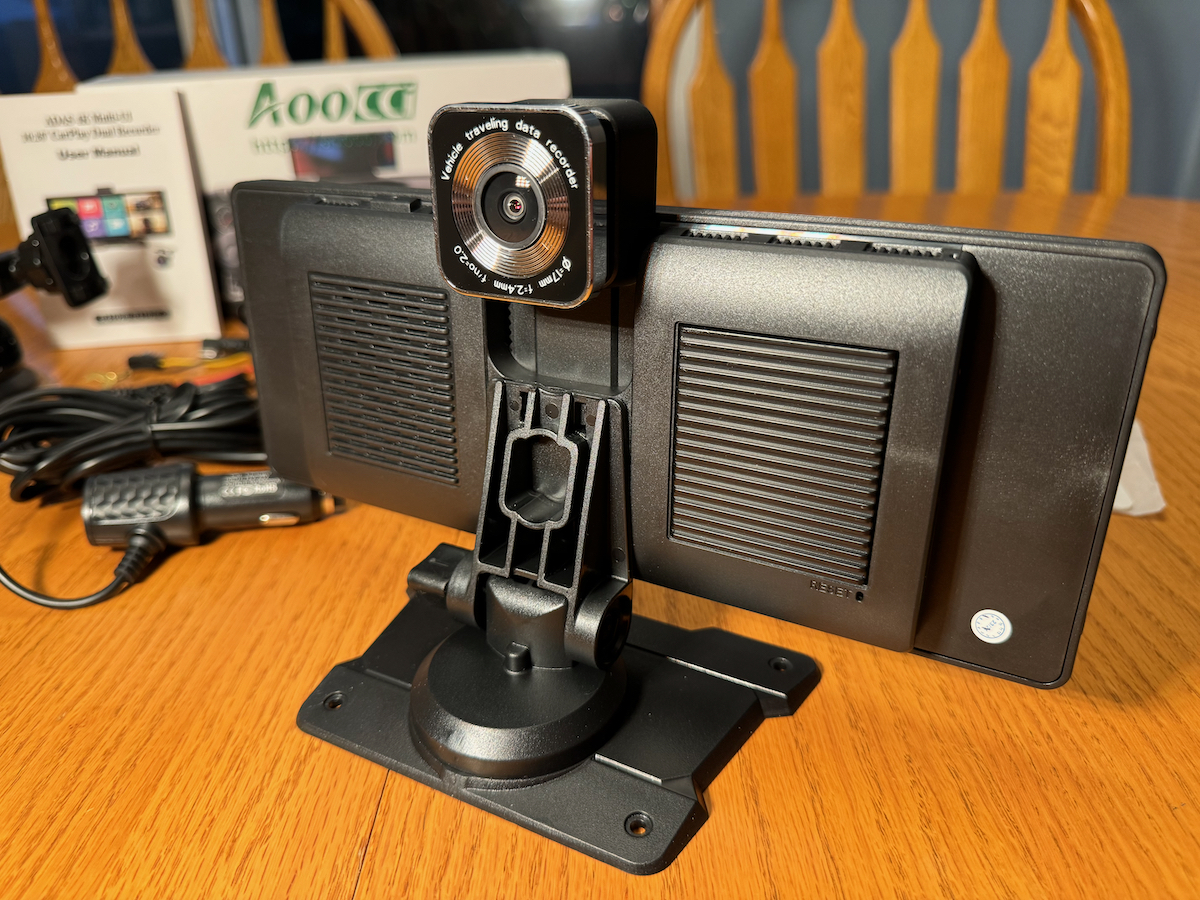

There are three ways to mount the display, depending on your vehicle and your preferred setup. There is a suction cup mount with a telescoping arm that can be stuck to the windshield or dashboard. This mount allows for vertical adjustment as well as rotation and tilting the display toward the driver. The third mounting option is a fixed dashboard mount, which has a flat bottom approximately 4” wide at its widest point, which allows for vertical tilt and horizontal rotation toward the driver. There is also a sticky pad cut to the shape of this mount, which can be stuck to the bottom of the mount and then stuck to the dash for a more permanent setup.
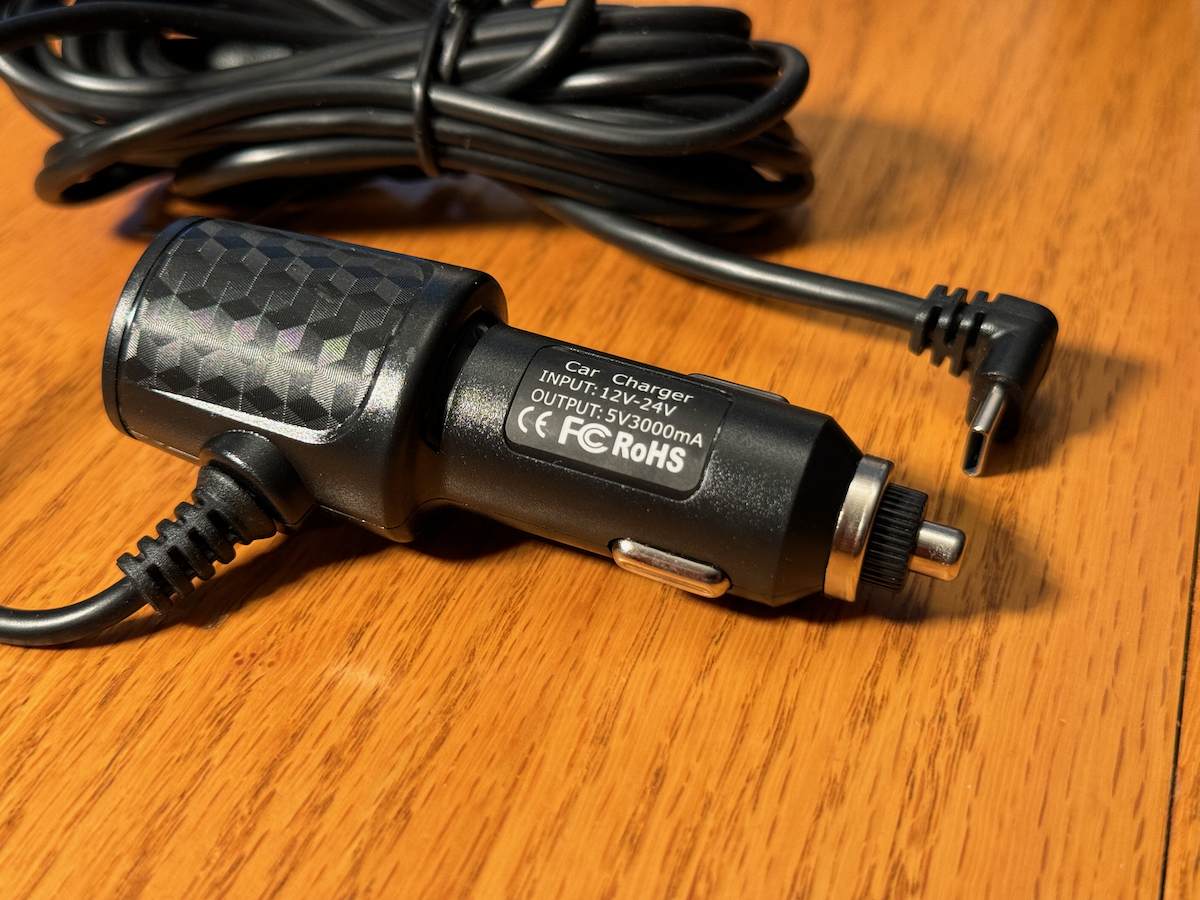
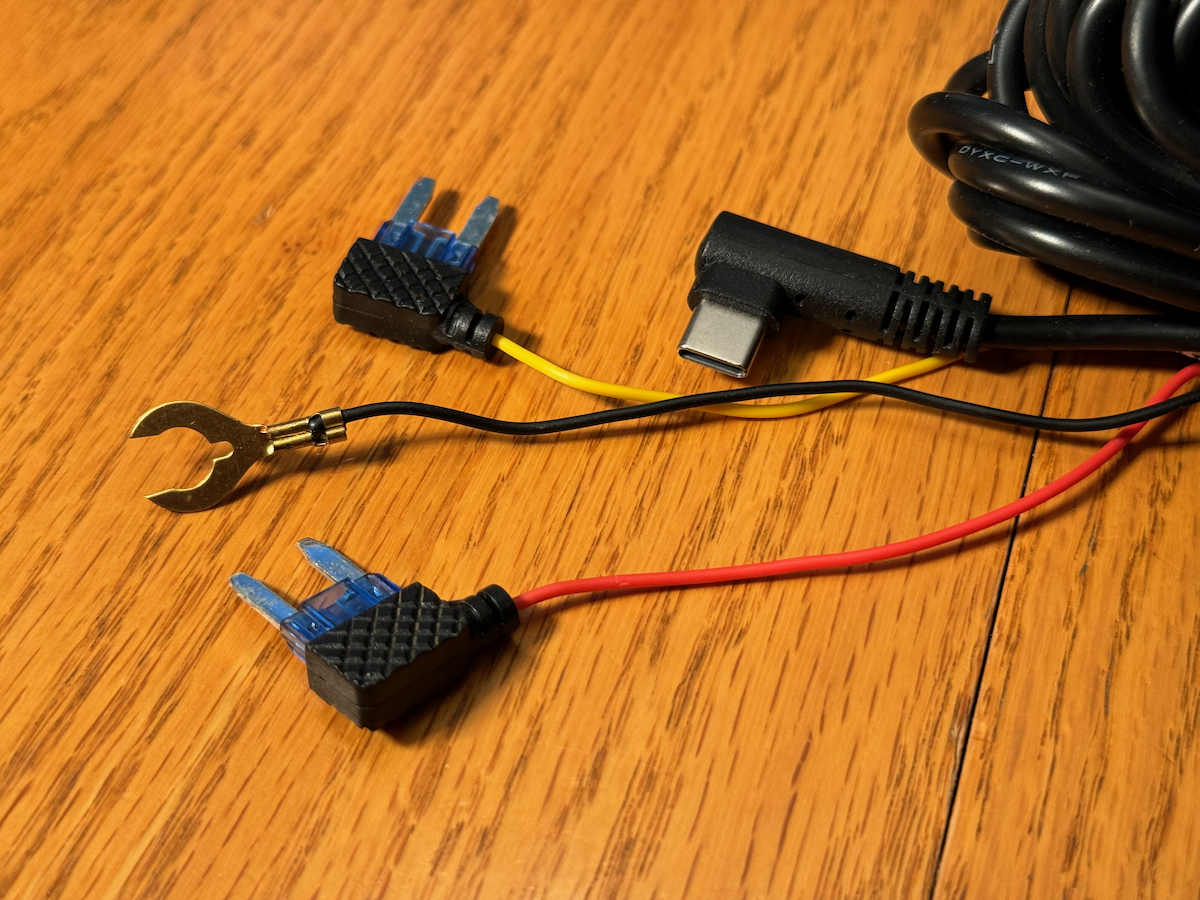
The V30(S) display comes with two power options. The first, and easiest, is a 12V aux power outlet adapter with a permanently attached cable which ends in a right-angle USB-C connector. This cable also includes a 3.5mm female connector which the GPS module plugs into for power and data. The second power option is a cable with two automotive fuse-shaped connectors and a grounding lug, meant to hardwire the power to your vehicle so you don’t have the aux power outlet adapter sitting out all the time.
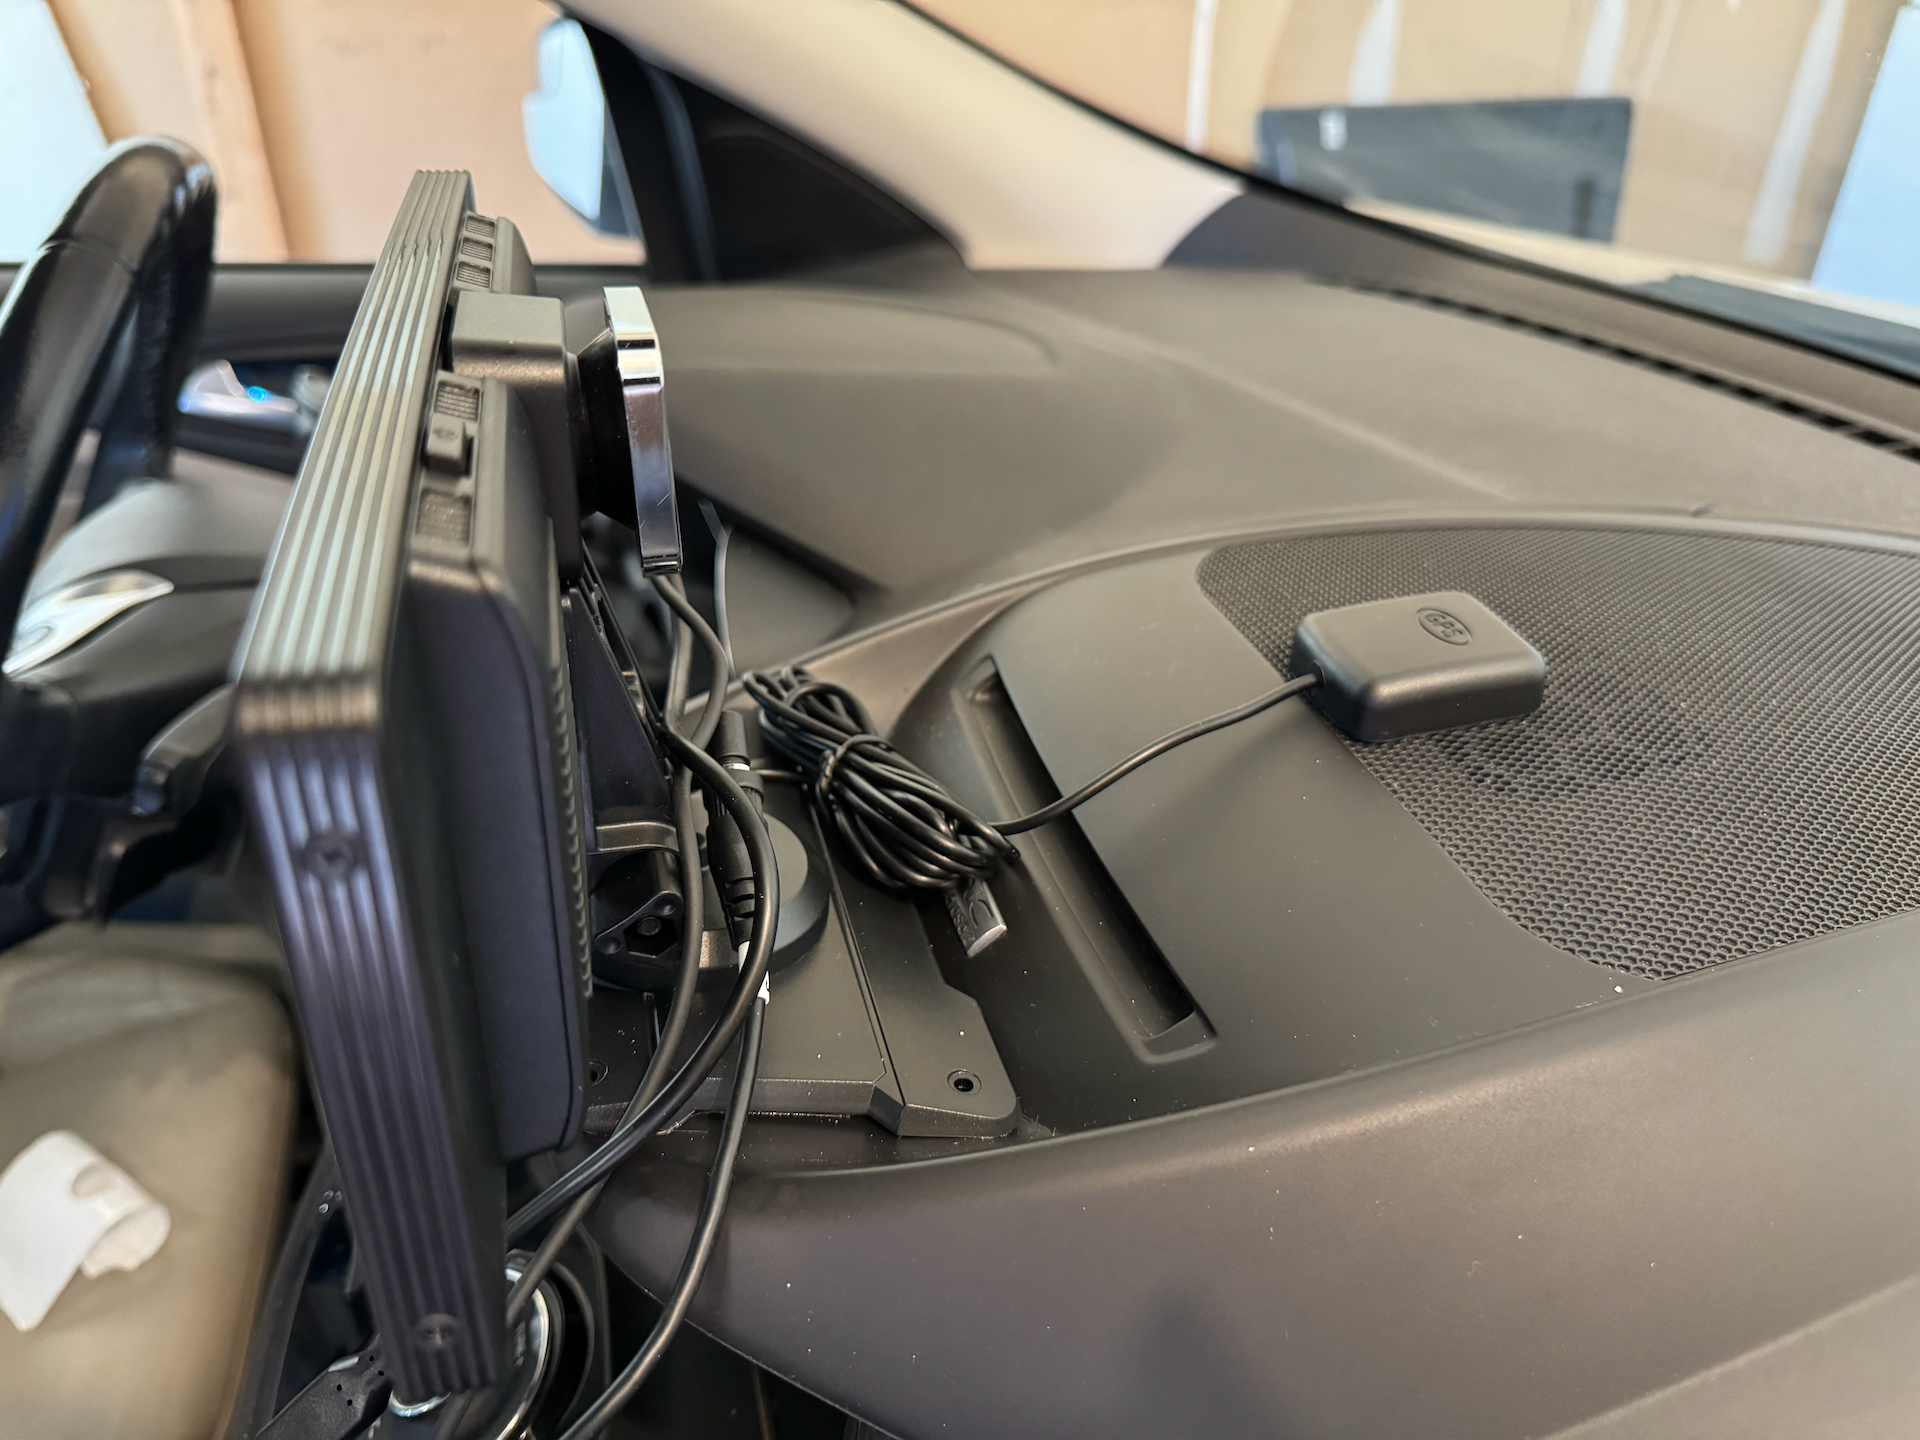
The GPS module is a small, flat black device, about 2” x 2” x 1/2”, and an attached cable that plugs into the extra jack on either of the power cables to power the module and transmit the GPS data to the display. The bottom of the GPS module includes a sticky pad to mount it to the dashboard.
The last major piece is the rear camera. This camera has a permanently attached cable and a mount that allows it to tilt up and down. There is a sticky pad sized for this mount as well as a pair of screws to mount it to your vehicle. I didn’t measure this cable but it was long enough to go from the top middle of my dash, under both sets of seats, all the way to the rear center of my trunk (I have a Ford Escape) with a couple feet to spare.
Assembly, Installation, Setup
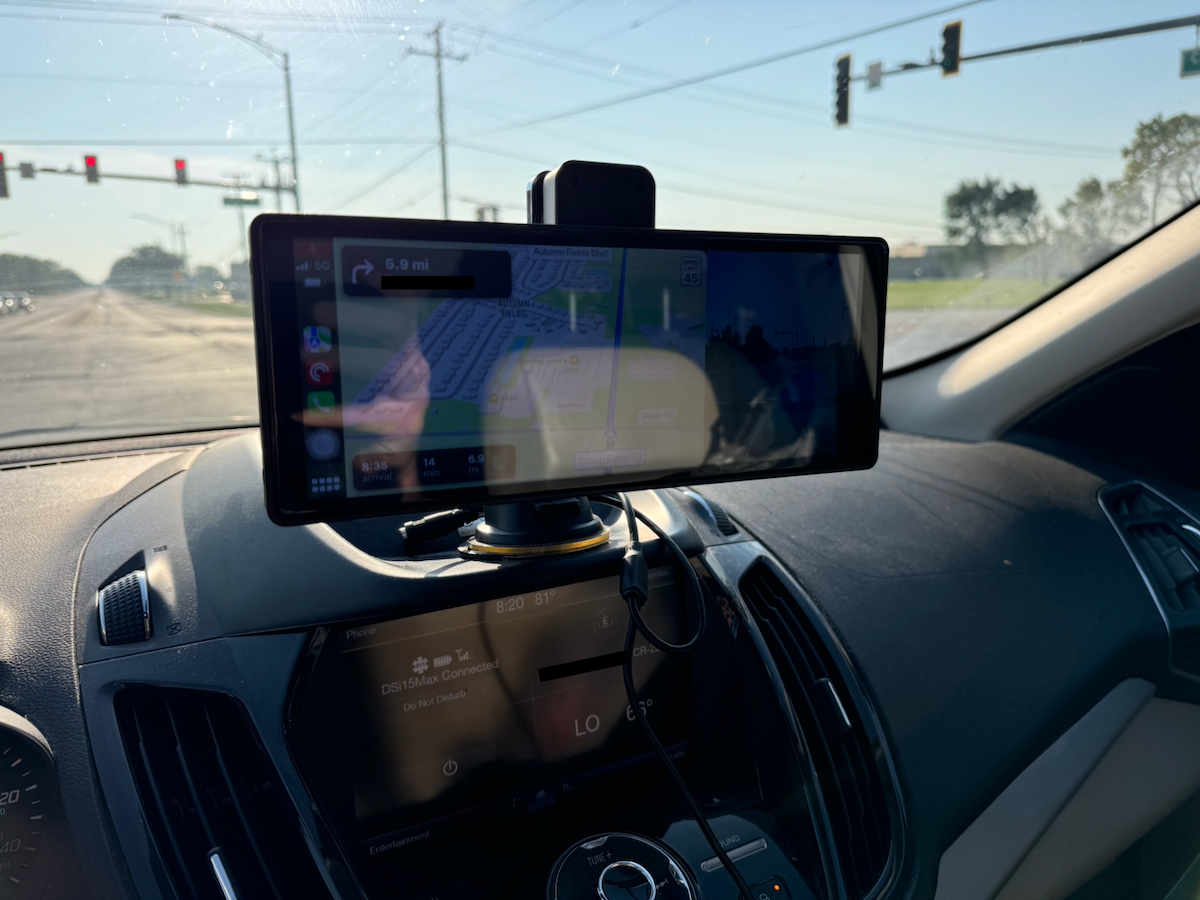
I first set this up with the existing phone mount I’ve had mounted to my dash for the last several years. I mentioned it in my ESR Qi2 Halolock MagSafe wireless car charger review because I decided to keep it mounted to my dash and used it with the ESR charger successfully for the last 7 months. Because this display has the same sized ball mount I wanted to try this before I decided whether I would keep it long-term or not. This worked great until I noticed the back of the mount was starting to come loose from the dashboard. I then decided that I would permanently mount the larger dashboard mount. I assume this was starting to come loose because of the weight of the display compared to the much smaller ESR charger that I had there before.
The setup process was mostly smooth. The display runs a version of Android, which is used to set time/date, preferences for camera view, split screen mode, audio & brightness levels, viewing recorded videos, and other features. It’s a barebones version of Android but it works well for the functions it is needed for. It probably took me 10-15 minutes to do the initial setup, including taking a 2 1/2 minute long video showing the interface.
There is a phone app, for both iOS and Android, for connecting to the display and downloading any videos or photos on the SD card. This is a pretty basic app but it does what is necessary. You can also use the app to change the WiFi name and password of the display, format the TF/SD card, restore the display to factory settings, and more. A lot of these features are also available in the settings of the display, but it’s nice to have more options. There is a second app, called GXPlayer, which can be used on a Windows PC to download videos from the TF/SD card and use the embedded GPS information to show you the routes you’ve taken.
Depending on how the display is plugged into power, you may have to manually power it on and off or even plug/unplug the aux power port adapter. My car’s aux port doesn’t shut off with the car so I have to plug it in and unplug it every time I drive. I do plan to permanently wire it to the fuse box so it will go on/off with the car and so the cables will be out of the way. This will also leave the power port open to charge my phone when I need to do that. The aux power port adapter probably wouldn’t wear down my battery considering that I use the vehicle 5-6 days out of the week, but I don’t really want to chance that. Unfortunately there is no option in my vehicle to have this port turn on and off with the ignition.
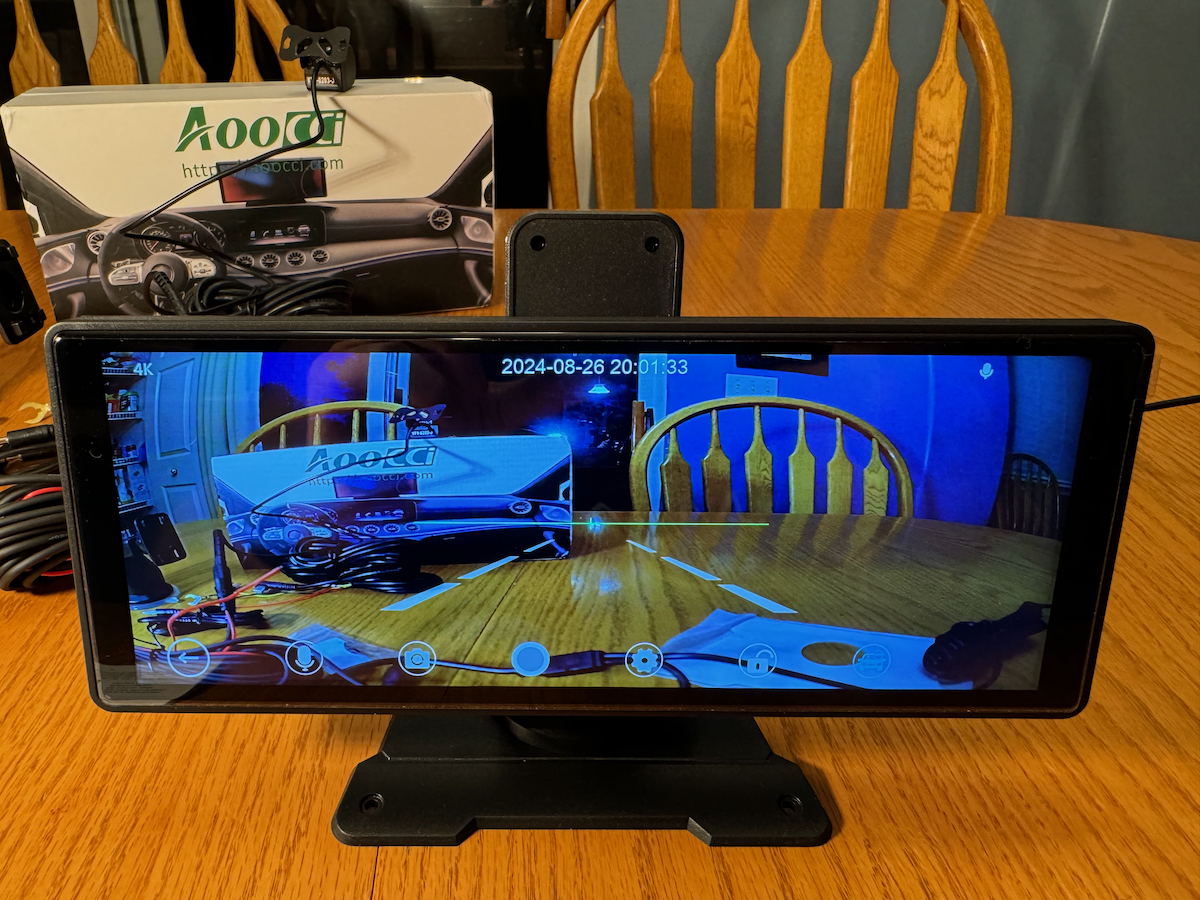
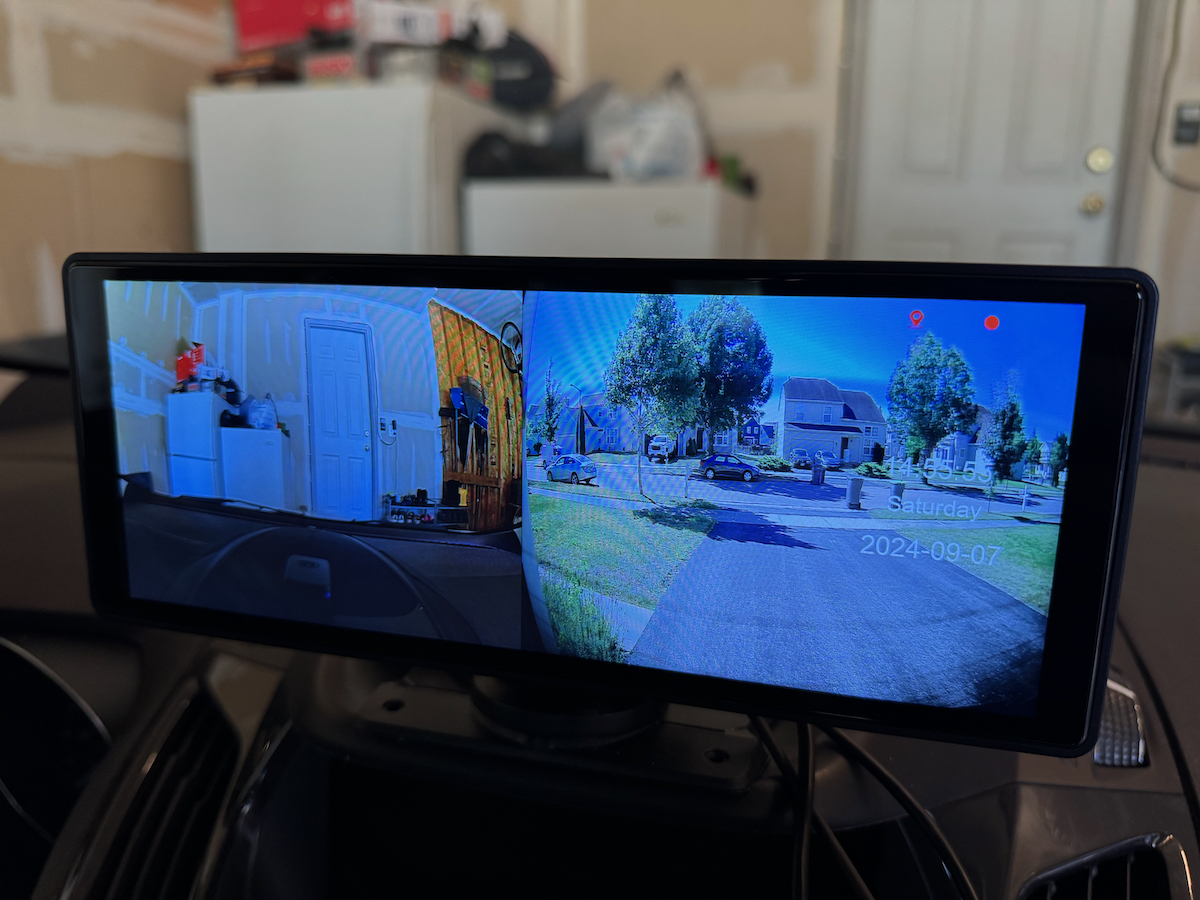
When I first tested this display at my kitchen table, the cameras were flickering badly. I didn’t know if this was a problem with the cameras or the low light compared to outdoor light. I think it turns out the cameras didn’t like my LED light bulbs. In all the testing I’ve done in my vehicle, in daylight or at night, there has been no flickering at all.
The cameras can be set to record in 60, 120, or 300 second clips. The recorder is always recording when it’s turned on (by default, although it can be turned off manually when desired). When the TF/SD card gets full it will delete the oldest files and record new clips over that space. You can press a lock button on the camera interface to save a clip from being recorded over, although the more you do this the more full your card will get so you’ll want to clean it up periodically. There is also a g-shock sensor that will detect a crash and automatically save any footage recorded around the incident. Thankfully I didn’t have to test out this feature. The video can be set to record in 4K or 2K resolution in either h.264 or h.265 formats.
In Use
On my first drive I realized that the display is very glossy and reflects whatever is directly in front of it. In my case, it was the seats of my car, which are a very light tan, and it was a sunny day, so it was pretty difficult to see the display. Since I’ve remounted the display it’s in a different position and I haven’t seen as much reflection since. It could also be a little brighter, but it’s visible and clear overall.

The audio from your phone is sent to the display by default, and can be transmitted to your in-dash stereo system in three ways: Aux cable, FM radio, or Bluetooth. There is also a built-in speaker. I almost always have a bluetooth headset in my ear, since that’s the way I prefer to listen to podcasts (the majority of my listening) so I set up an iOS Shortcuts Automation that automatically switches the audio back to my headset and jumps back 15 seconds to replay anything I might have missed. I’m probably an outlier and most people will use one of the regular methods of using audio with this display.
I tested this with my Google Pixel phone to see how Android auto would work, and it successfully connected and showed the apps on my phone that are compatible with Android Auto. Because I don’t currently have a cell phone plan on this phone, and the fact that the display connects over WiFi, I couldn’t do much testing on Android, but it did connect successfully and if that’s the ecosystem you prefer, I think you’ll be happy with this display.
While viewing the cameras (either in split screen mode or full screen) you can swipe the display to the left to switch between full screen front camera, full screen rear camera, and split screen with both cameras. This is an easy way to switch cameras without taking your eyes off the road for very long.
I found the display to be a little finicky at times. It wasn’t always as responsive as I’d like. I couldn’t always tell if the button I had pressed was accepted or not. Sometimes the display would just lag a little bit, taking a second or two to respond, and sometimes the touch wasn’t registered so I had to do it again.
When I used the RoadCam app to transfer a few clips from the display to my phone it took about a minute to transfer over the direct WiFi connection. The clips I transferred totaled about 400 MB; I felt like this was an acceptable transfer speed. For some reason the clips did not include audio, even though I had the microphone turned on in the interface. I feel like there would be times I’d want the audio recorded so I’ll be looking into this further. The clips also didn’t include GPS data when looking at them in my phone’s Photos app. I was hoping this information would be included since I was using the included GPS module but it seems the location data is reserved only for the GXPlayer app, which I did not test. I’ll probably download it and try it some day, but considering how inconvenient it is to take out the TF/SD card and the fact that I don’t often use a Windows machine, I haven’t gotten to it yet.
Another feature I didn’t try is the connection to the reverse light to automatically switch the display to showing the rear camera when backing up. Because I didn’t permanently mount this camera yet I didn’t wire this up yet. I do plan to do this some day. Thankfully I can manually tap on the rear camera and still view it when I’m backing up, which is a little less convenient, but it’s there anyway.
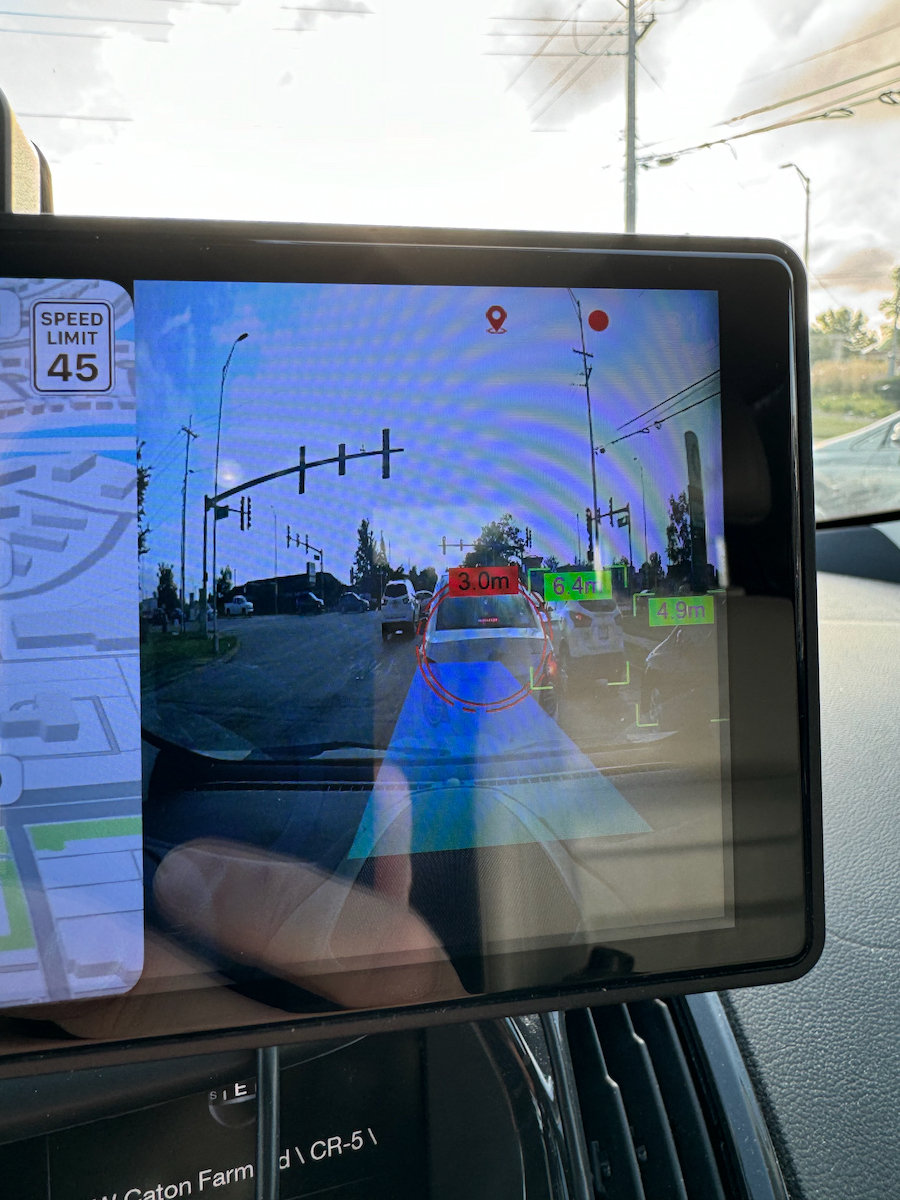
I found the ADAS system to be fun and convenient, but it was a little too sensitive for my preference. The display kept warning me about lane departure, when I definitely was not, and it kept warning me about getting too close to the vehicle ahead of me when I was slowing down. I decided to just turn down the audio so I wouldn’t keep hearing these unnecessary warnings. It could be that when using the GPS module (which I did not set up initially) that it would recognize my speed and know I was slowing down, but I’m not sure.
I tried to take a photo of the camera mounted in the rear window but it had fallen by the time I went to get the shot. I only had it set up one day so this was a little frustrating. I did initially mount it in the wrong spot (turns out it needs to be mounted upside down) so the sticky pad lost some of its stickiness. This won’t be a problem if I decide to use the included screws to permanently mount it.
There were a couple quirky things that happened during testing, although not deal breakers. A few times when it booted up there would be a translucent, rectangular blue box across the width of the display. This went away after a few seconds (too fast for me to take a picture either time) and didn’t interfere with the operation of the display at all. The other thing is that the display shut down and immediately rebooted two different times. I’m wondering if this was due to the temperature. I touched the back of the display where the heatsink is and it was very hot. I would think if this was temperature related, though, that it would have taken some time to cool down before it could be restarted. Since it rebooted immediately, this probably wasn’t the issue.
The last thing I’ll say, that’s a bit of a negative, is that the display interface can be a little bit laggy or jumpy at times. This is especially noticeable when swiping between apps in the CarPlay or Android Auto interfaces. Since I very rarely use this interface (I’m on the maps view about 99% of the time) it’s not a big problem but it was noticeable.
What I like about Aoocci V30(S)
- Fast boot up and CarPlay connection
- Wireless CarPlay is convenient and reliable
- Lots of features and included accessories
What needs to be improved?
- TF/MicroSD card hard to reach and remove
- Touchscreen could be a little more responsive
- Little bit of lag swiping through apps on CarPlay; even worse with Android Auto
Final thoughts
There are a few quirks to get used to with this display, most notably the sometimes laggy interface, and a few (very few) spontaneous reboots, but all in all this is a handy addition to my vehicle. Even though I know how to get to work and back home, since I have a 30-40 minute drive each way, or on longer trips, I like to keep a map view running so I can see the ETA and other possible routes that might save me some time. I’ve decided that I’m going to finish permanently mounting this in my car and keep it until I’m able to purchase a new vehicle with a built-in system.
Price: $198.99
Where to buy: aoocci.com (Save 18% with code: GADGETEER)
Source: The sample of this product was provided for free by Aoocci. Aoocci did not have a final say on the review and did not preview the review before it was published.

Gerber Gear Suspension 12-in-1 EDC Multi-Plier Multitool with Pocket Knife, Needle Nose Pliers, Wire Cutters and More, Gifts for Men, Camping and Survival, Grey
(as of March 29, 2026 18:30 GMT -05:00 - More infoProduct prices and availability are accurate as of the date/time indicated and are subject to change. Any price and availability information displayed on [relevant Amazon Site(s), as applicable] at the time of purchase will apply to the purchase of this product.)