REVIEW – I am new to laser engravers but was intrigued by the possibilities. I always was interested in engraving items and giving out personalized gifts, but I was unsure how complicated it would be to produce a quality engraving. How well did the Wainlux K10 Mini Laser Engraver help me overcome my concerns? Read on to find out!
What is it?
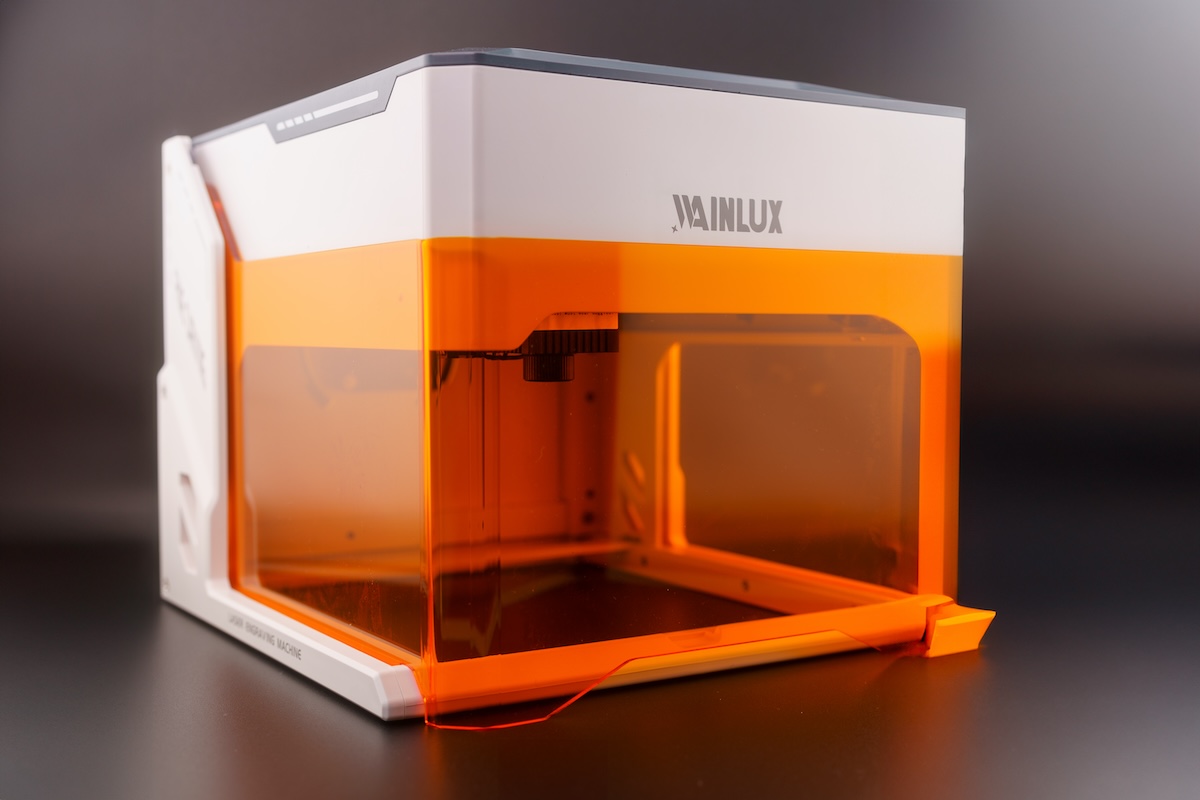
The Wainlux K10 Mini Laser Engraver is a small, compact enclosed laser engraver with a 3W laser. The carving area is 80mm x 80mm (3.15in x 3.15in).
What’s included?
- K10 Laser Engraver
- User Manual
- Power Supply
- USB-C Cable
- Maker Pen
- Brush
- Kraft Paper x 2
- Wood Board x 2
- Allen Wrench
Tech specs
Click to expand
-
- Product Number: K10
- Laser Wavelength: 455nm
- Engraving Speed: 3000mm/min
- Laser Life: >10,000h
- Focus Mode: Knob focus (50-100mm)
- Carving Area: 80mm x 80mm
- Engraving Precision: 0.01mm
- Sculpture Height: <50mm
- Total Power: <24W
- Laser Wattage: 3W
- Laser Level: 1
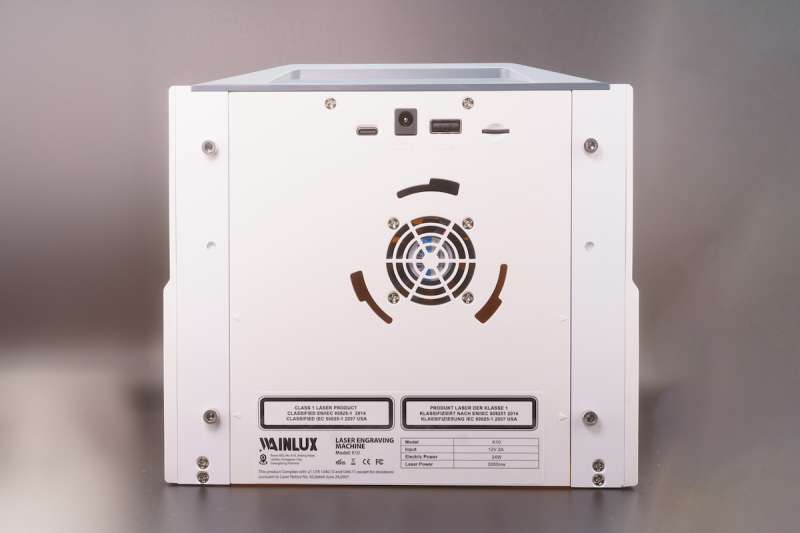
- Connectivity: USB to Serial port wired, WiFi, microSD
- Cooling Method: Air cooling
- Supported Software: CutLabX (Windows, MacOS, Android, iOS), GRBL (Windows, MacOS), Lightburn (Paid)
Design and features
Coming into this review as a complete engraving n00b, I did have some expectations of the difficulty level. I understood how a laser engraver works, but wasn’t sure about the process. I’m fairly competent at 3D printing and know it’s not a simple print-it-and-forget-it process. There is generating the STL file, slicing it into a gcode file, and then there are all the manual parameters (both physical and in the software) to print. I didn’t know how this would translate into the engraving world, or if it even would.
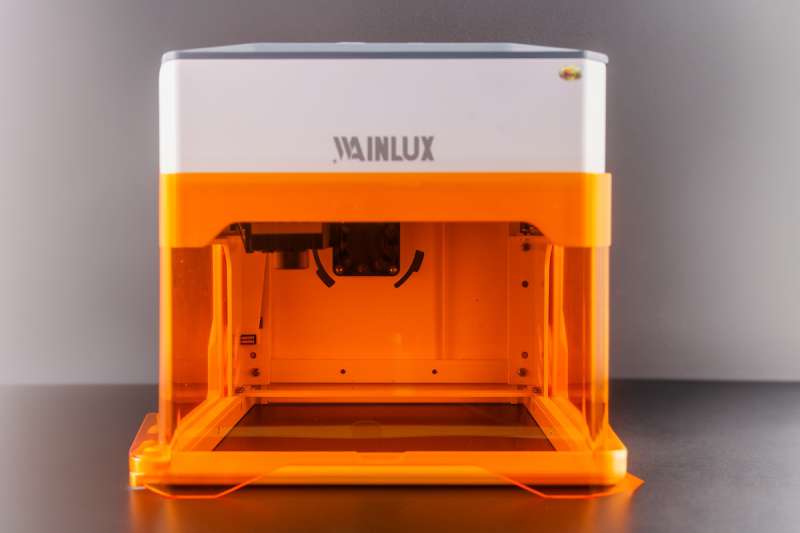
Unpacking the Wainlux K10 Mini Laser Engraver helped ease some of my trepidation. Everything was already put together and just needed to be plugged in. It was small, measuring 270mm x 250mm x 240mm (10.5in x 9.8in x 9.4in). I quickly scanned through the instruction manual, thankfully it is detailed and explains a lot. There are quite a few warnings, as you would expect for something that involves a laser. The hinged light shield is a thoughtful safety precaution and allows you to see the progress of the engraving without having to wear special safety glasses. The laser will automatically stop when the light shield is lifted or if the engraver itself is tilted more than 13 degrees.
I chose to connect to the Wainlux K10 Mini Laser Engraver via WiFi and use the CutLabX app on my iPhone. The great thing about this engraver is that almost any system can be used to generate and push projects. CutLabX can be run on Windows, MacOS, Android, and iOS. GRBL is also supported. I did read that LightBurn is also an option but with a cost. Although I chose the WiFi method, there is an offline method whereby files can be loaded on a microSD card, and using the buttons on the engraver, the engraving process can be started.
Using Wifi to connect to the engraver means that my iPhone wasn’t connected to the internet. I had to make sure that whatever I wanted printed was already on my iPhone or iPad. I stumbled upon this a few times but was able to disconnect from the engraver, connect to my home WiFi, get what I needed, disconnect from the home WiFi, and then finally connect back to the Wainlux K10 Mini Laser Engraver.
My first attempts were on one of the included wooden boards. I left all the speed and power settings as default and honestly, I wasn’t impressed. The engraving came out faint and in some places, it looked like nothing was engraved. Then I started playing around with the speed and power settings and paid more attention to making sure the laser was focused correctly. I used the included black paper to fine-tune the laser by rotating the focus knob until the dot on the black paper was perfectly round and small. I also went out to a local discount store and picked up a couple more items to engrave. I picked up some cork drink coasters that I did most of my tinkering and fine-tuning on.
My first attempt on the cork coaster was better. It did come out dark and more defined…but maybe a little too powerful and slow as the burn/scorch marks show.
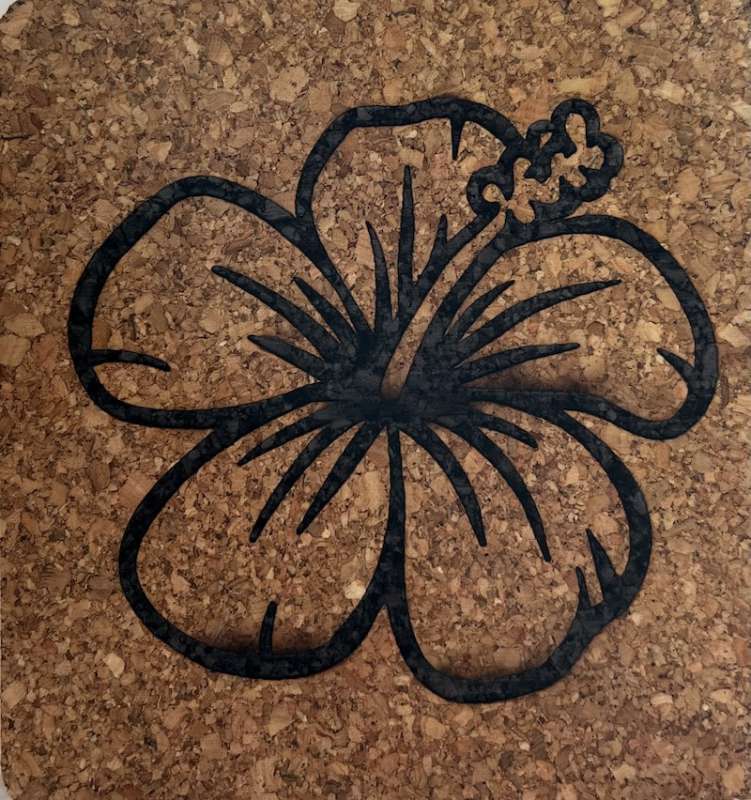

I then decreased both power and speed for the next coaster and that turned out really well.


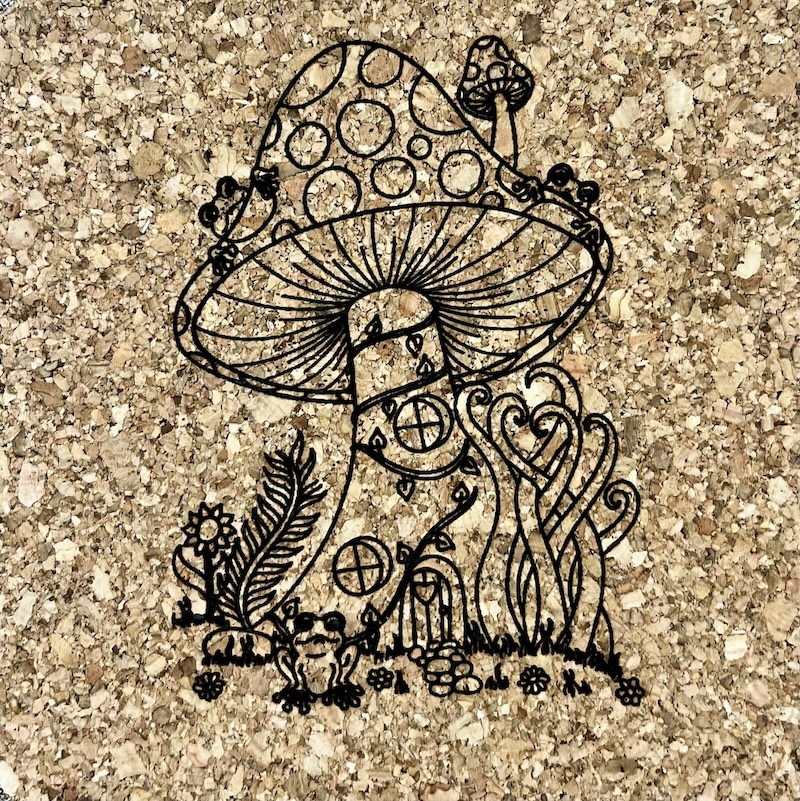
I think I had the settings right for this material so I tried a much more detailed engraving and was very impressed!

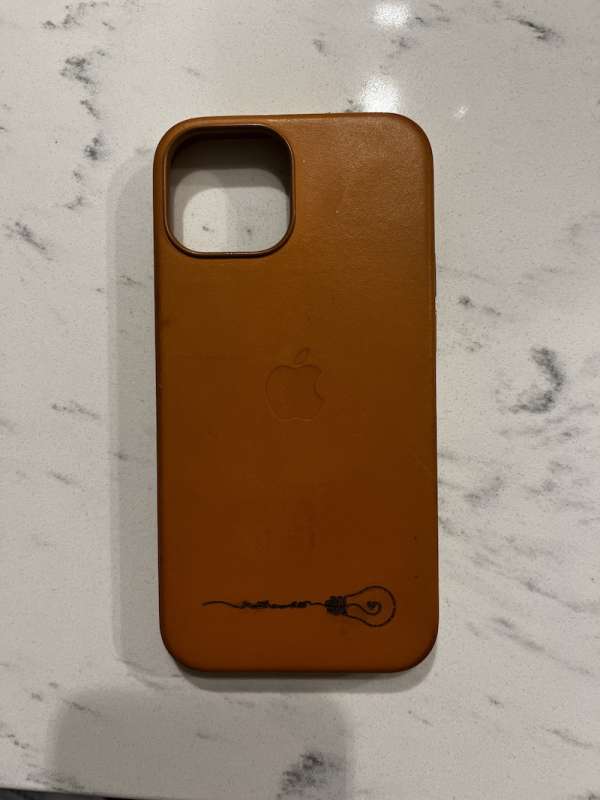
Feeling confident, I engraved my Apple Leather case for my iPhone. In my haste, I didn’t adjust for the material difference and it didn’t come out very clearly, but still liked the finished product.
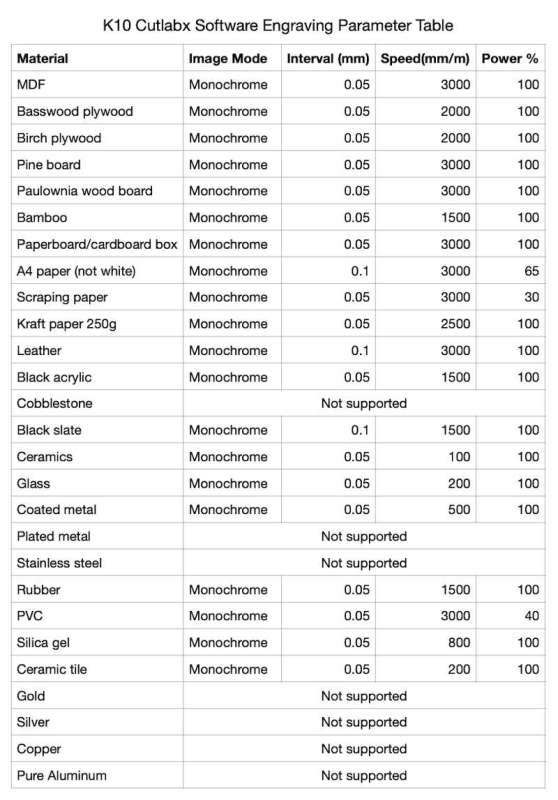
Wainlux did provide some recommended settings for different materials. I would strongly suggest finding some spare or inexpensive material and doing some trial and error to really get things dialed in before engraving your finished product.
Precautions
Getting back to the above mentioned warnings, here are some that are important to note:
- Before engraving on reflective/transparent materials (glass, ceramic), you’ll need to apply anti-reflective material (such as laser colored paper, black marker, etc) on the surface of the material to ensure the engraving effect and prevent the reflected light from damaging the laser module
- Reduce power and increase speed to help reduce smoke and dust on the material
- If power is lost during an engraving, the laser head will remain in place until the power is turned back on. The machine will re-initialize and printing will NOT continue.
- Objects that cannot be penetrated by the laser must be placed under the engraving object, such as stainless steel plates, aluminum allow plates, etc.
Assembly, Installation, Setup
The Wainlux K10 Mini Laser Engraver came fully assembled. All I needed to do was plug in the power supply and adjust the laser using the focus knob.
See it in action
What I like about the Wainlux K10 Mini Laser Engraver
- Easy, I was able to get up an engraving in about 15 minutes
- Safe, the unit is fully enclosed
- Flexible, almost any device can connect to the engraver (Windows, MacOS, Android, iOS)
- Fast, due to the smaller carving area, engraving usually completed very quickly
What needs to be improved?
- Nothing, it is a lower-powered mini laser engraver and it is nearly perfect in that role. Wanting a bigger carving area, or a more powerful laser, is not what this product was designed as. Those are things that more expensive, larger and more powerful engravers do.
- Although not directly a Wainlux product, the CutLabX iOS software needs to be improved, especially the typeface and colors. Changing the speed and power settings through the app is nearly impossible as it is white lettering on a near-white background. Again, not a fault of Wainlux, but something to be aware of.
Final thoughts
The Wainlux K10 Mini Laser Engraver was a great introduction to the world of laser engravers! I was able to understand the different parts of what goes into a successful engraving. I got to play around with different materials, different engraving speeds, and different laser power settings.
I did want to mention that there are some nice optional accessories available for the Wainlux K10 Mini Laser Engraver.
- MD19 dual parallel axis rotation module, used for engraver cylindrical objects like mugs and water bottles
- MD22 air purifier module, great for smoke exhaust
- Engraving position module, used for better and more stable material placement
I think the WainLux K10 mini engraver is a perfect way to get started in laser engraving. At first, I thought the carving size would be limiting, but I find that most personalized gifts, like journals, phone cases, pocket knives, etc, all fit within these dimensions. One good part about the engraver being compact is that it’s easy to carry. I can see bringing this to a friend’s house or a maker’s fair. The cost of entry is not very high and I believe you definitely get your money’s worth – I would highly recommend this engraver!
Price: $199.99
Where to buy: Wainlux K10 Mini Laser Engraver, Amazon, and Aliexpress
Source: The sample of this product was provided for free by Wainlux. Wainlux did not have a final say on the review and did not preview the review before it was published.

Gerber Gear Suspension 12-in-1 EDC Multi-Plier Multitool with Pocket Knife, Needle Nose Pliers, Wire Cutters and More, Gifts for Men, Camping and Survival, Grey
(as of March 21, 2026 18:28 GMT -05:00 - More infoProduct prices and availability are accurate as of the date/time indicated and are subject to change. Any price and availability information displayed on [relevant Amazon Site(s), as applicable] at the time of purchase will apply to the purchase of this product.)