REVIEW – I’ve been dabbling with 3D printing ever since my first 3D printer review a few years ago, and have since used/reviewed nearly a dozen of them, but one thing I’ve not had the opportunity to try out yet is a 3D scanner. The majority of models I get to 3D print are from 3D print repository websites, with a smattering of self-created items I’ve made for utility purposes (like drawer organizers, small risers for objects, or custom shims with angles for mounting something on a baseboard). The one thing I’ve been missing is the ability to scan something and then duplicate it (like a broken part or something that I simply want more of). When REVOPOINT offered to send their Mini 2 3D scanner to review, I enthusiastically agreed.
What is it?
3D scanners allow you to digitize an actual physical object which can then be viewed, edited, and shared/saved/3D printed/etc. The REVOPOINT Mini 2 3D scanner has various packages available for purchase, the one REVOPOINT sent over includes a turntable to assist with scanning and quite a few other useful items as well. It connects to either a PC/Mac or to a mobile device on iOS or Android. You scan the object from multiple directions (using a turntable or by physically moving the scanner around the object). The resulting scans can be exported to STL, PLY, and OBJ formats which makes them compatible with most other softwares you’d use for 3D models (like 3D printer slicing, CAD, and other 3D modelling programs).
What’s included?
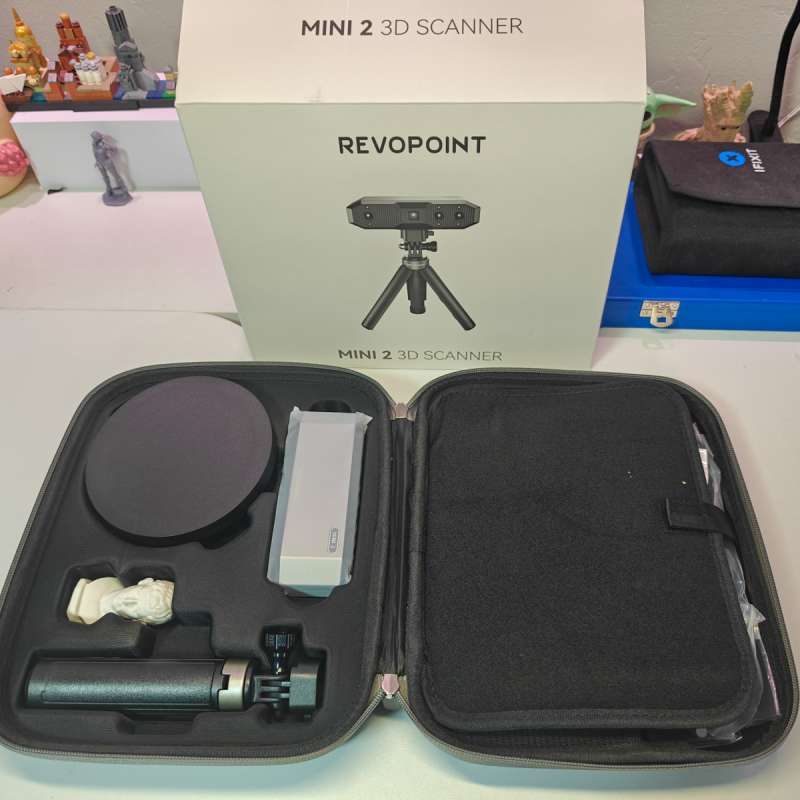
The nice carrying case has spots for everything, and many of the parts are labelled with instructions, which made setup easier later.
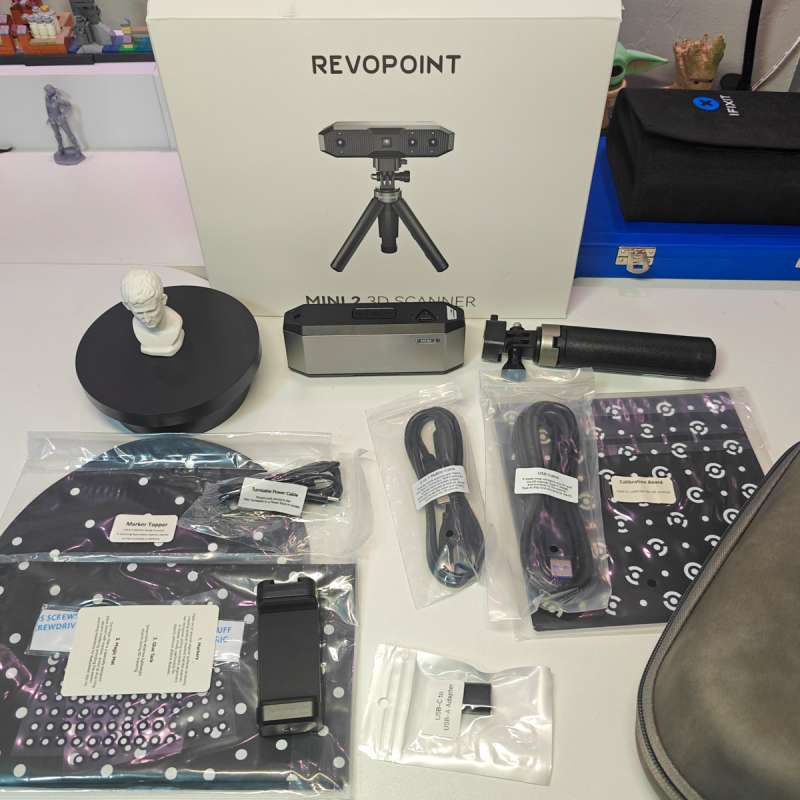
- REVOPOINT MINI 2 3D Scanner
- Tripod
- Phone holder
- Mini Turntable
- USB type A to C cable
- 2-in-1 mobile USB-C cable
- USB Type C to Type A adaptor
- Turntable topper
- Turntable power cable (USB-C)
- Carrying case
- Test model object (Agrippa)
- Magic mat
- Calibration board
- Extra marker dots
- Glue tack
- Quick start guide certificate and warranty
Tech specs
Click to expand
Depth camera resolution: 2 MP
RGB camera resolution: 2 MP
Single-frame Precision: Up to 0.02 mm
Single-frame Accuracy: Up to 0.05 mm
Single Capture Area at Nearest Distance: 52 x 64 mm at 120 mm
Single Capture Area at Furthest Distance: 168 x 132 mm at 250 mm
Working distance: 120mm-250mm
Point distance: up to 0.02mm
Minimum scan volume: 10 x 10 x 10 mm
Scanning speed: up to 16 FPS
Scanner position sensors: 9-axis IMU
Light source for depth scanner: Class 1 blue light
Tracking methods: Feature/marker
Output formats: PLY, OBJ, and STL
Outdoor scanning: no
Color scanning: yes
Scanner weight: 175 g
Dimensions: 132 x 53 x 36 mm
White flash LEDs: yes
CPU: Dual core, 1.8 GHz
Wifi: Wi-Fi 6
Connector Type: USB Type-C
Design and features
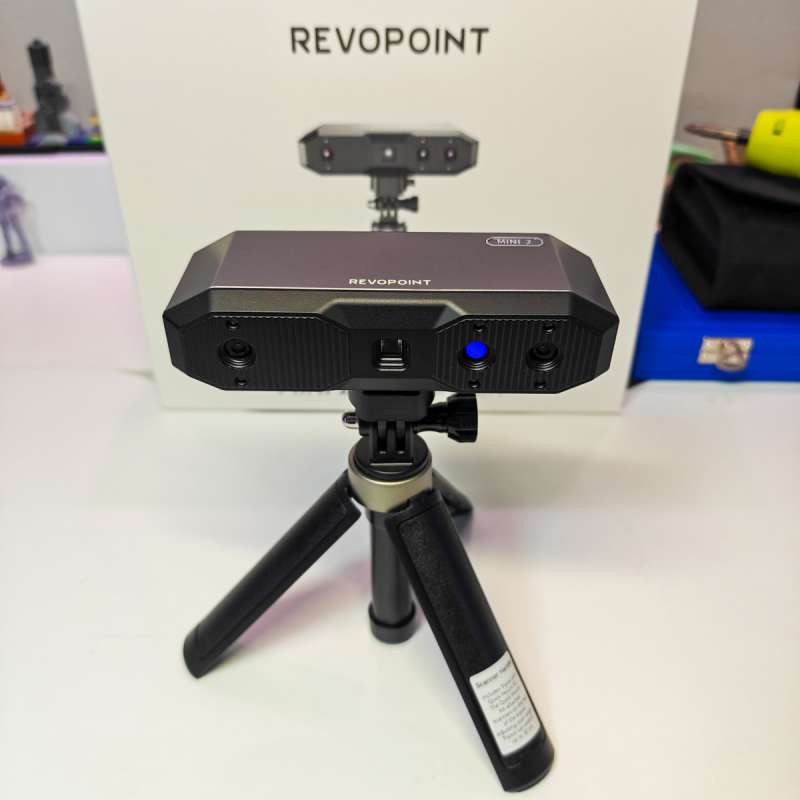
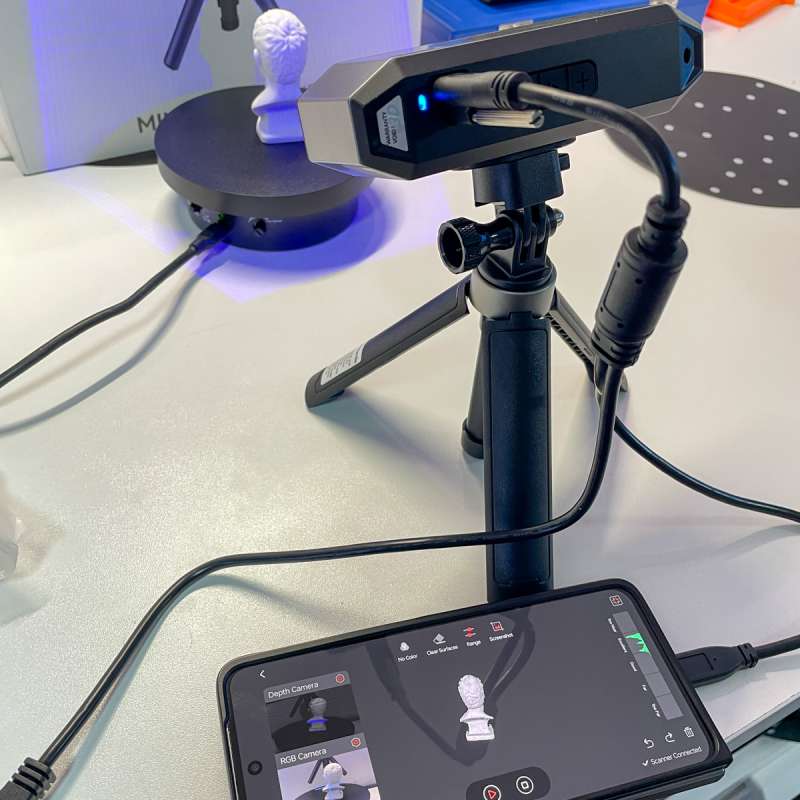
The actual REVOPOINT Mini 2 3D scanner itself is fairly small (appropriate given the MINI moniker). In the photo above it’s mounted on the included tripod, which is height adjustable and can be locked at certain angles. The front sensors include a regular digital camera and a depth sensor camera, with a blue light emitter to aid the depth sensor camera with detection.
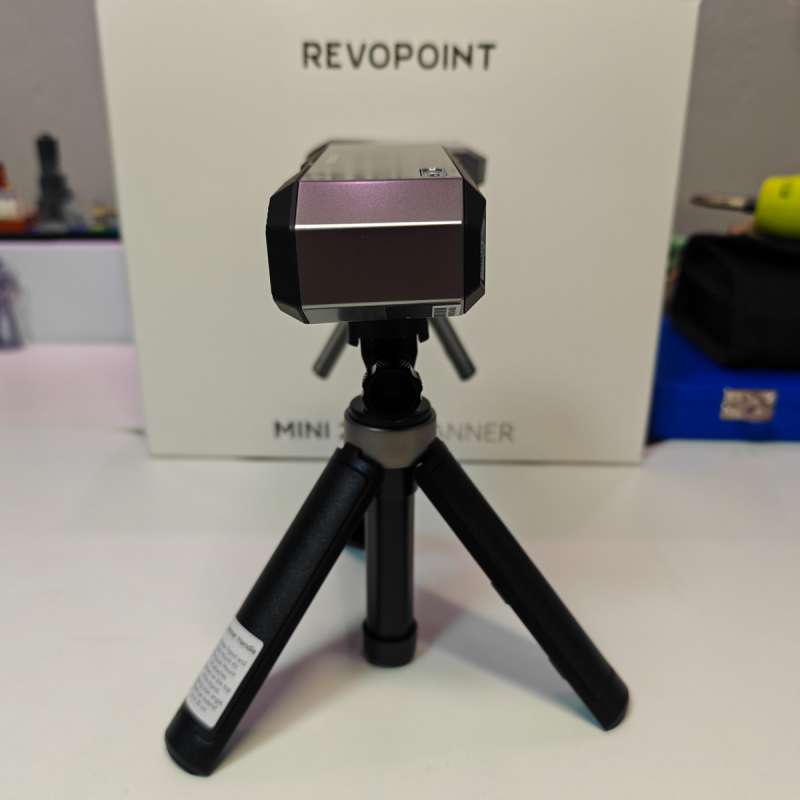
You can see from the side profile how small the unit is.
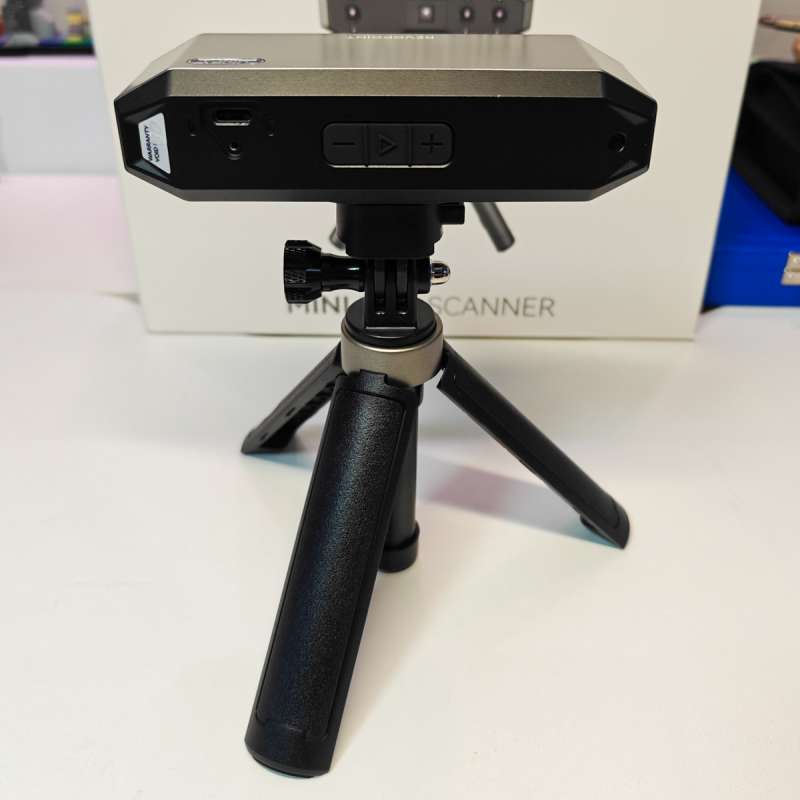
Around back is the input USB-C port (and screw hole for secure cable mounting). There’s also a trio of push buttons on the back.
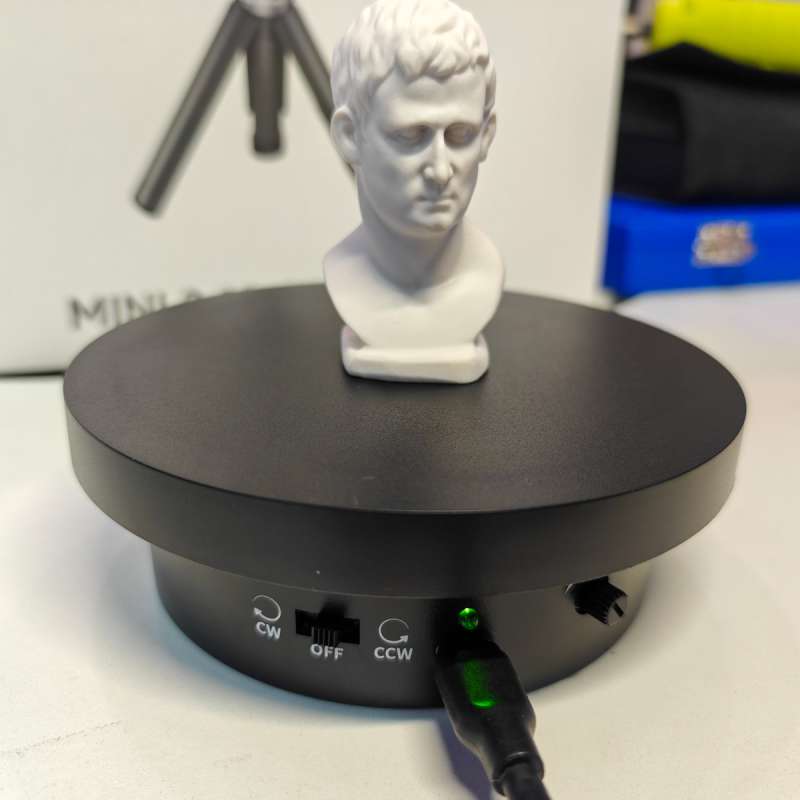
There are two versions of turntables included in the different available packages. The one I was sent is the more basic mini turntable, which can be set to spin in either direction and has an adjustable speed knob. It’s powered over USB-C, but you’ll need to plug it into a power supply or battery pack. You can use your own turntable as well, there’s no integration between the turntable and the software, the scanner simply detects the object moving while it’s scanning.
Assembly, Installation, Setup
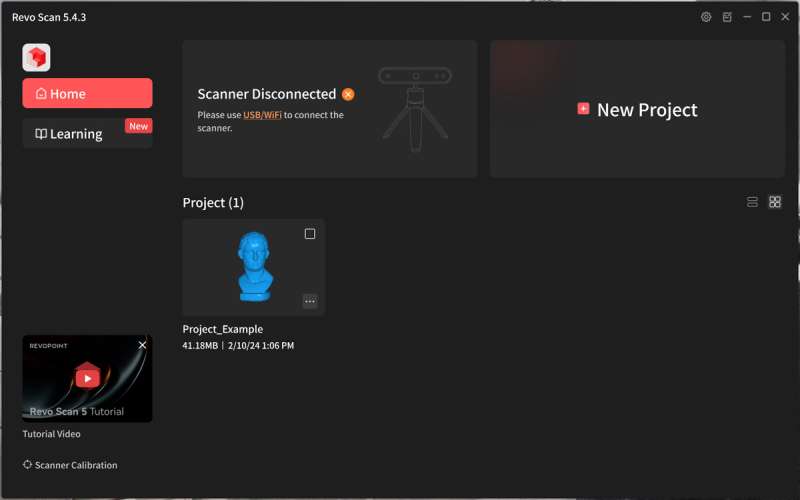
Setup varies depending on if you’re using a mobile device or a computer. I tested out both, so I’ll first describe using the REVOPOINT Mini 2 3D scanner with my PC. I mounted the scanner to the tripod (it simply screws on), then attached the PC/Mac cable to my computer. I downloaded REVOSCAN 5 (free) and installed it which was straightforward. I quickly found that basic scans are fairly straightforward, but reading the manual is going to help a lot if you’re doing much beyond scanning the included object.
I also tested on Android (OnePlus Open phone on Android 12). Everything worked without issue, and I liked the mobile app for quick scans with easy models that didn’t need a lot of touch up after the scanning. For more complex models, I switched over to my PC since it’s easier to edit things with the extended controls in the desktop software and with the mouse/keyboard interface.
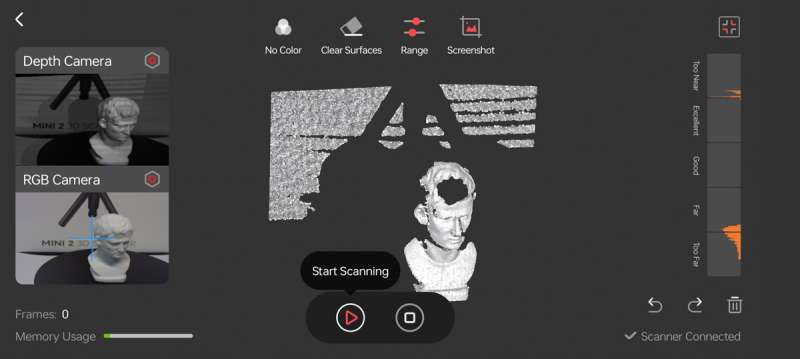
The screenshot below shows the scan in progress, with preview videos on the left and (probably most important) the range data on the right – you want most/all of your model to be in the Excellent to Fair distance from the scanner, if it’s too close or too far you’re going to get incomplete or artifact-riddled scans.
Performance
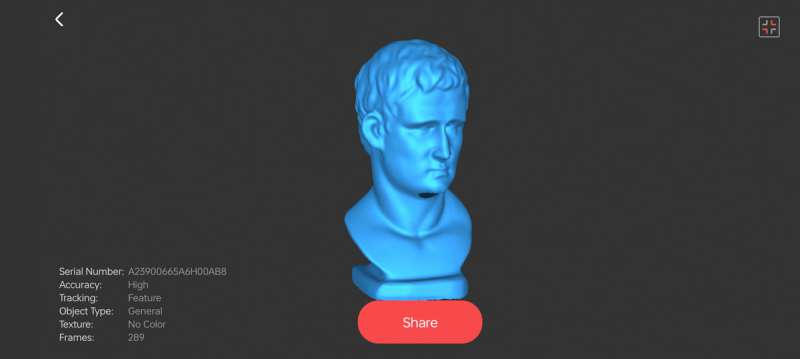
The video above shows a live test scan of the provided figurine connected to my Android phone. The REVOPOINT Mini 2 3D scanner with default settings produced an excellent 3D scan of said figure.
I exported this as an STL file, and printed it on default settings on a BambuLabs P1S 3D printer, with the result below:
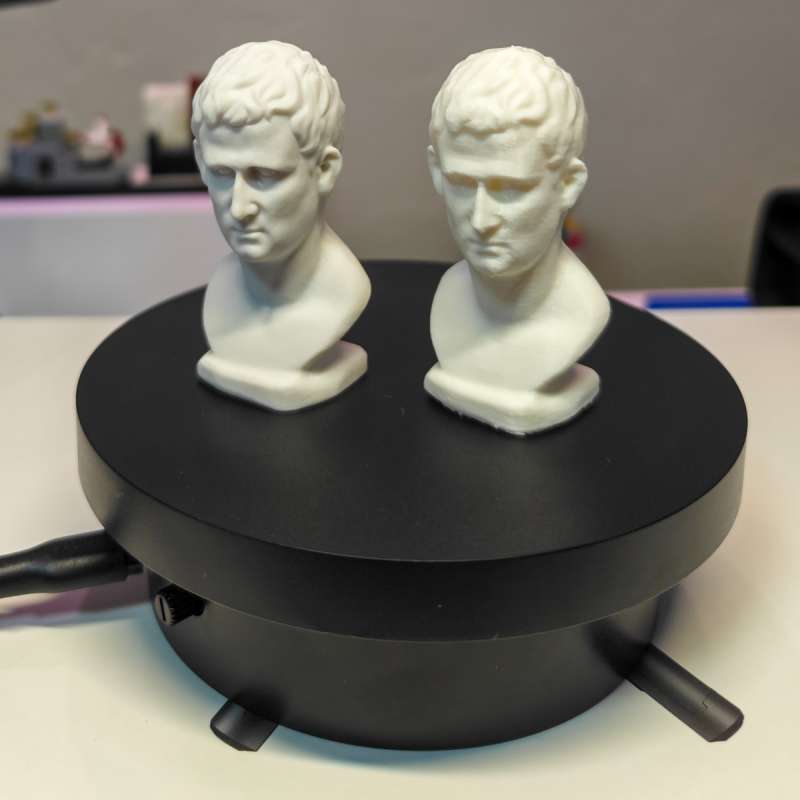
I was impressed with the accuracy and detail from the scan, which could have been even better if I’d taken the time to carefully edit and post-process the scan instead of just accepting the automatic version. Printing at a finer detail setting on the 3D printer would also have improved quality, but functionally the end result was great for me.
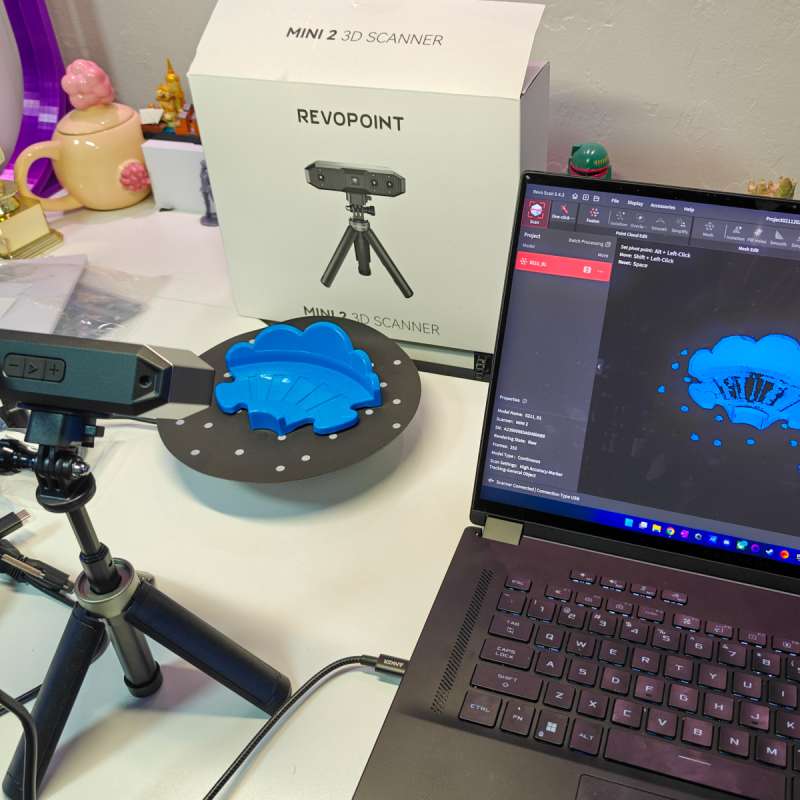
There were some issues I ran into while testing out the REVOPOINT Mini 2 3D scanner, but most were overcome with reading the manual, watching their tutorials, or by trial and error. One issue was gaps or holes in the scanned model, as shown below:
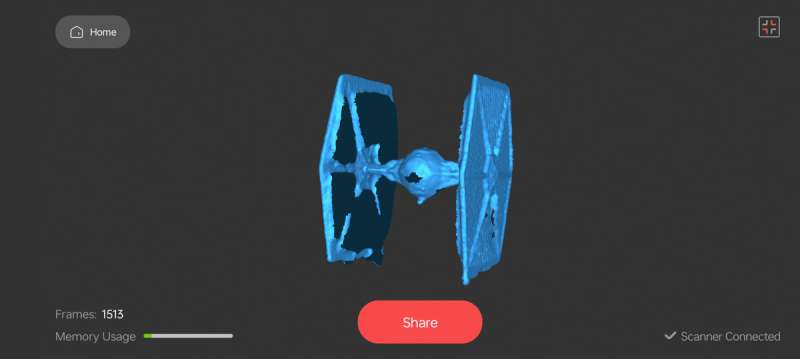
I tried many scans from multiple angles and kept having issues getting the inside of the TIE Fighter’s wings, until I learned that I could take 2+ scans from different angles and merge them together. You need to clean up the “point cloud” on each scan, and then the software can use unique features to merge the multiple scans together. I’m still working on getting a 3D printable TIE Fighter from my source model, but the multi-scan feature is getting me much closer.
What I like about the REVOPOINT Mini 2 3D scanner
- Detail/resolution is very good
- With the right conditions and materials the resulting scans are great
- Mobile app works great with my Android phone
What needs to be improved?
- Even after watching tutorials and many hours of trial and error, items with glossy surfaces return a lot of artifacts or errors – you may need to purchase $40-a-can “scanning spray” for some objects
- The sweet spot where it scans best is fairly narrow, even with smaller objects it can be tricky to get every angle – but you can overcome this by taking multiple scans from different angles and merging
Final thoughts
While the REVOPOINT Mini 2 3D scanner wasn’t as easy as I had hoped it would be going into the review, with a little reading and trial and error I am very pleased with the scan quality and the new options I have now being able to scan in all sorts of things for various purposes. One project I am already organizing is a couple of board games that run out of pieces (and instruct you to just use substitutes); I’m going to scan in and then 3D print some copies of various low-supply tokens and markers, which will be much easier than modeling my own.
Price: $829 as reviewed (other packages available with different accessories)
Where to buy: REVOPOINT and Amazon
Source: The sample of this product was provided for free by REVOPOINT. REVOPOINT did not have a final say on the review and did not preview the review before it was published.

HP OmniBook 3 17.3 inch Laptop PC, FHD Display, AMD Ryzen 3 30, 8 GB RAM, 512 GB SSD, AMD Radeon 610M Graphics, Windows 11 Home, Mica Silver, 17-dp0199nr
(as of July 12, 2026 13:44 GMT -05:00 - More infoProduct prices and availability are accurate as of the date/time indicated and are subject to change. Any price and availability information displayed on [relevant Amazon Site(s), as applicable] at the time of purchase will apply to the purchase of this product.)