REVIEW – Light strips that mount behind the tv have been around for a few years. We had the original Philips Hue light strip behind our main TV years ago. You could change the light strip color via an app or Alexa. It was relegated to a single color. Then there were the light strips that mounted around the entire back of the TV. Some of the better ones included a device that needed to be mounted in front of the tv to see the picture. They could then change the light strip colors to match the various edge colors of the TV picture. I did not want any bracket hanging off the front of my tv or have any camera that I had to mount in front of the TV, potentially blocking our center channel or soundbar. When I was offered the Lytmi Fantasy TV LED Backlight Kit that could read the TV picture directly from the HDMI signal, I immediately offered to review it. Does it work well? Read on to find out.
What is it?
The Lytmi Fantasy TV LED Backlight Kit is a LED light strip you mount around the back of the TV. It is controlled via a box that connects to the HDMI cable from your streaming box, game box, or laptop.
What’s in the box?
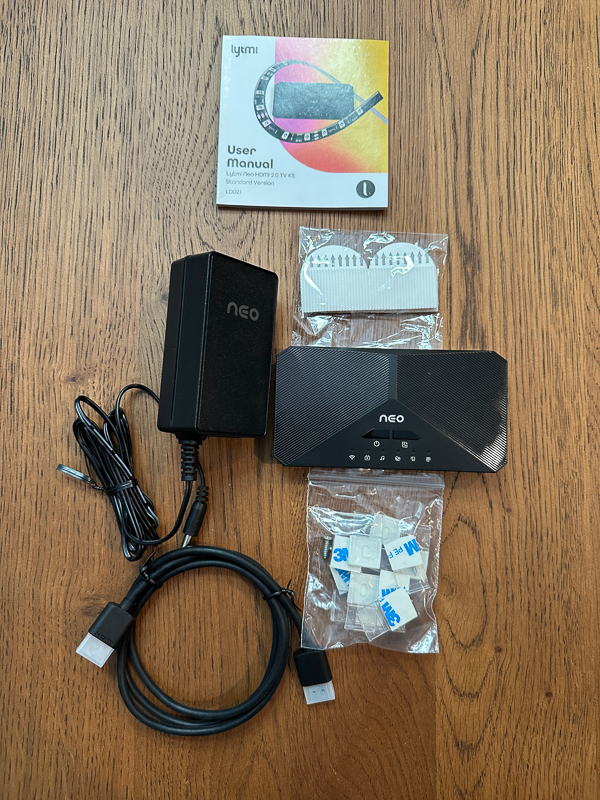
- User manual
- Controller box
- HDMI cable
- Power adapter for the controller box
- Package of extra plastic brackets to keep lights up
- Package of velcro tape to mount the controller box on the back of the TV
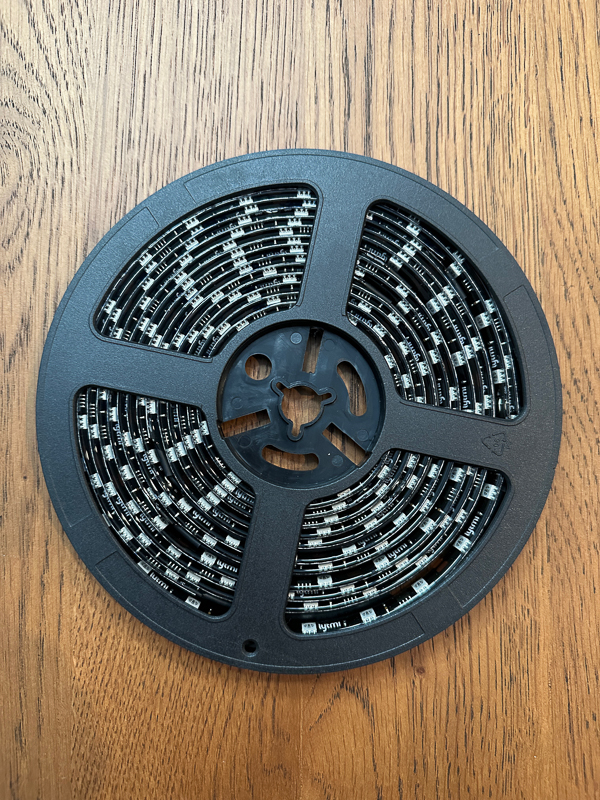
- Roll of LED lights
Hardware specs
- Voice Assistants – Amazon Alexa, Google Assistant, SmartThings
- Video Resolution – 4K 60Hz; 1080p 120Hz; HDR 10; Dolby Vision
- Quick Sync – sync to screen or sync to music
- One HDMI input and One HDMI output
- HDMI 2.0b
- WIFI 2.4GHz
- Light Type RGBIC
- Dimmable – yes
- Cut Ability – no
- Length – 190 inch for 55 ~ 60-inch TV, 220 inches for 65 ~ 70-inch TV, 265 inches for 75 ~ 80-inch TV, 295 inches for 85 ~ 90-inch TV
- Warranty – 12 months
- Output Voltage – DC 12V
- Max Power Consumption – 36W
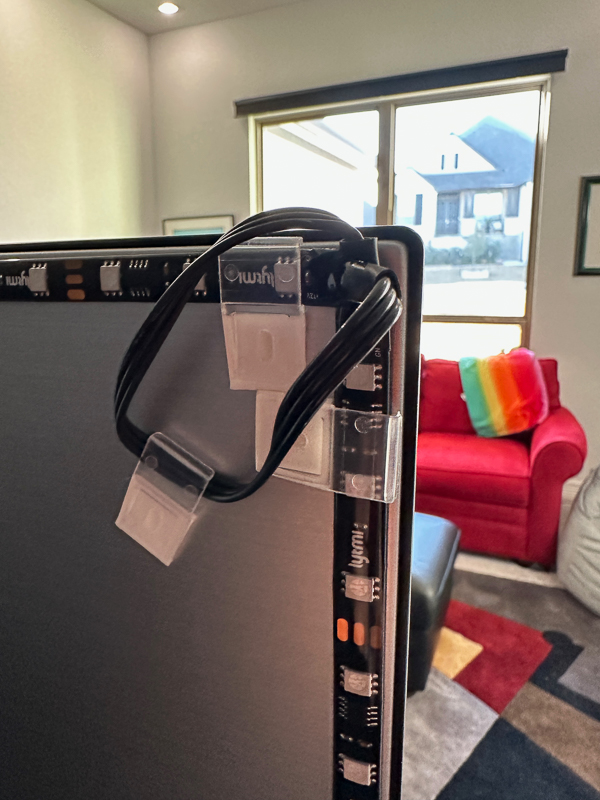
Setting up the Lytmi Fantasy TV LED Backlight Kit was pretty easy. I had to first decide which side of the TV to place the controller box. Even though Lytmi offered the option of mounting the control box on the back of the TV, we did not want to do that. We decided to place the box on the left side of the TV as you face it. That was the same side where all the ports on the back of the TV reside. From the back of the TV, I started on the bottom right-hand corner and applied the LED light strip. The strip I was given will work for a 65 to a 70-inch TV, and ours was 65 inches. Below you can see a picture of the LED light strip mounted on the back of the TV. The strips went from corner to corner with no real room for the extra wire they give on the strip to handle the sharp turns on the corners. I apologize that I could not get the entire back of the TV in the picture. Our media room is not that large, and we could only pull the TV so far out from the wall.
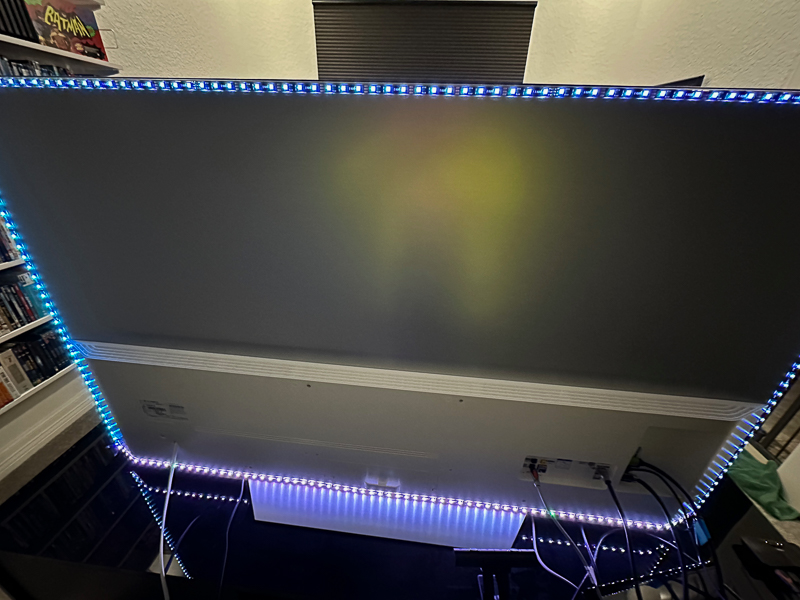
Here is a close-up shot of one of the corners. If I had a 70-inch TV, there would have been less cable to manage. I approve of Lytmi having this cable there, as it allows you to have LED lights right up to the edge without trying to bend the actual light strip. The tape on the back of the light strip was very strong. I only used the extra brackets as a ‘CYA’ just in case the tape ever starts to give out. I also want to note that the light strip itself felt very durable and did not feel flimsy at all.
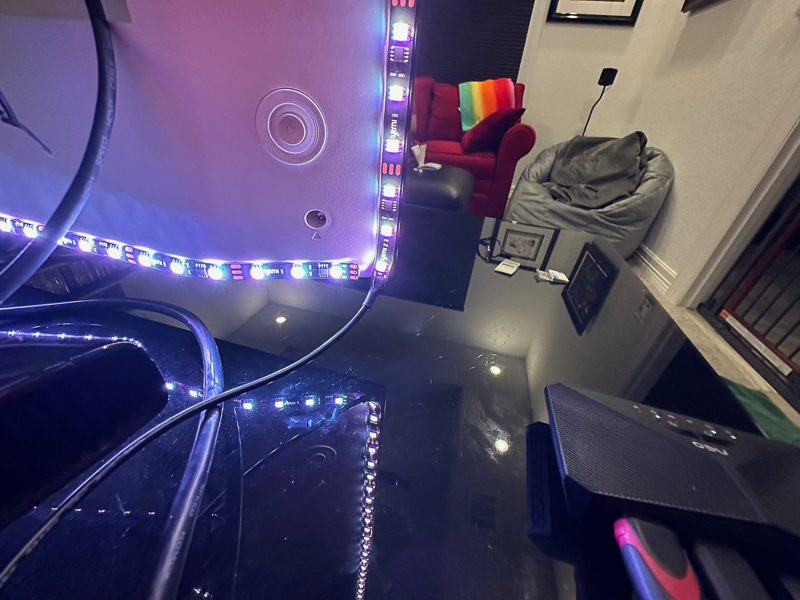
On the bottom right-hand corner of the light strip, you can see the cable that comes out to attach to the controller box. You can see the Lytmi Fantasy TV LED Backlight Kit’s controller box just to the right of the TV.
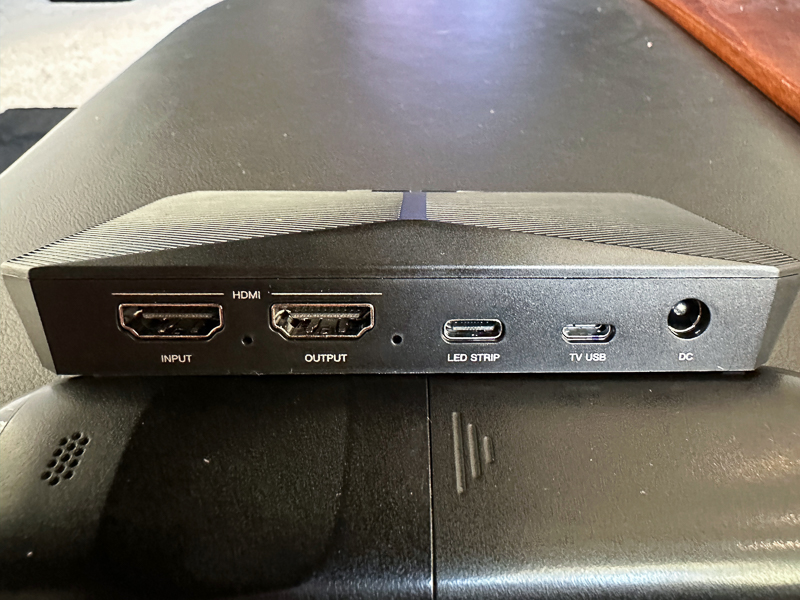
The back of the controller box has several ports. Starting from the left is the input port. Our setup has a Roku box that connects to a soundbar via an HDMI cable. Then the soundbar is connected via HDMI to the TV. I unplugged the HDMI cable from the TV and plugged it into the input port. I then took the HDMI cable provided by Lytmi and plugged it into the output port and back into the HDMI port on the TV. The USB-C cable from the light strip plugged into the LED Strip port, and the power adapter went into the DC port. I did not use the TV USB port at all. The manual does not even mention the port in its setup instructions.
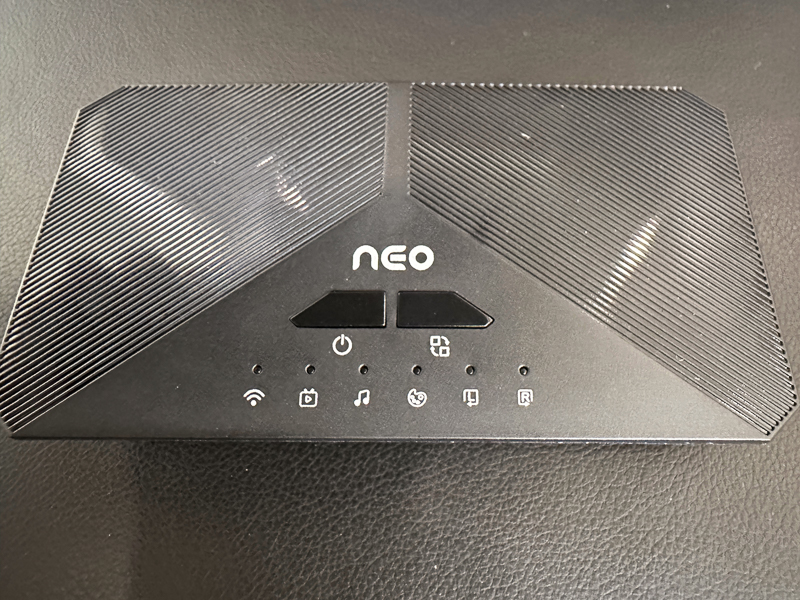
This is the top of the Lytmi Fantasy TV LED Backlight Kit’s control box. The box itself is small at only 5 x 2.5 inches. You turn the unit off and on with a quick press of the power button. The button to the right of the power button controls the modes (TV, Music, or Scene). The LED indicators below the buttons are:
- Wifi – solid green when connected, blinking when not connected
- TV sync indicator – set by using the mode button
- Music sync indicator – set by using the mode button
- Scene indicator – set by using the mode button
- The last two LED lights indicate if the controller is on the left or right side of the TV as you face it. So only one will be lit up at any time.
You can control all of these settings through the Lytmi app.
The Lytmi app worked well for the most part. The only issue I had was when I first added the Lytmi Fantasy TV LED Backlight Kit to our account, and it told us there was a firmware update. It took three tries, but we eventually got the update. The first two times threw an error. You do have to sign up with an email address. After connecting to the Lytmi, it asked for the WIFI connection information. It only connects via 2.4GHz. The screenshot below shows the opening screen after we added the Lytmi to our account.
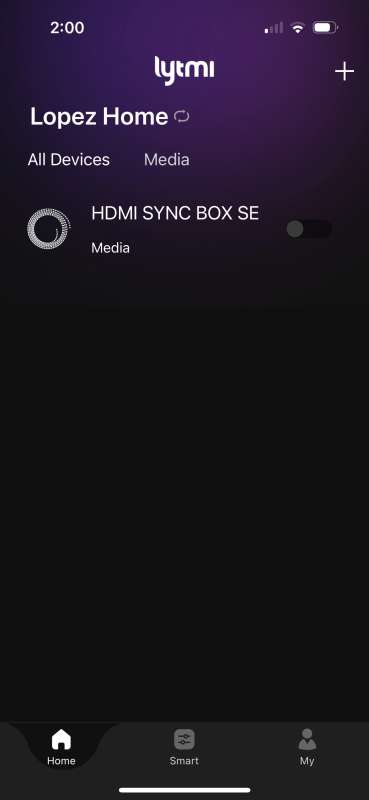
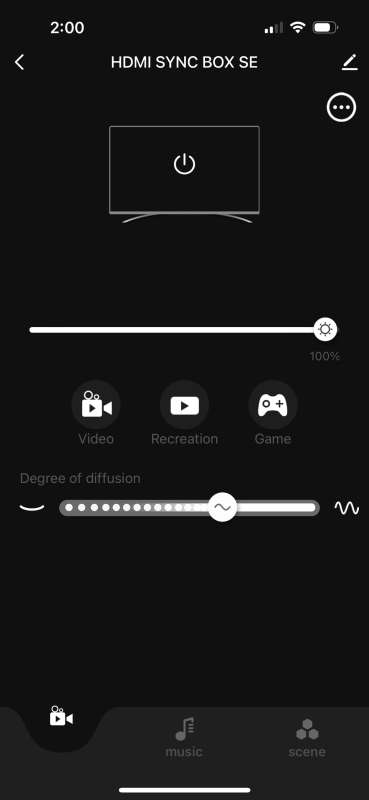
From that page, you click on the HDMI Sync Box SE and are presented with the TV synchronization screen. There are three tabs at the bottom of the screen, and TV sync is the first and default option. On this page, you can control the brightness and diffusion of the LED lights. You can also specify if the TV broadcasts video, recreation, or game. We chose video. We do have an Xbox, but to use it with the Lytmi Fantasy TV LED Backlight Kit, we would have had to manually unplug the HDMI cable from the soundbar and plug in the HDMI from the game or have an HDMI switch that had both the Roku and Xbox on it and then plug that into the Lytmi Fantasy TV LED Backlight Kit. The circle with the three dots is the way to get to the settings for the Lytmi. From there, you can specify if the Lytmi is on the left or right side of the TV and do firmware updates.
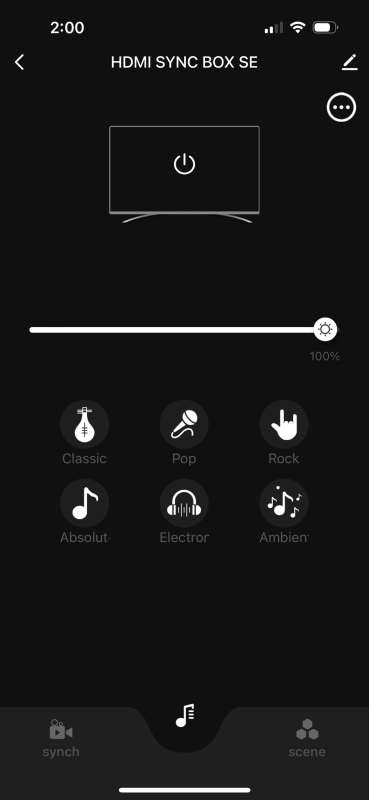
The next tab is the music tab. Not every option on this tab produced good effects. The ‘classic’ option works well with any music. It listens to words and music and accents every hit of the singer or music. All of these effects use random colors. Rock seemed only to accent electric guitar hits. So it would have long periods of no lights if there was no guitar. Pop was also strange in that there were long periods of no light. It seemed to want to accent drum hits and vocal hits but was not always consistent. Besides the classic option, the only other option we liked was Elector. That produced firework-type lights that accented the main hits of the music, no matter if it was vocal or instrumental.
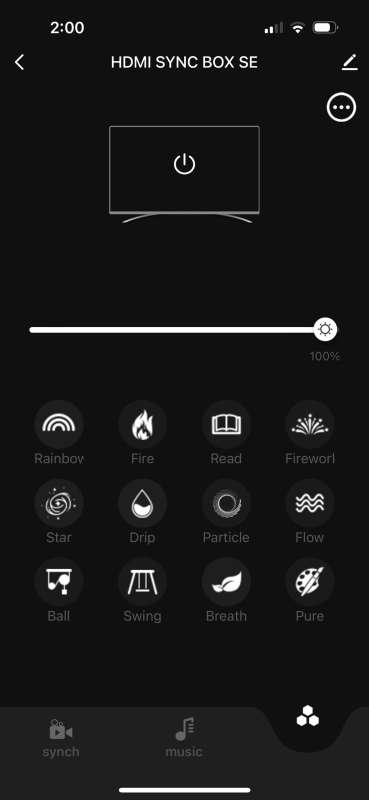
The final tab is the scene tab. It will give you a light show that has nothing to do with what is playing on the TV. There are some really good effects that you will see below.
Performance
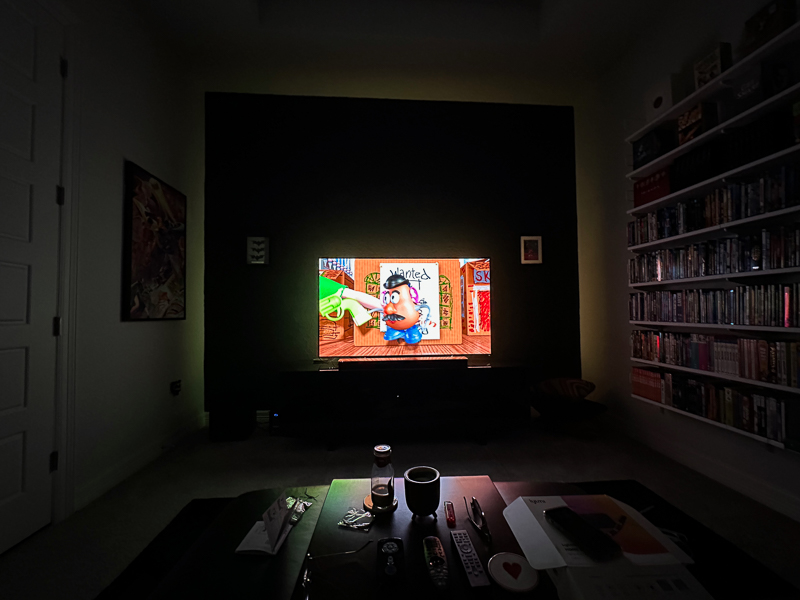
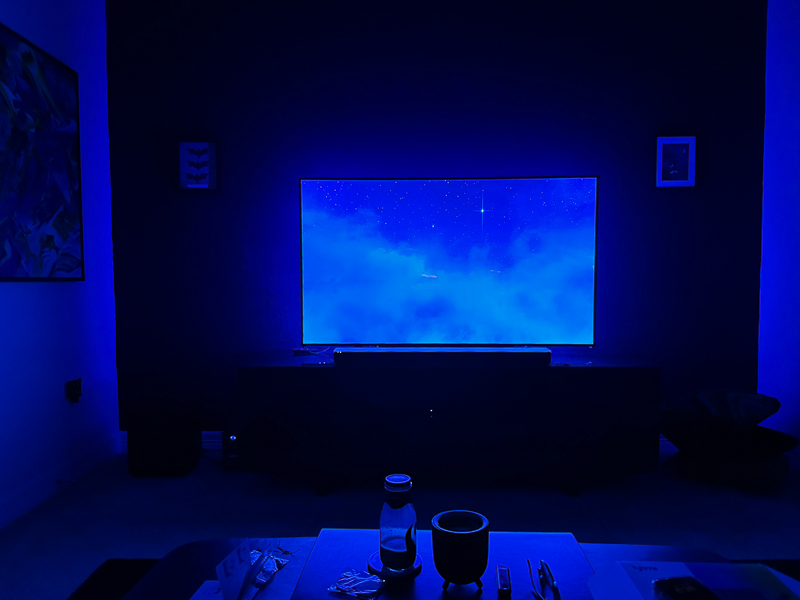
Both my husband and I enjoyed having the Lytmi Fantasy TV LED Backlight Kit connected to the TV. It did a really good job with video synchronization. I need to mention that in our media room, I did paint the wall behind the TV black as an accent wall. The ceiling, floor, and side walls are light grey. If the entire room had been the base grey color, the lights would have popped more, but that is not the fault of the kit. The picture below was the opening scene of a movie. You can see how well the blue shows up on the side walls and only barely directly behind the TV.
I waited for a scene with distinct colors on various sides of the picture. You can see that the green gun did cause the green light to show up to the left of the TV. I should also note you would most likely get better lighting effects off the bottom of the TV if it were mounted directly to the wall. Our TV is on a stand, and you can see the brownish lights reflecting off the top of the stand from the bottom of the TV.

Next, we decided to play with some of the scenes. I did a short clip of three of my favorite scenes for you to see the effects. First up is the fireworks scene.
Next, we have the rainbow scene.
Finally, we have the fire scene.
What I like
- Nothing has to sit in front of the TV. It uses HDMI input.
- The LED light strip has plain cords for the corners, eliminating the need to twist the strip.
- The app works well and controls the lights as it should.
What I’d change
- Make the music synchronization more sensitive. Unlike the classic and Elector, all other music options display very little light.
- Offer an option that can take multiple HDMI inputs.
Final thoughts
We are enjoying having the Lytmi Fantasy TV LED Backlight Kit connected to our TV. It produces a nice light show when syncing with video or music. The scenes would be a nice option if you wanted ambient light to set the mood for dinner or conversation. The fact that we don’t need to hang anything over the top of the TV or place anything in front of it sets it apart from other TV light strips. The setup was easy, and the app worked well. I recommend purchasing the Lytmi Fantasy TV LED Backlight Kit if you want lights to be placed behind your TV.
Price: $189 – $249, depending on TV size. $209 as tested.
Where to buy: Amazon
Source: The sample of this product was provided by Lytmi.


Gadgeteer Comment Policy - Please read before commenting
Sure seems like a lot of cables/box hardware to install on a TV, especially its wall mounted. Too bad it doesn’t support HDMI 2.1
Could you please check how the kit displays matching colors with a letter boxed movie and scrolling credits at the end of a full screen movie.