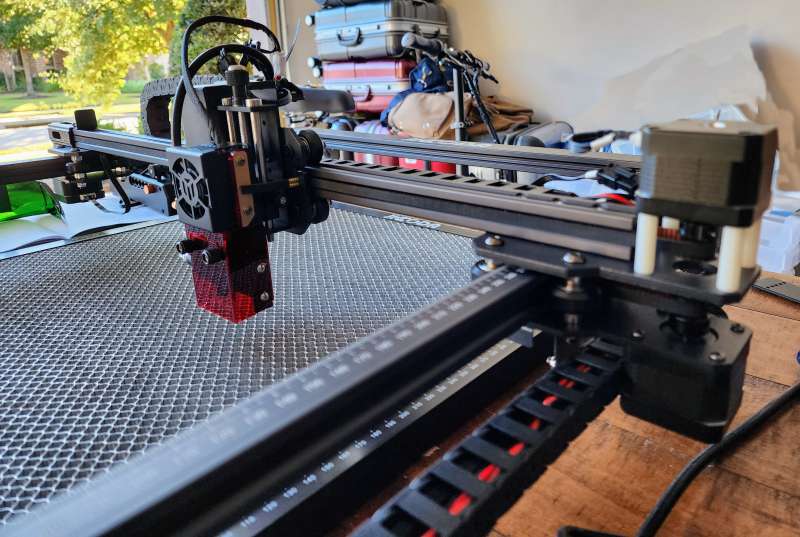
REVIEW – Laser engravers/cutters are everywhere these days. Seems like a lot of people discovered during COVID that making unique, personalized, and custom gifts is a great way to cut costs and even, perhaps, develop a side hustle. Like with any hobby, though, having the right tools is the difference between great gifts and owning a collection of mugs that say “Haddy Barfday, Irvert”. Where does the Jiccoda LE-1 Laser Engraver fit? Read on to find out…
What is it?
The Jiccoda LE-1 Laser Engraver is a 10-watt (output) blue diode laser that can engrave or cut a variety of materials including glass, metal, wood, plastic, etc. The cutting area is a generous 15.75 x 15.75 inches. And with a couple of additional accessories, you can cut/engrave both flat and cylindrical surfaces.
What’s in the box?
- All of the components to build the engraver – rails, guides, motors, cables, electronics and, of course, the laser
- An instruction manual/assembly guide
- A micro-SD card with documentation, videos and software
- Protective eye glasses to prevent damage when you inevitably feel compelled to look directly at the laser while in use
Design and function
The first step with the Jiccoda LE-1 is assembly. Let me tell you, this is not 30 minutes from box to engraving operation. It isn’t that the instructions are bad – they are actually quite good. The length of time to build (at least for me) came from the rather dark photos in the assembly guide that made a fair amount of the process a guessing game. There were many times along the journey when I thought I was doing something wrong and would have to step back to engineer my way forward.
The micro-SD card (as previously noted) has documentation on it, but I did not know until after the fact that buried in a directory on the card there is a short video that shows how to assemble the engraver. Literally, every problem I had with the dark pictures in the manual was resolved with the video. Although I will take full credit for the satisfaction I felt when I realized I had made the right engineering choices, if I had known upfront the video existed I could have cut 4 hours of assembly down to maybe 90 minutes.
So, watch the video first. You’re welcome.
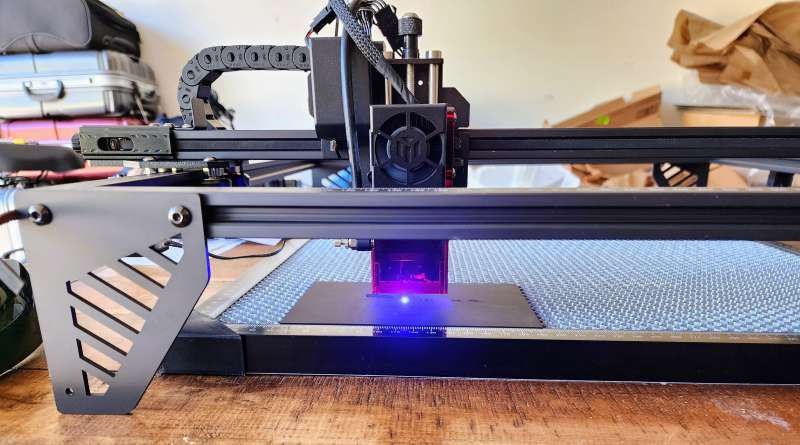
To spare you the pain of assembly pictures, I can sum up the process like this: there are 32 separate parts and dozens of screws, cables, cable ties, connectors, and more that go into the build. Here is the finished project, 4 hours after unboxing:
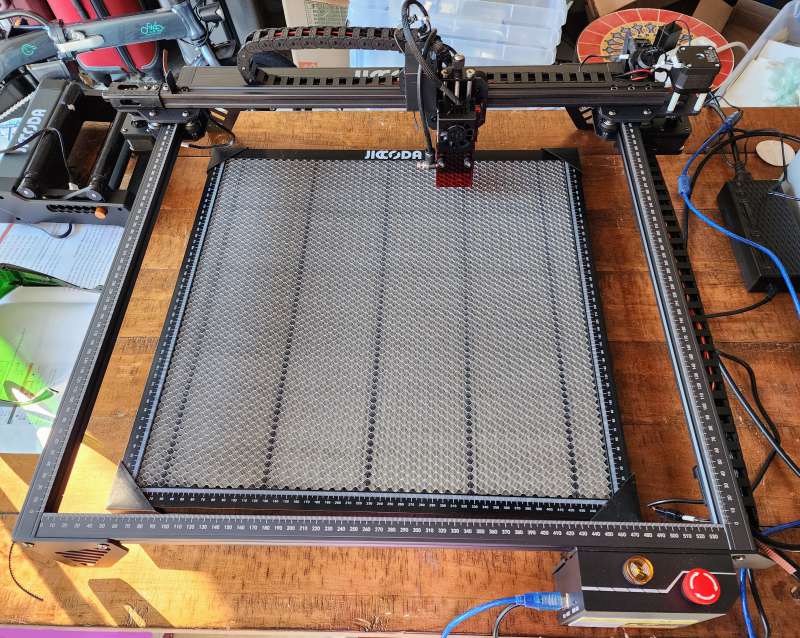
Note that in the center of the frame is an optional honeycomb panel ($40.99). This accessory protects your workbench surface from accidental laser burn plus it helps channel any smoke (like when you engrave wood) away from the work area. If you are seriously jumping into this hobby (or doing this for work), it’s a pretty good idea to get the panel. Jiccoda sent this along with two other accessories (the Laser Rotary Roller for cylindrical objects and an air blower, $109.00 and $99.00 respectively) – these are also recommended if you are getting started. But as they are optional, they are not a large part of this review.
On to the Jiccoda LE-1 Laser Engraver itself:
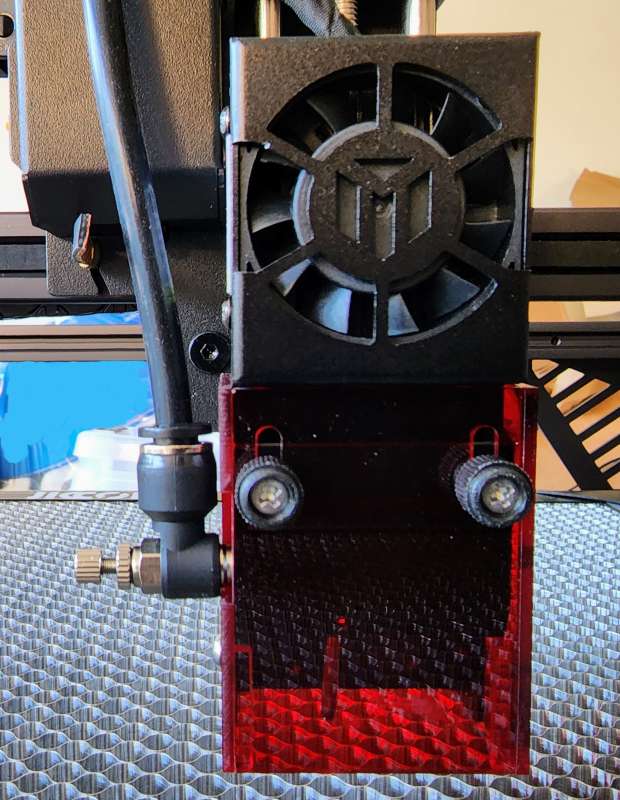
The Jiccoda LE-1’s laser is a 10-watt output blue diode laser. It sports a 0.08mm beam compression spot which allows the detailing on your project to be very fine-grained. And with a 10,000mm/minute routing speed, this unit can take less time to burn a project than a lot of the competition. On the left side of the laser housing is a hose that connects to the optional blower unit to help keep the laser chamber clear and functioning at peak efficiency. Now for the brains of the operation:
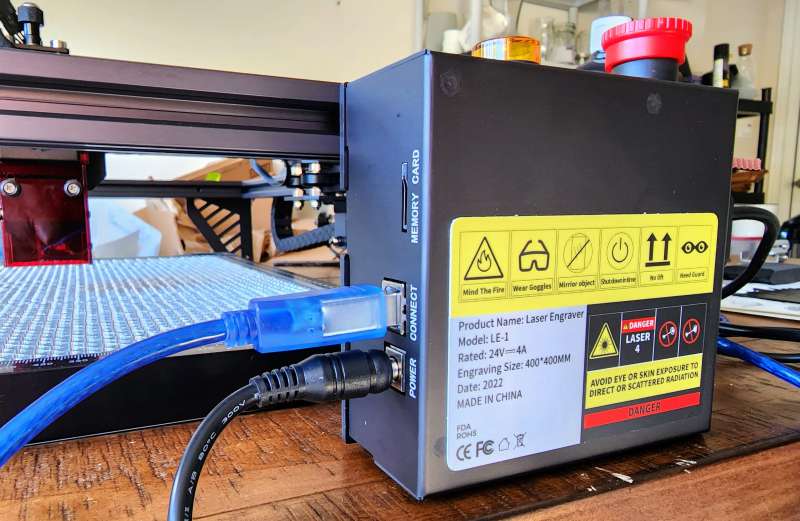
This is the control box for the laser – it drives the x and y axis guides as well as the laser. It has a USB 2.0 type B connector for your computer, although if you use a machine that has only USB type C ports, you will need a USB C to B cable for a direct connection. Like other laser engravers, the SD card slot is used as external memory for burns, and putting a card in this slot will help make the engraving process go faster.
The other optional accessory for the Jiccoda LE-1 Laser Engraver is the Rotary Roller, pictured here:
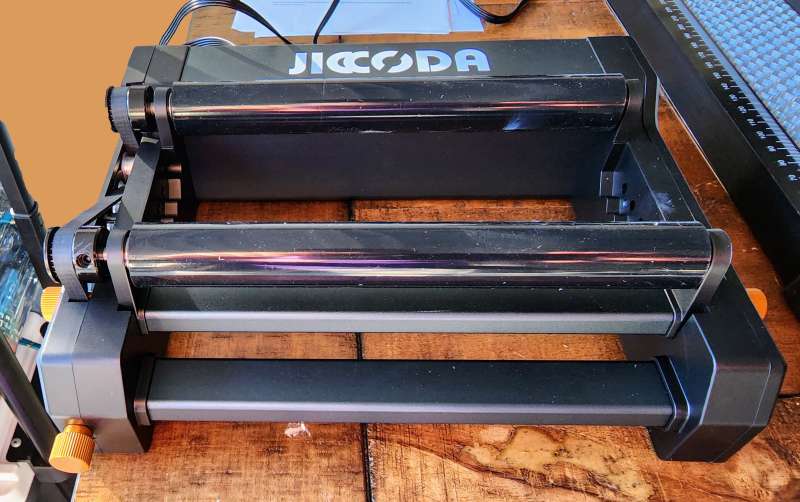
A cylindrical object like a mug or tube is placed between the rollers. Remove the Y axis motor connection and plug this in – the control box will now rotate the object between the rollers to get a nice, even burn on a not so flat surface. There is one issue, though, with this accessory: in order to use it, you have to raise the laser assembly higher than the object sitting between the rollers. If you mounted this on your workbench, that means removing the 4 mounting screws. Then you have to find 4 objects on which you can rest the feet of the engraver and they have to be reasonably stable so the x axis movement doesn’t knock it off what you are using to get the needed height.
This brings up the only real complaint I have about the Jiccoda LE-1: the legs. Look closely at the left foot in the assembled picture (here it is again):
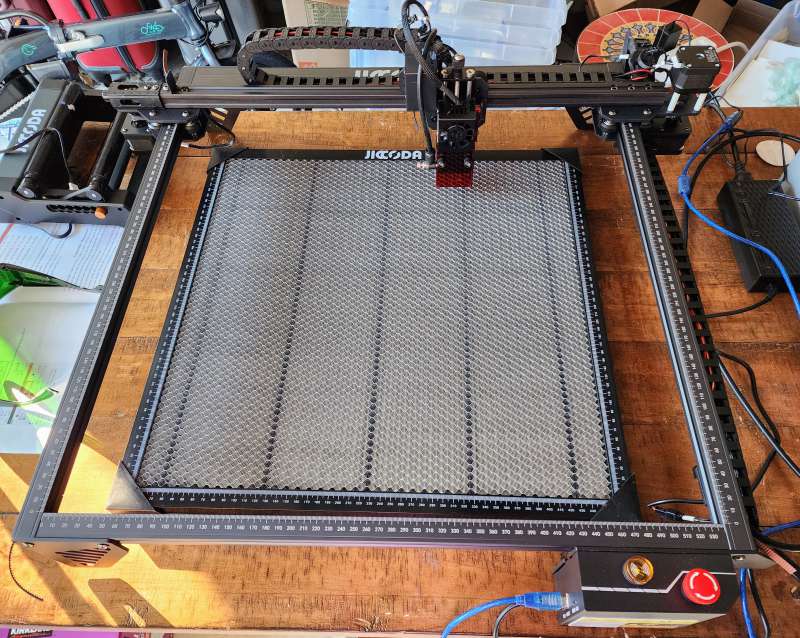
There are 3 triangular feet – two rear and left front. The control box is the fourth foot, and herein lies the problem. The control box sits too high on the guide frame, so the left front foot sits maybe 0.25 to 0.4 inches off the surface. If you mount this to a workbench, I suppose you could close that gap. But when you have to place this on other objects to gain the necessary height for the rollers, the instability (and gap) returns. In my opinion, a better design choice would have been to have 4 feet, with the control box mounted higher so it does not come in contact at all with the workbench. And if Jiccoda had made these feet some sort of screw-together cylinders, then they could also sell the leg pieces needed to get the height to use the roller.
Enough about all of the parts. Let’s burn something!
I chose to start with glass, a notoriously hard to laser etch surface – mainly because, well, glass. You can see through it and so can the laser. I went to a local hobby store and bought a very inexpensive 4×6 dual picture frame and took out the glass to use.
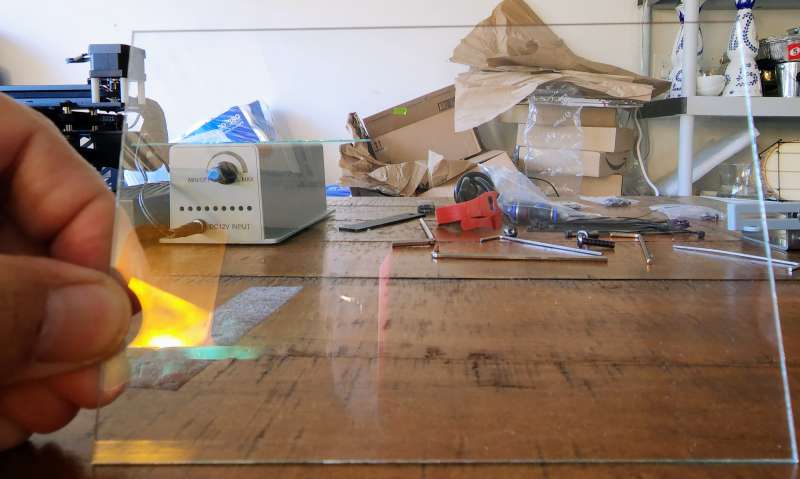
In order to etch on glass, you need to put something on the glass that will prevent the laser from going straight through, but at the same time will be easy enough to remove after etching. For this experiment, I chose black tempera paint because it should wash off with water when I am done.
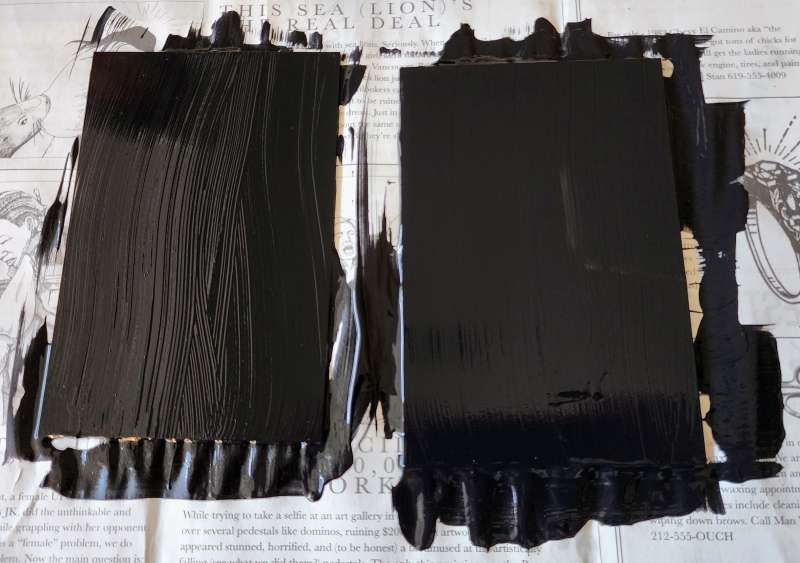
Here is the glass coated on one side with the tempera. This is the first coat – I added a second coat to minimize the brush marks from the first and to provide a better etch surface. Now it’s time to put this under the laser, but what image to use? Yeah, the Gadgeteer logo – I’m nothing if not a loyal company man. We’re going to do this twice – once using the SVG image type (which should render a clean outline of the logo) and a JPG version (for shading and detail). Put on your safety goggles and go-go-gadget laser beam!
I set the laser power to 30% and the speed to 500mm/minute – this should get a very nice, clean and clear etch without breaking this very inexpensive glass. Each burn took about 2 minutes to complete. A few minutes soaking in a bowl of water and a wipedown later, and here are the results – first up, the JPG version:
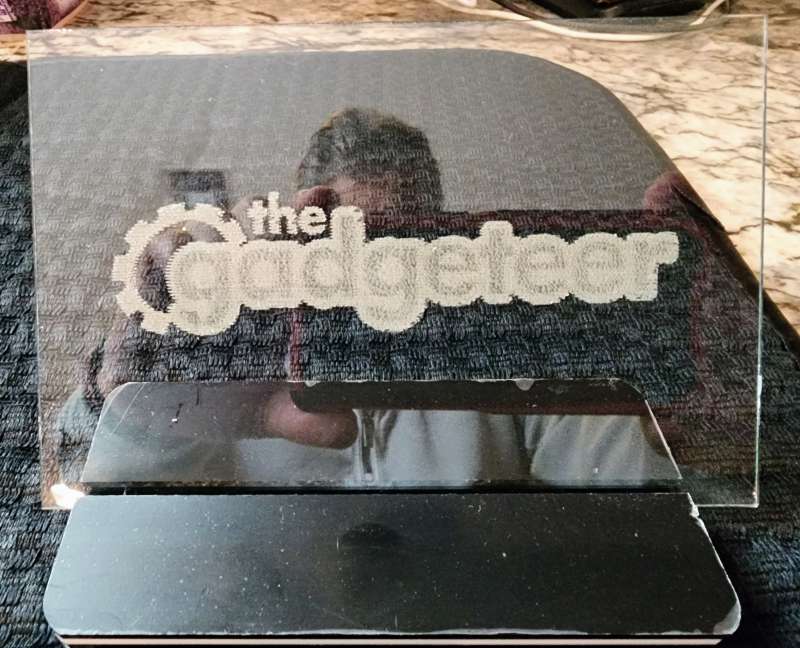
While this turned out nice, I think this sort of detail is better used on materials like metal or leather. The picture makes the logo look fuzzier than the actual result, and with the right image, this could also work on glass. Now for the SVG version:
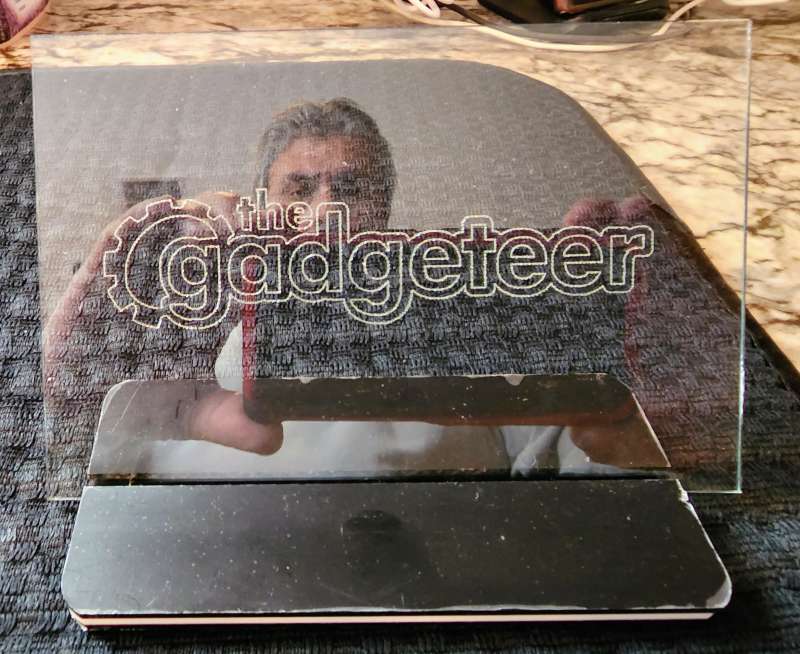
Much better this time. Vector graphics FTW when glass is involved.
To achieve these results, I used the LaserGRBL software on Windows 11. It is free (and Jiccoda includes the latest version on the microSD card so you don’t even have to go looking for it) and out of the box, it read the LE-1 directly and adjusted its settings. Toward the end, I also tried the LightBurn software. While it is nice, there is quite a bit of prep work needed to get the software to talk with the laser. Once you get that tweaked, it is OK – but it is easy to get lost while trying to make it work.
I had wanted to do a laser cutting project – recreate a tiki bar sign in plastic which would require a lot of cuts using different plastic colors. I assembled all of the necessary graphics but just couldn’t find the material locally to do the project. I’ve ordered the necessary pieces, but unfortunately, they won’t be here until sometime in early December. When I get it, I will update this review.
I’ve had experiences with other laser engravers but to be honest, they were more consumer-focused devices. The Jiccoda LE-1 Laser Engraver is a prosumer unit and it shows in the attention to detail that went into the materials in the engraver, the thoroughness Jiccoda has shown in assembling everything a novice to a pro could need to get started, and, of course, the actual output. Top to bottom, this is a great device and so far, for me, has yielded some zen-like experiences as I play with the engraver. If the problem with the feet could be resolved, this would be the prosumer device to beat. For now, though, it is a great entry in a field with a lot of other great entries.
What I like
- The inclusion of more than you will need to get started (spare parts included), even if you don’t know it’s there at first
- Accessories readily available that make the Jiccoda LE-1 feel more like a system than a singular device
- How simple and straight-forward the instruction manual is on getting started on your first project
- How, by following said instructions, I can look like a seasoned pro engraver rather than an absolute noob
What I’d change
- The feet. I might have mentioned that.
Final thoughts
My reaction to previous laser engravers was mostly yawns along with the occasional “my God, that is hideous” when looking at the output. From the first burn, the Jiccoda LE-1 Laser Engraver has had my attention and enthusiasm. I can see how it can become an interesting art outlet for me, where I can spend more time being creative than having to think about the mechanics of realizing the vision. I can recommend this system because the price is good and the equipment great. But if Jiccoda fixes the foot problem and (by extension) makes it easier to use the roller, this would become an unequivocal must-buy.
Price: LE-1: $429.99 with a $100 off coupon, Honeycomb working panel: $79.99 with $20 coupon, Rotary Roller: $99.99 with $10 off coupon, Blower: $69.99 with $20 off coupon
Where to buy: Made the Best and Amazon – LE-1, Honeycomb panel, Rotary Roller, Blower
Source: The items in this review were provided by Jiccoda.


Gadgeteer Comment Policy - Please read before commenting
Is this machine can engrave in stone.. like making a tombstone..
Yeah, you can etch stone. It isn’t a super deep etch like something you might want on a tombstone, but you can do it.
If you are going to etch a tombstone, you’d probably want a bigger laser engraver. I’m not sure anything larger than pet-sized would fit in this. Plus the time it would take to etch would be very long – like hours.
And it’s unsafe, like every laser cutter/engraver.
Nothing to protect from fumes, no air exhaustion system, nothing like that. Pitiful.
Is there a place to get software for this machine?
In the article I mentioned LaserGRBL – this is a free and open source app that will drive the laser just fine. There are other apps (some paid, others free) that will do the same. The laser uses the GRBL standards, so really any software that supports it can be used.
I am very new to laser cutting so bear with me! I have my laser all set up, but the very last step of positioning the focus has me perplexed. I don’t see a baseline mark on the actual laser to compare with the measuring tool that was included. I don’t know what height to set the laser! Please help!
If you have the Jiccoda, then the base of the laser should be at the 0 mark on the ruler (the base is measured from the bottom of the colored laser housing – see the 3rd picture above). Just hold the tool up against the laser housing.
As to the height, a lot depends on what you are engraving/cutting, any effects you are looking for, etc. Generally speaking, you want about 20cm from the bottom of the laser housing to the target. I’ve stuck with that distance while etching wood, ceramics, glass and plastic. If necessary, I can make additional adjustments in the software (like laser strength, speed, etc.) so there really isn’t any harm in using 20cm as a good starting point.
Hello , I have a question I hope you can help with . I have a JICCODA LE-1 and I used the MKS laser tool and it was in asian but i was trying to follow a post of some ones and hit the erase . now it wont connect at all to the GRBL . Anyone know what to do to fix this . I really am frustrated about it . Thank you .
The memory card that should have come with the LE-1 will have a firmware update directory with update tools for both Mac and Windows. I’d try running one of those first since they communicate with the device using a COM port and raw machine code rather than an advanced protocol like GRBL.
If that fails, you should contact Jiccoda support for more help.
sadly there is not a firmware update or program on the memory card and I have contacted Jiccoda on the only email I could find hoping the will respond . I found others also with this problem who are searching for a way to fix it . Thank you for your help very much . I’ll post when I get it fixed here if thats okay .
Do you happen to have any tips or video for cleaning the machine?
DO THEY MAKE ANY LONGED RAILS TO EXTEND IT PRINT AERA? I CAN FIND THE LONGER MACHINE. CAN NOT EVEN FIND WHO MAKES THEM