REVIEW – Are you eying up some new holiday decorations but fretting about where to put them? Did you go overboard on Black Friday shopping, and now you’re short on storage space? Are you dreading Christmas morning because you have nowhere to put those brand-new goodies? Fleximounts overhead garage rack could be the solution you’ve been hoping for.
What is it?
The classic overhead storage rack in the GR series by Fleximounts is a heavy-duty, hanging shelf that adds a whole new dimension of storage space to your garage. It comes in two colors (black and white) and several sizes to make the most of your space.
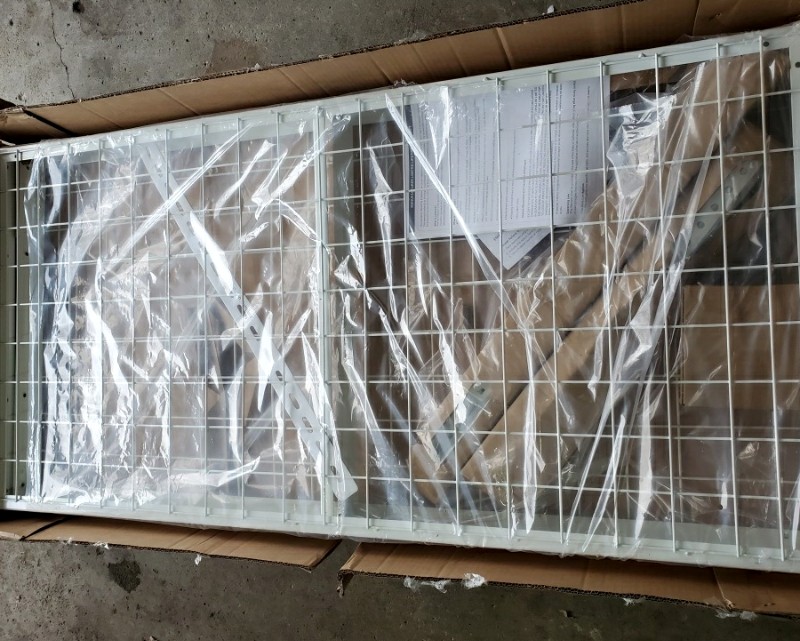
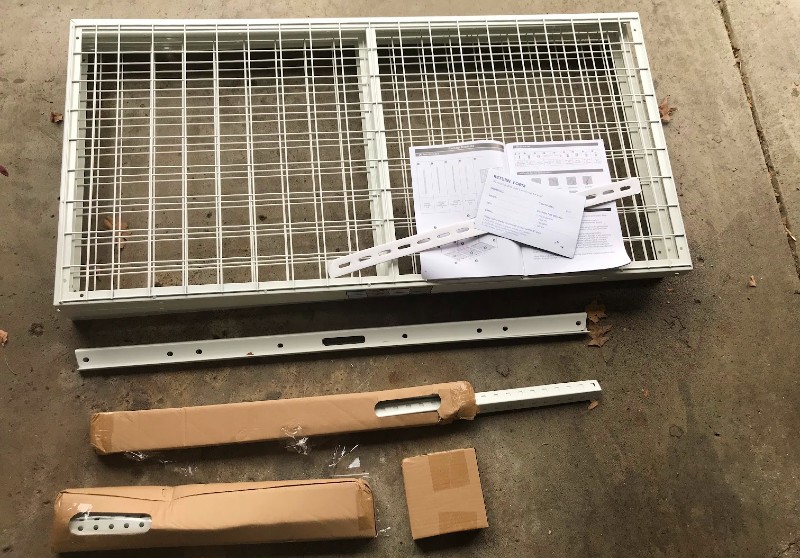
What’s in the box?
- 4 ceiling brackets
- 4 L-shaped upper vertical posts
- 4 L-shaped lower vertical posts
- 2 connecting plates
- 3 wire grids
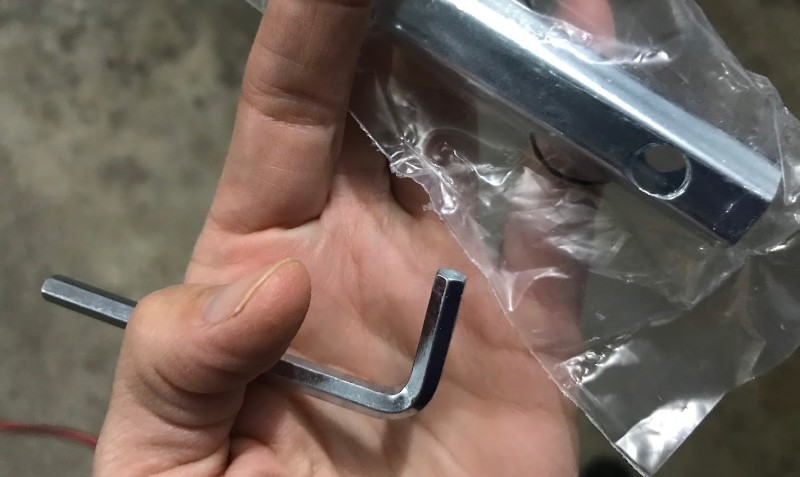
- Hardware, hex key and socket wrench
- Instruction manual
 Hardware specs
- Height adjustment: 22-40 inches
- Weight capacity: 400-600 pounds (450 pounds for reviewed option)
- Material: Cold-roll steel
- Item weight (4’x6’ rack): 65 pounds
- Manufacturer: Fleximounts
- Part number: GR48
- Finish: Powder coated
- Mounting type: Ceiling
- ASIN: B0194RLK4Y
 Design and features
Pre-Setup
Take some time before you pick out your Fleximounts overhead garage rack to make sure you select the correct one. Not only do you need to consider your space, but you need to find out where your ceiling joists are located, and also note where they are in relation to the other features of your garage. You’ll need to factor in things like the moving parts of your garage door, the door clearances and any headspace you’ll need for walking under the rack, or possibly the heights of your vehicles.
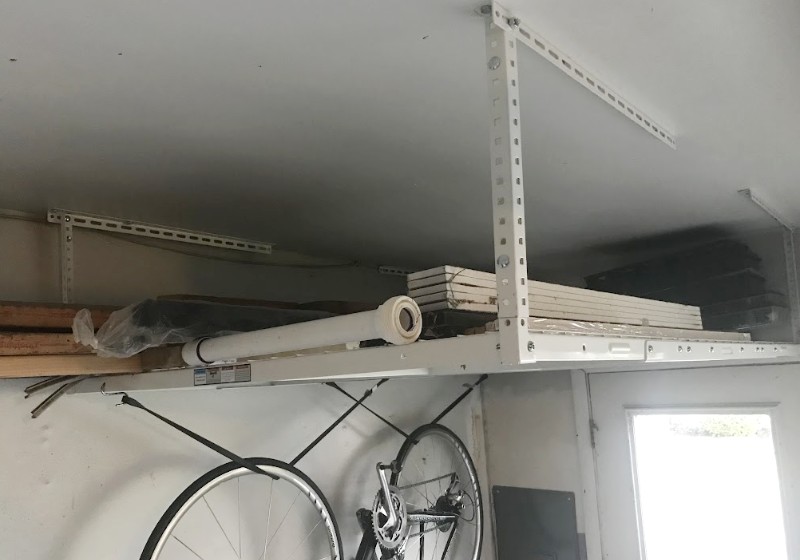
We did our homework and picked out the 4’x6’ rack, and it still just barely, barely gave enough clearance for the outside door to our garage (something I hadn’t thought to consider). So be warned!
You have lots of options to choose from:
- 4’x6’
- 3’x8
- 3’’x6’
- 2’x8’
You can also pick white or black.
The Fleximounts website gives some examples to help you map out your own layout.

Setup
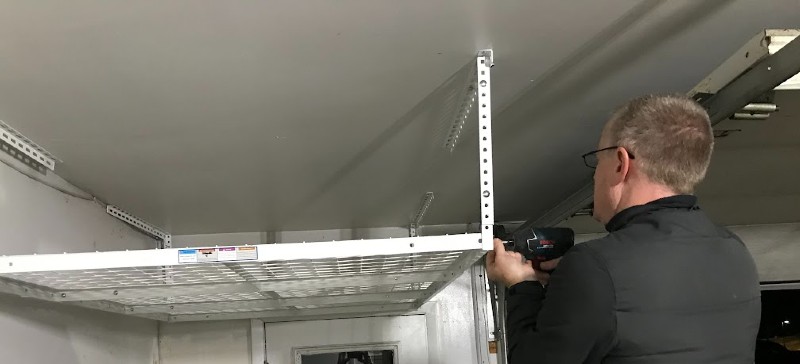
It took my husband about 2.5 hours to put up the Fleximounts overhead garage rack. While my son and I were lingering about, you couldn’t really count us as helpers. With better helpers, it would have been faster.
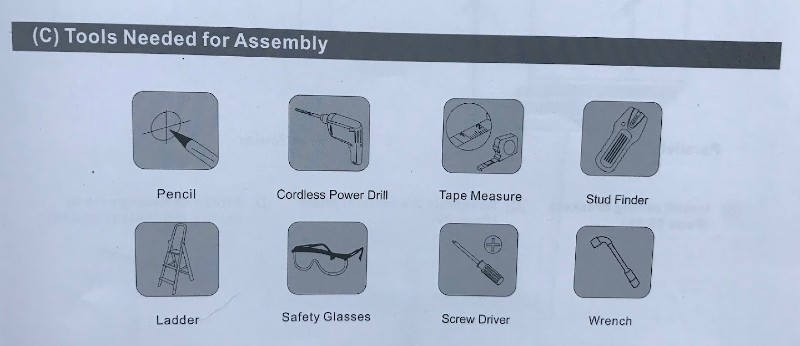
The manual says you’ll need a pencil, cordless power drill, tape measure, stud finder, ladder, safety glasses, screwdriver and wrench. We also used an impact gun, which we found preferable to the little hex key and socket wrench included. We just used a ladder, but having a scaffold would have made the job a lot easier, especially measuring to determine the layout.
The general assembly was pretty simple and the pieces fit together intuitively. The instruction manual was easy to follow, and the website also features installation videos.
The hardest part was mapping out where it would fit on the ceiling. Unless they’re visible, you need to use a stud finder to locate the joists in your ceiling and then determine if you’re going to align your ceiling brackets parallel or perpendicular (for parallel installation, your joists must be 48” apart). You also need to make sure the vertical posts are positioned correctly over the ceiling brackets but also hang over the wire grid so your shelf hangs how you want it. We wanted ours snug in a corner, so it took some time to lay it out.
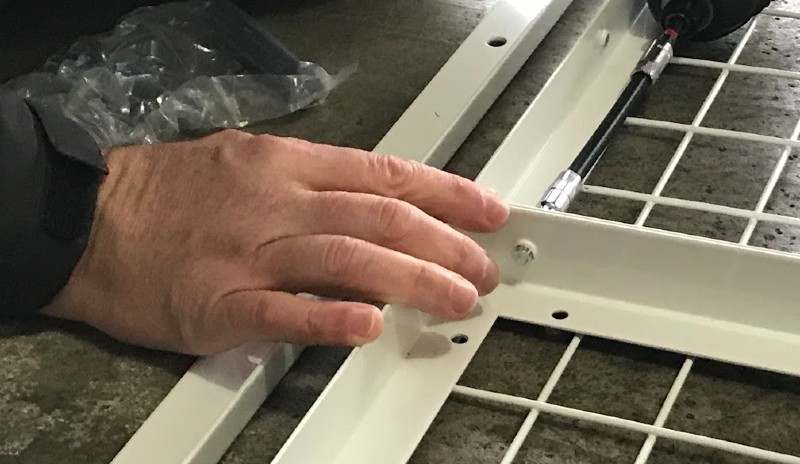
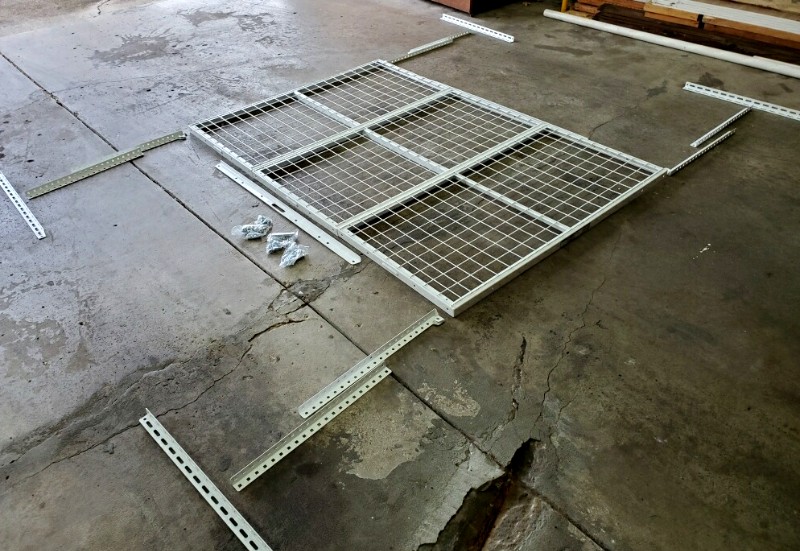
We laid it all out on the ground and assembled the shelf. Then measured out and assembled the vertical posts.
Then he mapped out the location for the starting corner and installed the corner ceiling mount, followed by the other three ceiling brackets.
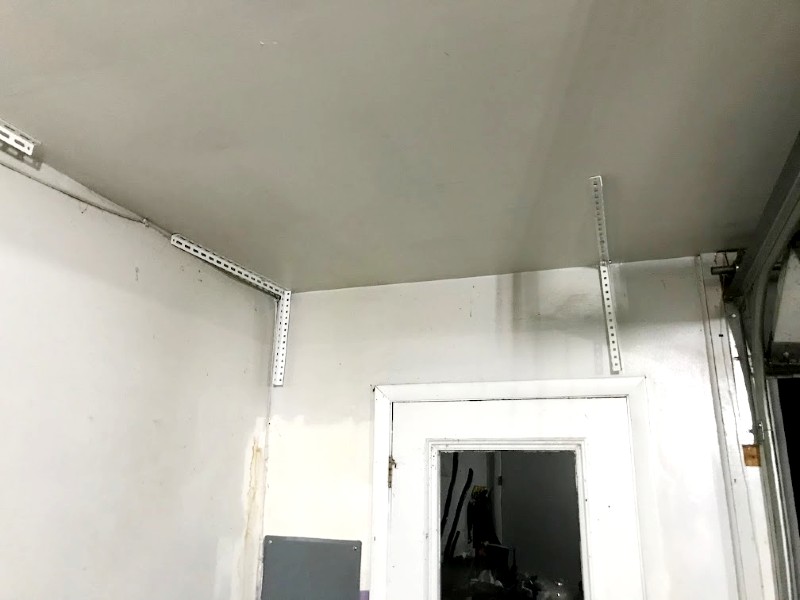
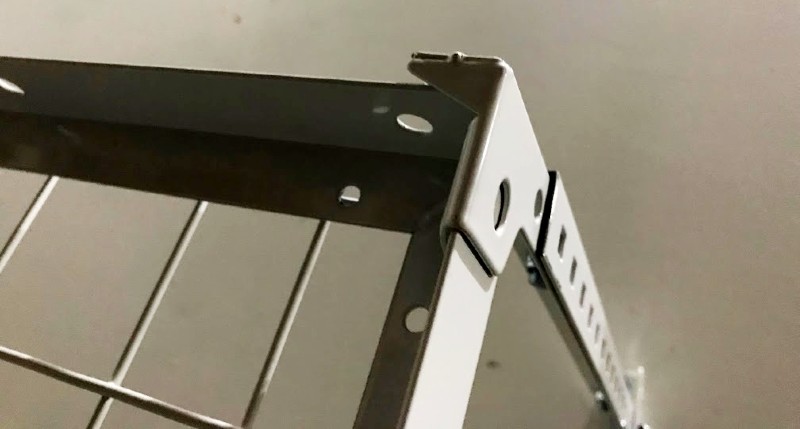
Once the ceiling brackets were installed, we used a screw and locknut (four per post) to attach the vertical posts. If you’re using an impact driver, be careful not to over-torque these; we did strip one of the 16. This was tricky in the corner and, in retrospect, would have been easier to attach the corner vertical post to the ceiling bracket before we mounted it, so heads up for those installing close to a wall.
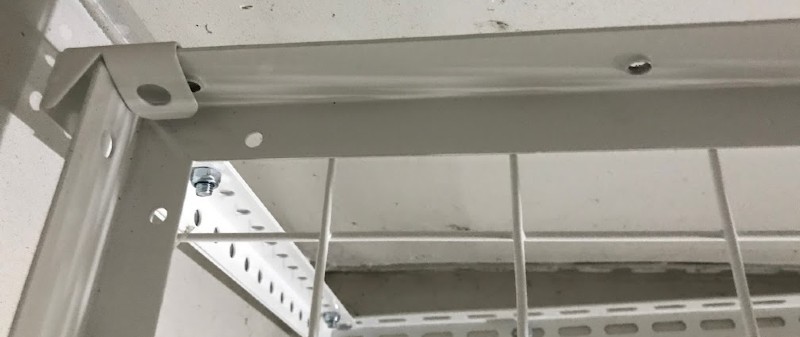
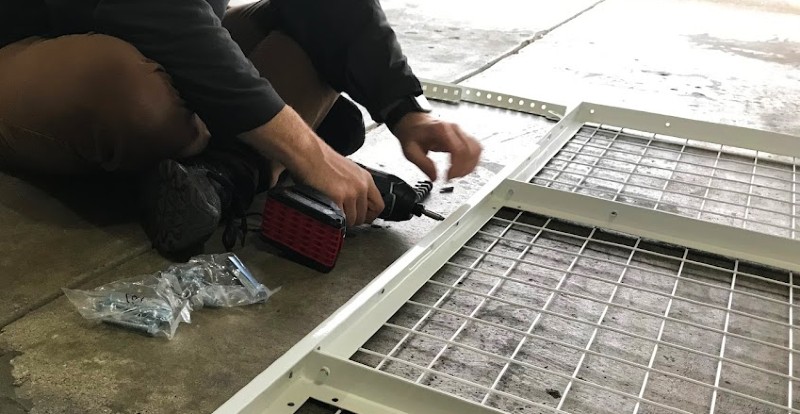
Then you just need to place and attach the wire grid. It’s helpful in this step to have two people. One of the nice features of this design is the clips you use to get the shelf in place. That made it easier to position the grid, and plus it gives you both hands free to secure the posts to the grid. Without those clips, it would be impossible to assemble this as a one-person job.
Another feature of the Fleximounts overhead garage rack that we liked is the grid itself, which you can reach through to position things on your shelf. Just be aware of what you have positioned along the edges since there is no stop lip or anything like that to prevent items from falling off the edge.
Performance
Overall, the Fleximounts overhead garage rack is a very nice-looking, effective storage system.
As you plot out your shelf placement, you can adjust the height from 22 to 40 inches. As you can see, we had to keep ours a bit shorter to accommodate for the door clearance. A cut-to-size option here would have been even more versatile in our case, but might not be for everyone.
The 4’x6’ option that we chose has a 450-pound weight capacity and offers 80 cubic feet of storage at maximum height (ours is less to accommodate for door clearance).
And I’m not the only one who likes the Fleximounts overhead garage rack. With nearly 8,000 Amazon ratings, these are currently rated 4.7 out of 5 stars. This rack is also number one in Amazon’s category for ceiling-mounted storage racks.
What I like
- Lots of storage space
- Looks attractive
- Heavy duty
What I’d change
- An option for a lip on the edge to prevent spillover or accidents
- A trim-to-size option on the vertical post would have been helpful for us
Final thoughts
Fleximounts overhead garage rack is heavy-duty and nice looking. It gave us a whole new way to store our stuff without taking up any floor space. Just make sure to consider all aspects of your garage configuration before you click, “Add to cart.”
Price: $179.99 for the 4’x6 white rack that we reviewed’; $139.99 to $189.99, varies by option (black or white, 4’x6’ or 3’x8 or 3’’x6’ or 2’x8’)
Where to buy: Fleximounts website
Source: The sample of this product was provided by Fleximounts.
![[MINI SIZE. ULTRA PORTABLE CHARGER]: Roughly the size of an AirPods Pro case, this smallest power bank packs 10,000mAh of long lasting power into a tiny, nano footprint. Easily slide this ultra slim, credit card size charger into your skinny jeans, a...](https://m.media-amazon.com/images/I/41rATpm6dyL._SL160_.jpg)
INIU Portable Charger, Ultra Mini 10000mAh 45W Fast Charging with Detachable Cable, Flight-Safe Travel USB C Power Bank External Phone Battery Pack for Xiaomi iPhone 17 16 Samsung S26 Google iPad etc
(as of June 14, 2026 19:02 GMT -05:00 - More infoProduct prices and availability are accurate as of the date/time indicated and are subject to change. Any price and availability information displayed on [relevant Amazon Site(s), as applicable] at the time of purchase will apply to the purchase of this product.)