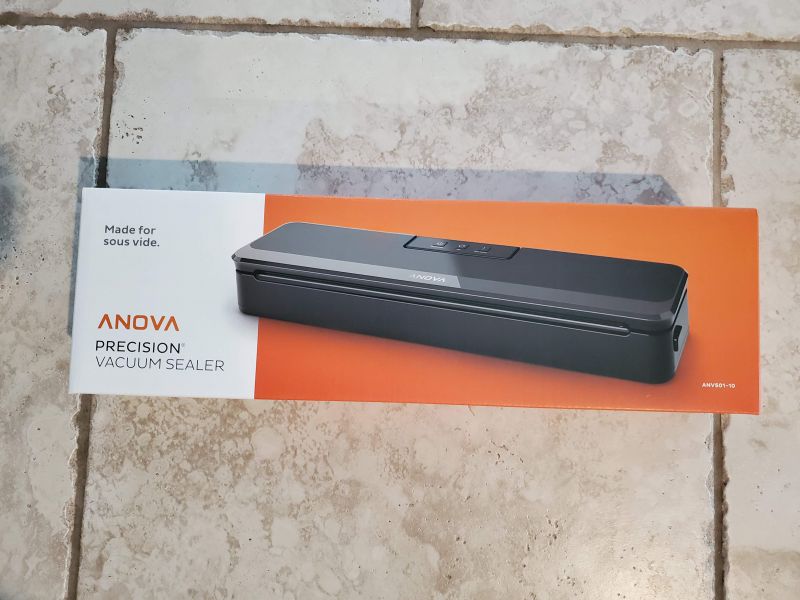
REVIEW – I recently received an reviewed my first vacuum sealer a little over a month ago. It worked great and was really economical. It was made my Uten and you can find the review here. When the chance came to review the new vacuum sealer by Anova, I jumped at it because I know they make some quality sous vide products, and I wanted to see how this sealer compared to a less costly sealer. Read on to see how it went!
What is it?
The Anova Vacuum Sealer is exactly what the name says it is. It is a vacuum sealer that will suction the air out of specially made plastic bags and then use heat to form an airtight seal on the bag. It is a great way to preserve foods longer. Also, a lot of people will often buy meats in bulk and use the sealer to portion off smaller meal sizes to store in the freezer.
What’s in the box?
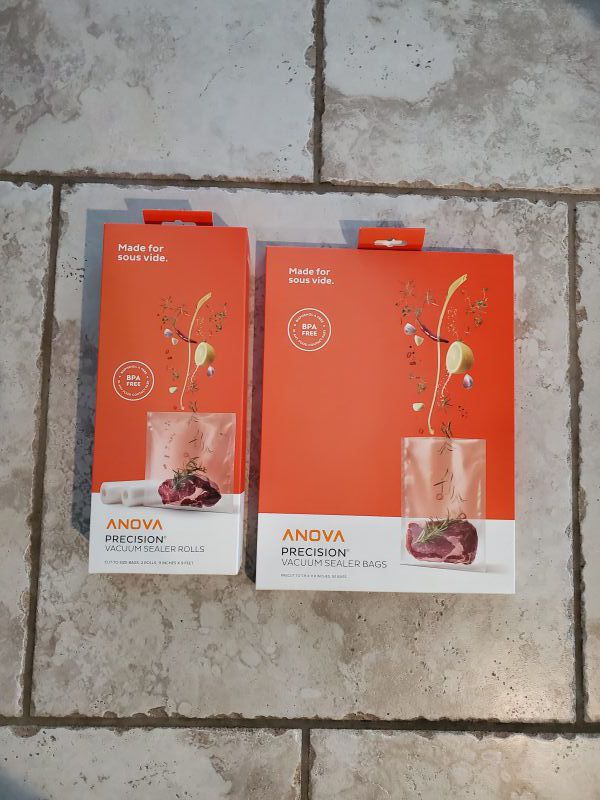
Anova sent me the vacuum sealer and an additional box of vacuum sealer rolls and a box of sealer bags. One box had two rolls that you self cut to size with the dimensions of 11 inches by 9 feet. The other box had 50 bags with dimensions of 7.9 inches by 11.8 inches.
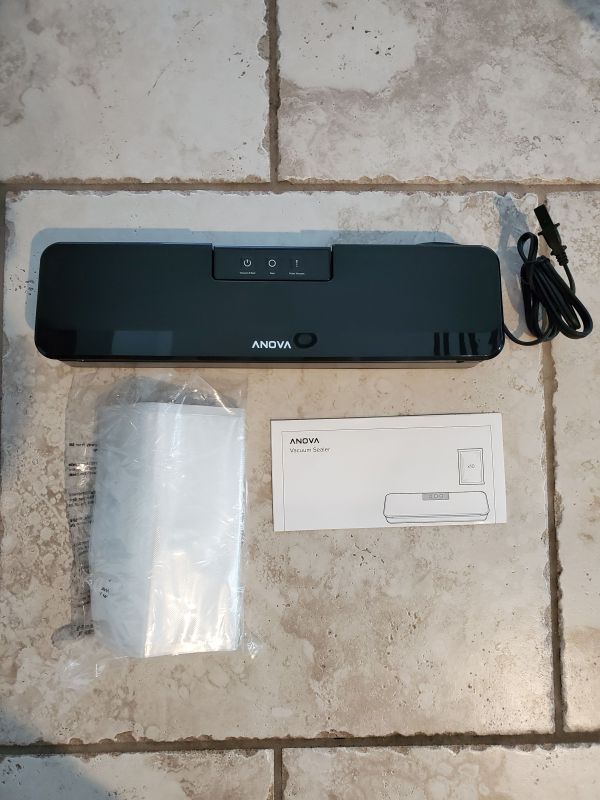
The following items were in the actual sealer box and are shown in the first picture above.
- The sealer itself with an attached power cord. The power cord cannot be removed from the sealer.
- A user manual that uses pictures more than words on how to use the product
- Ten 7.9 inches by 11.8 inches pre-cut bags
Design and features
The first thing I noticed was that the bags provided by Anova seemed to be a bit more studier. I say this because the bags provided by Uten had the texturized thicker plastic on one side of the bag only. The other side was a thinner clear plastic. The bags Anova provided had the thicker textured plastic on both sides of the bag.
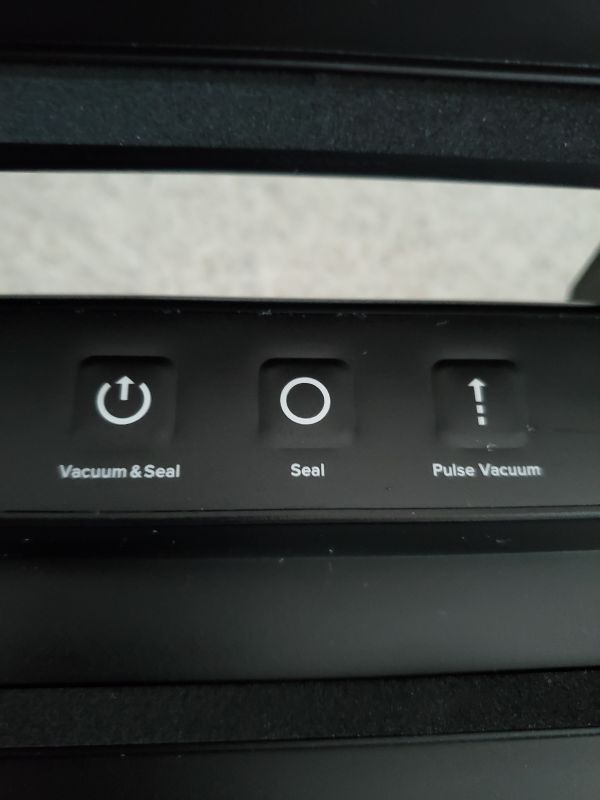
This first picture is a shot of the buttons on the machine. There is not the moist/dry option that the Uten sealer had, but with my chicken test, I found it pulled all the air from the bag without any issues. There is a vacuum/seal button that will vacuum first, then seal the bag all in one step. There is a seal only button that you would use with a roll where you would want to seal one side first to close the bottom of the bag. Finally, there is a pulse vacuum button where you can control the vacuum level yourself. Once you have vacuumed as much air as you want manually from the bag, you would then press the seal button.
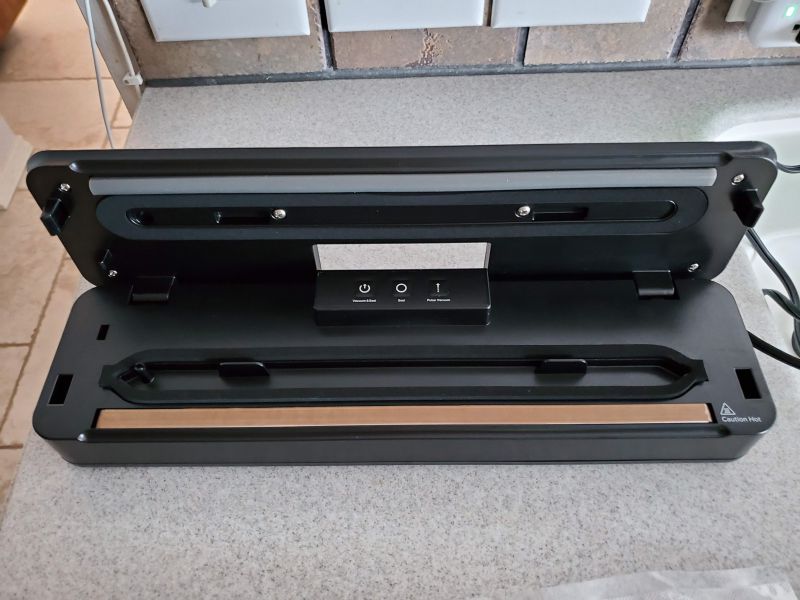
This next picture shows you the entire vacuum sealer. I noticed it had the same pop-up nozzle that pulls the air out of the bag that the Uten did. I wonder if I can attach the hose provided by the Uten and use it to suck the air out of containers as the Uten can. Unfortunately, I do not own any of those containers or I would have tested that feature. I did notice the area where the seal is made is much larger than what the Uten had. It is all a single piece while the Uten had the metal band running separately on top of the whole heat band. One thing the Uten had that I wish the Anova had was a storage spot under the sealer for the power cord.
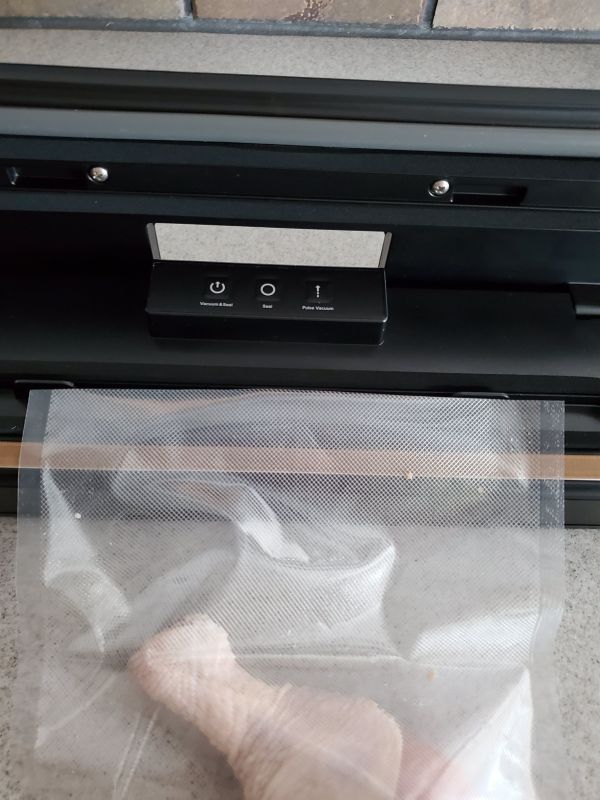
So I decided to do a chicken test again, but this time with leg and thigh quarters. As shown in the picture above, you place the edge of the bag over the drip tray and then close the top down until you hear the click of both sides locking into place.
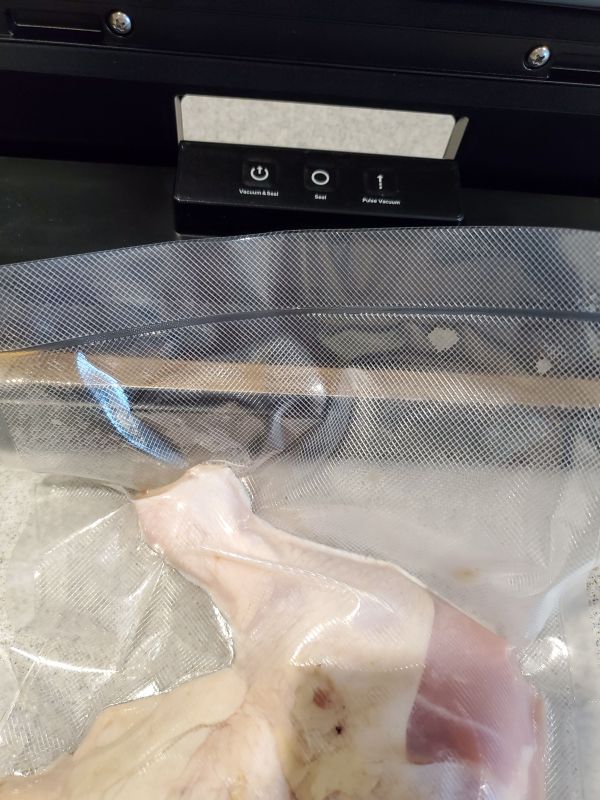
I pressed the vacuum/seal button and let the appliance go to work. It pulled all of the air out in about 22 seconds and then took about another five to six seconds to seal the bag. In the picture above I tried to show you the actual seal. It is a slightly wider seal than what the Uten provides.
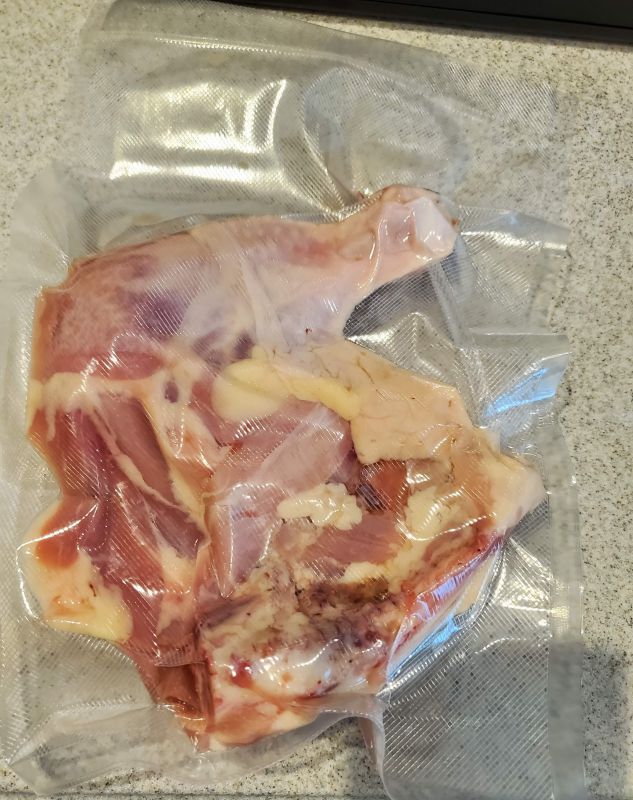
This last picture shows the back of the chicken so you can see the level of vacuuming that took place. It did a really good job of pulling the air out of the bag. Below is a video I took of the vacuum sealer in action.
What I like
- I really like their bags. They seem more heavy duty than others I have seen and have the thicker textured plastic on both sides. This may be due to the requirement for sous vide compatibility.
- It does a great job of pulling the air out of the bag.
- The actual sealing process is faster than what the Uten could do, and it creates a slightly larger seal band.
What needs to be improved
- It would be nice if there were a storage area for the power cord.
- I Need to know if the sealer can work with external storage containers like the Uten using a hose. If it can, they need to put that in their advertising and in their user manual.
Final thoughts
I really like this vacuum sealer. Overall, it seems much more heavy-duty than the Uten with the wider heat sealing strip and the fact it is ever so slightly wider than the Uten. I noticed the Uten is no longer available on Amazon as of the day I wrote this review. It was listed for thirty dollars cheaper than Anova, but what good is that if you can no longer buy it. I also love the fact that Anova is a U.S. company that is based out of California.
Update 3/4/20
I have used this vacuum sealer many times since my review and it has worked flawlessly. It has become a necessary gadget in my kitchen.
Price: $69.99
Where to buy: Anovaculinary.com and Amazon
Source: The sample of this product was provided by Anova


Gadgeteer Comment Policy - Please read before commenting
Is there any cleaning or maintenance required by the Anova vacuum sealer?
There is no maintenance that I know of. The only cleaning that can happen is if when you are vacuuming out a bag with liquids in it and some liquid comes out into the tray. I have not had any of that happen yet. I would think that if you pack a lot of stuff like chicken or meat into a smaller bag you might get some liquid into the tray. Then it is a simple matter of just wiping it out and disinfecting with a bleach type cleaner.
HOW do you put the bag in? Against the front edge of the notches? Over them (and the air intake)? I can’t prevent the bag from shifting out of position when I close the lid, so NOTHING happens when I push either vac button (pulse or auto-vac & seal). The WORST owner’s manual in the history of home appliances–no photos to show you WHERE exactly the edge of the bag goes before closing the lid, nothing in the troubleshooting section other than “is the edge of the bag fully in the chamber?” DEFINE “chamber!” Absolutely NO videos showing how to insert the bag so it can be vacuumed!!! I’d say this sucks…but the problem is it doesn’t. Meanwhile, I have a vat of very hot water circulating and a couple of chicken thighs that are getting tepid.
It sounds like you have the bag too full, or used too small of a bag. The ends of the bag need to lie flat against one another on thier own. If it is gapping, it makes it very hard to get a proper grip on the bag. I have the edge just over the middle of the trough, so liquid will catch in the trough. Don’t push it past the trough. Try that and see if it works.
OK–I figured it out: you need to have the bag and its contents absolutely flat on the counter. In order to do so, you need enough counter space near an outlet for that and the sealer–something I wish I knew when I ordered it. I’d been using ziplocs, working on my center island, which lacks power outlets. I had to move my coffeemaker and use a cutting board as a countertop extender–a PITA, but I was finally able to keep the bag edge in the “well” without it slipping out when I closed the lid. Thus far, after 90 min., the vacuum is holding.
Is there a warranty on this item?
There is a 5 year limited warranty. Click on the link for Anova above on the where to buy to check it out.
Warning: I have one but doesn’t vacuum with smooth bags. Only with the structured bags like the ones in the package
I had some bags from another company that was smooth on one side and pebbled on the other and they worked fine. I don’t have fully smooth ones to try out the situation you are speaking of. If and when I do, I will reply to this post.
Hello!
Thanks for this very helpful review – I’ll be picking one of these sealers up for sous vide. I was just wondering how you cut the rolls into bags (if not buying the pack of 50 pre-cut bags)?
I of course understand you (if you’re making bags from a roll) have to seal one end, put the food into the bag and then vacuum and seal the other end. What I mean is how do I cut the rolls in the first place? On my old vacuum sealer there was a knife inside the machine itself: You’d just put the whole roll inside the machine, drag out let’s say 8 inches from the roll and then drag a built-in knife across to separate those 8 inches from the rest of the roll. Then you’d seal one end, put the food into the newly created bag and then vacuum and seal from the other side.
If this vacuum sealer doesn’t have anything like this: Would you just be using a regular kitchen knife, if the plastic isn’t too thick? Or scissors? I’ll probably figure it out, but thought I’d ask, Anova’s website isn’t that helpful and it seems you’ve used this vacuum sealer a lot by now.
Hope you understand my question, I’m not a native English speaker. And thank you in advance 🙂
Hi @Ma,
I personally use a pair of scissors to make the cuts. The plastic is not too thick for a good pair of scissors. I would make sure though that the roll is completely flat and not open in any way to ensure the cut is even on both sides. A knife would require a cutting board underneath and there is the possibility you may not go through both sides of the bag. I hope that answers your question.
Great! That answers it completely. Good to know. Thanks for your quick reply – and the review 🙂
I am a new owner of the Anova Precision Vacuum Sealer and I have the same problems that Sandy has– very, very difficult to get a fully suctioned and sealed bag. I also tried (wrongly it turns out) to align the bag to the left edge and over what I thought was the sucking nozzle. Hopelessly poor instructions. I’ll also try with the Anova bags. I was using ziploc bags. Although this may be simple when you “get” it, it would be nice to have a youtube video to explain and show the process. I paid $78 for this unit thinking it would be high-end. Not so, at the moment. Lynn or Sandy, I’d love a youtube video.
You need to be sure you are doing a couple of things. One, make sure the edges you are sealing are straight and parallel with each other. If you have a jagged edge it won’t work. Two, make sure the edge of the bag is in the middle of the drip groove. Think of it as placing it where any liquid that comes out will fall in that drip groove. If your edges are over the drip groove. it won’t suction. if the edges dont reach the groove it may partially suction. I have never had a vacuum sealer before and assumed this was how all of them worked.
I have been using mine pretty regularly, and as long as I follow those rules it always works.
I need advice on how to seal with a little liquid in the bag. It sucks it up to the top and then won’t seal great.
I am using this to vacuum seal food to help preserve in the refrigerator and to freeze foods, not for using with a sous vide. Can I use ziploc brand bags and cut the ends off or is there another brand you would recommend?
I think ziplocks are too thin. They may overmelt on the seal. You can try one. There are plenty of vacuum seal bags in the grocery store. Pick the cheapest and use it.