REVIEW – Remember phone calls? With so much email, text and work messaging, many of us make far fewer calls than we used to. If you’re a car commuter however, you likely take a few conference calls while driving or even just rely on one of the hands-free assistants who all require connectivity for responding to your every whim. I’m in that camp and also have a couple of major reception trouble spots that routinely cause me consternation. Enter Drive Sleek from WeBoost with a solution that claims to work with all carriers and solve that exact problem with a complete system universally designed to fit most vehicles. Needless to say, something I was keen to check out.
What is it?
Drive Sleek is a complete signal booster kit for vehicles designed to increase reception to and from your mobile phones.
What’s in the box?
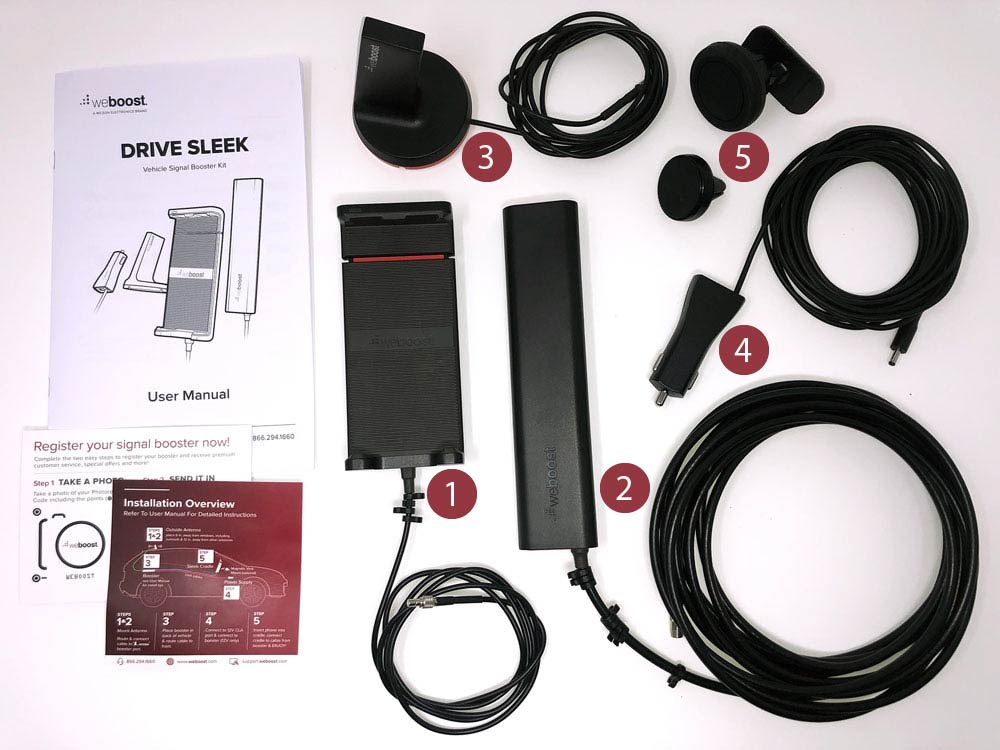
- (1) Sleek cradle
- (2) Signal booster
- (3) Sleek outside antenna
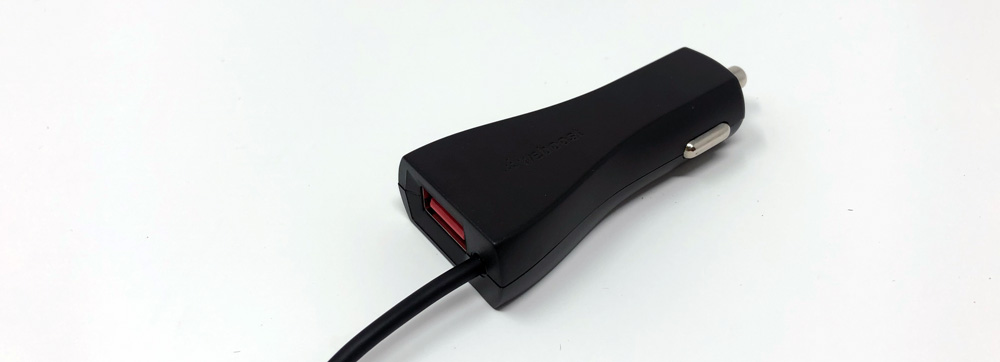
- (4) Power supply
- (5) Cradle mount adapters
- Instruction manual, Overview and registration cards
- Adhesive mount disc for external antenna, velcro mount for signal booster (these not shown)
Hardware specs
- Supported frequencies: 700 MHz (bands 12/17 or 13), 850 MHz (band 5), 1700/2100 MHZ (band 4), 1900MHz (band 2)
- Impedance: 50 Ohm
- Max gain: 23dB
- Connectors: SMB
- Cradle fit: Mobile phones 5.1 – 7.5″ tall
Design and features
As mentioned above, the Drive Sleek is a complete signal booster kit designed to fit as many vehicles and mobile phones as possible. Not the easiest task, but WeBoost has done a commendable good job of covering the bases.
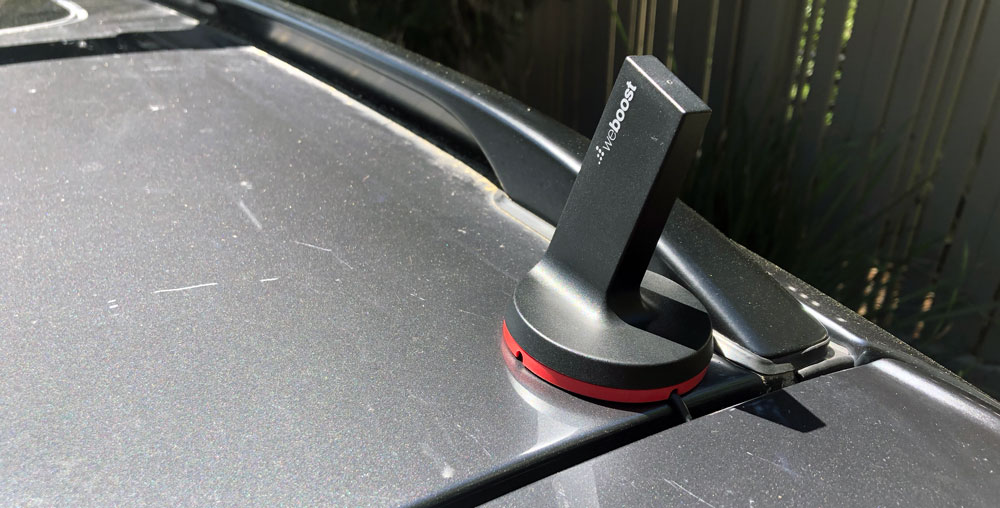
The antenna is magnetic and gently but securely holds fast to most car bodies. They’ve included an adhesive disc should you need to mount to glass or something more exotic that’s not metal.
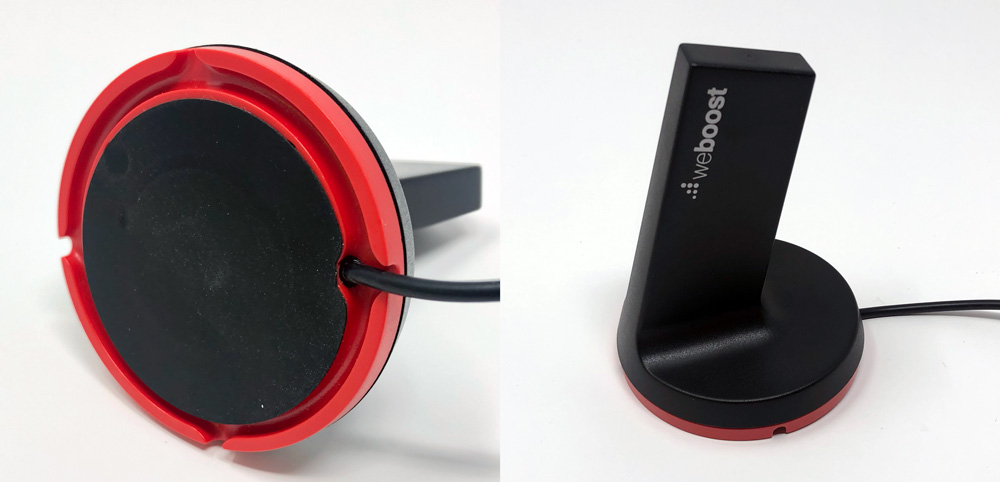
The antenna has a circular perimeter recess on the underside with exits at the compass points allowing you to orient the cable for as little cable showing as possible. Just choose your direction before you place it on the roof.
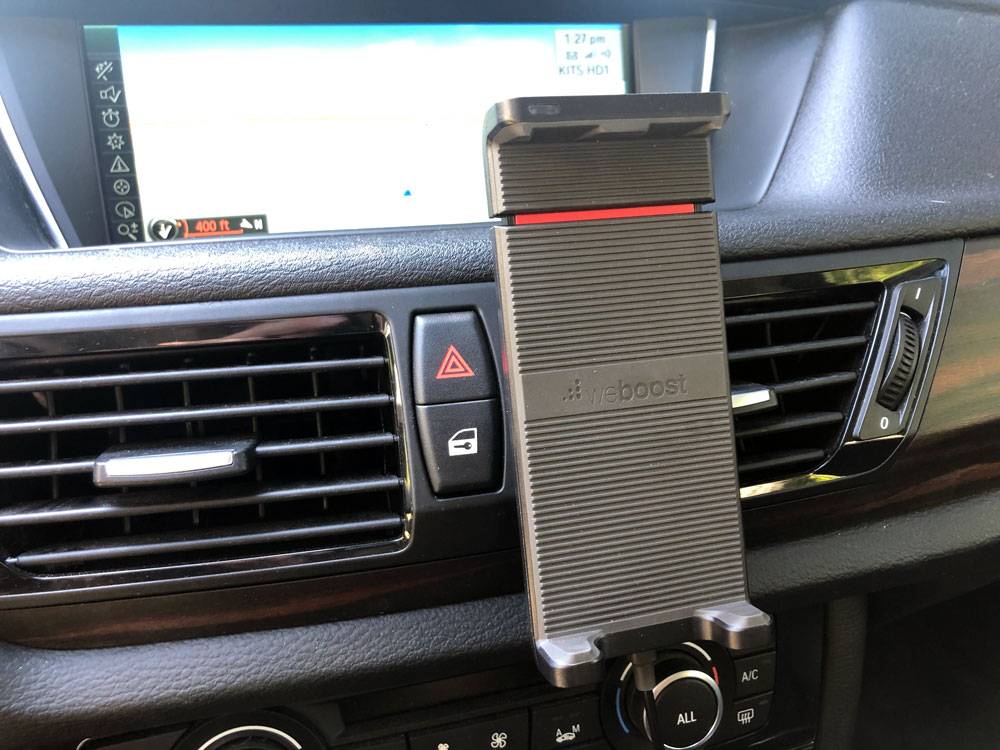
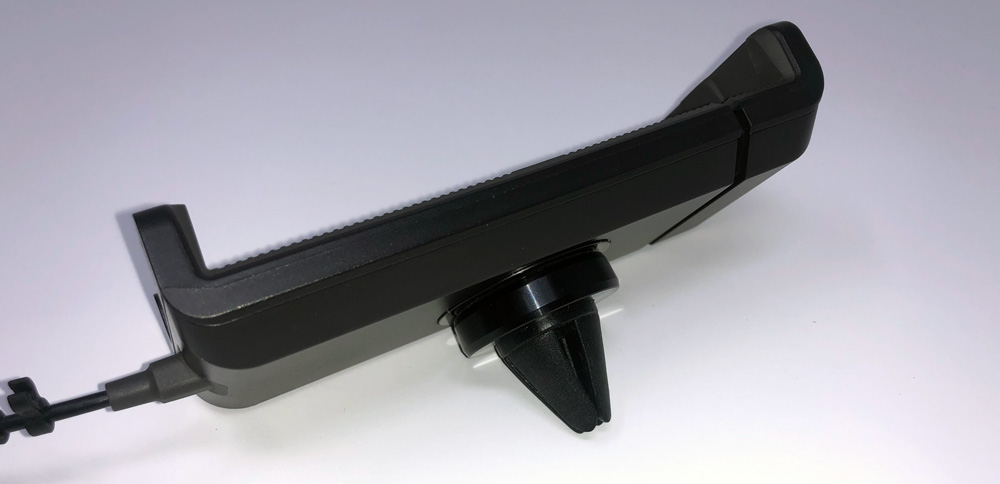
The cradle also mounts magnetically to a vent or adhesive mount to solve for most dash scenarios.
The ability to quickly disconnect the cradle from the mount and stash it when parking is pretty cool. Love the red hit showing you where the expansion section is before you start to slide it.
The power supply is a typical CLA (Cigarette Lighter Adapter), but with a flattened design and a really long cable in case you need to make a run from a 12V outlet at the front of your car. The built-in USB port may come in quite handy if that’s the setup you need.
The signal booster module has a long tethered cord with a port to connect the power supply on one end and the roof antenna on the other. All the cables are designed to be tucked away and out of sight.

Possibly the best feature is one that I can’t show visually. It’s that once everything is plugged in, it’s just on and working whenever your car is running.
Setup
Installing Drive Sleek can be very easy and quick if you’re installing the system temporarily or take a good deal longer if you’re trying to install it more permanently and want to be meticulous.
Here are the basics… Mount the antenna on the roof and route the cord inside through a trunk or door to the signal booster. Connect the power supply to a 12V CLA and the other end to the signal booster. Finally, run the long signal booster cable up to the cradle for your dash. If you’ve done this quickly for a road trip in a rental car (my first couple days of use), you likely have cables draped everywhere and will need to tuck a few of them out of the way.
As for installing more permanently, the order doesn’t change a whole lot other than taking stock of what makes the most sense for your particular car. Here’s how that worked for installing on my mine.
I placed the antenna on the right rear of the roof for a couple of reasons.
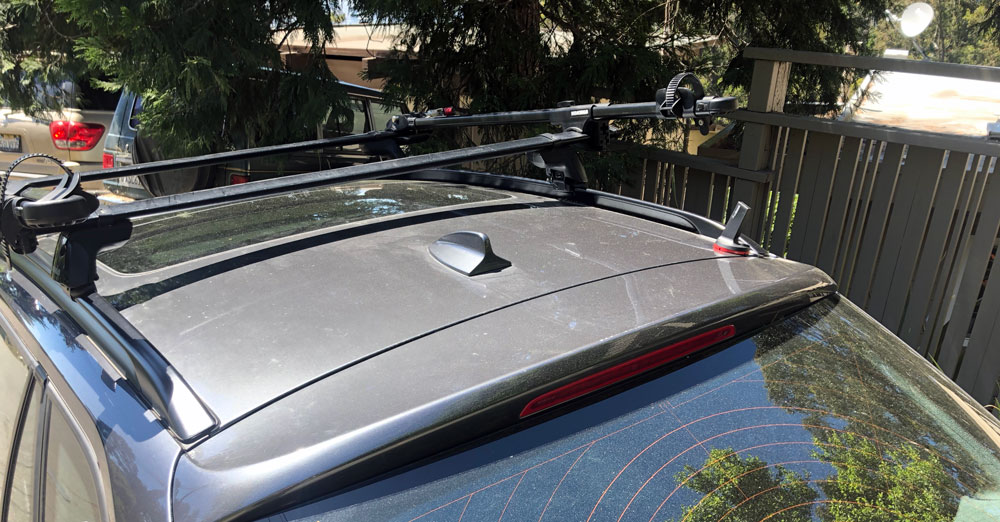
The antenna has a 6′ cable needs to be at least 12 inches away from any other antennas. My car already has the antenna in the center rear where I probably would have put the Sleek antenna, so I needed to find a different location. Putting it in the right rear allowed almost no visible cable and also helped add some visual camouflage the antenna near the end of the built-in luggage rack.
It would have also fit on the left, but there’s an accessory 12V outlet in the right rear. Easy peasy.
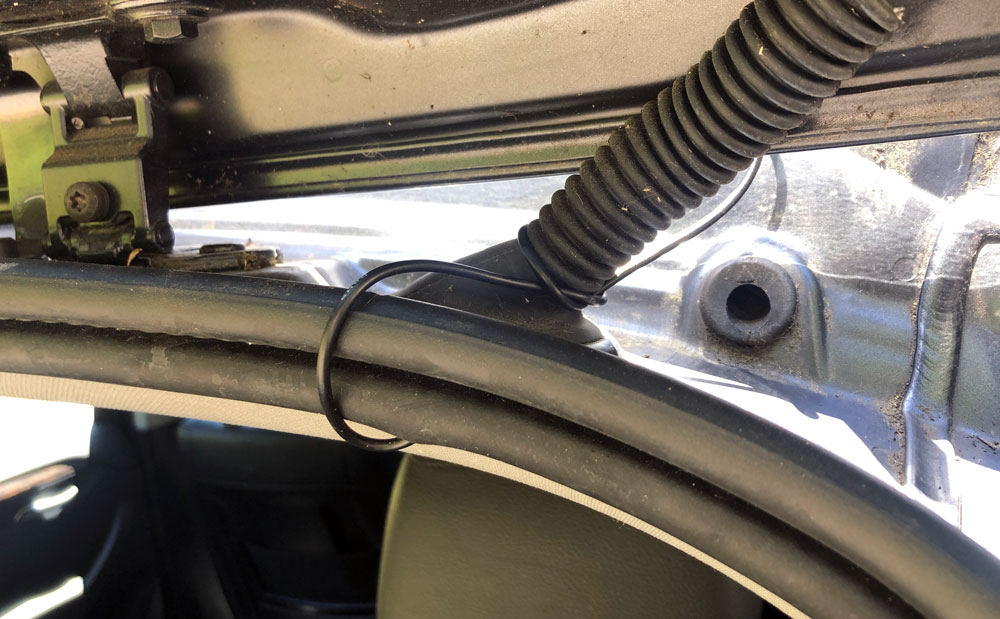
I looped the cord around the electrical for the rear window so that opening and closing the hatch wouldn’t tug on the antenna cord and then tucked it inside the roof lining before running over to the right side.
The signal booster is pretty slender, lightweight and already has hook velcro adhered to the back. The mating velcro with adhesive is included in the box if you need it. I found that the hook side actually gripped to the lining material of the trunk as is, so just found a spot up and under to keep this one out of sight for the nefarious types that like to peer into parked cars.
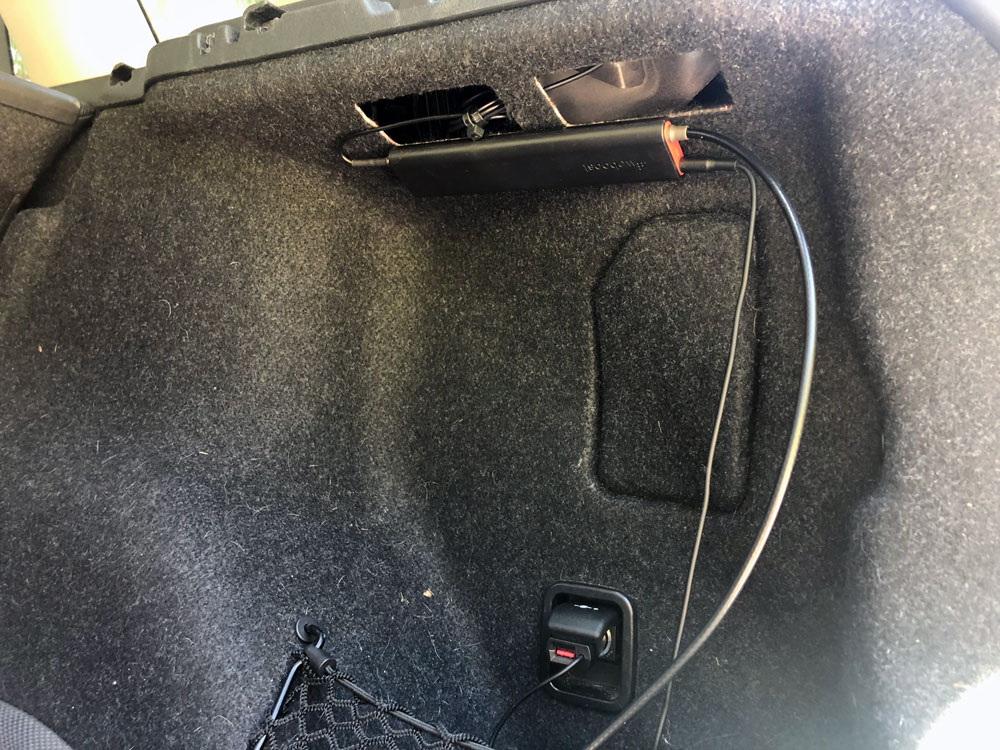
I used some zip-ties to secure extra cable lengths and then connected the antenna cord to the front of the signal booster. I only needed about a foot of cable to make the jump from the outlet to the signal booster. All good.
Next, you’ll want to figure out where you’re placing your cradle. They include two magnetic adapters for finding a good location in your car. One is a vent mount which has the now-typical 4 finger claw that pushes into place.
The second is a ball-joint mount with peel-and-stick adhesive you can secure to a clean, smooth surface on your dash.
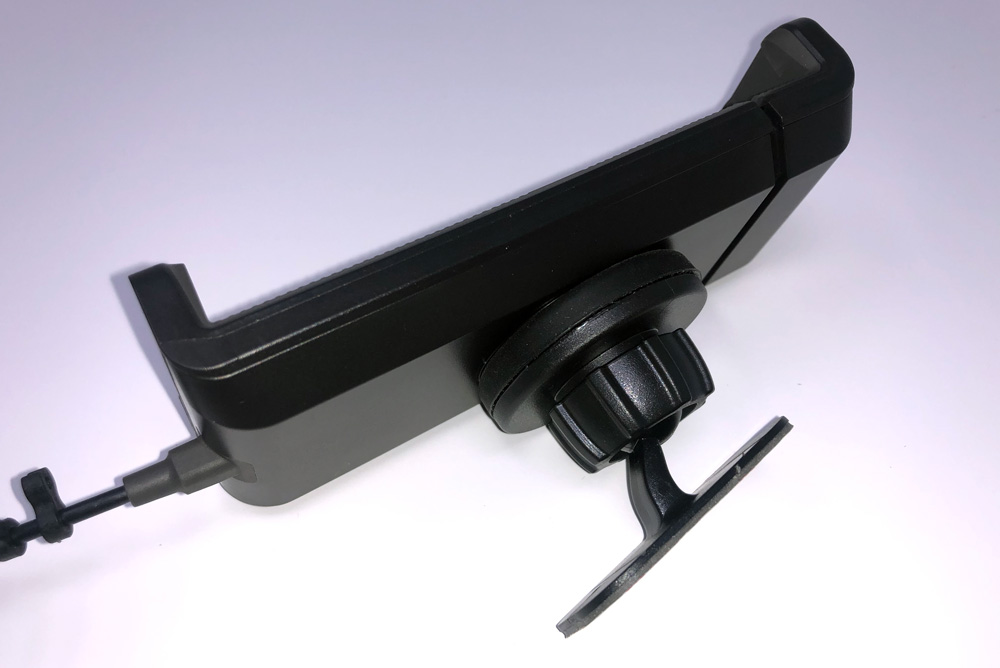
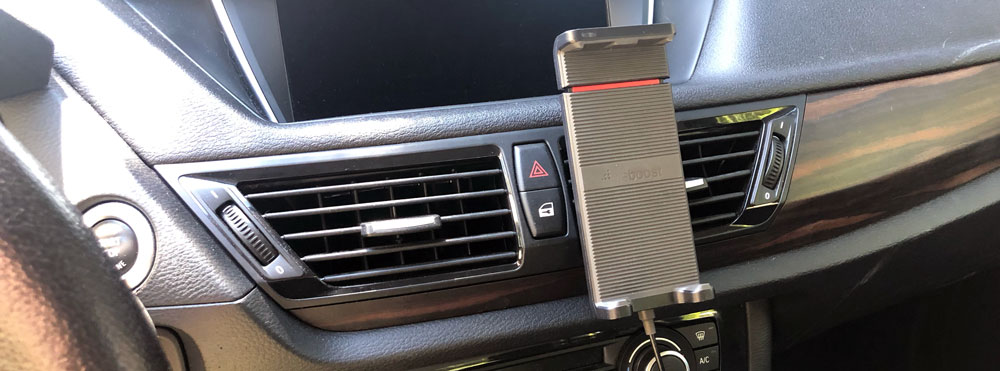
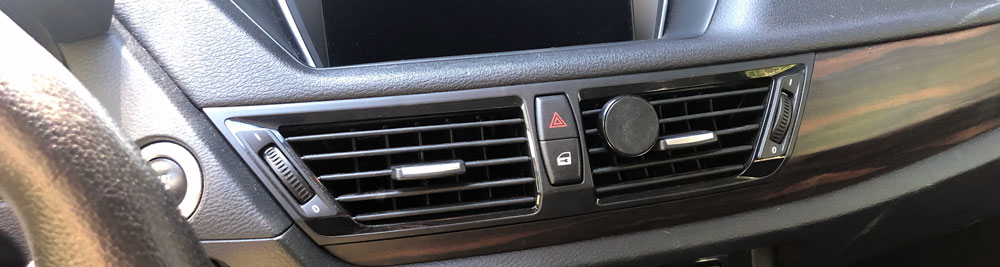
I opted for the dash mount. (Tip: Try to find a location that helps lock the vent into a position that prevents vertical motion and then allows the cradle to rest against the bottom).
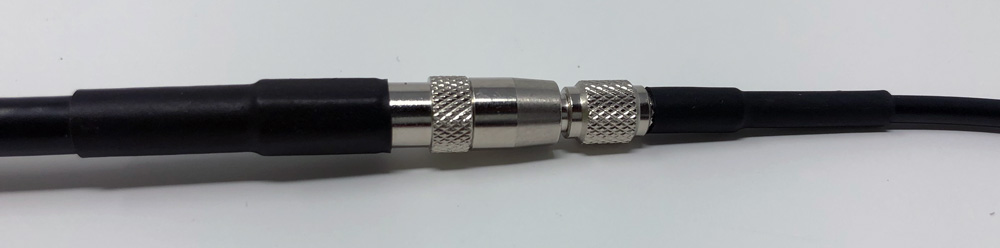
The cradle’s cable is only about 4′ long which is long enough to get the connector end down between your seat and console, so you’ll need to run the signal booster’s long cable up to meet it with a connection that looks like this.
I was able to run mine underneath the rear trunk cover, under the back rest of the right rear seat and then down under the door step covers. I didn’t need to actually pry anything up, just kinda wedge the cables under and tuck them out of sight. I then connected the two cables under the front passenger seat.
Performance
A couple of weeks ago my son and I flew up for an Oregon/Washington college visit weekend that was going to have us clocking in some pretty significant miles and some good stretches of what was likely to be spotty cellular coverage. I brought Drive Sleek along to use in the rental car as I knew we’d be on the phone multiple times to relay new college info and answer lots of questions. The rental car was a Ford Explorer and I had Drive Sleek installed in about 5 minutes as we headed out far too early in the morning.
The phone goes into the cradle easily by placing the top edge of your phone under the top lip and sliding up until the bottom clears and enters the lower edge of the cradle. (This is an iPhone 6+ in the photo to show capability for larger phones and it easily had another 1.5″ of motion available.)
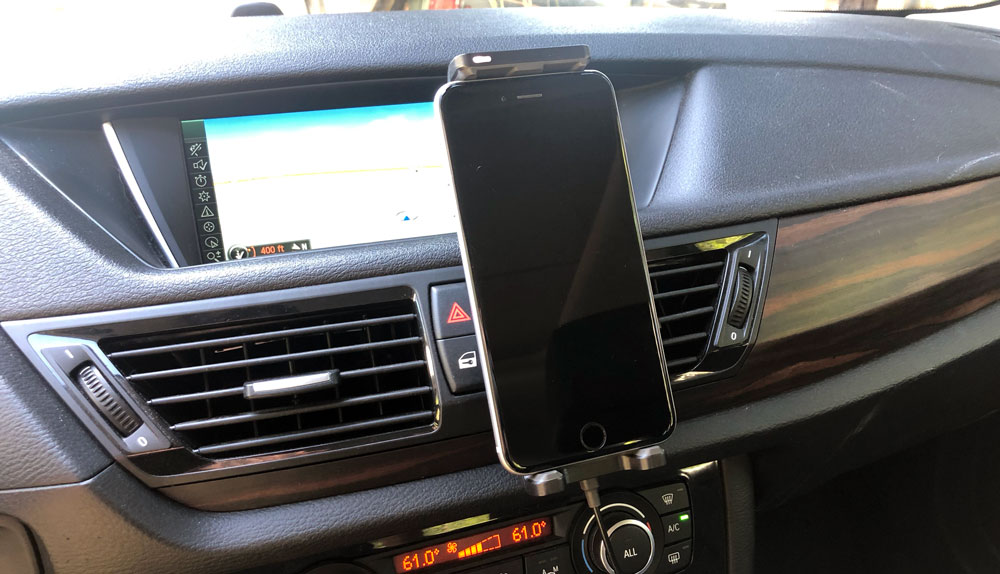
Adjustment is automatic with a super smooth slide and as long as your vent isn’t pivoting on you, it’s a one-handed operation. There are two recessed areas under the top cradle edge if your phone has a power button up top (nice touch). A little (but very bright) white light resides in the top left corner of the cradle to let you know the system is functioning properly and is at maximum gain.
So, how did it work for me? I use an iPhone X and my son has an iPhone 8. The reception indicators are shown as 4 bars where zero is no reception and 4 is all good. That said, these indicators are much more FYI and not great at actually showing what is really happening. In our case (having different model phones) I didn’t want to add any additional variables to the mix so the real test came down to making calls.
Throughout the trip, I was able to make and receive calls without trouble as well as ask Siri whatever it was I needed to ask. I did all the driving so my phone stayed in the cradle and I’d ask my son to look for restaurants and gas stops on his phone. We definitely hit a few areas where I would have 2-3 bars when he had 1. Again this isn’t conclusive, just anecdotal. We had a good 60+ minute phone call through a long, less populated stretch where my phone was showing a single bar a few times. This phone call never dropped, got fuzzy or hard to hear and I do feel that Drive Sleek was part of why.
We also drove through some pretty nasty rain conditions, as is common in the northwest from time to time. We did not see any issues with the external antenna or reception of my cloud-based music library. Nor was there any leakage past the trunk seal where the cable was routed. We finished the trip up with the feeling that Drive Sleek may actually live up to WeBoost’s claims.
Back home, there are two specific spots which have repeatable coverage issues and would help to prove that out. One is on the bay bridge on the way to SF, just before Yerba Buena Island. The second is at my kid’s high school in Oakland which somehow is an AT&T black hole.
For the bay bridge issue, I was able to make and finish phone calls through the trouble zone without dropouts. This is pretty impressive as phone calls typically just abruptly end where even the built-in streaming of our car’s entertainment system blacks out for this one 500 ft section. Similarly, at the high school, I was able to drive within the troubled area and have an uninterrupted phone call without any signs of audio trouble.
Overall, very positive results, but there are a few things to nitpick as I tend to do.
- The white light on the cradle is fine during the day, but for night time driving it is very bright. There’s no control to knock it down or toggle a “night mode” so I’ll probably end up fashioning a little gaffer’s tape hood, or use some tinted transparent tape to knock it down a bit.
- Would love to see wireless charging on the cradle. Phone calls and GPS apps kill batteries. Wireless charging here would just be the icing on the cake for the new crop of phones.
- I’d also like to see the cable on the cradle be detachable. I would prefer to fully wedge the cable behind some panels on my dash and have it pop out just below to connect. This would also allow for someone to purchase a longer or shorter cable if needed.
What I like
- Improved reception
- Simplicity of the system
- Design and function of the cradle
- Magnetic attachment style of antenna and cradle
What needs to be improved
- White cradle light is very bright at night
- Wireless charging please (feature request, not a con)
- Detachable cable on the cradle would be useful
Final thoughts
Drive Sleek is aimed at personal vehicles where one’s phone is mounted while driving. It’s well built, looks good and solves for most common mounting scenarios. The cradle itself is great and outperforms a lot of vent mounts I’ve used. As a system, it’s not inexpensive, but if you rely on your phone while driving for directions or work calls it may pay for itself quickly. It’s definitely worth a shot as WeBoost offers a 30-day money-back guarantee. Good luck!
Price: $199
Where to buy: WeBoost and Amazon
Source: The sample of this product was provided by WeBoost.

Samsung 14" Galaxy Chromebook Go Laptop PC Computer, Intel Celeron N4500 Processor, 4GB RAM, 64GB Storage, ChromeOS, XE340XDA-KA2US, Student Laptop, Silver
(as of June 21, 2026 13:15 GMT -05:00 - More infoProduct prices and availability are accurate as of the date/time indicated and are subject to change. Any price and availability information displayed on [relevant Amazon Site(s), as applicable] at the time of purchase will apply to the purchase of this product.)
Gadgeteer Comment Policy - Please read before commenting
If you are in an area with no bars, can the weboost still work? Also with consumer cellular?
Paul, the WeBoost isn’t magical. If you don’t have any signal at all, it can’t amplify/boost it. 🙂 As for Consumer Cellular, it is supposed to work with all cellular signals. But you have to have at least a weak signal for it to work.