
REVIEW – When taking outdoor pictures, you are generally limited to several conditions such as the weather, the lighting, and even the environment itself. You might have your camera and tripod ready but the conditions can become unfavorable. Sometimes, it’s like mother nature just isn’t co-operating when you want to take those landscape pictures. With Landscape Pro Studio Max 3, now you can tweak your landscape photos to compliment or help fix your image to really make them stand out.
What is it?
Landscape Pro Studio Max 3 is a creative editing software for photographers of any level to help enhance and process their landscape photos.
Installation Requirements
- 1GHz processor or faster recommended.
- 2GB RAM minimum recommended.
- Windows 10, Windows 8, Windows 7, Vista or macOS (10.7 or later)
Design and features
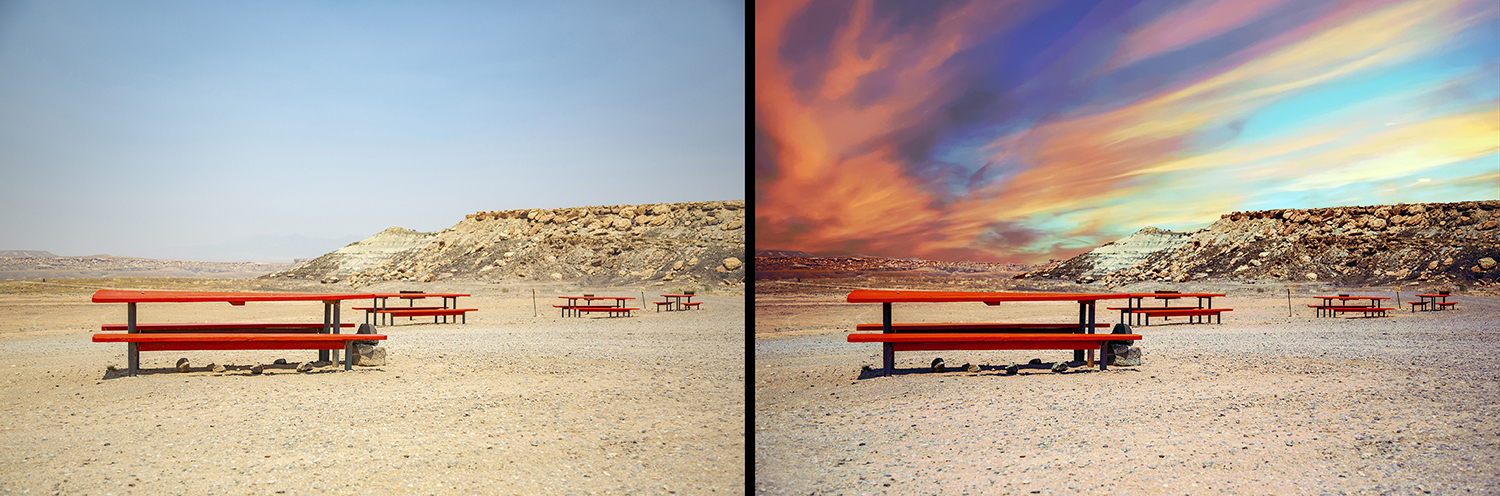
What Landscape Pro from Antropics Technology can do for you is help spice up the landscape pictures you take and make them more dramatic by adjusting specific areas in your pictures such as the sky, grass, ground, mountain, water, and more. This software allows you to individually manipulate and fix the selected areas and helps give them a little punch to brighten, sharpen, or add color. Landscape Pro can also straighten images as well as add watermarks and it can also add realistic atmosphere like fog or rain. There is also a feature to remove unwanted objects in your photo, as well. I am very impressed with what this software can do.
If you are not familiar with Anthropics Technology, they are the makers of Portrait Pro which is a powerful editing software for portrait photography. I had a trial of an earlier version of Portrait Pro a few years ago and although it had a few small bugs, it is very impressive, to say the least. So, it is only natural that Landscape Pro is just as intuitive as Portrait Pro and just as impressive.
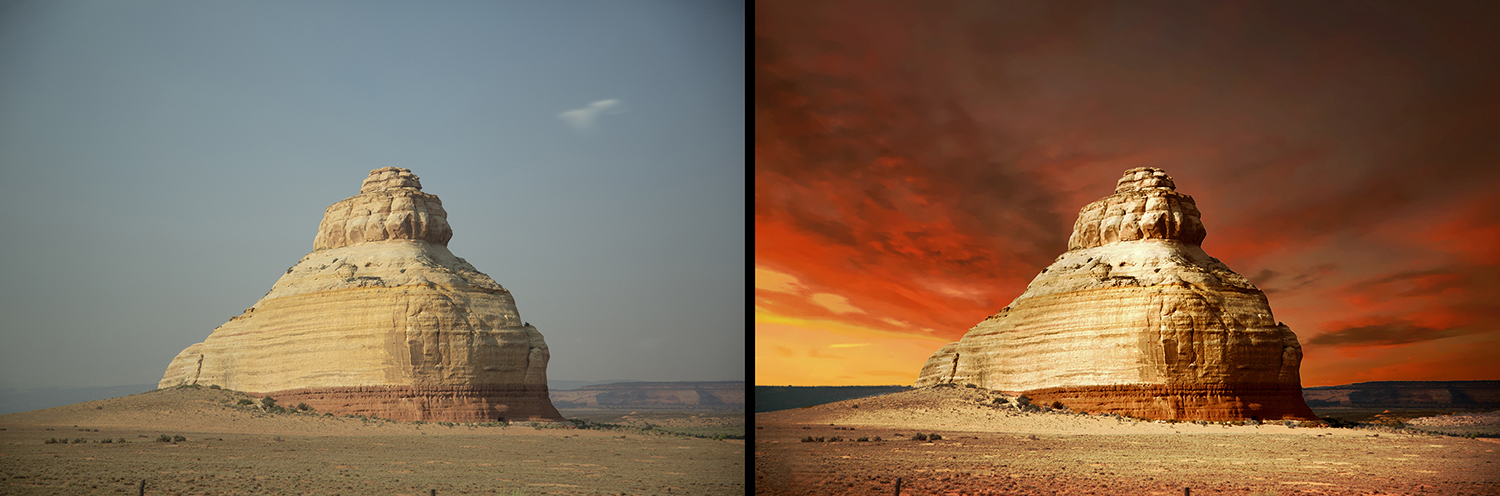
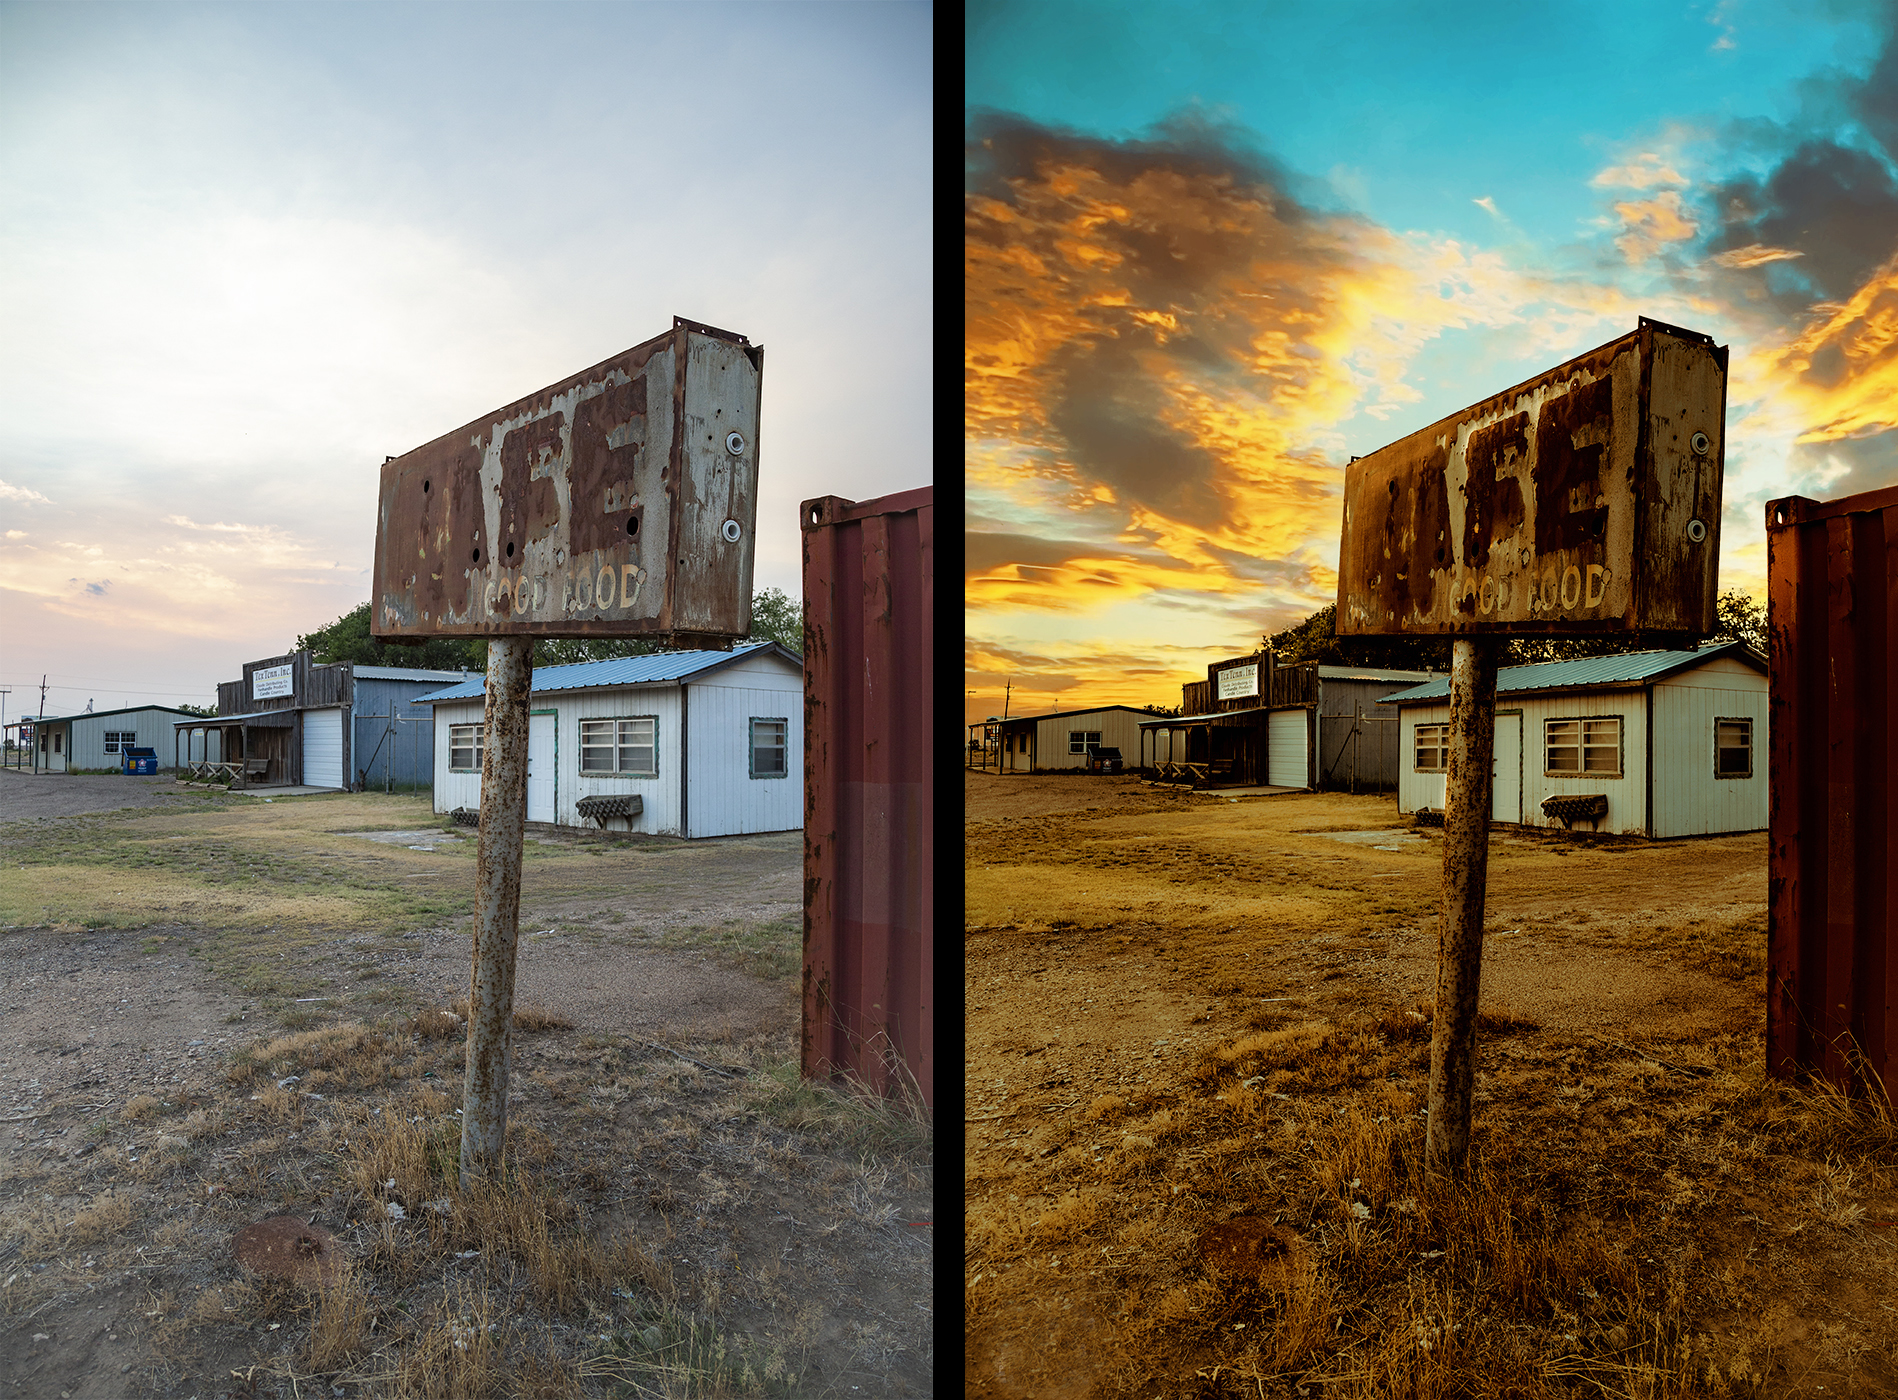
Landscape Pro uses advanced image recognition technology to target certain areas that you select on your image. In conjunction with the image recognition, Landscape Pro has many included Presets for the selected areas along with a slider interface to make adjustments and fine tune the areas. It’s all very responsive when making the adjustments and the results are instant. One of the popular features is the Sky replacement with 150 built-in Preset skies to choose from. Believe me when I tell you that there are plenty of skies to select such as clear and cool cloudless skies to dark and dramatic cloud-filled skies. You even have the option to import your own sky picture, too.

To begin editing, you just drag Labels onto specific areas of your image. For example, if you want to change the look of the sky in your image, then you would drag the Sky Label onto an area of the sky in your picture. If you want to adjust the water in your image, then you would drag the Water Label onto the water area in your picture. Want to edit the trees in your picture? Just drag the Tree Label to a tree. Drag the Mountain Label to a mountain in your picture, and so-on and so-forth. There are plenty of Labels for areas in your picture that you can use.
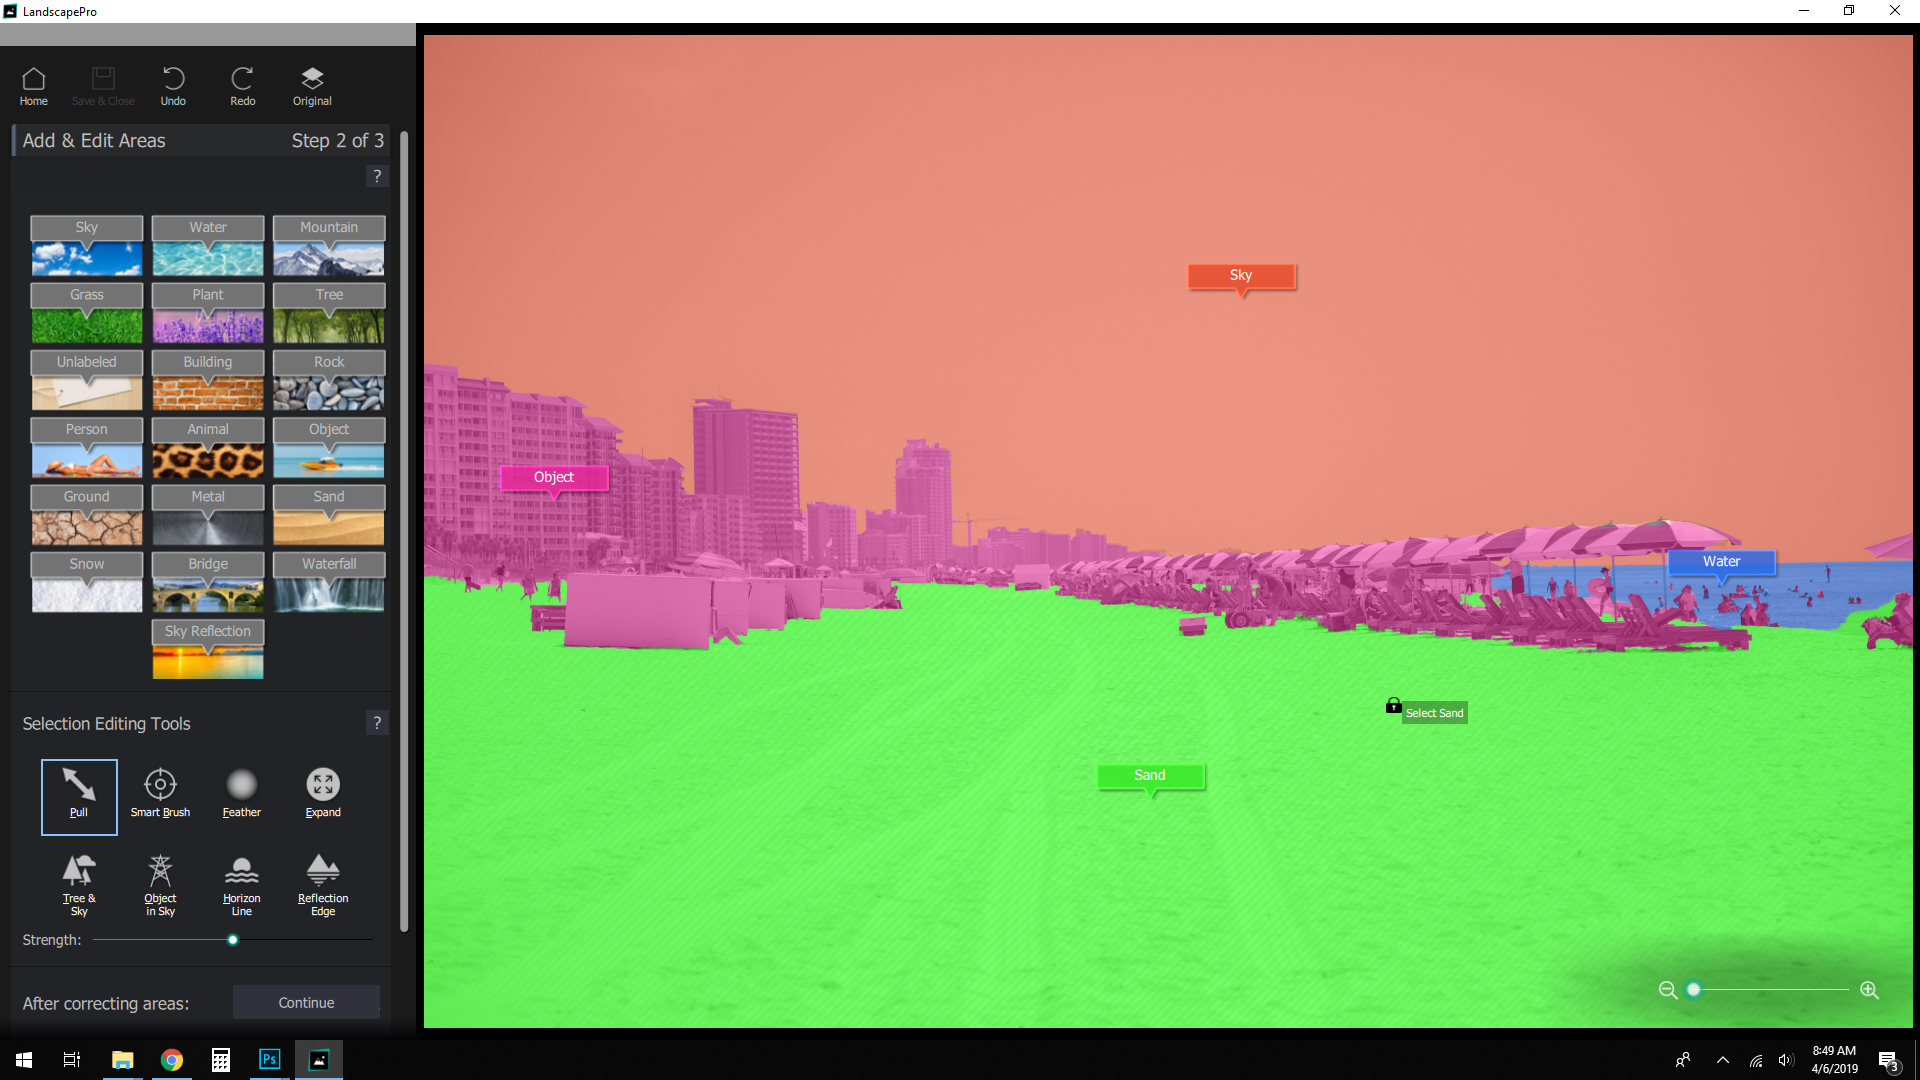
As soon as you are finished labeling the selected areas that you want to edit, then the real fun beings. Whether you choose the Presets or just go straight to manually adjusting your image using the Sliders in the Side Panel. Keep in mind that you will eventually be using the Sliders in the bulk of your edits to fine tune your image. The Side Panel is where all the options to edit your image are grouped. The one-click Presets get you started with a certain look in the areas you selected and then you can go in with the Sliders to tweak the Presets you selected.
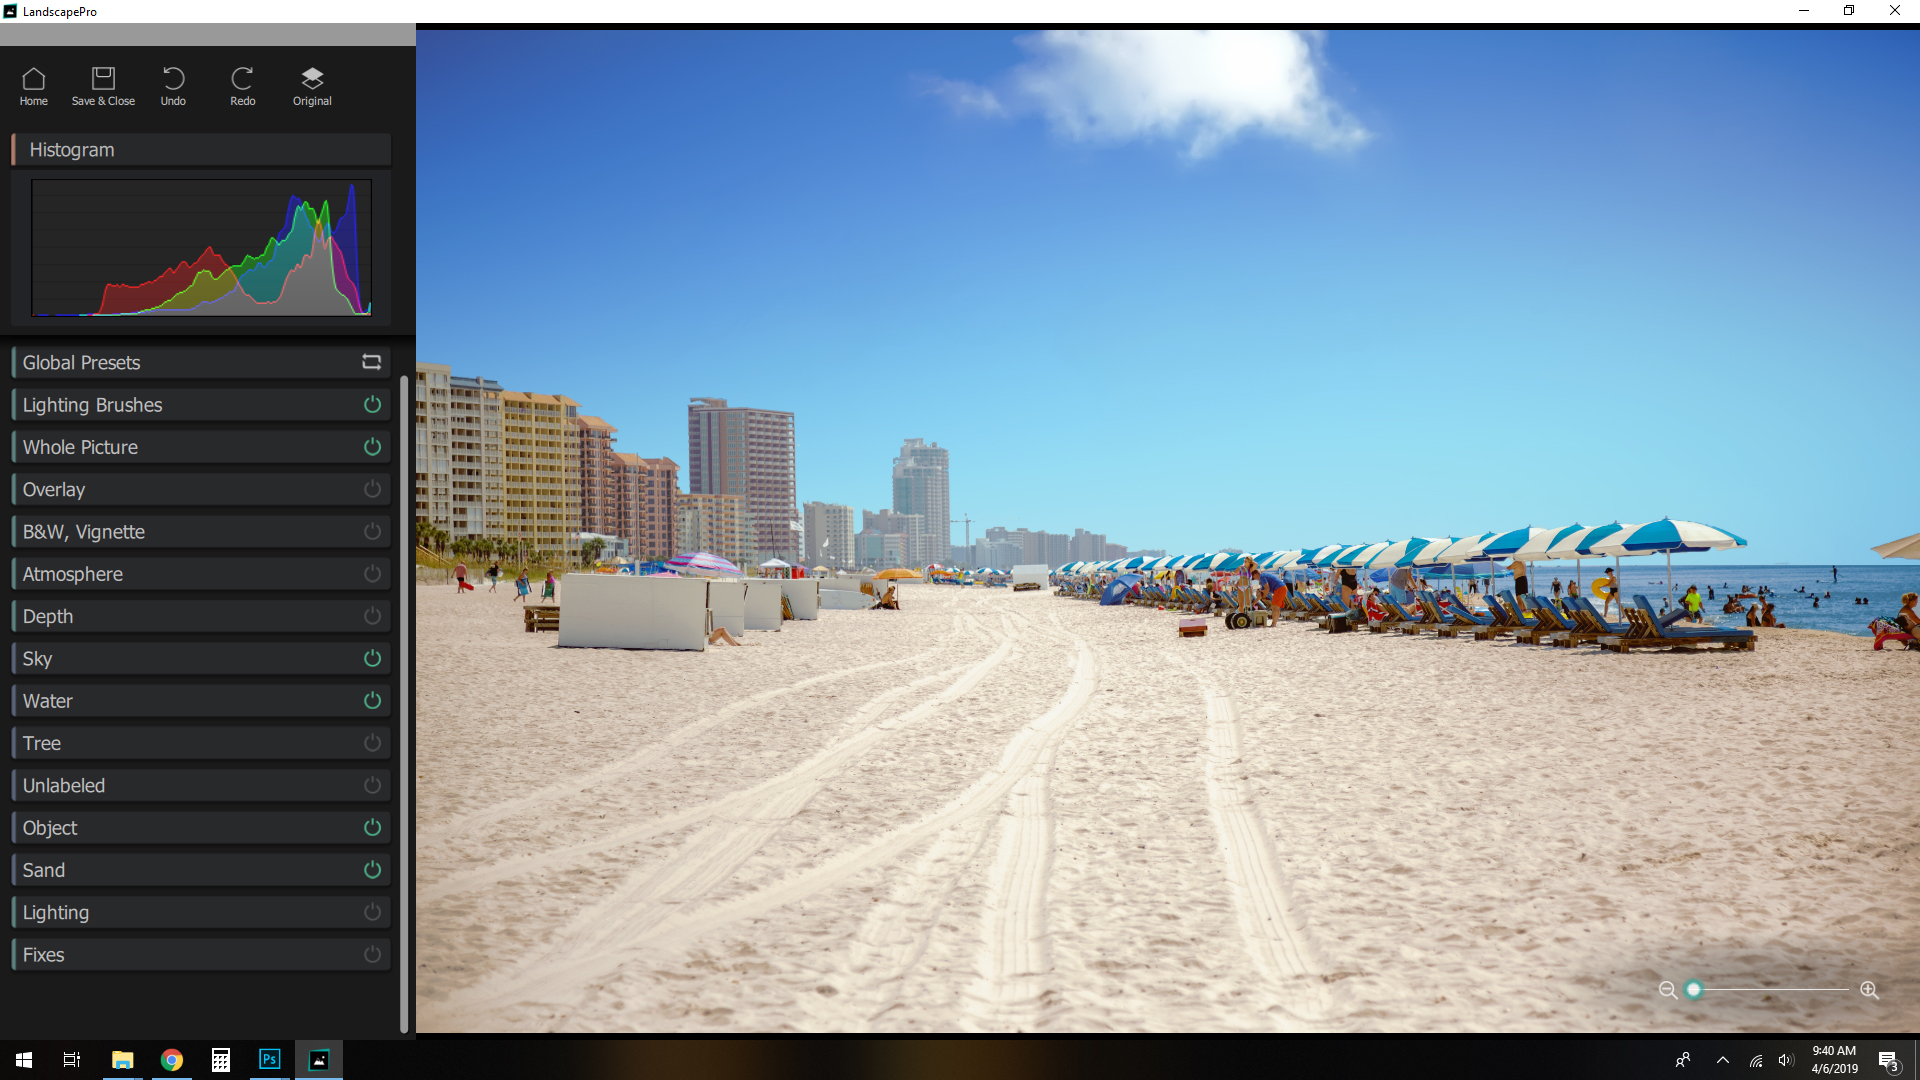
Landscape Pro does a great job of reading the elements in your photo like the sky, water, sand, trees, people, etc. to help analyze the scene. And not only can Landscape Pro adjust isolated areas in your photo but it can change the overall mood and feel of the entire image. One of the main features that Landscape Pro has is its Lighting feature. What it does is analyze your picture’s scene and the elements within your photo so that it can make the proper natural 3D adjustments to the lighting as it would be in real life. So, as you move the light source in the picture, the corresponding highlights and shadows move when you adjust the light source. This can add some really nice dynamics to the overall look, mood, and feel of your photo.
Depending on how much editing you want to do to your picture is up to you. You can use Landscape Pro to just tweak a little bit to enhance your photo or you can go overboard and totally change your entire image to make it look like a fantasy dream world. It’s all up to you and what you want to create.
Landscape Pro can be either used as a stand-alone program or as a plug-in filter in Photoshop or Lightroom. I prefer using Landscape Pro as a standalone program because when I used it as a Photoshop plug-in filter the export seems to take a fairly long time for the edits to render out. Whereas, when I use it as a standalone, the export was significantly faster. However, keep in mind that unlike some third party plugin exports, Landscape Pro’s edits don’t show up in a separate layer. The edits were applied directly to my original image. If you are like me and prefer to do non-destructive editing in Photoshop, then it’s probably best to make a copy of the original image and use that one to edit with Landscape Pro. It’s just good practice to never edit the original image.
I noticed that when I used Landscape Pro as a plug-in that the rendering from the Save and Close option is super slow versus if I just did the editing inside Landscape Pro as a standalone program. When I used Landscape Pro as a standalone program, there was virtually no render time like there was when I use it inside Photoshop. Now, keep in mind that there may be factors on your computer such as RAM, processor, graphics card, etc that may affect the render speed. However, as far as I know, it just may be something in Photoshop that may be the culprit because everything was working just fine except the render speed after I clicked “Save and Close” in Landscape Pro. It literally takes two to three minutes to see the filter applied to my image. Now, the processor on my computer is an Intel i5 2.70 GHz with 8 gigs of RAM and my Dell All-In-One computer may not be the fastest out there but in no way is it slow. I normally can edit all day with Photoshop and Capture One and never experience any lag.
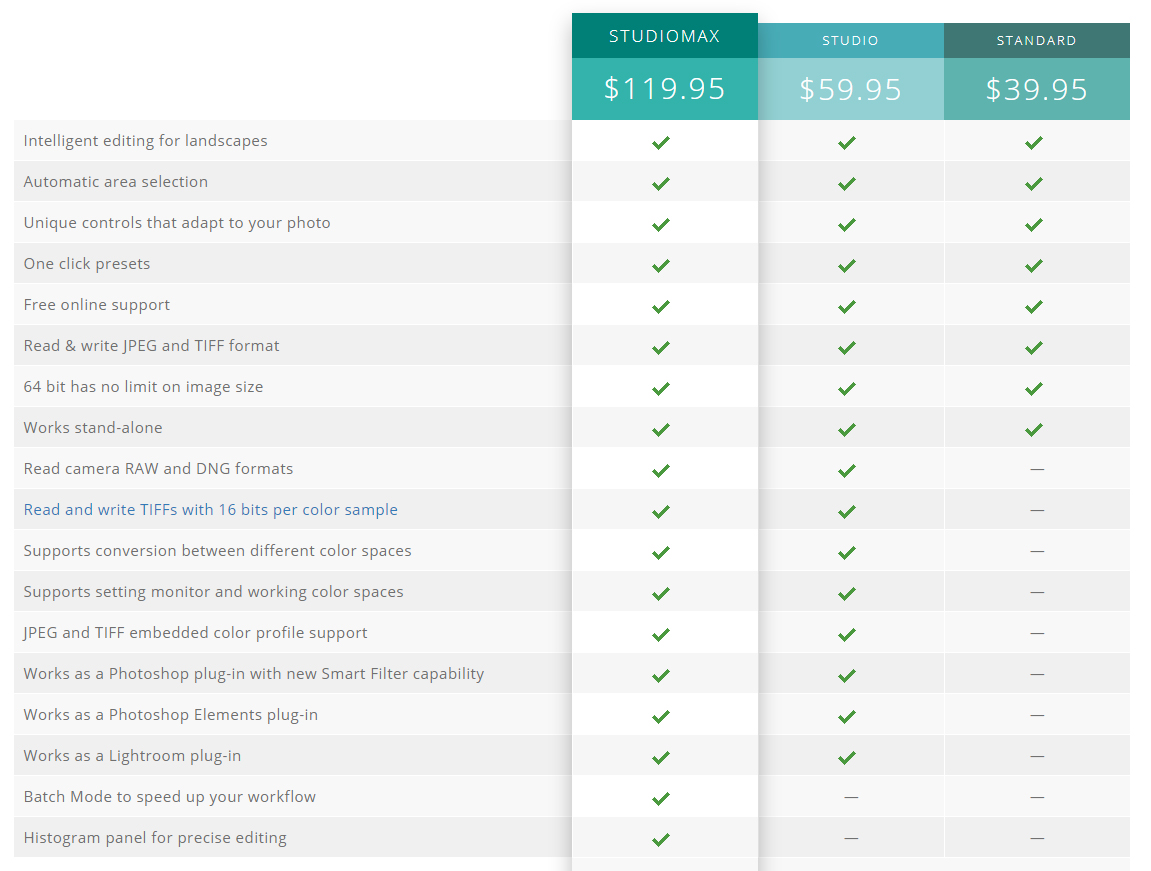
There are two other versions of Landscape Pro: the Standard and the Studio. Below is a chart that compares the two versions to the Studio Max.
Installation
Installation was very easy. I just downloaded the software from the Landscape Pro website, installed the software and then input the token (activation code/license) that I received. Software installed without any problems. Landscape Pro Studios max 3 is available for both Mac and PC.
What I like
- Very responsive and fast edits.
- Numerous Presets to incorporate into your photos.
- Instant preview inside the Sections of the Side Panels.
- High Resolution Output Images
- Works with RAW and DNG formats.
- Can be used as stand-alone or a plug-in.
- Video tutorials available on the Home page.
What needs to be improved
- Couldn’t find a setting to turn off the Help dialog box which pops up when you are in the Side Panel area.
- Smaller detailed areas are difficult to select and edit.
- Filter rendering in Photoshop was very slow.
Final thoughts
As someone who takes plenty of landscape photos, whether traveling on vacations, road trips, and even in my hometown, I always want to take the best photos I can right out of the camera. But sometimes I can look at an image I took and decide that I wish it had a little more to it; maybe a little more pop to the picture. Whether I want the image to somehow jump right out into the viewers face or if I just feel like the image needs some tweaking, I found that using Landscape Pro Studio Max 3 is a great tool for enhancing my landscape photos. Using this software was fairly quick and easy. Plus, I really liked seeing the different modifications of my images inside the program so I can make choices right on the fly. I know I will be using this software now and in the future for many of my photos. Not only will I be editing some of my older landscape photos but I can’t wait to get out there and take more landscape photos. I definitely know that I will have more landscape photos to print and hang on my walls after a little tweaking from Landscape Pro.
Price: $119.95
Where to buy: Landscape Pro Website
Source: The sample of this product was provided by Anthropics Technology.

Gerber Gear 22-47162N Fast Draw Folding Assisted Opening Pocket Knife, Fine Edge, Black
(as of June 22, 2026 18:55 GMT -05:00 - More infoProduct prices and availability are accurate as of the date/time indicated and are subject to change. Any price and availability information displayed on [relevant Amazon Site(s), as applicable] at the time of purchase will apply to the purchase of this product.)
Gadgeteer Comment Policy - Please read before commenting
landscape-pro-studio-max-3 for plugin photoshop is too slow
very very bad
VONGSIKAN
yes, I agree. In my review I mentioned a blurb about the slow rendering.
“I noticed that when I used Landscape Pro as a plug-in that the rendering from the Save and Close option is super slow versus if I just did the editing inside Landscape Pro as a standalone program. When I used Landscape Pro as a standalone program, there was virtually no render time like there was when I use it inside Photoshop.”
I did get an email from the company and they asked me what rendering issues I had and asked my computers configuration so hopefully that have made some updates or fixes since my review.
Raul
I run the Landscape app mostly from within Photoshop. My Mac is equipped with 32GB RAM and a 2TB SSD instead of a traditional hard drive. Given that set of features final rendering is fast.
Marshall,
having that much RAM really helps. And the SSD is a plus, as well. I’d love to have the speed of that setup. Very nice!
Raul
Already owned Luminar 4 & Aurora HDR; what makes Landscape Pro Studio Max worth buying? Or can Skylum Family do the job?