I love the idea of a video doorbell. Being able to see and speak to your visitors even when you are not home could really be handy. So fortunately when the Gadgeteer was offered the DoorBird Video Doorbell for review, I was given the opportunity to test it. When doing so, I found that the device was not very easy to install, the WiFi and app setup was a tad confusing, but the DoorBird provided clear live video during daytime and nighttime hours and captured clear photos of each motion event and of visitors who rung the doorbell. To visitors, the audio quality is excellent through the DoorBird speaker, but the audio was very quiet when listening to visitors through the app on a device. The DoorBird also has a motion sensor, but since its sensitivity cannot be adjusted, it detected every car that drove by on our street and thus had to be disabled.
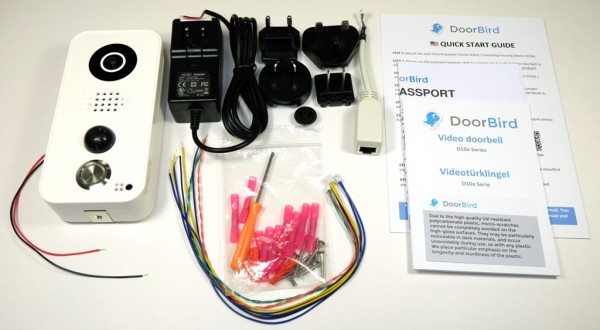
Package Contents
- DoorBird Video Door Station
- Power supply unit (mains adaptor) with four country-specific adapters
- Cable with plug for the power supply (black, red)
- Cable with plug and RJ45 jack for the network cable (white-orange, orange, white-green,
green) - Cable with plug for the network cable (white-orange, orange, white-green, green),
alternatively to the cable with plug and RJ45 jack - Cable with plug for the electric door opener (purple, purple)
- Cable with plug for the electric door chime (blue, blue)
- Cable with plug for the door-opening button (yellow, yellow)
- Several crimp connectors
- 4 Phillips countersunk head screws for the wall mounting plate, long
- 4 Phillips countersunk head screws for the wall mounting plate, short
- 4 Dowels (wall anchors)
- 1 Safety screw
- Specialty screwdriver for the safety screw
- Wall mounting plate with sealing ring (installation on wall surface)
- Installation manual
- Quick start guide
Technical Specifications
- Camera: HDTV 720p, dynamic (VGA – HDTV)
- Lens: High-end, ultra-wide angle, hemispheric lens, 180° horizontal, 90° vertical, straightened, IR capable
- Night-Vision: Light sensor, automatic IR cut filter
- Audio components: Speaker and microphone, echo and noise canceller
- Audio streaming: two-way
- WiFi: 802.11b/g/n 2.4GHz
- Ethernet connector
- Motion sensor type: Passive Infrared sensor (PIR)
- Range of motion sensor: 2-8 m (depending on environment)
- Illumination: 12 intelligent infrared LEDs
- Outdoor-ready: IP54
- Operating conditions: – 20 to +40°C, Humidity 10 to 85% RH (non-condensing)
- Dimensions: 157 x 75 x 35mm (H x W x D)
- Weight: 290g
- See Specifications for a more detailed list
Design & Build Quality
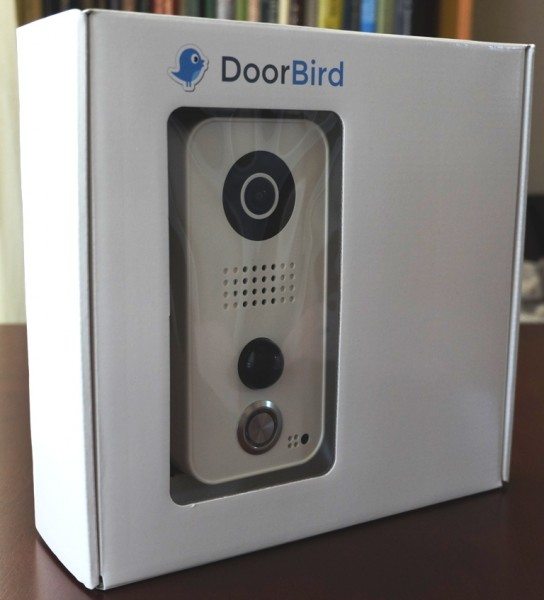
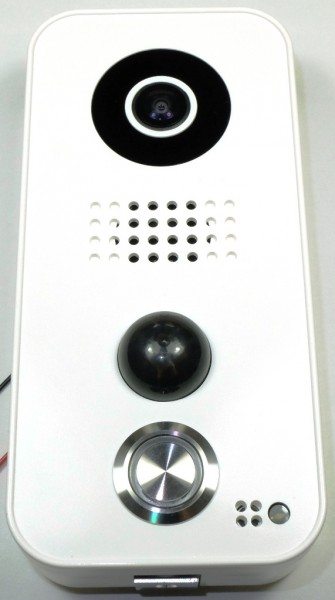
The DoorBird Video Doorbell was designed and engineered in Germany. It is encased in a fairly rugged white polycarbonate housing and is outdoor ready (rated IP54). Located at the top of the device is the ultra-wide 180° video camera lens with 12 nighttime infrared LEDs surrounding it. Just below that is the “large-sized and speech enhanced broadband speaker” to communicate with your visitor. Below that is the 180° infrared motion sensor for alerts. And below that is the stainless steel doorbell button with a blue LED ring that will remain lit during nighttime hours. Next to the doorbell button is the active noise canceling microphone for the visitor to communicate with you and the light sensor to trigger night-vision mode.
When first observing the DoorBird Video Doorbell, I was curious if visitors would know which circular area to push for the doorbell, but it didn’t seem to pose any problems.
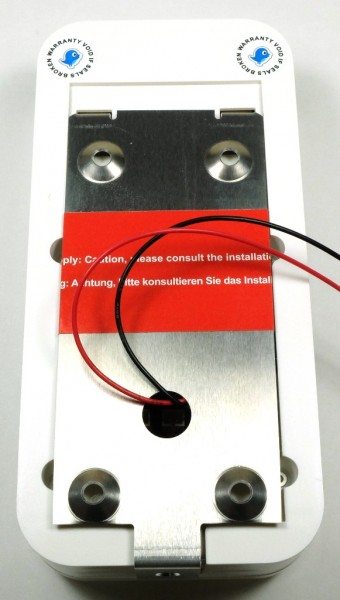
The DoorBird comes in different models. The model that I have, D101, comes with a mounting plate as shown above.
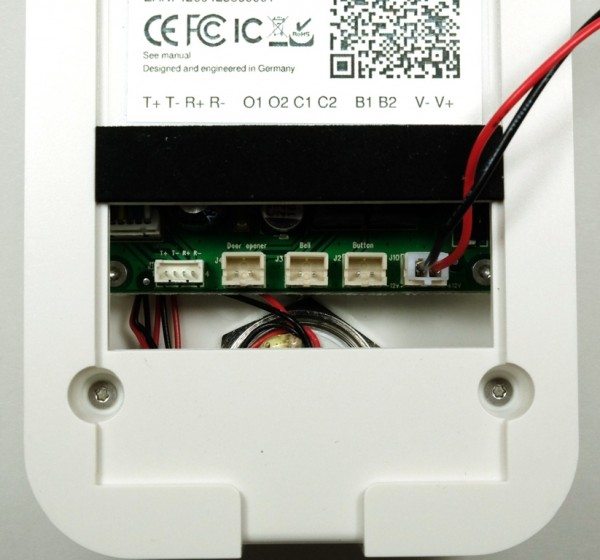
The DoorBird has available slots (left to right) for connection to your home network, an electric door opener (such as a garage door opener), the electric doorbell chime within your home, a door opening button (allows you to continue to use the garage door opener button instead of disabling it), as well as the power supply for the DoorBird.
The bulk of this review covers the rather involved installation and setup process of the DoorBird Video Doorbell which proved to be more challenging than expected. If you are not interested in reading all that was required to setup this device, please click on the link to skip to the Use section.
Installation
The DoorBird website states that its video doorbell “Mounts in minutes. No professional help or special tools required” and in a more detailed explanation:
Remove your existing doorbell. You will then see at least two wires in your wall. Connect these two wires to the DoorBird video door station to power it and mount it near to your door. Connect the DoorBird to your Internet router using WiFi or Ethernet cable. We use bank level encryption technologies. Done!
I did not find this to be accurate. As I have very little interest in understanding the electrical wiring in our home, I decided to rely on my professional installer, otherwise known as my husband Rob, to complete the installation for me. I’ll let him explain how he performed this task (his writing will be in blue, mine in black).
The DoorBird website shows how “simple” the wiring process can be. The installation video instructions show how they simply connect the power supply leads from the DoorBird to the provided transformer (AC adapter) and plug it in as though you have no existing wired doorbell. This works very well if you are going to be installing your DoorBird on a table at a convention for display. However, if you actually want to install your DoorBird in your house and you don’t happen to have an outlet on your porch near your doorbell, the process is a bit more complicated. An alternate installation (not explained below) would be to pull a wire through your exterior wall and route it to an outlet inside your house. I considered this method to be even more complicated than the method below because it involves drilling holes in your drywall and also penetrating the moisture barrier, which if not done properly can cause problems.
The installation of the DoorBird is a three step process. This is certainly a doable process for anyone with a modicum of electrical aptitude and common sense (I guess that means that I don’t have either of those, eh dear husband? 😉, but you will need some electrical tools (wire stripper and crimper).
Step 1 – Find and disconnect the existing doorbell transformer
First you must locate your existing doorbell transformer. This will most likely be located in the attic somewhere (like it was in our house), however in my previous house I installed the transformer directly inside my breaker box. The best way to find it is to go into the attic and find the wires that go to the doorbell. These wires will probably be thinner than the normal wires in your house that supply electrical power to the outlets.
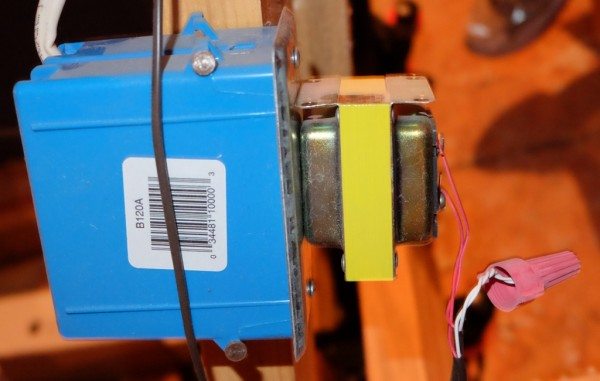
Follow the wires and you should find something that looks like the setup shown above. You will need to identify which of the two wires go to the doorbell switch, and which goes to your chime. Label the wire that goes to the doorbell switch and then disconnect the two leads that connect to the transformer, but before you do be sure to disable the power source from the breaker box.
Step 2 – Make connections to the new transformer
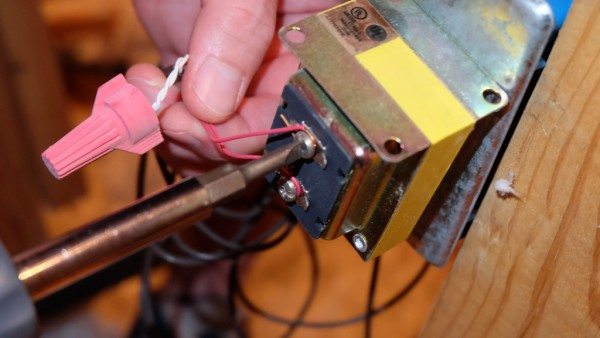
The next part of the process is the most complicated part. If your existing doorbell circuit is typical, the transformer will be part of a circuit with the chime and the doorbell switch. Since we are making connections to power the DoorBird only, the chime cannot be part of this circuit (we tried this and confirmed that it does not work). One of the two wires that come from the doorbell switch will probably be connected to another wire that connects the chime. If your installation is typical, this lead will be somewhere near the transformer and is likely connected with a wire nut to the other wire that goes to the chime (see photo above for our example). Disconnect these wires from each other, and label the wire that goes to the doorbell switch. You now have two wires (the ones you labeled) that connect to the doorbell switch, and these will be connected to the leads in the new DoorBird supplied power supply. Since the DoorBird is a digital electronic device, you must use the provided power supply. Using your existing transformer could damage the DoorBird. Connect these two labeled wires to the DoorBird power supply, and make sure that you note the color of the two wires and which one was connected to the red and black leads. The polarity doesn’t matter for a normal doorbell circuit, but it will matter for the DoorBird. The red and black leads from the transformer must be connected to their respective red and black leads in the DoorBird.
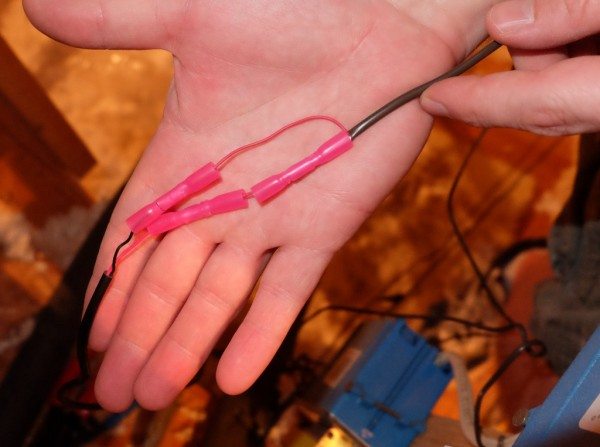
In the picture above there is an extra crimp connector because we first connected the DoorBird while keeping the chime in the circuit, and then had to rewire it to remove the chime.
Since the DoorBird transformer is designed to be plugged into an outlet, you are going to need one in the attic. We were lucky to have one that was used to provide power to our security system, and it was right next to our existing doorbell transformer. If you don’t happen to have one in the vicinity, you may need to install one. Do not plug the new transformer in yet.
Step 3 – Install the DoorBird Video Doorbell Station
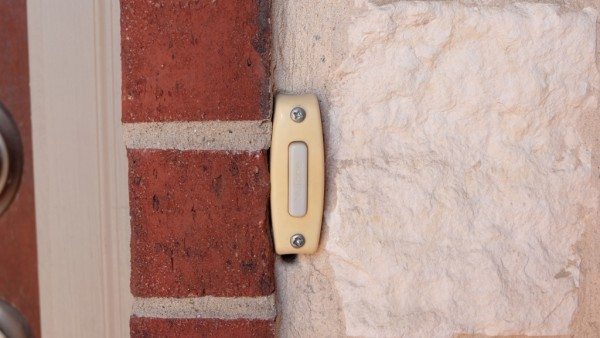
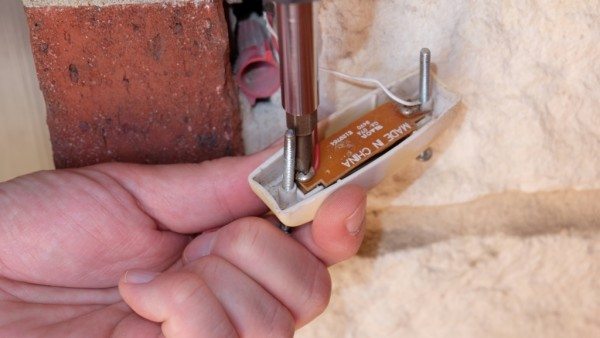
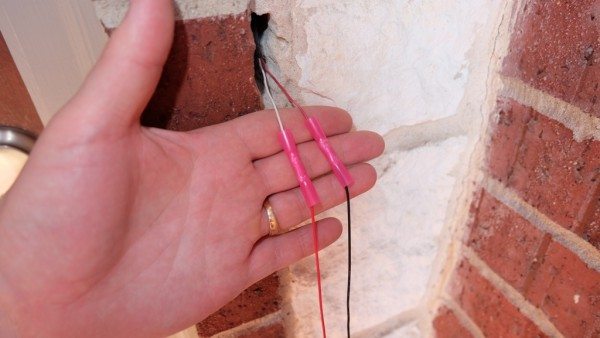
Now it will be necessary to remove your existing doorbell switch and disconnect the two leads as shown in the photo above.
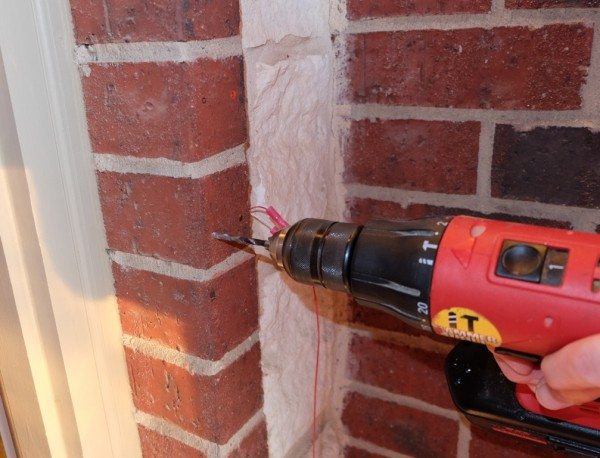
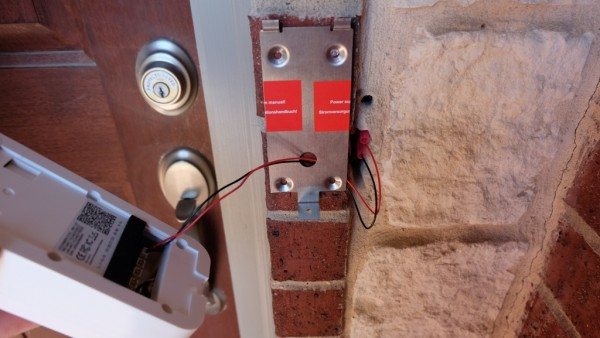
Next you’ll need to mount the bracket that will support the DoorBird Video Doorbell. If you have a brick house like we do, it’s time to get out the hammer drill and masonry bit and drill a few holes.
Once the bracket is installed, connect the two existing leads to the DoorBird power supply leads in the back of the unit. Be sure to connect the correct leads to the red and black wires, as mentioned above.
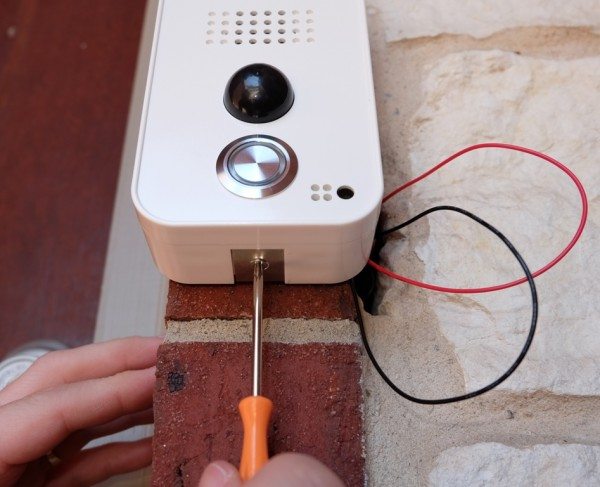
Then mount the DoorBird to the bracket using the safety screw.
DoorBird provides a special screwdriver to screw in the safety screw which has a special head.
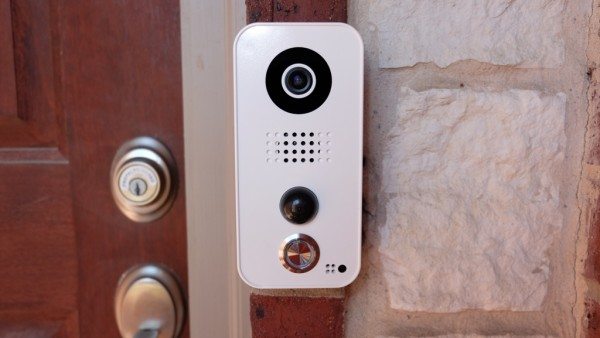
Here is the DoorBird finally mounted in its permanent place. I hope it works because we drilled holes into our brick!
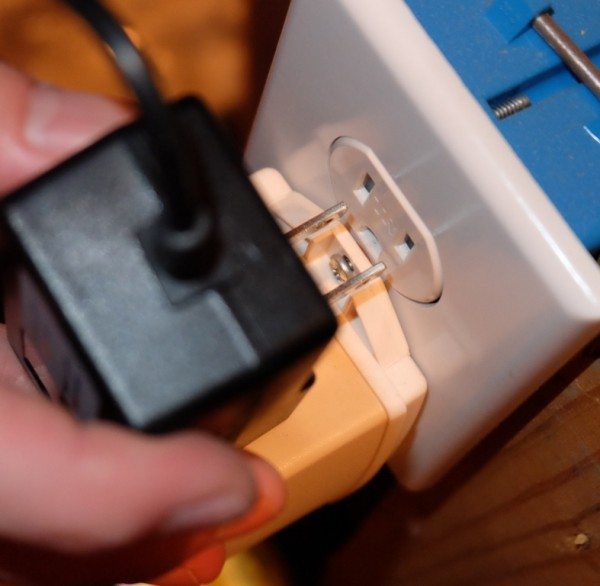
The last step will occur at a specified time during the software setup. When requested by the app, plug in the transformer to power the device.
And that’s it. Simple, right?!
Note that the steps outlined above will result in your existing door chime no longer working. The DoorBird in this configuration will only alarm your mobile device or tablet. If you wish to use the DoorBird to also ring your existing door chime, the installation will be more complicated and will probably require pulling new wires from the attic (in our case) to the DoorBird. The existing transformer and door chime circuit can be connected to the “Bell” slot on the DoorBird which would allow it to mimic a regular doorbell switch (according to the installation instructions; we did not make this connection in our installation).
App Setup
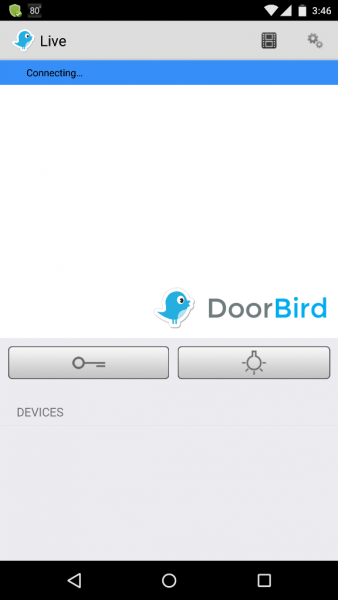
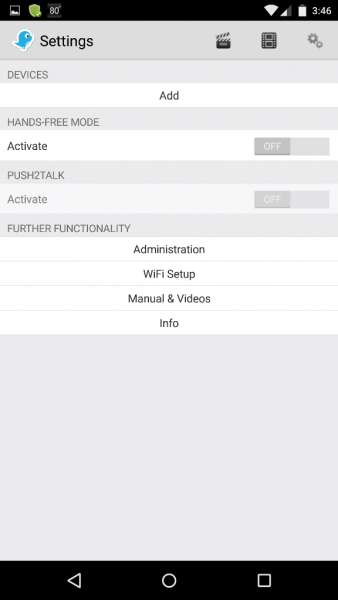
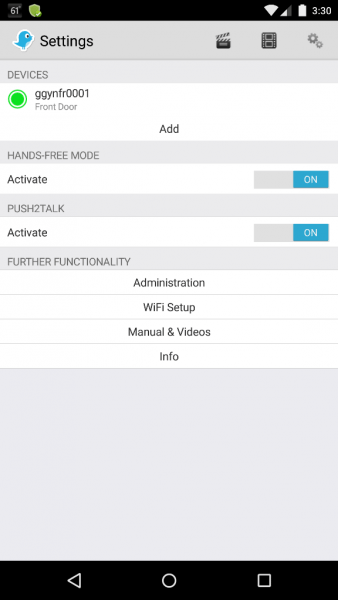
WiFi setup: The next step of the setup process is to download the DoorBird app (my Nexus 6 phone is my primary device and thus most of the screenshots are of the Android app, but I also installed the app on my iPod Touch 5G and found that the iOS app is very similar). After opening the app, you must tap the Settings gear icon to start the app setup process (right screenshot).
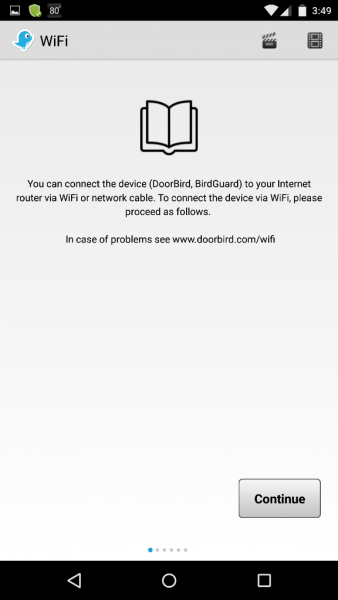
We chose to connect the DoorBird to our home network via WiFi and thus needed to select “WiFi Setup” under “Further Functionality” as shown in the right screenshot above. However, it is recommended that you connect the DoorBird to your network using a network cable for the best performance since WiFi is susceptible to issues such as interference from nearby WiFi networks or inadequate range. WiFi worked well in our house since our router is in a front room about 15 feet from the front door.
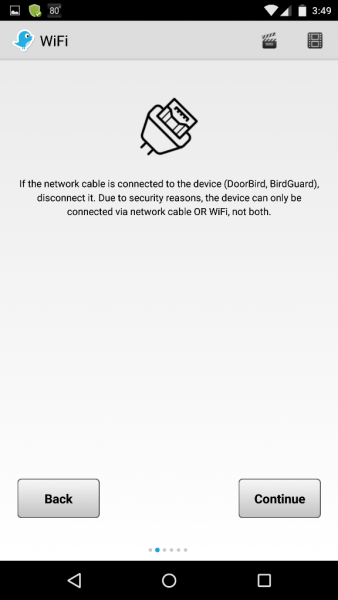
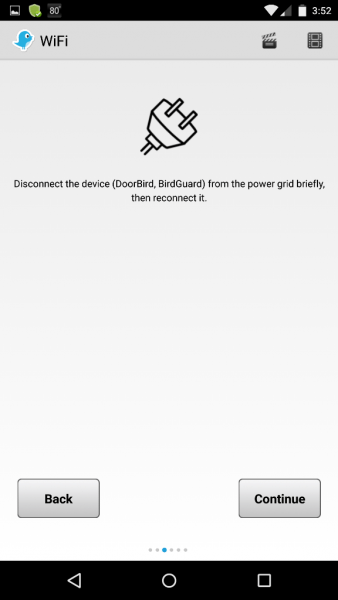
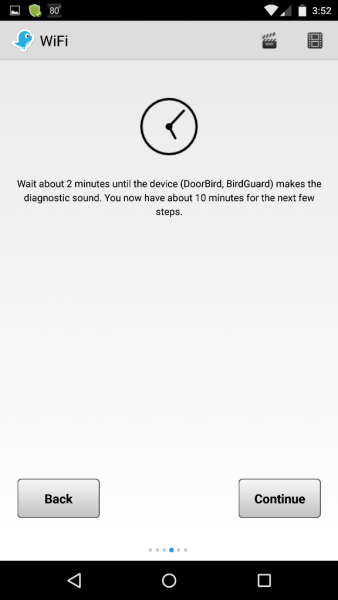
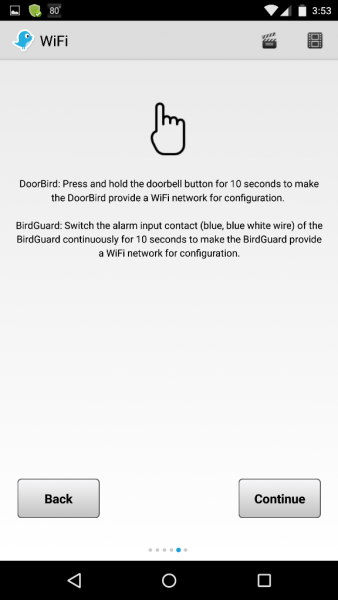
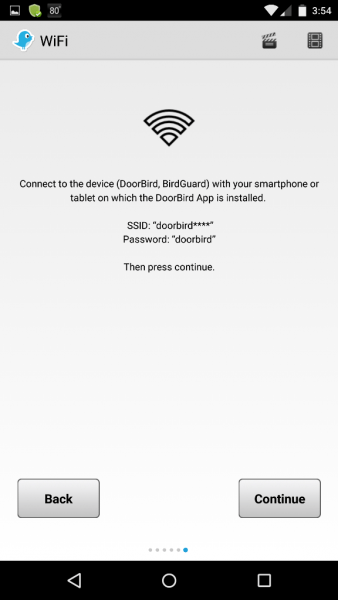
We stepped through the process, performing all the instructions on the screen prompts.
What a fun process of running up and down from our attic to plug in the DoorBird’s power supply!
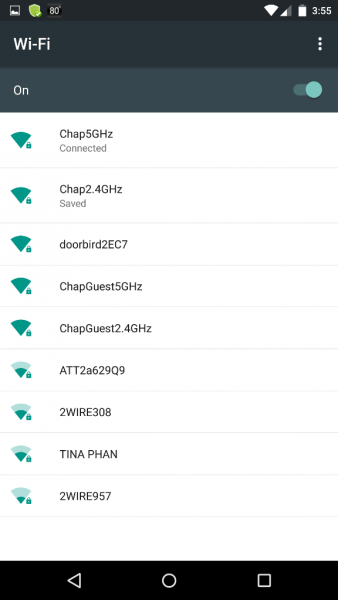
Pressing the Doorbird doorbell for 10 seconds at this stage of the setup will allow your router to detect the DoorBird as an available WiFi device in the list of available WiFi devices.
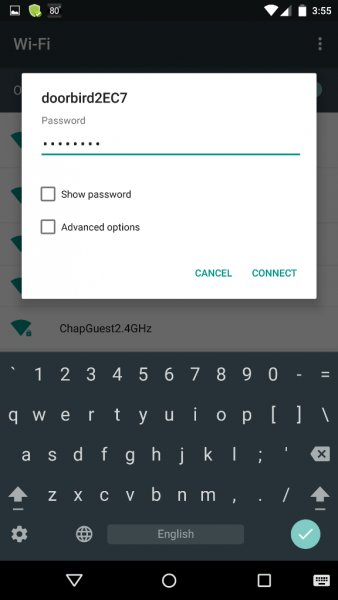
Once Doorbird is recognized in the list of WiFi devices, you’ll need to select it and enter the default password (which can be changed later in Settings).
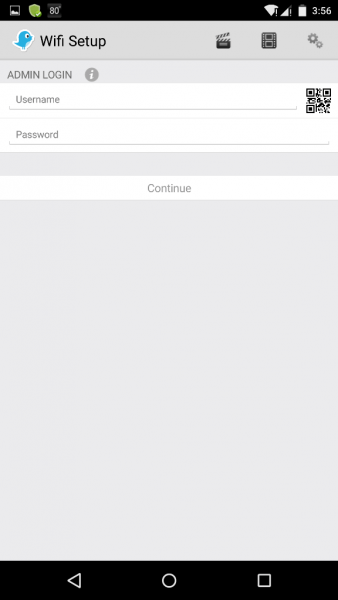
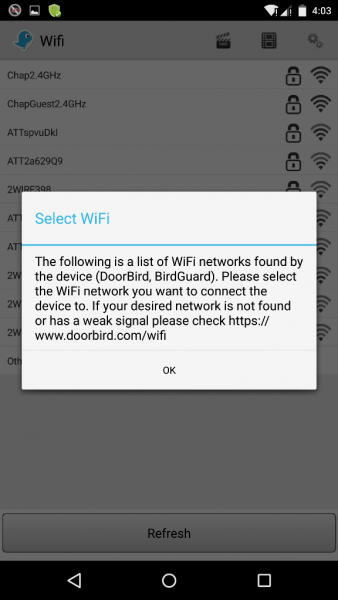
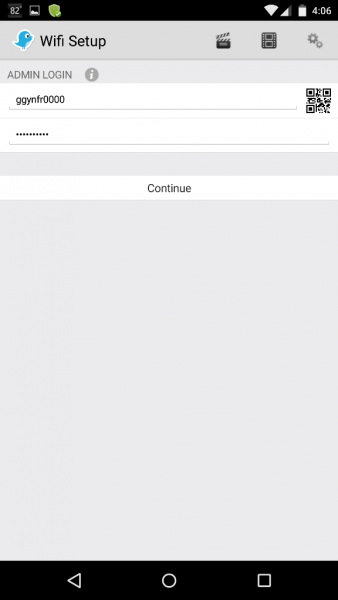
I used the QR code provided on the Digital Passport sheet to automatically enter the Admin Login username and password (this is the information listed under “Login for Administration,” not the username and password information located under “Add device to the App” also provided on the same sheet). If you have problems with the QR code, the plain-text authentication information is also provided on the same Digital Passport sheet. Once you have entered the username and password, you will see the next screenshot (on the right in the above screenshots). Select your home network and enter its password.
After entering your network password, you will be brought back to the Admin Login page which already has the login information entered from the previous step and a Continue button located at the bottom of the page as shown in the left screenshot. At this point, the WiFi setup is complete – do NOT select the Continue button. If you select Continue you will end up selecting your network and entering its password again. Unfortunately, there is no screen to let you know that you have finished the WiFi setup process.
Add your DoorBird device to the app: So once you have entered your network password and the Admin Login page pops up again, select the Settings gear icon located in the top-right corner (left screenshot), then select “Add” under the Devices heading to continue with the setup (right screenshot).
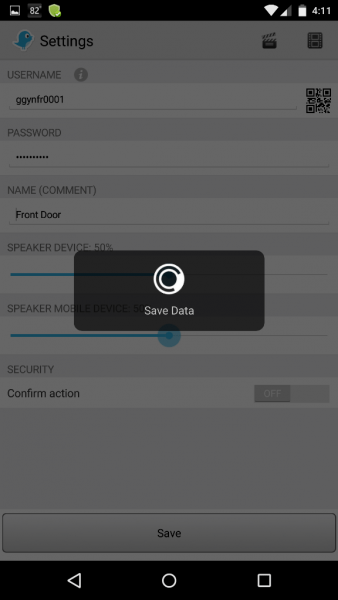
When asked for the device username and password, I used the QR code for “Add Device to the App” located on the Digital Passport sheet provided with the DoorBird. I also named the device “Front Door” then saved the information.
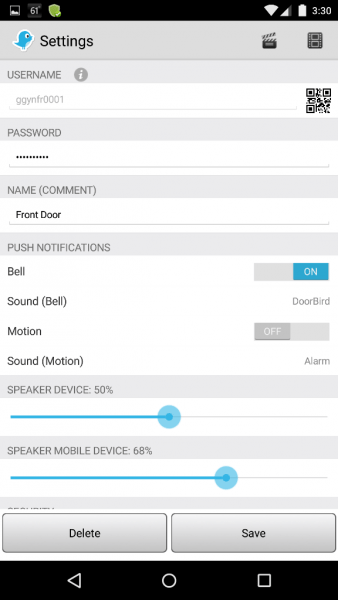
Device and User settings: The screenshot on the left will show that you have successfully added your device. Initially, there will be a red dot next to the device name (the red dot shows up only on the Android app and is green on the iOS app) to show that it is not yet active. At that point, you can tap on the device to go to the individual user settings page. This is a page that allows each user to modify their personal preference settings like push notification preferences (no Admin login username and password are required for individual user settings once everyone in the household has added the device to their DoorBird apps). Even after saving your preference settings, the device may still show the red dot, but after selecting the Live video feed icon (the icon looks like a clapper board used to begin filming a movie or TV show scene), you’ll notice that the dot becomes green when you go back to the Settings page.
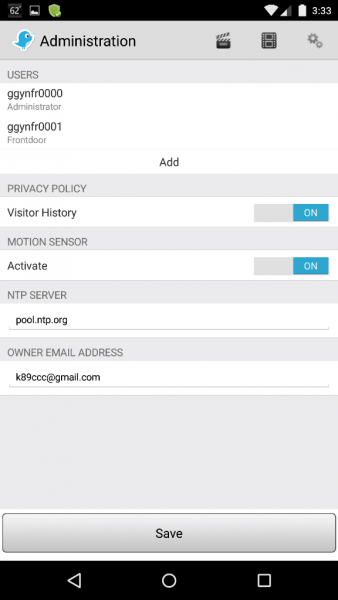
If you need to change an administrator setting, like turning on the Motion sensor for everyone to be able to receive motion push notifications, you will need the Admin login username and password, then you will see the above screenshot.
Use
App use: Once everything was installed and setup, using the DoorBird Video Doorbell was easy. By tapping on Settings then your DoorBird device within the DoorBird app, you can select your user preferences settings. The only user preference settings available to change are whether or not you will receive push notifications when the doorbell is pushed, whether or not you will receive push notifications when the motion sensor detects motion, adjusting the volume of the speaker, selecting the sounds for the doorbell/motion detection on your device, and activating Hands-free mode (to allow instant two-way communication with your visitor without having to push a “Talk” button).
And the only Admin settings available for you to change are the username and password for the device and admin login, turning on or off the motion sensor and turning on or off Visitor history. When the Visitor history setting is on, up to 20 pictures are taken when the doorbell is pushed for the first 20 visitors and an additional 20 are taken when the motion sensor detects motion, after which the pictures will be copied over starting with the first image).
Both Android and iOS apps were easy to use. The only complaint I have with the Android app is that the Live video, History (the icon looks like a film strip and is where you can view photos of visitors or motion detected), and Settings icons were not labeled; so initially I had to randomly tap on them to determine what did what. It was nice to be able to view the live video feed at any time, but I noticed that it is not possible to view the live video feed in landscape position in the Android or iOS apps.
Motion detection: I had problems with motion detection. The motion sensor was sensitive enough to detect the motion of cars driving by our house and even the headlights of cars at night which is a distance of about 18 meters (60 feet) from the DoorBird. This meant that if I had push notifications on, the DoorBird accurately took photos and sent me notifications every time a car drove by our house. Since there is no way to modify the settings of the motion sensor, no one in the house could tolerate all the notifications we were receiving so we turned them off. I was very disappointed about this because whenever I receive deliveries, it is typical for the carrier to avoid ringing the doorbell; thus, I still do not know when I receive deliveries.
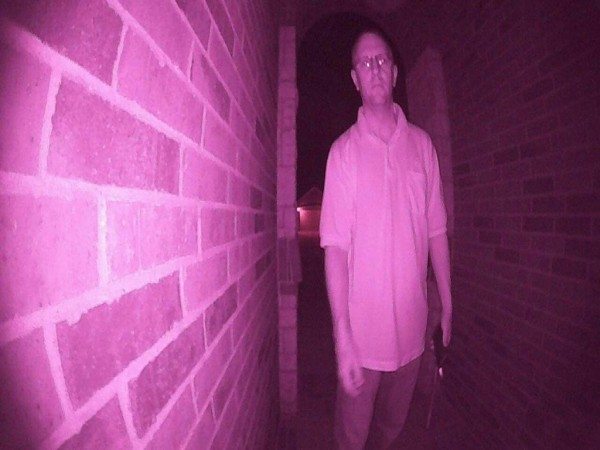
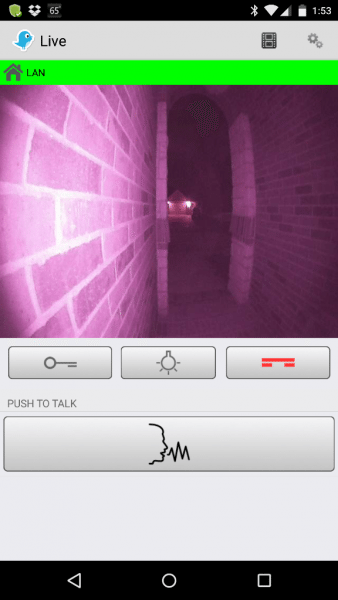
Video quality: The video quality during daylight (720p) and nighttime hours was excellent as illustrated from the above two photos. The quality of the video and photos, however, is only decent up to about two meters away during nighttime hours. Unfortunately, since I have such a narrow front entryway, I was unable to test the entire 180° view of the camera or motion sensor settings. It is also important to note that there is currently no video recording available using DoorBird.
Sound quality: The audio quality through the DoorBird speaker was very clear. It was a little less clear and was also very quiet when listening to the visitor’s voice through the app using an iPad Mini, Nexus 6 phone, and HTC One M9 phone. When testing this feature, the visitor would speak at a normal volume level and stand at a comfortable distance from the DoorBird which was about two feet away from the device. If the visitor spoke within 10 inches of the device, the volume level improved a little.
There was one notable difference between the Android and iOS apps. The Android app provides a means for the user to use a Push to Talk button to improve the sound quality, while this is apparently unnecessary for iPhones or iPads. According to the manual,
Since Apple uses very high quality microphones, loudspeakers and digital audio components that are perfectly in tune with one another, the voice quality with an iPhone or iPad is usually noticeably better than with an Android smartphone or Android tablet.
This was indeed the case. When using the iPad Mini to speak to a visitor (Hands-free option), the audio was clear on both ends albeit somewhat quieter when listening to a visitor through the iPad Mini.
But when testing this with my Nexus 6 phone, choosing the option to use the Push to Talk button worked better than the Hands-free option. The Hands-free mode without Push to Talk allowed additional background noise to be heard which cluttered the audio for visitors and even sometimes created feedback through the DoorBird speaker.
Cloud storage of photos and security: Even though I turned off push notifications for motion detection, I did leave the motion sensor on and was thus able to automatically capture photos of all motion that was detected which meant capturing photos of all the wonderful cars that drove by our house. The photos are stored in their cloud, which means that the photos captured are available to all the app users for your particular DoorBird. And, as far as security is concerned, the website states, “Our products are cloud-based solutions…For reasons of reliability and security no port forwarding is conducted through the internet (using NAT or DynDNS). Our products establish an encrypted VPN tunnel connection to our cloud server.”
Conclusion
I have mixed emotions about the DoorBird Video Doorbell. It was not as easy to install as the manufacturer states on their website. I didn’t have the patience to figure out all the wiring in our attic to wire the DoorBird properly so I left that task to my husband. You should also know that installing this will require you to drill permanent holes into the exterior of your home to mount the device. Once you have installed it and set it up in the app, the DoorBird is easy to use. It reliably detects visitors and motion, takes pictures, and sends notifications (if you have them turned on) every time a visitor rings the doorbell or every time motion is detected. The video quality of the DoorBird is wonderful and it is very nice to be able to open the app to view the Live video feed at any time. The audio heard by visitors is wonderful as well, but the audio heard through the app was not quite as nice. In addition, the motion sensor was discovered to be too sensitive and since it cannot be adjusted, it was unusable. So, is the DoorBird Video Doorbell worth its $349 price tag? Unfortunately, I would have to say no especially since there are other video doorbells out there that are cheaper and apparently easier to install.
Updates 08/02/16
I enjoy using the DoorBird Video Doorbell. I like viewing the live video feed whenever I like. However, while using it every day, I did notice a couple of things. The DoorBird’s vertical camera range often limits the view of a visitor if they stand to close to the doorbell such that the photos taken of visitors that ring the doorbell often do not show the head of the person (I’ll have to adjust the placement of the Doorbird to compensate for this). I also noticed that because my entryway is a short narrow hallway with light entering only from behind our visitors, there is a problem with backlighting. I had to adjust the exposure (thankfully DoorBird added this feature recently) such that the bright background was overexposed in order to get a decent view of our visitors.
Update 10/17/18
I’ve used the DoorBird for about 2.5 years now and I have to say it drives me crazy. Anytime I needed to change something about my WiFi network, it was a hassle to update that information in the DoorBird app – I basically remember performing the entire setup process again.
Back in February 2018, I upgraded my Nexus 6 phone to a Pixel 2 XL and when I went to install the DoorBird app on my new phone, it didn’t work and I discovered that the DoorBird no longer worked on any of our devices. I tried adding the device again to the app and it failed. I tried logging into the app (in the Administration section) automatically by using the username/password QR code and it failed. I also tried to manually enter the login information and it failed. According to customer service,
“The QR code for the stored users on the “Digital Passport” document is only working for as long as the associated user in the Administration area of the DoorBird has not been deleted/changed. When the video door station is connected to the Internet (see www.doorbird.com/de/checkonline), but the App gives an error notice when a device is added or you lost the connection to a DoorBird that was already connected to your App, in 99% of the cases, the stored user “…0001” on the “Digital Passport” document (the one for which the QR code stands) does not exist on the device or the password has been changed (see “DoorBird App -> Settings -> Administration).”
None of the stored users were changed when I tried to add the DoorBird to my new phone. Grrrr…
I tried resetting the DoorBird only to find what a huge pain in the neck that process was. The following are the steps that I had to use just to TRY to reset the device:
1. Disconnect the device from power. (This is not easy as our DoorBird’s power was connected in the attic)
2. Connect the device using a LAN cable to your Internet router. (So if you connected your DoorBird via WiFi like I did, you’ll need to pull out an Ethernet cable)
3. Connect the device to power. (Back up to the attic…)
4. Wait until the device plays “Successfully connected to Internet”.
5. Then click “Continue”. You have one minute to proceed with the next steps.
After tapping on “Continue”, the DoorBird then told us to “Please press any door button 5x with 30 seconds.” I began to press the DoorBird button but within 5 seconds of starting this process, a message popped up stating that, “The reset of the device failed. Please try again.” Wait, what? Are you kidding?!? I repeated the whole process again and again and it failed each time. The customer service representative passed my issue on to technical support. After collecting my DoorBird’s MAC address and “token”, they provided me with a link to start the reset process. Thankfully, that worked. It took TWO DAYS to reset my DoorBird. Wow.
In addition to all of those issues, The DoorBird app functions differently than most of my other smart home devices. Normally, when I launch a smart home device app, I immediately get the screen to log in, and if I haven’t already connected the device to the app, I do so, and then I have access to multiple functions. But with the DoorBird, to log in you must do so in the Administration section of the app. But if your Doorbird is not connected in the app, you first need to do that. Ugh! I can’t even remember clearly about the details of each of the problems that I’ve had with this device. This is just not an intuitive video doorbell app.
When I asked the customer service rep if they will be simplifying at least the reset process, he responded that,
“We are sorry that this simple way not work for you at your doorbird. This is an unique issue, our another users doesn’t have this issue and they can reset and setup their doorbird easily [the reset was easy?!?] like designed. We are sure that you will not get this issue again.”
Oh, but I did get the reset issue again when I decided to get rid of the DoorBird in favor of a Ring Video Doorbell 2, which by the way, is WAY easier to set up and use.
Needless to say, after long-term use, I can no longer recommend the DoorBird. Get a Ring. Get anything else.
Price: $349
Where to buy: Amazon
Source: The sample used in this review was provided by Bird Home Automation. Please visit their website for more information or to purchase the product.
ESR for MagSafe Wallet, 5-Card Holder With RFID Blocking, MagSafe Sticker Included, Slim Magnetic Wallet for iPhone 17/16/15/14/13/12 Series and Selected Samsung Devices, Not for 13/12 Mini, Black
(as of February 17, 2026 08:02 GMT -06:00 - More infoProduct prices and availability are accurate as of the date/time indicated and are subject to change. Any price and availability information displayed on [relevant Amazon Site(s), as applicable] at the time of purchase will apply to the purchase of this product.)KRTALS Magnetic Wallet Cell Phone Card Holder for Phone Case, Stronger Magnetic RFID Leather Phone Wallet Stick on Series of iPhone 17/16/15/14/13/12 and Pro/Promax, Light Pink
(as of February 16, 2026 12:35 GMT -06:00 - More infoProduct prices and availability are accurate as of the date/time indicated and are subject to change. Any price and availability information displayed on [relevant Amazon Site(s), as applicable] at the time of purchase will apply to the purchase of this product.)Product Information
| Price: | $349 (model D101) |
| Manufacturer: | Bird Home Automation |
| Requirements: |
|
| Pros: |
|
| Cons: |
|




Gadgeteer Comment Policy - Please read before commenting
Thanks for the great write-up.
I live in a remote rural area where internet connection is limited and is therefore wondering if DoorBird Video Doorbell is working on a local network without internet access? Will I still be able to view live video feed and receive push notifications to my smartphone?
According to the DoorBird website, their products are cloud-based, and your data goes through a secure server located in Germany. Their website states:
“It is not technically possible to use our products autonomously without internet access or without access to our cloud servers.”
Therefore, it appears that you have to be connected to the internet for the DoorBird to work. If you have additional questions, I recommend you contact DoorBird. You can email them at [email protected].
Thanks for the great write-up! I’ve purchased Doorbird a few days ago and your review helped me a lot with the installation process!
Thanks again for the awesome cover-up!
@Jeremy – That’s wonderful – I’m so glad that we were able to help out! 🙂
Hi,
I have bought Doorbird Model 202 and I am looking for someone to install it as it is very complicated.!There are some installer who do the job but they don’t cover my area (Exeter). Do you know anyone who can do this installation.
Many thanks
Hassan
Hassan – I’m sorry but I do not know of people who can install your Doorbird. The only thing I can think of is to call electricians in your area. Good luck!
How do we enable the existing door chime to work when I am not home with my phone and the housekeeper needs to answer the door?
@Henry Clark – The last paragraph in the Installation section of the review above describes how to make the chime work. Here is some additional details that may help.
The DoorBird has a separate contact (labeled “Bell”) that will act just like a doorbell switch to activate a chime. You may have to pull a separate wire to the DoorBird to connect this contact to the chime and the original doorbell transformer. It is just like the original doorbell circuit that you probably had, where the DoorBird becomes the doorbell switch. The difficulty with this is that you probably used the existing wires to provide the power to the DoorBird, so that is why you will need to pull new wires, which may not be very easy, depending upon how your house is configured.
Hope this helps.
Hi, thanks for the great review. It was a major factor in choosing this product. Just a quick question, just like you I suffer from backlighting. Which settings did you change in order to improve the picture quality? Changing Brightness or Contrast only seems to make it worse… any other tips?
Stefan – The only settings I used to try to compensate for the backlighting was adjusting the Brightness and Contrast (which you already tried). After altering the Brightness and Contrast settings several times, I settled on Brightness: 65% and Contrast: 65%. This overexposed the background moderately without completely washing everything in the background out while lighting up the foreground enough to see the person at the door. It’s not perfect, but it was the best I could do. I don’t know if this will help you or not. Anyway, good luck!
I recently installed installed a DoorBird video doorbell for a client. My comments / observations are as follows:
1. The physical install was straight forward
2. The app setup is more complicated; primarily, since there are serious gaps in the instructions or they do not exist (eg. how to add additional users)
It would be helpful to have a narrated video IN ENGLISH to address a great deal of the app setup ambiguity.
Hello, Kathleen. This is a very comprehensive review of DoorBird indeed. Well, I am bit confused between Ring Pro and Doorbird because of the price differences. Ring is relatively cheaper?
Naveen K – It would appear that the Ring Doorbell Pro is less expensive but I don’t know anything about the Ring doorbells to really compare them to the DoorBird (model D101). Please visit the Ring website and DoorBird website for more information.
Oh sure. I will check that out. Thanks for the response!
I purchased the Doorbird for the reason that it has built in door release. If you have an electronic striker or electric gate, you can hook it up directly to the Doorbird and open it with the app. Ring requires additional hardware/fees.
We just recently purchased the Doorbird, and for the most part I really like it. Setting up the app was a bit confusing, but got it done. The thing that really annoys me and i’m hoping there is something i’m missing in setting this up, but you can barely hear the door chime when someone pushes the button. I literally have to have my phone sitting right next to me in order to hear the little bird chirp when someone rings the bell. I have my sound turned all the way up and its still so quiet. There must be a different setting or volume control ???? Please help.
Zac – this is what I found in the FAQ section of Doorbird support:
“No Push Notifications
Please make sure you’ve allowed push notifications for the DoorBird app in your device settings/notification center and that they are also active in the settings for DoorBird (DoorBird App -> Settings -> Devices -> [select]). Should these both already be active, please tell us the WiFi MAC address of your video door station (see document “Digital Passport”). For the motion sensor, the setting must additionally be activated under “Administration” (DoorBird App -> Settings -> Administration).
In some cases, the sound setting for push notifications on your mobile device has been set to silent or very quiet (i.e. the switch on the side of the device, or for iOS, Settings -> Sounds -> Ringtones and Alert Tones.). In some cases, restarting the mobile device can also help to refresh these settings.”
If you need further assistance, you can contact Doorbird using the following link:
http://www.doorbird.com/contact
Zac – By doing the following you can change your notification sound to something more audible:
Doorbird app > Settings > under “Devices”, tap on your Doorbird doorbell > under “Push Notifications”, tap on “Doorbell” > make sure “Activate” is on and tap on “Sound”. Select the notification sound you prefer and then go back to Settings and Save.
Hi
Do you need to subscribe for DoorBird doorbell? How much if it need?
Thanks
Tarn
Tarn – There is a free basic cloud recording service and a paid service. Here is the info from DoorBird:
”Each DoorBird IP Video Door Station comes with free recording storage (history) for the most recent 50 visitors and motion events (VGA-Image).
This storage (Cloud-Recording Free) as well as the secure remote access via our Apps via our Cloud are free of charge and will remain free of charge in the future. The use of the DoorBird IP Video Door Station is not connected to any additional costs!
If you need additional recording storage you can either connect the DoorBird IP Video Door Station to a local NAS/NVR (e.g. Synology, see http://www.doorbird.com/connect) or subscribe to Cloud-Recording Pro.
Cloud-Recording Pro
-Unlimited number of Doorbell event recordings (HD-Video 720p)
-Unlimited number of Motion Sensor event recordings (HD-Video 720p)
-View and download event recordings
-Convenient search filter
-Recordings will be stored for 7 days
-Cloud-Recording Pro requires additional 0.5 mbit/s upload bandwidth to the Internet per DoorBird IP Video Door Station…
After you have bought Cloud-Recording Pro, please make sure to enable it within the DoorBird App (Settings -> Administration -> Cloud-Recording). Please note that it can take 2-3 working days after the receipt of your payment until the function is available in the App if you have used the payment method “Bank wire-transfer”.”
My doorbird has an empty sd card slot, i will be testing
Your review is so helpful and full of detail. Thank you so much Kathleen!
Tarn
Tarn – No problem! I’m so glad the review helped. DoorBird has since updated the app such that it looks a little different from the screenshots I included in my review, so if you’d like to see their manual for the DoorBird app please click on the following link:
https://www.google.com/url?sa=t&source=web&rct=j&url=https://www.doorbird.com/downloads/manual_app_en_de.pdf&ved=2ahUKEwjVjqCew8vZAhUs94MKHaC6DNYQFjADegQIARAB&usg=AOvVaw3r6ZC-G72w5ECbQjIlq49P
I’m going to be updating this review shortly to mention things like the following: pay attention to whichever mobile device you used to set up the DoorBird first, because if you should upgrade that mobile device and get rid of the old one without resetting the DoorBird (so that you can successfully set up the DoorBird with your new device), it will cause problems for all the other devices connected to your DoorBird.
Thanks for your review. I recently bought a doorbird, but since I deleted the user, the whole thing stopped working. I am an Engineer myself, and I now know there are lousy engineers in Germany. I cannot connect to the device, period, for the user or the administrator. Emailed [email protected] 2 days ago, no reply yet. Their phone system is a joke. Wonder how you got to talk to a real person.
Sean – Unfortunately, I did not get to talk to anyone either to get assistance with my DoorBird problems. Like you, I emailed them at the email address you did and had to wait. Email is such a long an inefficient way to get help, but that’s what how I did it. I hope they get back to you. Did you try resetting your DoorBird?
Yes, I finally figured it out, not totally with their help.
The key is that after your factory reset, you have to WAIT until the device to reboot, which may take several minutes. Otherwise, the new digital pass would not connect.
It is a great piece of hardware, but the software side is quite unfriendly. It is a shame that they could make this product 100 times better than Ring.
Sean – Yes, the reset process is quite convoluted; the software really needs to be reworked which would indeed improve the DoorBird dramatically. I’m glad you were able to figure things out!
Hello,
Would you be able to provide me with the name of the connector used for T+T-R+R-?
I need to buy extension and not sure which one to buy.
Thank you!
Yours – Unfortunately, I no longer have my DoorBird. You can contact DoorBird to answer your question:
https://www.doorbird.com/contact
Good luck!
FEEDBACK…regarding D101S model
I’m from Australia and have owned the D101S model for about a year. Generally it’s a good intercom except for two issues.
People keep on pressing the sensor dome thinking it is the call button. The button LED is on and even with the addition of a label I stuck next to the button saying PRESS HERE> people still press on the black dome. Doorbird needs to change this design so that the sensor is concealed like you have in other models
The other issue is the contrast/brightness – dynamic range. My Doorbird is under a veranda facing the North (same as South in Europe) and so when people press on the button, their face is blacken because of the high brightness background. I have adjusted the brightness and contrast to improve this situation but now the picture quality is not as good. Doorbird needs to have high dynamic range plus face recognition like photographic cameras so that when people are standing in front of the Doorbird the camera is focused of peoples faces for best picture quality.
In regards to people pressing the sensor dome, one solution I have that could be retrofitted to existing D101 is by making a black face plate. This will make the the call button more obvious and will help conceal the sensor dome. I’m sure you will have many buyers from existing customers.
Italo – I was curious if people would mistakenly press the sensor rather than the doorbell button. I like your suggestion about designing a black faceplate which would help that situation.
The backlighting issue was a problem for me as well. Even though I no longer use the DoorBird, I remember it being difficult to get a good look at the person at the door during the day even after adjusting the brightness/contrast. Perhaps this is something that the company is working on for the future.
Thanks for your comments!
Hi Kathleen,
You see I am back after 3 years and could not install this Doorbird. I am fed up and very disappointed.
Thank you.
I do not recommend Doorbird to anyone.
Hassan – I’m so sorry that you were not able to install the Doorbird. I agree with you and do not recommend the Doorbird video doorbell. I have since replaced mine with a Ring doorbell and am much happier for it.
Don’t do it! Doorbirds are trash. They drop offline frequently, require reboots constantly, video and audio quality is laughably poor. They do not hold up to outside exposure well at all and they are ridiculously expensive. The Doorbird “cloud” is sluggish and barely usable.