A good label maker is one of those things that you do not realize how useful it can be until you have one. Pretty much every container, drawer, and file in my shop at work is labeled and it has made my life so much easier in so many ways (like trying to tell someone over the phone where a specific gizmo is.)
I had been using a pretty generic label maker, and was excited to try the more creative Epson LabelWorks LW-300 and play with all of its features!
The LW-300 is the more ‘home-based’ companion to the more ‘office-oriented’ LW-400. Both feature:
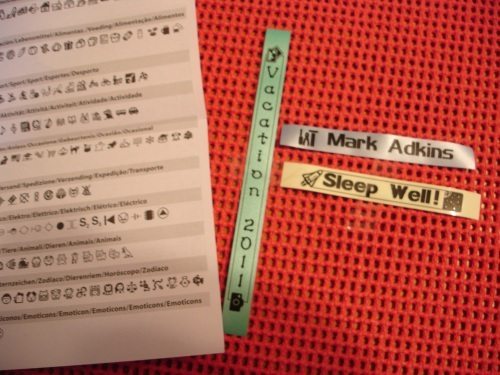
- 14 fonts, 10 styles, and 300+ symbols
- less margin waste than other brands
- memory
- multi-line printing (2 lines for the LW-300, 4 for the LW-400)
- wide tape capabilities (up to 1/2″ for the LW-300, 3/4″ for the LW-400)
- 7 languages
- quiet operation
- easy to apply ‘split-back’ labels
- specialty tapes from glow-in-the-dark to iron-on
The LW-400 can also print specialty projects like bar codes and cable wraps and on tapes that include fluorescent colors that do not come in the 1/2″ size used by the LW-300.
I was sent the LW-300 unit to try, and it is a lot of fun to use! It reminds me of when Print Shop originally came out and suddenly people were making signs with fancy fonts, borders, and clip art all over them. Sure, a lot of them were horribly ugly, but you could also do some neat stuff with it, as you can with this labeler.
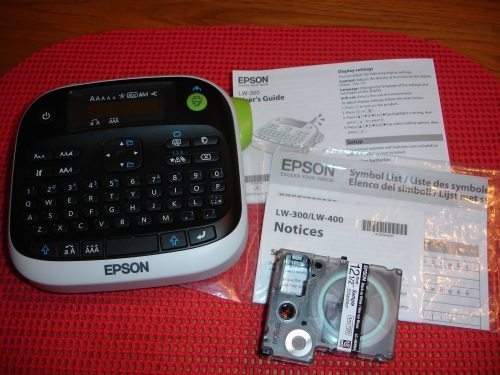
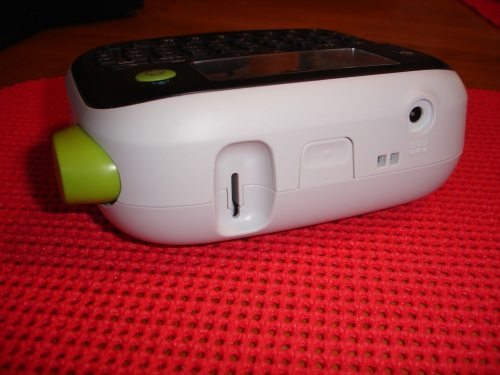
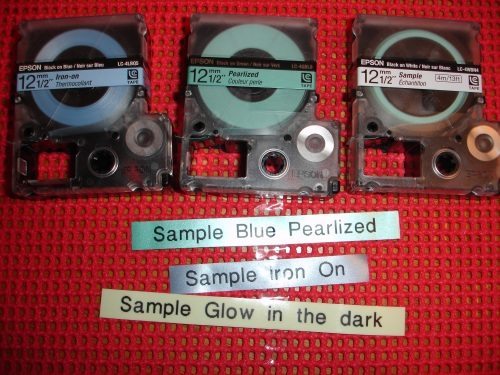
The labeler is packed in a box that, intentionally or not, makes a very functional storage box. It contained the printer, a warranty card, instruction booklet, symbols reference card, and a starter cartridge of 1/2″ black on white tape. I was also sent a roll of glow-in-the-dark, iron-on, and blue pearlized tapes to play with. It runs on 6 AA batteries or an AC adapter, neither is included.
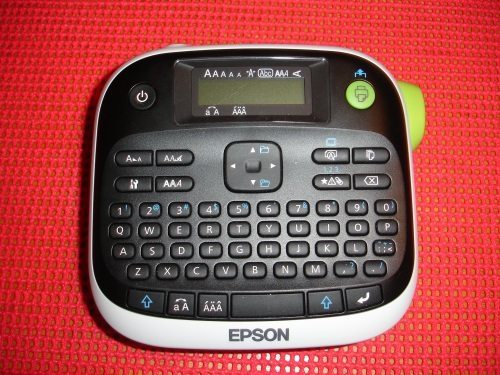
The LW-300 is about 6″x5.5″x2″ with a QWERTY keyboard and several special purpose keys. Many buttons have another function when the ‘shift’ key is pressed. Most of the controls are labeled clearly enough and the unit is intuitive enough that you won’t need the instructions… most of the time. The default ‘enter’ key is the typical downward bent arrow, which keeps causing me troubles because it is also used to start a new line on this and other machines.
You can change the looks of the labels in many ways:
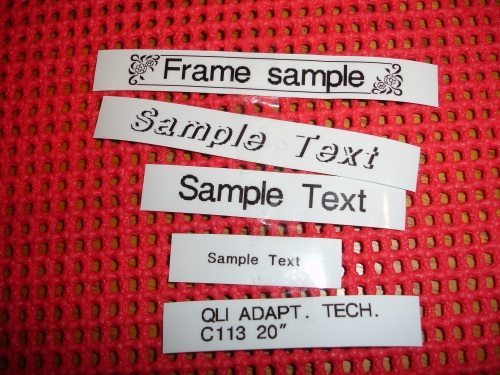
- 14 fonts, from Sans Serif to Roman to Script
- Character size, spacing, and width
- Styles such as italics, bold, outline, shadow, or combinations
- Label length
- Several frame options, vertical or mirror printing, and adding sequential numbers
- Using different tapes
It can do so much that it is tough to convey it all on the controls, so you’ll want to keep the instructions handy for details on some features (or use the abbreviated reference sticker on the bottom). The screen shows a limited ‘WYSIWYG’ display- it will show the text and symbols, but not the font, frames, etc.
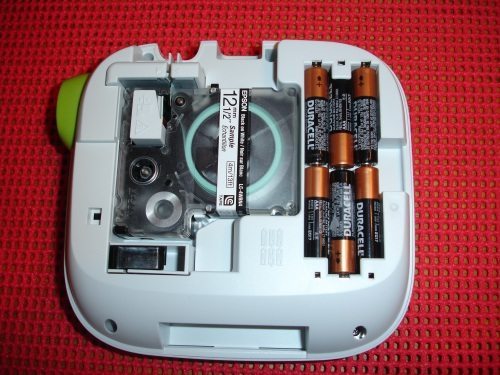
The entire back comes off easily allowing for very easy access to the batteries or to change the tape cartridge. A small window in the back shows you which cartridge is in place, and swapping tapes is very easy with the large index guide and a label path that is easy to get the tape into.
I was sent several samples of tapes to play with…
- The stock 1/2″ Black on White labels are very much like similar labels used on a variety of label makers. Like most of the tapes made for this machine, the backing is slit in the middle to make it easier to remove.
- Glow-In-The-Dark is a fun option. Like similar products, it charges with exposure to light. This tape will glow for hours, getting fainter as it goes. It would make an interesting ‘night light’ for kids, or be a handy way to label light switches or other things you may need to access in the dark. As the glow fades, it becomes harder to read the letters, so use bold fonts to get the best results.
- The Blue Pearlized labels were very pretty, but the black letters on the slightly dark background did not have as much contrast. On the other hand, they look great on projects like scrapbooks, etc. where you do not want such a stark or industrial look.
- I did not get a chance to try the Iron-On tapes for durability, but they did iron on easily and survived one washing without noticeable damage. This seems like a good choice for labeling clothing going to school or camp, etc., but it would also be an easy way to do things like personalize a work shirt, identify special purpose cleaning cloths (like ‘Glass Only’), and so on.
My primary use of a labeler is at work at a rehab center for adults with disabilities, where I use it to organize the shop. However, with the specialty tapes available, I can also tackle other projects, like attaching identification labels to seat cushion covers (Iron-On) and wheelchairs in the loaner fleet (Metallic or High Strength Adhesive), or identifying risks (Fluorescent).
But, as I play with this machine, I see more and more interesting uses, like…
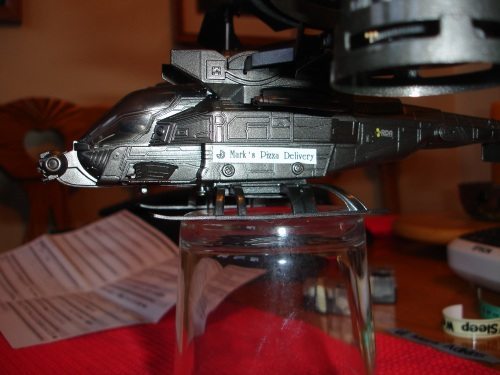
- Customizing toys with the variable text options and sizes – trucks with door signs from ‘Mark’s Construction’, or signage in a toy town. You could even use the iron-on labels in small print sizes to put words and images on doll clothing.
- Return address label maker – setting up a memorized label with your address and city, state, and zip on the two lines, then tinkering with the settings to make a nice, legible, compact label you can print whenever you need one or ten of them.
- Make two identical vertical labels and stick them back to back on the edge of a page to make an index tab you can read from either direction.
Like many printers nowadays, the base machine is fairly cheap (MSRP $39.99), but you can go broke on the consumables – the tapes range from $16.99 to $21.99, but the lengths also range from 5 to 30 feet. The basic black-on-white cartridge is $17.99 for 30′. Figuring two inches per label, you can get 180 labels from a roll at a cost of about a dime a label. On the other hand, the glow-in-the-dark tape is $29.99 for 5′, making each 2″ label worth about a buck each!
My two biggest complaints about this unit are both pretty petty. My older labeler did not let you press multiple buttons, so to get a capital letter, for example, you hit ‘shift’, then the letter. This unit requires pressing multiple buttons – shift and the letter at the same time. I also keep loosing track of which button I need to advance in the menu or to select the option I want.
Beyond those two nit-picks, this is a nice machine. It is well-built and passes the Gadgeteer Creak Test. It stores away nicely and goes a long time on a set of batteries. It is easy to use, and easy to figure out when you do get stuck.
Amazon Echo Show 15 (newest model), Full HD 15.6" kitchen hub for home organization, with built-in Fire TV and Alexa+ Early Access
$299.99 (as of January 17, 2026 17:41 GMT -06:00 - More infoProduct prices and availability are accurate as of the date/time indicated and are subject to change. Any price and availability information displayed on [relevant Amazon Site(s), as applicable] at the time of purchase will apply to the purchase of this product.)Dosmix Retro Bluetooth Speaker, Vintage Decor, Mini Wireless Bluetooth Speaker, Cute Old Fashion Style for Kitchen Desk Bedroom Office Party Outdoor Accessories for iPhone Android (Green)
$17.99 (as of January 18, 2026 02:40 GMT -06:00 - More infoProduct prices and availability are accurate as of the date/time indicated and are subject to change. Any price and availability information displayed on [relevant Amazon Site(s), as applicable] at the time of purchase will apply to the purchase of this product.)Product Information
| Price: | $39.95 MSRP |
| Manufacturer: | Epson |
| Retailer: | Amazon.com and others |
| Pros: |
|
| Cons: |
|


Gadgeteer Comment Policy - Please read before commenting
My first label, affixed to my Brother Label maker, reads “Label Maker”.
I love your mention that it might have smaller waste on each side of the label. Looks like a nice unit. I had a need, a while back, of a label maker that I could get to do graphics of my choosing so I started looking at ones that you could connect to the computer. I found the “Brother PC-Connectable Label Maker (PT-1230PC)” which I have been quite pleased with. The software is a touch crude, but overall it’s nice. It did enable me to import graphics of my design and print those on my labels.
Nice Information…………