 I finally got around to upgrading my MacBook Pro’s 200 GB hard drive. I could go on and on about how annoying it was to have to go to an authorized service center to get the upgrade since my generation of MBP does not have a user-upgradeable hard drive, but since Julie does not provide a “whine and moan” category, I’ll save you the diatribe.
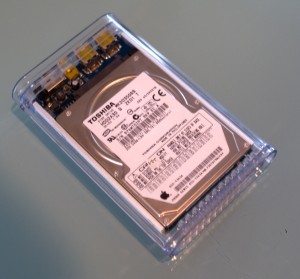
I wanted to get an enclosure for the drive, and was hoping to get a FW 800 enclosure. There are not a lot of them out there, and they are pricier than simple USB or even USB FW400 enclosures. I settled on the OWC Mercury On-The-Go Drive Enclosure because some of the reviews of the other contestants indicated that it did not always work on USB power alone. And, yeah, I also thought it looked nice. I like the see-through case.
The enclosure comes in three styles:
- USB ($24.99)
- USB/FW400 ($47.99)
- USB/FW800 ($72.99)
I purchased the USB/FW800 drive for 2.5″ SATA hard drives.

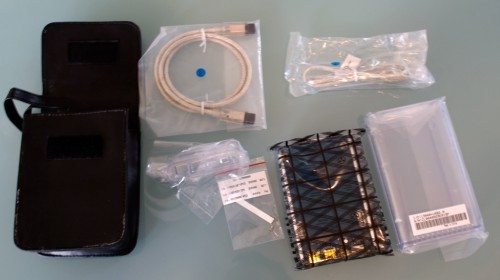
The drive included:
- Enclosure
- End Piece
- Board
- USB cable
- FW 800 Cable
- Carry Case
- Silicone Feet
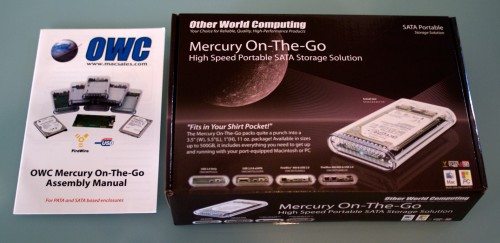
- Assembly guide

The assembly manual clearly explains the assembly of the enclosure. There were only a few steps that did not jibe with what I received, but nothing that was difficult to follow.
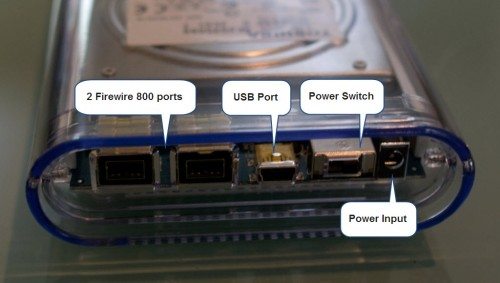
I was surprised that the enclosure came with a power switch, the ports are laid out nicely:
Once I completed the installation, I tried out the drive with the Firewire cable. Everything worked great. When I hooked up with USB I had issues. The drive would show up, then dismount, then mount again. I sent an e-mail to their support and while I waited for a reply, did some research on my own. Turns out it is a known issue with MacBook Pro USB ports being under-powered. I have heard differing opinions. The one that reflects best on the MacBook Pro is that Apple follows the USB spec to the letter, and most enclosures want a little more juice than the spec calls for. Regardless, the effect is that USB does not work well on the MBP. It works fine on my wife’s MacBook (turns out the design of the MB allows one port to “steal” juice from the other, while the MBP isolates the two ports).
It actually is not a huge issue for me. I got the FW 800 interface to use it, and it powers the drive fine. If I needed to use it on the MBP as a USB drive, OWC sells an adapter for 7.99. I did not have a FW 800 – FW 400 cable to test FW on the MacBook, but I assume it would work fine.
UPDATE:
I want to make it clear that I am very satisfied with this enclosure. I purchased it so that I could use the FW-800 interface on my MacBook Pro. I was surprised that my MBP did not have enough power to power the enclosure while connected via USB, but had no issues with the FW power. Furthermore, the USB works great on my MacBook (where I NEED to use the USB interface), so the issue is obviously related to the power of my MBP USB port. I re-tested the USB interface on my MBP with a powered USB hub and it worked fine.
My only point in bringing up the USB issue is to make you aware of the issue. Since you are paying extra money for the FW interface, I don’t see it as a big deal with this drive. There are a lot of factors that determine if a USB can power a drive, this includes the power provided by the USB port, the power used by the interface in the enclosure and the power required by the drive itself. In addition to the AC Adapter they sell for the drive, you can also purchase a Y-Adapter for $3.99 that uses 2 USB ports to interface and power the drive if your computer does not provide enough power.
Product Information
| Price: | $72.99 |
| Manufacturer: | Other World Computing |
| Pros: |
|
| Cons: |
|


Gadgeteer Comment Policy - Please read before commenting
I use a Antec case for my SATA 2.5″ drives. This drive was 40 bucks, and does ESATA, and it didn’t come with a power adapter either. Anyone else miss the days when they GAVE you the stuff you may need like adapters instead of just “use USB power”? The drive is plastic and got scratched easy, but it does what I wanted it for.
I have mixed emotions about that. I have a LARGE collection of useless adapters and cables. I just wish everyone would go 5V USB connector for power.
That would be nice, IF THEY INCLUDE THE LITTLE ADAPTER :-p
Who says the MacBook Pro doesn’t have a user replaceable hard drive? If the drive went in the computer, logic states it has to come out somehow.
I replaced my non-unibody MacBook Pro’s drive rather easily about a year ago; I am planning on an upgrade to a 500GB 7200RPM drive fairly soon to get another year (hopefully) out of it. As of today, it is about 2.5 years old.
@Tyler I ordered an HD yesterday to do the same thing with an older non-unibody MBP.
@Tyler
Cracking open my MBP to replace the Hard Drive would void my warranty. Already had the logic board replaced once under warranty, so I didn’t want to risk it. First laptop in at least 15 years that I have owned that didn’t have a hard drive that easily slid out to replace. Luckily they fixed that flaw in the uni-bodies.
I have been using this enclosure (OWC Mercury) for about 5 years now and love it! Because you know, the circuits and hardware stuff is all visible throught the clear Lucite. It always impresses people at its sublime geekiness! Lovely during night too, its blue light is pure discotheque all flashing randomly during read/writes.
Merely replacing the HD on your Macbook will not void your warranty. If you do damage something while doing the replacement, that damage might not be covered, but if you replace it yourself without hurting anything, your warranty is still intact.
At first I was going to pay to have the hard drive upgrade on my none unibody Macbook Pro but after hearing the price I decided to do it myself. The user instructional videos on youtube made it very easy. Glad I did it myself.
@Lloyd,
Actually, only the first generation unibodies are super-simple to replace the HDs on. (They have a panel that you can open without tools, though you need a tiny screwdriver to remove the drive itself.) Later model unibodies aren’t hard, but you do need to remove 8 or so screws and remove the entire bottom panel.
I’ve replaced the HD on my first-gen unibody MacBook twice to upgrade the storage (first to 500 GB, last week to 1 TB).