REVIEW – I’ve been crafting since I was a kid – my childhood was filled with collages made from magazine cutouts and doll food made from Crayola Model Magic. My brother and I spent hours building imaginary worlds with our shared LEGO collection. A lot has changed since the 80s and 90s, and there is an enormous assortment of incredible, affordable technology available to indulge in every creative impulse we makers cannot help but pursue.
I’ve been interested in hobby laser engraving (and cutting) since I first learned about it in the era of the original GlowForge. We wanted to buy a laser engraver, but never invested in one, especially as prices stayed high for several years. So, when Julie offered the new WeCreat Lumos laser engraver, I had to jump on it. Let’s dive in!
⬇︎ Jump to summary (pros/cons)
Price: $1199.00 and up
Where to buy: WeCreat
A quick vocabulary lesson
This review makes use of two important terms: vector and raster.
Vectors are mathematically-defined shapes, built by creating a set of X-Y coordinates and defining the curve of each coordinate. Vectors are typically created in a program like Adobe Illustrator, Affinity Designer, or InkScape (FOSS) and are typically shared online as SVG or EPS files. A vector can be infinitely resized with no loss in quality, because it’s a shape, not an image. Hobby plotters, such as those from Cricut and Silhouette, cut vector paths.
A raster image is a collection of pixels (digital dots) of many colors. Photos and screenshots are examples of raster images, and raster images are printed line-by-line, with a printhead that typically moves along the X-axis, while the substrate moves along the Y-axis. Vector laser equipment is often capable of engraving raster images, and the laser moves line-by-line, just like a printhead. Many inexpensive laser engravers, found on Amazon and elsewhere for a few hundred dollars, are only capable of raster engraving.
What is it?
The WeCreat Lumos is a compact vector (and raster) laser engraver and cutter. It’s equipped with red (3mW) and blue (10mW) lasers.
The Lumos supports both USB and wireless connectivity. Bluetooth is required for initial setup if you don’t use USB, and the wifi supports 2.4GHz only. The desktop software supports Windows 10/11 and MacOS, and there are apps for both iOS and Android.
What’s included?
The basic Lumos kit includes:
- Laser module with lens cover
- Base with exhaust fan and safety shroud
- Purple base plate with threaded holes (for engraving)
- Two L-shaped aluminum alignment pieces for engraving plate
- Black base plate (for cutting)
- 168W (24V @ 7A) power adapter
- USB A-B cable
- USB B-C adapter
- Exhaust hose and mounting bracket
- Wrench for securing laser module in base
- Two basswood 6×6″ sheets for basic testing
Design and features: The Hardware
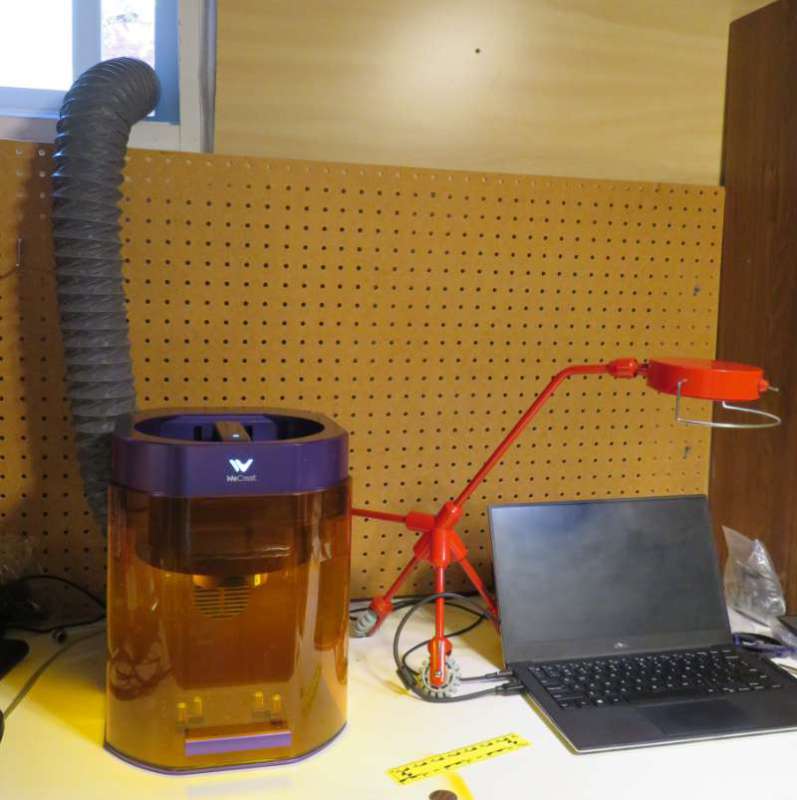
This particular laser engraver is specifically geared toward on-the-go use at expos, conventions, and festivals, which means it’s portable and boasts a remarkably small footprint. If your workshop has limited counter space, this little guy only takes up about 11×18″, including room for the exhaust hose.
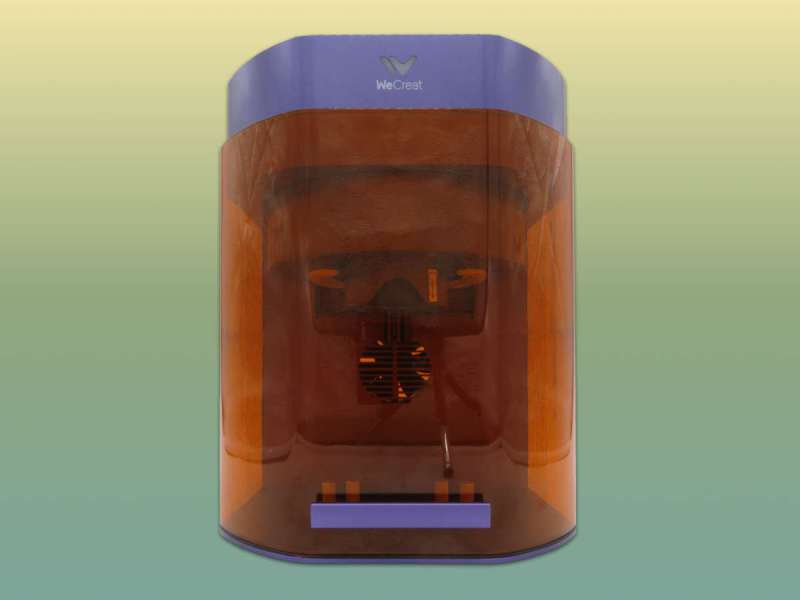
The base and laser module are both a nice purple color, while the safety shroud is a particular tone of yellow designed to shield your eyes from the harmful effects of the blue laser. On the front of the base, above the work area, is an illuminated WeCreat logo. This appears to change color based on the status of the machine, although so far I’ve only seen it output white (idle) and green (active).
On the right side of the base are the manual focus knob and an autofocus button. The manual focus offers precise adjustment of the laser before engraving. Pressing and holding the autofocus performs the same autofocus which can be accessed in the desktop software.
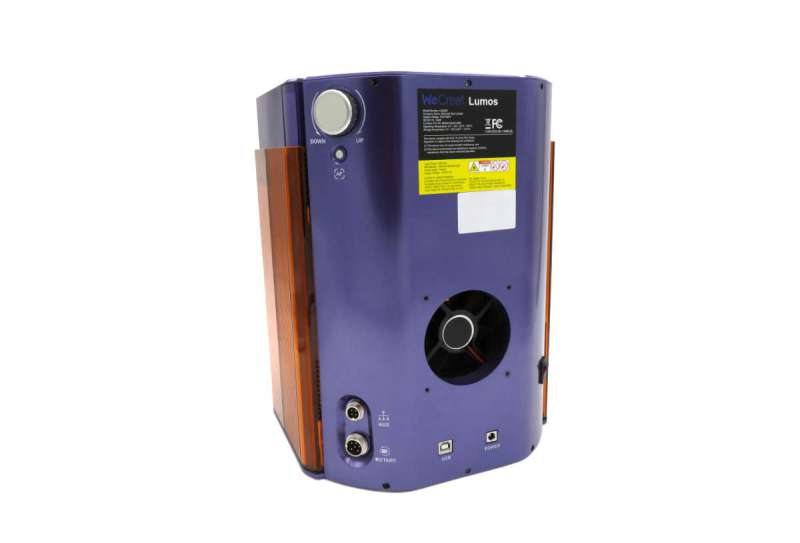
Below the focus controls are two additional ports, marked Aux and Rotary. WeCreat is planning on offering two accessories, which make use of these ports: a rotary jig for engraving both large items, such as drinkware, and small items, such as rings; and an extended bed for engraving long items. These accessories are not yet available for review, so watch out for an update once I’ve had a chance to test them!
On the rear of the base, above the power and USB ports, is the exhaust fan. The included hose and bracket attach to this for active removal of fumes during use. Although WeCreat’s user manual illustrates installing the bracket before attaching the hose, I found it was much easier to wrangle the hose and bracket together, and tighten the clamp around the hose, before bolting the bracket to the back of the base.
We ordered a longer exhaust hose with plans on setting up the Lumos in a specific location in our basement…until I read the manual and noticed WeCreat cautions against doing this, as a longer hose will reduce the effectiveness of the fan and can result in fumes leaking into your work space. Since engraving anything synthetic releases pretty terrible chemicals into the air around the laser, you absolutely need to make sure you properly ventilate your engraver.
With adequate additional inline fans, a longer exhaust hose should work, but if you want to go this route, make sure to thoroughly smoke test everything before you engrave any synthetic surfaces.
Sitting under the laser module is a bed area that takes different inserts depending on the project. The Lumos includes two beds – one each for engraving and cutting. The engraving bed is fitted with a grid of threaded holes, and two L-shaped brackets with thumbscrews are included. These can be used to align and secure materials for engraving.
I like this design, but I really wish the engraving bed had twice as many holes for more precise positioning of the alignment brackets. I’d also really like to see more brackets and other options for holding materials in place.
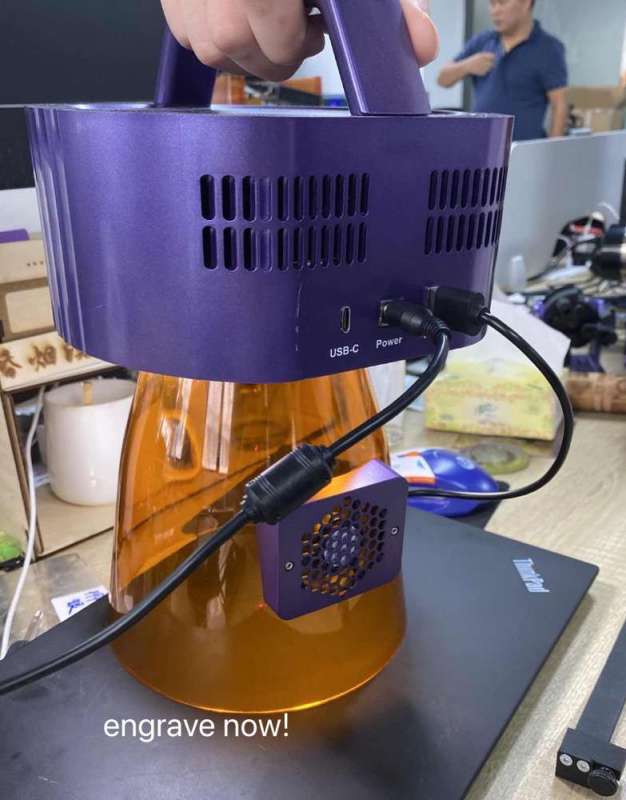
The laser module itself is separate from the base and enclosure. It has an integrated handle and an illuminated power button, which also functions as the start button for kicking off an engraving or cut.
WeCreat is planning the release of a special safety shroud designed for hands-free portable use. This means the Lumos can be used to engrave anything with enough flat surface area to support the shroud. This is a really cool feature that I don’t think is possible with most prosumer laser hardware.
The portable shroud doesn’t include an exhaust hose, so you’ll want to ensure you have other means of ventilating your workspace during use.
Since the laser module is designed for use independent of the base, it has its own power and USB connections on the rear. The integrated handle on the laser module is not for moving the engraver when the module is installed in the base! It’s for placing the laser module on a large object with the portable shroud attached.
The included power adapter feels pretty beefy, and it doesn’t emit the high-pitched whine symptomatic of a bad circuit. It uses a standard grounded power cord (like those found on desktop computers, not laptop chargers), so you can use a longer cord with it if necessary.
The included USB cable is quality and appears to be of a heavier gauge than the average bargain bin cables often included with consumer peripherals.
Design and features: The Software
As noted, WeCreat supports Windows, MacOS, iOS, and Android. If you’re using Windows or MacOS, you can use the included USB cable. If you’re on a mobile OS, however, you’ll use wireless connectivity with your Lumos.
Initial setup wasn’t too complicated, but it was annoying, mostly because the Lumos doesn’t support 5Ghz Wifi, and I didn’t know this until partway through the iOS app’s setup process. I had to cancel the setup, change to my router’s 2.4GHz network, and go back to setting up the Lumos.
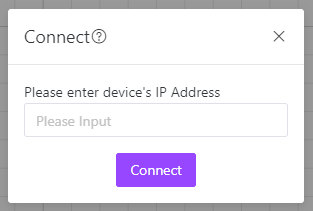
Once the Lumos is connected to the network, adding it to the desktop software requires knowing its IP address. I was initially annoyed by this, but pragmatically, it’s not a bad thing – this means the hardware isn’t constantly broadcasting itself with a service that might be buggy or vulnerable to security exploits.
The software appears to check for firmware updates when a device is connected (even if the software is already running), so you’re unlikely to miss any firmware updates. That said, the update notification doesn’t provide any details on what each update includes. This might be an artifact of the hardware still being in preview at the time of this review. I’ve received around a dozen firmware updates in the three weeks since I set up my Lumos, so WeCreat is definitely still refining their code.
You can always check for both software and firmware updates from the settings page for your Lumos.
The software is mostly pretty intuitive to use. It makes it easy to snapshot the engraving area for proper design placement, and you can configure different power and speed settings for each layer of your project.
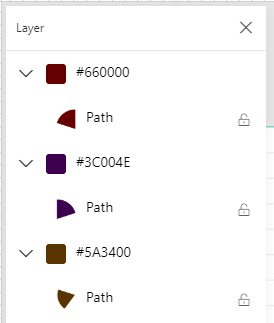
The software supports importing layered SVGs. The layers pane makes it easy to ensure you’re working with the right layer to make changes before engraving or cutting.
I had no problems using SVGs exported from both Adobe Illustrator and Affinity Designer, including those with text layers.
It’s also easy to insert and work with basic geometric shapes from within the app. Text is also supported, but if you have more than a few dozen fonts installed, the system fonts list takes a very long time to load.
The software also includes vector editing tools, if you don’t already use a preferred vector editor for making new projects. These were useful for quickly editing imported SVGs – just double-click a shape to edit it – but I’m proficient in other vector editing applications, so I’ll stick to what I know.
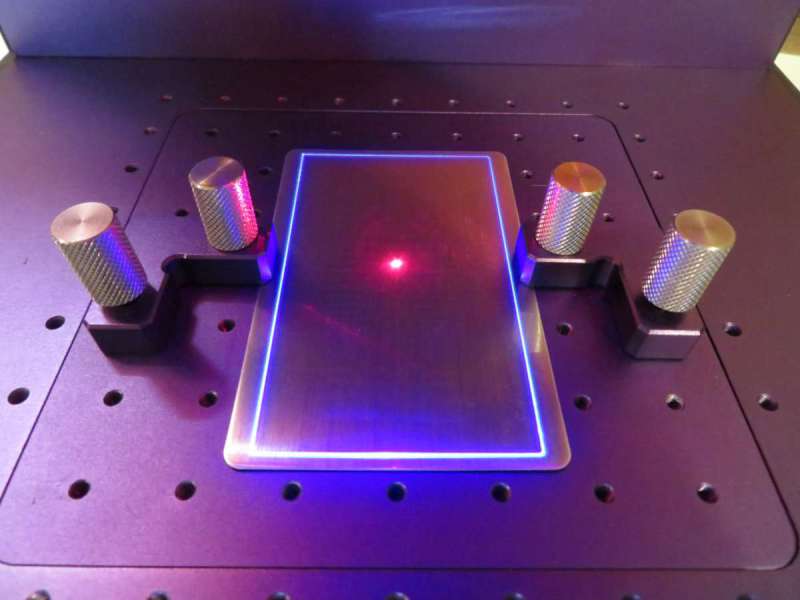
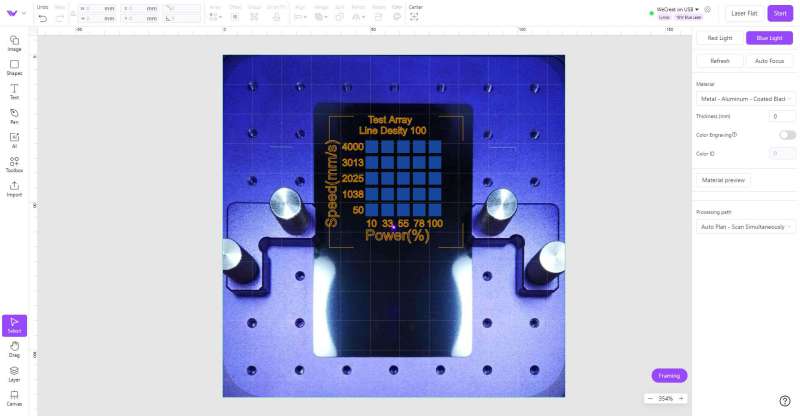
A handy feature of the software is the Framing button, in the bottom right corner of an open project. Clicking this turns the Lumos’s light off and illuminates the blue laser, which outlines the perimeter of any selected layer(s) in your project. This makes it easy to make sure your material is properly aligned to your design before starting the engraving, and you can roughly see where individual layers will align on your material.
The basics: Engraving wood and anodized aluminum
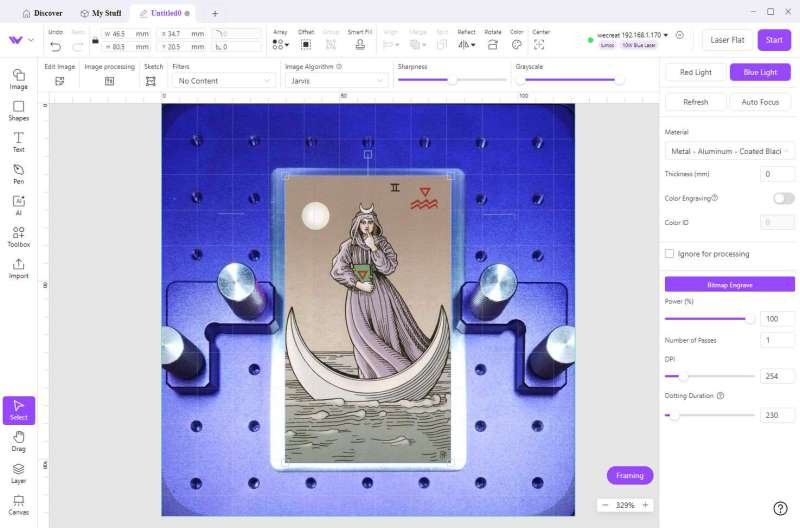
I did some tests with tarot art on both wood and anodized aluminum blanks – the former are tokens of different sizes; the latter are business cards.
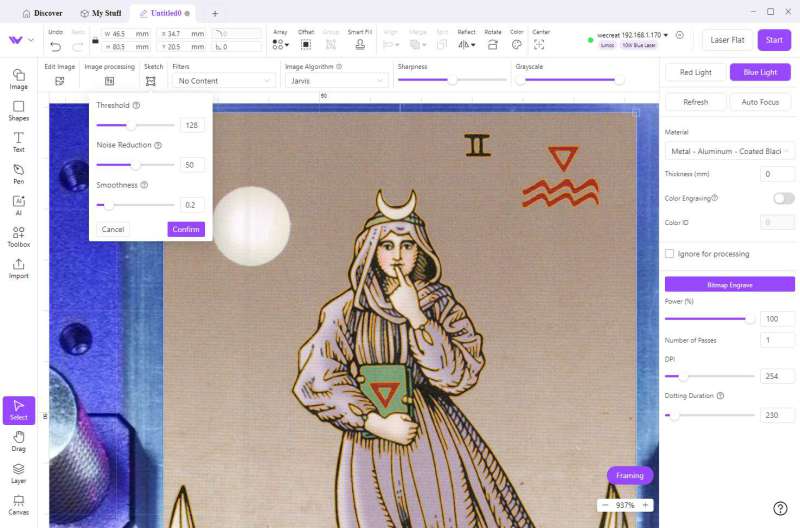
WeCreat’s software includes two useful features for working with raster images: a set of filters and adjustments for maximizing the quality of the engraving, and a “sketch” tool, which attempts to intelligently convert a raster image into a set of vector paths for engraving.
The sketch tool allows you to adjust the characteristics of the outline with a live preview of the results, so you can make sure your engraving is to your liking before sending it to the Lumos. In this image, turning down the threshold and noise reduction gave me the result I was after.
For images with solid outlines and clear shapes, the sketch tool works very well. I was able to turn my PNG into a sketch with only minimal adjustments. I have created many a complex vector, and so far, this feature has worked well with the right sort of illustration, saving me a lot of time and tendonitis.
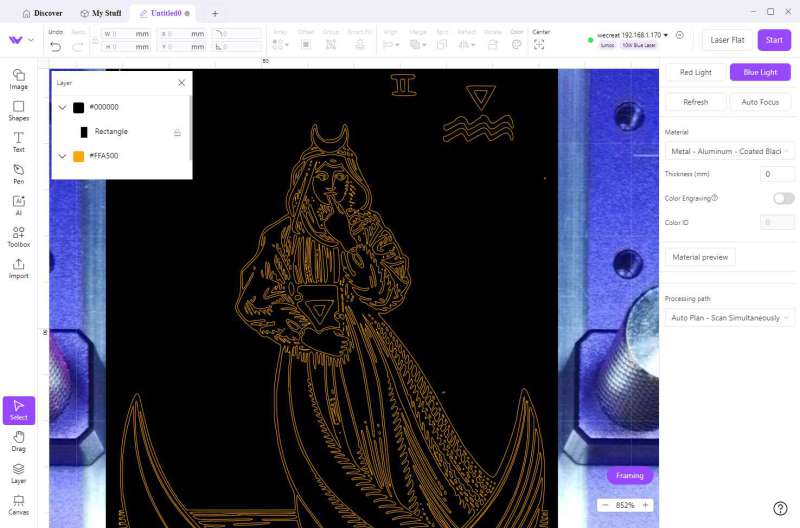
For engraving a raster image, I needed to invert the color of my image first, so the dark outlines of the original illustration are emphasized with the anodized color, rather than plain aluminum. The filters make it easy to select the resolution, dither pattern, contrast, and other characteristics of your imported images.

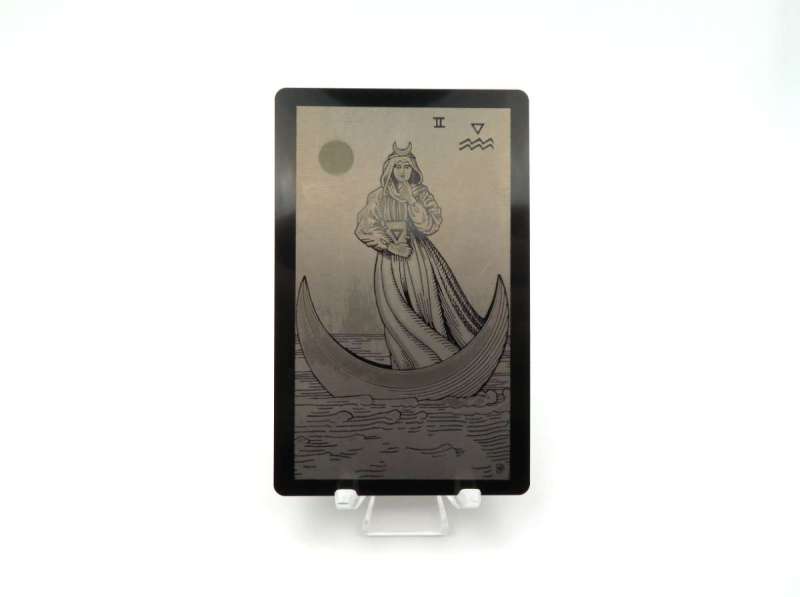
The finished engraving looks very nice. I tweaked the image quite a bit to enhance the dark outlines of the illustration, to achieve this result.
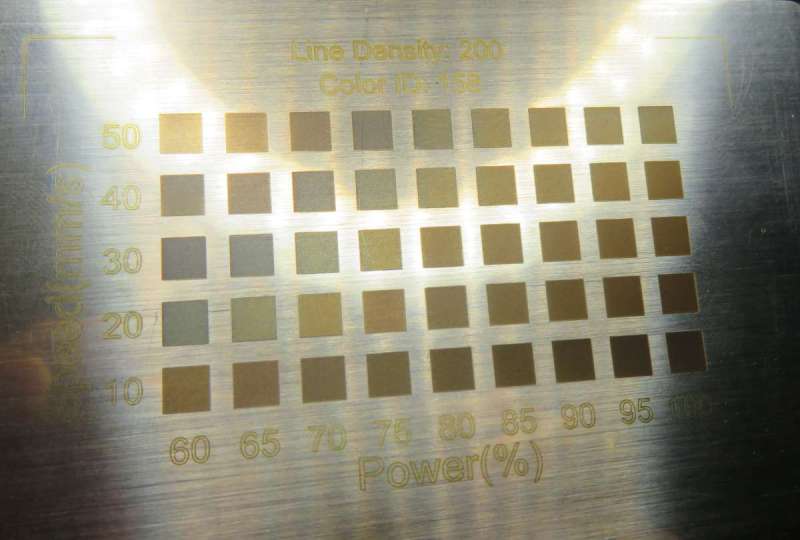
WeCreat includes a tool for quickly producing a test matrix of swatches with a variety of power and speed configurations – it’s called “Material Testing Array” and is available in the Toolbox menu. I’m unsure if other laser engravers include this feature, so I don’t know if it’s unique to WeCreat. It’s really handy for dialing in the laser configuration for each material you intend on engraving.
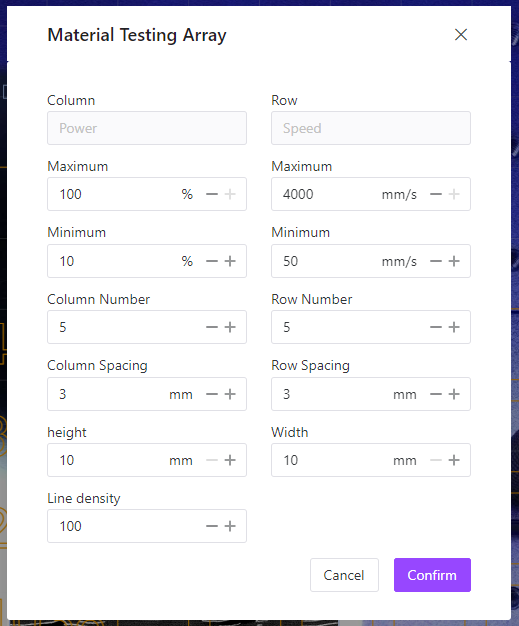
This swatch grid tool allows you to customize how many rows and columns to produce, as well as the range of power and speed configurations. This can be used on any engravable material. It can also be used with the color engraving feature (more on that in a moment).
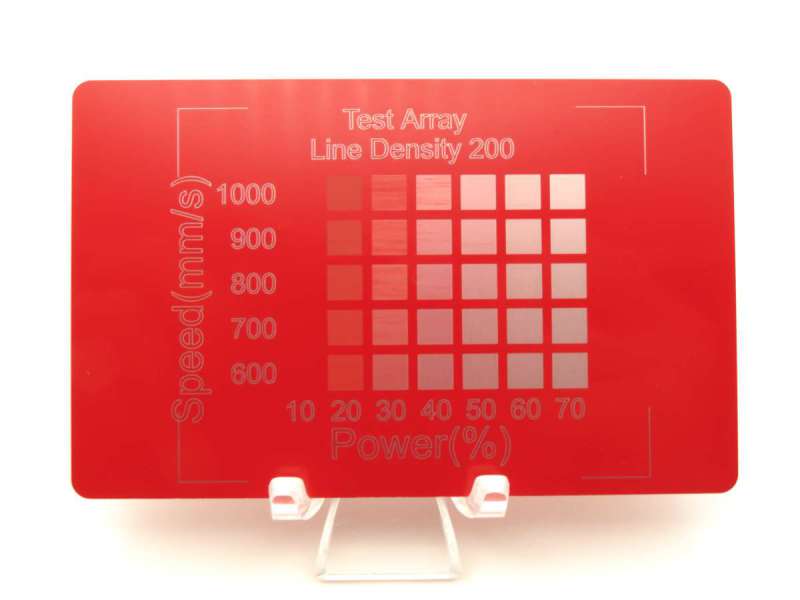
This test array was engraved on an aluminum business card with a red gloss coating. At 10% power, the laser isn’t burning away the gloss, so the 10% column remains untouched.
You can produce an assortment of these swatch sets and keep them for future reference. Do be aware that natural materials like wood and slate have natural variation, so you probably should do a new swatch test for each lot of blanks, if you want to account for this variation in your projects.
I tried printing over a few engravings with my eufyMake E1 UV printer. The colors look really good, but the alignment is ever-so-slightly off, which ruins the effect.

That said, with the right hardware and calibration, printing over a raster engraving will really bring out the detail of the engraving. Without color, engraved raster images can be quite difficult to see, especially on wood.
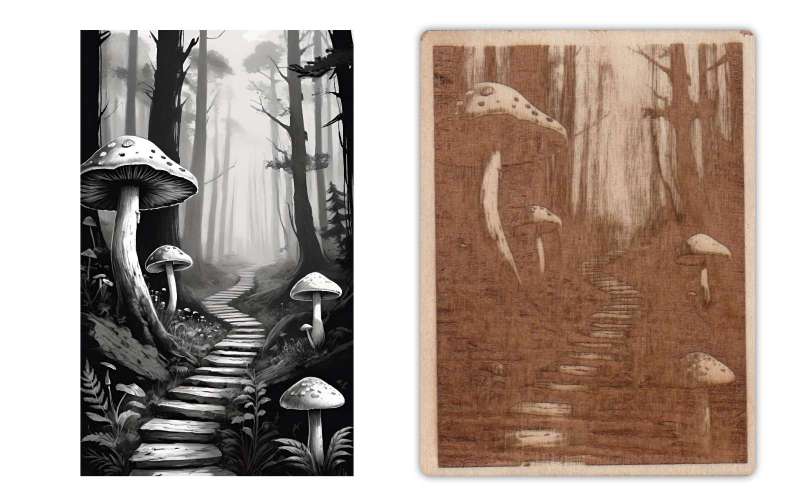
Even so, the detail is very good, including on my cheap poplar blanks. This test engraving is some art from Wombo (dream.ai).
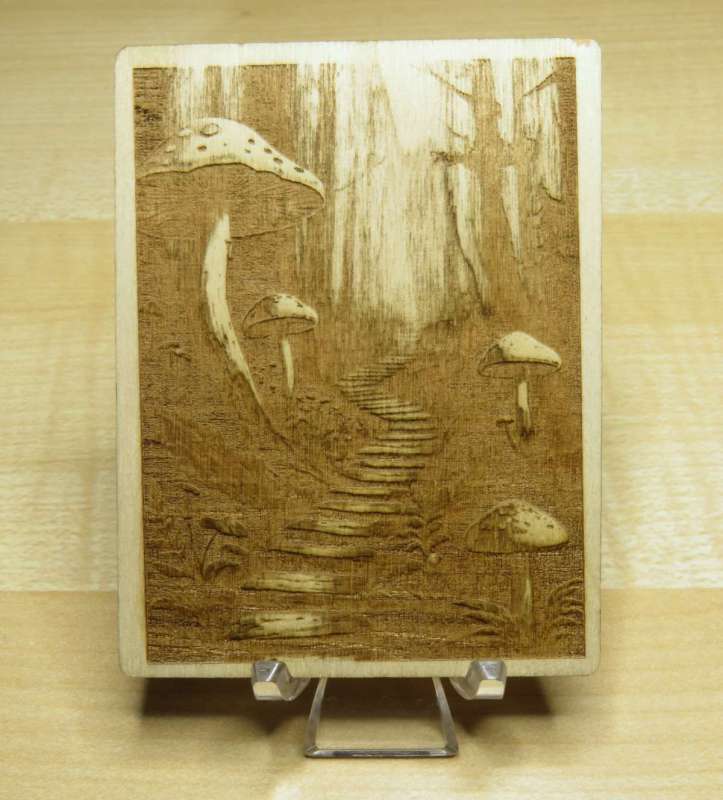
I might try coloring this image with something, but since liquid bleeds into woodgrain, I’ll have to do some tests to figure out what will work best.
Regular vector engravings look great on wood, as one might expect. WeCreat has positioned this as a kit meant to be used on the floor at conventions, expos, and other similar events, and this definitely seems like more than marketing hype – it’s fast and easy to quickly produce things like cards and tokens from customer material, like photos and logos. You don’t need any experience with vector graphics applications, and WeCreat’s software is comprehensive enough to stand on its own.
While the Lumos is capable of cutting, I don’t have my hardware set up in a safe location for the fire hazard of laser cutting wood. I started a cut right after I set up my Lumos, and the flame was enough for me to cut the job short – it’s small and well-contained in the safety shroud, but we live in a tinderbox, so I’m particularly paranoid about fire hazards.
As with all laser hardware, safety comes first: wear protective eyewear when the shroud is left open (e.g. engraving on long items), keep a fire extinguisher nearby when working with combustible materials like wood, and never leave your hardware unattended, especially if the shroud is open. Lasers are serious business!
The science of color and metal
The Lumos features a pretty cool capability – engraving color on certain metals. This color effect is achieved by defocusing the laser to specific positions and applying the laser at high power and slow speed. The metal oxidizes as it reacts to the heat, producing a spectrum of colors.
This is possible with steel and titanium, but it doesn’t work equally on all metals, and the specific formulation and quality of the steel used contributes a lot to the results. I used two different stainless steel blanks for my tests – business cards and 1″ round tokens. The 1″ tokens are made from an inferior stainless formulation, as they remain magnetic in spite of being sold as stainless steel.
Be prepared to go through at least a few blanks in the course of dialing in the color settings. The software steps through making a set of numbered swatches, then making a set of swatches from a single color ID with different speed and power combinations.
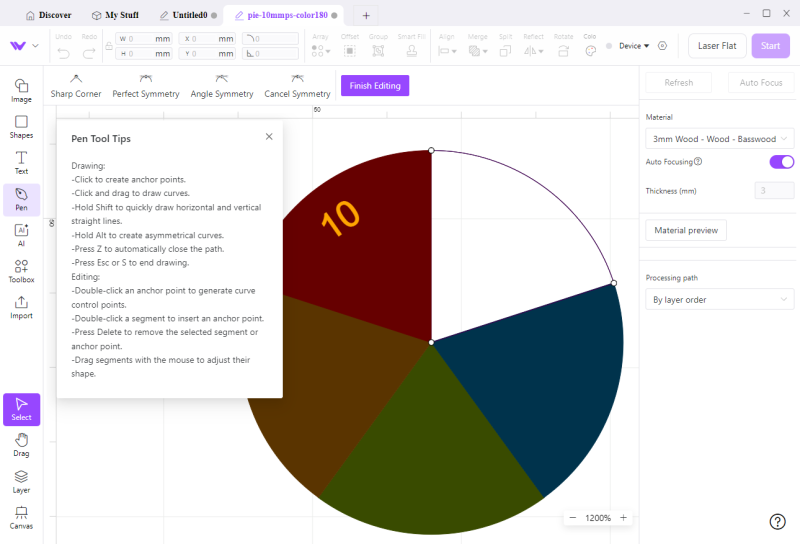
A single color ID can produce a variety of colors. I made these 1″ tokens from a single color ID (180). The number represents the speed in mm/s and keys the first wedge, which was engraved at 60% power. Each wedge increases in power by 10% clockwise around the circle.

This feature is meant for use with vector paths, so anything you’d like to try with color needs to first be turned into an SVG. If you’re familiar with designing cutout artwork with a Cricut or similar plotter, the same ideas apply to designing for color engraving.
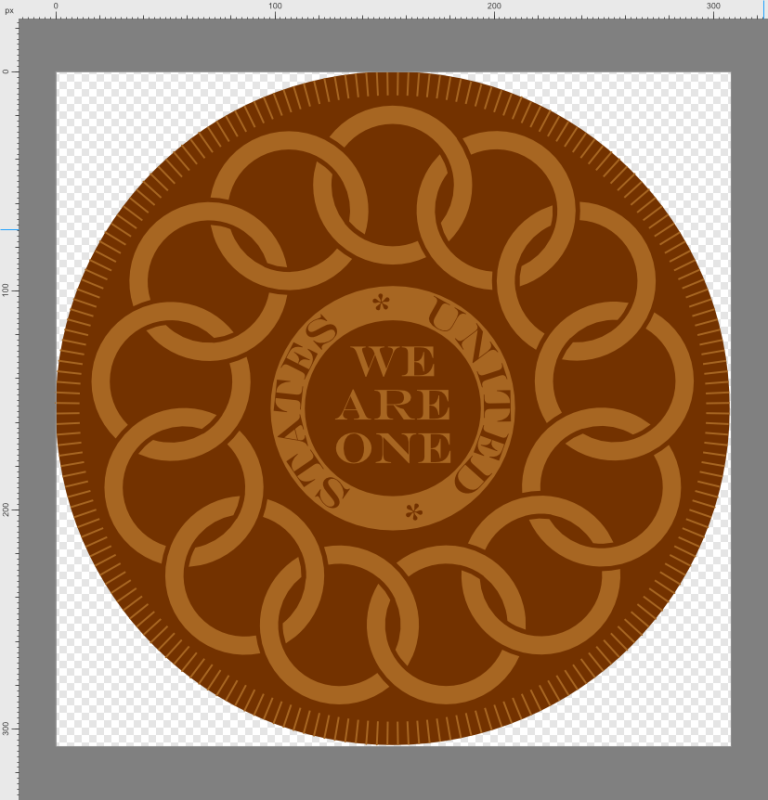
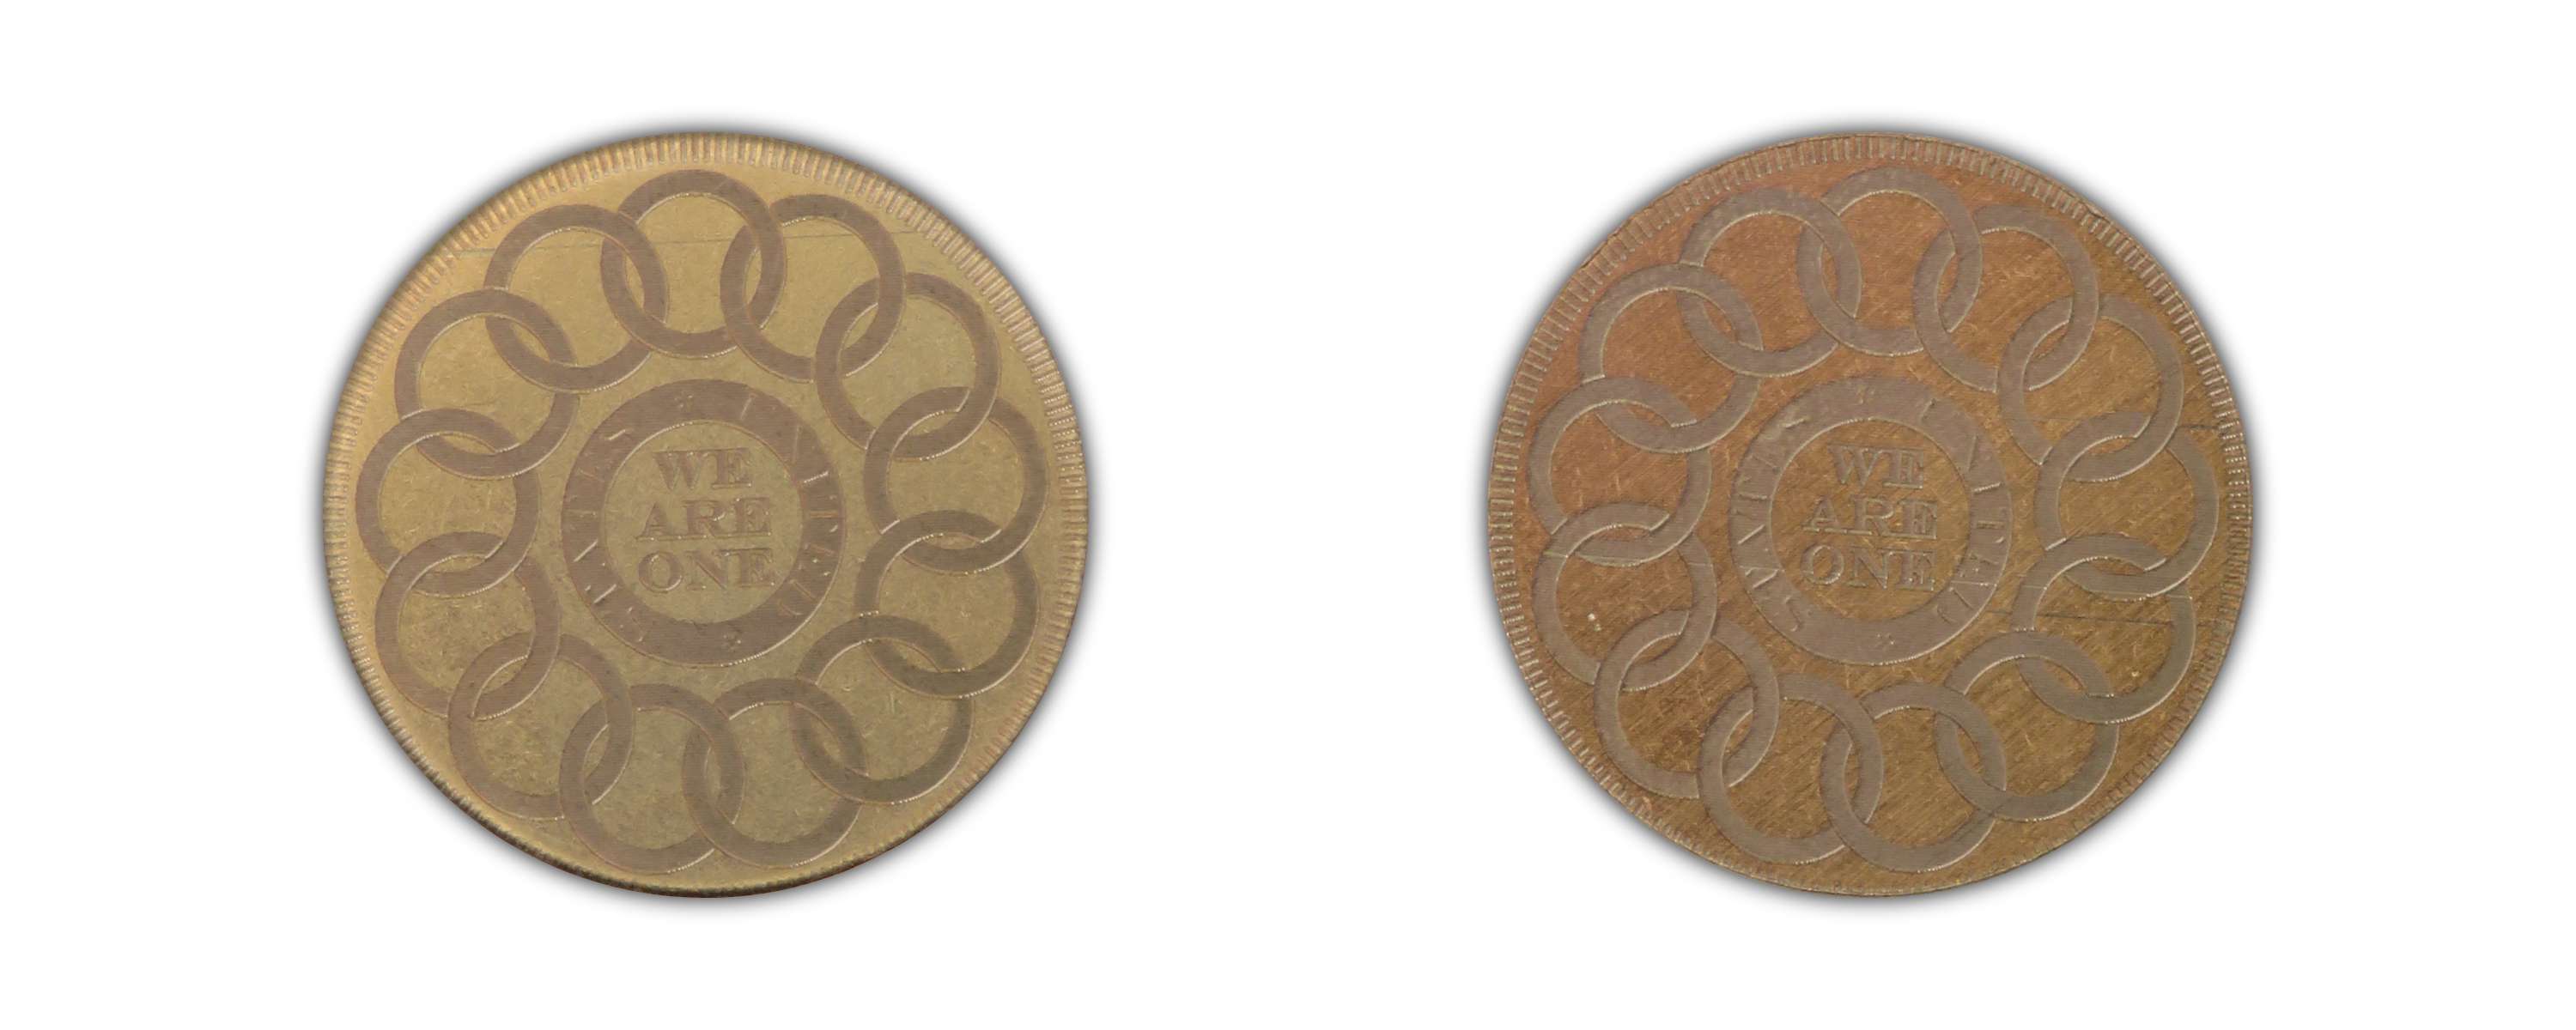
I designed a replica of the first penny minted by the first Continental Congress of the United States and made some tokens with the design. The smallest elements of the design are visible, including the fine lines of the “United States” in the middle ring around “We are one.” I aimed to make a copper- colored token with very dark detail, which is accomplished by intentionally refocusing the laser or selecting a different color ID (140 worked well for me).
I did three engravings of this design. For the first engraving, I just did the detail without the copper background. When the laser is focused, it engraves a dark rust color, and tiny bits of oxide from the iron content in the steel are left on the surface of the engraved material. This is easy to wipe off with a dry dish towel, and the finished effect is very nice.
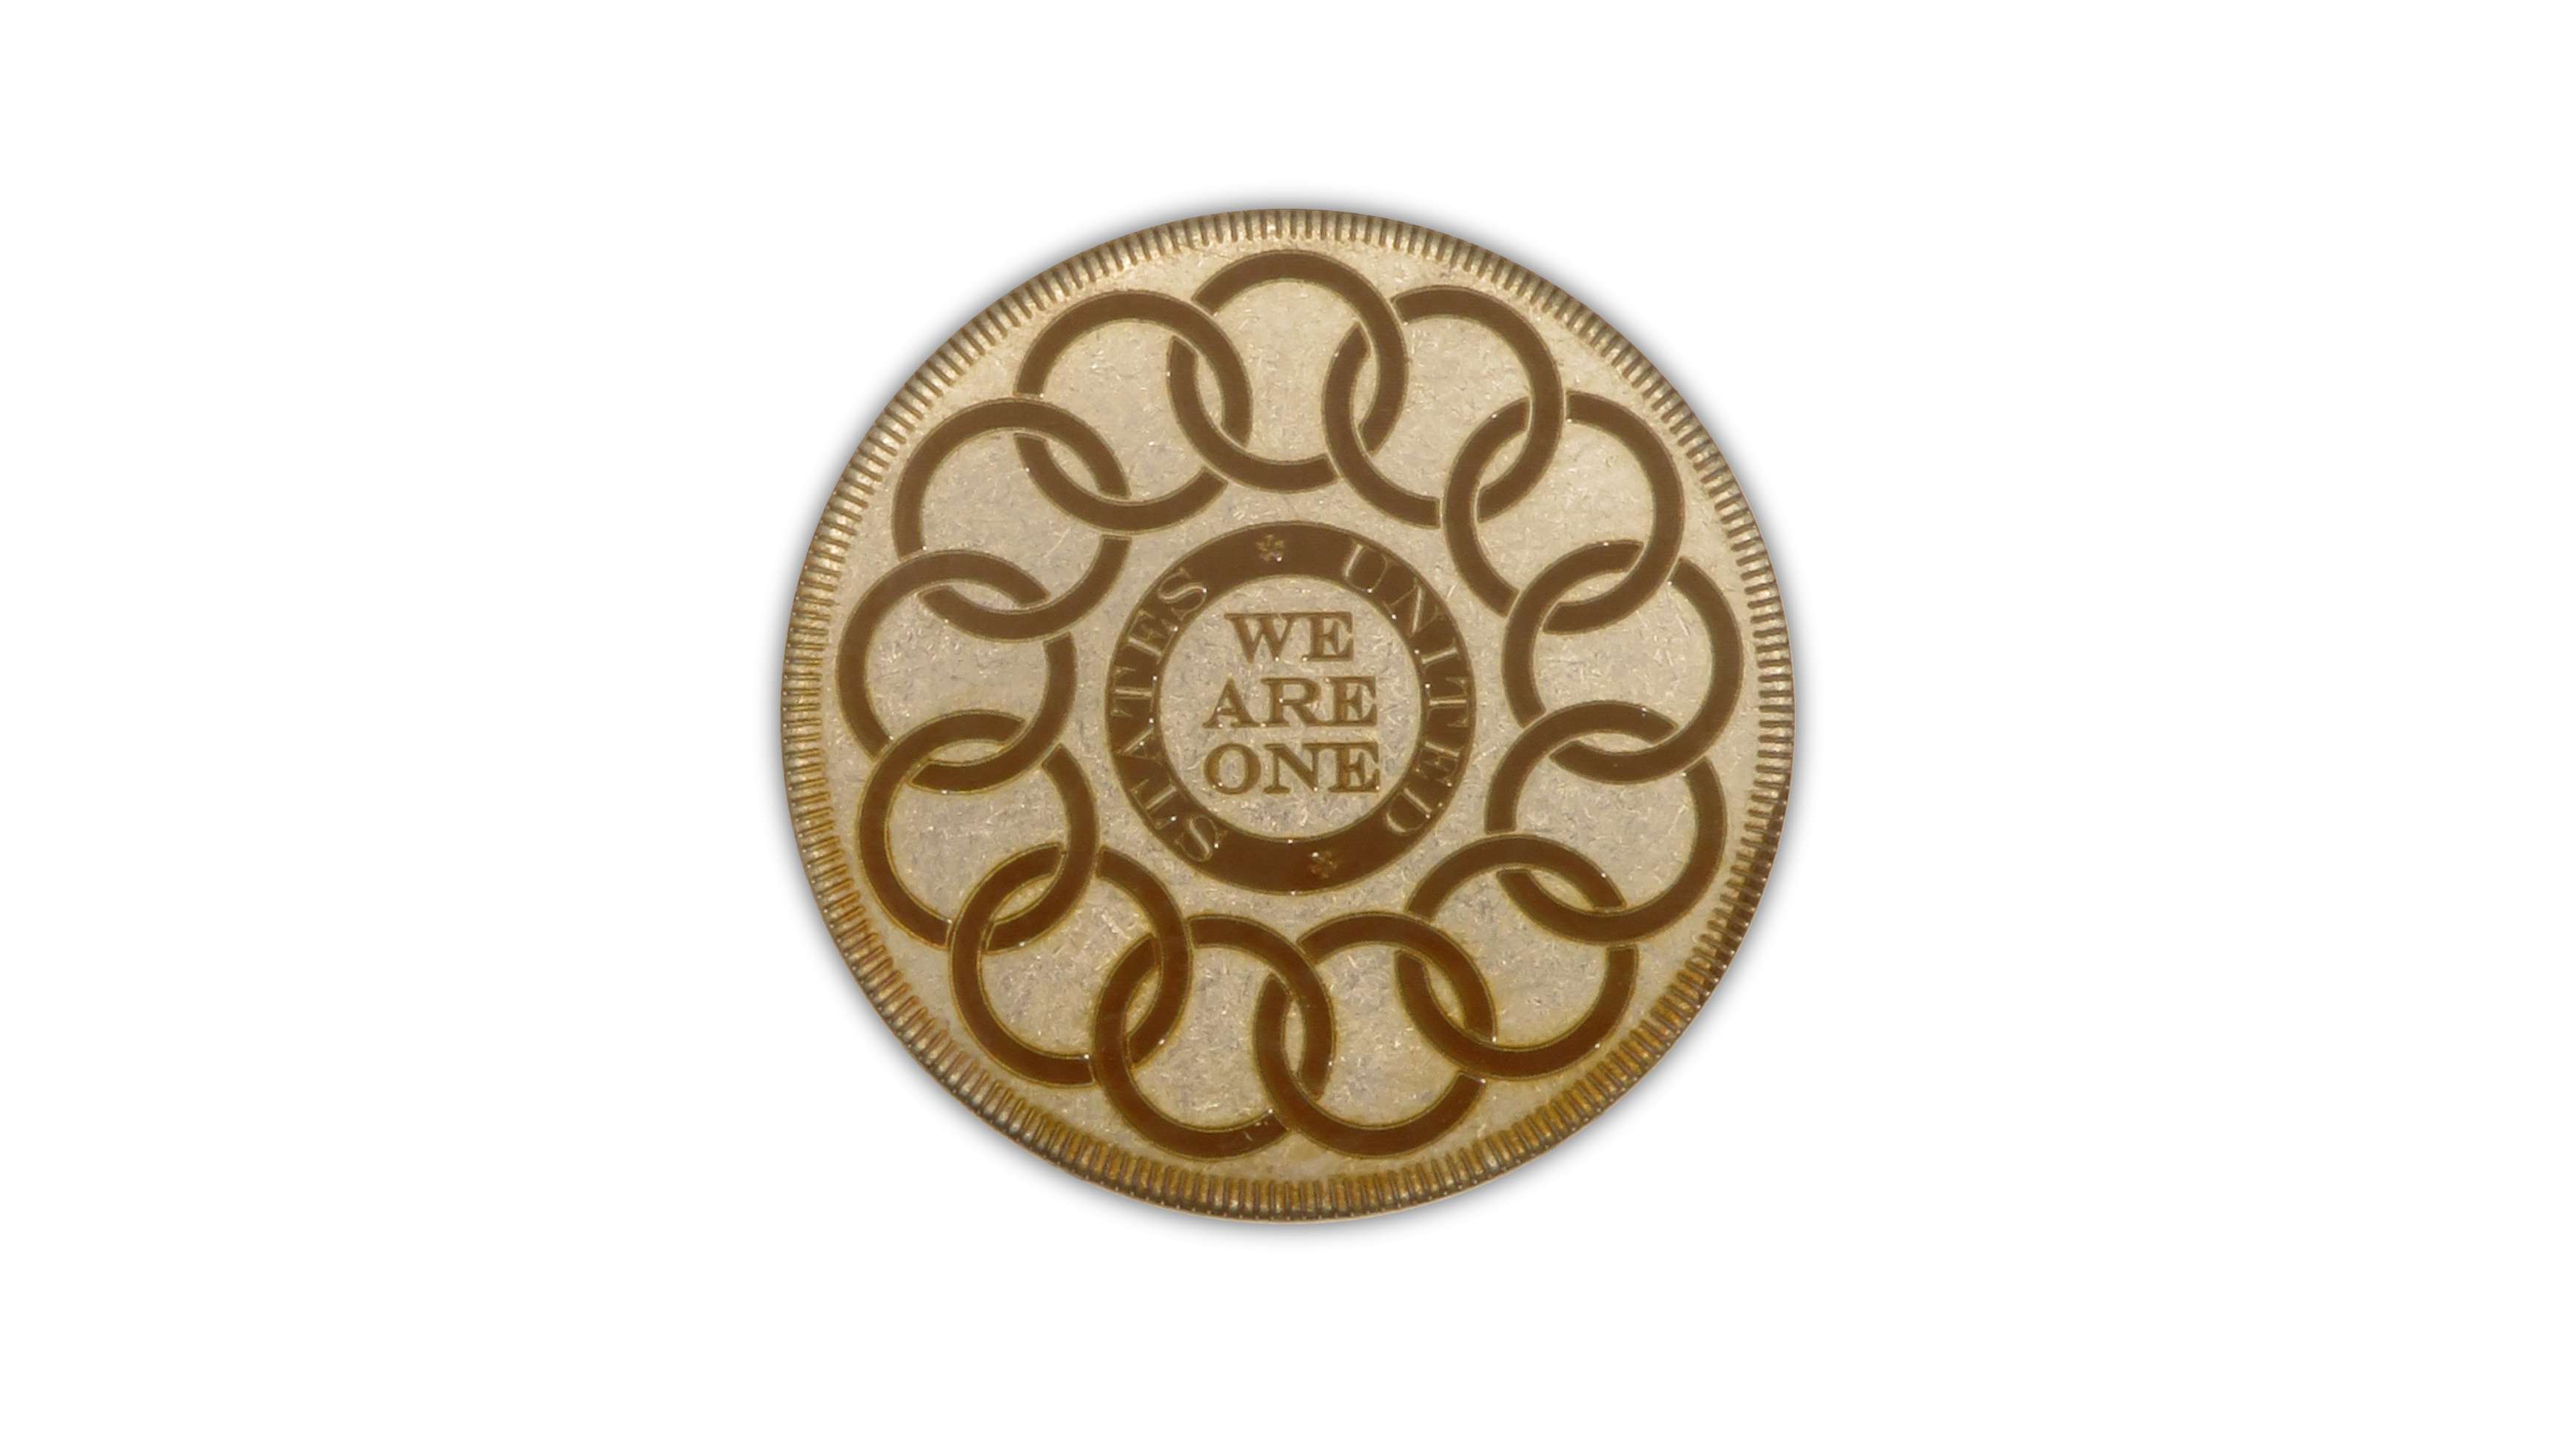
My second attempt used the right settings, but for some reason, the token turned out more gold than copper. It looks good, but it’s not what I was aiming for. I redid the design on the reverse of the token, and the color was what I expected. This is also a good example of how the finish of your chosen metal blank impacts the final appearance of the color.
My third attempt looks much better, and for this one, I added a design on the reverse of the token – a larger version of the ring and text in the center of the original design. The actual penny on which this design is based has a different reverse image; I wanted to accentuate the text instead.
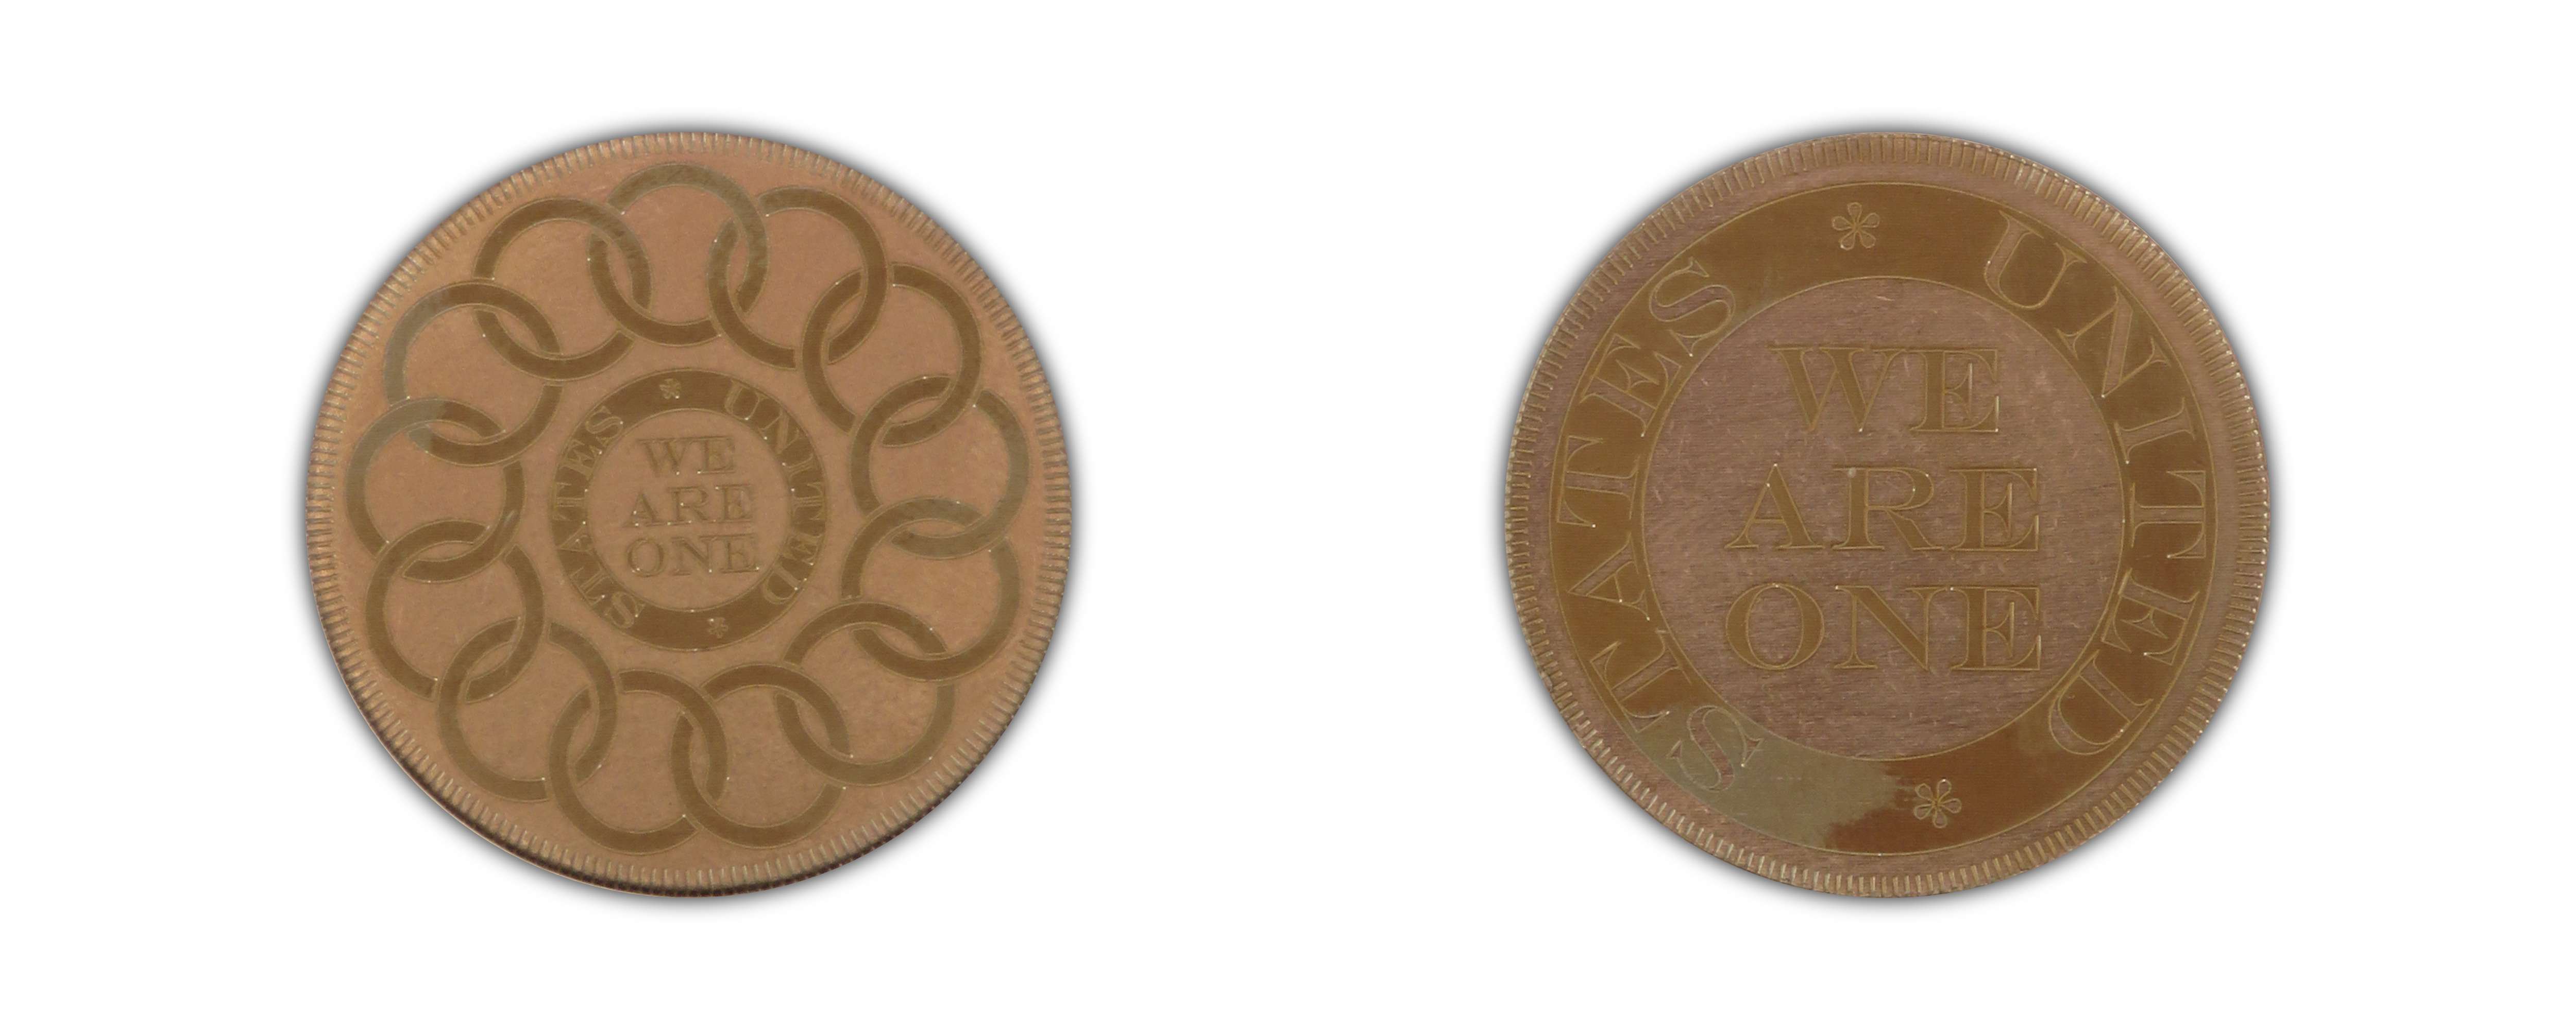
This token turned out pretty nice in terms of the copper color, but the detail isn’t one consistent color across the surface of either side. The discoloration is in the same location on both sides, so this might be from impurities in the (very low grade) steel blanks I chose. Oils – from both skin and the machines used in manufacturing steel blanks – can also interfere with the color effect, so it’s a good idea to clean your steel blanks with a nontoxic degreaser like Simple Green and handle them with gloves until your project is done.
Since this color effect is accomplished through the reaction of the metal with oxygen and heat, continued exposure to ambient oxygen might noticeably change the color, which is something I noticed with the copper and greenish hues of the swatch tokens I made. If you want to make products for sale with this feature, make sure to do plenty of testing with friends and family first, to make sure your products look as intended for the long haul.
The color feature of this laser equipment is really interesting, and offers new creative opportunities for artists and makers. It will take time and extra blanks to dial in the settings to your personal preferences and design goals, and since stainless steel gets expensive pretty quickly, I recommend starting with inexpensive, low grade blanks before moving on to higher grade stainless and larger blanks, like metal panels for wall art. The 1″ tokens I used for my review and evaluation of the Lumos were priced at $25 for a 300 pack, which comes out to about eight cents per token.
The color feature has a learning curve, but once you get the hang of it, it’s no more difficult than any other project.
Final thoughts
I really like the Lumos. A bigger laser engraver has a larger enclosed workspace for proper ventilation of fumes, but such hardware also has a much bigger footprint. The Lumos lets me get creative in a small work area, and the portability means I can use it at our town’s annual festival if I want to run a booth doing custom stuff.
My biggest complaints are really pretty minor. The software has some quirks, but none are insurmountable, and the desktop software is more than enough for getting quick jobs done with little friction.
I’m looking forward to making more cool stuff with my Lumos. If you’ve been on the fence on investing in laser hardware and want something compact and easy to use, this is it!
What I like about the WeCreat Lumos laser engraver
- Portable and compact compared to most consumer laser hardware
- Innovative color engraving feature
- Software is reasonably useful on its own
What needs to be improved?
- Additional tools for creating color swatch sets would be nice
- Engraving bed would be better with more mount holes
- Better written documentation
Price: $1199.00 and up
Where to buy: WeCreat
Source: The sample for this review was provided by WeCreat. They did not have a final say on the review and did not preview the review before it was published.
Check out these other engraver reviews!
- WeCreat Vista laser engraver review – The compact and capable craft laser engraver
- WeCreat Vision 20W Laser Engraver and Cutter review – the best engraver for beginners

50MM/S (2In/S) Electric Metal Marking Machine, 400W 110V 200x150MM/7.9x5.9In Desktop Jewelry Engraving Machine Tools Dot Peen Metal Engraver Device with USB Flash Disk for Nameplate Tag Marking
(as of July 11, 2026 23:52 GMT -05:00 - More infoProduct prices and availability are accurate as of the date/time indicated and are subject to change. Any price and availability information displayed on [relevant Amazon Site(s), as applicable] at the time of purchase will apply to the purchase of this product.)