REVIEW – Back when COVID was in full swing and we were locked down, I remember the great toilet paper shortage of 2020! At that time I really wished we had had a bidet so I would not be so reliant on toilet paper. I also thought it would bring me a cleaner bottom. Unfortunately, at that time the house we lived in did not have any outlets installed by the toilets. I really wanted a bidet that could provide warm water. Even though we live in south Texas, the water temperatures from our aquifer can be pretty darn cold. When we had a new house built a year ago, I purposely added a power outlet in our master bathroom toilet room in order to accommodate a future bidet. When the SmartBidet SB-3000 bidet came up for review I jumped on it. Let’s see if my dreams of a toilet paperless future came true.
What is it?
The SmartBidet SB-3000 bidet is a plug-in bidet that offers a ton of features. It has warm water, a heated seat, several modes of tushy washing, feminine washing, and air drying.
What’s in the box?
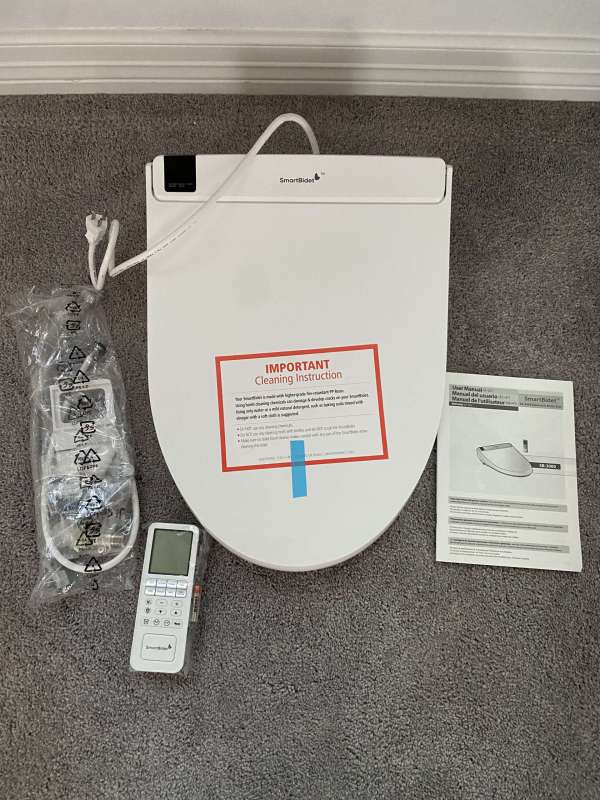
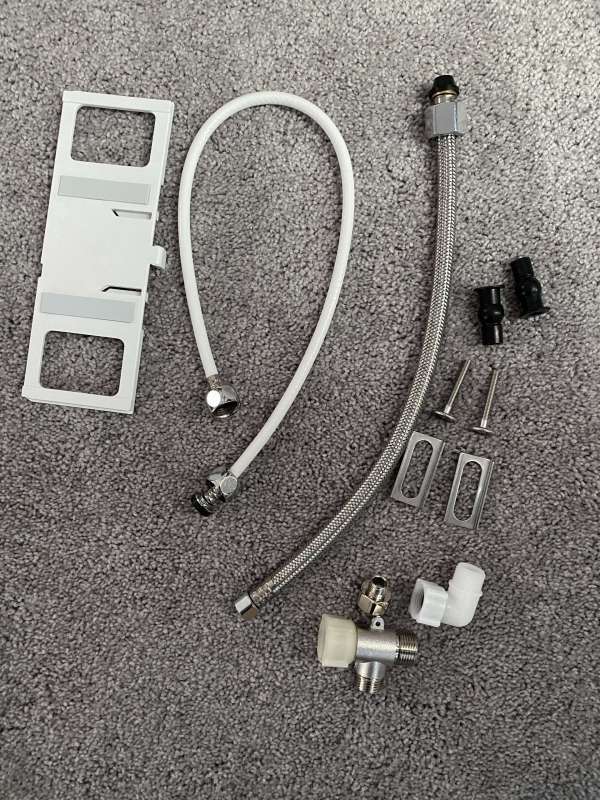
- A package of installation parts shown in the second picture
- seat bracket
- hose from the water line to the bidet
- water line hose from the wall to the toilet
- line splitter to connect water hose to hose for the bidet
- plastic mounting clamp for the bidet hose to the bidet
- bracket hardware
- A remote control attached to the wall bracket
- Bidet toilet seat
- User manual
Hardware specs
- Weight Capacity: 330 lbs
- Length of Power Cord: 3’10”
- Seat Thickness: 1.3″
- Power Source: 120V / 60Hz / 1400W
- Product Dimensions: 15.4″ x 20.9″ x 6.3″
- Amps: 11.7
- Seat Hole Dimensions: 7.9″ x 11.5″
- Product Weight: 10.3 lb
- White Color Only
Design and features
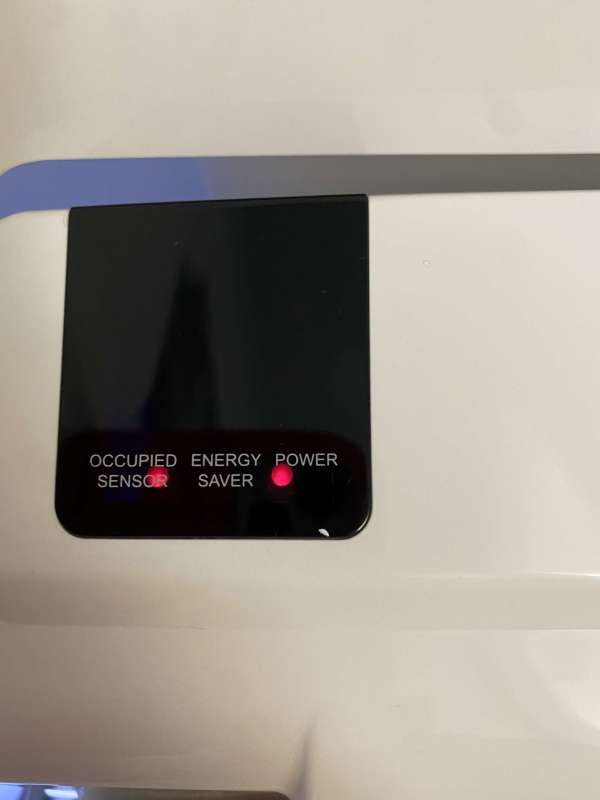
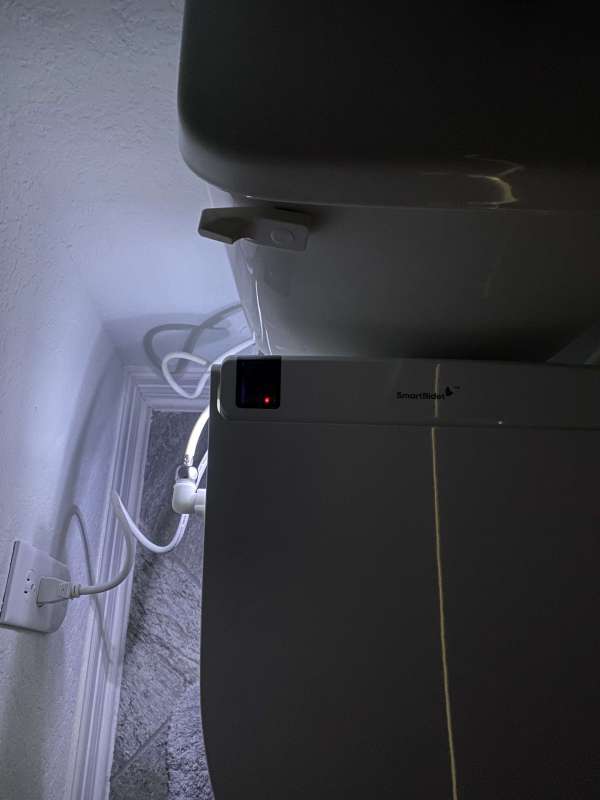
The top left corner of the SmartBidet SB-3000 bidet has three led lights: occupied sensor, energy saver, and power. The power button is lit the entire time the unit is plugged in or if you press the power button on the remote. When you sit on the toilet seat and for a few seconds when you get up, the occupied light will come on. Finally, the energy saver light will come on if you press the energy saver button on the remote. The energy saver mode will keep the water temperature at a fixed 89.6 degrees Fahrenheit.
On the right-hand side of the bidet where the power cord comes out, there is a button you can press to release the toilet seat from the bracket. This feature works smoothly and I never had any issues releasing our mounting the toilet seat on the bracket.

On the left-hand side of the toilet seat are buttons you can use to control the SmartBidet SB-3000 bidet if you do not wish to use the remote. You can only turn on or off the rear or feminine wash. The square indicator is the power button for the unit. You can also see there is a night light built into the unit. It will stay on all of the time and is not motion-activated. If you do now want it on you can press the stop and temperature buttons on the remote at the same time.
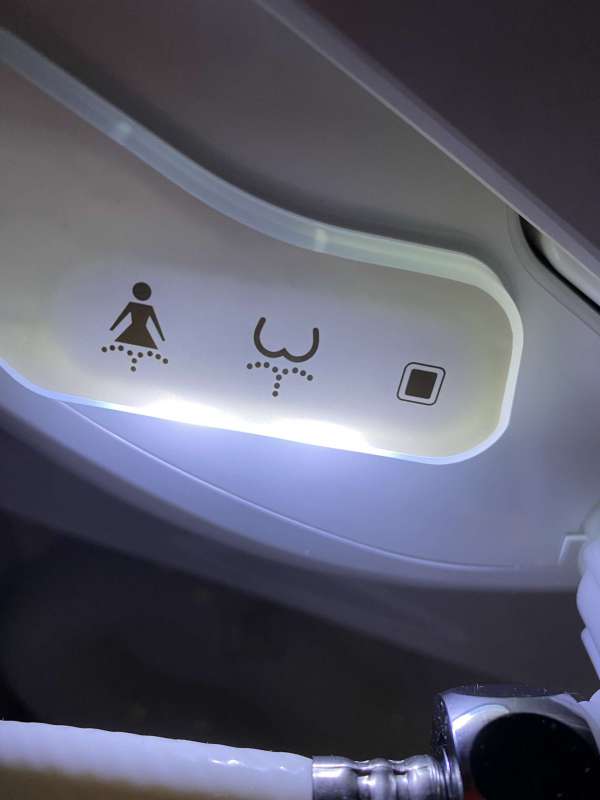
I took this picture so you can see how well-lit the area to the left of the toilet is.
The SmartBidet SB-3000 bidet comes with a truly comprehensive remote and wall bracket. The bracket has 3m tape on the back and mounts to a wall. It has a large square that pops out of the bracket. The remote mounts by placing the square into the hole of the remote. It is very solid and it is easy to take on and off the wall. I personally never take it off the wall and now have all of the buttons memorized.
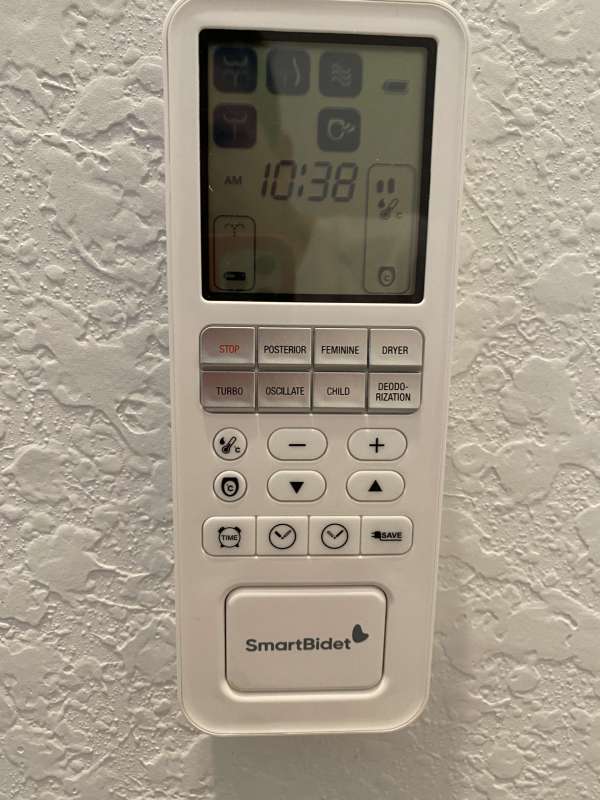
The SmartBidet SB-3000 bidet button functionality is as follows:
- stop – stops the currently running wash or dry function
- posterior – this button turns on the tushy wash
- feminine – this button turns on the more forward feminine wash
- dryer – this button turns on the dryer
- turbo – only applies to the posterior (it shoots up and into the anus) that can help with bowel movements.
- oscillation – this applies to both the posterior and feminine wash – it makes the beam of water move back and forth. You can press and hold this button for there seconds to automatically turn it on or off every time the posterior or feminine wash is used.
- child – child wash and dry mode. Wash level for 30 seconds and dryer for 1 minute.
- deodorization – turns on the deodorizer – it should be noted that the deodorizer turns on automatically when it senses skin on the seat.
- The next row of buttons controls the water temperature. I will note that the water can get very warm.. I use it on the second to lowest setting.
- Those plus and minus buttons can also be used to increase or decrease the amount of water pressure you have.
- The up and down arrows can also be used to adjust the forward and backward position of the spray nozzle.
- The next row of buttons controls the seat temperature.
The nozzle will clean itself before and after each use by streaming out a small amount of water.
Setup
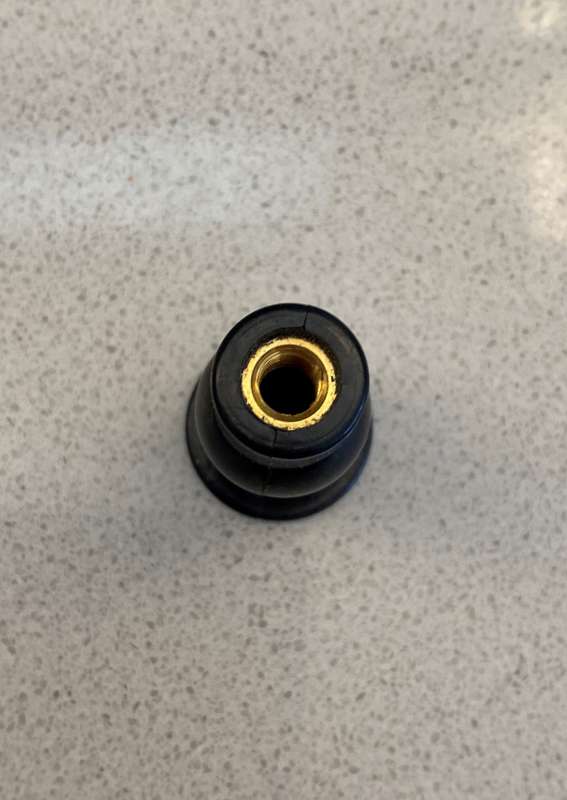
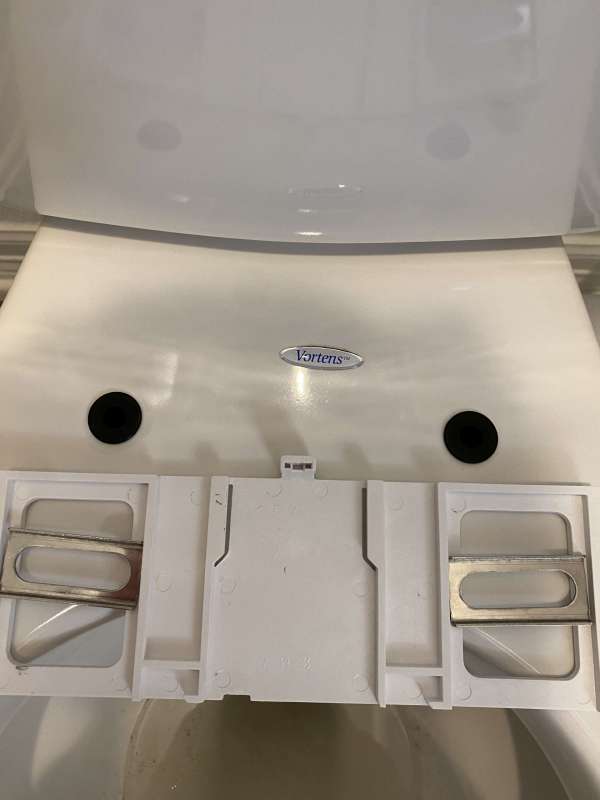
The first thing you do is to take off your old toilet seat and any hardware used to attach it to your toilet. Next, you take the two rubber-mounted screw bases and install them into the two holes on the back of your toilet bowl. You need to push them all the way down so that the top is flush with the top of the toilet. I used a combination of pushing down with one hand and pulling down on the bottom tip of the rubber under the toilet. The picture below shows a close-up of the screw base. It is a nice metal screw thread that allows you to really tighten down the bracket to the toilet. So many toilet seats now come with plastic everything and it is very easy to over tighten them and strip the screw. You will not be stripping these screws.
This next picture shows the two screw mounts installed with the bracket sitting below waiting to be installed. The bracket is very flexible in that the metal sliders can be moved up and down in the bracket to allow you to move the toilet seat forwards or backward to get the perfect installation. You also can install the screws within a pretty wide range due to being able to slide the entire bracket to the left or right.
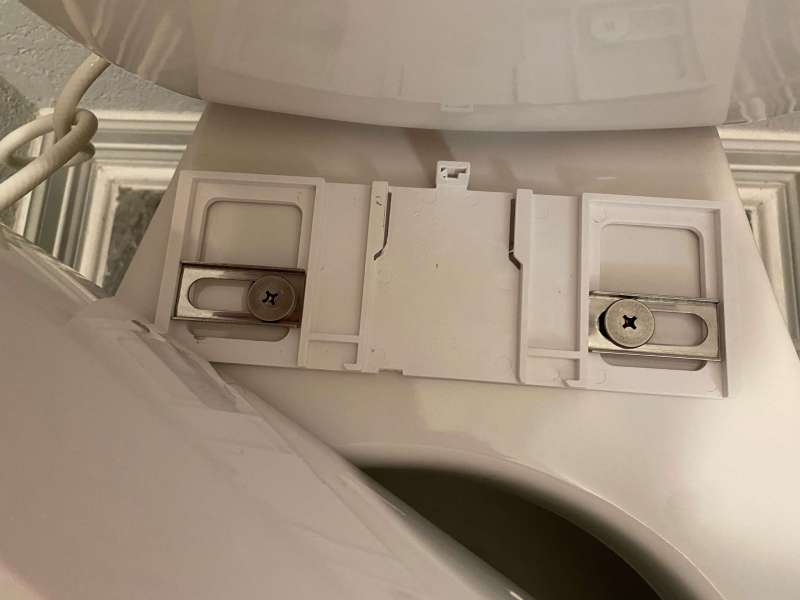
This next picture shows the final mounting point I used for the bracket on my toilet. This picture was taken after I installed it and then removed it again to retighten down the screws. I did that to make sure I had the toilet seat in the right position.
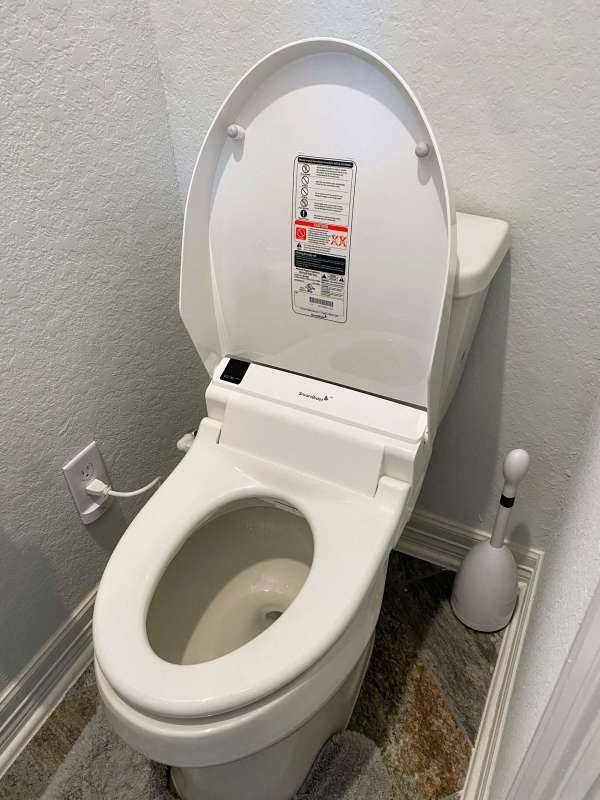
Here you can see the seat installed with the lid closed and then with the lid open.

I will say that the seat opening was slightly smaller than the original toilet seat that came with the toilet.
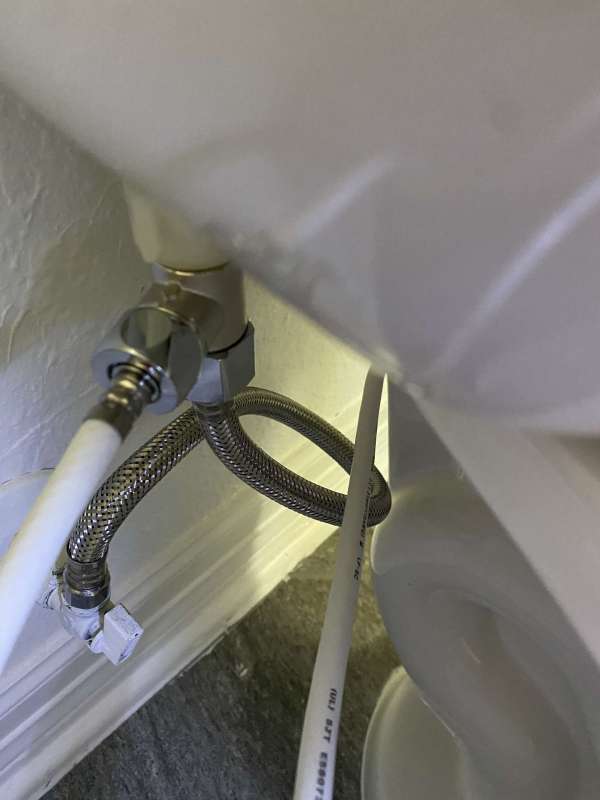
Next, I installed all of the plumbing. I found it interesting that the first step of the plumbing install had you unscrew the nut under the tank that connects the water line to the tank. There was no mention of making sure you drained the tank first. I learned that lesson the hard way in my old house when I replaced the hardware in one of my toilets. The instructions did mention shutting off your water first. Needless to say, I drained the water out of my tank first, then disconnected the waterline from the toilet and the shut-off valve on the wall.
I then connected the new waterline to the shut-off valve and to the line splitter. I then connected the line splitter to the toilet tank. From the line splitter, I connected the white hose and connected the other end to the bidet. All of the hardware was top-notch and included washers inside every connection. I made sure everything was tightened down and then turned the water back on. No leaks at all on the first try!
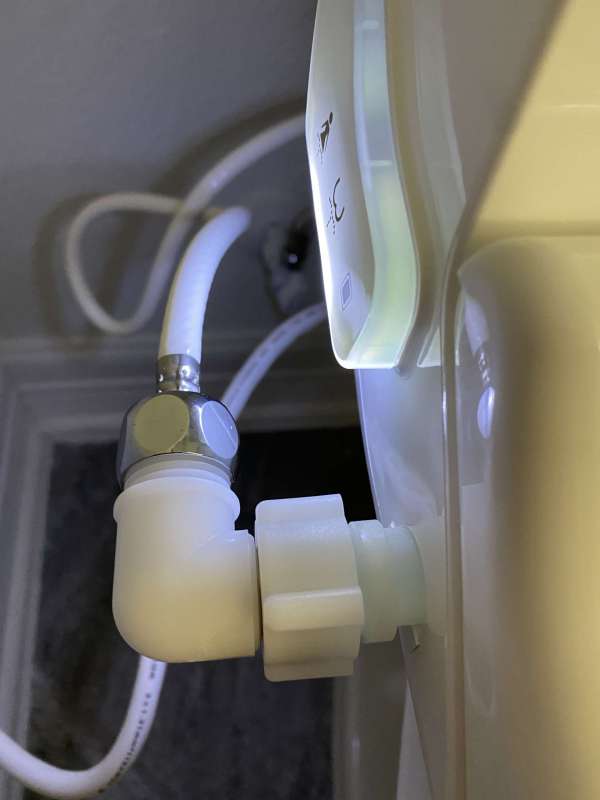
Finally, I plugged in the SmartBidet SB-3000 bidet to the wall. Even though the cord came out from the right side of the bidet as I faced it, and the outlet was on the left side of the toilet, I had more than enough cord to connect it to the outlet.
Performance
Once I got over the initial sensation of using a bidet, I have come to really love it. You definitely feel cleaner than using plain old toilet paper. My one main complaint is that the wand spraying the water could extend a bit more forward. I find myself sitting much further back on the toilet seat than I normally would. As a female, I really wish it would wash a bit further forward. Some bidets out on the market have people complaining that the seat makes the feel like they are falling forward on the toilet because it raises the back end of the seat too much. That is not the case with the SmartBidet SB-3000 bidet.
The dryer could also be more powerful. I find myself still having to use a bit of toilet paper to dry off afterward. I know there are some folks that keep a washcloth handy to do this but I really don’t want a ‘used’ washcloth hanging around the toilet. I am finding that I do use a lot less toilet paper than before, but I am still using it.
What I like
- Tons of functionality – you can set the water pressure and temp how you like it
- Good quality hardware was provided – no leaks
- Very nice remote
What needs to be improved
- I would love it if the remote were backlit, but now that I have the buttons memorized it is not such a big deal.
- The dryer could be a bit more powerful. I really don’t want to sit on the toilet for another 2-5 min waiting to dry off.
- The nozzle head could extend a bit further out.
Final thoughts
The SmartBidet SB-3000 bidet is a keeper. Now that I have one, I will always have one. It makes me wish I had put an outlet in every bathroom for one.
Check out our other bidet reviews too.
Price: $529.41
Where to buy: Amazon and Home Depot
Source: The sample of this product was provided by SmartBidet.
![[MINI SIZE. ULTRA PORTABLE CHARGER]: Roughly the size of an AirPods Pro case, this smallest power bank packs 10,000mAh of long lasting power into a tiny, nano footprint. Easily slide this ultra slim, credit card size charger into your skinny jeans, a...](https://m.media-amazon.com/images/I/41rATpm6dyL._SL160_.jpg)
Now retrieving an image set.
INIU Portable Charger, Ultra Mini 10000mAh 45W Fast Charging with Detachable Cable, Flight-Safe Travel USB C Power Bank External Phone Battery Pack for Xiaomi iPhone 17 16 Samsung S26 Google iPad etc
(as of July 13, 2026 18:57 GMT -05:00 - More infoProduct prices and availability are accurate as of the date/time indicated and are subject to change. Any price and availability information displayed on [relevant Amazon Site(s), as applicable] at the time of purchase will apply to the purchase of this product.)
Now retrieving an image set.
Gadgeteer Comment Policy - Please read before commenting
Thanks for the review. We installed a much more basic bidet that cost under $50, 90% less than this one. All those bells and whistles that are possible if you can take advantage of an available outlet sound nice, but I’m not sure we need them. (You even get used to cold water, oddly enough!) But I would never give up having a bidet in the house, and usually make a special trip to the bathroom that has it.
“When the SmartBidet SB-3000 bidet came up for review I jumped on it.” – Lynn, I think you’re using it wrong!
A bidet spews whatever germs were in your butt, into the air.
Which is why the government tells people with compromised immune systems to NOT use a bidet.
People who use bidets like to tell people who use toilet paper how nasty toilet paper is…..
But people who use toilet paper don’t breathe in their butt germs…..