REVIEW – The intricacies of replicating color have become an entire commercial industry over the years. It started with mass-produced color media and analog film photography, but the digital revolution is what really turned color calibration into a finely-tuned art. Between computer displays, digital SLR cameras, high-resolution scanners, and inkjet printers, there are a lot of ways the original color of your project can end up misrepresented in the final product.
Blues are purple, reds are orange, yellows are green. People look sickly, one way or another, because the skin tone is just “off.” All this is the result of the color telephone game played by the assortment of hardware and software used to turn a beautiful image into a sellable product. The best way to mitigate this is through specialized hardware, which uses an assortment of sensors to assess your color outputs and create a profile to mitigate inevitable discrepancies.
The world of color calibration is, predictably, mostly very expensive, because the industries it targets – like advertising and fine art – tend to be particularly lucrative, and people interested in Pantone-perfect color are willing to pay dearly for that privilege.
This is all well and good if you’re a profitable business, because a few grand on color calibration is most definitely a worthwhile purchase – every time you upgrade any piece of hardware in your digital-to-print workflow, you have to calibrate your new hardware, or you’re just going to have a bad time.
If you’re a hobbyist like me, however, two grand is a bit eye-watering, just to get consistent color. X-Rite’s biggest competitor, Datacolor, makes a series of products designed for prosumers and hobbyists. Prices vary from $169 for basic monitor calibration, to $499 for a kit which includes both the Spyder Print and Spyder Cube, the latter of which is used for calibration of RAW images from a DSLR.
Is this cheaper product worth it? As always, I did a wide assortment of tests to find out.
⬇︎ Jump to summary (pros/cons)
Price: $349.00
Where to buy: Datacolor and Amazon
What is it?
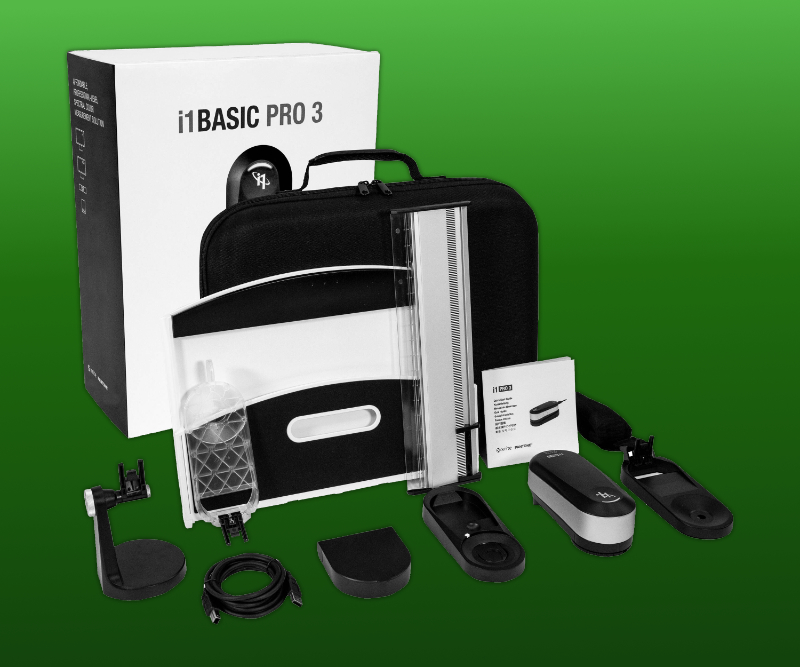
The Datacolor Spyder Print is a spectrophotometer device for calibrating color printers. It’s primarily designed for standard inkjet printers, but it can be used for calibrating other scenarios, too.
What’s included?
Everything you need to get started with printer calibration is included in the box:
- Calibration device
- Dock
- Strip alignment tool
- Mini USB cable
You will, of course, need both a printer and the substrate you want to calibrate – this can be simple copy paper, or it can be anything your printer supports.
How does color calibration work?
Even before the advent of digital graphic design, color calibration was important: the Pantone color system was developed in the era of print media, for the purpose of ensuring the accurate recreation of original artwork for publication.
Old-school color matching originally was all about human vision, and those with particular sensitivity to minute color discrepancies were very good at color matching. These days, we use electronics to do the heavy lifting for us.
In abstract terms, digital color calibration is a means of measuring the difference between your hardware’s output (DSLR cameras, scanners, displays, and printers) and what is considered perfect color. Hardware and software work together to determine this difference. This is the same idea behind active noise cancellation technology, which uses soundwaves to counteract unwanted ambient noise.
The final calibration step produces an ICC profile, mathematically correcting all the color imperfections. This is a portable color profiling standard developed by the International Color Consortium, and it ensures everyone, no matter what platform or workflow, may guarantee the integrity of color, from start to finish.
ICC profiles are typically used as .icm or .icc files. In both Windows and MacOS, the system color management interface makes it easy to install custom profiles for all supported hardware – displays, scanners, and printers. In Linux, while color profiling for printers is no longer directly supported, monitor profiling is. Professional graphic design software more or less universally supports installing and using custom profiles for both documents and printers.
Why does calibration use RGB instead of CMYK?
Believe me, this one confused me for a long time, so you’re not alone if you’ve been wondering this. RGB – red, green, and blue – lightwaves are used to produce all the colors we see emitted from glowy screens. CMYK – cyan, magenta, yellow, and black – refers to the collection of inks which can be combined to produce most of the visible color spectrum.
CMYK is the king of commercial printing. Offset printing presses use these four colors combined with a tiny halftone pattern to produce all the printed things we know and love. Although CMYK is somewhat limited in how many different hues it can mimic, it’s the least expensive way to mass produce high-quality printed goods in full color.
Even though regular consumer ink or toner is physically CMYK dyes or pigments, the digital data sent to the printer is in the RGB color space, which is richer and offers more color depth than standard CMYK. The printer’s firmware intelligently converts the RGB data to CMYK using logic designed to maximize the representation of the RGB color space.
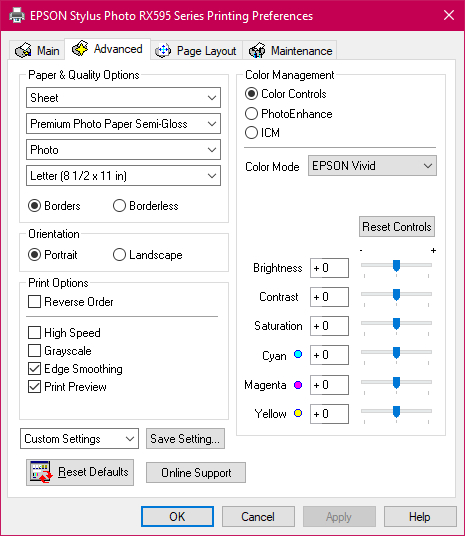
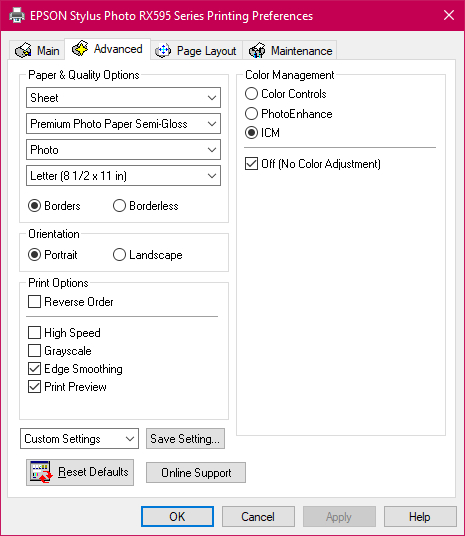
Advanced photo printers, like my old RX595, use additional inks for even greater color range. My printer uses light cyan and light magenta, while Epson’s current top end desktop photo printers, the ET-8500 and ET-8550, use gray and photo black (for richer blacks in photos, compared to the matte black used for text).
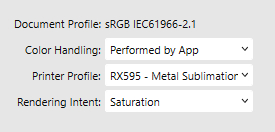
Consumer photo printers include premade RGB print profiles in both the printer firmware and the driver software. For the purposes of my tests, I compared my calibrated results to the EPSON Vivid profile included with the print driver.
How reliable is color calibration?
This is the trillion-dollar question. Every human perceives color slightly differently, and when it comes to home printing, there are many other variables which can influence the quality and consistency of color output.
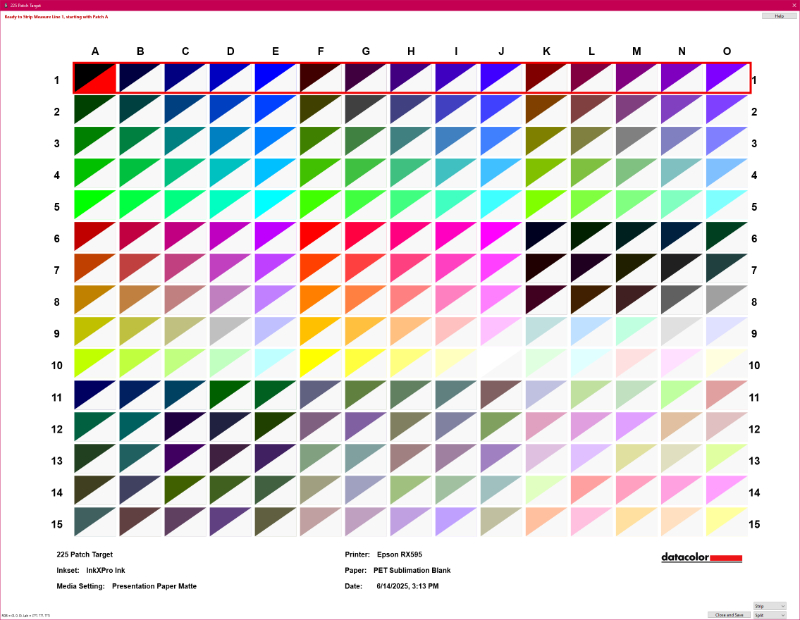
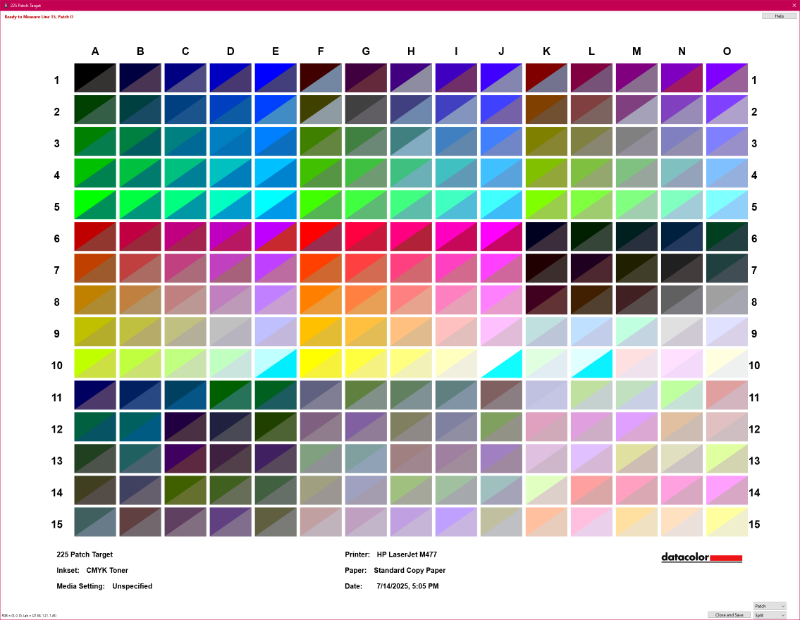
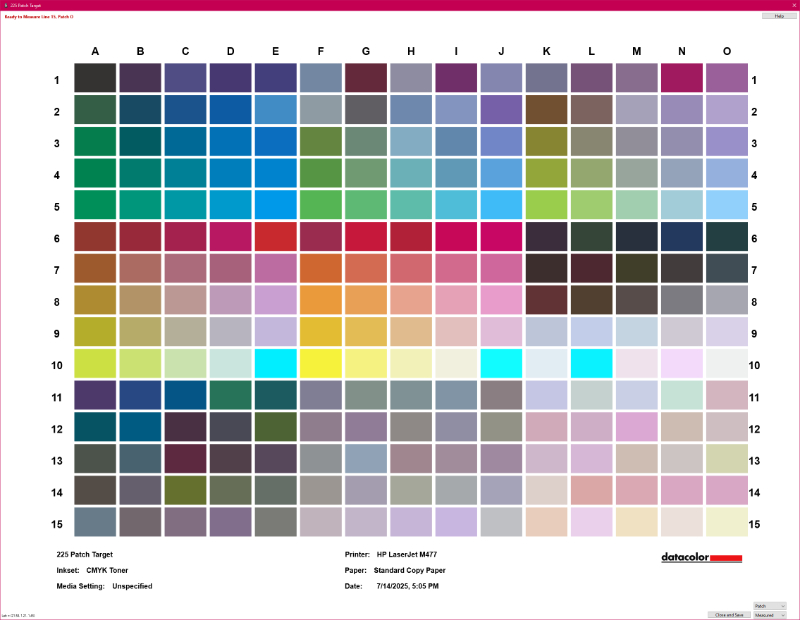
I’m calibrating two color printers: an Epson RX595 inkjet photo printer outfitted with sublimation ink, and an HP LaserJet M477 multifunction laser printer. These two print scenarios are not optimal for standard printer calibration hardware, which is important to keep in mind as you read through this review.
In the case of sublimation, the process and blanks used are both variable (including between individual items), and it can be very difficult to get accurate calibration results with the Spyder Print. I performed all my readings with extended standard patch sheets, sublimated onto several different substrates: Neoprene mousepads, 8×10″ aluminum panels, and sheets of plain white PET.
Color laser printing is not really engineered for high-quality, picture-perfect output. It’s geared toward office use, so it’s great for printing diagrams and layout proofs of new marketing material, but it’s not at all great for reproducing illustrations and artwork. Laser output is sensitive to ambient temperature and substrate quality, so while calibration can be useful, it’s not necessarily going to be reliable over time. I still went ahead and calibrated my printer, mostly because I wanted to evaluate how well the hardware performed with standard printed paper, as opposed to a non-paper sublimation substrate.
Now let’s get into the hardware!
Design and features
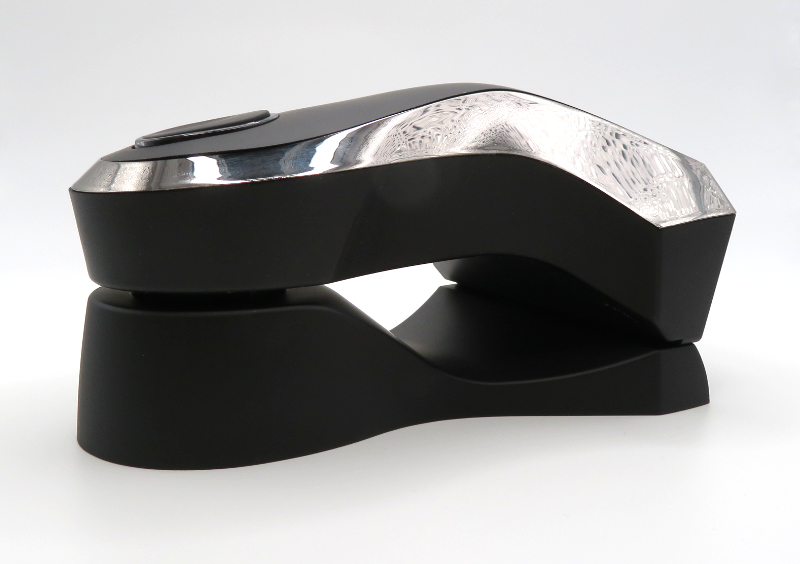
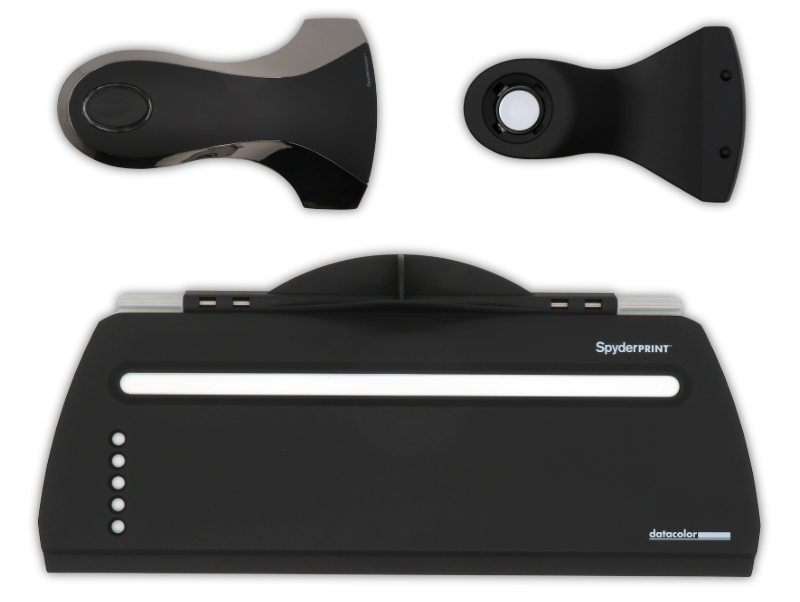
The device itself is a small handheld module with a mini-USB female connection on its rear. This positioning makes it a bit unwieldy to use, depending on how your workstation is configured, but not overly so. I really like that Datacolor still uses mini-USB. Micro-USB is a terrible hardware design with a very high failure rate compared to mini-USB, and since this is a USB 2.0 device, there’s no need to use more expensive USB C components.
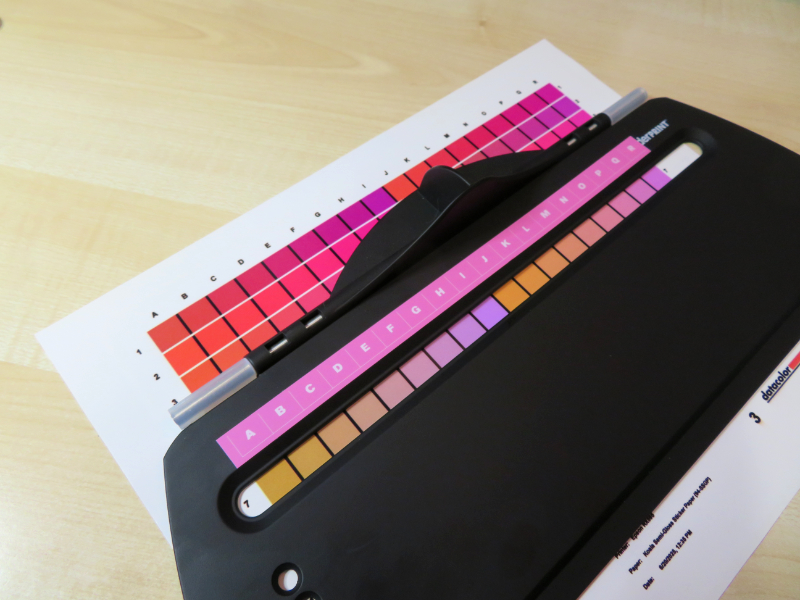
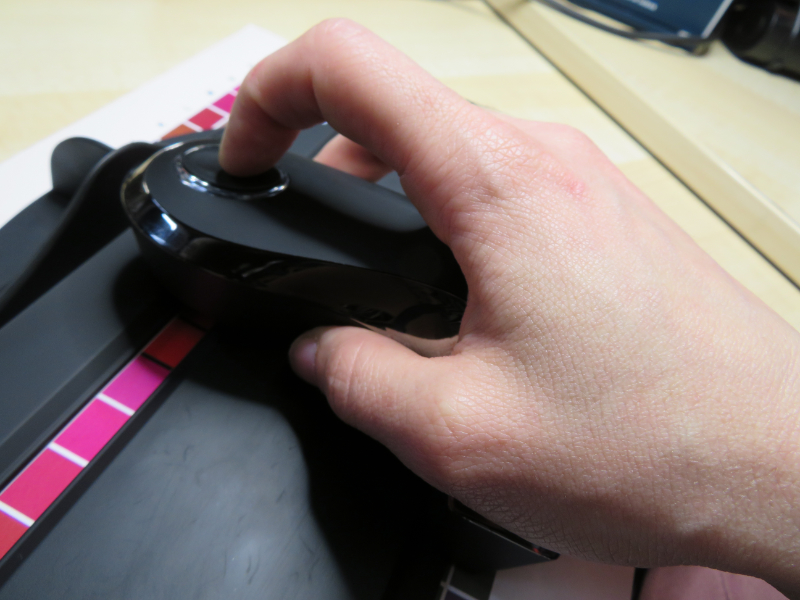
The button on top is used to calibrate and activate the device. The dock has a small white patch under the device’s eye, which is used for white calibration before reading a set of patches. It’s important to keep this white baseline patch clean, or you’ll end up with a bad calibration result.
Clicking the button once will either begin reading a strip or read a single patch, depending on your configuration. The software defaults to strip mode. Successful reading is indicated by a blue ring around the button.
The strip alignment tool makes it easy to align the device to each row of patches, regardless of which patch size you prefer.
I would have liked Datacolor to include labels or something for the alignment tool, because otherwise, it’s impossible to know what column you’re reading without moving the tool. I ended up making my own with my P-Touch label maker.
The bottom of the device has a smooth foot to reduce friction as it slides along the tool, but the soft-touch finish of the tool adds friction, making the overall experience less than optimal at times. I’m a little uncertain about the rubberized finish on this hardware. It seems very few OEMs other than Lenovo (invented by IBM) understand the chemistry of how to produce this finish in a way that doesn’t result in it breaking down into a sticky mess on a long enough timeline.
I have two real issues with the hardware: it’s not wireless, and the included dock just isn’t heavy enough.
In the course of calibrating 967 swatches multiple times, both of these became repeat annoyances. I don’t think this device is particularly high bandwidth (it’s only USB 2.0), nor is it likely to need ultra-low latency, so it’d be pretty great if Datacolor made a wireless edition with a receiver built into the dock.
I got tangled in the USB cable more than a few times. I don’t think this is nearly as much of a problem if you only ever need to use the standard, single-page patch set, but if you’re like me and want to calibrate many different substrates, it’d be a worthy upgrade.
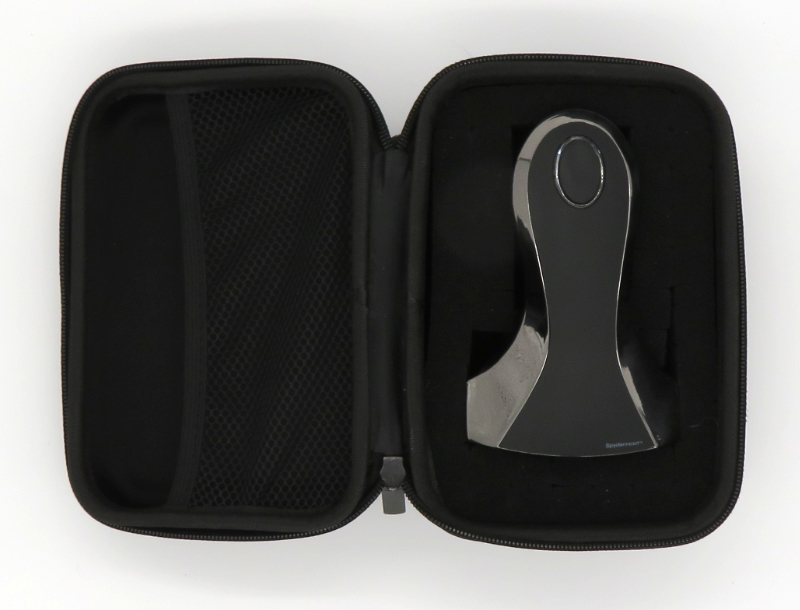
The dock is very lightweight and has nothing on the bottom to keep it stationary on my desktop. I do all my print work in my maker space, which is in our unfinished basement. I was constantly checking to make sure the dock – and the $350 device it held – wasn’t about to fall off the edge of my desk onto the unforgiving concrete below. I ended up buying a small clamshell case with pick-and-pluck foam to store my Spyder Print when it’s not in use.
Overall, the device itself is easy to use. It’s not too heavy for extended use, and the body and button designs – and button tension, which matters a lot when you’re clicking thousands of times – lend well to lots of calibration runs. I have bad tendonitis in my entire right arm, from shoulder to fingertip, and I noticed I didn’t have any pain in any of my trouble spots throughout my evaluation of the hardware.
The software
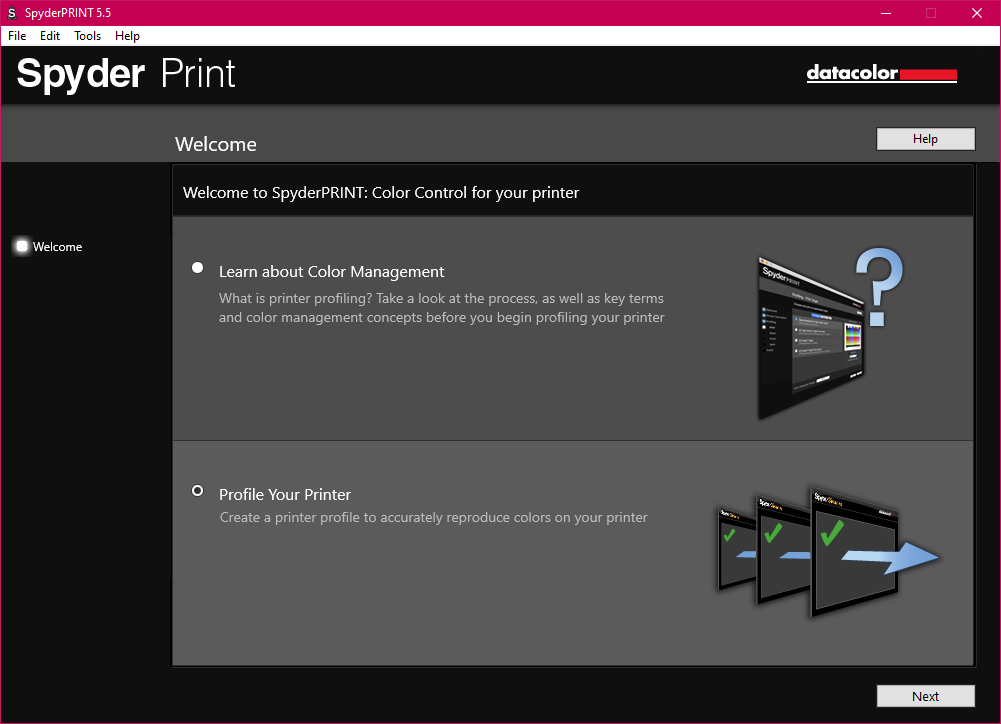
Datacolor’s desktop software is compatible with MacOS and Windows. I performed all my tests on Windows 10. The software is straightforward and simple to use, with a step-by-step wizard for performing a complete printer calibration. Reading results are saved as an XML file, which you can later reopen if you want to make adjustments to the ICC profile created by the data.
The software also makes it easy to find all the file locations you need to do things, including a one-click shortcut to the system installation location for ICC files.
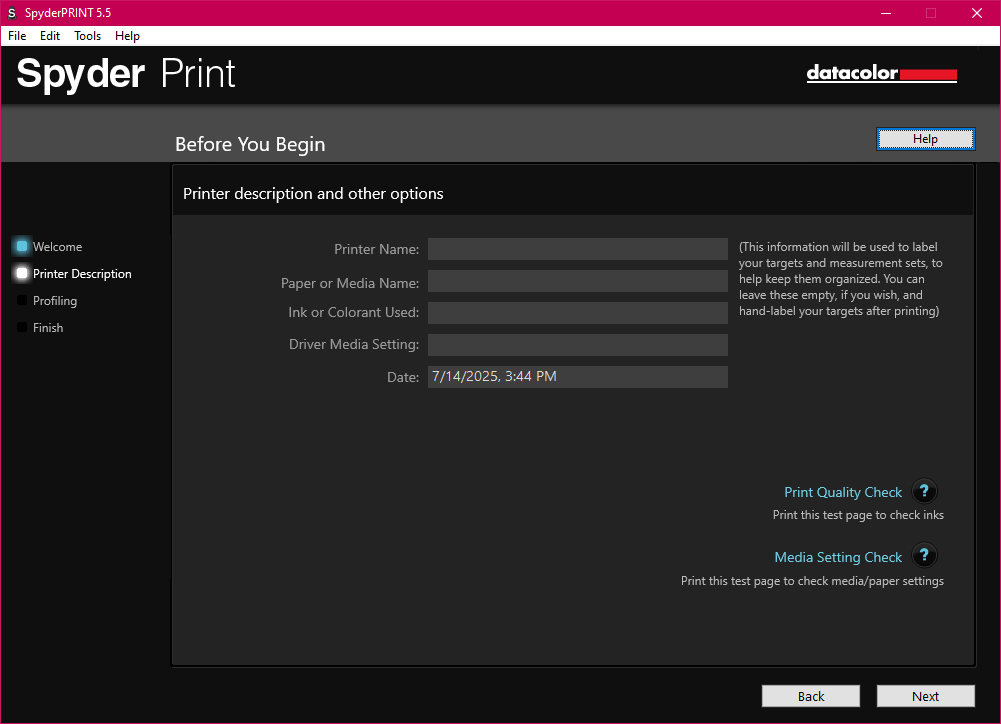
My biggest complaint about the software is the initial form for specifying the details of your calibration target. None of the text boxes remember previous entries, and none are preloaded with data that can easily be pulled from the system – both installed printers, and the media settings available in a given printer’s installed driver. This is something that’s relatively simple to add to the software, so I hope Datacolor considers it in a future release.
Clear, unobnoxious audio feedback allows you to work without looking at your computer’s display – a click signals a successful patch reading, a ding signals the end of a row of patches, and a double ding signals the end of the patch reading process. These can be disabled if you (or your officemates!) prefer.
On my 4k display, the patch view is still nice and large, making it easy to review. The form elements for interacting with this page are pushed into the corner and are quite small, though, and bigger interactive elements would be helpful.
When reviewing your patches, note any bright cyan blocks – these are bad readings, and must be rescanned before continuing.
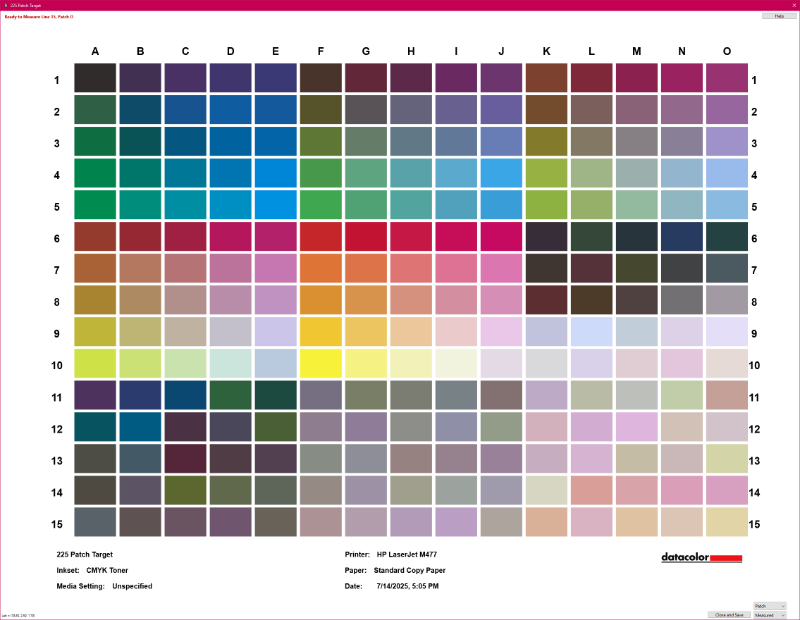
You can switch the view to show only your results, so you can look for any out-of-place patches. This is often the result of a bad reading, and you can easily select and re-read individual patches.
It’s easy to select individual patches to reread them. You can see the improvements in this result compared to the previous screenshots.
After reading your patch set, the software will process the recorded color data and produce a color profile. Depending on factors like your specific print setup and the substrate for which you’re calibrating, you might need to make further adjustments to the color profile before saving it, using the provided assortment of images to gauge the accuracy of your new profile.
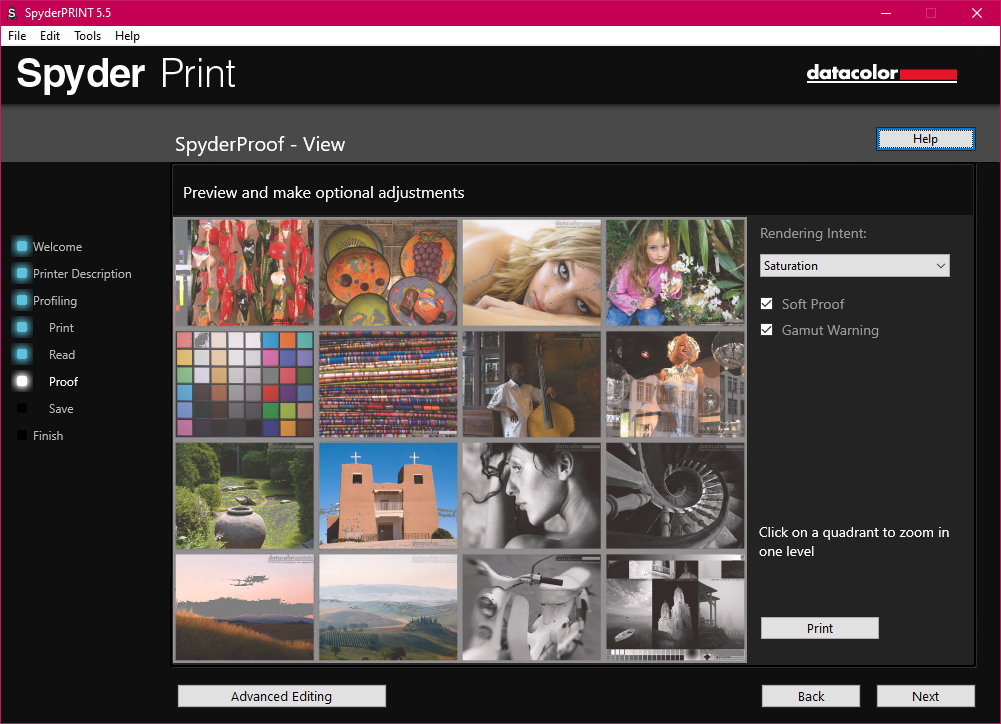
You can print the entire set of soft proof images, and you can also print either quadrants, or individual images. This is helpful if you need to make manual adjustments to the calibration result.
Datacolor has conveniently published a comprehensive ebook on color calibration and how to get the most out of their software. You can download a copy here. This is a subject which becomes advanced rather quickly, and Datacolor’s extensive documentation will help you achieve the best results with your particular hardware.
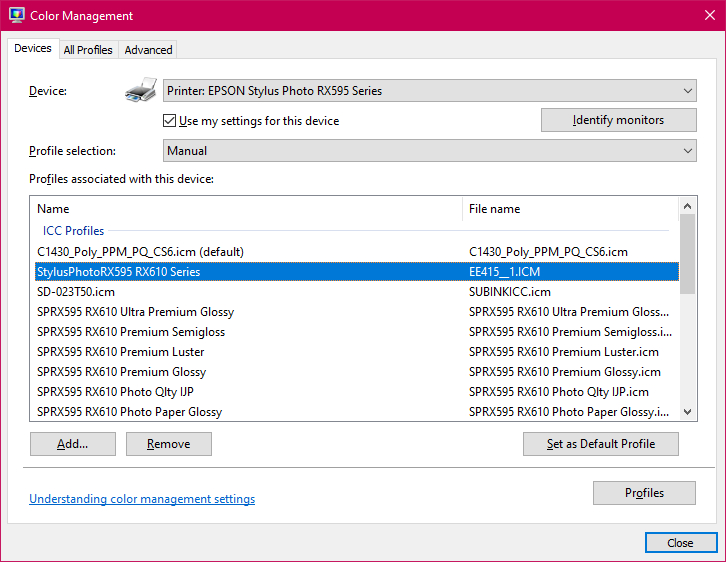
Once you’re satisfied with your newly calibrated printer profile, the wizard completes the process by exporting the data as an ICC profile and installing it in your system color profile directory. In the Affinity suite, either rebooting the software or installing the profile from the Affinity Photo persona makes it immediately available for use as both a document and printer profile.
If, for some reason, your desktop publishing software doesn’t support specifying a print color profile, you can assign the profile directly to your printer in both Windows and MacOS.
The new open-source print standard, IPP, was unfortunately not developed with advanced print scenarios in mind, and it does not support ICC profile assignment. This means this support has been deprecated and removed from CUPS, and the only way to use a printer profile in Linux is to use software that supports print profiles.
The calibration experience
Datacolor provides several different patch assortments from which to choose, based on your needs and preliminary results.
Selecting a patch size
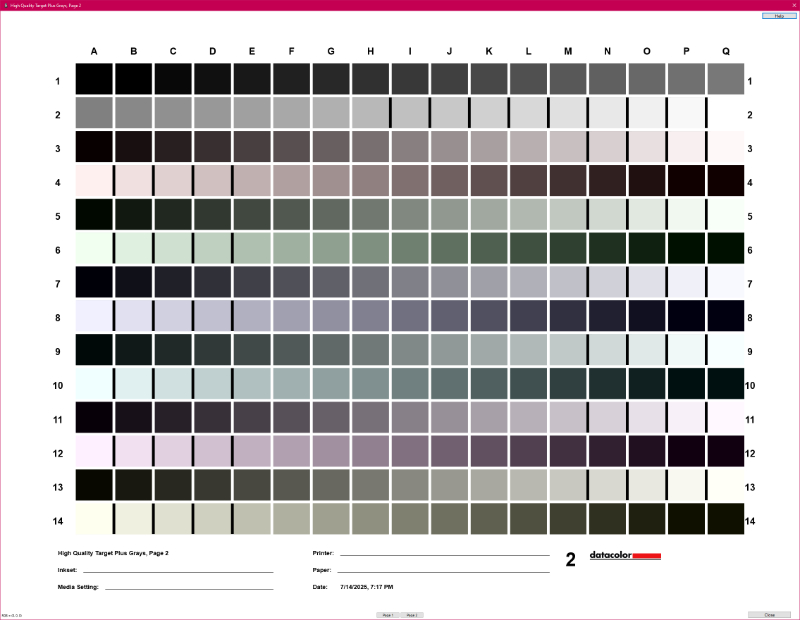
There are two patch sizes available – EZ and classic. EZ patches are much larger, making the process of reading easier, but they also require more material. Since I’ve been calibrating against various sublimation substrates, my blanks are a bit too expensive to use the EZ patches. A complete set of 967 patches covers nine standard pages (8.5×11″)!
Selecting a patch set
There are four patch sets available of increasing quantity (and thus take more time to scan). The two main sets are the High Quality and Expert targets, which are 225 and 729 patches, respectively.
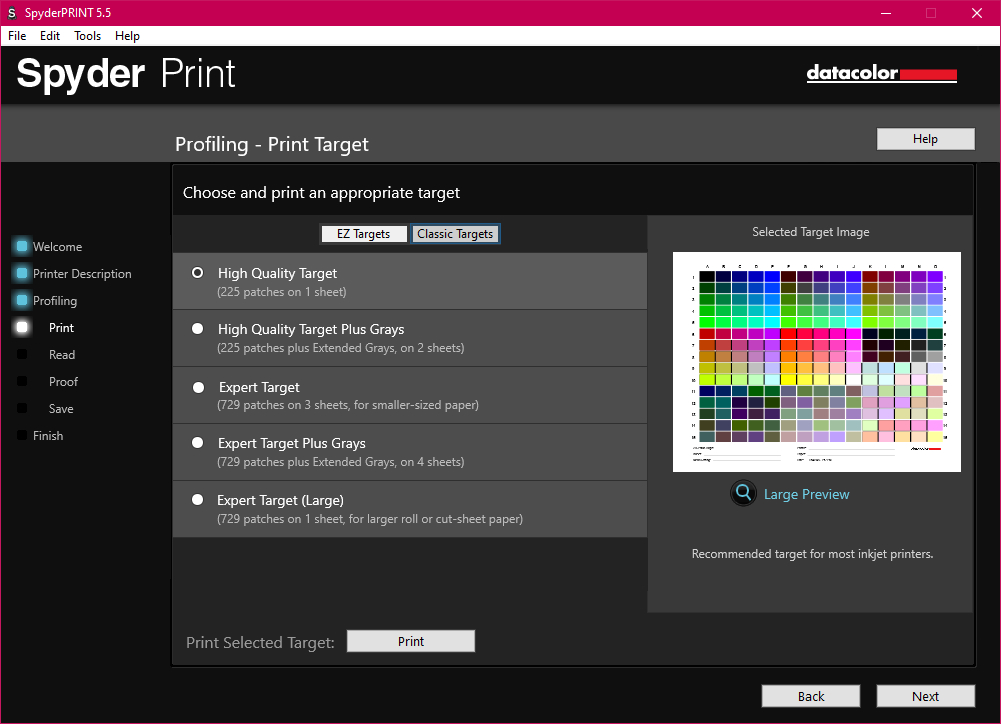
The 729-patch Expert target is also available as a single sheet, for calibrating with uncut sheets or rolls of material. In addition to this, both sets can include an extra set of 238 colored grays.
For most standard inkjet printers using regular ink, the High Quality patch set is likely adequate to calibrate your printer. For advanced substrates with unusual qualities, and for more precise calibration in general, you’ll want to use the much larger Expert target.
If your printer has an advanced ink system, with colors or tones beyond standard CMYK, the extended gray set is worth taking the time to scan.
Printing patch sets
It’s important to print your chosen patch set with the correct settings for your color printer. Make sure that all color management is disabled in your printer’s preferences. If you haven’t installed the complete driver for your printer before, you might need to do this to access advanced color settings.
Reading patch sets
Actually scanning a target can take anywhere from a few minutes to an hour or more, if you’re like me and end up doing per-patch scanning of a complete set of 967 patches.
With the included alignment tool, strip reading mode is just a matter of smoothly sliding the tool across each row of patches, listening for the click sound the software plays after each successful scan. I found that scanning even standard laser printed images was really inaccurate in strip mode. I ended up reading all my targets in patch mode, by which each patch is scanned with a manual click of the button on the device. This is easy to do from the main patch window.
Once you’re done scanning, you can point-and-click to take a new sample of any specific color on the grid.
Evaluating the results
This is where things get really hairy for me, and it seems to be in part related to the fact that I’m trying to get better color out of my aftermarket sublimation setup, and I’m printing a lot of scanned content.
The Datacolor Spyder Print is specifically designed for calibrating standard print substrates – glossy and matte paper of all weights and varieties. The physical properties of other substrates, how they reflect lightwaves, and how sensors perceive them will alter the reliability of the Spyder Print’s results, and I think necessarily require manual tweaking of the generated ICC profile.
Reprinting halftone content
What you’re printing makes a pretty big difference in the result. Mass-produced printed goods use the CMYK halftone process I covered earlier in this review, and this definitely has a measurable impact on how scanned material looks when printed. The halftone pattern is very regular, so it does some weird things at certain scales, especially depending on the interpolation algorithm you choose to use when you scale down high-resolution scans.
On top of this, the scanner itself is a factor in accurate color reproduction, and I have yet to calibrate my scanner, since I don’t have the appropriate tools. Accurate print reproduction of scanned content is difficult and requires a lot of tedious color profile adjustments to really dial everything in.
As such, my results with scanned content have been a mixed bag. It’s quite difficult to accurately depict the visible color discrepancies in photos and scans, although some samples are more dramatic than others.
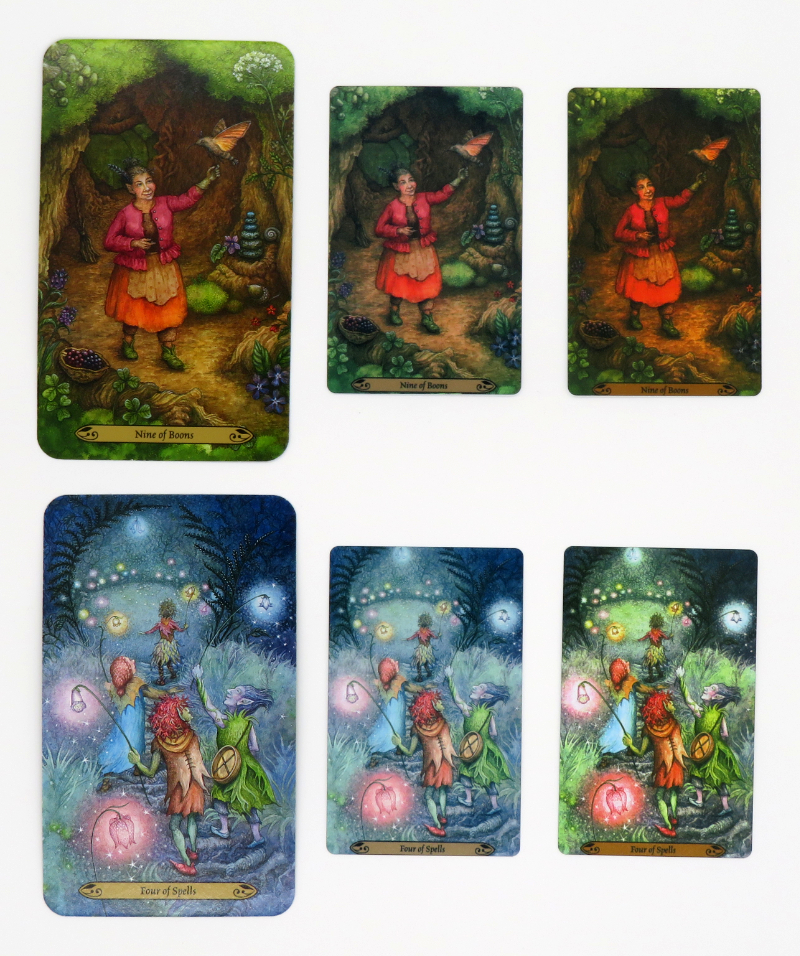
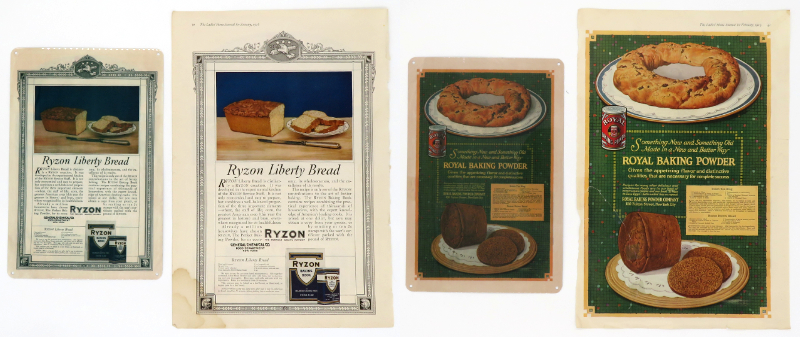
I scanned two tarot cards and sublimated them on metal business cards, and I made two metal panels from scanned vintage tabloid size (11×17″) magazine advertisements, so in both sets, I could compare my results to known good originals. I scanned everything at 800 DPI with no color correction.
Here’s how my cards turned out.
And here’s how my metal signs turned out.
With scanned content, I consistently see a yellow tinge to my reproductions. The EPSON Vivid profile gives me better color range, but it’s not saturated enough and is slightly too cool, so I will probably need to spend some more time tuning this particular print scenario.
Printing others’ high-resolution digital photos
Printing high-resolution photos found online can also have unexpected results, because photos for online distribution are tuned from the original RAW files for digital consumption, whereas photos for print are tuned differently. This is really obvious when I print sports photos, which are often closeups of athletes against a very blurry spectator background.
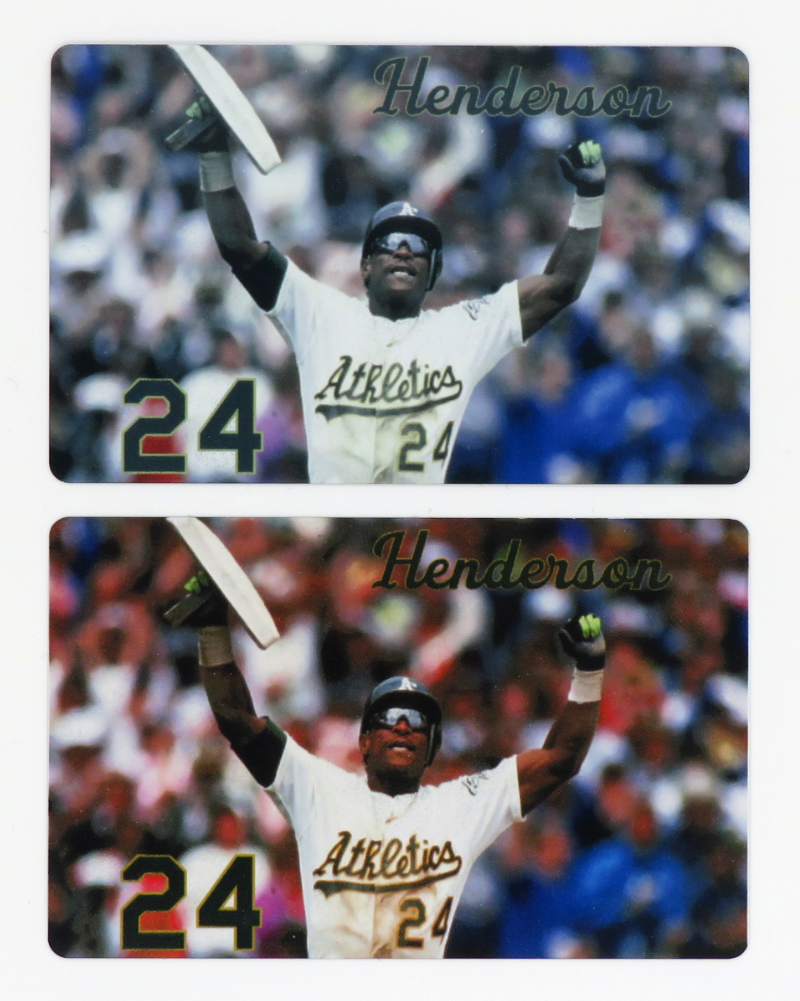
It’s that background which can be a real challenge to accurately print without a lot of existing industry experience and knowledge, which I don’t have.
On the whole, I’m happy with how good the calibration works with sports photos in particular. We’re a Red Sox family, and I enjoy making things for my family members with really nice action shots of their favorite players throughout the franchise’s history. Given the challenges with printing sports photos in general, I’m satisfied with my results.
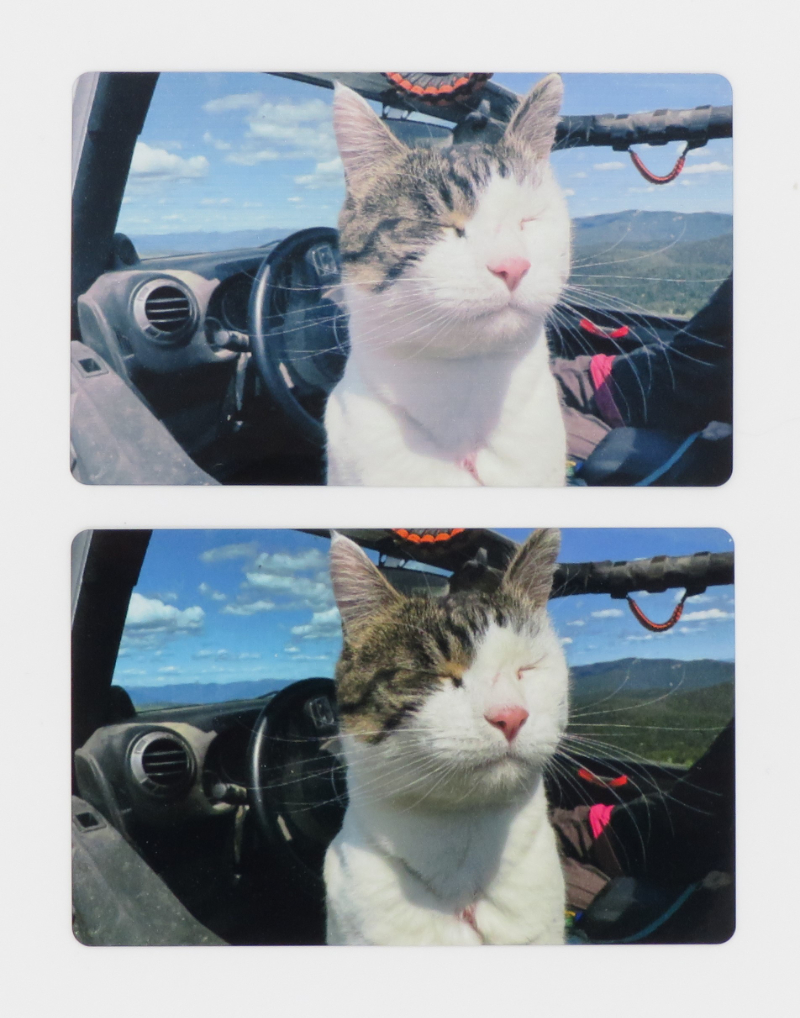
Printing your own high-resolution digital photos
I’m very happy with my calibrated results when printing original HEIC photos taken with an iPhone 15 Pro Max. This scenario allows the use of the original image with complete color data from the camera itself, which makes it possible to get a much better representation of the original subject and scene. This photo of our cat looks significantly better after calibration.
If you’re a digital photographer with a camera which supports RAW, you can shoot your photos in this format and then tune them with photo editing software for optimal print results. For the absolute best color output, you’ll also need to calibrate your camera…which means more tools. Fortunately, this is relatively simple – by including a sufficiently bright white and dark black reference object, you can adjust the white balance and exposure for every photo. Datacolor’s Spyder Cube is one such reference object and retails for $54.
My Canon PowerShot SX720 HS supports RAW, so I might end up getting more into this side of things, depending on where my creative pursuits take me next!
Final thoughts
This is where the whole color calibration journey comes to a close: how important is uber-accurate color reproduction for your needs, hopes, and splendiferous dreams?
If you just want better color output when printing random fun photos, the Datacolor Spyder Print can definitely improve your results compared to your printer’s native color profiling.
If you’re a professional photographer, you need to invest in enough kit to calibrate your entire workflow. Datacolor’s $499 Spyder Print Studio includes the Spyder Print ($350), the SpyderPro display calibrator ($269), and the Spyder Cube reference object ($54).
If you’re a digital artist, you need to make sure all your displays in your workflow are properly calibrated. The standard Spyder ($169) can calibrate any regular CRT or LCD display; the SpyderPro ($269) can also calibrate OLED and mini-LED displays.
If you plan on reproducing vintage print materials with a high-resolution flatbed photo scanner, it’s probably worth investing in additional calibration tools, because you’re otherwise likely inclined to drive yourself completely mad chasing the dream of perfect color – LaserSoft Imaging offers a scanner application called SilverFast Ai Studio ($178), and it supports using their color calibration targets ($100-120) for scanner calibration.
If you’re an analog media artist who wants to reproduce your own scanned artwork, I think you’re likely to have better results with an uncalibrated scanner than what I’ve seen with the type of content I’m scanning, but ultimately, it’s still worth spending the money on scanner calibration tools.
If you’re in the world of marketing and advertising and absolutely need Pantone-perfect color, spend the benjamins on X-Rite’s hardware. It’s the price you pay for the privilege of Pantone. Now say that five times fast!
This is a good printer calibrator for $350. I’d prefer to see it with some updates to the hardware design, and there are various aspects of the software that mostly point to the outdated nature of the user interface. I was able to provide some suggestions on improving the UI to my Datacolor rep, so hopefully we’ll see some improvements roll out in the future.
As of now, it looks like SilverFast offers the only solution for prosumer scanner calibration, and they don’t indicate universal support for all scanners. It seems like a relatively straightforward product to engineer, and I would love to see Datacolor offer a kit for multifunction printers with tools for calibrating scanners.
Color calibration is a never-ending quest. Fortunately, Datacolor has you covered on most things for $500. Since these are tools which can be continuously reused every time you upgrade your equipment, it’s a worthy investment which will save you frustration in the long run.
What I like about the Datacolor Spyder Print
- Reasonably good color calibration for $350
- Easy to use
- Ergonomic hardware design
- Customer support is knowledgeable and helpful
What needs to be improved?
- Dock isn’t sturdy enough
- A wireless model would be great!
- Software has some minor UX annoyances
- Reproduction of scanned content is very inconsistent
Price: $349.00
Where to buy: Datacolor and Amazon
Source: The sample for this review was provided by Datacolor. They did not have a final say on the review and did not preview the review before it was published.
Check out these other reviews!
- eufyMake UV DTF Laminator review – Exploring sticker making with the E1 UV printing system
- eufyMake E1 UV printing system review

Google Review Tap Cards (3-Pack) by TapFive - Tap for Instant Reviews - All Phones Compatible - Reusable Smart Tap NFC & QR - Boost Business Reviews - Powered by TapFive (3 Card Pack)
(as of March 20, 2026 18:24 GMT -05:00 - More infoProduct prices and availability are accurate as of the date/time indicated and are subject to change. Any price and availability information displayed on [relevant Amazon Site(s), as applicable] at the time of purchase will apply to the purchase of this product.)