REVIEW – Summer is officially here and has been for a while in South Texas. I enjoy working on woodworking projects in my garage, but unfortunately, I didn’t plan to have my garage insulated when the house was built. I want to insulate the garage so that I can eventually install a mini-split AC to keep it cooler during our hot summer months. That requires a significant amount of money, so as a stopgap, I volunteered to review the Zafro 16,000 BTU Portable Air Conditioner. Does it bring the temperature down at all in my 3-car garage? Read on and find out.
⬇︎ Jump to summary (pros/cons)
Price: $549.00
Where to buy: Amazon
What is it?
Zafro makes several models of portable air conditioners, and the one I am reviewing is the 16,000 BTU version. It has two hoses, with one serving as the input and the other as the output. It can also be set in a dehumidifying mode.
What’s included?
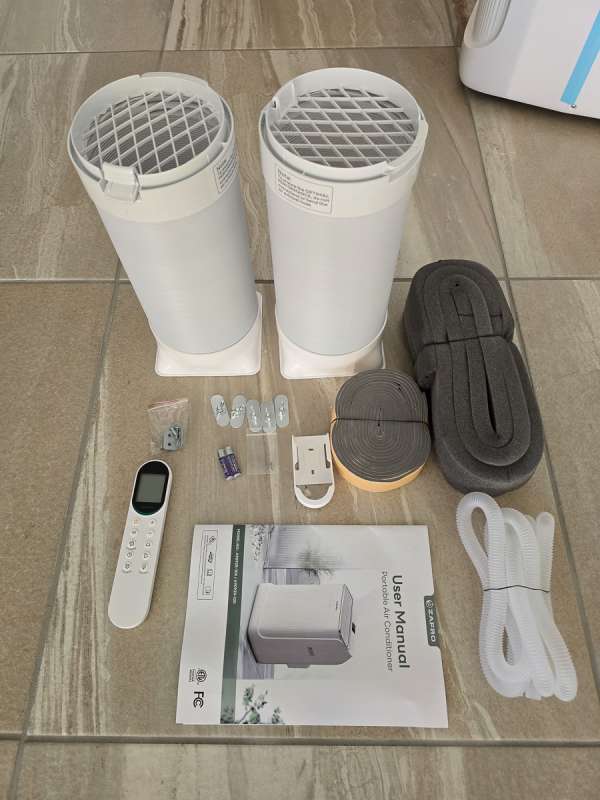
- Two air hoses
- User manual
- Wall bracket for the remote control
- metal bracket – I am not sure what that is for
- Five pieces of window brackets
- Drainage hose
- Remote control
- Sealing foam
- Five butterfly bolts
Tech specs
CEER 12.8 rating
42dB Ultra Quiet
Dual-hose and inverter dual-cylinder compressor delivers 16,000 BTU (12,000 BTU SACC) powerful cooling—4-way airflow.
WiFi+ZAFRO APP, remote control, and digital panel
55.68 lbs, 13 in deep, 27 in high, and 18 in wide
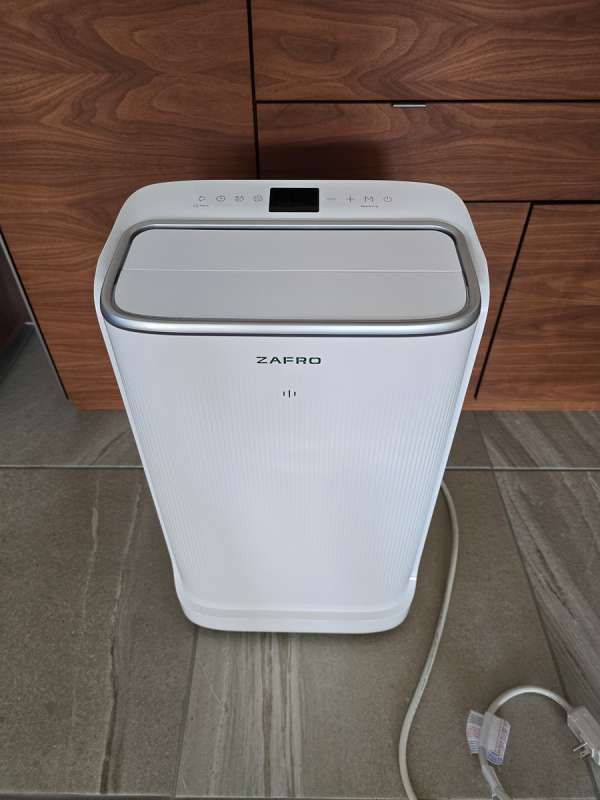
Design and features
The Zafro 16,000 BTU portable AC is a solid-feeling machine. It has a control panel on top with a display screen. When not in operation, the two louvers close to prevent dust and foreign objects from entering. It only comes in white. The manual doesn’t state this, but I believe the small holes visible under the logo are intended for the speaker. The unit beeps as you change the settings.
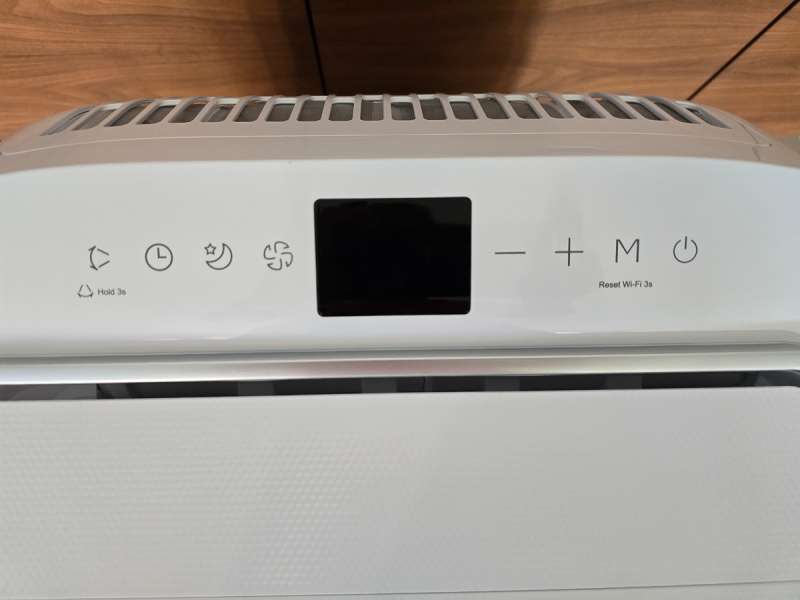
Here is a close-up of the control panel. From left to right these are the settings.
- Louver swing – Press once to activate the two outside louvers, which start swinging up and down. Hold for 3 seconds to activate the inside louvers, which then swing left and right.
- Timer – When the unit is in standby mode, press to program the start-up time. When running, press to program the shut-off time. You can program anywhere from one-half to 24 hours. Press and hold this button for 3 seconds to turn off the display screen, creating a dark room.
- Sleep – Pressing this for 3 seconds will turn off the sound. Press and hold again for 3 seconds, and the sound will return. A quick press of this button will dim the display lights. If no further action occurs within 6 seconds, the lights will turn off and the fan speed will be set to low.
- Fan – Pressing once each will set the fan to low, middle, high, or auto no matter what mode the unit is in.
- Plus/Minus – used to set the desired temperature
- M – Mode button. A single press each time changes the mode to cooling, dehumidifying, or fan-only. Cooling allows you to set the temperature anywhere from 64 to 95 degrees. Dehumidifying is recommended for working air temperatures of 50-77 degrees. The humidity range settings are from 30% to 70%. A long press of 3 seconds on this button will activate the WiFi pairing mode.
- Power button
Special Features:
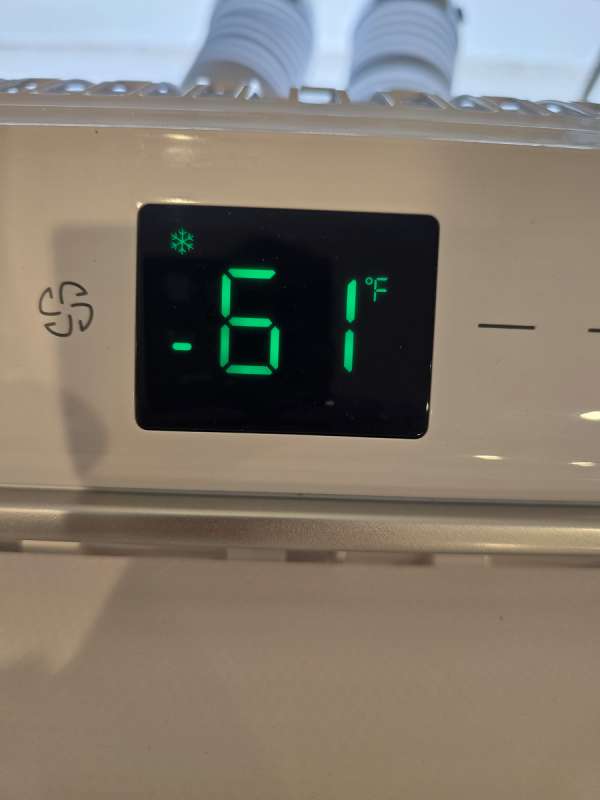
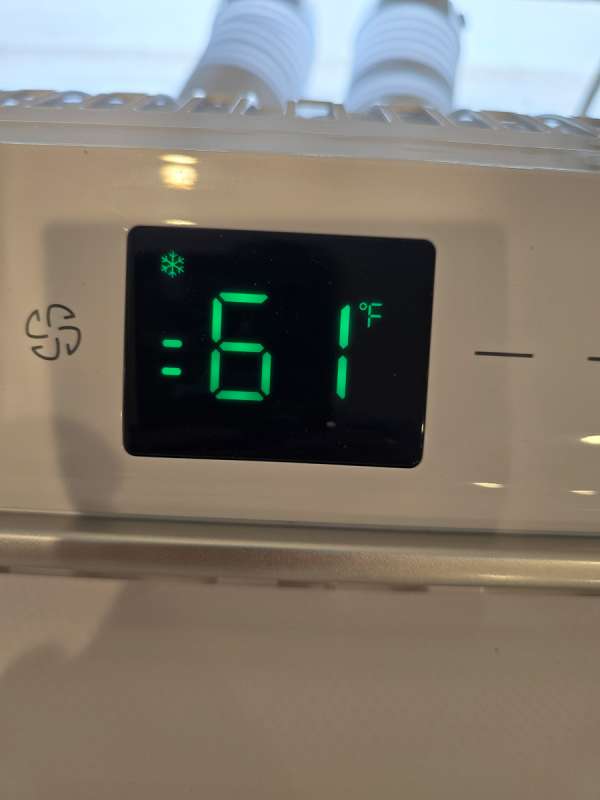
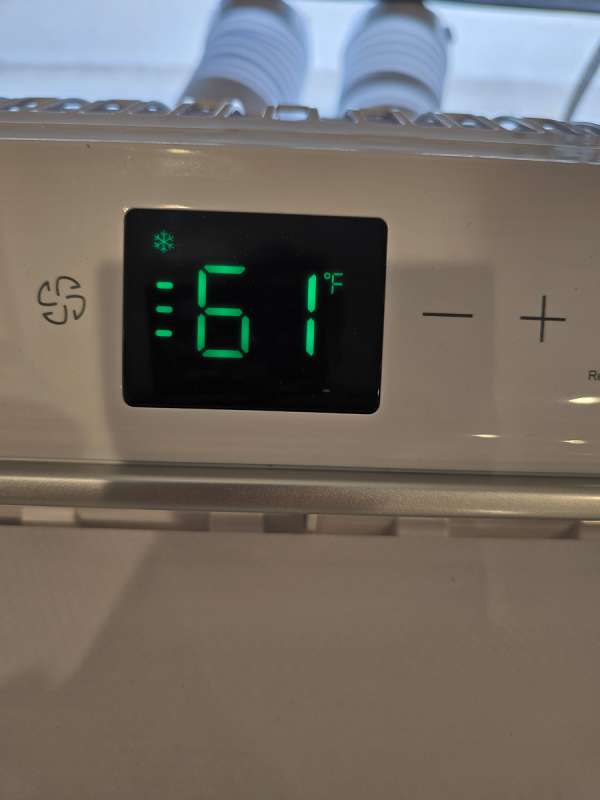
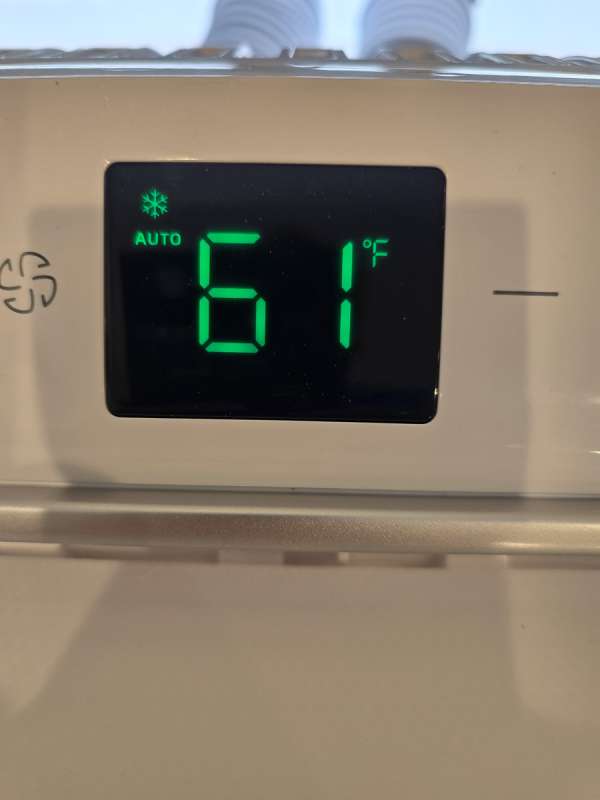
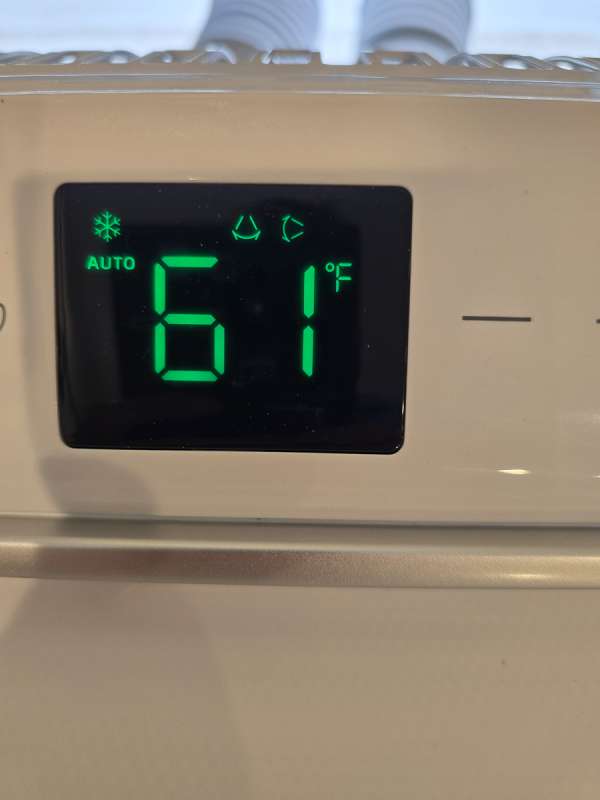
- Extra Mode – Pressing the fan button for 3 seconds while the unit is in cooling mode will set the temperature to 61°F and the highest fan speed.
- Child lock – press and hold the fan and timer button for 3 seconds displays a 3-2-1 countdown and turns on the child lock. Performing the same action turns off the child lock. When in child lock mode, the unit can still be controlled by the remote control.
- An air filter symbol will display every 600 hours of use, reminding you to clean the air filters.
- If a power failure occurs, the unit will work in the same mode it was last in but the fan will be at low speed when you manually turn the unit back on.
- ECO mode – long-press the sleep and timer button for 3 seconds. This will set the temperature to 76°F and the fan speed to low. It can only be activated when the device is in cooling mode. It can be cancelled by pressing the plus, minus, or mode button.
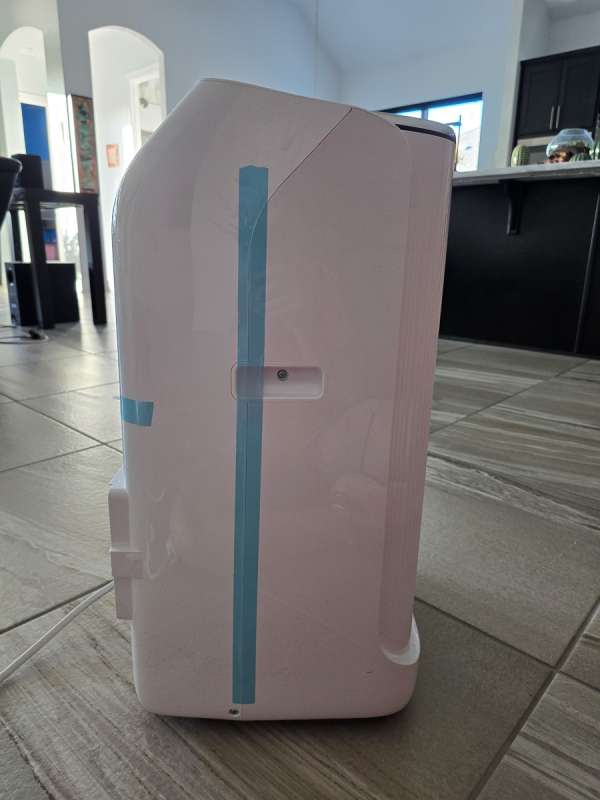
This is a picture of the side of the unit. Both sides are identical and feature a built-in handle.
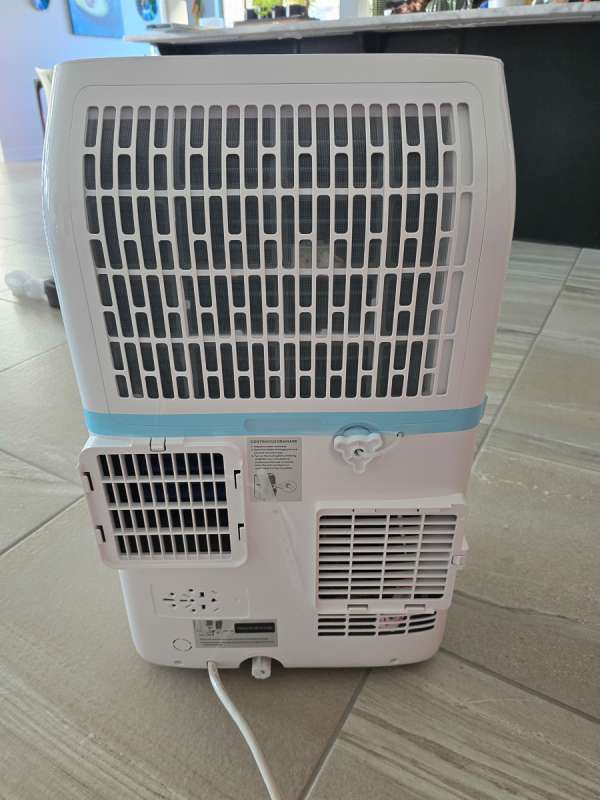
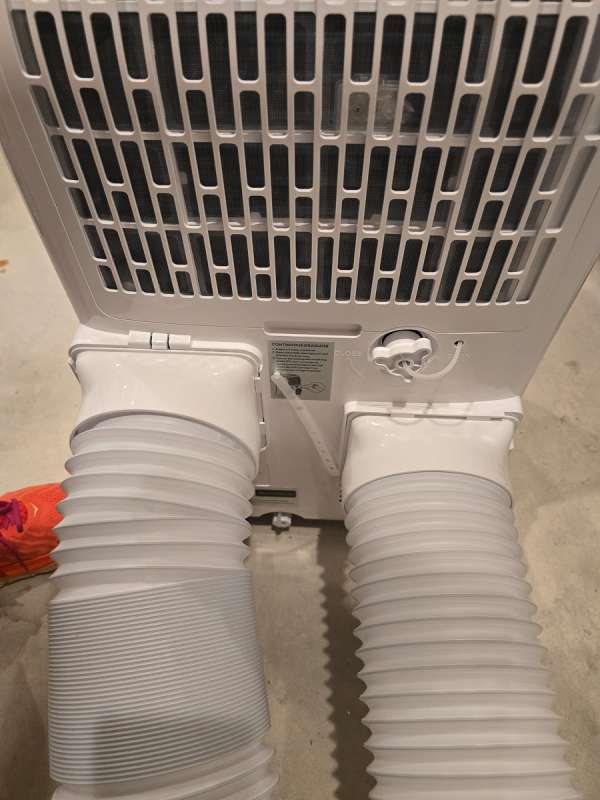
In the back of the unit, we have the main air inlet filter at the top. It features a removable screen that allows for easy cleaning. On the bottom left is the air outlet port, and on the bottom right is another air inlet port that uses one of the hoses. It also has a filter in place.
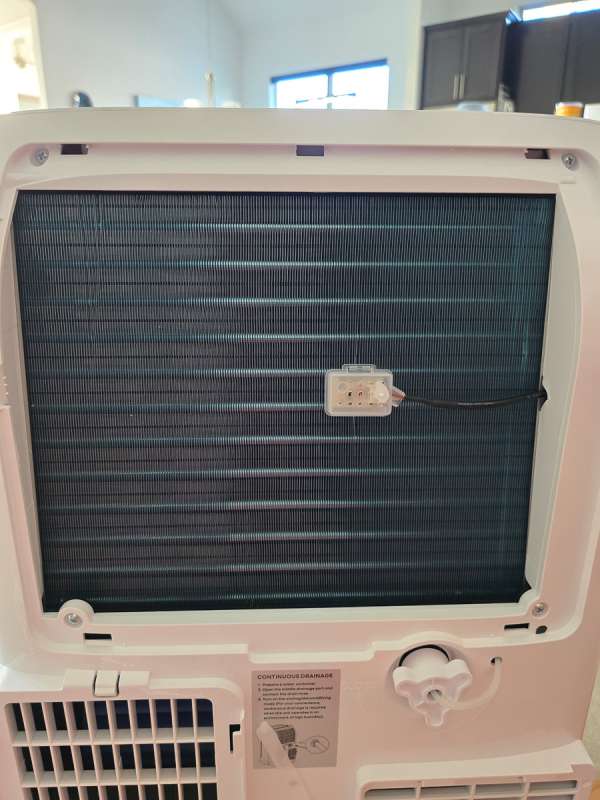
Here is a picture of the top air inlet with the screen cover removed. It looks just like the AC coils I have on my main AC for the house.
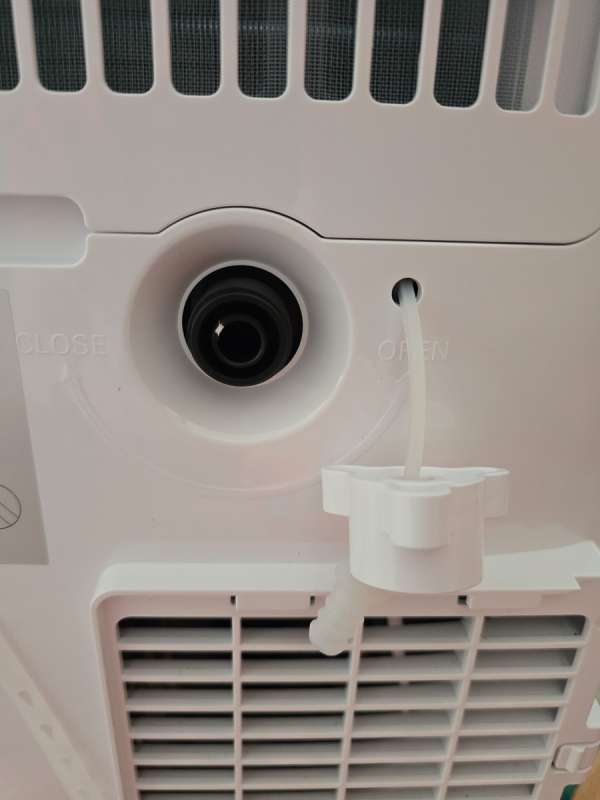
This unit has two different drain ports. At the very bottom is a manual drainage port that you will need to empty periodically, depending on the level of humidity in your area.

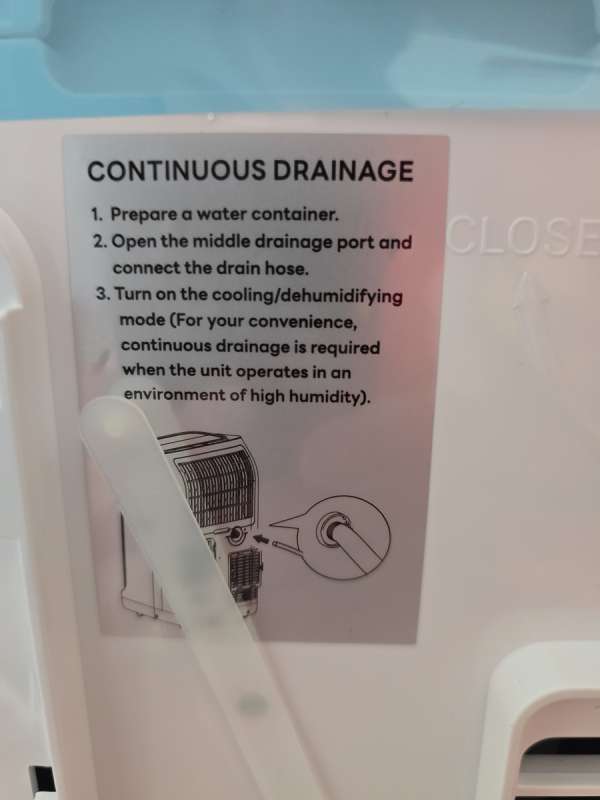
There is also a continuous drainage port that you should connect to a bucket or drain if you decide to run the unit in dehumidifying mode. The cover for this port has a tether to keep it attached to the unit.
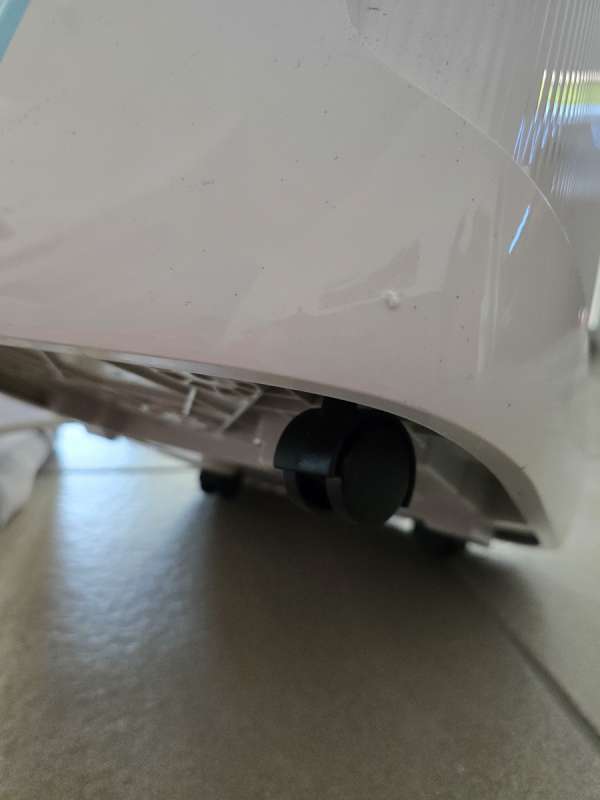
There are four casters under the unit. They seem sturdy and move smoothly. This unit is heavy at almost 60 lbs, so the casters come in handy.
The screens below show the fan in cooling mode with the fan speeds in low, middle, high, and auto.
The pictures below show the main louvers open at their widest and smallest settings.
This picture shows you the icons for both sets of louvers in motion.
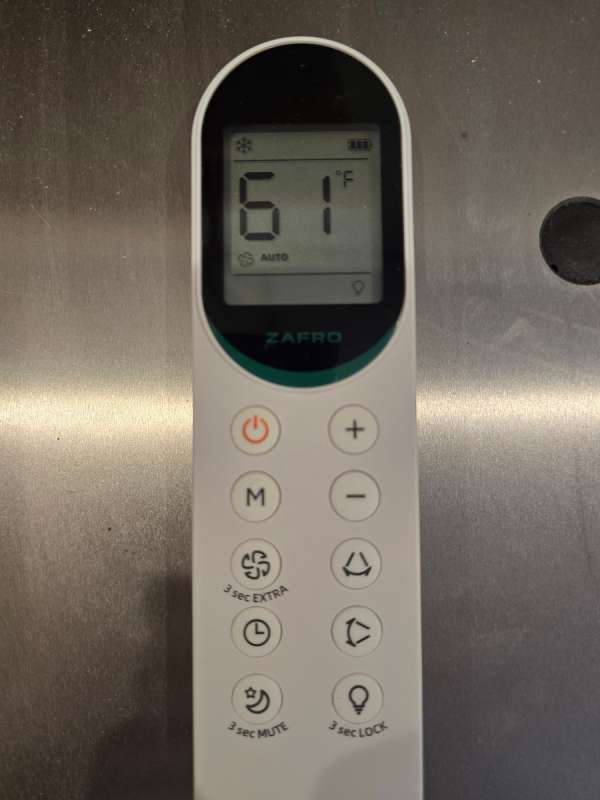
Here is a picture of the remote. It has the same functionality as the display. I want to mention they also have an app for both Apple and Android that will let you control the unit. It works exactly like the remote and the display, but connects via WiFi. I did not download it because I found using the remote or the buttons on the unit worked fine for me.
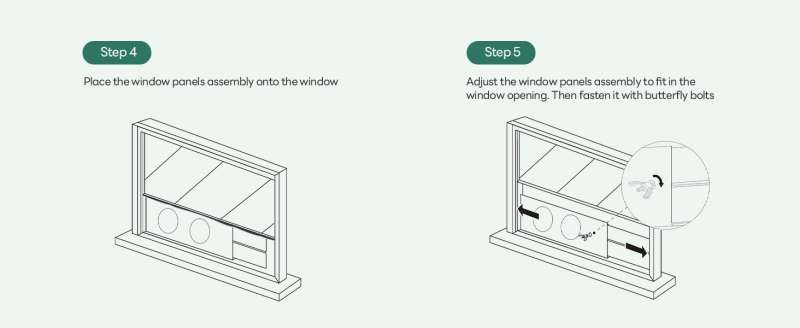
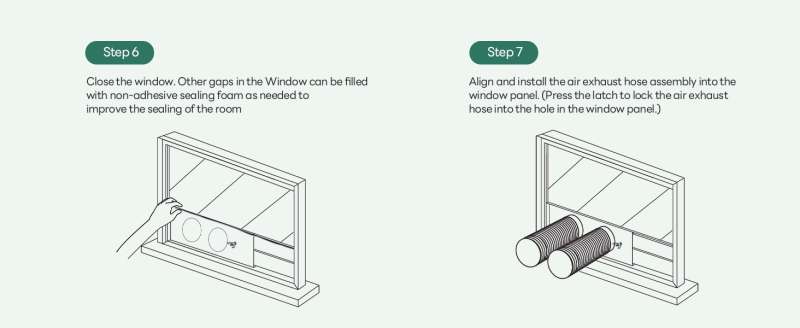
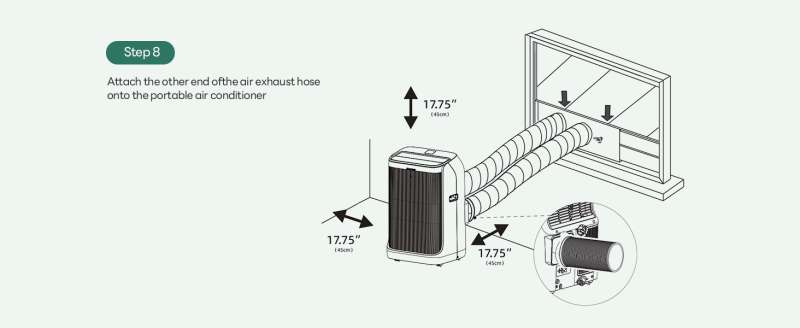
Assembly, Installation, Setup
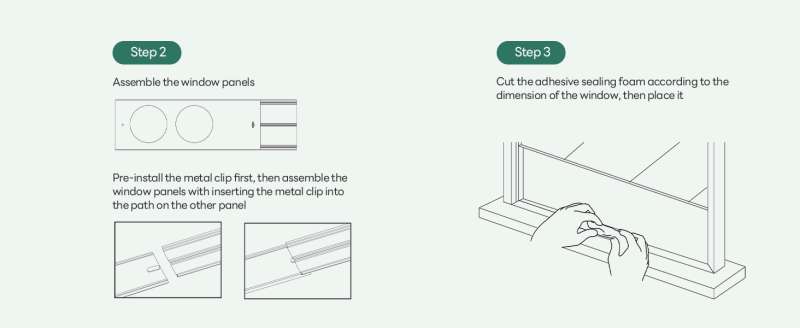
Below are the steps from the Amazon website on how to install the air conditioner in a window inside your home.
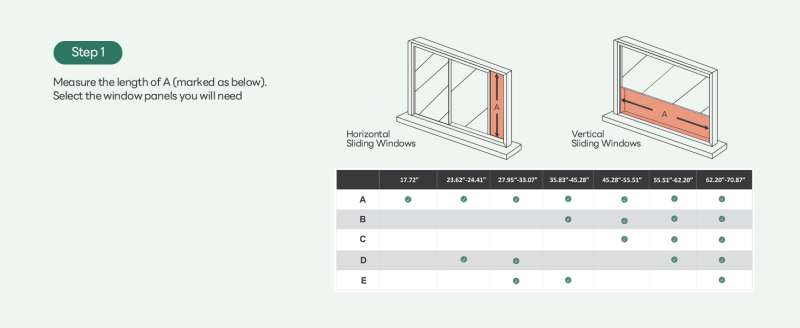
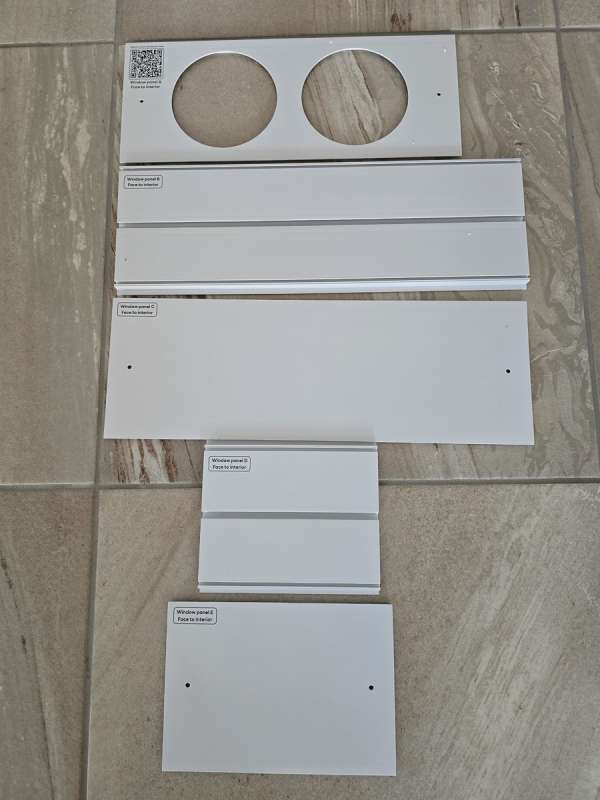
Here is a picture of the five different window panels they provide. Notice the holes on either side of the main panel where the hoses connect. You can add other panels to the left or the right of that main panel, and they stay in place with the butterfly bolts. There were some complaints on the website that the panels were too large for some people’s windows. I think it would be easy to get a hacksaw or even a Dremel and cut a panel down to size if need be.
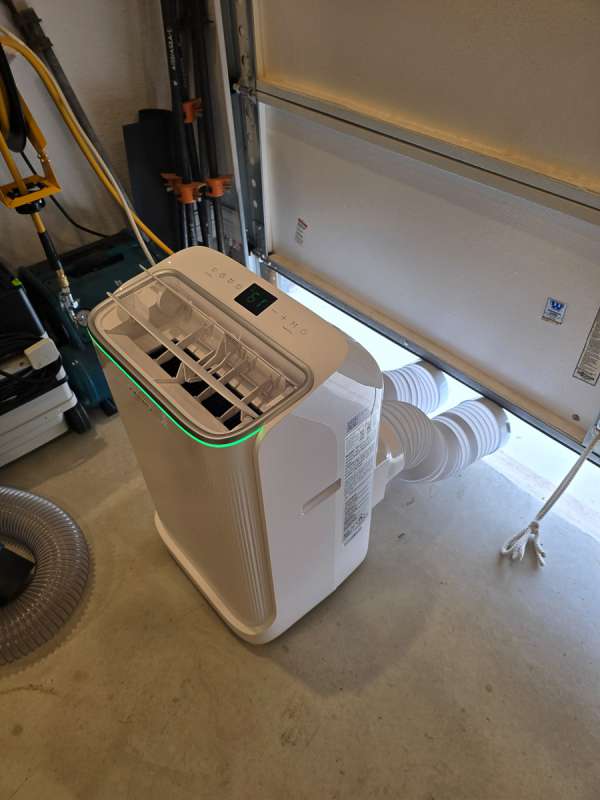
In my case, I was not going to be installing the panel in a window. I hoped to use one of the existing ventilation areas that were already set up along the bottom side wall of my garage.
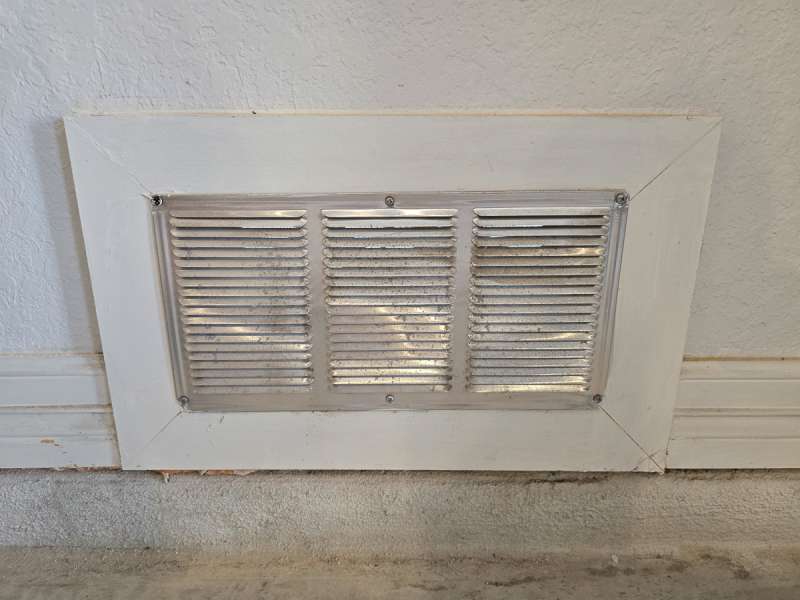
I unscrewed the screen that was mounted to the inside of the ventilation gap. The main panel, which holds both hoses, fits over the space. I used the two holes on either side to screw the panel into the frame around the ventilation window. I then used the foam insulation table to wrap around the top and bottom, creating a good seal. What you can’t see in this picture is that there is about a five-inch space between that interior screen and the outside wall. My outside wall had another screen installed in the stucco that I could not remove. It had larger screen holes, so I hoped it would still work. You can see the tab on the right hose that I pressed in to get it to click into the panel.

I then extended the hoses and slid them into their slots in the back of the unit. These hoses are very stiff. They can easily extend and retract, but they do not bend easily. The user manual states that the unit should not have bends in the hoses for proper operation. Once you have the hoses installed in the window and in the unit, you can’t move the machine around without them popping out of the window pretty easily.
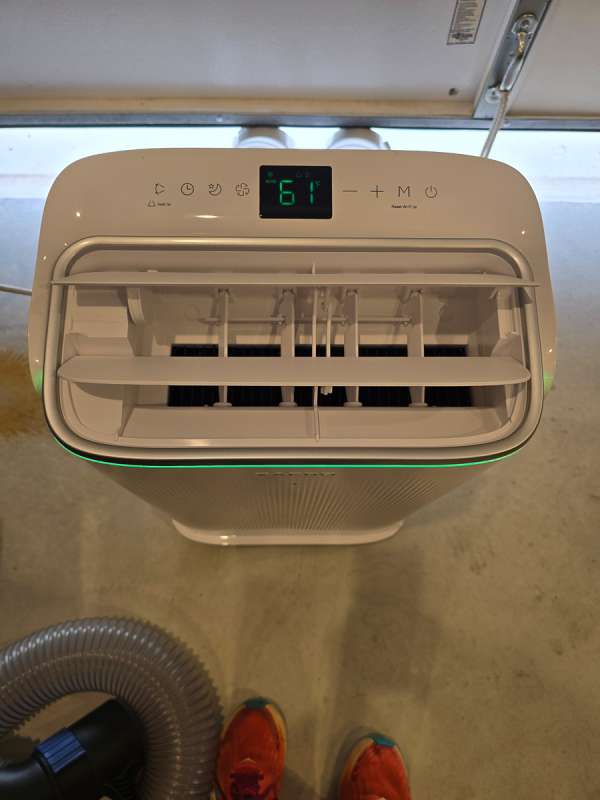
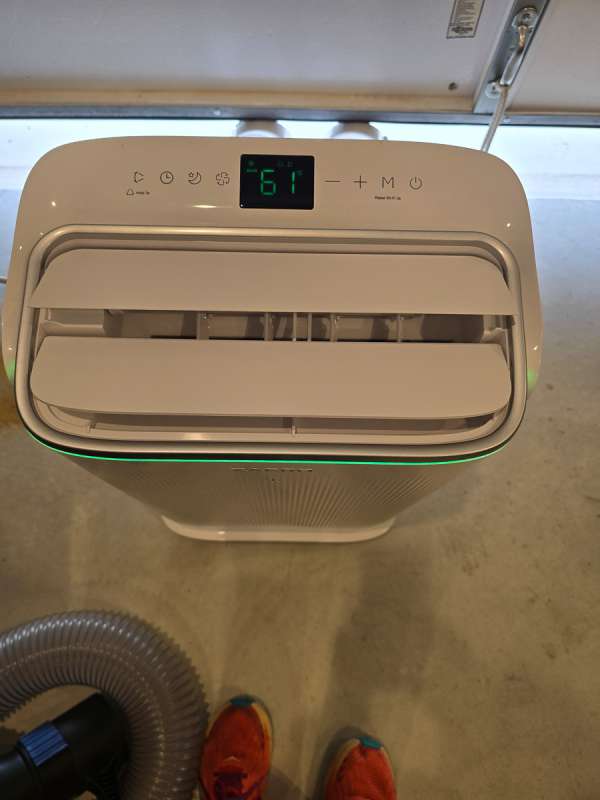
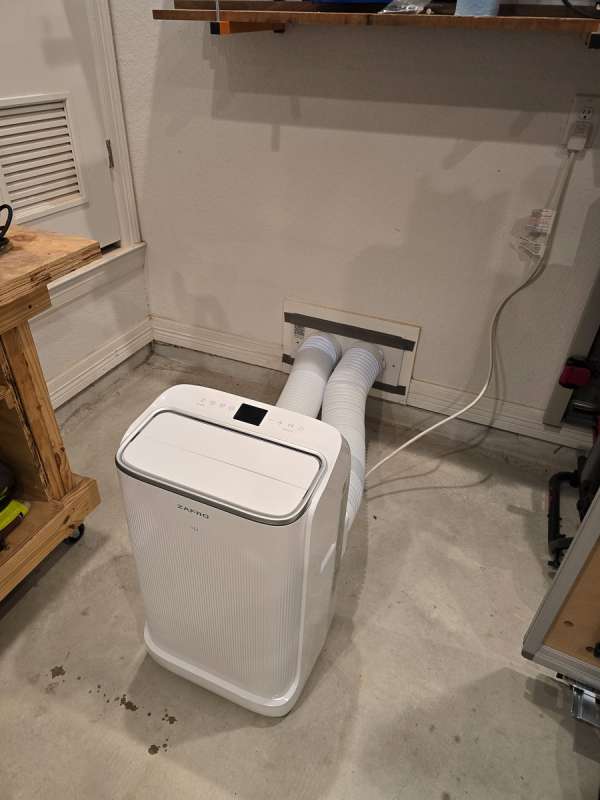
Here is a picture of the entire unit all set up and plugged in.
Performance
After hooking the unit up to the small ventilation window in my garage, I turned it on, set it to cooling, and adjusted the temperature to 64 degrees. I then left the garage to attend to other tasks inside the house. The temperature in my garage was 94 degrees. I came out about 20 minutes later, and the temperature had dropped about 3 degrees. I came out an hour later and found the unit had stopped and had no power. It had tripped the breaker in my garage. I am fairly certain it was because too much hot air was being recirculated into the unit by having both the exhaust hose and inlet hose trying to pull air through the 5-inch gap in the wall. Essentially, it lacked sufficient free-flowing air. I moved the unit to my garage door, as shown below. This is not optimal, as I have a huge gap. I turned the unit back on and let it run for another hour. It ran perfectly this time around. It was pumping out very cold air. After about three hours, I was able to lower the temperature in my garage by a total of 7 degrees. This may not seem like much, but realize this is a 3-car garage. The side walls and ceiling are not insulated. The small garage door also had a big open gap, as shown in the picture below. The temperature outside was also 98 degrees, with the sun shining directly on my garage doors.
Final thoughts
The Zafro 16,000 BTU portable AC is a very powerful unit. It can blow out some very cold air. I honestly believe that in a fully insulated room, this unit would perform exceptionally well. Given the chance to start cooling the room when the temperature outside was lower, and then maintaining the set temperature should not be an issue. Many of the bad reviews I have seen on Amazon were for the 8,000 BTU unit. That is not a very powerful unit, and I am sure it would struggle to cool larger rooms. I have seen other portable AC units for sale at Costco, but this unit outperforms them in BTU size and is reasonably priced. I think that if you’re looking for a portable AC to cool an insulated room and have a window that allows proper ventilation, this would be a great unit to own.
What I like about the Zafro 16000 BTU portable AC
- 16,000 BTU!!!!
- CEER 12.8 rating
- Tons of settings
- Controls on the unit, remote, and app
What needs to be improved?
- Possibly make the hoses a bit more flexible
Price: $549.00
Where to buy: Amazon
Source: The sample of this product was provided for free by Zafro. Zafro did not have a final say on the review and did not preview the review before it was published.
Check out these other portable AC unit reviews!
- TORRAS COOLiFY Air Personal Air Conditioner review – I could get used to this!
- Dreo Smart Air Conditioner review – Beat the summer heat with this smart AC!

HP 15.6" Business Laptop Computer with Microsoft 365 • 2026 Edition • Copilot AI • Intel 4-Core N100 CPU • 1.1TB Storage (1TB OneDrive + 128GB SSD) • Windows 11 • w/o Mouse
(as of March 3, 2026 12:44 GMT -06:00 - More infoProduct prices and availability are accurate as of the date/time indicated and are subject to change. Any price and availability information displayed on [relevant Amazon Site(s), as applicable] at the time of purchase will apply to the purchase of this product.)