REVIEW – I’ve reviewed and ridden a few E-bikes and I love seeing the different styles and functionality that different companies incorporate into their designs. Recently, the opportunity to review the CYCROWN Dremax E-bike came up and I jumped at the chance. The way that the battery is incorporated into the frame as well as the power ratio and overall build really piqued my interest. Dive in and let’s see how it has held up so far!
⬇︎ Jump to summary (pros/cons)
Price: $1399.00
Where to buy: CYCROWN (Save $50 with code: Gadgeteer50)
What is it?
The CYCROWN Dremax E-bike has a 48V 750W motor assist, top speed of 28 miles per hour, and a range of up to 65 miles.
What’s included?
- Dremax E-bike
- Charger
- Reflectors
- Bell
- Toolkit
- 2 Battery Keys
Tech specs
- Weight: 65.5 lbs / 29.8 kg
- Size (assembled): 74.8 x 27.5 x 49.2 in / 1900 x 700 x 1250 mm
- Range: 45-65 miles / 72-104 km
- Motor Power: 750W Peak
- Max Load: 330 lbs / 150 kg
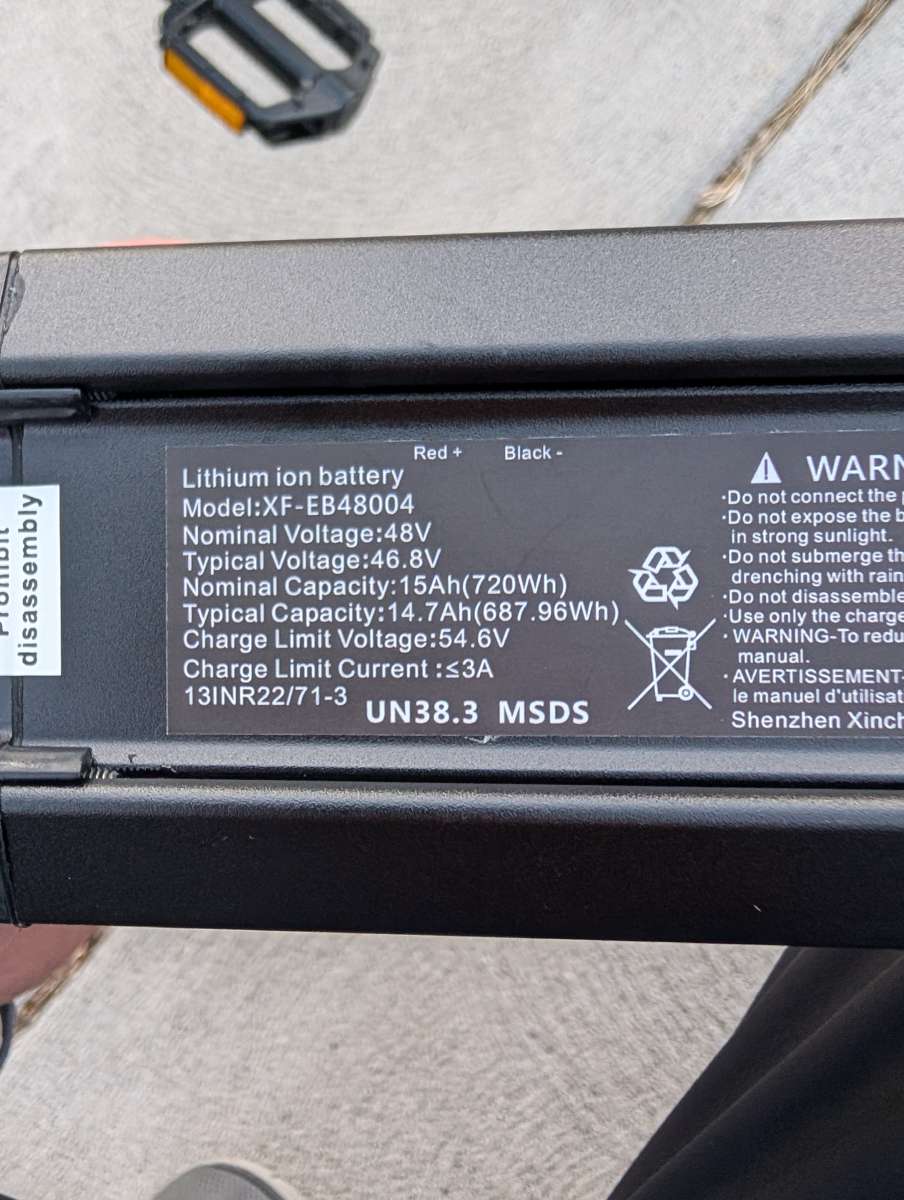
- Battery: 48V, 15 Ah
- Charger Output: 54.6 V, 3 A
- Charging Time: 5-6 hours
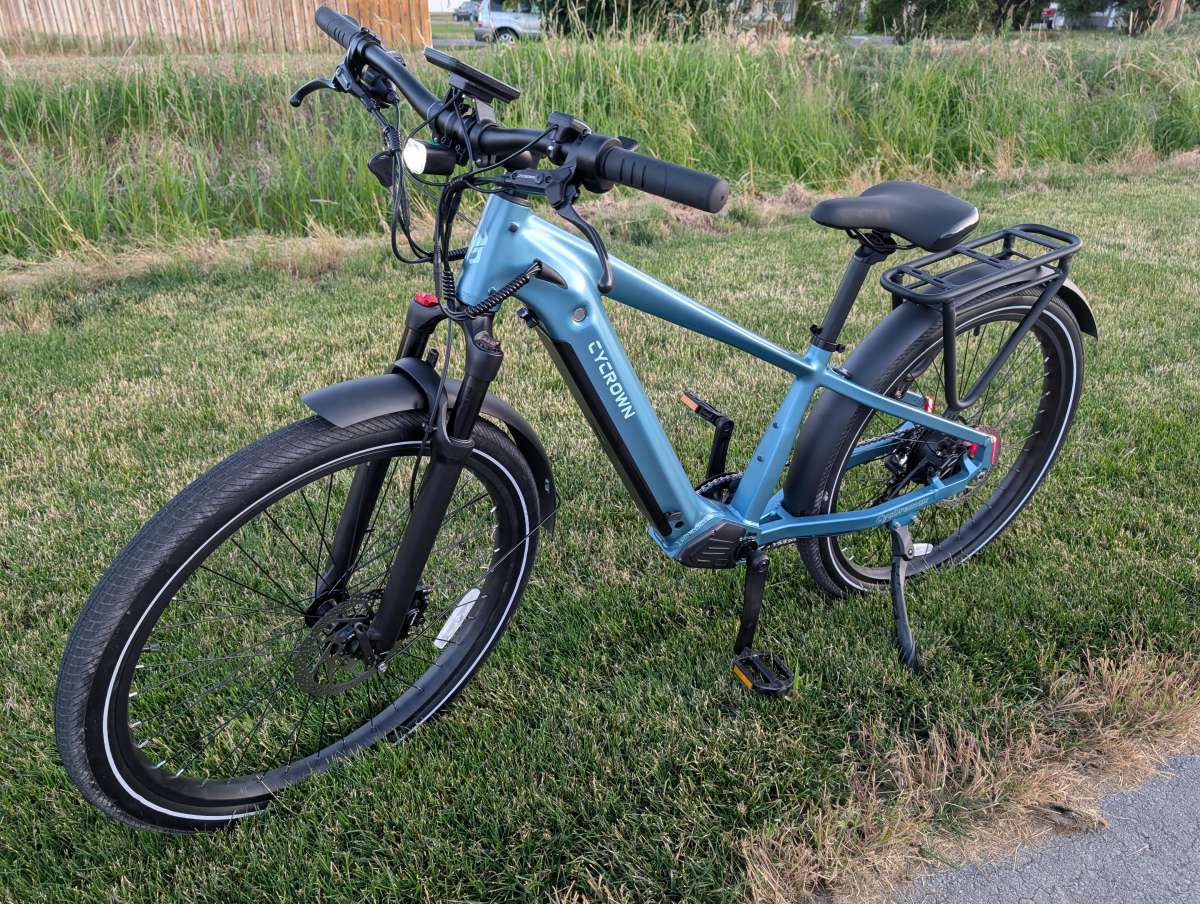
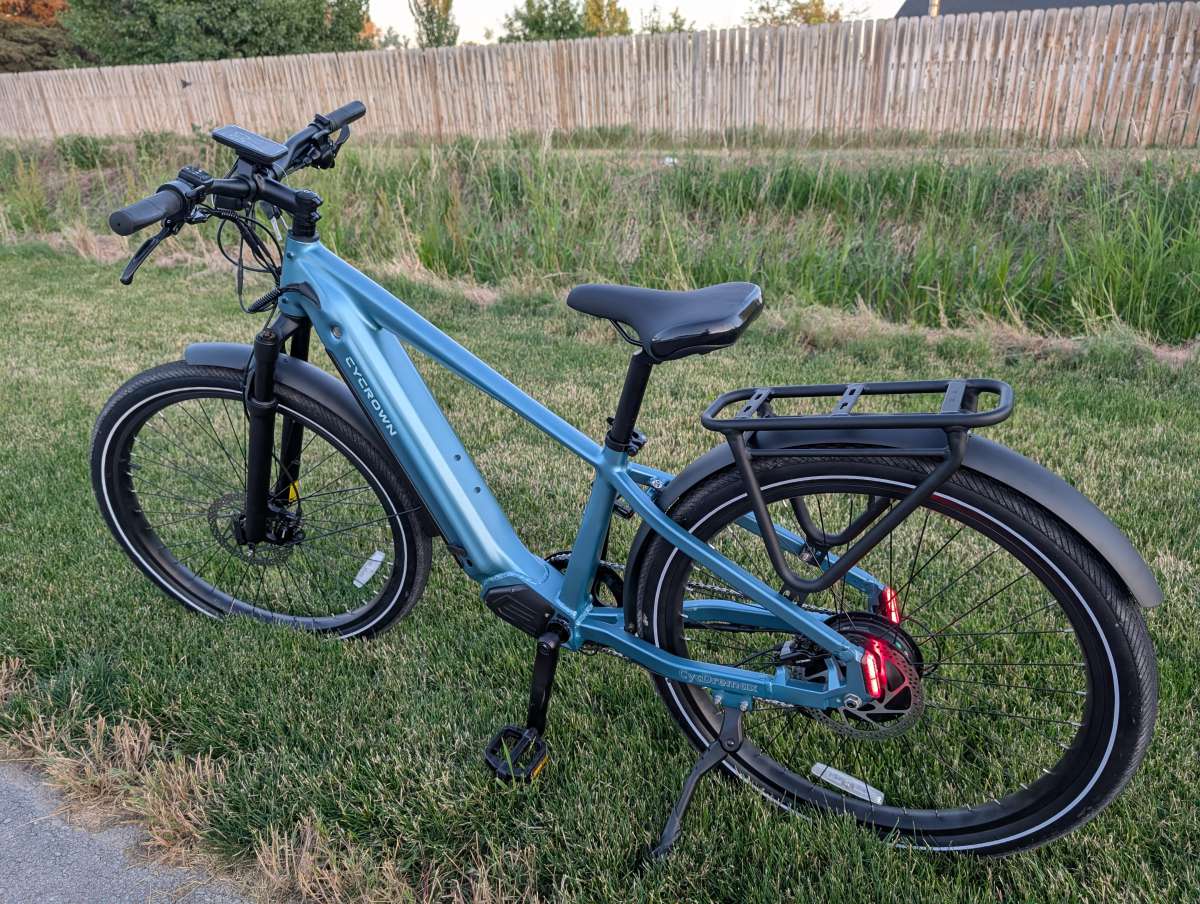
Design and features
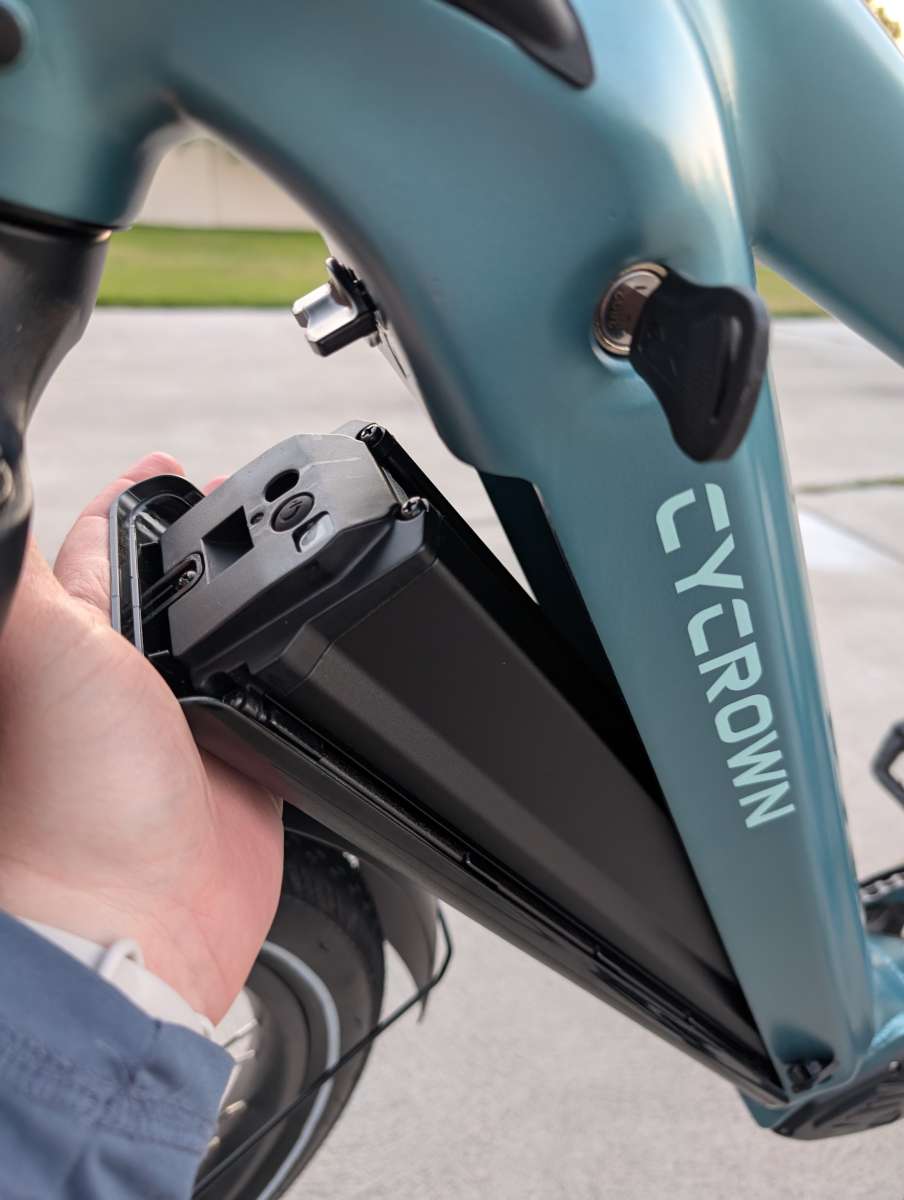
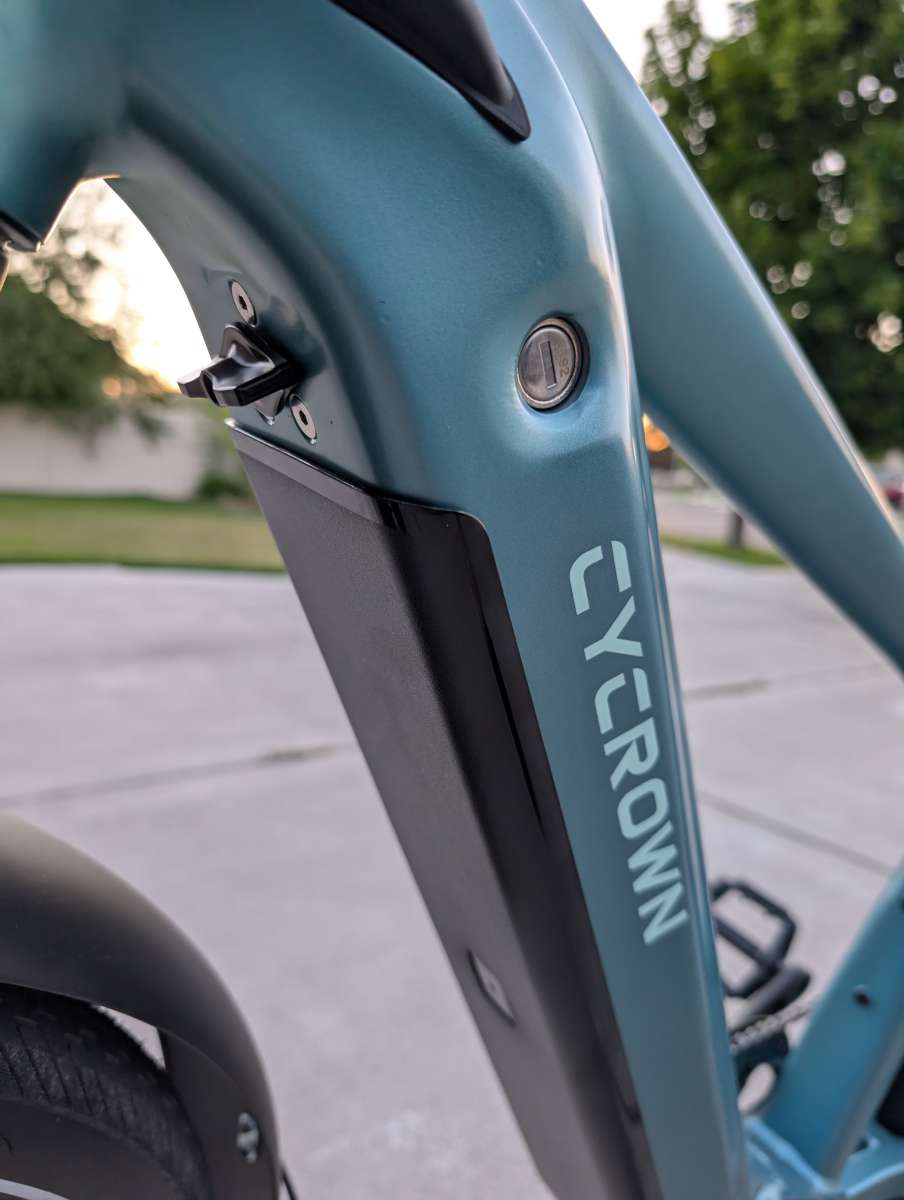
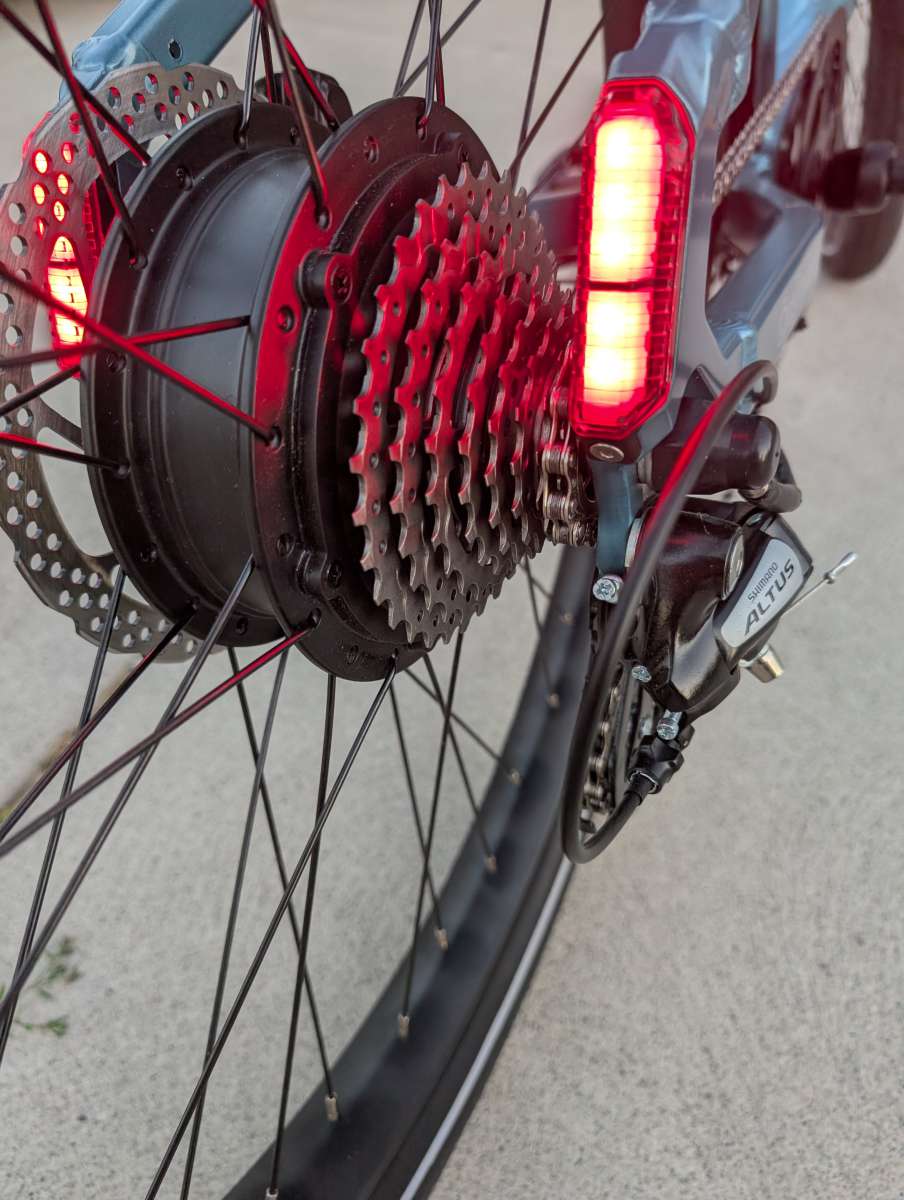
I really like the overall design of this E-bike. Ground-up and starting with the tires, they use 27.5×2.4″ Kenda wider tires, which are quite nice on gravel or looser materials. They use disc brakes as well, which I think are essential for larger and heavier bikes like this. The frame of the bike is well designed and incorporates the battery into the main post of the frame. The battery locks up into the bottom of the frame and has a manual locking mechanism in addition to a keyed lock to keep it secure.
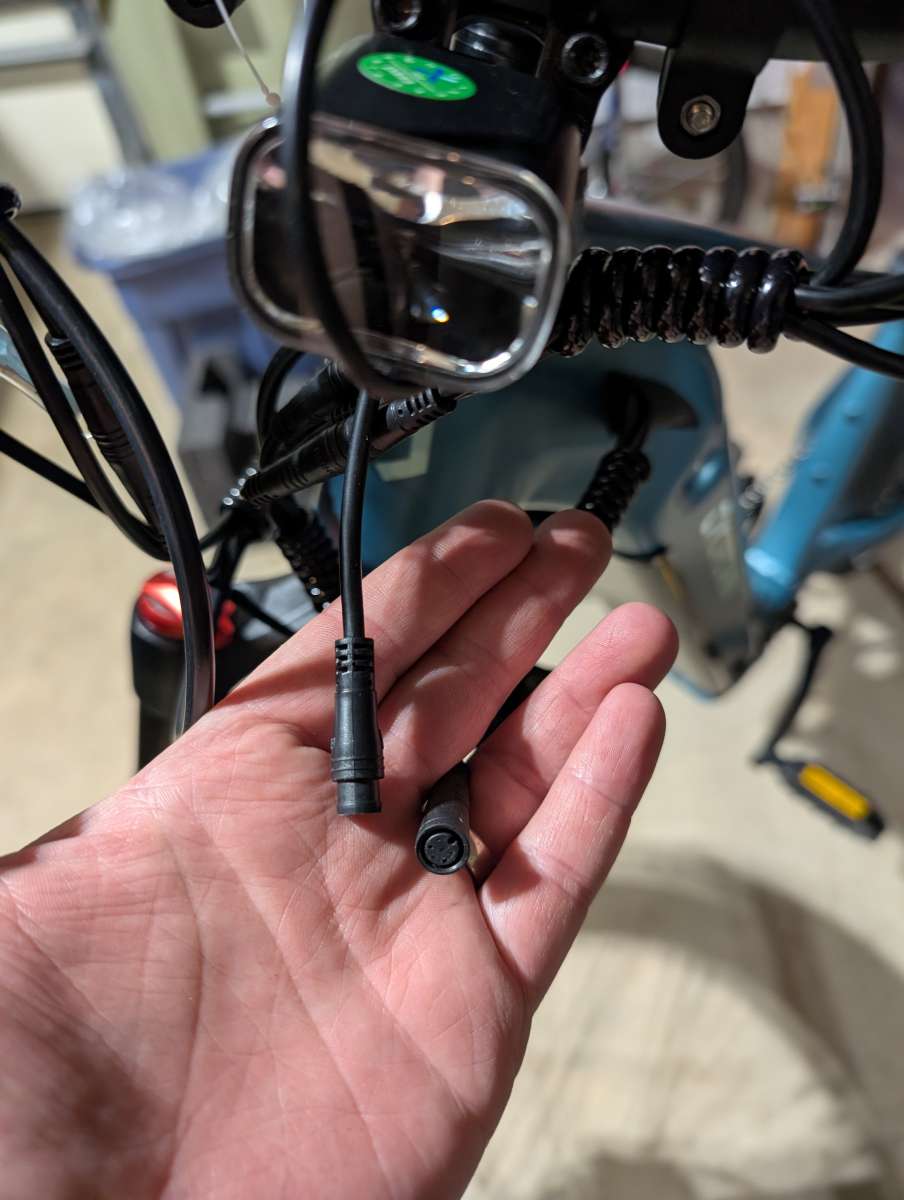
I’m impressed by the wiring of this bike. The cabling is wired well through the frame and is unobtrusive. Some E-bikes struggle with their cable management, but not CYCROWN.
The lights on this bike are nice and well integrated into the design. They’re not just an afterthought.
Assembly
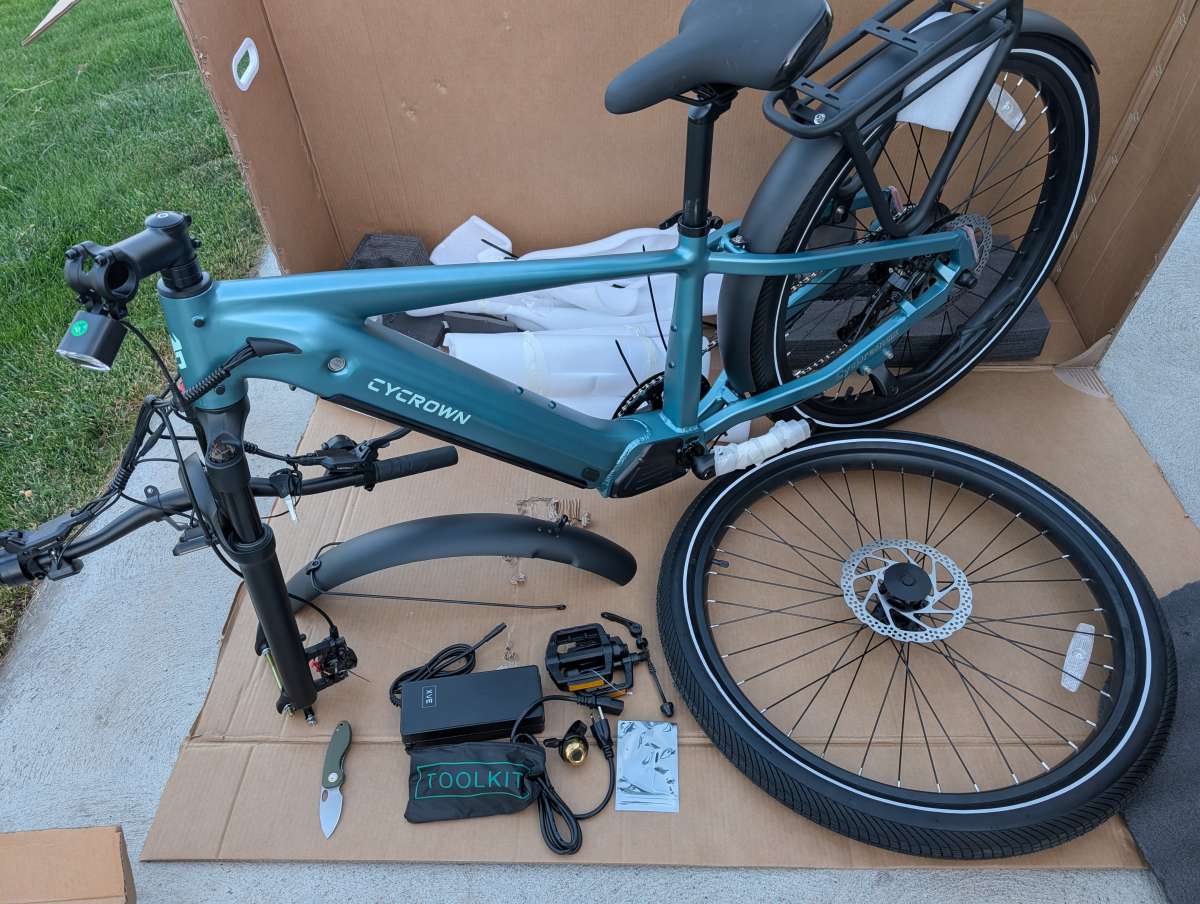
Out of the box, I have to admit that I struggled a little with where to start with assembly because I forgot where the assembly guide that they sent was. I’ve put together a few bikes in my day, so I was able to get everything together and was happy to see that I did everything right after the fact when I found the assembly guide. When in doubt, read the instructions!!!
Packing was well done and everything seemed well-protected.
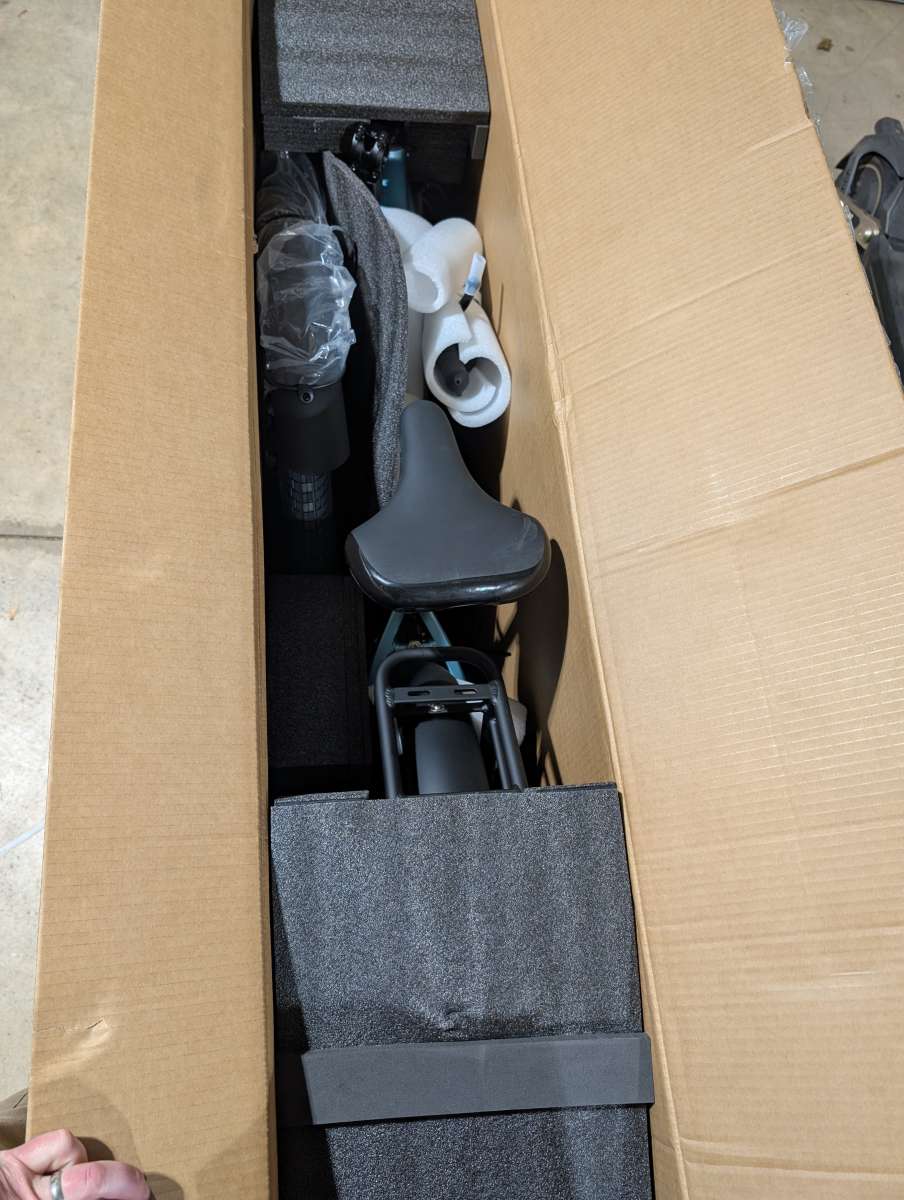
I forget who, but one of the other Gadgeteers opens up their boxes like this, which is really nice because it gives you a clean surface to build things on without messing up the finish or getting things dirty. Lots of zip ties and foam, so some wire cutters or pliers is recommended.
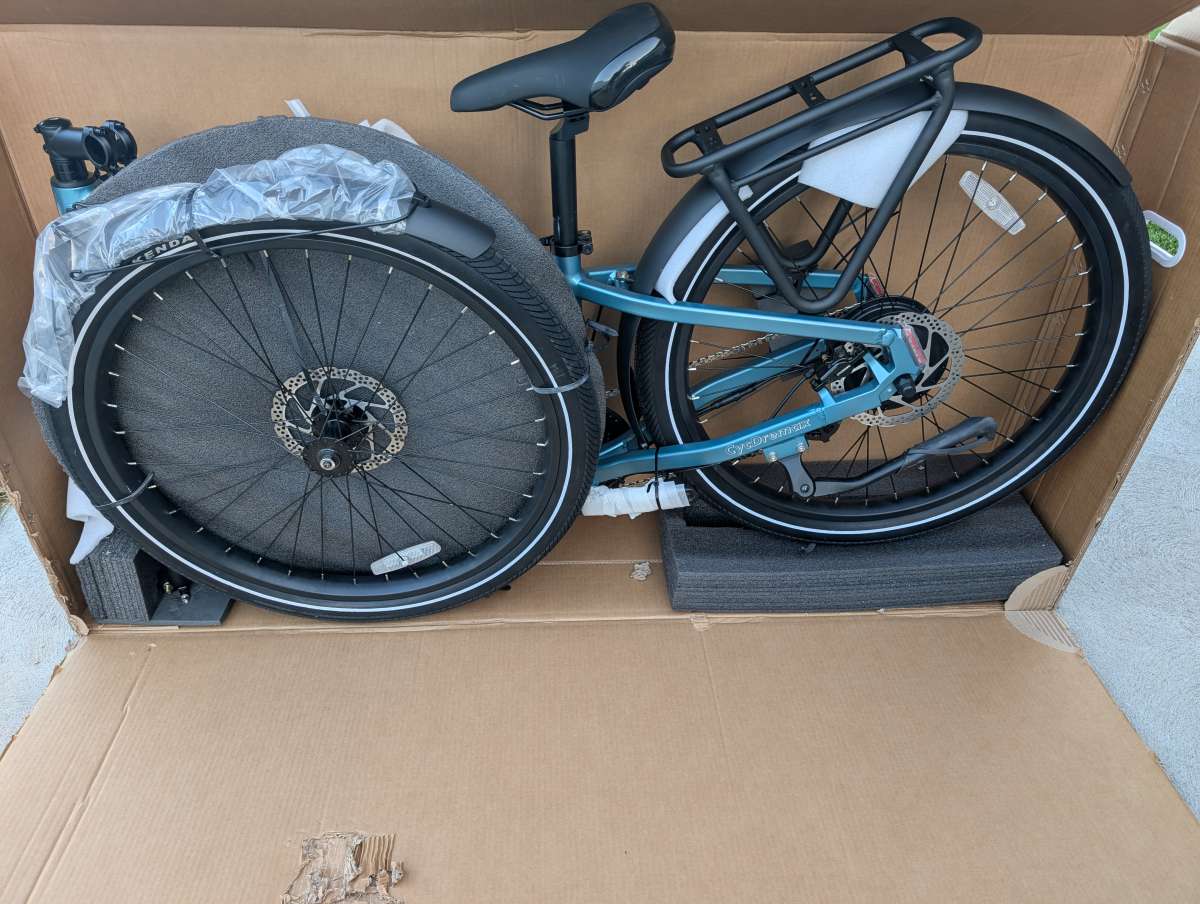
First course of action, get the handlebars on. Remove all four screws here, take this piece with the light off and place the handlebars centered here and put the screws back in. You can’t easily get the handlebars on just by loosening them up. Just take them all the way out.
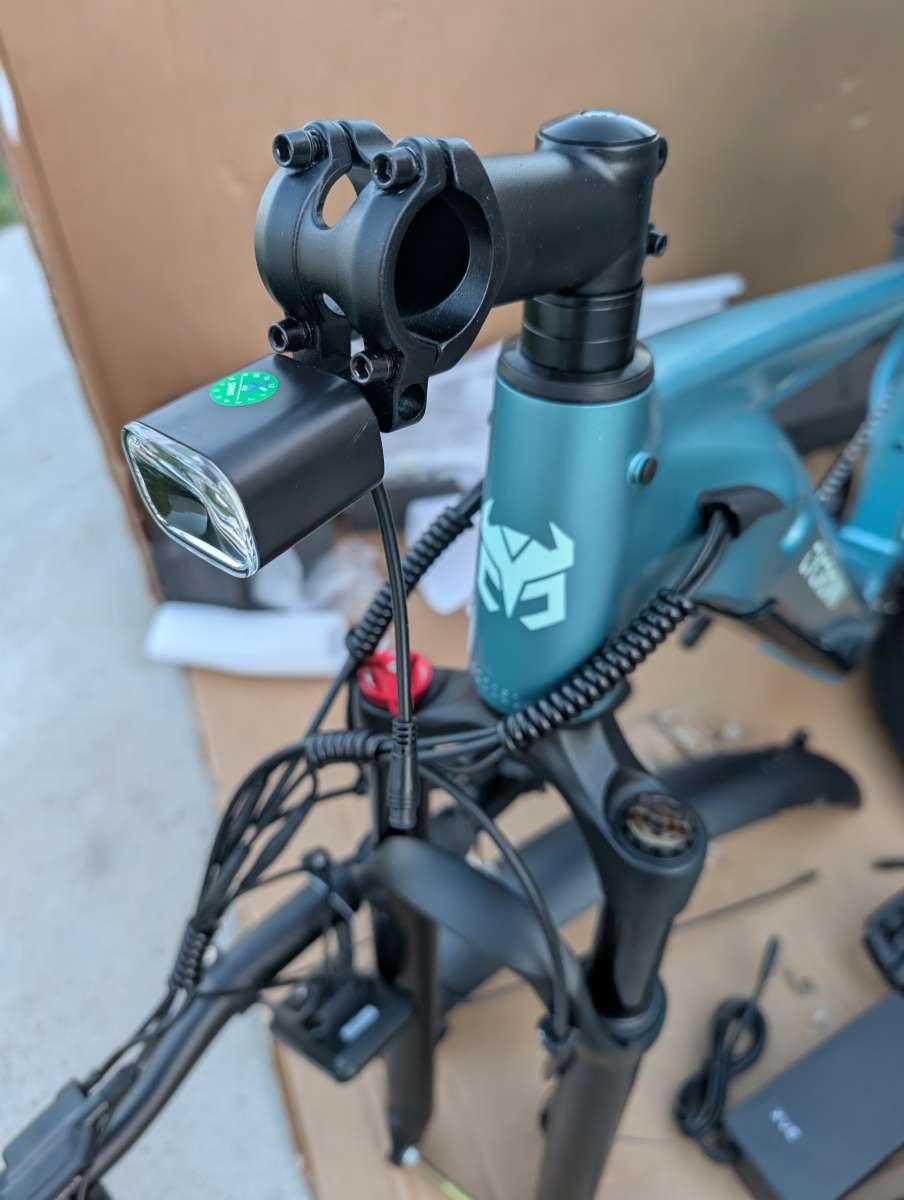
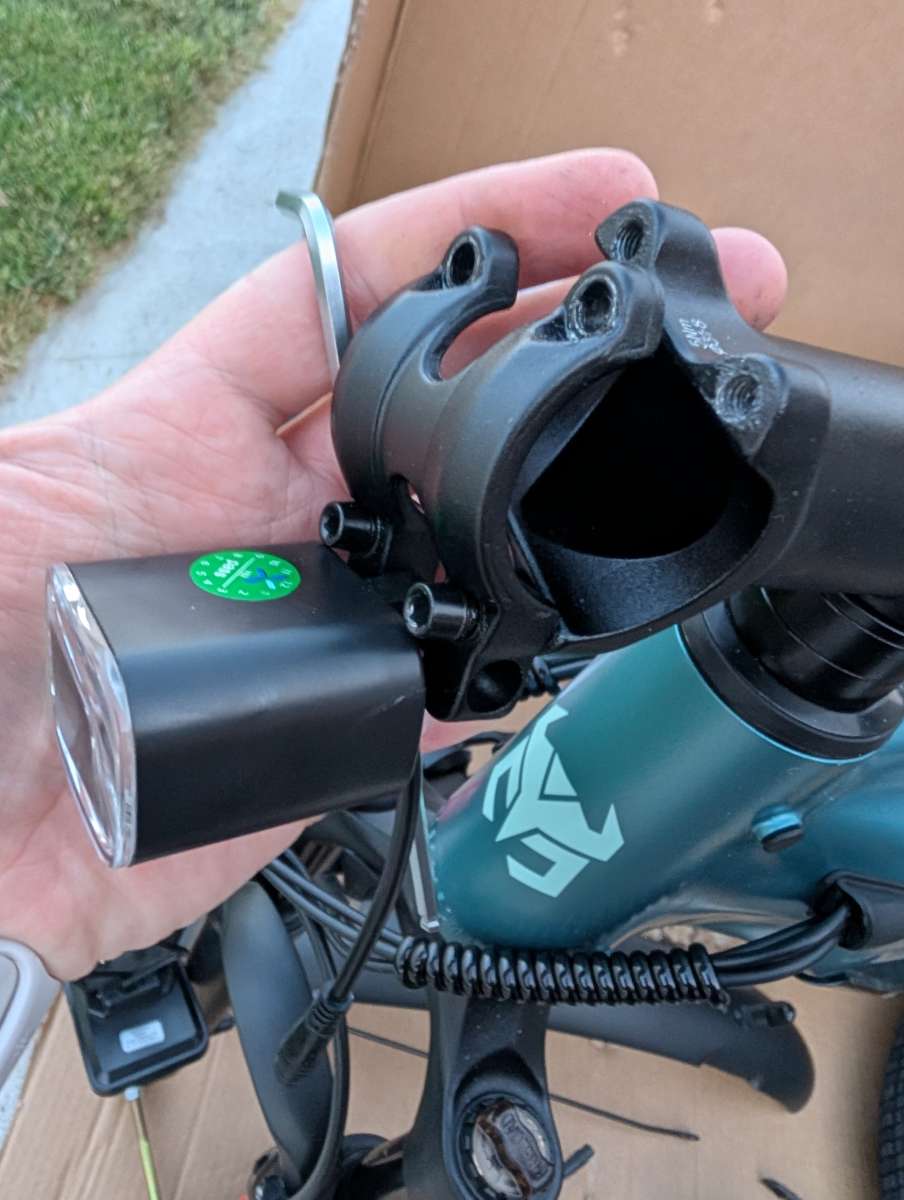
With the handlebars centered and back in place and the screws back in and tightened down, go ahead and connect the front light.
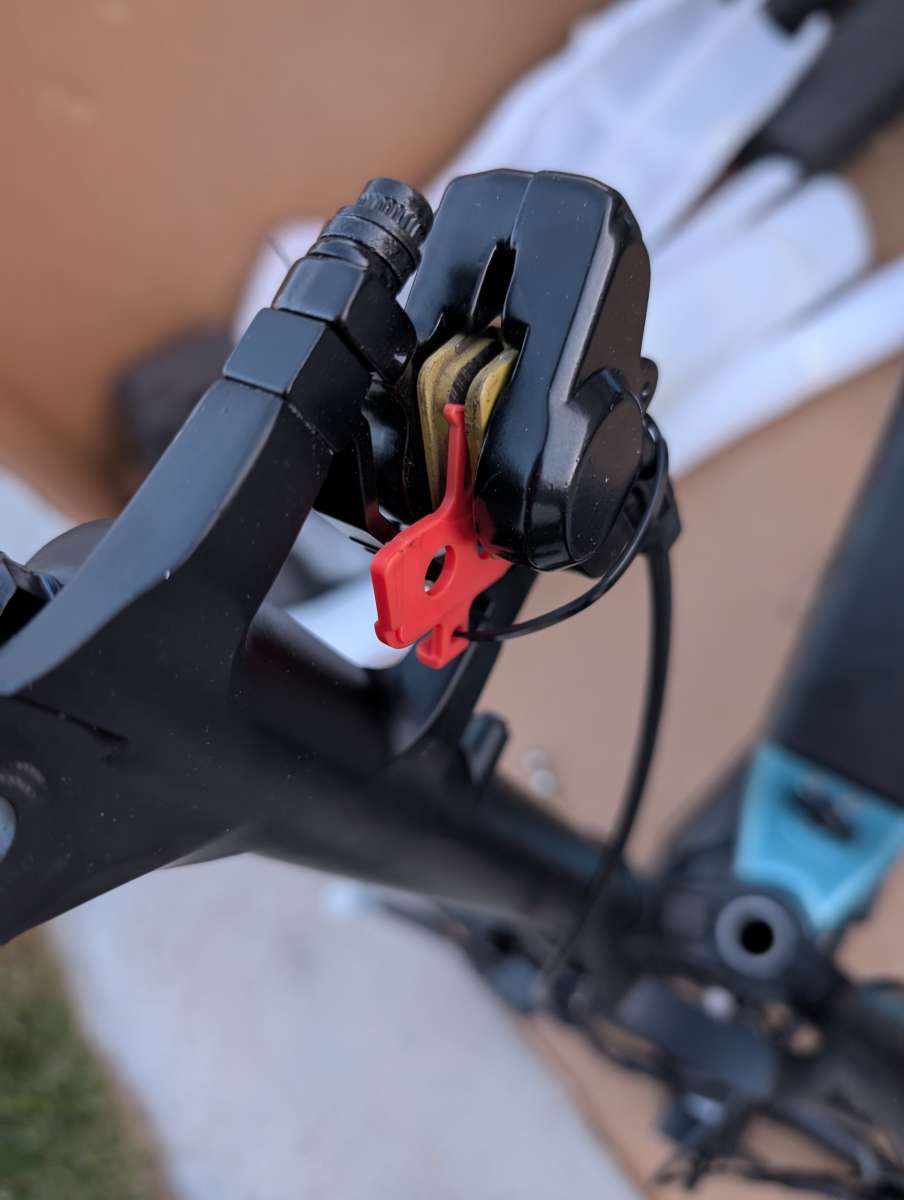
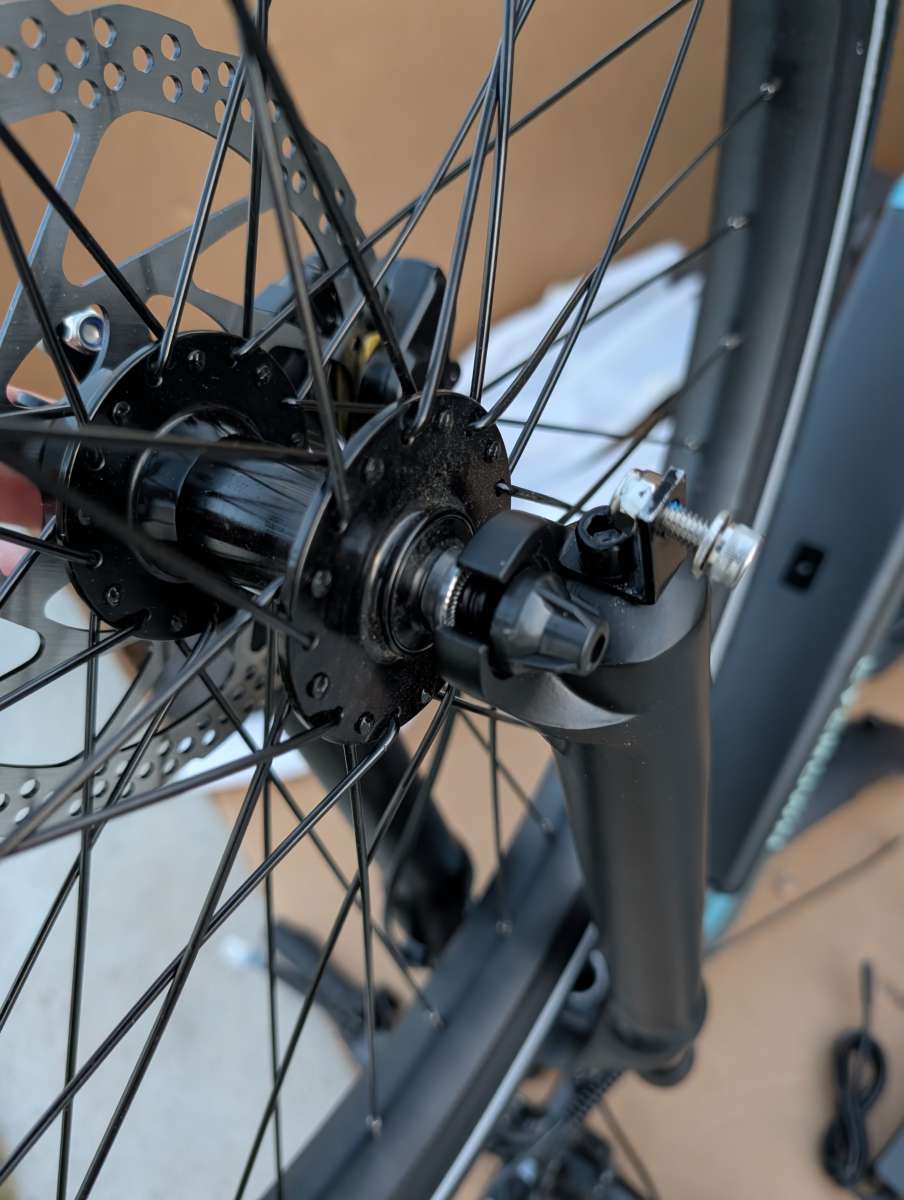
With the handlebars on and tightened down, flip the bike over and install the front tire. Make sure you remove the brake protector that is zip-tied in place first. The disc part of the brake on the tire will slot in place where this red protector (below) is. Also remove the front fork dropout.
Make sure you refer to the directions on all of these steps if you have questions. The front bar skewer has several springs and you need to make sure that they’re all in the correct spot for the quick release setup. If you’ve done these before it’s pretty straightforward, but when in doubt, read the instructions.
After the handlebars and front tire, the only thing I had to make any adjustments on was the fenders. The front fenders were pretty easy to install, but the back fender took a little more time because it was already installed at the factory, but was a little too tight out of the box. When I tried to ride the bike, it rubbed against the tire and got in the way. Once I figured out the cause, I just needed to loosen a couple of the fasteners, lift the fender and rear platform, and then tighten things back down again.
Final installation step was charging the bike up. The factory charge was almost full still, but I like to top it off. The charging port is covered by a small rubber gasket on the main tube next to the pedals.
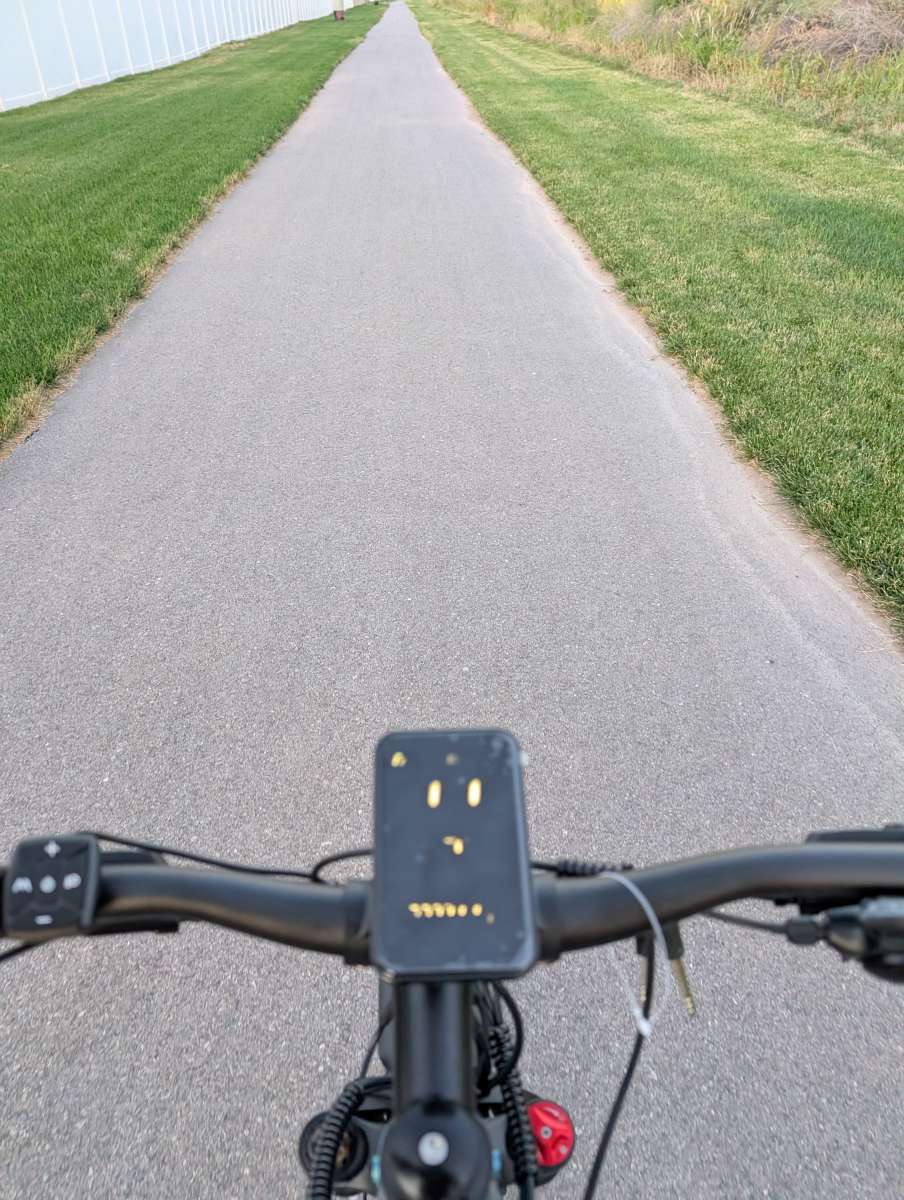
Performance
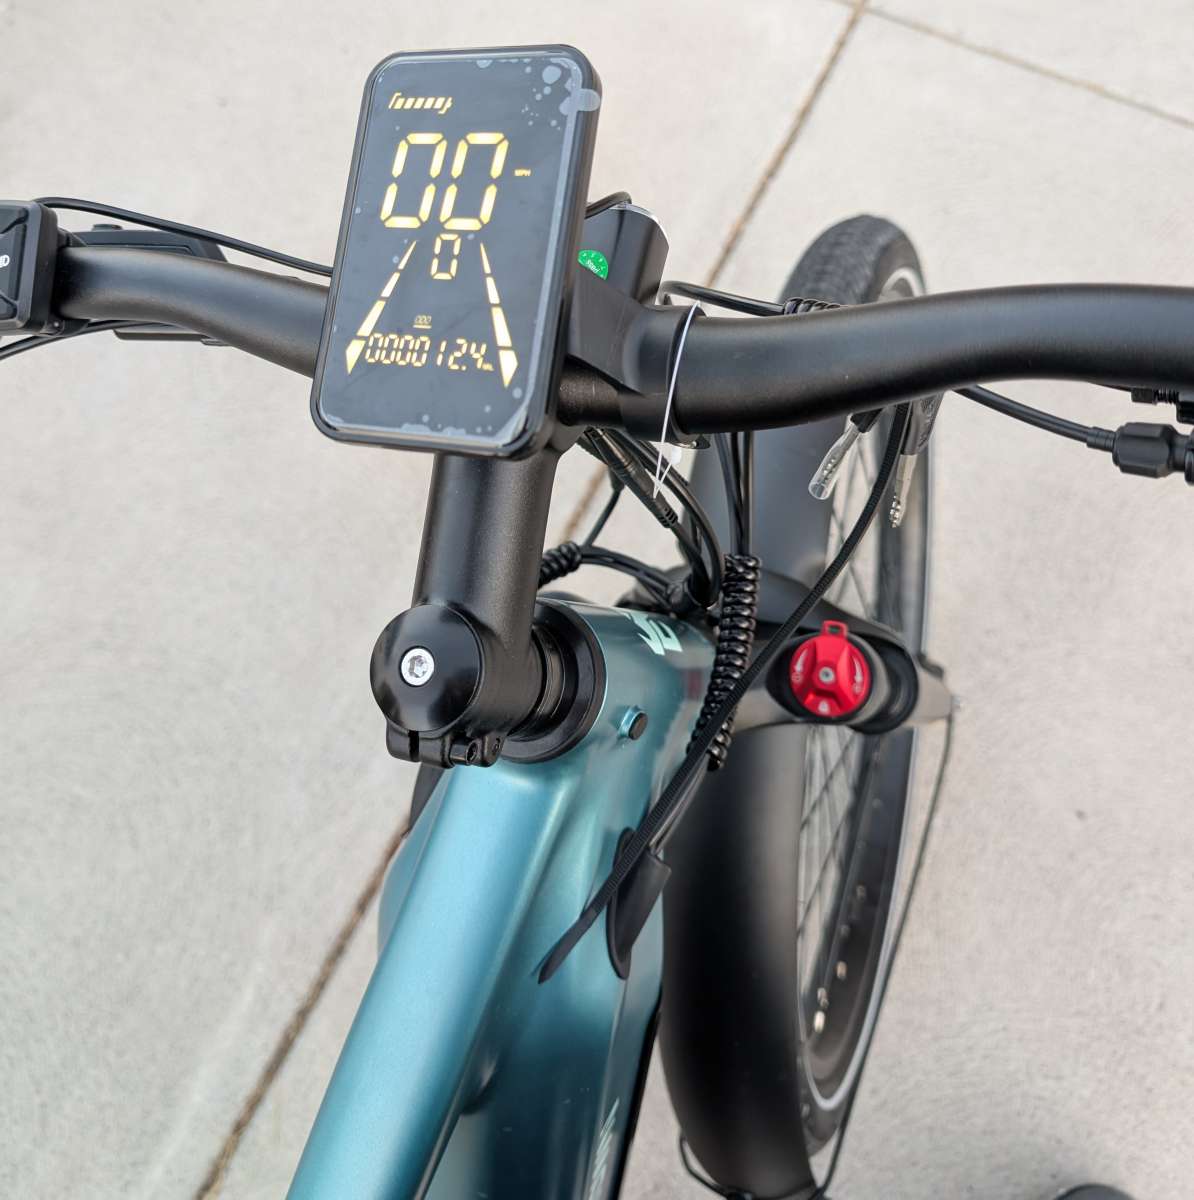
The biggest thing to realize about this E-bike is that there are two different pedal assist modes you can choose from, the Cadence Sensor and the Torque Sensor. The Cadence Sensor pedal assist mode shows up as PAS on the screen when it’s enabled. What it does is automatically assist at the highest speed mode automatically when you pedal the bike. I can understand how that would be beneficial for long straight distances or commutes, but it’s kind of annoying to me anywhere else. The Torque Sensor pedal assist mode is fantastic. It assists you more granularly and as you exert more effort it assists more. The assist levels are ranked from zero to five, zero being no assist and 5 the highest level with a top speed of 28 mph.
To shift between the two sensor pedal assist modes, you need to press the M button down three times quickly.
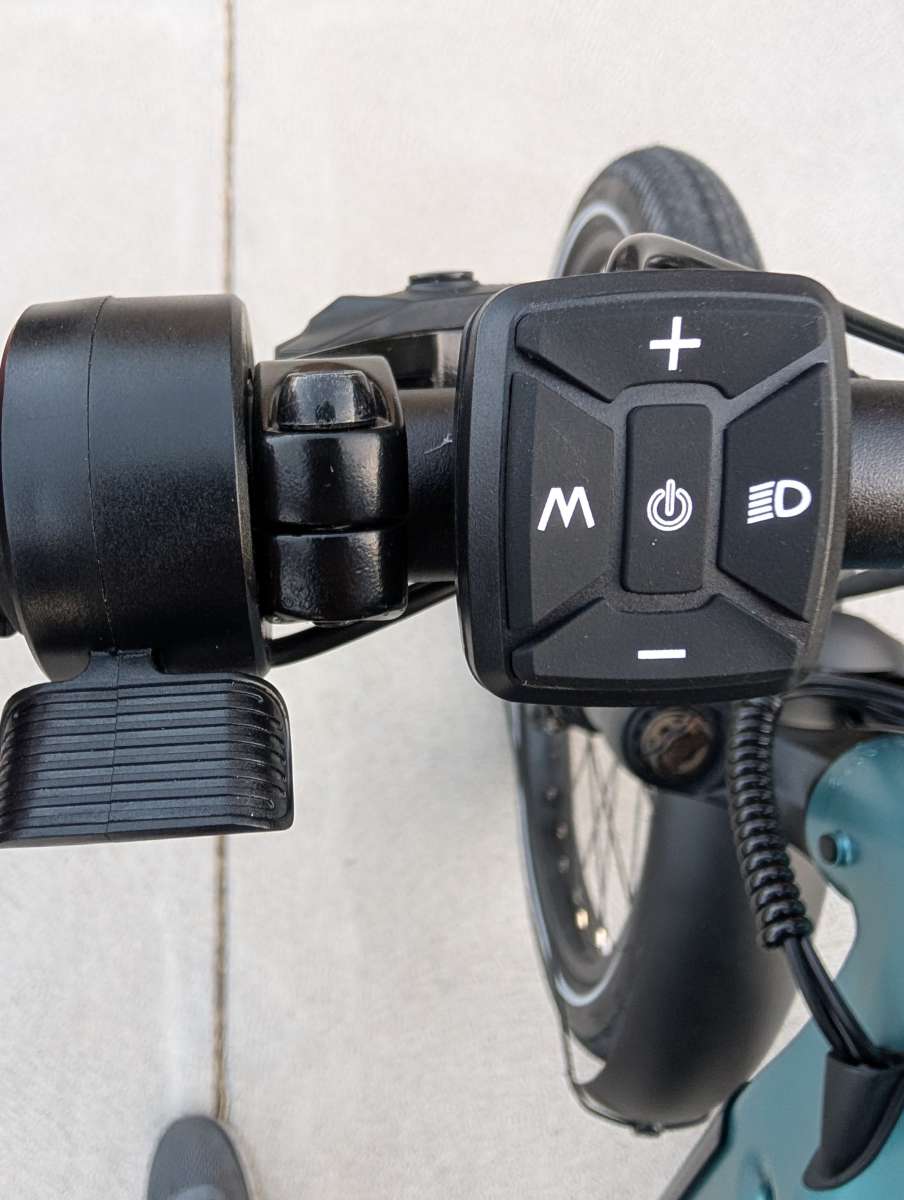
Taking pictures of LCD screens is kind of a pain due to their refresh rate, so my apologies. It looks much better than this.
Final thoughts
I really like the look and feel of the CYCROWN Dremax E-bike. Once I activated the Torque Sensor pedal assist, I was impressed by how responsive it was to the effort I was exerting. The bike is very comfortable to ride and handled both gravel and pavement very well. Cable management on the bike is excellent and the whole package is very nice. I definitely recommend this E-bike.
What I like about the CYCROWN Dremax E-bike
- The Torque Sensor pedal assist is fantastic
- Sleek design with well managed cables
- Placement and protection of the battery
- Very comfortable ride. Adjustable suspension and a comfy seat
What needs to be improved?
- Make it easier to switch between Torque and Cadence sensor pedal assist modes
Price: $1399.00
Where to buy: CYCROWN (Save $50 with code: Gadgeteer50)
Source: The sample of this product was provided for free by CYCROWN. CYCROWN did not have a final say on the review and did not preview the review before it was published.
Check out these other ebike reviews!
- TST R002-2025 eBike review – a fun little moped for adults and teens alike
- Engwe LE 20 Cargo eBike review – ride with cargo all day, everyday!

amzluv Bike Phone Holder Mount, Secure Handlebar Phone Mount Holder for Bike and Motorcycle, Suitable for iPhone and 4.5-6.8" Smartphones, Black
(as of March 31, 2026 22:48 GMT -05:00 - More infoProduct prices and availability are accurate as of the date/time indicated and are subject to change. Any price and availability information displayed on [relevant Amazon Site(s), as applicable] at the time of purchase will apply to the purchase of this product.)
Gadgeteer Comment Policy - Please read before commenting
I learned after my first e-bike assembly to just flap down the front and pull it out onto the cardboard. Makes for a clean workspace, if (like me) you’re having to assemble it in your entry hall because you can’t move the box too far, you don’t have to worry about scaring your new flooring!
I like the idea of the two sensor modes. I have discovered some bikes give the result of Torque sensor if I’m in a lower gear, and Cadence sensor in higher gears. I discovered this by accident with a bike I reviewed last year, and I like the difference! I was popping up into a higher assist level, rather than the bike sensing I was exerting more and giving more assistance.
It’s easy to change between (usually around 4th/5th gear) while riding, but can be irritating when someone pulls out in front of you from their driveway right as you’re having to downshift for a hill!
Love the rear light placement on this guy! I’m so tickled makers are moving away from all the exposed wiring and the add-on look of external displays. My Himiway with the screen in the headstock is still the sleekest one I’ve seen.