REVIEW – EM-Smart has recently announced their newest laser engraver, the EM-Smart Dual Desktop Laser Engraver. I’m always interested in reviewing lasers, but much more than that, I’m always interested in reviewing items from a manufacturer that is new to me.
⬇︎ Jump to summary (pros/cons)
Price: $3499.00
Where to buy: EM-Smart
What is it?
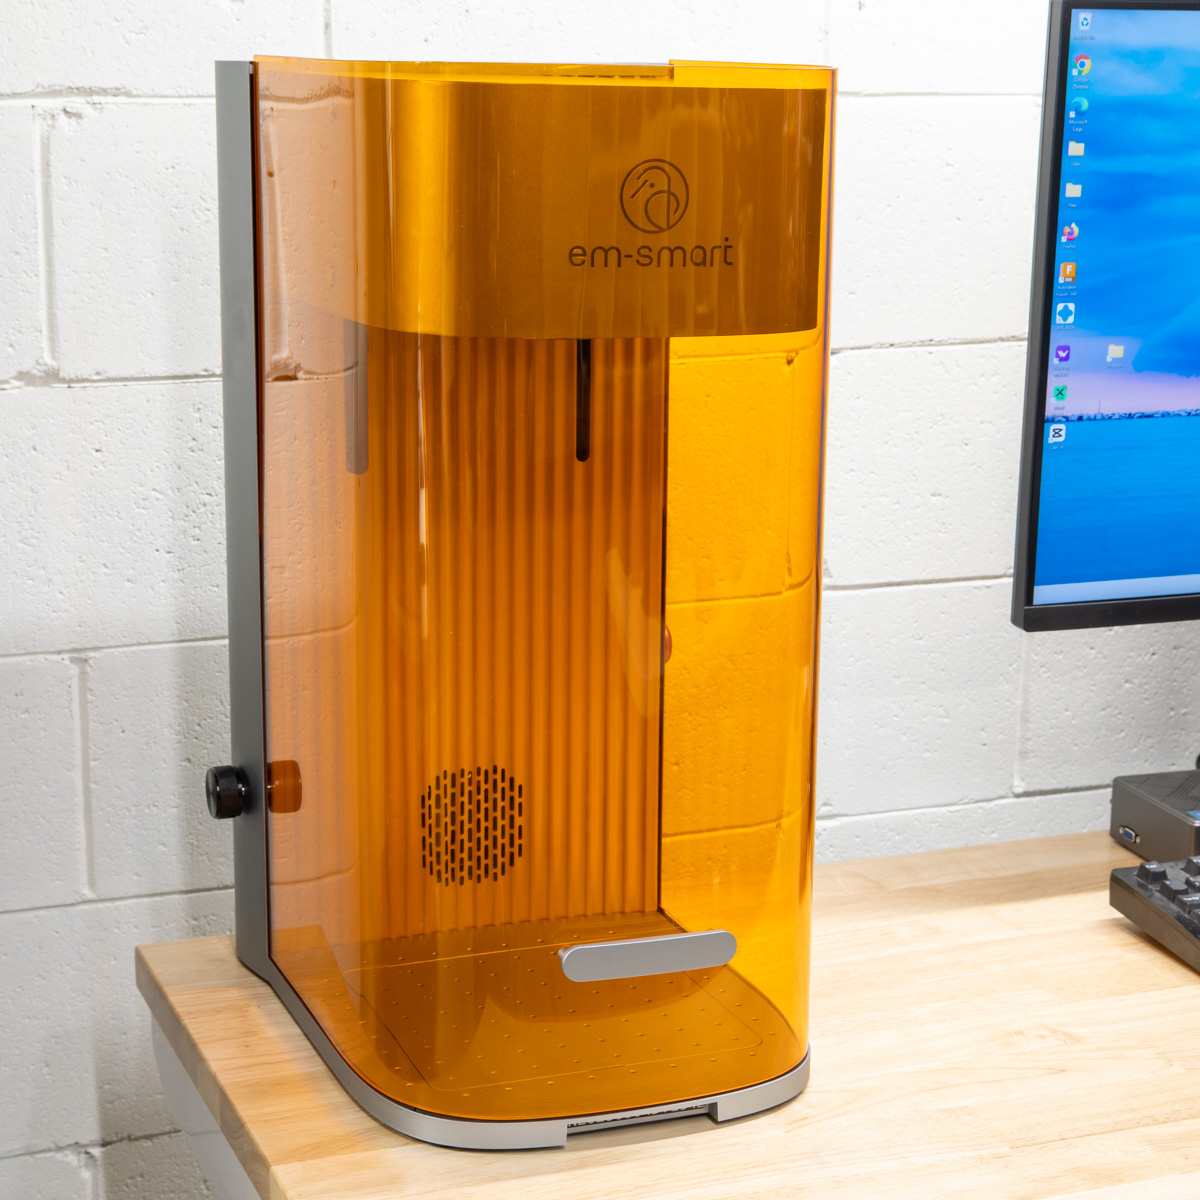
The EM-Smart Dual is an enclosed desktop laser engraver that features both a 20W fiber laser source and a 20W diode laser source.
What’s included?
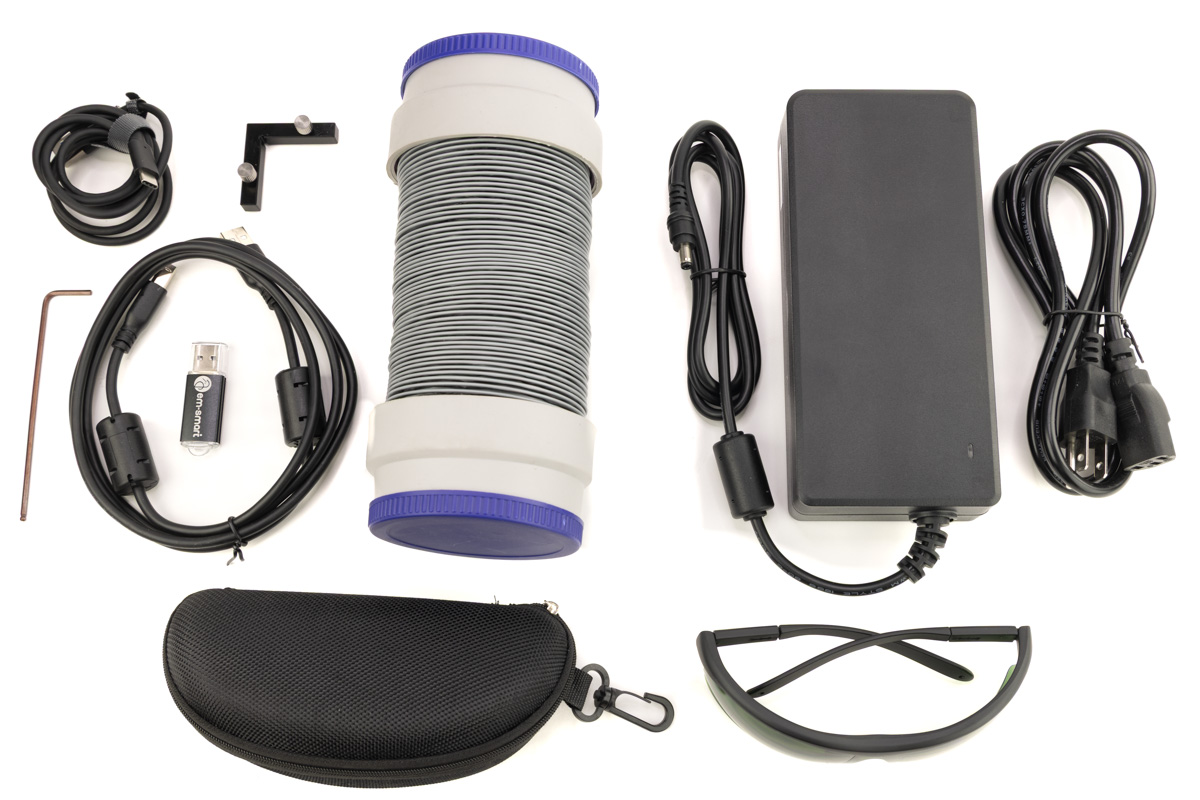
- EM-Smart Dual
- Power Adapter
- USB-B Cable
- USB-C Cable
- Quick Start Guide
- User Manual
- Exhaust Hose
- USB-Drive
- Hex Wrench
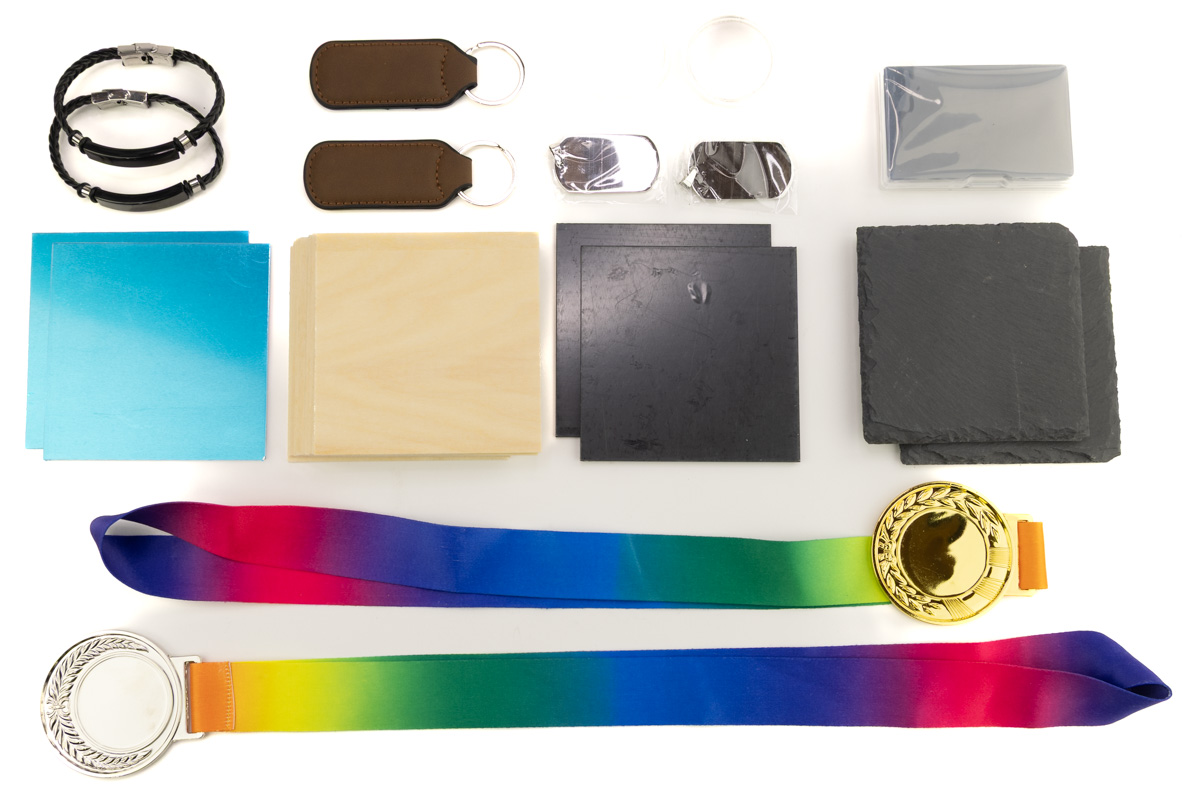
- Sample Material Kit
- Alignment “L” bracket
- Safety Glasses
Tech specs
Laser: 20W fiber, 20W diode
Work Area: 230mm x 230mm, max height, 150mm
Max Speed: 10,000 mm/s
Enclosure: Yes
Camera: 4k
Software: Lightburn & EZCAD
Rotary: Optional
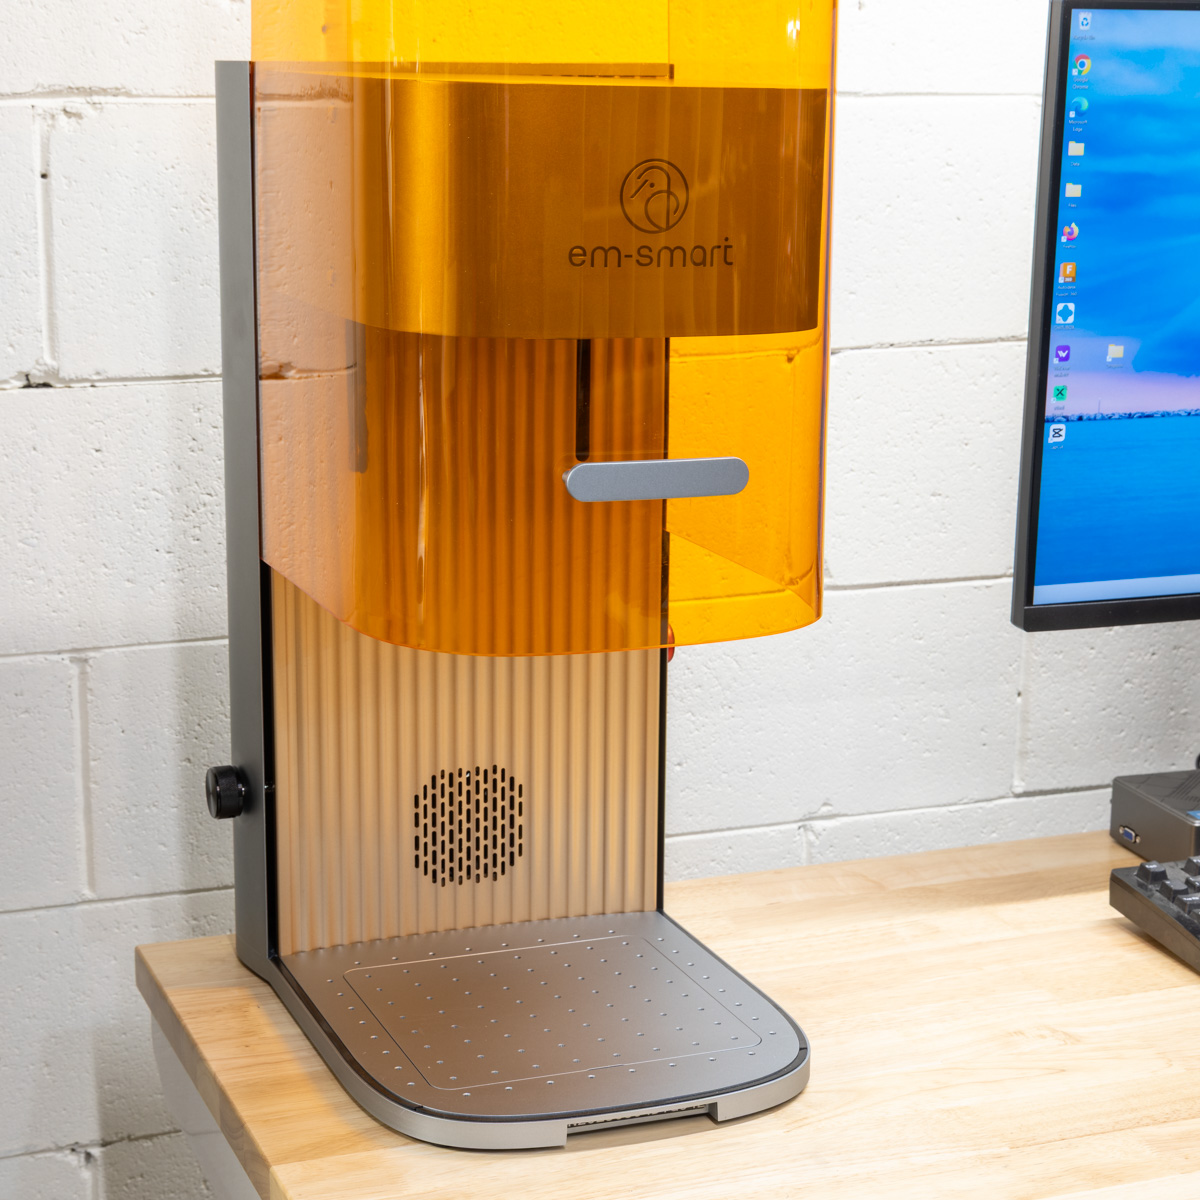
Design and features
The EM-Smart Dual arrived well packaged in thick foam protection. The machine is an attractive and sleek design that will fit on just about any desktop. There is no assembly to perform, just connect the exhaust hose, remove the lens cover, plug in the power and USB cables and you’re ready to go.
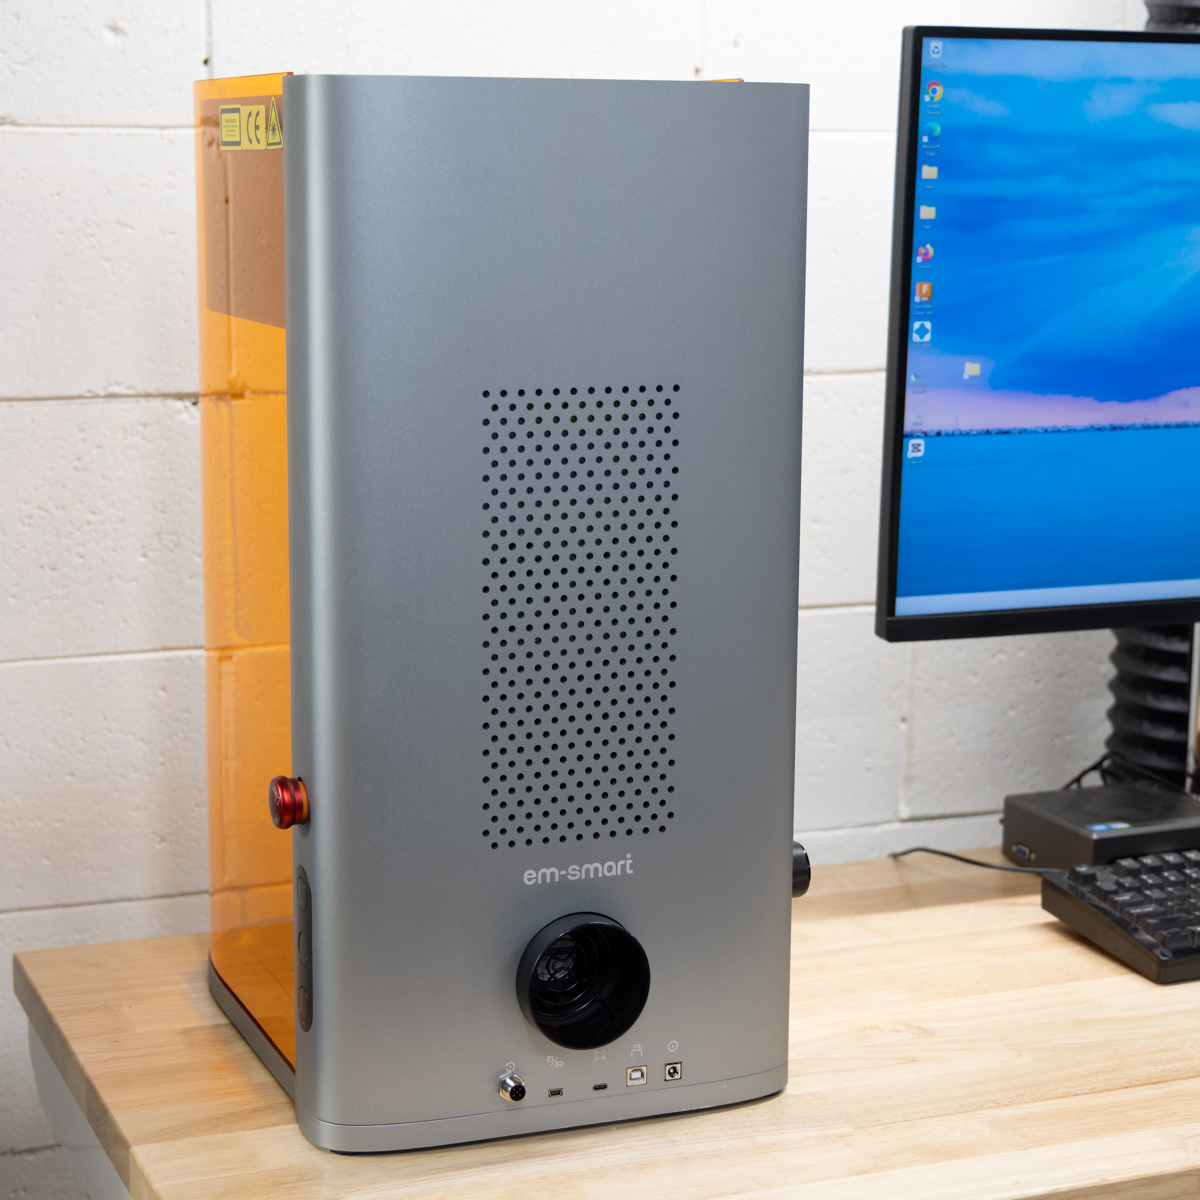
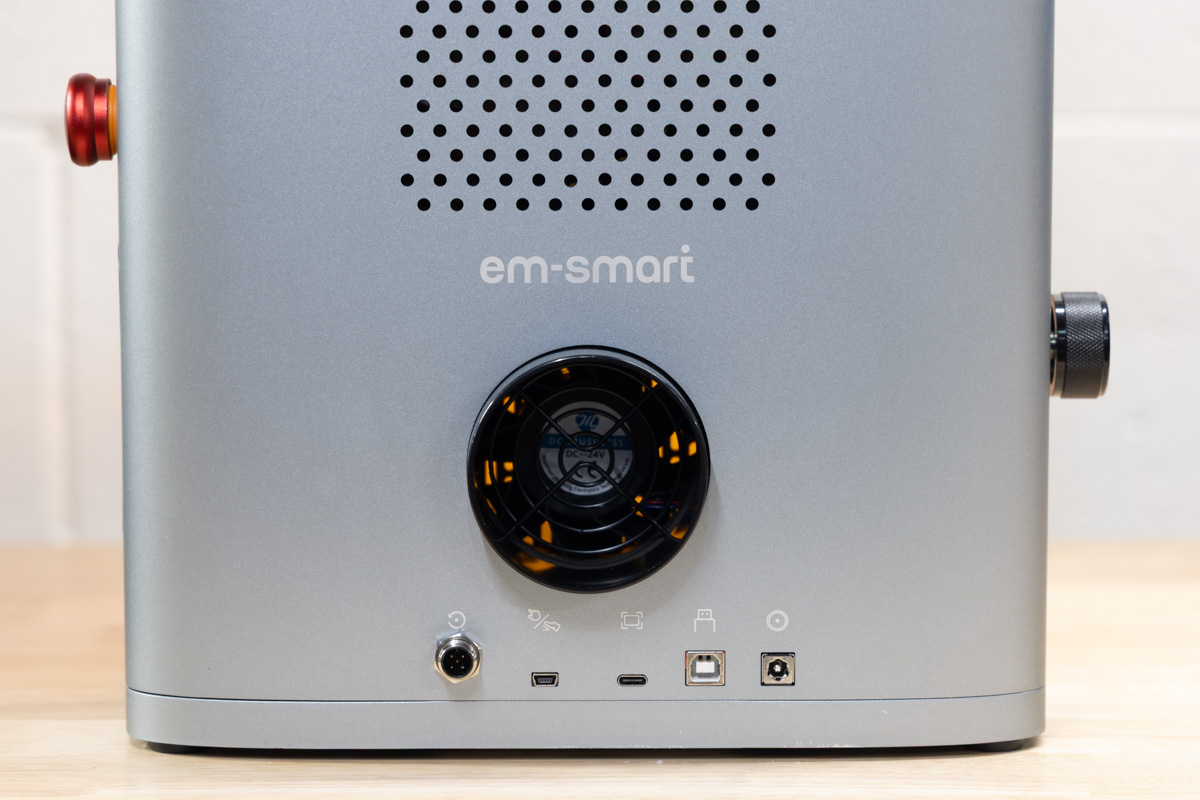
The left side of the machine has a manual focus knob and the right side of the machine has up/down focus buttons, a power button, and an emergency stop switch.

I followed the quick-start guide to connect the EM-Smart Dual to the Lightburn software. I did have some problems at first due to the released software from Lightburn being an older version, but after messaging EM-Smart, I was able to get it working with the version they included on the USB flash drive and some slight adjustments to the settings.
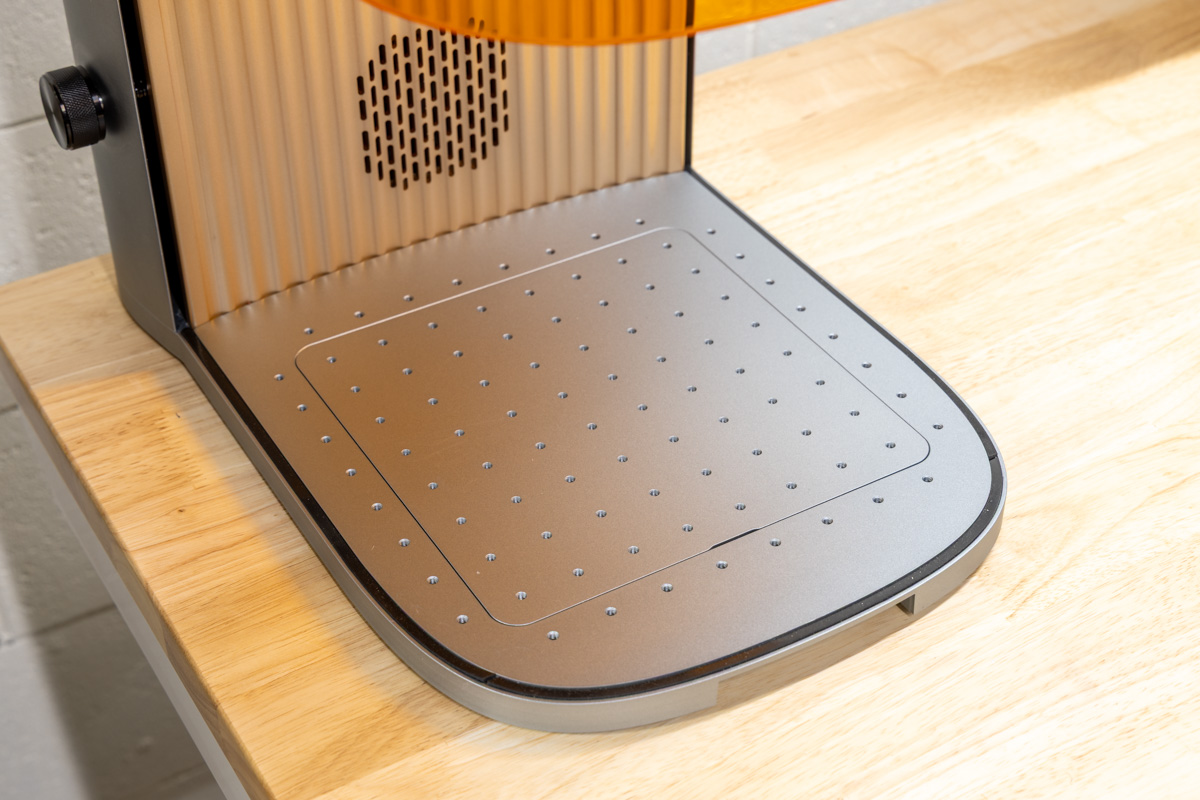
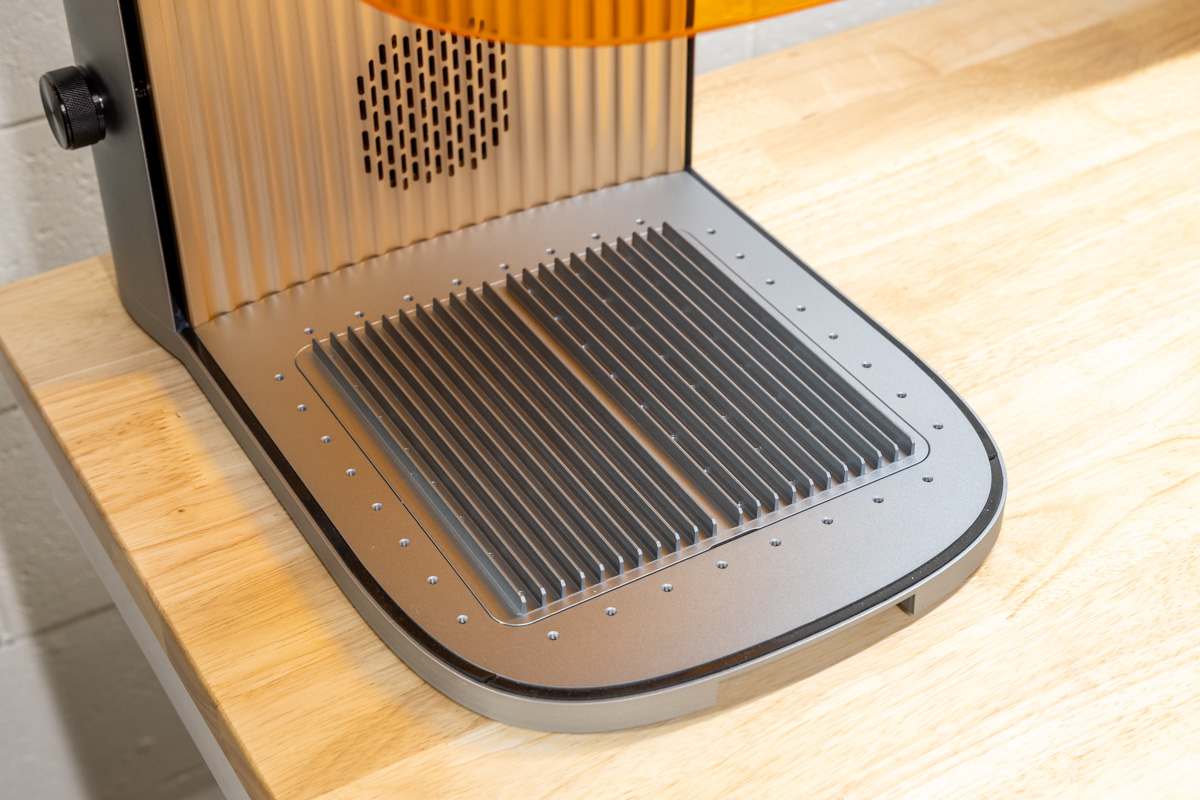
The EM-Smart Dual has a laser safe enclosure that raises and lowers on a spring loaded rail. The enclosure opens 10.4″ (265mm) for easy access to the working area. The base plate features M4 threaded holes spaced at 25mm for securing items with jigs (fixtures) or the included “L” bracket. The base plate is also dual use, it has a cutting surface (raised venting) on one side for cutting, and flat on the other.
I like the removable base plate. My other fiber laser does not have this feature. The removable base plate makes it much easier to create fixtures that self-locate in the hole for the base plate. Being able to remove the base plate also means you can place items under the EM-Smart Dual for engraving. The nearest I can tell, it can focus up to 1″ (25mm) below the machine (table surface). The dual-use base plate was a welcome feature.
One of the reasons I chose this review was for the Lightburn software experience. I haven’t used Lightburn much, just a little on one of my friends’ lasers. I really wanted to compare the experience to other proprietary software that I have used on other lasers. I thought this would be a great insight as to how a first-time laser user would experience the machine.
Now it was time to use the laser to create something. I’ve been used to other lasers that have proprietary software with built-in presets for various materials. The EM-Smart Dual uses the 3rd party software called Lightburn, so you may be on your own for figuring out what settings to use. The EM-Smart website does have settings for some of their other lasers, but as of this review, none for the EM-Smart Dual yet. There are a few articles in their blog section of the website for the EM-Smart Dual. This is perhaps the biggest hurdle for a first-time laser user, it’s going to involve a lot of trial and error to figure out settings.
When I placed the metal business card on the base plate to set the focus, I noticed right away that the red laser focus dots were much easier to see than another fiber laser that I have. I do wish they would implement some form of crosshair focusing system, as it can be hard to see when the dots are aligned properly with my bad close-up vision.
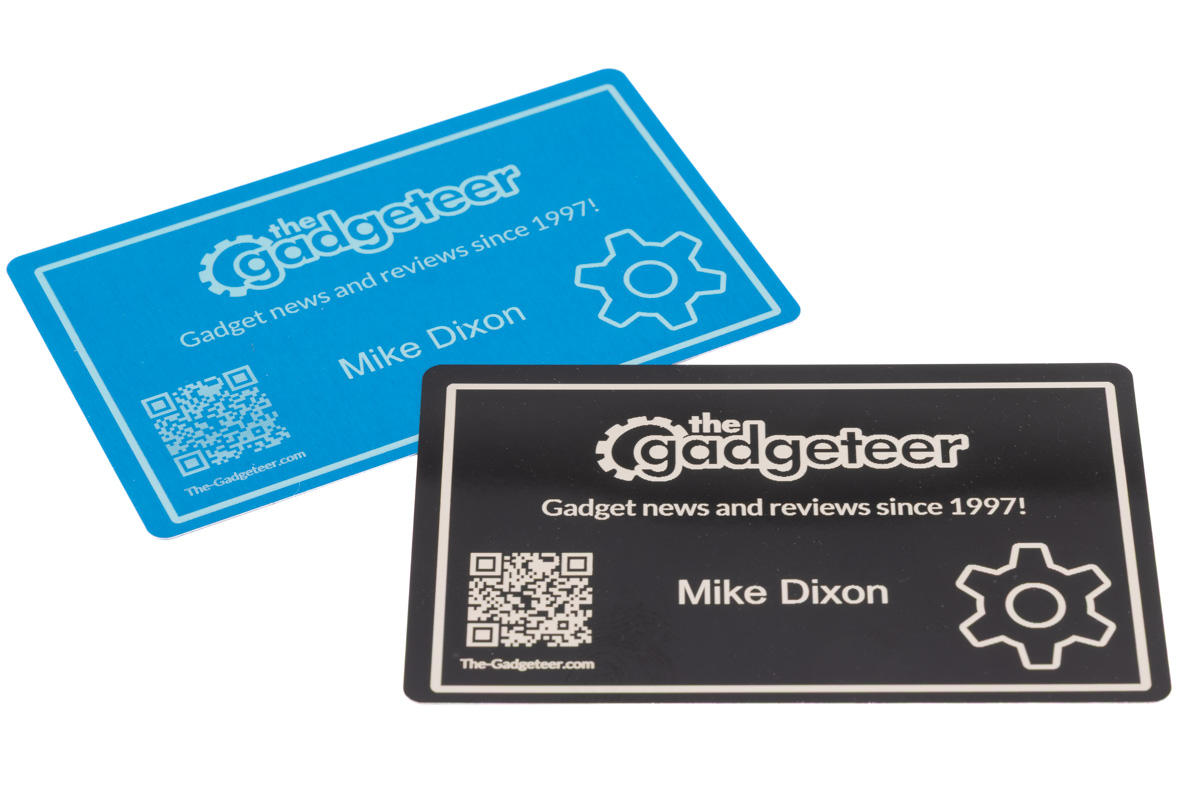
I had a rough idea of the settings to use because my other fiber laser has the same power. I threw in a test card and ran the laser at 4000 mm/s and a power of 90%. I ran my The-Gadgeteer business card test, and it came out great.
In Lightburn, the lasers are simply referred to as “Laser 1” and “Laser 2.” I wasn’t 100% which was which, so I ran a quick test on wood and metal and determined that “Laser 1” is the fiber laser.
Next, I engraved a 30mm square to check for scale accuracy and found that it was way off. The square came out about 35mm. I could have looked up how to do this on the internet, but I decided to use this as an opportunity to test out the EM-Smart support via my contact, and they quickly told me how I could calibrate it.
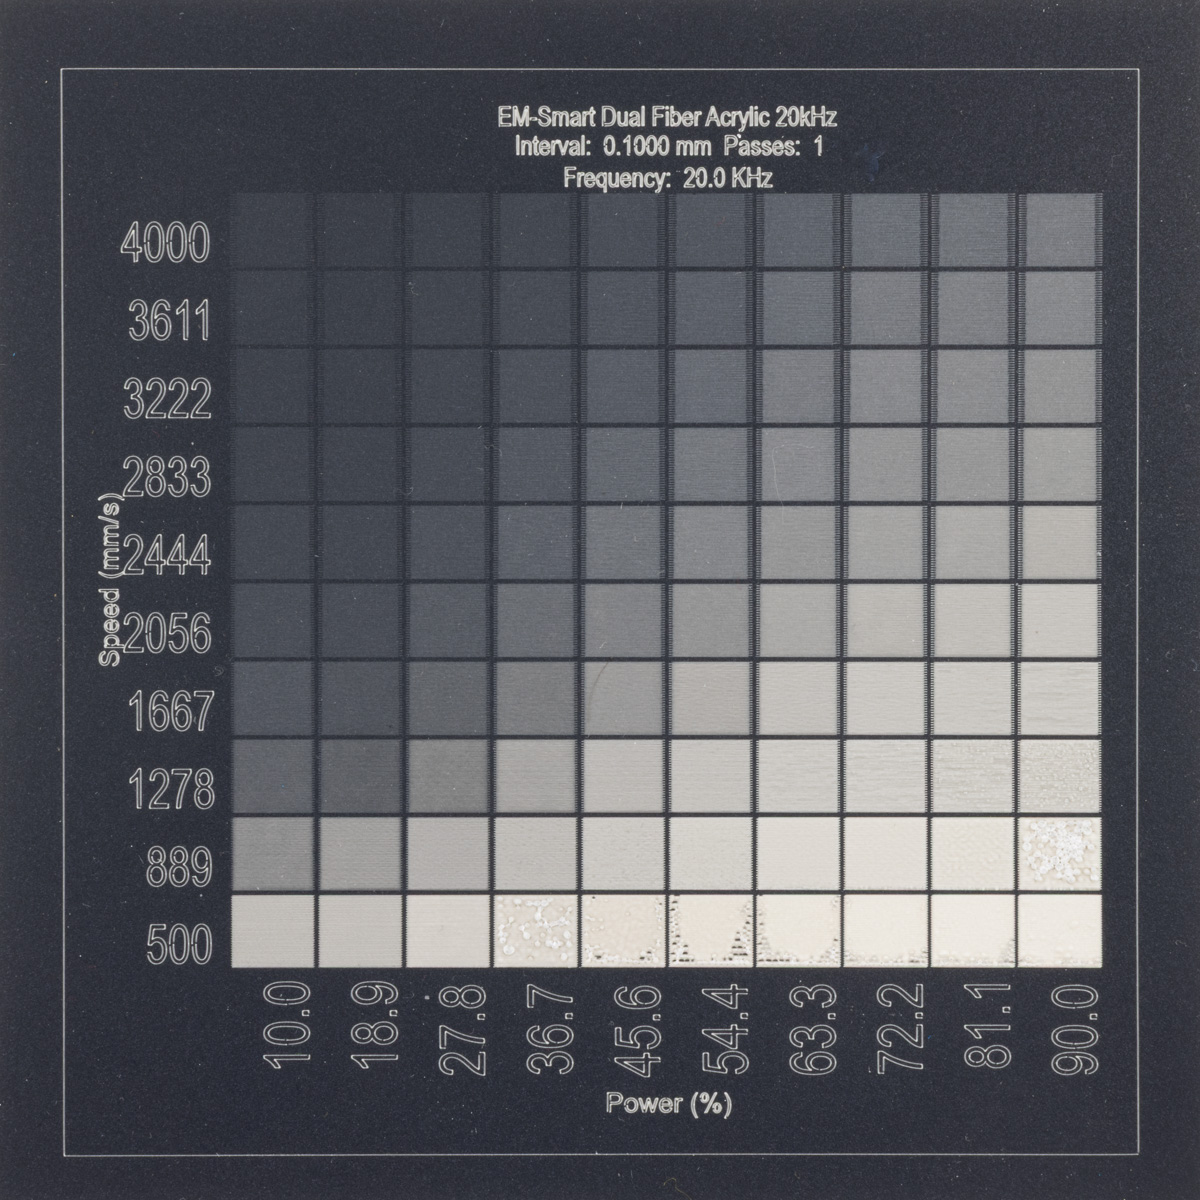
Since the sample material pack included some acrylic, I ran a few tests to get an idea of the power and speed needed, then I ran a material test. I don’t particularly like the way Lightburn does its material test, but that’s not really anything that EM-Smart can control. I prefer the way other software generates a project that you can modify, especially to fit the test in the desired area.
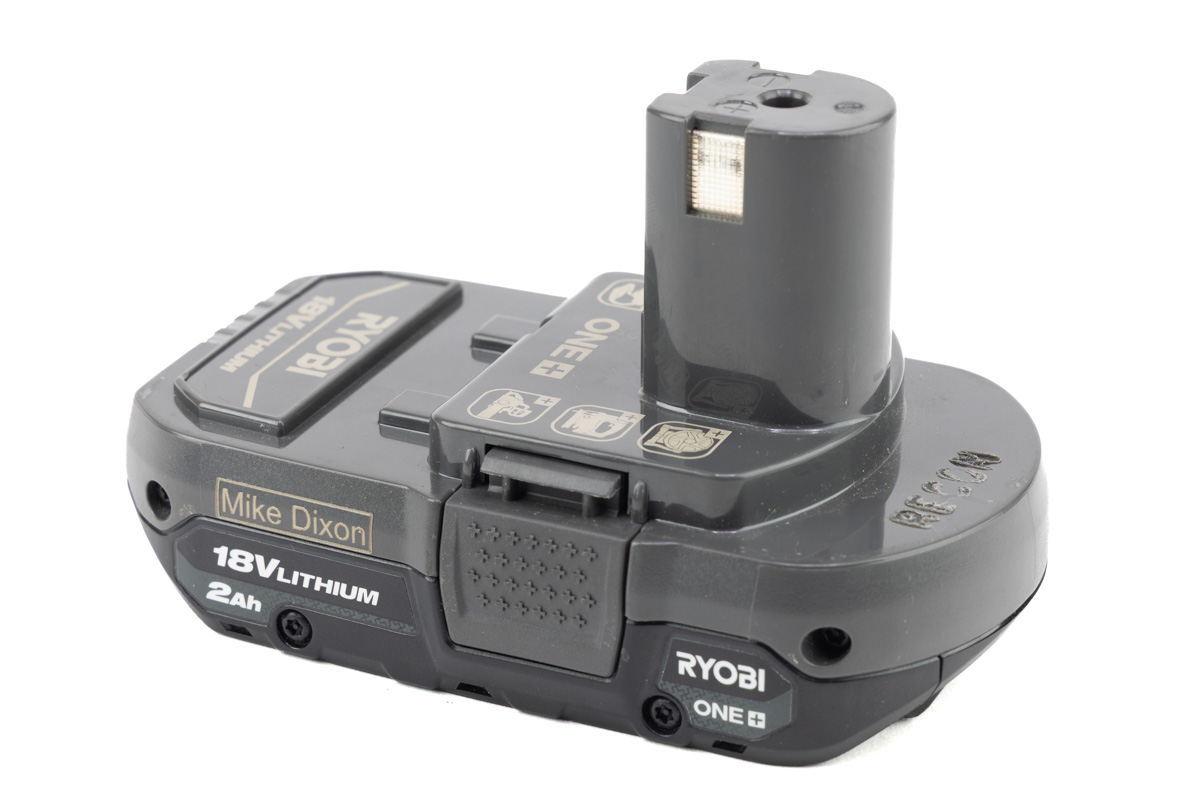
Now that I had a pretty good idea of what settings to use on acrylic/plastic, I used the laser to put my name on my cordless tool batteries so that when people borrow them, I can ensure that I get them back. Marking my tools is something I’ve been doing more of lately, and the speed and capability of the fiber laser make it a very quick task.
Moving on to slate, I ran a test grid using a speed of 100 to 1000 and power from 10 to 100%. The EM-Smart also performed very well and the framing makes aligning the image much easier than a grantry style diode or CO2 laser.

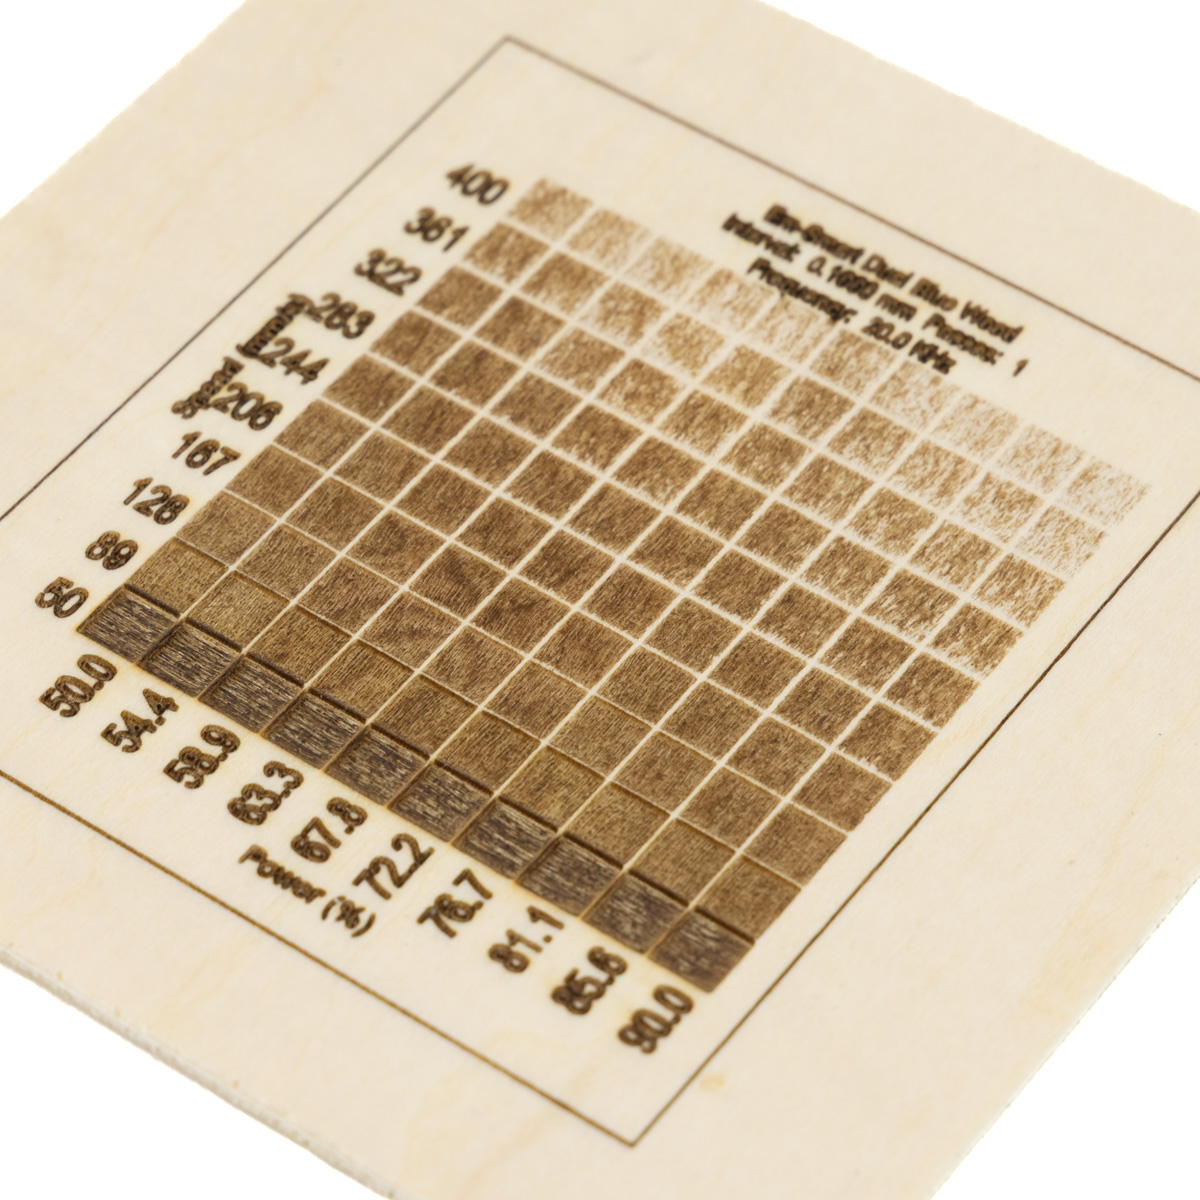
Wood engraving was next on the list of things to try. I ran a test grid from 400 to 800 mm/s and 50 to 80% power, which turned out to be a bit fast. Next, I ran a test grid from 50 to 400 mm/s and 50 to 90% power. This resulted in an excellent range of engraving settings to choose from. After a couple of tests of cutting, I created the following engraving.

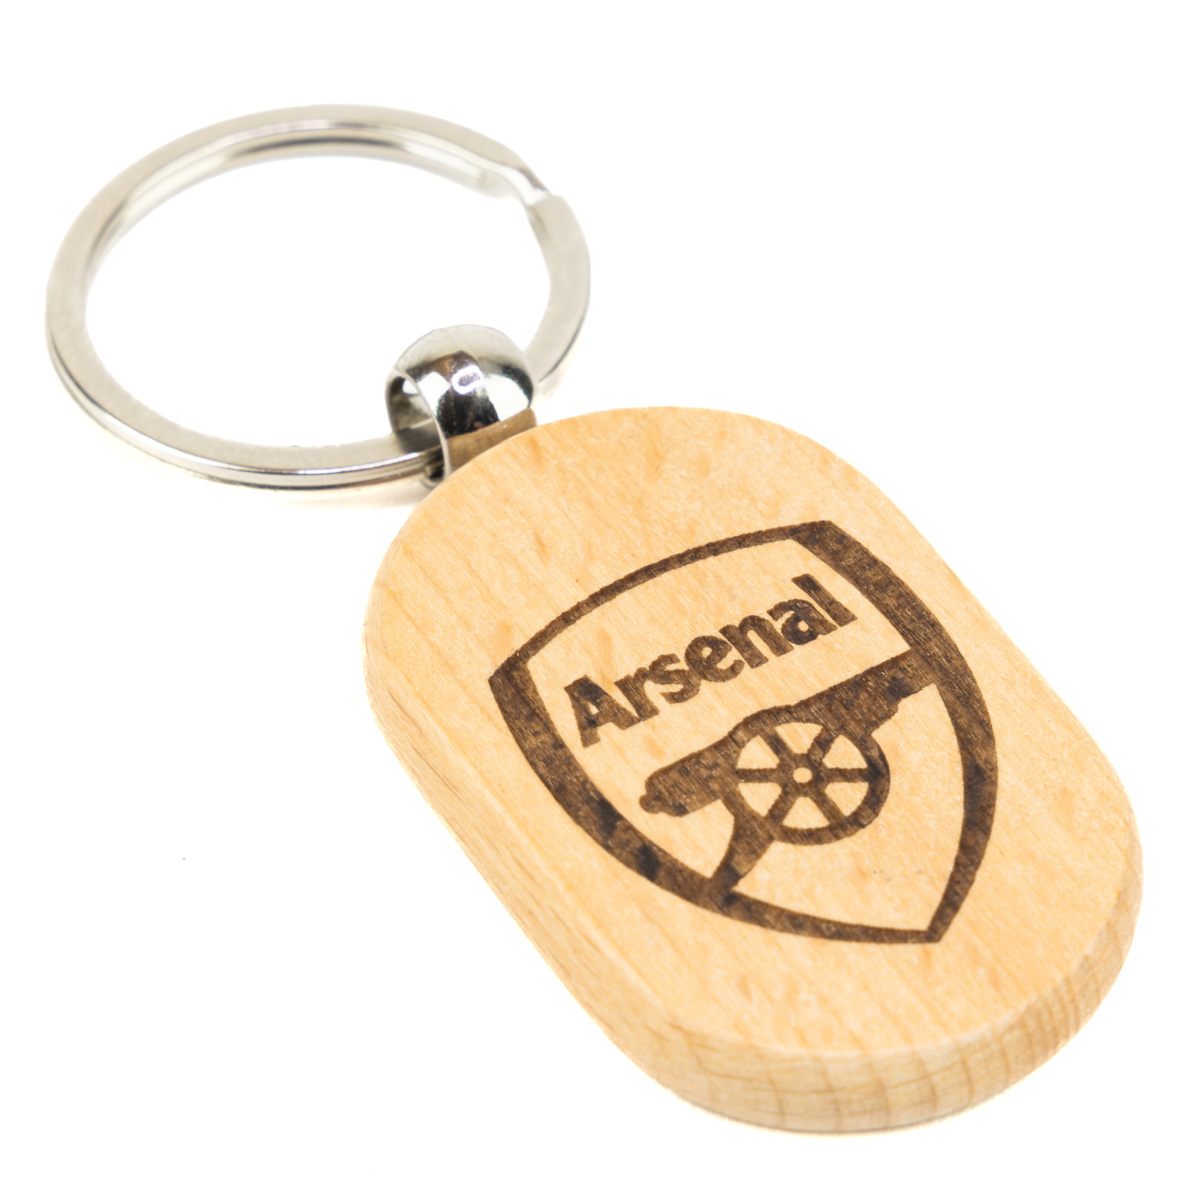
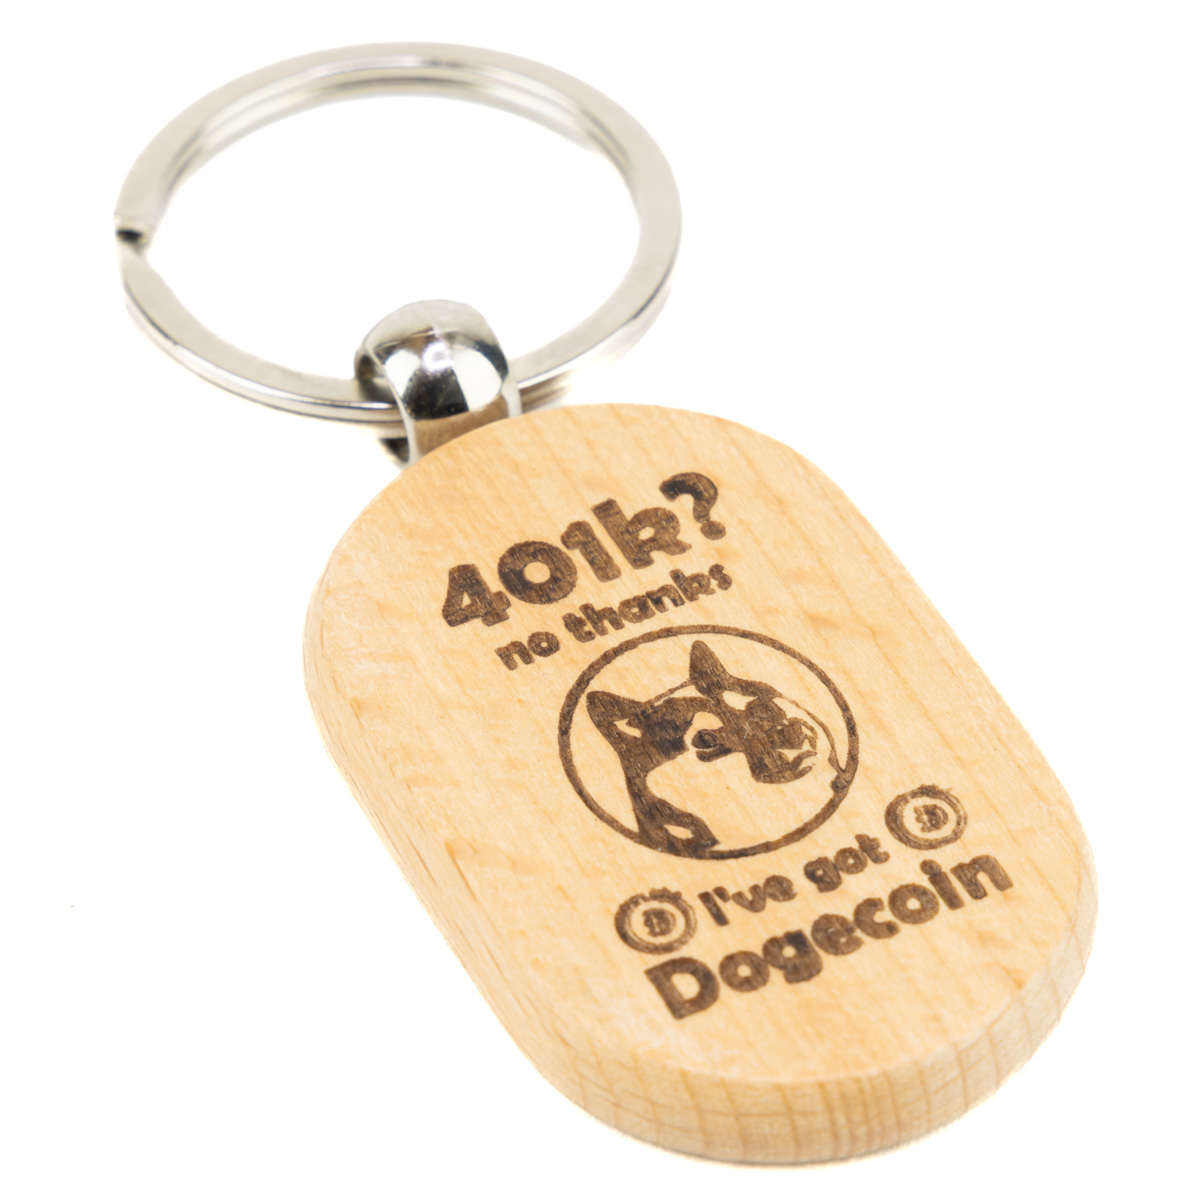
I had a bunch of key rings, so I decided to experiment with the settings for those. I burnt up one of them before I realized that I had the line spacing at 0.03 vs 0.1mm. I had used 0.03 for metal, and didn’t notice that the setting stayed between sessions. These have a decent amount of depth, but it doesn’t show very well in the photos.
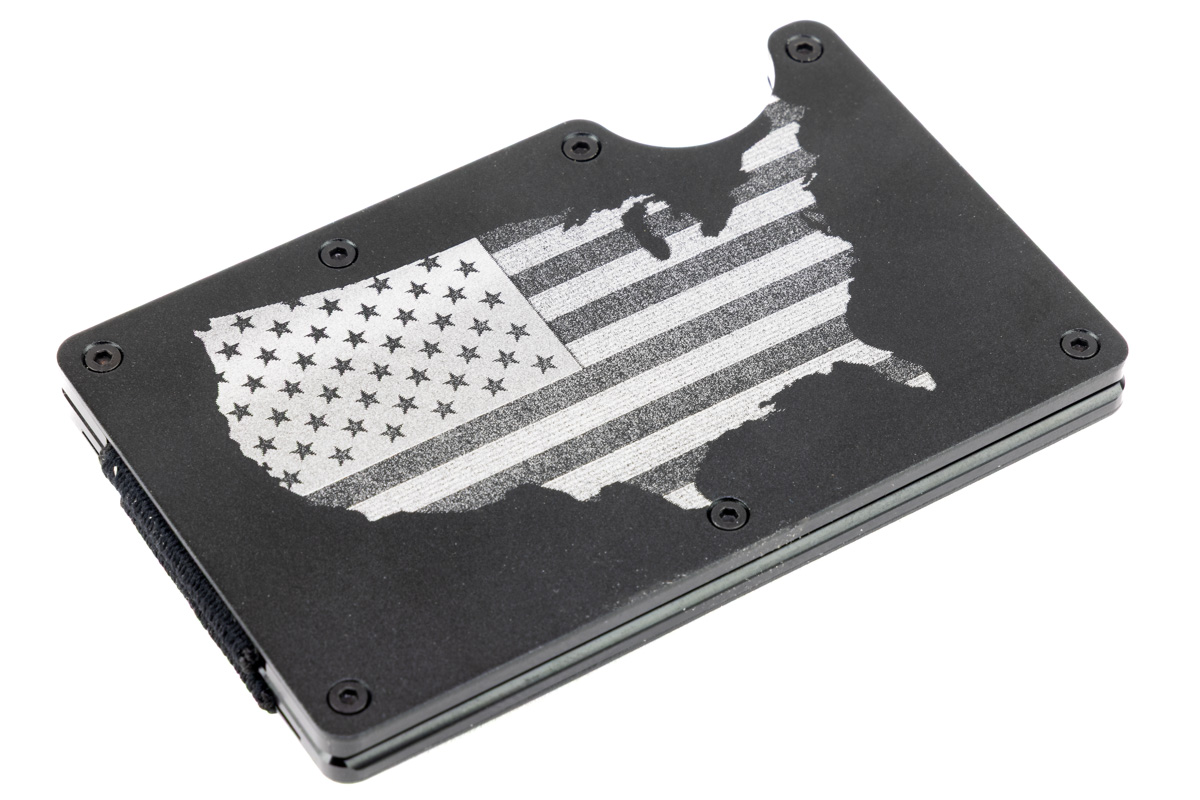
I had one of those rigid wallets that someone sent me, so I decided to give that a try. I only had one shot at it, so I basically guessed at the settings based on the black metal business card settings. I did run some of it with several passes in separate jobs. The alignment was perfect between jobs (as expected).
Next, I chose to try a metal coin. I knew the 20W laser wouldn’t be very good for depth engraving coins, so I was aiming to just mark on them. I struggled for quite a while with the settings. I tried quite a few settings and just couldn’t get much of a mark on the coin. I contacted EM-Smart, and after suggesting that I try a 0.03 mm line spacing, I was finally able to get a dark mark on the coin. If you’re looking to do metal coins, I would consider getting a higher-powered laser, as the 20W fiber laser takes a really long time to make a coin, especially if you’re looking for significant engraving depth. These coins took about an hour and a half each.


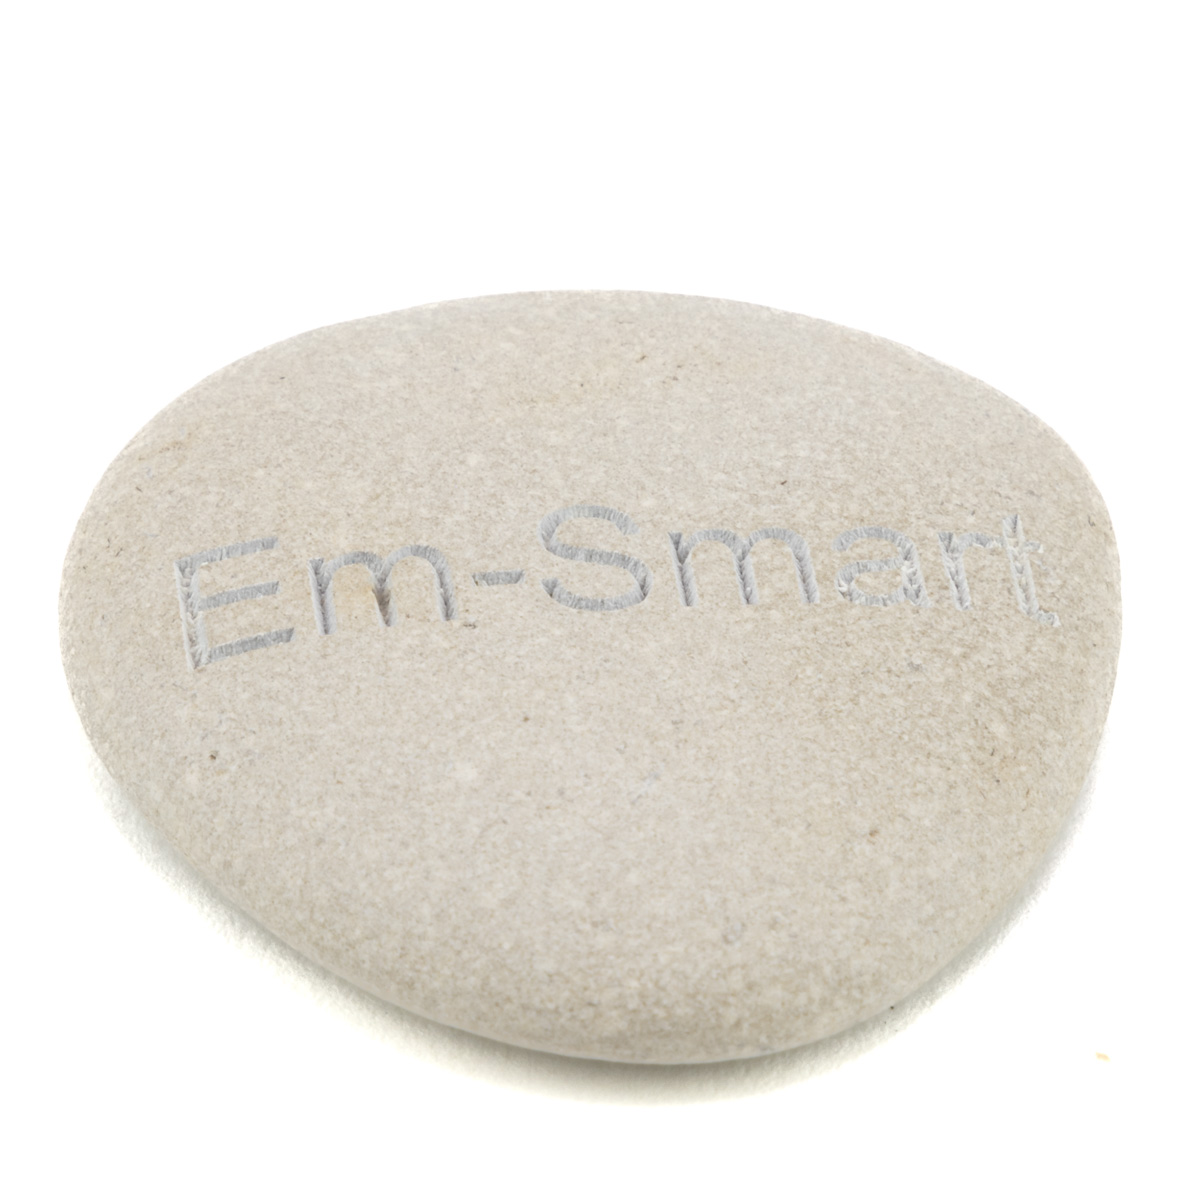
One of the things I’ve been experimenting with lately is engraving rocks. They’re fairly quick to engrave and the effect is stunning due to the depth of the engraving. At 100% power and a speed of 600 mm/s, 2 passes were performed and then I lowered the focus a bit and ran it again. One of the things I wish the EM-Smart Dual had was the ability to control the focus via the software to lower the focus after each pass.
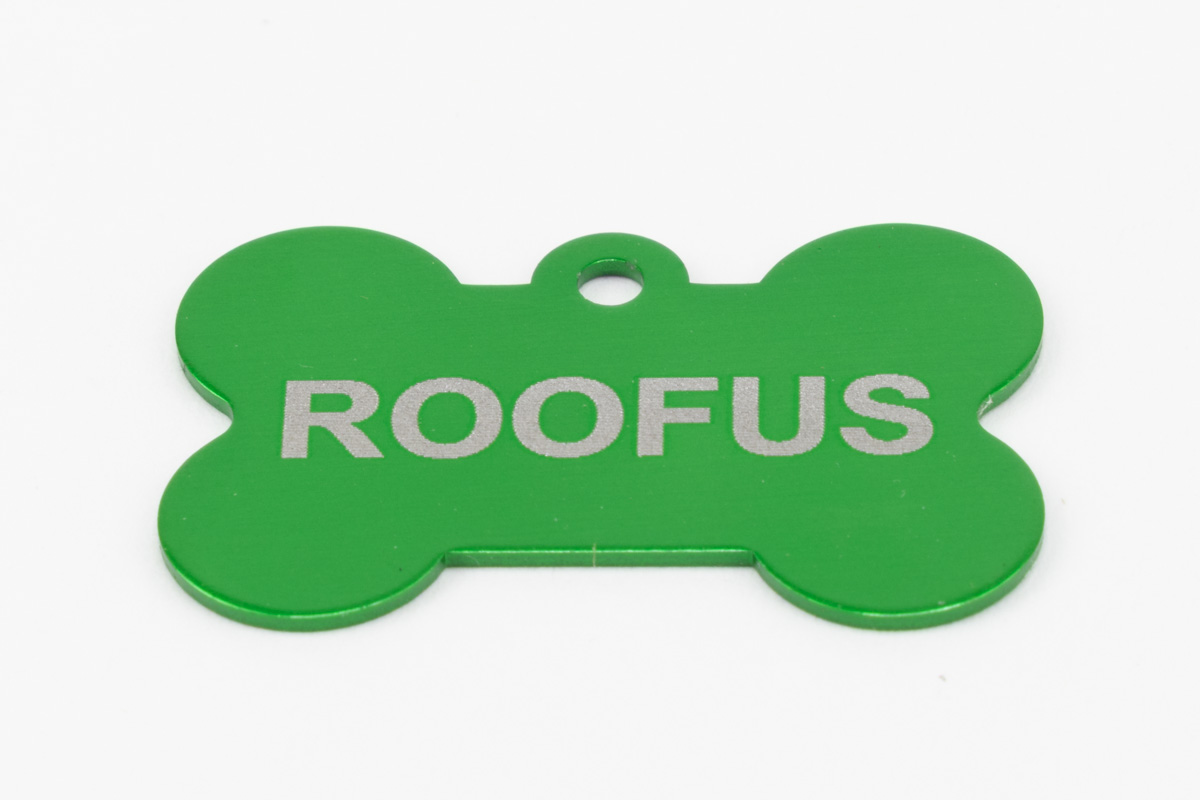
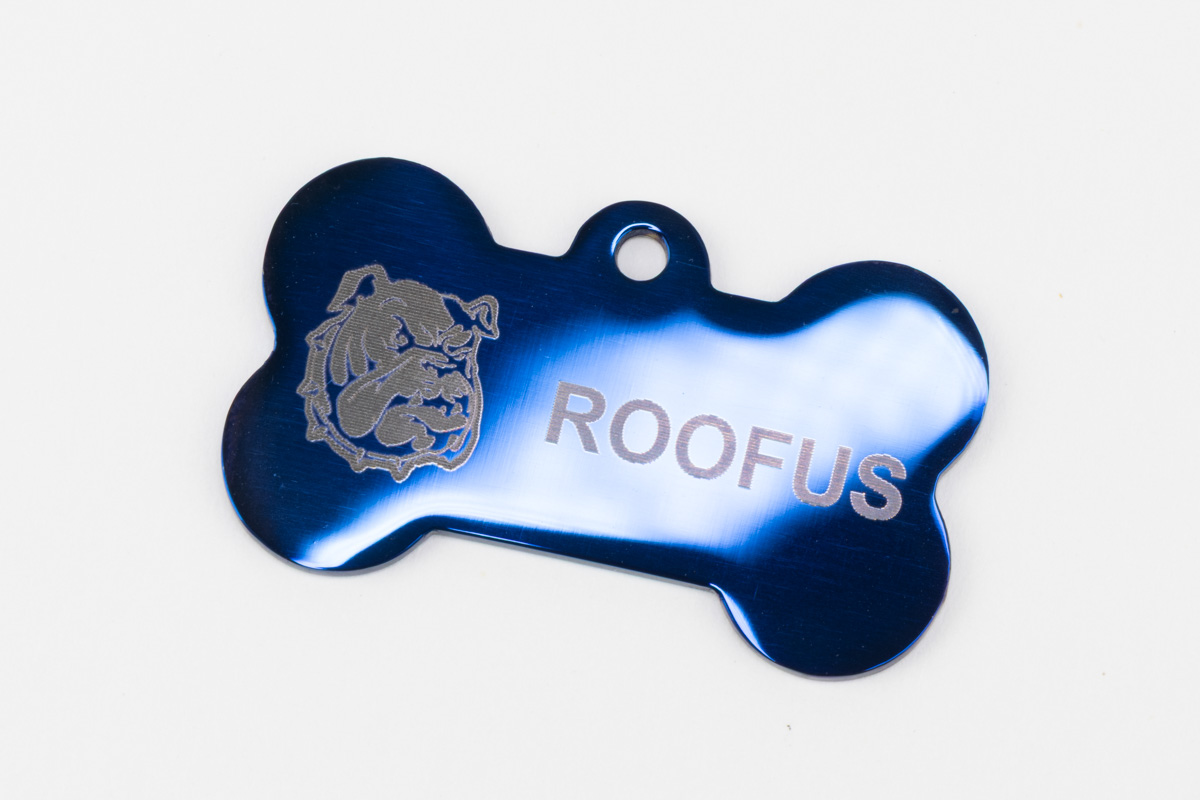
Lasers usually engrave anodized aluminum very well, and the EM-Smart Dual was no exception. I engraved this pet tag at 4000 mm/s at 100% power and 2 passes. The engraving only took 20 seconds. Not only does anodized aluminum engrave well, it is also very easy to obtain focus on, whereas sometimes other materials are harder to see the focus dots on.
One of my favorite things to engrave is the glossy blue anodized metal tags. The colors you can get from them are fantastic. I ran some tests to see what kind of colors I could get. I’m not sure why, but I wasn’t able to get a good range of colors. I still need to experiment with it.
The EM-Smart Dual Laser Engraver has the capability to use a rotary, but one was not included for this review, so I was unable to test that functionality.
Final thoughts
The EM-Smart Dual Laser Engraver appears to be well built and capable. The lack of settings for common materials will make it difficult for inexperienced users, but nothing that a bit of trial and error won’t take care of. The small footprint and enclosure will make it nice for those who want a portable laser for shows. The flexibility of the fiber and diode laser means that you’ll be able to mark almost any material. The Lightburn software may be a bit advanced for some users, but there is also EZCAD, which I did not test for this review.
What I like about EM-Smart Dual Laser Engraver
- Removable base plate
- Enclosed working area
- Great focusing laser
What needs to be improved?
- The fan needs to be easier to access for cleaning
- A list of settings for common materials would be helpful
Price: $3499.00
Where to buy: EM-Smart
Source: The sample of this product was provided for free by EM-Smart. EM-Smart did not have a final say on the review and did not preview the review before it was published.
Check out these other laser engraver reviews!
- AlgoLaser alpha MK2 20W diode laser engraver review – a new level of creativity
- Creality Falcon2 Pro 40W laser engraver review – a great laser engraver with tons of features

Lenovo IdeaPad Business Laptop with Microsoft 365 • 2026 Edition • Intel Core • Wi-Fi 6 • 1.1TB Storage (1TB OneDrive + 128GB SSD) • Windows 11
(as of March 16, 2026 11:13 GMT -05:00 - More infoProduct prices and availability are accurate as of the date/time indicated and are subject to change. Any price and availability information displayed on [relevant Amazon Site(s), as applicable] at the time of purchase will apply to the purchase of this product.)