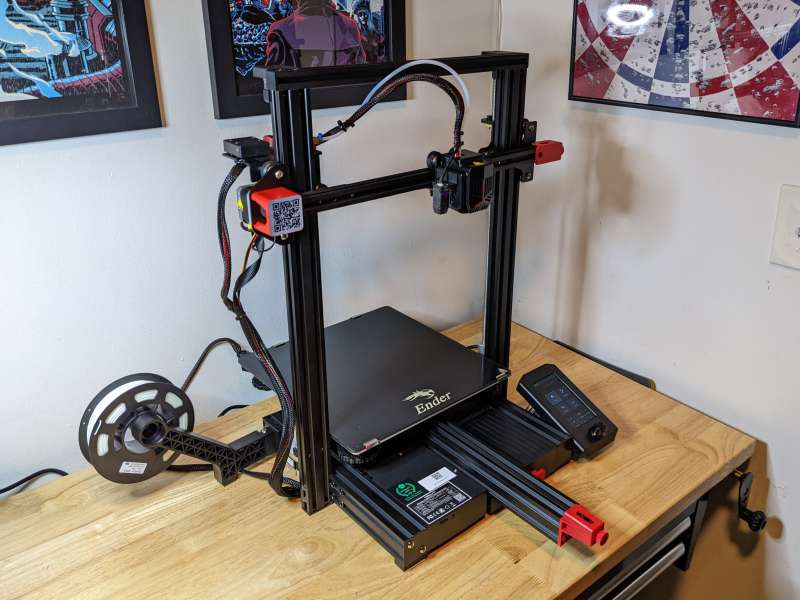
REVIEW – After getting bit by the 3D printing bug a few years back the desire to print larger, more complex items quickly followed. Unfortunately, the price of large format 3D printers runs pretty high, with some models costing well into the thousands. But, since I’m only interested in printing items slightly larger than possible on standard 3D printers there are a lot more affordable options. The Creality Ender 3 Max Neo 3D printer fits the bill for me in price, functionality, and dependability. Creality is a well-trusted manufacturer that produces some of the most popular 3D printers and the Ender line in particular is a user favorite. After spending some time with the Ender 3 Max Neo I’ve found that it definitely lives up to the Ender reputation and with a price of $369 it’s a great option for someone looking to “max” out their 3D prints.
What is it?
The Creality Ender 3 Max Neo is a large build volume, Cartesian, Fused Deposition Modeling (FDM) 3D printer which is part of Creality’s successful Ender series. The printer supports PLA, ABS, PETG, and wood filament. The Max Neo comes partially assembled and is simple to set up and operate. The printer is operated via a knob control unit with a 4.3-inch color screen and receives models through a MicroSD slot and a Micro USB port.
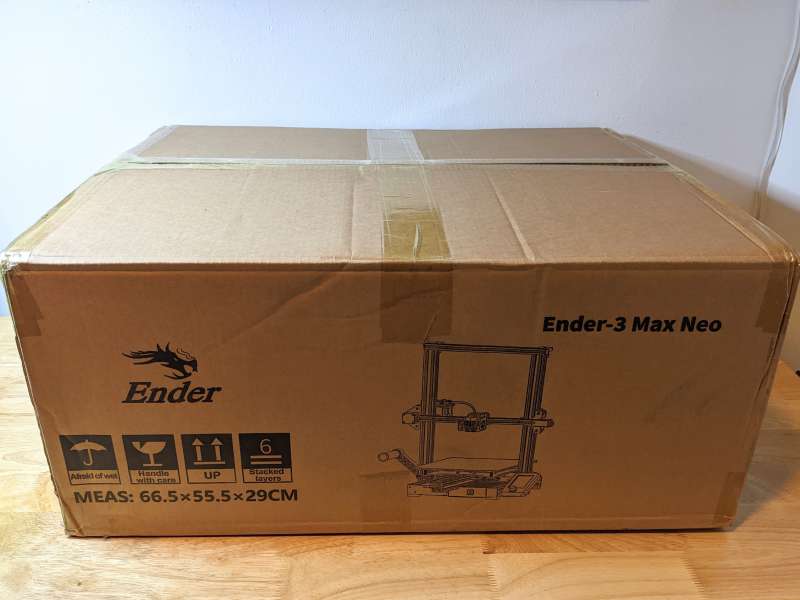
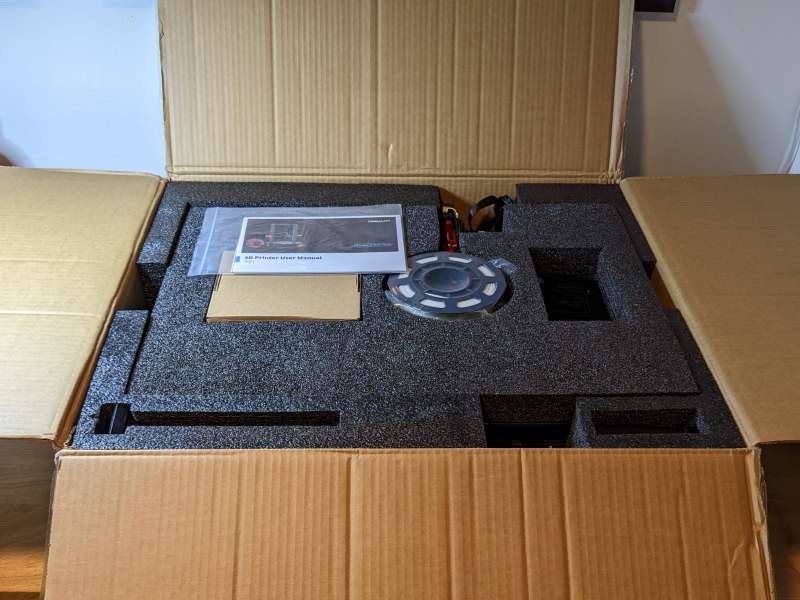
The Creality Ender 3 Max Neo comes in an appropriately large plain cardboard box. The box is bare save for a small illustration of the unit. Plenty of thick foam inserts protect the various parts of the Max Neo during shipping.
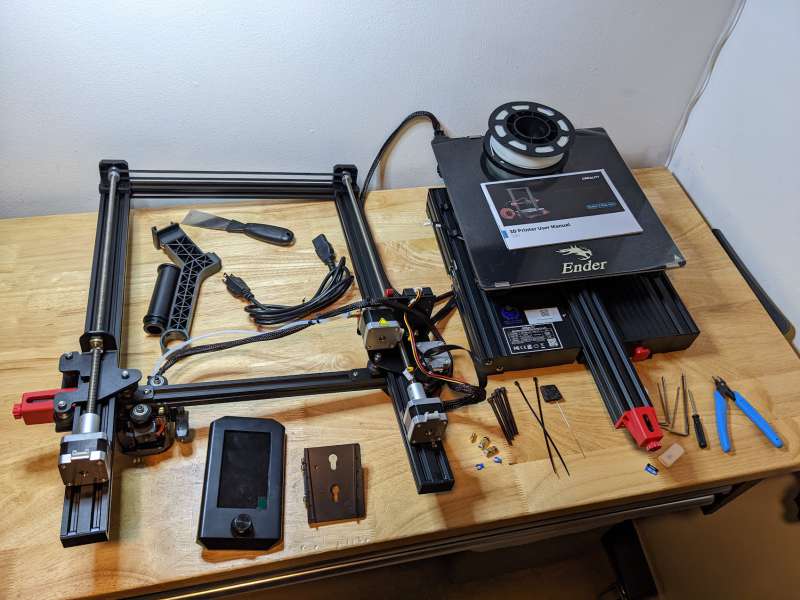
What’s in the box?
- Creality Ender 3 Max Neo 3D Printer
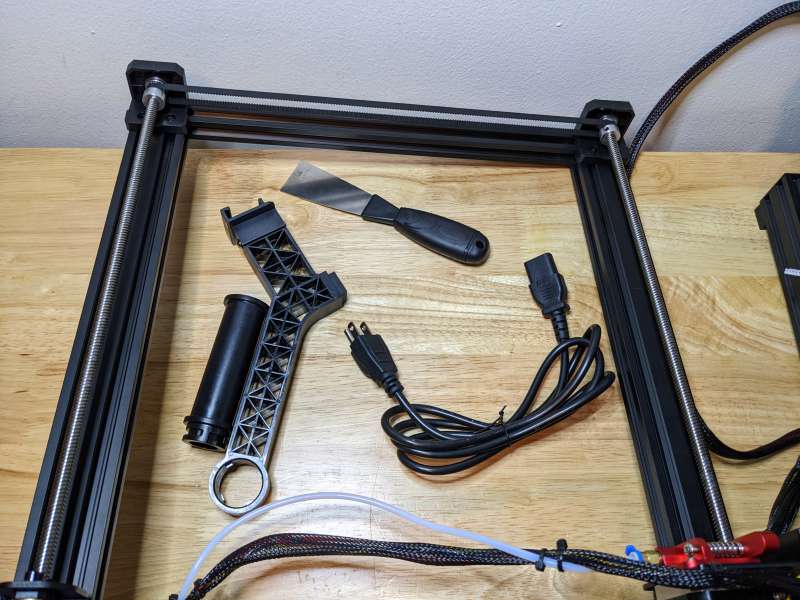
- Toolkit
- 2 x Standard Wrenches
- 4 x Allen Wrenches
- Flathead Screwdriver
- Wire cutters
- Spatula Print Removal Tool
- Nozzle Dredge Needle
- Replacement .4mm Nozzle
- 2 x Replacement Pneumatic Fittings
- White PLA Test Filament (200g)
- User Manual
- Gantry and attachment bolts
- Filament Spool
- Power cord
- Control Unit and Mount
- Cable zip ties
- MicroSD TF Card
- 8GB MicroSD to USB CardReader
Hardware specs
- Molding Technology: Fused Deposition Modeling (FDM)
- Machine size: 516mm x 582mm x 590mm
- Build Volume: 300mm x 300mm x 320mm
- Package Dimension: 665mm x 555mm x 290mm
- Weight: 22lb. 11oz (10.3kg)
- Printing Speed: ≤120mm/s
- Printing Precision: ±0.1mm
- Layer Height: 0.05~0.35mm
- Filament Diameter: 1.75mm
- Nozzle Quantity: 1
- Nozzle Diameter: 0.4mm
- Nozzle Temperature: Up to 260℃
- Heat Bed Temperature: Up to 110°C
- Build Surface: Carborundum Glass
- Extruder Type: Bowden
- Extruder Composition: Metal
- Leveling Mode: CR Touch Auto-leveling
- Display: 4.3” Color Knob Screen
- Mainboard: 32-bit Silent Mainboard
- Resume Printing Function: Yes
- Filament Sensor: Yes
- Rated Voltage: 100-120V~, 200-240V~, 50/60Hz
- Rated Power: 350W
- Slicing Software: Creality Slicer/Cura/Repetier-Host/Simplify3D
- Data Transmission Method: Micro USB and MicroSD Card
- Supported 3D File Formats: STL/OBJ/AMF
- Supported Filaments: PLA/ABS/PETG/Wood
Setup
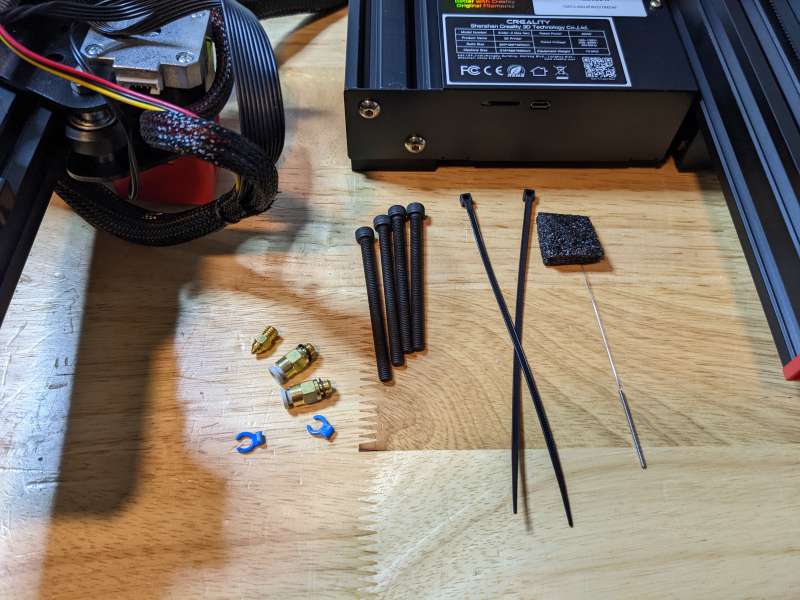
Before I get into the design and features of the Creality Ender 3 Max Neo 3D Printer there is some assembly required, but not as much as most rectilinear printers with a similar design. The most important initial task is affixing the Max Neo’s gantry.
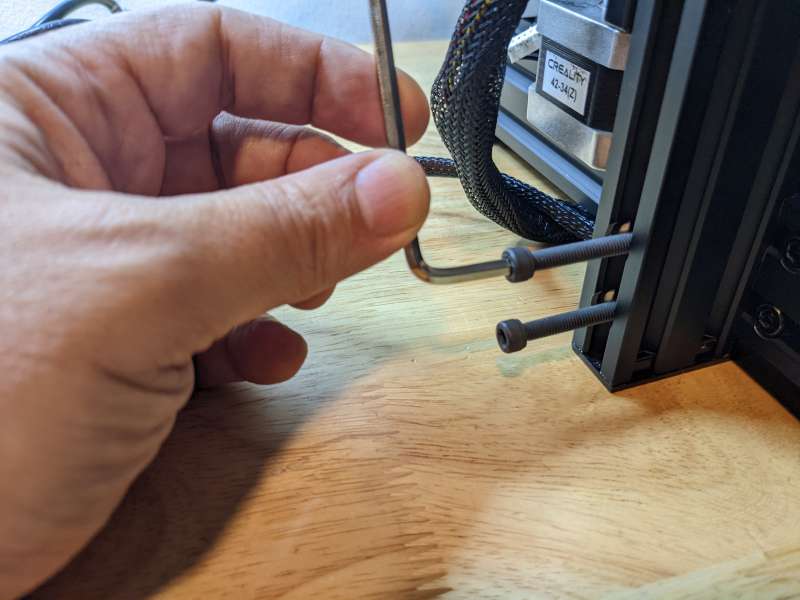
The four bolts needed to connect the gantry to the base are included along with an extra printing nozzle, zip ties, some extra fittings, and a Nozzle Dredge Needle.
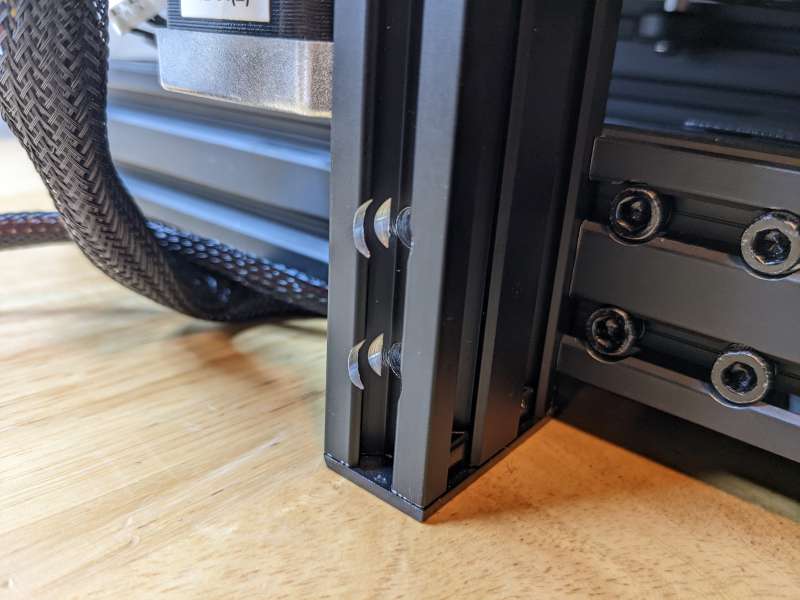
The gantry lines up with notches on either side of the printer base.
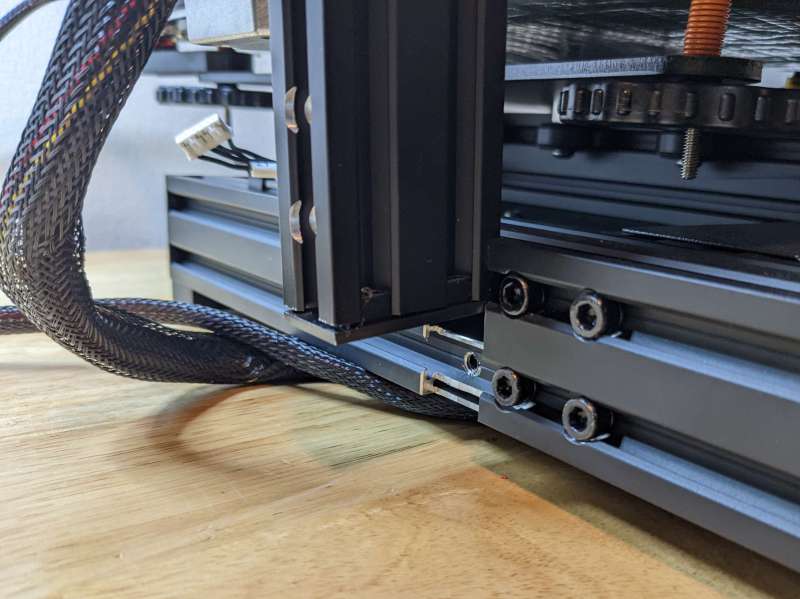
It’s important to make sure that the two holes for the gantry bolts on either side of the base align perfectly with the holes on the gantry. It takes a little bit of patience and adjustments to get them aligned, but they eventually fall into place.
The four gantry bolts can be tightened using the included large Allen wrench.
After the gantry is attached, the control unit needs to be mounted and linked to the printer base.
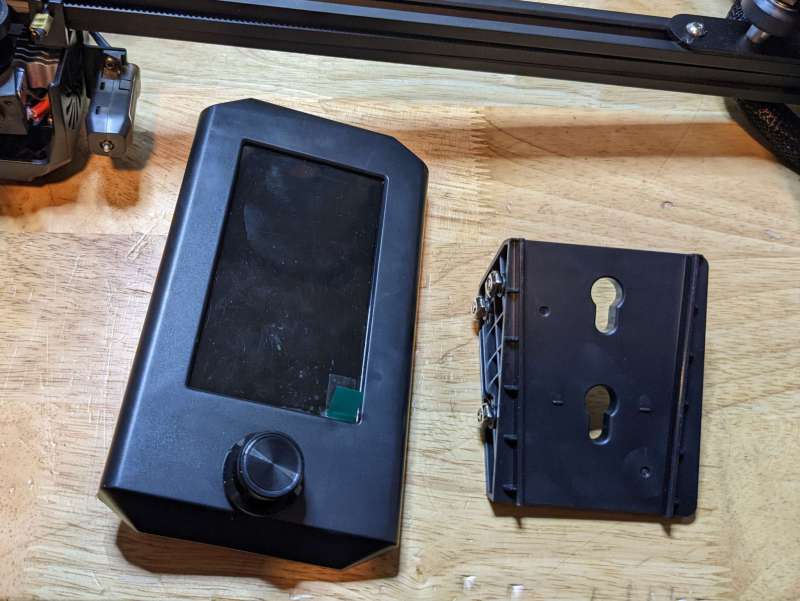
To attach the control unit to the printer base the mount for it has to lock into the grooves on the sides of the base.
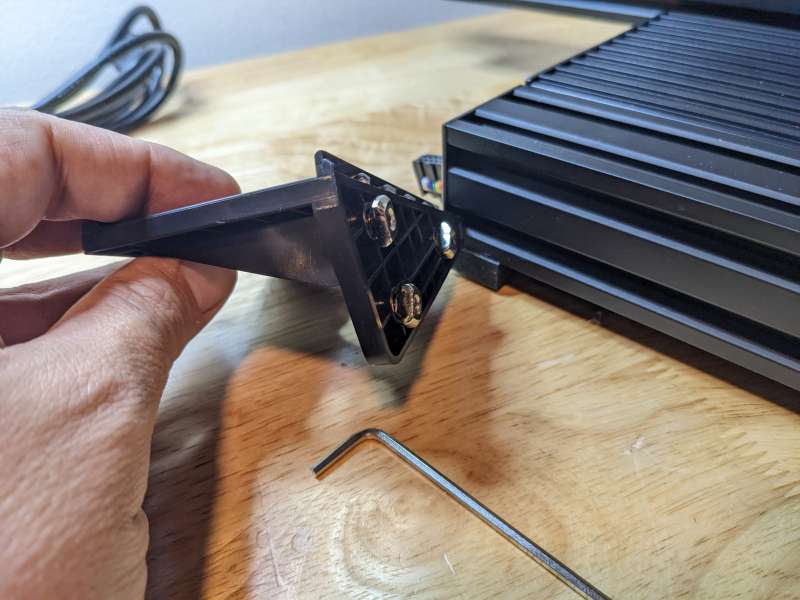
Again using an included Allen wrench, rotate the screws until the tabs align with the grooves then tighten them to hold the mount securely.
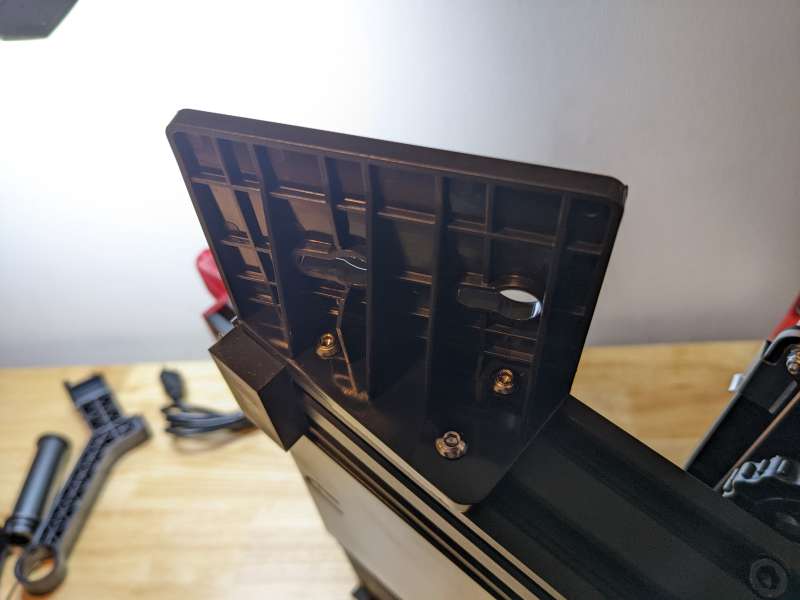
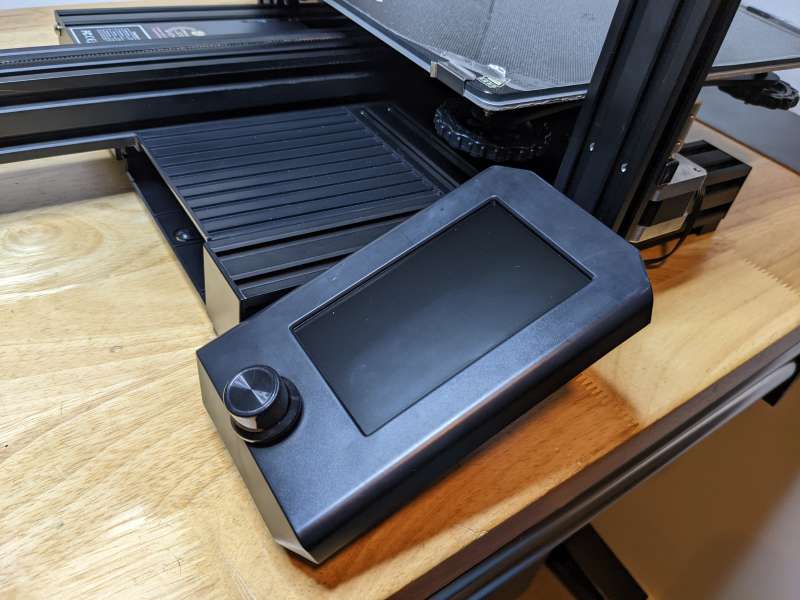
Once the mount is fastened to the base the control unit locks on to it by slotting the pins beneath it into the holes on the mount.

Be sure to connect the ribbon cable to the port on the back of the control unit as well.
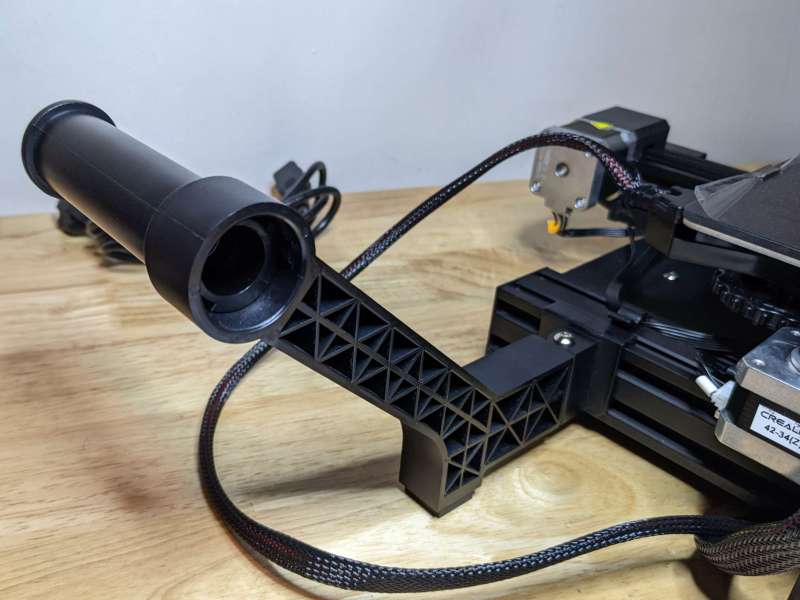
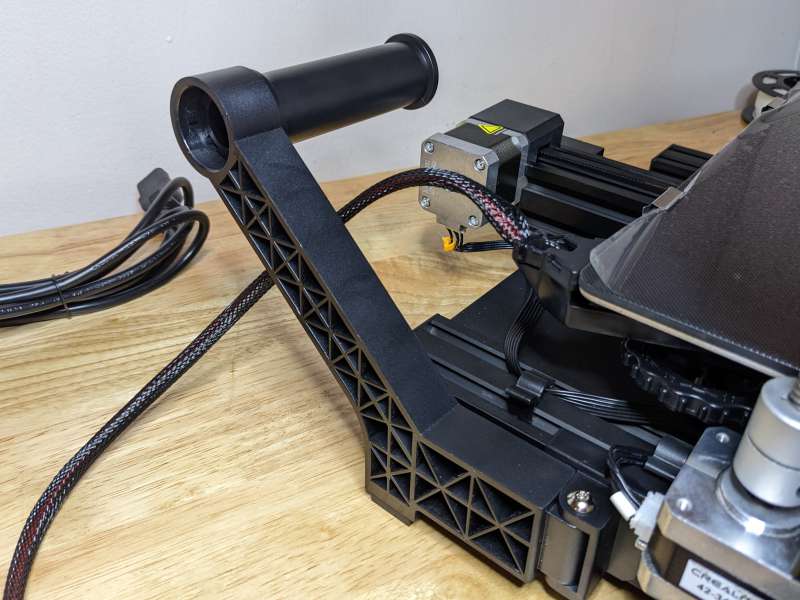
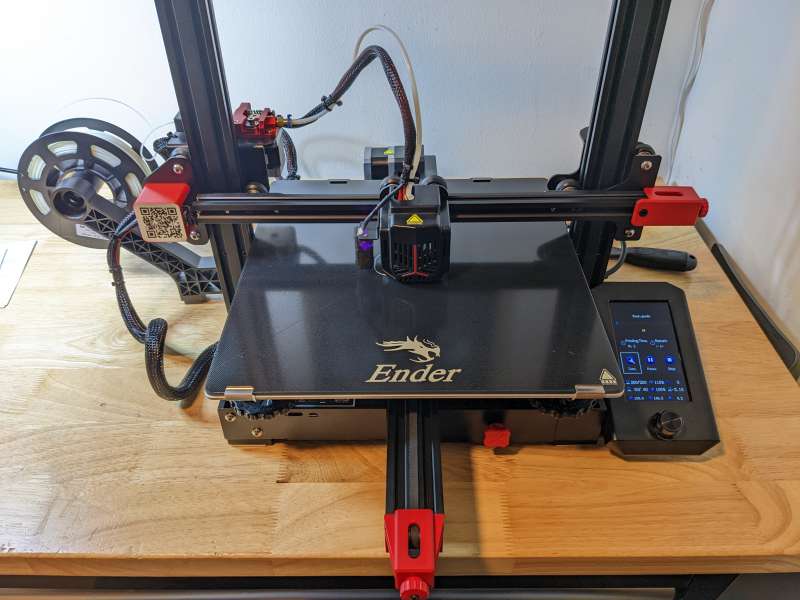
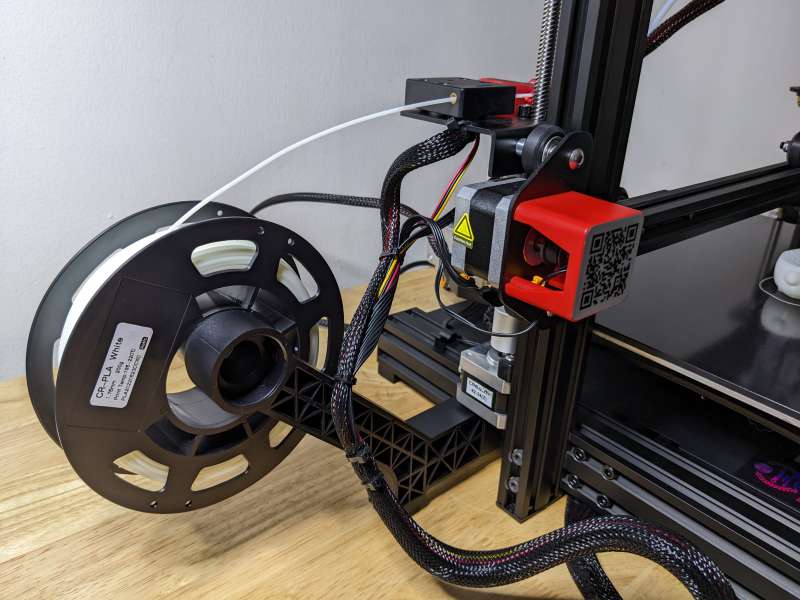
The Creality Ender 3 Max Neo 3D printer has an atypical filament holder which is attached to the side of the unit instead of on top of the gantry.
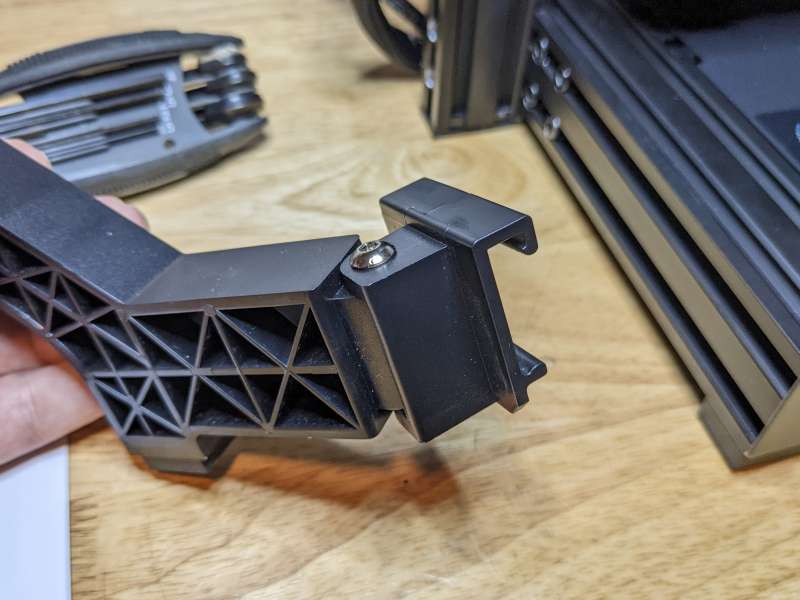
The filament holder is easy to attach, simply hook the end of the holder over the top of the grooves on the side of the base.
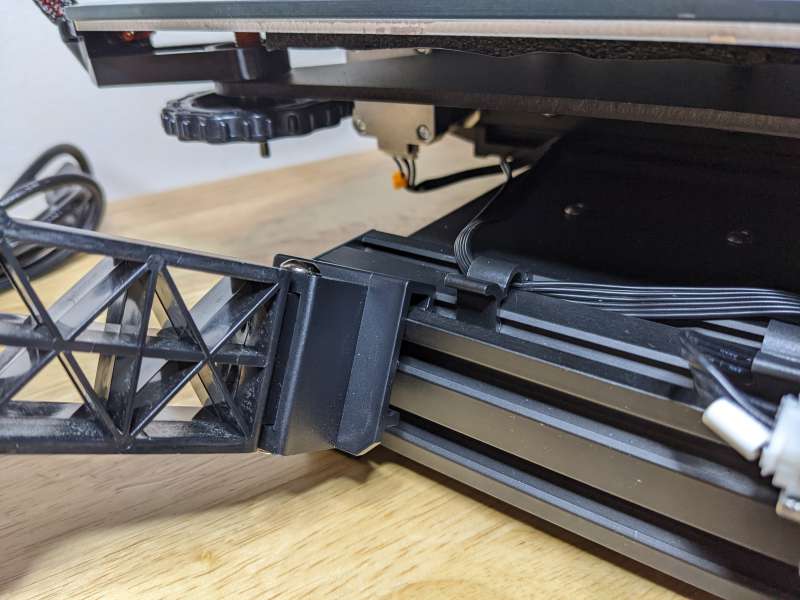
There are no bolts or screws needed, once fitted into the grooves the filament holder rests on its own support.
When not being used the spool of the filament holder can be folded back behind the unit to save space.
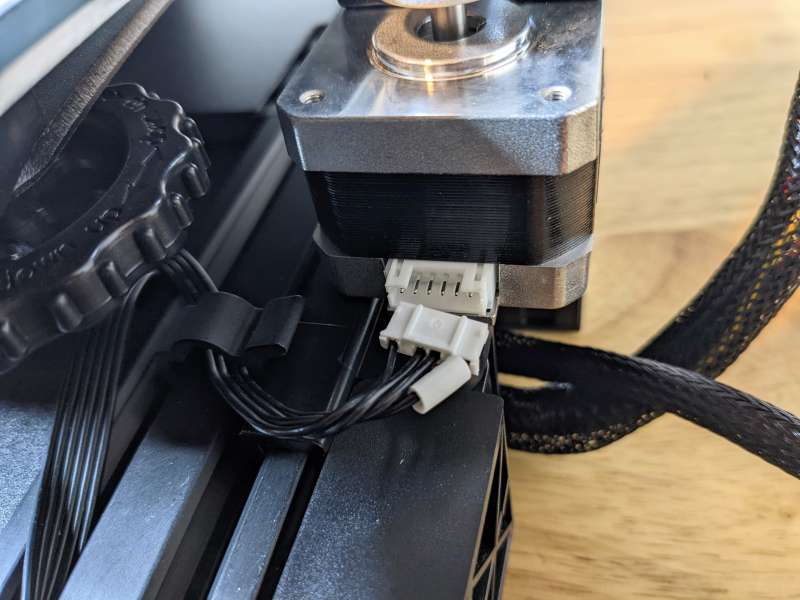
Now that the major assembly work is complete there are two small white plugs to attach to the motors for both of the dual Z axes.
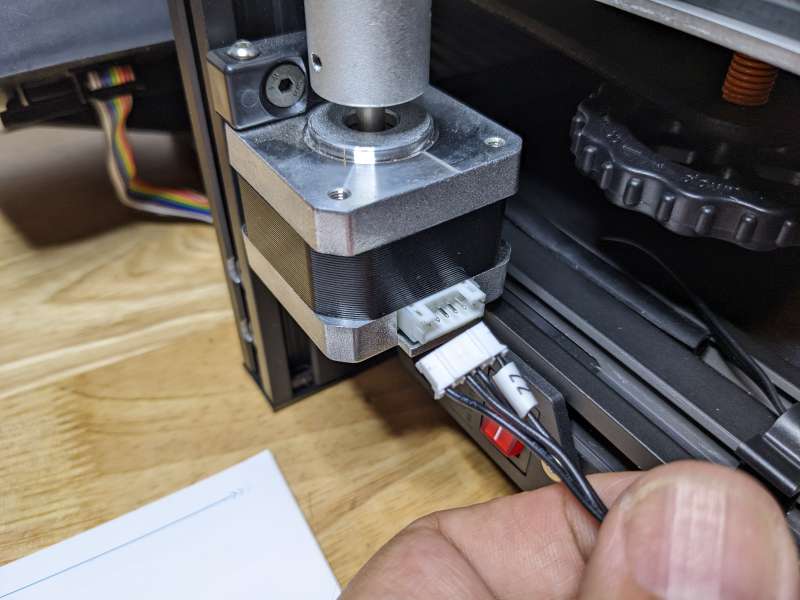
Once the plugs are attached to the corresponding motors all that remains is setting the Max Neo up for power.
The Creality Ender 3 Max Neo ships with its voltage selector set to 230V, it is vitally important for U.S. users to make sure this voltage switch is instead set to 115V.
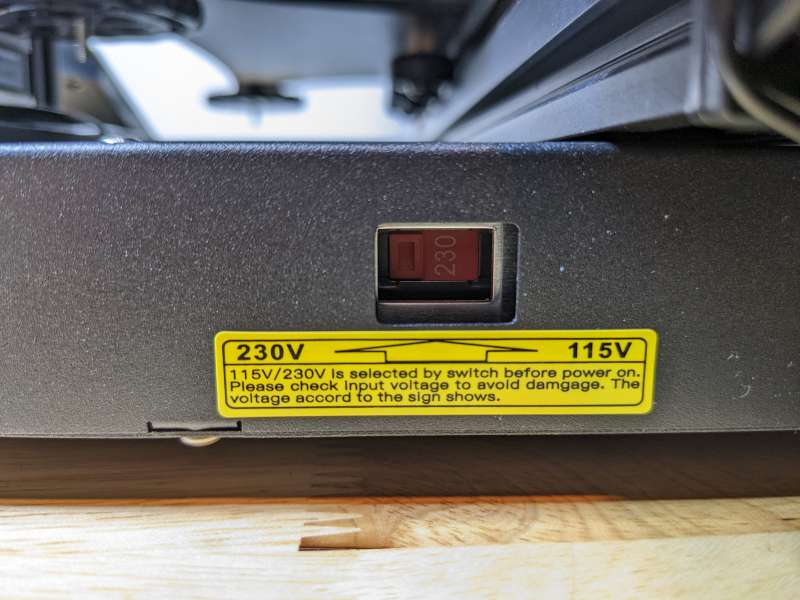
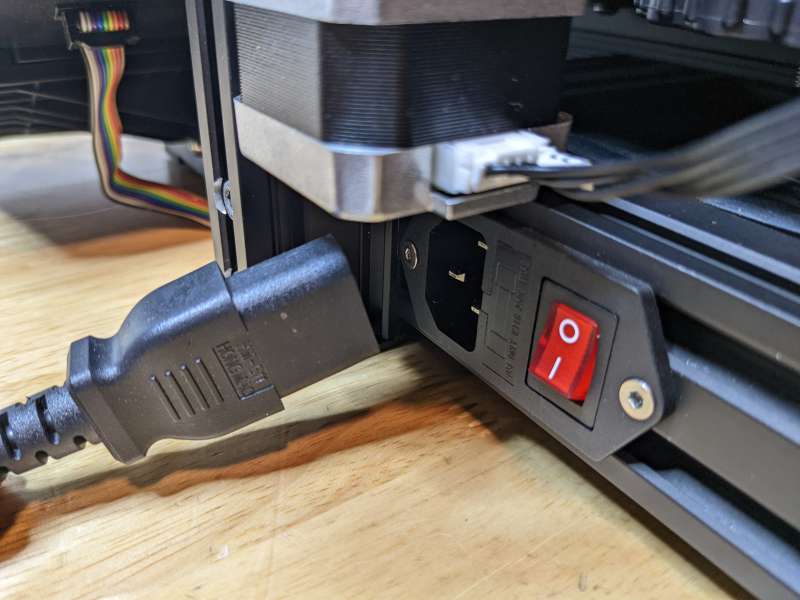
After ensuring that the voltage switch is set to 115V and not 230V, connect the three-pin power cord and the Max Neo is ready to power on.
If you want to start printing right away, now is the time to run the Max Neo’s auto-leveling function. The Level option appears on the main menu and activates as soon as you select it with the control knob. The auto-leveling takes a few minutes and should be fine for most first-time users. Personally, I like to perform manual leveling in addition to auto-leveling just to be safe.

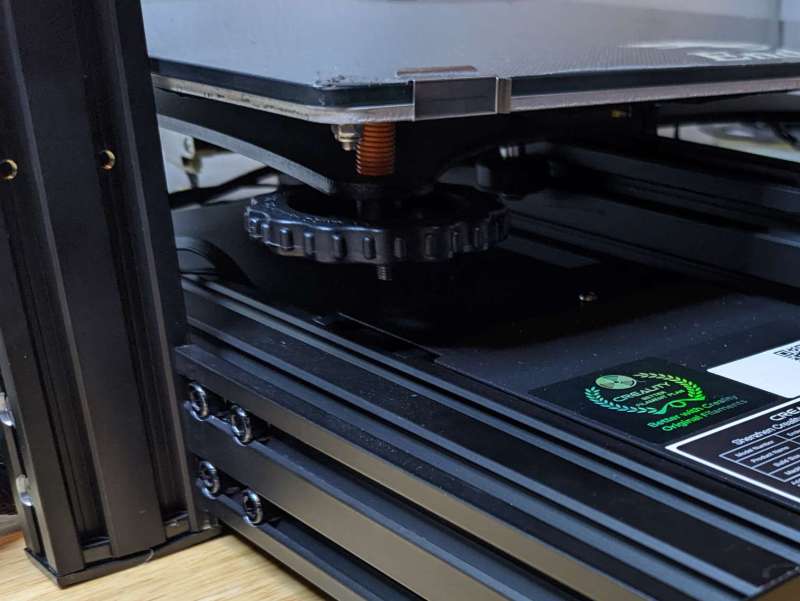
There are four large leveling knobs in each corner under the build plate. Most printers ship with these tightened a bit too much, so it’s always good to check them and do a quick manual leveling. The User Manual provides instructions on how to manually level the Max Neo.
Basically, it can be accomplished by moving the print head to a corner of the build plate and using an A4 piece of paper to gauge the distance between the nozzle and the plate. Tighten or loosen the leveling knob until there’s a slight resistance between the nozzle and the piece of paper and then repeat for the other three corners.
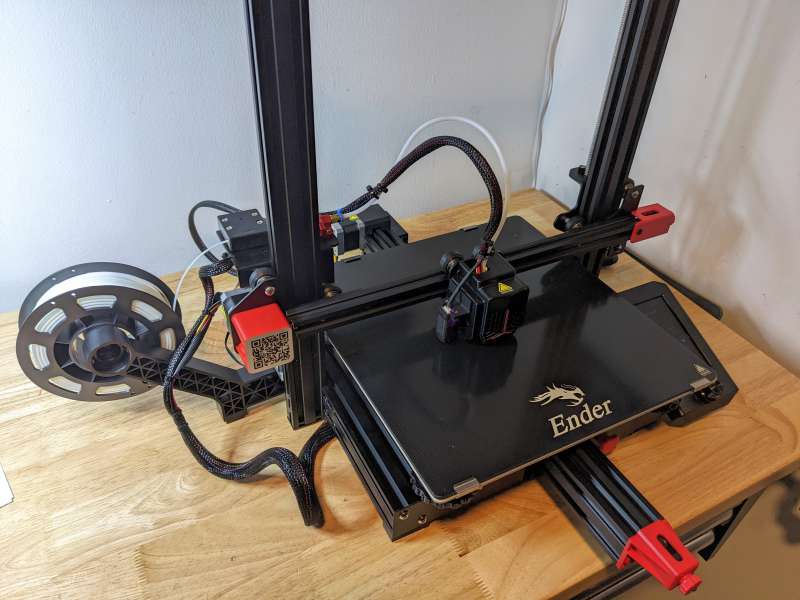
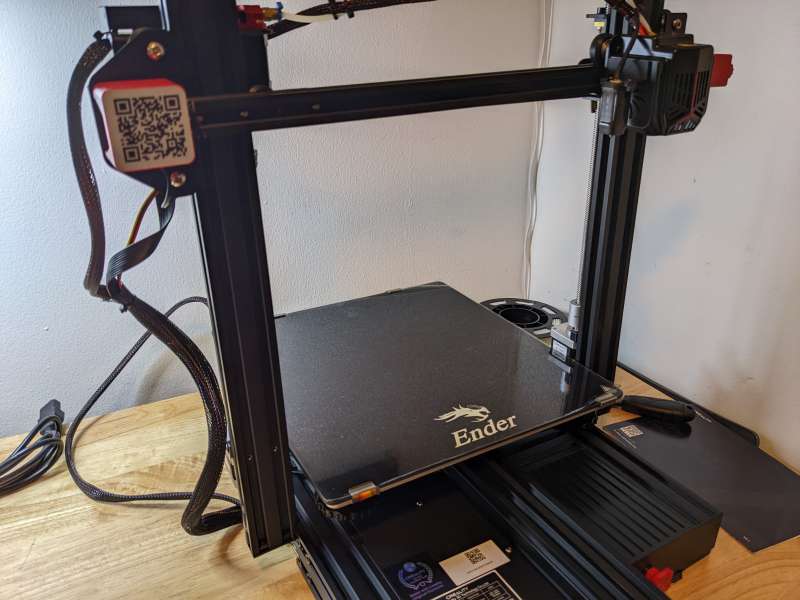
Design and features
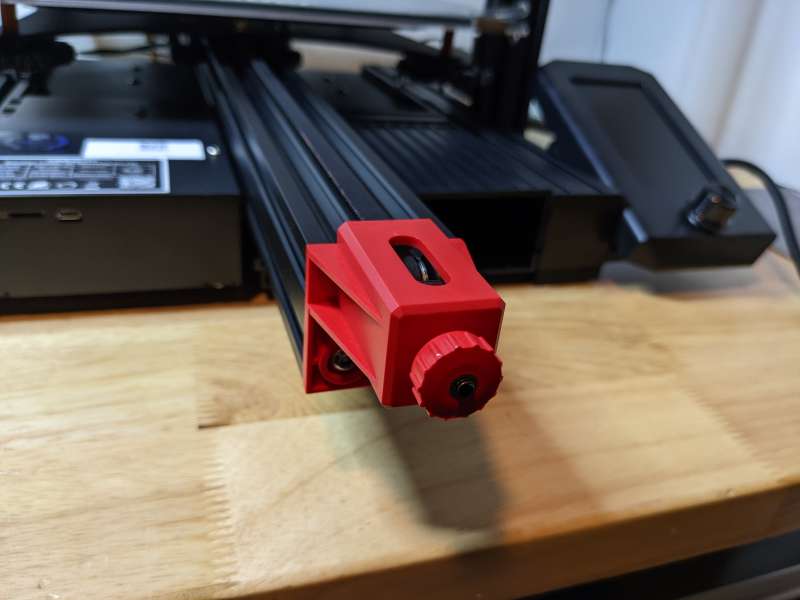
The Creality Ender 3 Max Neo 3D printer is crammed with features and I really like its overall design. Sure, it looks like almost every other Cartesian 3D Printer, but there are a bunch of design tweaks that make the Max Neo stand out from the crowd. I especially like the color highlights found on different parts of the printer, they’re stylish and serve a function. For instance, the belt tensioner knobs on the X and Y axes are colored bright red for visibility.
The red knobs make it easy to keep the belts that move the bed and print head at the proper tension for optimal operation. If the tension is too loose and the parts won’t move or may skip, too tight and the parts could stress or damage the motors.
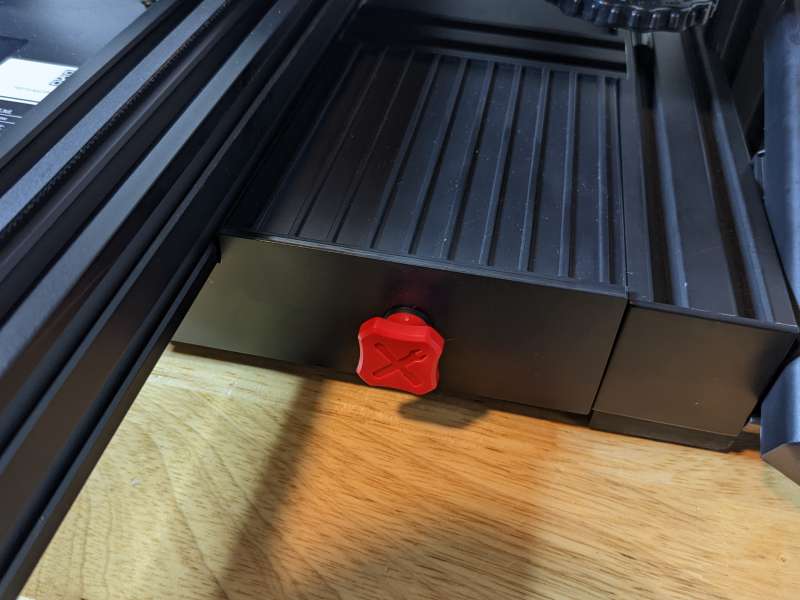
The red highlights are also found on the knob of the built-in tool drawer.
Creality includes a basic tool kit with the Max Neo and while at first, I was skeptical of their usefulness, I find myself reaching for these tools time and again.
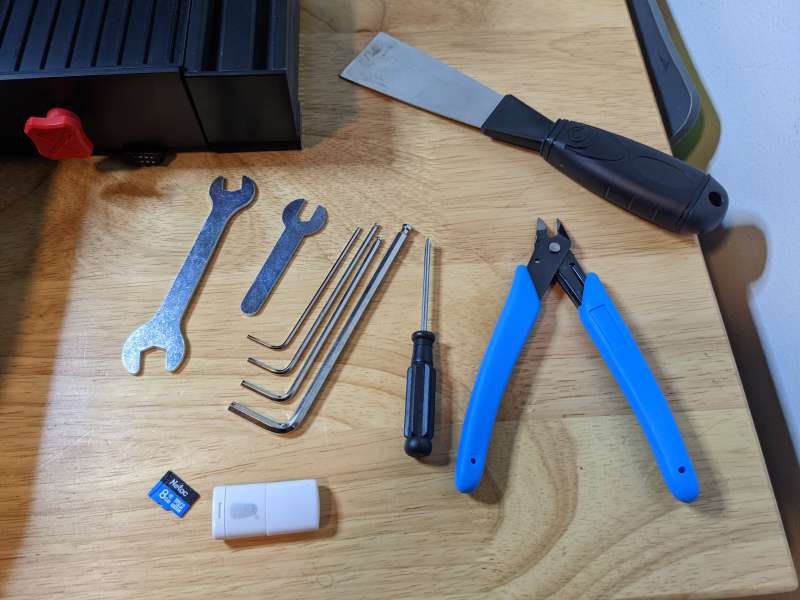
All of the tools, except for the large Spatula fit perfectly in the tool drawer integrated into the base of the printer. A great design addition that adds to the convenience of using a quality 3D printer like the Max Neo.

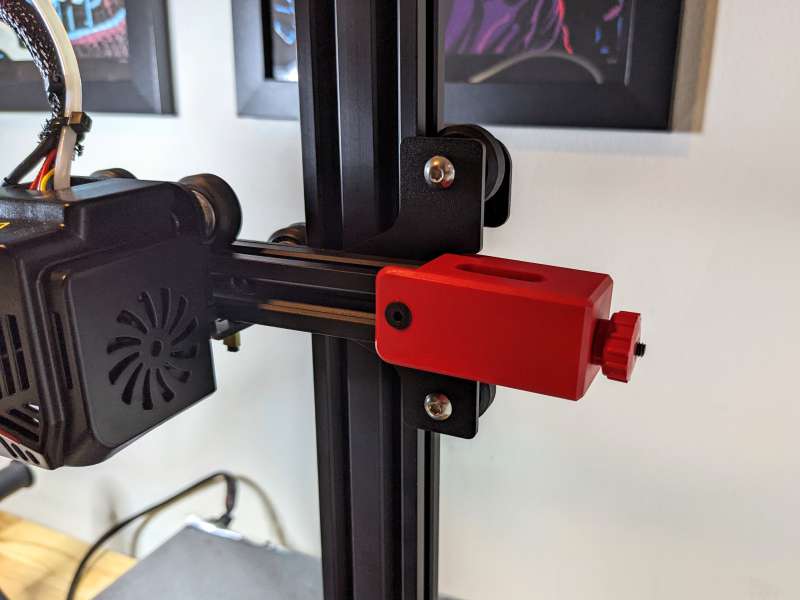
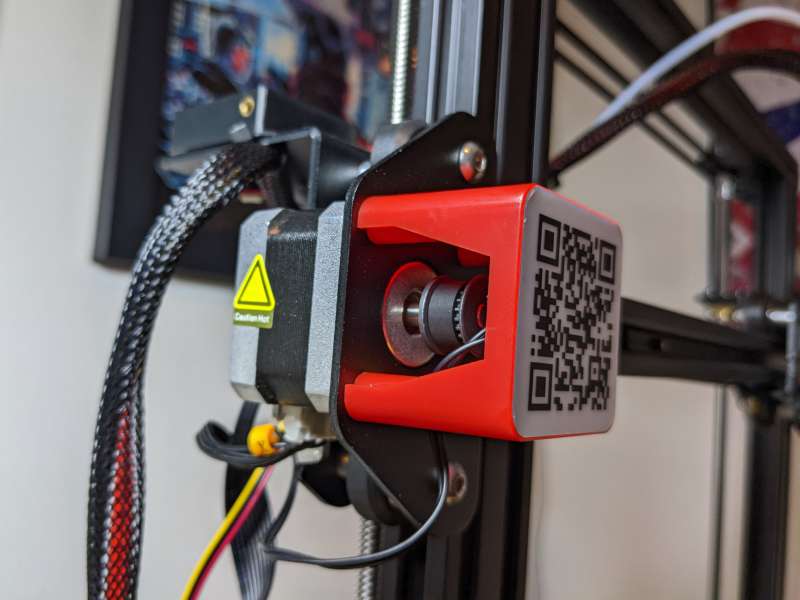
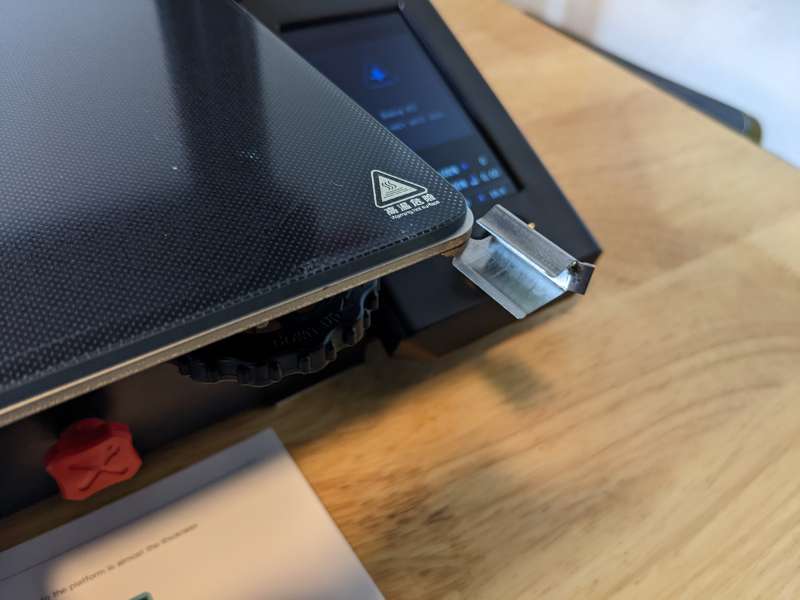
The red highlights show up again on the cover for the X-axis limit switch which also has a QR code on it that leads to Creality’s product listing site.
The red accents on the cover for the hotend assembly appear as thin red stripes.

Removing the plastic cover for the assembly reveals the Max Neo’s unique cooling fins.
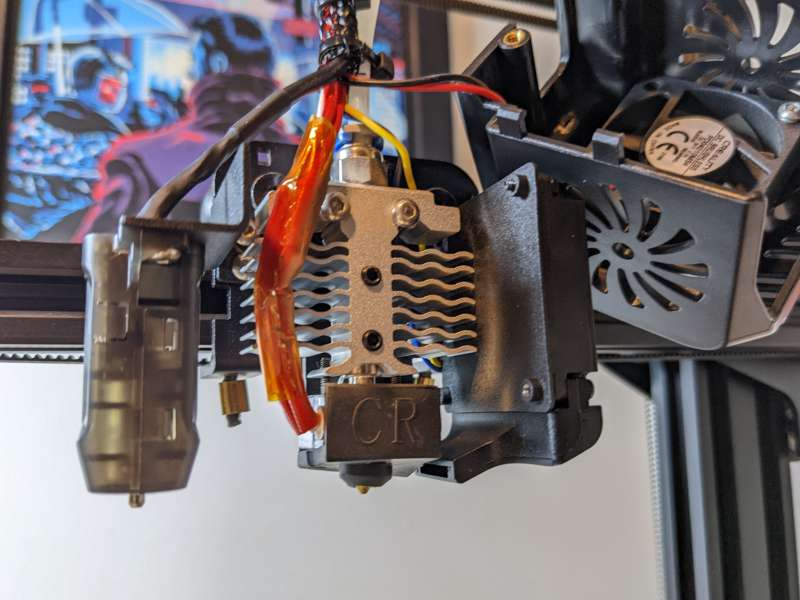
The .4mm brass nozzle for the Max Neo is visible peeking out from below the case. Creality provides an extra nozzle since these parts tend to wear out over time.
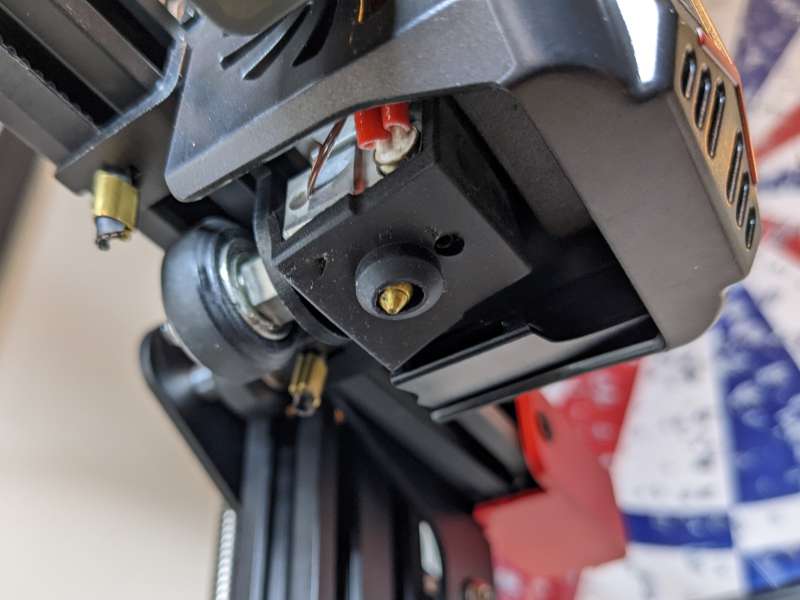
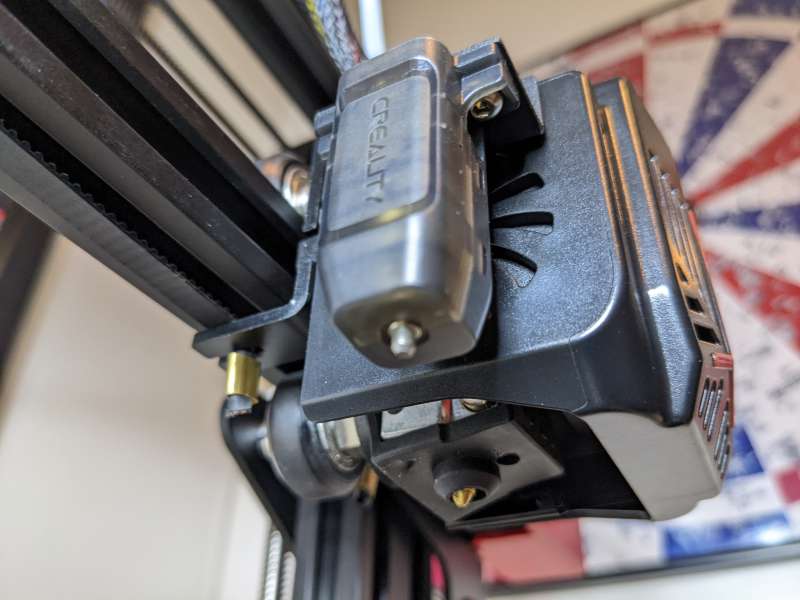
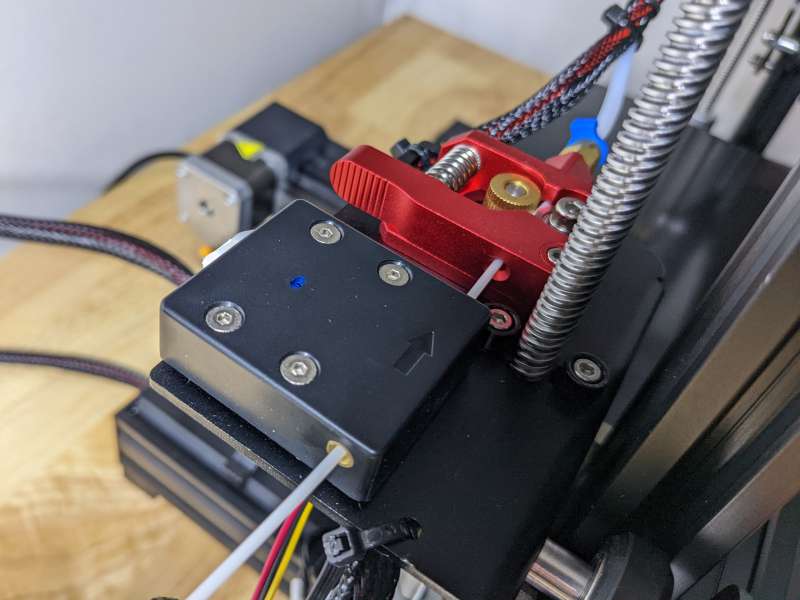
Attached to the side of the hotend assembly is Creality’s CR Touch Auto Leveling Sensor. This sensor with its tiny metal probe provides 25-point detection of the print bed and records the height of each detection point. This aids greatly in successful auto-leveling and helps ensure the accuracy of the Max Neo’s prints.
The aluminum Bowden feeder assembly is colored red as well and provides easy visibility during filament loading.
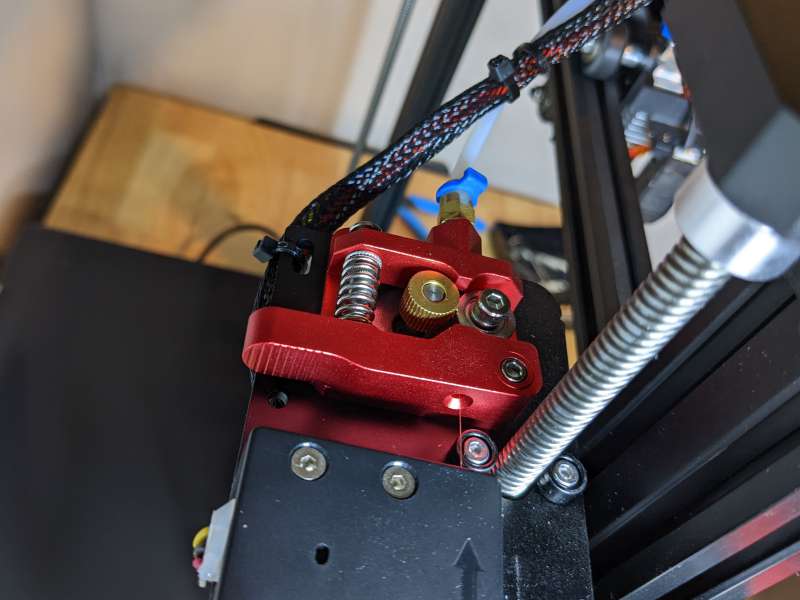
Adjacent to the feeder assembly is the filament detector. This detector is invaluable in rescuing print failures from oblivion by letting the user know when the filament has either broken or run out.
This happened to me a few times while testing the Creality Ender 3 Max Neo 3D printer and the detector worked flawlessly, allowing me to pause the print, reload new filament and continue the print where it left off.
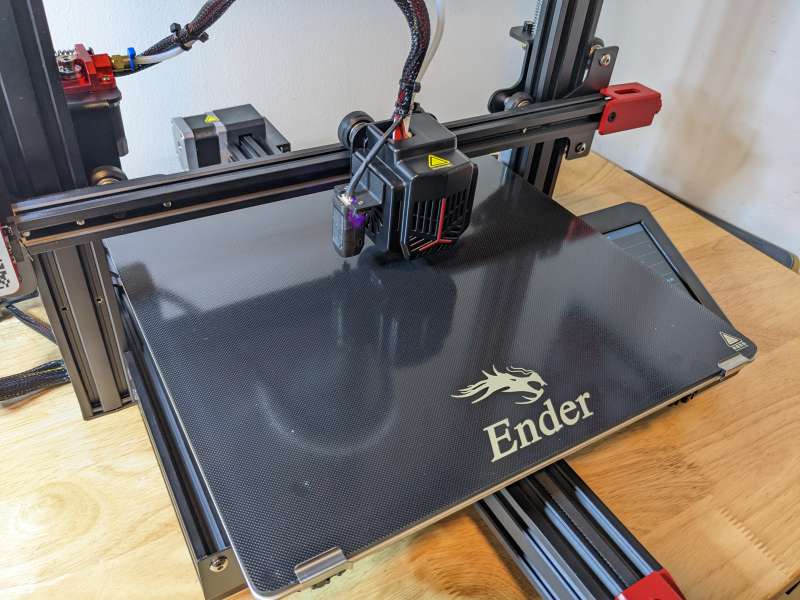
The print bed on the Max Neo is a glass plate with a carborundum coating. Glass plates have very good adhesion in general and allow printed objects to be removed easily. They aren’t as flexible as other types of build plates though like PEI sheets or steel flexing plates.
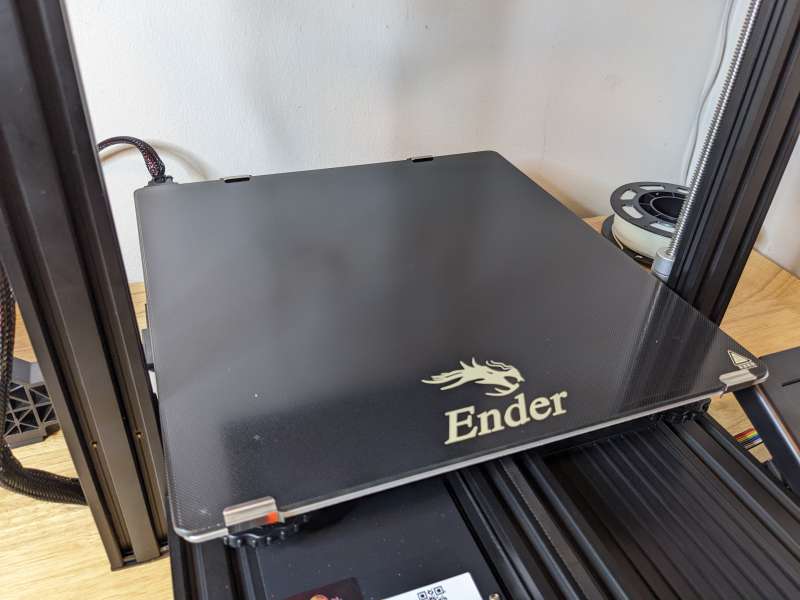
The glass printing plate is held in place by metal clips on the four corners, by opening the clips you can remove or replace the plate.
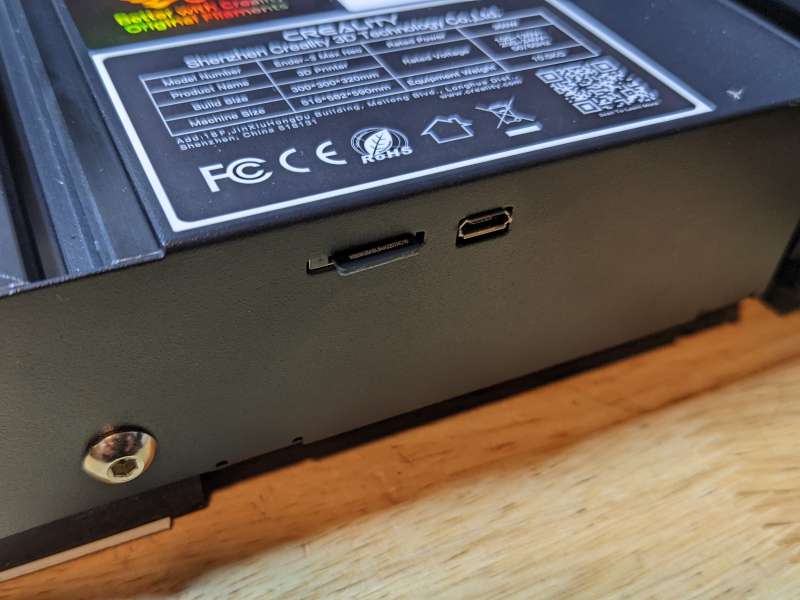
Just under the build plate on the front of the Max Neo are the MicroSD card and the Micro USB ports. These ports allow the user to load models for printing via a MicroSD card or by connecting the Max Neo directly to a computer with a Micro USB to USB-A cable.
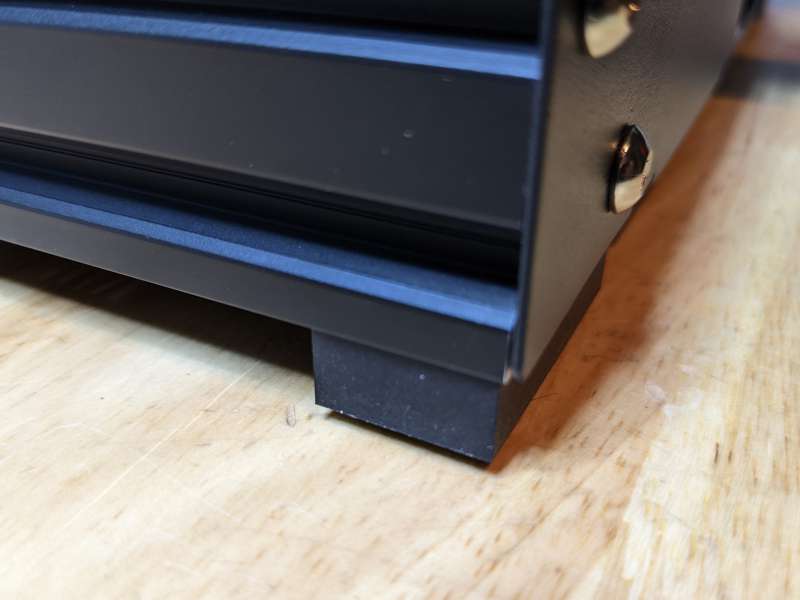
Beneath the base of the Creality Ender 3 Max Neo four rubber feet keep the unit steady and help minimize vibrations. I couldn’t get my printer to lay completely flat for some reason, but I remedied it by attaching small squares of double-sided mounting tape to two feet and it leveled the unit.
Performance
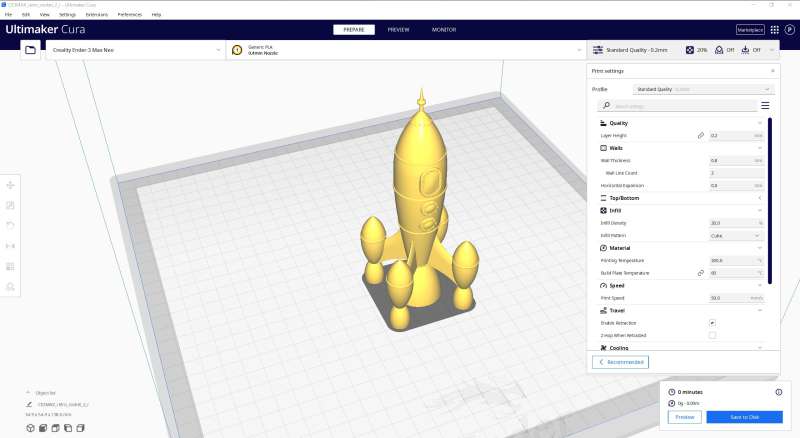
I ran a lot of prints through the Creality Ender 3 Max Neo 3D printer, more than I can include in this interview lest it becomes much too long. Creality includes versions of its own 3D slicer and printing program called Creality Slicer and Creality Print respectively. The slicer is just a skinned version of the excellent, industry-standard Ultimaker Cura and the Creality printing program is a bit clunky and not very intuitive. I ended up using Cura for all of my prints since I’m most familiar with it.
Once I added the Max Neo profile to Cura it was as easy to prepare models for printing as with any other 3D printer I’ve worked with.
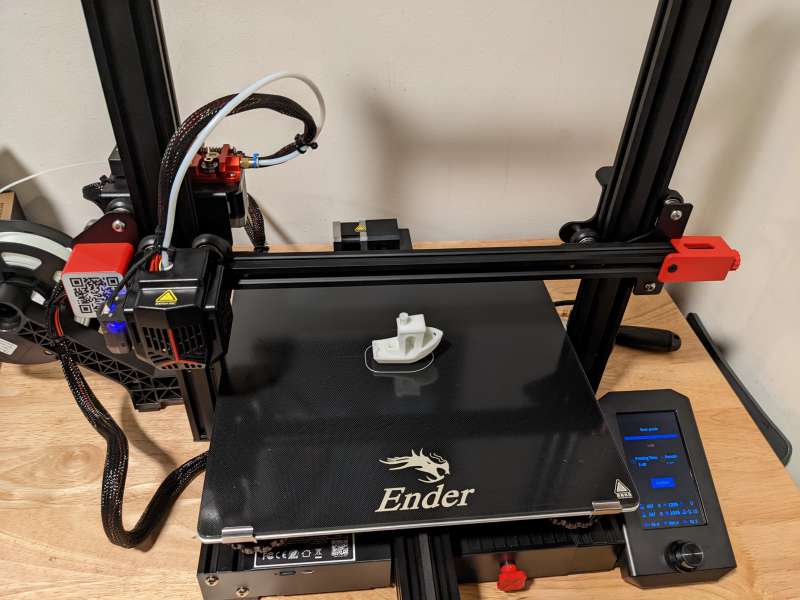
Creality includes two basic models on the MicroSD card that ships with the Max Neo, a tiny rabbit, and that old 3D print test standby Benchy the tugboat.
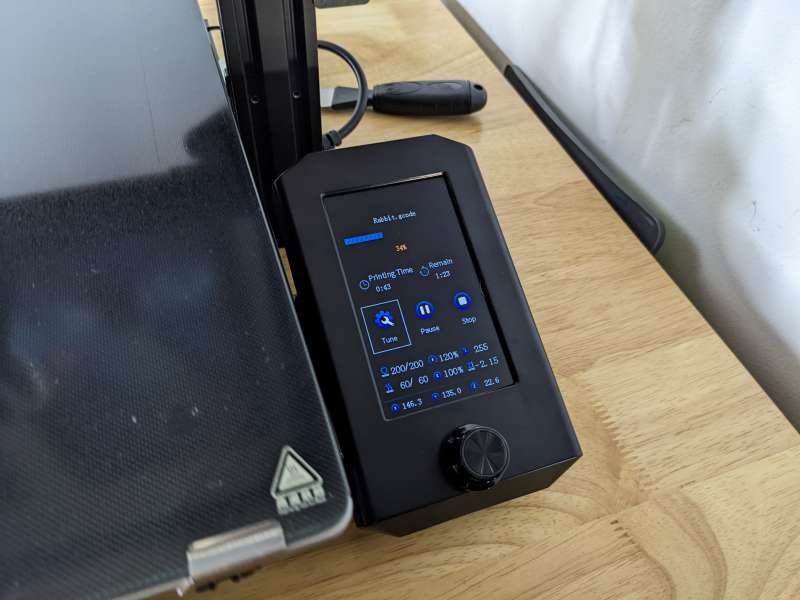
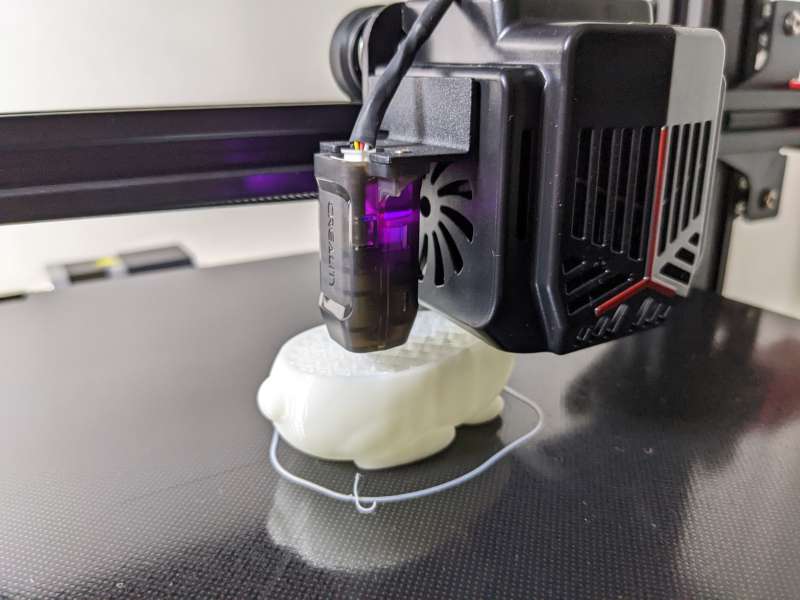
I began my testing with the rabbit model using the white PLA filament that comes with the Max Neo.
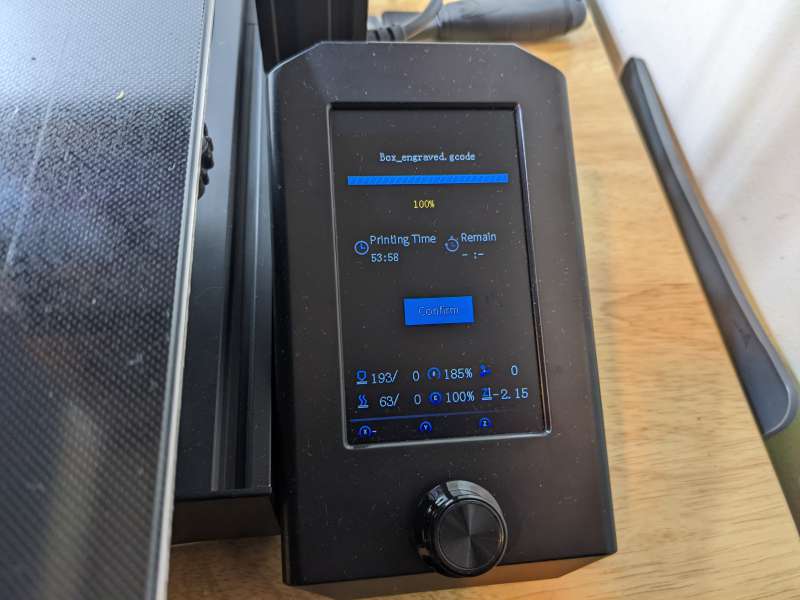
While the rabbit model was printing I was able to monitor all aspects of the job from the screen of the control unit. The remaining print time, position of the printhead, and fan speed are just a few of the stats on display while printing.
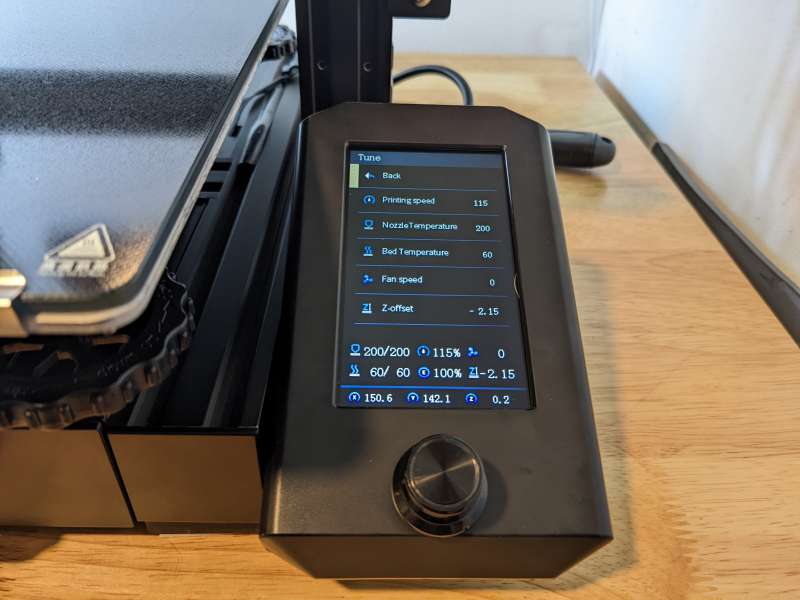
The Creality Ender 3 Max Neo’s control unit also allows you to modify or “tune” the print while it’s in progress. You can change options like the printing speed, nozzle temperature, and bed temperature. You can even change the offset of the Z axis, bringing it closer or further away from the bed if needed. I really love this feature as it prevents having to stop a print, reload the model into a slicer, make changes, and start the print again.
I didn’t modify the rabbit model print settings on the fly at all as I wanted to see how the first print would come out with the default Max Neo settings.
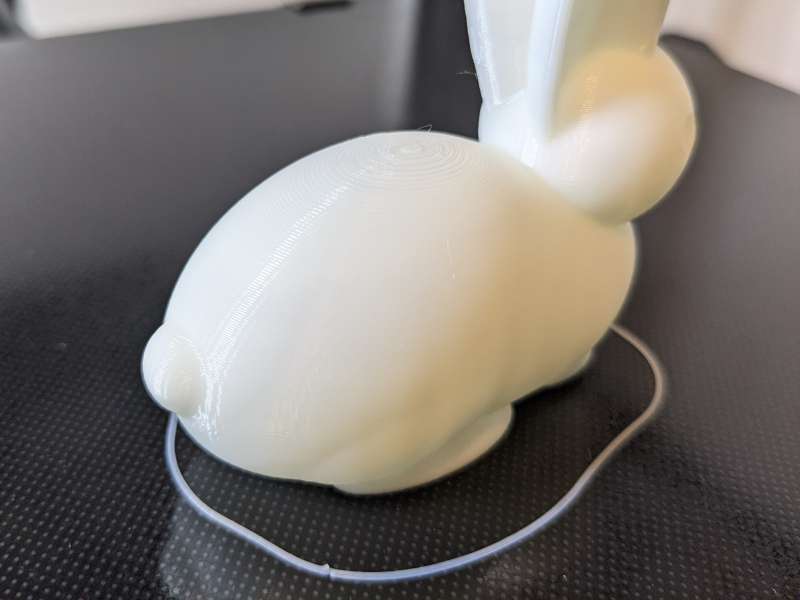
The Max Neo’s first print was pretty impressive, with no defects, tight lines, and consistent print quality.
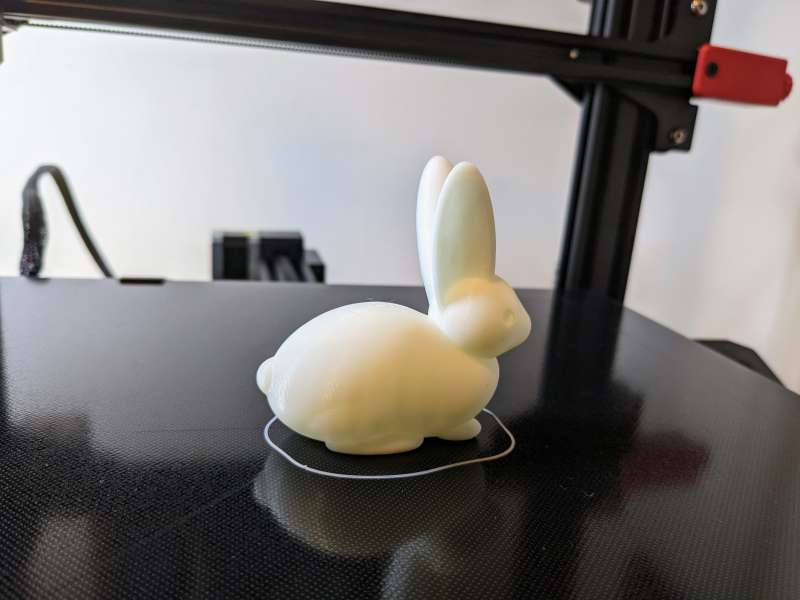
Even on close inspection, I couldn’t find any issues with the rabbit print. The print took about two hours to complete, which made sense for the quality of the print.
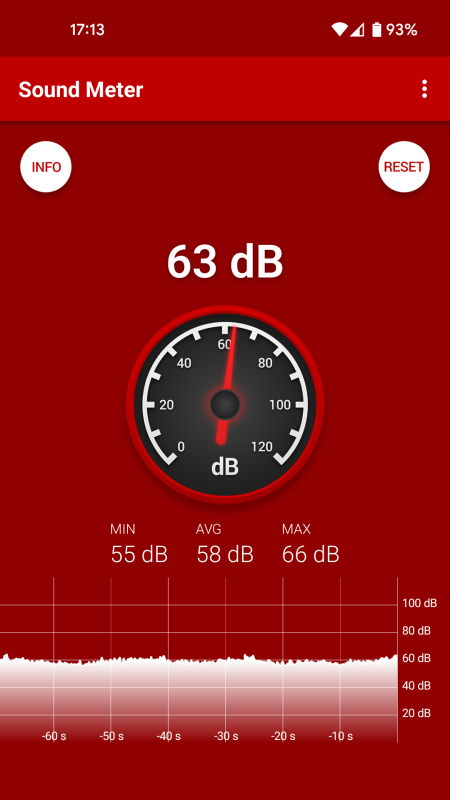
During the rabbit print, the motors on the Max Neo were surprisingly quiet, but the fan noise was pretty significant. The fan runs constantly and I measured its loudness at an average of 60dB, which is equivalent to the hum of an air conditioner or the background noise of a busy office. While the loudness isn’t harmful, it was definitely noticeable and persistent.
Next up was Benchy, the 3D printing test everyone loves to run. I loaded up the model, tweaked the print speed a bit to cut down on the print time, and let the Max Neo do its thing.

Benchy came out great and finished in about an hour and forty minutes.
There were a few inconsistencies in the main arch, but I have a feeling it was due to the increased print speed.

I didn’t give the Creality Ender 3 Max Neo a break and went right to a 3D printing torture test that highlights issues like overhangs, bridging, and wall diameters.
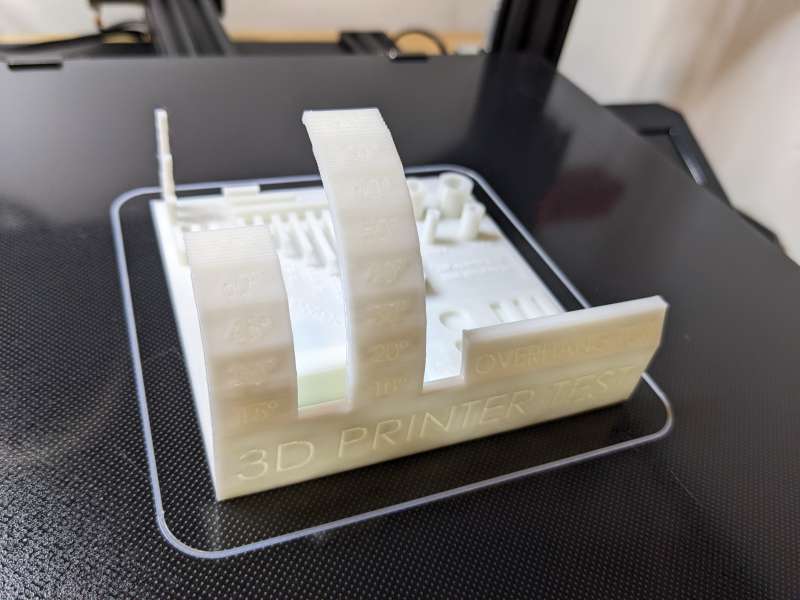
The Max Neo did great across the board with only a slight quality dip in the 80° overhang.
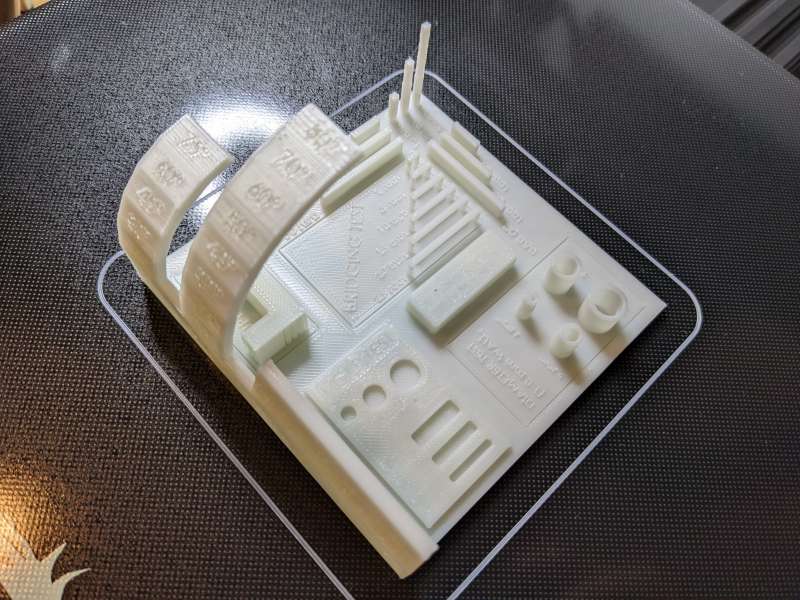
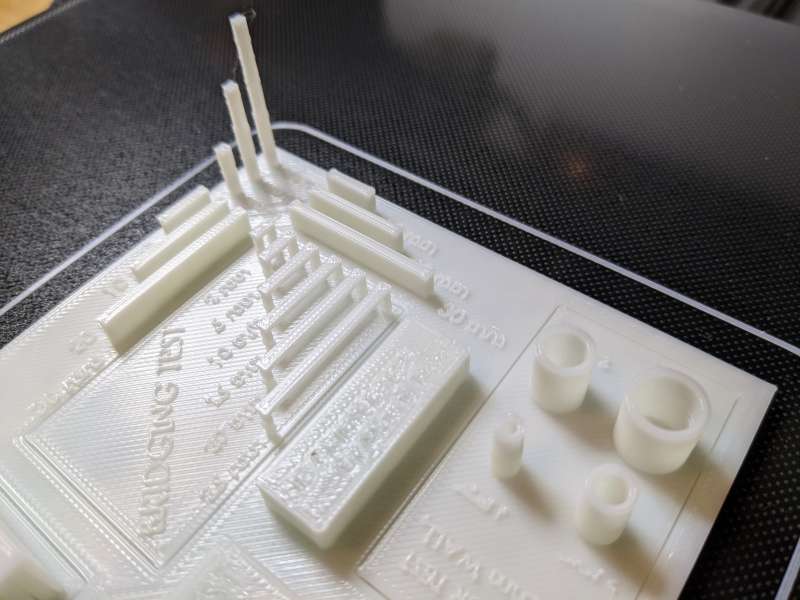
I was most impressed by the bridging test where the 3D printer has to link two raised points with a horizontal “bridge” without support. The Max Neo’s bridges were flawless in this test.
For all of these initial testing prints, I used the standard filament spool mounted on the side of the Max Neo but I wasn’t crazy about its sturdiness or lack thereof. I switched over to a basic Hatchbox filament stand for the rest of my prints and I also tried some new filament instead of the basic white PLA.
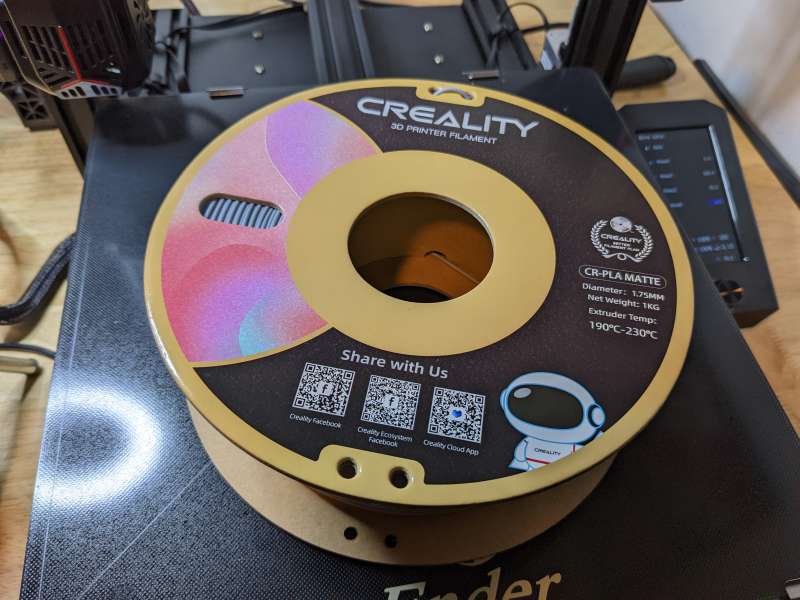
Creality kindly shipped a 1KG spool of their excellent CR-PLA filament in gray matte so I loaded it up for the rest of my tests.
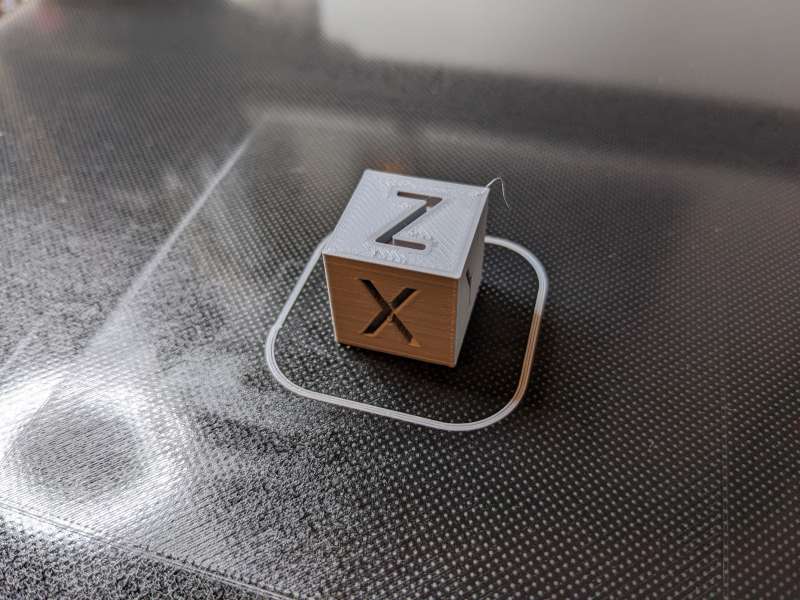
One of my standard 3D printing tests is a basic XYZ 20mm Calibration Cube and with the gray matte filament, I was really able to see the quality of the test.
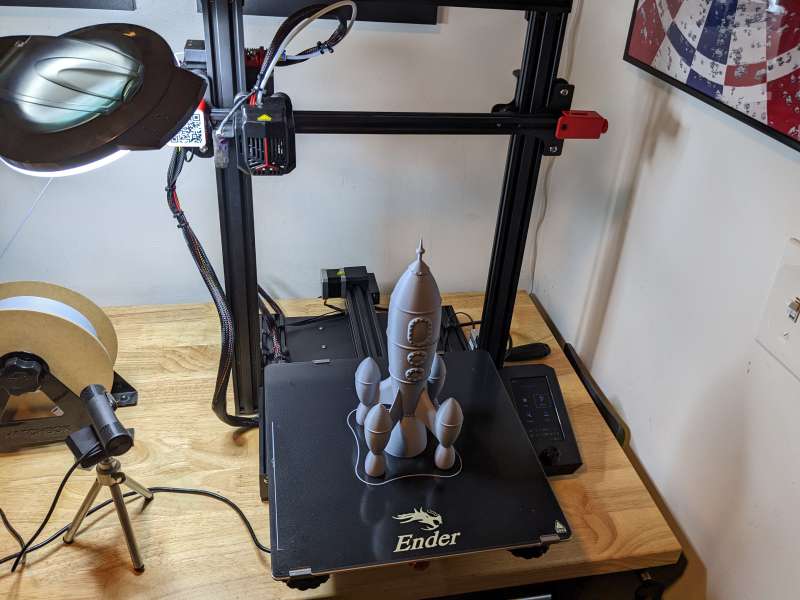
Once my basic small-sized tests were complete I was excited to start taking advantage of the Creality Ender 3 Max Neo 3D printer’s large build volume and what better way to do that than to print a really tall cool retro rocket? The build volume of 300mm x 300mm x 320mm is significantly large than most build volumes which are usually less than 200mm on each axis.
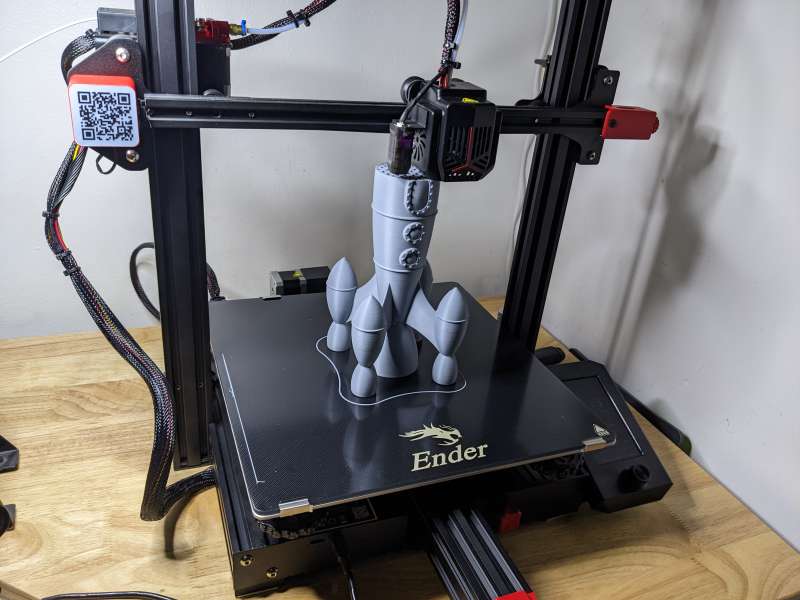
Despite the long print time for such a tall object, the rocket came out great and it was cool to print something so much bigger than I’m used to. I was concerned about the model tipping over, but the heated glass bed provided great adhesion for the model preventing it from dislodging.
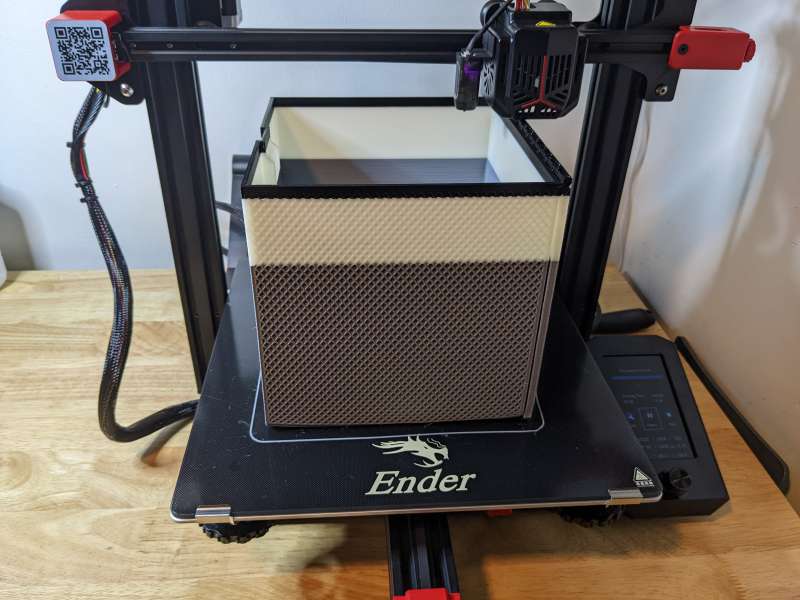
After successfully printing a tall item I wanted to test out the maximum width of the Max Neo’s print area. So, I loaded up a simple textured box with a working hinged lid and scaled it up to fill the print bed. The box took about 54 hours to print, which I expected.
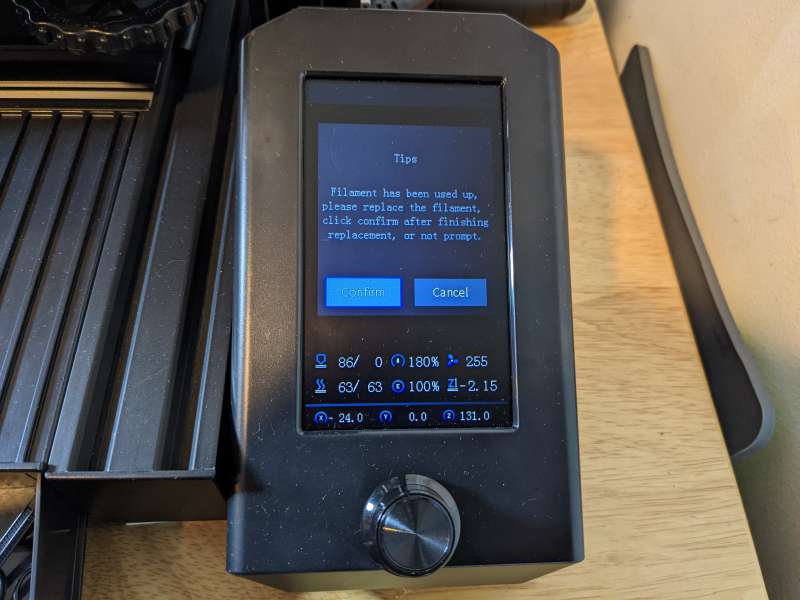
What I didn’t expect was running out of the gray matte filament in the process. Luckily, the Creality Ender 3 Max Neo’s filament detector worked perfectly and I was able to load in the remaining white PLA to make a cool two-tone print. But. I again overestimated the amount of filament I had left and after subbing in some black filament I ended up with a tri-tone box.
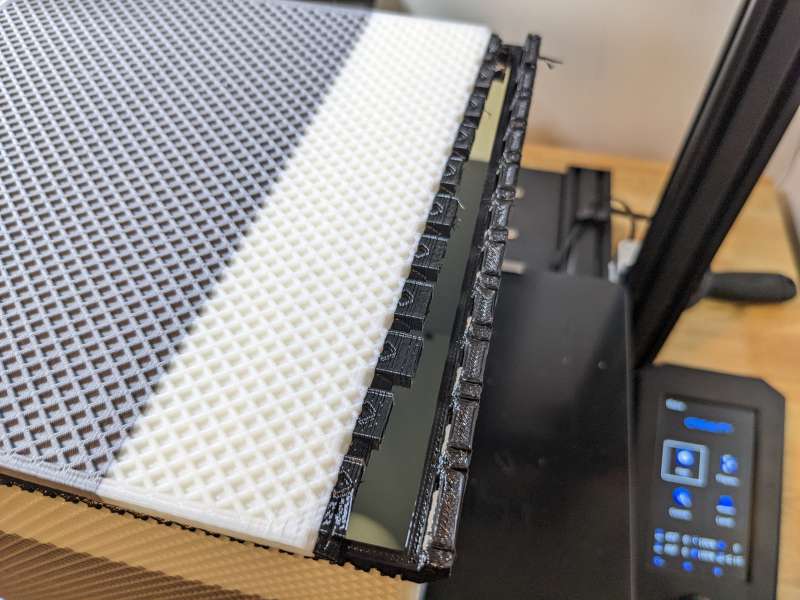
Besides running out of filament twice due to human error, the one failure of the print was the hinge for the lid. This was a print-in-place model which should have been no problem for the Max Neo, but the parts of the hinge didn’t print with enough space between them to work properly.
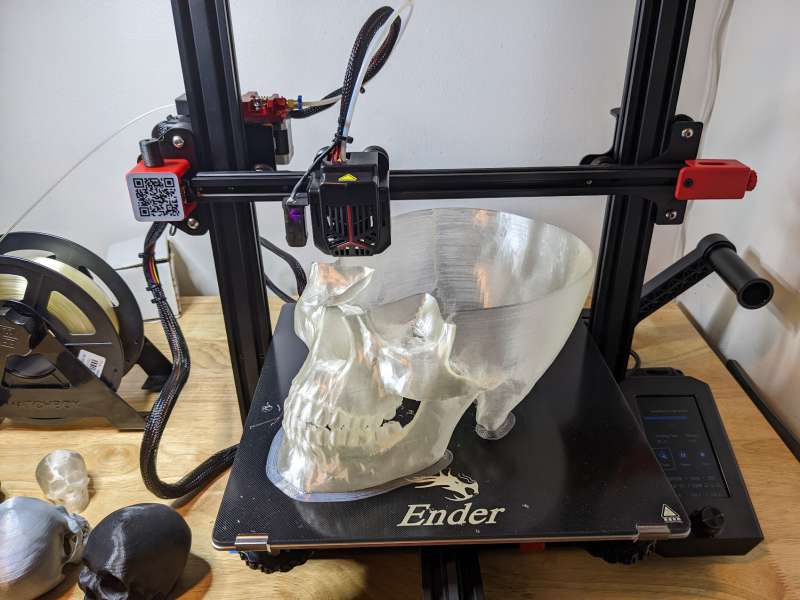
To wrap up my Max Neo testing I tried out a few more larger prints along with some specialty filaments. I started with a large skull printed using a clear filament. The skull took about 73 hours to print and despite being a rather complex model it came out amazingly well.
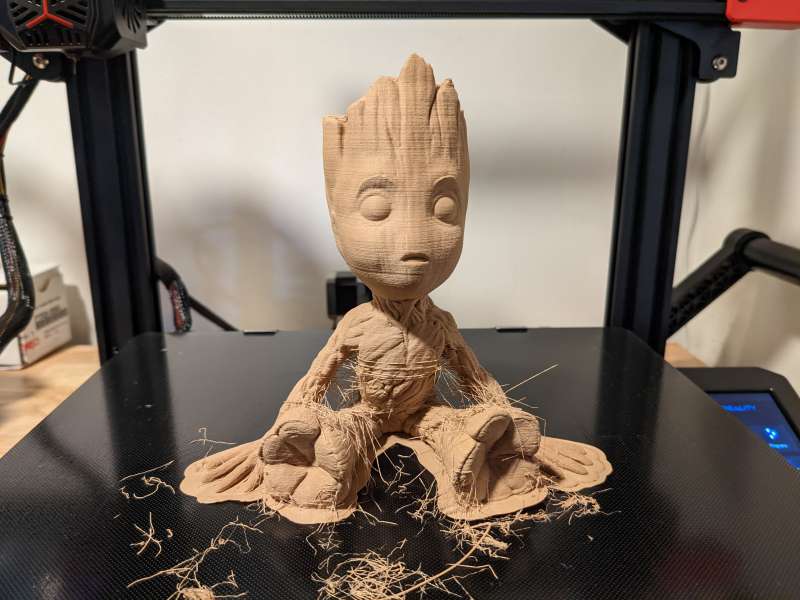
My favorite successful print of all was Baby Groot model printed using some Hatchbox wood filament. Wood filament is fun to use but is a bit tricky to get right and the Max Neo handled it very well aside from some small stringing issues.
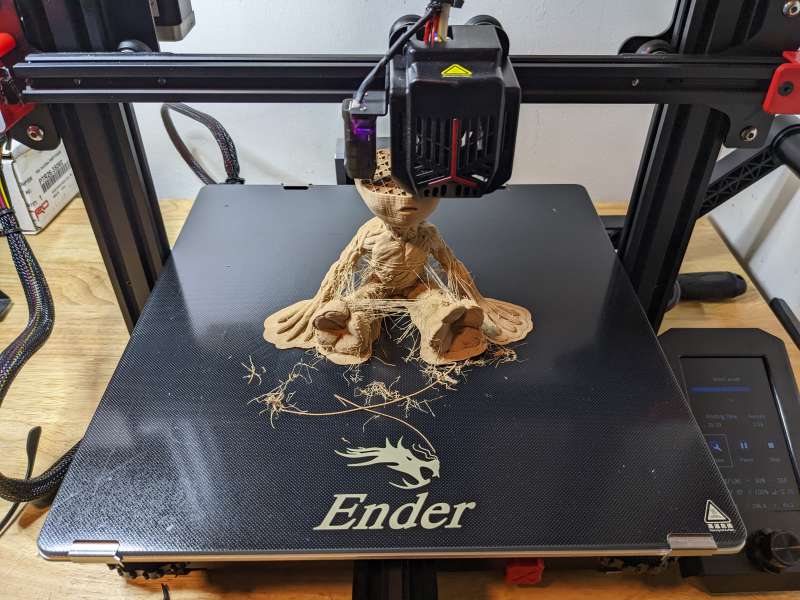
I’ve had this print fail many times on my other 3D printers, especially with the temperamental wood filament. It was great to see it print so well on the Max Neo after the first try. A bonus of printing with wood PLA filament is the smell of burning wood, which I enjoy.
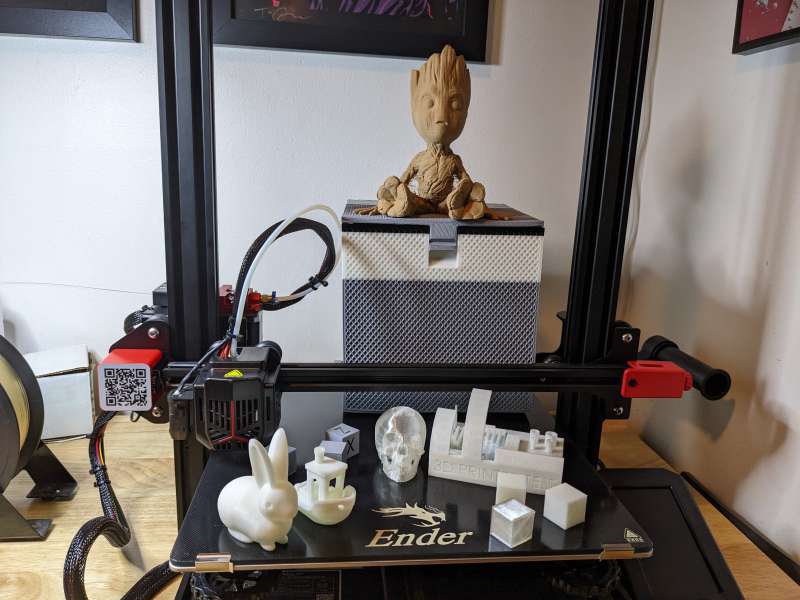
Overall, the Creality Ender 3 Max Neo 3D printer performed well on all of my tests. I ran so many prints it was difficult to fit even some of them in a photo together. The Max Neo excels at printing large and small-sized models with a high degree of accuracy pretty consistently for a consumer-grade 3D printer.
What I like
- Simple assembly
- Easy to make 3D prints right out of the box
- Excellent design and build quality
What I’d change
- Initial bed leveling should be done manually for best results
- Awkward side positioning of Filament Spool Holder
- Consistent fan noise can be a bit annoying
Final thoughts
The Creality Ender 3 Max Neo 3D Printer definitely lives up to the popularity the Ender series has established over the years. With such a large support community and fanbase, it’s hard to knock the Enders, especially for 3D printing newbies. The Ender 3 Max Neo delivers on the ease of use and dependability the series is known for and adds the bonus of a large build volume. Along with that large print area, the $369 Max Neo is a great buy for all of its other features like the CR Touch automatic bed leveling system, filament detector, dual Z-axes, and easily accessible belt tensioners.
Price: $369
Where to buy: Creality and Amazon
Source: The sample of this product was provided by Creality.

ANYCUBIC PLA Filament 1.75mm Bundle, 3D Printing PLA Filament 1.75mm Dimensional Accuracy +/- 0.02mm, 1KG Spool (2.2 lbs), 2KG Black+Black
(as of July 5, 2026 19:58 GMT -05:00 - More infoProduct prices and availability are accurate as of the date/time indicated and are subject to change. Any price and availability information displayed on [relevant Amazon Site(s), as applicable] at the time of purchase will apply to the purchase of this product.)
Gadgeteer Comment Policy - Please read before commenting
Hello, I just bought a Ender 3 Max Neo. I am a beginner. I am having problems. my first print the beachy almost came out good until it unstuck from the bed. I made a earring cutter that turned out too large and now having problems. I am not sure with the bed plate getting to hot. I would like to know if there is a class you can take to show the ends and outs of it. I tried to contact Creality it is very hard. Any suggestions on how to learn my machine? please
I feel you Linda. I’m in the same boat. YouTube has a lot of good content that should be able to help though
Great article! Question, where did you get the Ender-3 Max Neo profile from? the Ultimaker Cura doesn’t have it and i would love to have the right profile! thanks in advance.
I selected the Ender 3 Max and then renamed it (in the manager printer menu) to add Neo.
There’s a few good videos on YouTube that cover initial setup on this printer, the creality on from memory didn’t mention checking the roller tension on the axis rollers or checking the esteps all of which need tweaking, my Estep was about 15% out. Then there is another that covers the settings needed in cura for the ender 3 max Nero and setting up custom profiles for the printer and materials, after following those mine was much better than straight out of the box.
Don’t have the links handy but they were pretty easy to find, one is by justvlad and the other by Havocbuilds.
Hope they help.
Hello: Yes I’m a newbie also. I have watches numerous videos,the best by far was by ”JV””JUST VLAD”’. I followed his video step by step. Only one problem, his machine worked; mine don’t. Ender 3 Mav Neo; when it gets to Auto Home,everything works except ”Z”. tHAT IS WHEN i GET ”HOMING FAIL.” Any help is greatly appreciated.