REVIEW – The Wacaco Minipresso seeks to fill a cold, dark void in my life by enabling me to whip up a coffee anytime, anywhere. The clever piston-driven mechanism promises a real-deal espresso shot on demand. Does it do the job? Will my longing for fresh caffeine be fulfilled? Let’s find out. To the review!
What is it?
It’s a hand operated, piston driven portable espresso maker that produces up to 50 ml of espresso.
What’s in the box?
You’ll get the coffee press including a scoop, cleaning brush, and travel cup that all pack together in one unit. You’ll also get a travel bag for the press.

Hardware specs
- 175 x 70 x 60 mm (6.89 x 2.75 x 2.36 in)
- 360 g (0.8 lbs)
- Water capacity 70 ml (2.35 oz)
- Ground capacity 8 g (0.28 oz)
- Average pressure 8 bar (116 psi)
Design and features
The Wacaco Minipresso is brilliant little self-contained unit designed to produce a single shot of espresso up to 50 ml. For this review I am testing the ground coffee model (called the Minipresso GR) so I’ll be providing my own ground beans. They also make variants for different coffee pods if that’s your thing.
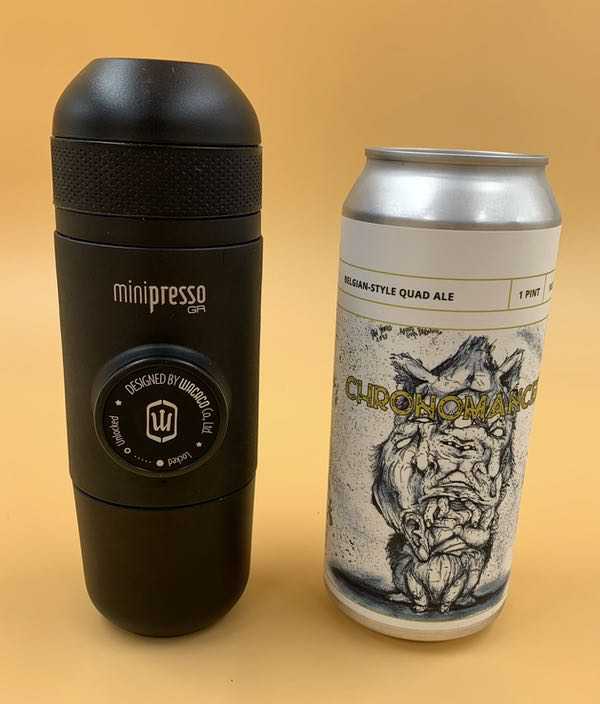
The size is extremely travel friendly, roughly equivalent to standard pint-sized beverage can. (We’ll save that pint for later, ’cause this is a coffee review).
The Minipresso kit provides everything you need but the beans and hot water, packed up in one integrated unit. There’s a little drinking cup that snaps on the end cap. A coffee scoop and cleaning brush are stashed in the water tank when not in use.
It’s a burly, well-built unit that feels like it’s designed for long-term abuse. I expected that from the pumps and mechanisms given that we’re pushing some pressure through the unit, but every component is just as solid. Even the bag is tough and durable. It just feels well-engineered from top to bottom.
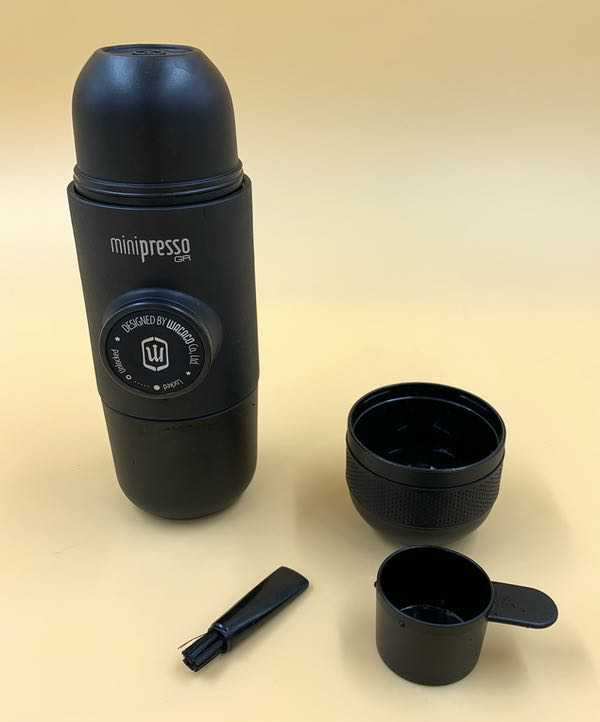
The unit disassembles for coffee production. Let’s meet the parts!
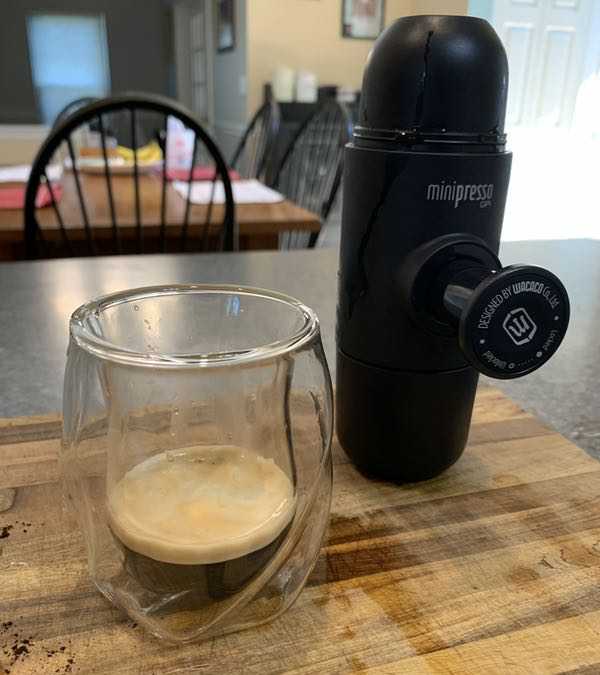
On the back row in the photo you’ll find the built-in espresso cup and cleaning brush. That’s my coffee in the center. I’m using the glass on the right so you can see the pour; if you like an Americano-style coffee you’ll probably want a similar drinking vessel as the built-in cup doesn’t leave room for extra water.
The bottom row is all of your working bits for brewing, from left to right: the coffee scoop, the filter basket, the outlet head, the main body, and the water chamber. Everything comes apart (and re-assembles) with a push and a twist. Let’s brew!
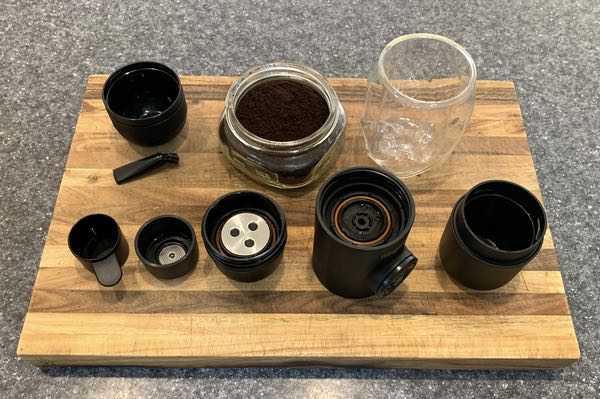
One scoop of grounds is all you need, which measures out to roughly 8 grams of coffee. Mine is an espresso blend that ground very fine, and I keep it in a small Ball jar for the trips to the office.
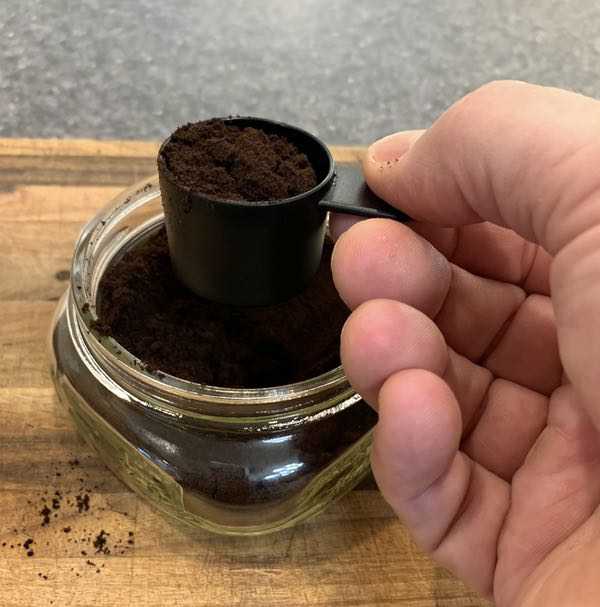
The coffee goes in the filter basket, which fits perfectly over the scoop to minimize spills. There’s some nice engineering happening here throughout the package for stuff like this.

A light tap with the back side of the scoop packs the coffee in a bit.
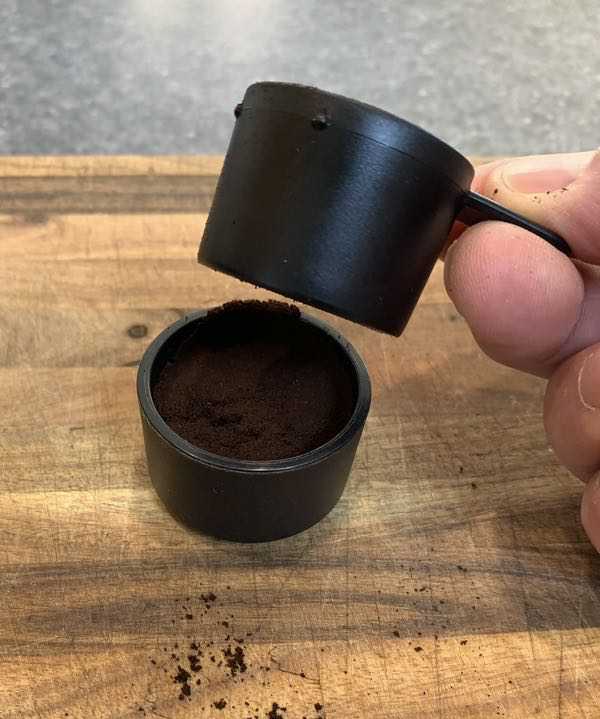
Now the filter basket gets put in the outlet head. There’s a slot in the head that accepts the filter basket, so I find it easier to leave the basket on the table and pop the outlet head on top to minimize spillage.
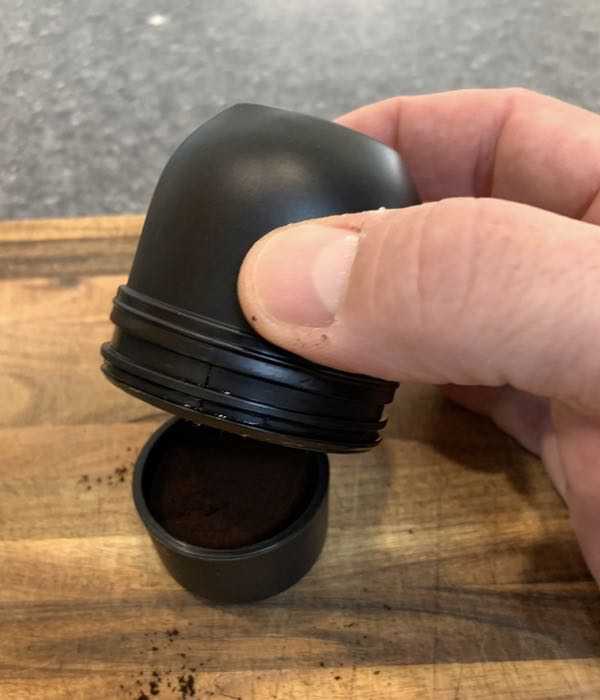
Flip it over and you’re ready to screw it into the main body.

You’ll hand tighten it for a secure fit. Wide threads make this step quick and painless.
Now we’re on to the water. You’ll add boiling water to the water chamber up to the inside line.
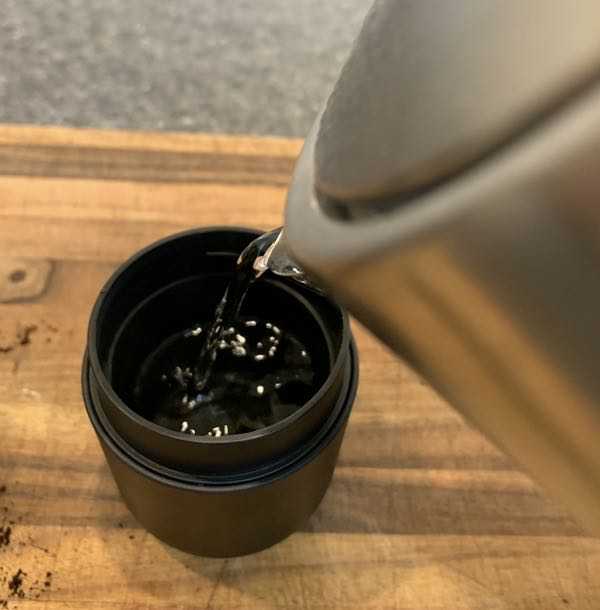
The rest of the assembled unit now goes on top. A push and twist locks the water and everything is locked in place. The water chamber, like the rest of the unit, is thick-walled so that you don’t burn your digits trying to assemble the parts.
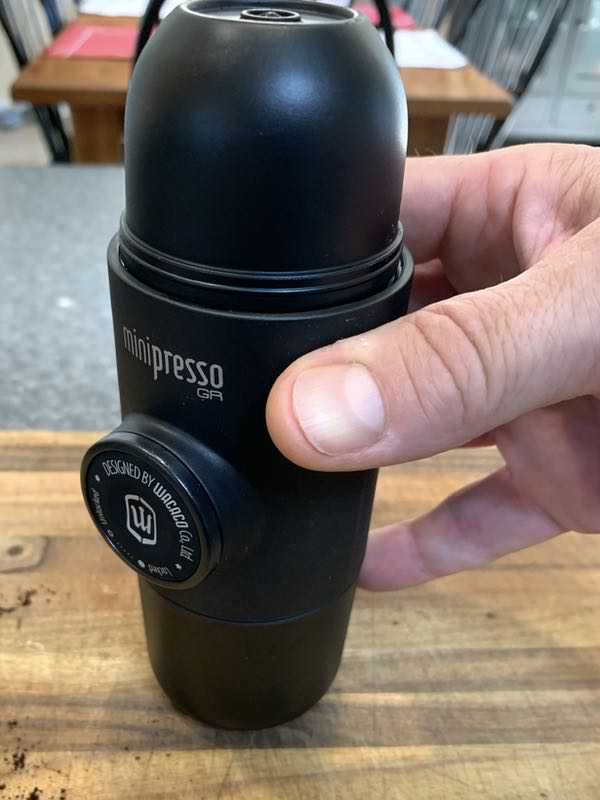
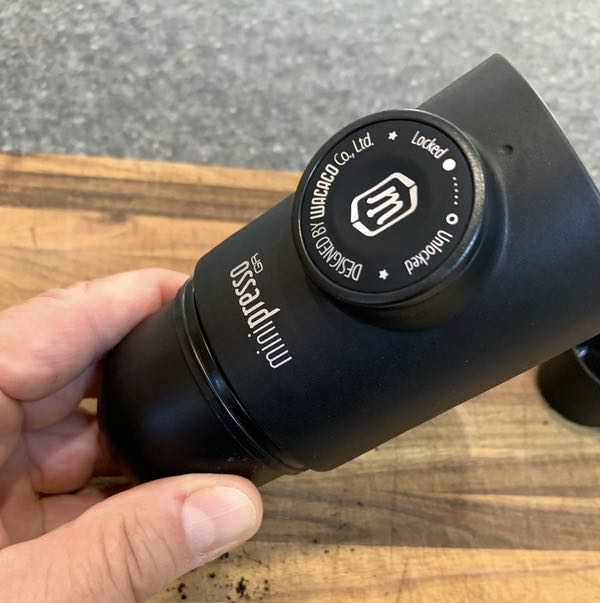
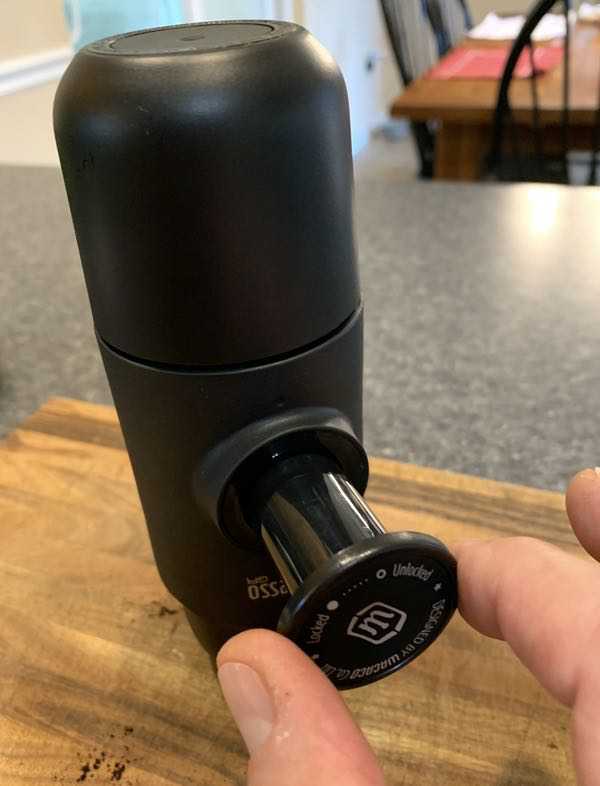
Now you can flip that bad boy over and unlock the piston. This is done by twisting the dial on the side…
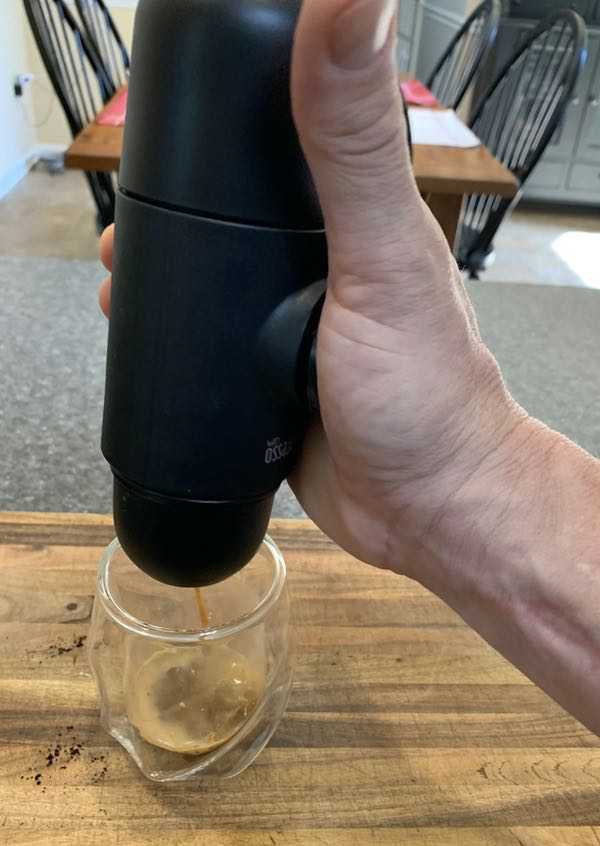
… and you’re ready to go! Position the Minipresso over your desired drinking vessel and pump the piston. You’ll feel the pressure build up over the first 5-10 pumps.
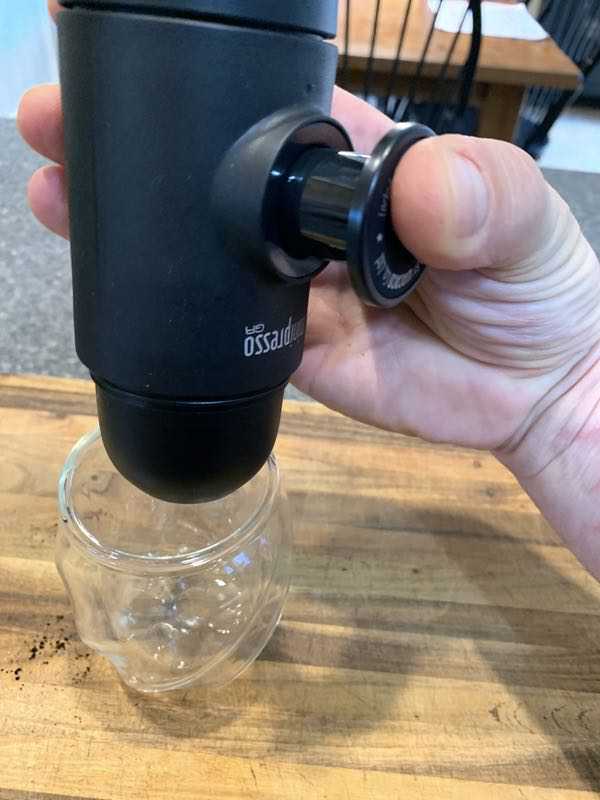
The coffee starts dispensing once sufficient pressure has built up. I should note that this is much easier to do with two hands, but I was taking pics with the other hand.
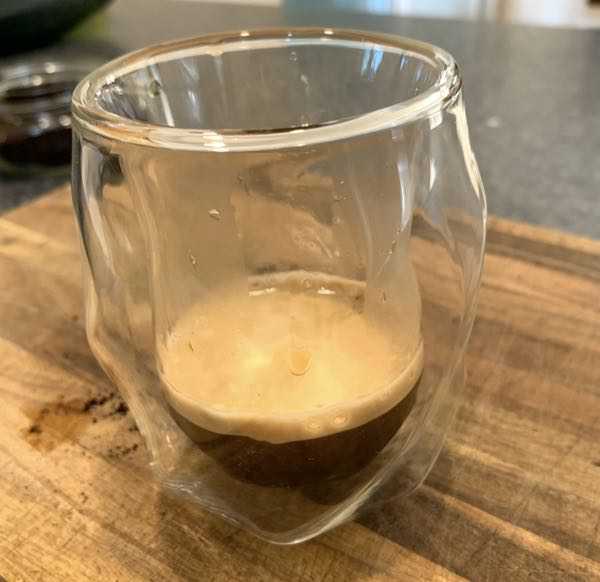
The finished product has a beautiful crema. Look at that!
When you’re done you push the piston in and give it a twist to lock it in place. Then you can rinse out and reassemble the rest of the goods.
I did notice that it’s a little sloppy. The outlet head does retain some water that leaks out as it dries, and you can get some sludge in there. I find a quick rinse is the best way to clear out the gunk. If you’re out in the wild you could easily give it a quick wipe out and a splash of water, but you’ll probably have to do a more thorough cleaning when you get home. When you re-assemble the unit, by the way, you won’t find any leakage in your bag. The tight machining on the Minipresso and that rugged carry bag make sure that there’s no mess in your backpack.

The finished coffee is a VERY good espresso, considering the portable nature of the device. My pulls have consistently had a rich, silky texture and a lovely crema. I’ve tried several different styles of beans and have been pleasantly surprised with the consistency. I will note that you lose a lot of heat in the process, so the finished espresso is not super-hot (even with boiling water). I usually add hot water to make an Americano, however, so this doesn’t bother me.
The portable nature of this unit is fantastic. I’m doing the home/office hybrid thing these days, and the coffee at the work location is… not great. But they have hot water. I bring the kit you see in this article, and happiness is achieved! If you’re traveling, camping, or commuting you’ll find this to be a great (and easy) solution.
What I like
- Quality construction & engineering
- Fully integrated — just bring the grounds and hot water
- Extremely portable and convenient
- Produces a legitimately good espresso shot
What needs to be improved
- Loses a bit of heat in the brewing process
- Can be a bit sloppy/leaky after brewing, but easy to manage
Final thoughts
My go-to for portable coffee has been an Aeropress for years, but the Wacaco Minipresso has found a permanent home in my office kit. It really does produce a lovely espresso shot on the go, it’s easy to use, and easy to transport. I still love my Aeropress, but I find the Minipresso to be more convenient for the office grind now that we’re doing the temporary workstation thing. It will be great for camping too. It’s a good one!
Update 6/23/22
Folks, this little wonder produces a damn good espresso shot. My son and I have been experimenting with coffee drinks (we’re watching way too much TikTok) like homemade lattes, mochas, and the occasional cocktail concoction for the Missus. The Minipresso is great for busting out an espresso shot for all of our creations. It’s still a little sloppy, but that’s not a problem when I’m working in my kitchen.
Price: $54.90 + shipping
Where to buy: Wacaco.com and Amazon
Source: The sample of this product was provided by WACACO.

Keurig K250 Single Serve, Programmable K-Cup Pod Coffee Maker, Black (Discontinued)
(as of June 3, 2026 17:08 GMT -05:00 - More infoProduct prices and availability are accurate as of the date/time indicated and are subject to change. Any price and availability information displayed on [relevant Amazon Site(s), as applicable] at the time of purchase will apply to the purchase of this product.)
Gadgeteer Comment Policy - Please read before commenting
I have one for a few years now, albeit the one that lets you use capsules.
Yes, the heat loss is notable.
Its a bit of a bummer.
Other than that – its hard to describe the envious looks from other people when you make a fres espresso on a mountain top 🙂 🙂 . Awesome!
its then worth the extra weight, including the hot water.