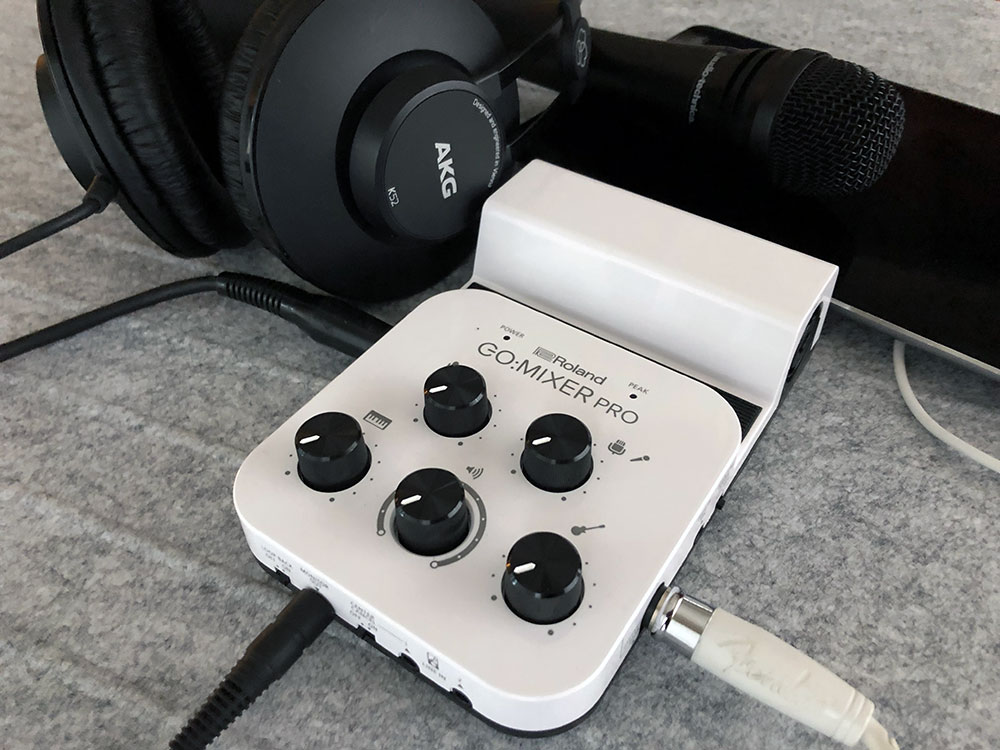
REVIEW – Do you like to mess around with a guitar, vocals, keyboard or other musical instruments? Are you looking for a cleaner way to record audio into videos that you upload to social media? A yes to either one of those questions identifies you as the target for Roland’s new Go:Mixer Pro.
What is it?
The Go:Mixer Pro is an audio mixing device with easily understandable analog controls for capturing multiple input sources simultaneously and streamlining the output for capture directly to a mobile phone, laptop, or another similar device.
Hardware specs
Audio Channels: Input – 9 channels, Output – 2 channels
Connectors:
– Instrument (L/MONO, R) jacks: 1/4-inch phone type
– Line-in 1&2 jacks: Stereo miniature phone type
– Guitar/bass jack: 1/4-inch phone type (supports high impedance)
– Plug-in mic jack: Miniature phone type (supports plug-in power)
– Mic jack: Combo type (XLR, 1/4-inch TRS phone, phantom power DC 48 V, 6 mA max.)
– Monitor out jack: Stereo miniature phone type
– USB port: USB Micro-B type
Controllers:
– Knobs – Instrument, Guitar/Bass, Plug-in Mic, Mic, Monitor Out
– Switches – Loop Back, Center Cancel, Phantom Power, Battery
Indicators: Power, Peak
Power Supply: USB Bus Power or 4 AAA batteries – Alkaline (LR03), or Rechargeable Ni-MH (HR03)
Current Draw: 170mA
Battery Life: ~4.5 hours on Alkaline batteries
Dims/Weight: 104 x 155 x 41mm / 220g
What’s in the box?
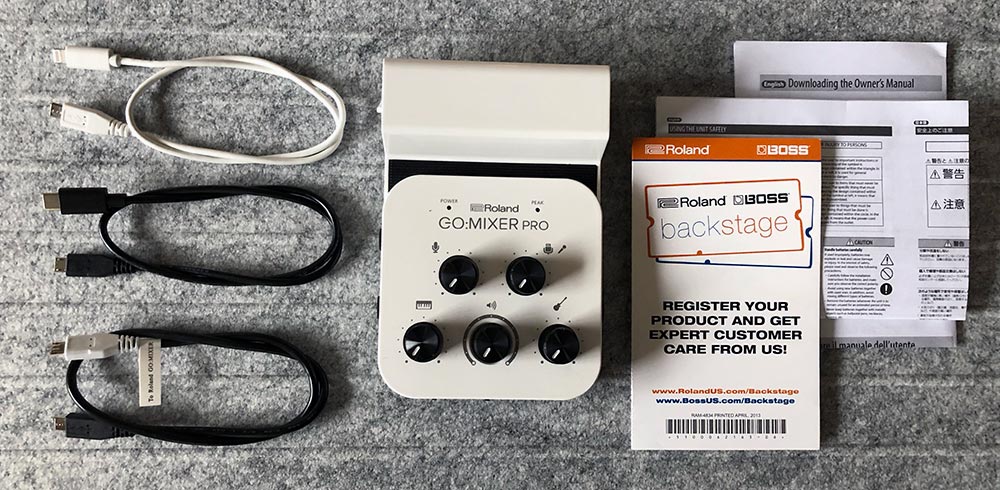
- Go:Mixer Pro
- 3 USB micro cables – Lightning, Micro & USB-C
- Guides for registration, downloading the digital manual and using the device safely
Design and features
First off, the Go:Mixer Pro solidly builds its look and capability from a baseline of Roland’s original Go:Mixer which we reviewed in May of 2018. Take a jump back to read about some of the core functionality which remains largely intact.
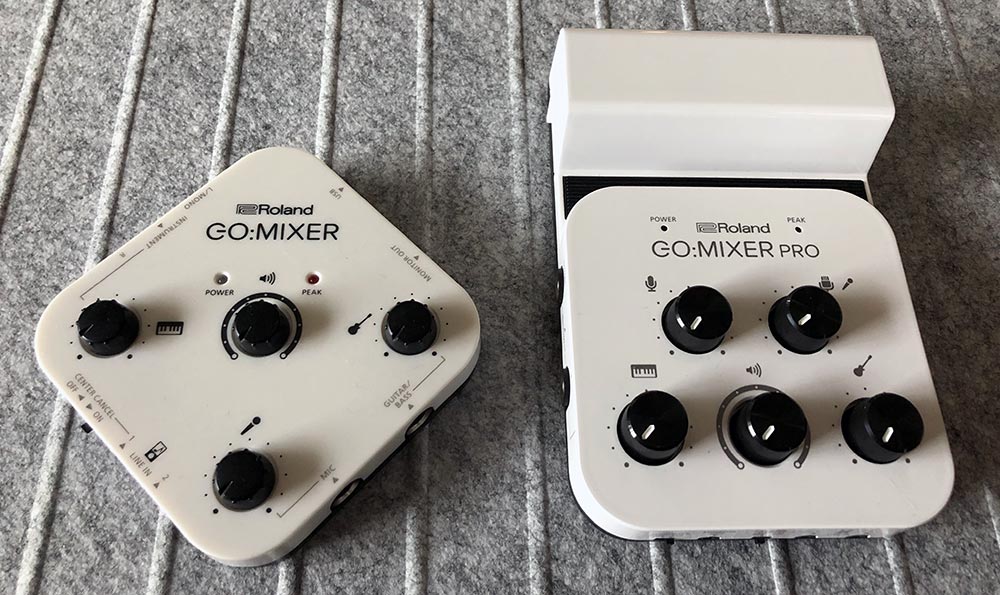
From a visual perspective, there are some key design changes. As you can see above, the orientation is now squared up versus the diamond positioning of their original unit on the left. As a result the knobs have a more traditional layout which translates to faster adjustment in the moment.
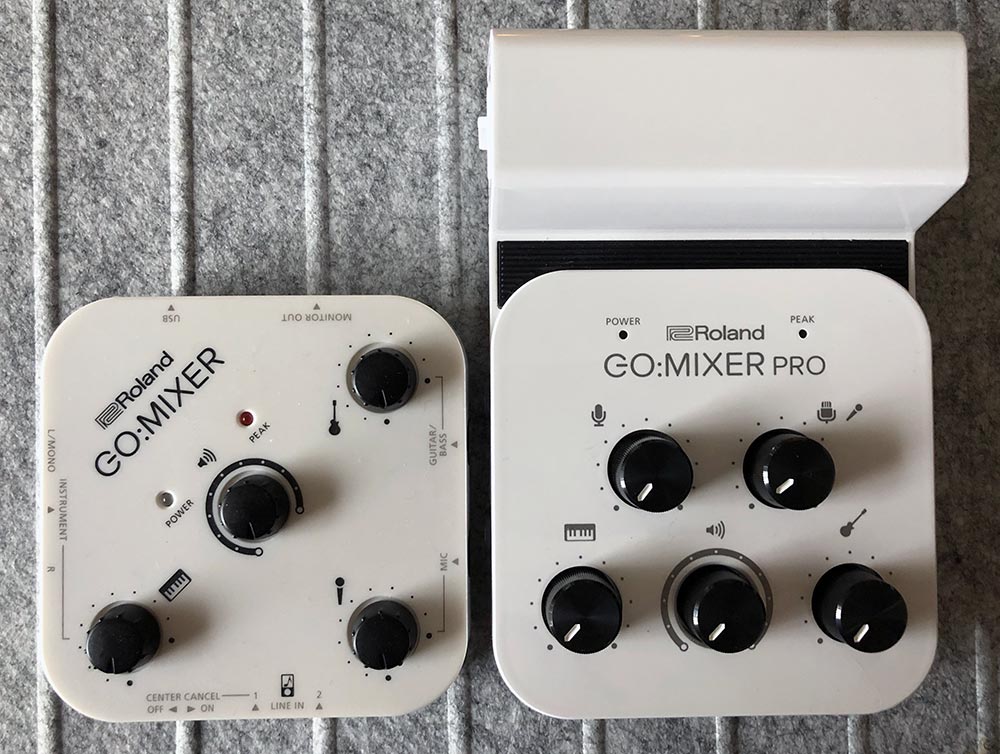
The square itself is a bit bigger as are the knobs including a 5th knob for the additional microphone input. Roland has added a large section to the rear of the unit that houses optional AAA batteries as well as the combo port.
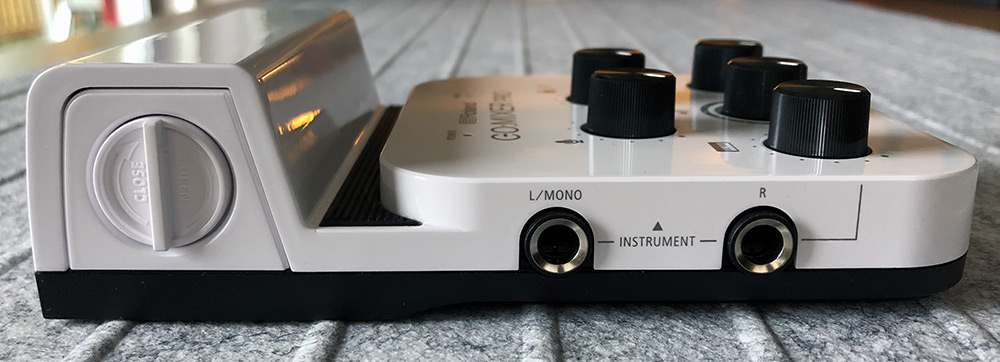
The left side has a well designed, spin-to-unlock battery door and the two 1/4″ instrument inputs.
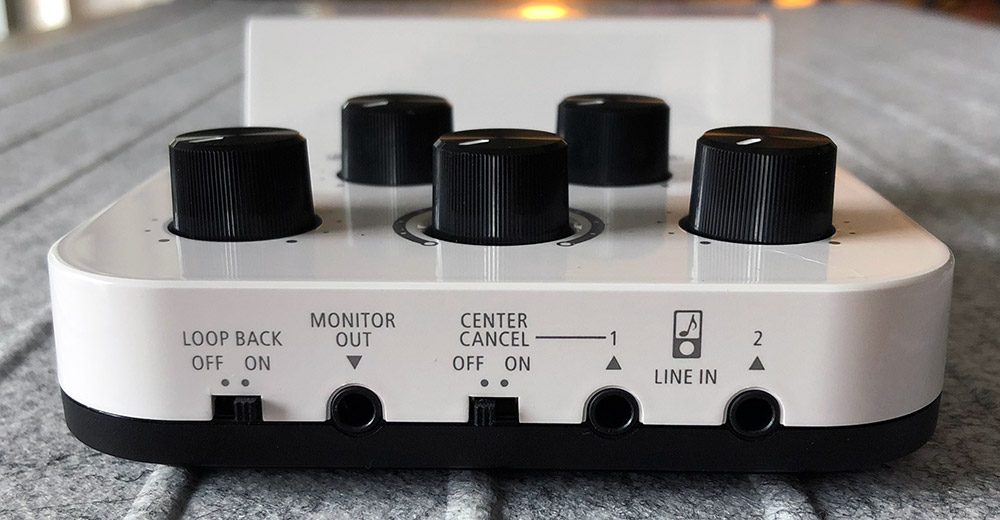
The front panel has 1/8″ inputs for lines 1 & 2 with a center cancel function on line1. There’s also an 1/8″ monitor out port and an off/on switch for loop back.
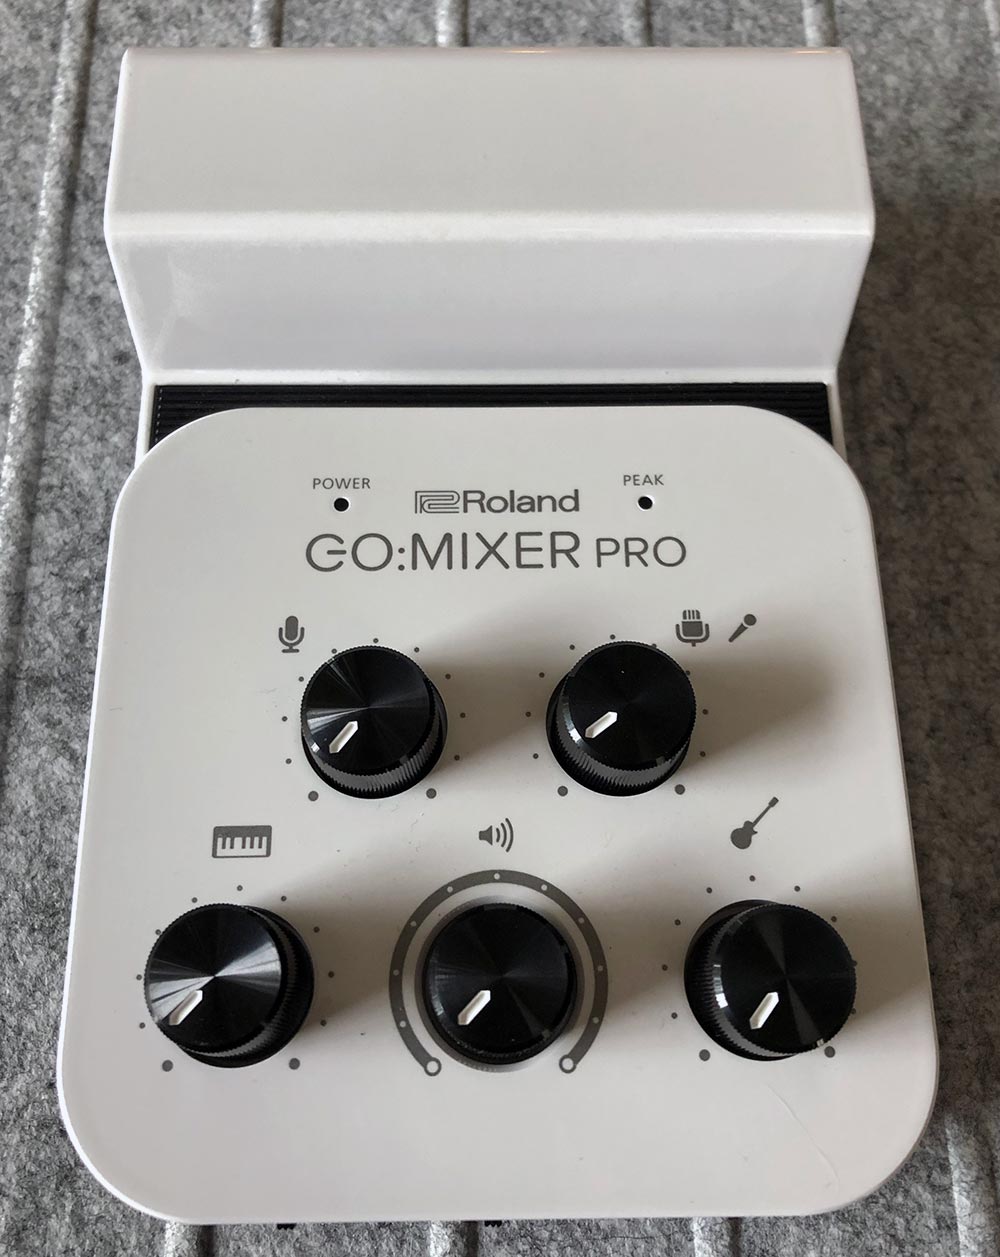
On the top face, indicators for power and peak sit above control knobs for the mics (top two), instruments (left and right) and master volume (center).
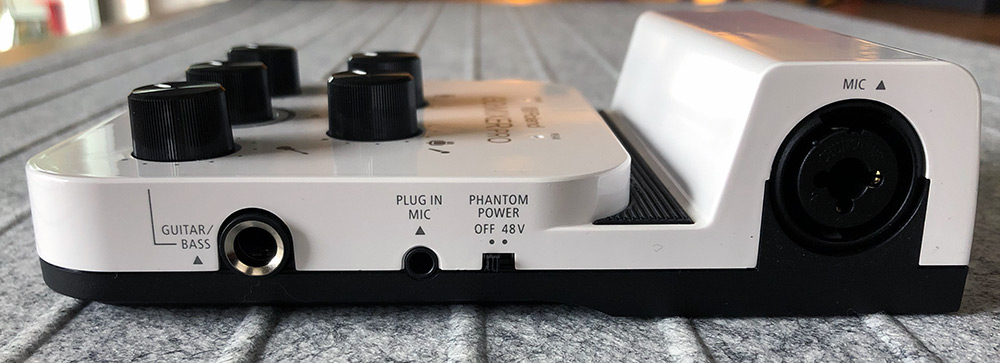
On the right side, you’ll find inputs for the Guitar/Bass 1/4″ along with Plug-in mic 1/8″ and a phantom power switch for the combo mic port already mentioned.
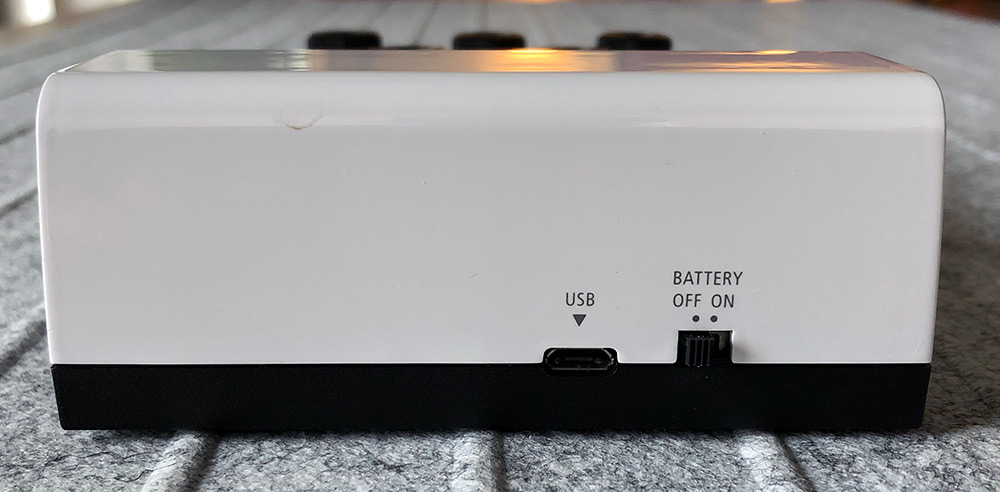
On the back is a battery switch and the USB port for connection to a device.
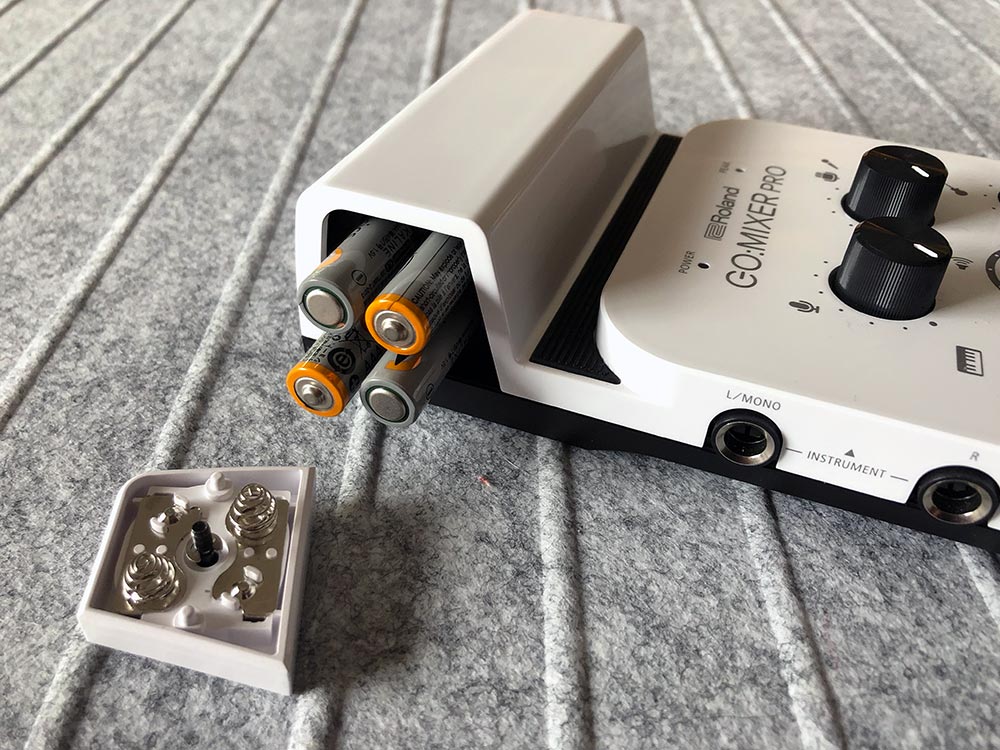
The biggest visual change is that new back section shown here with the door off and battery orientation. It’s a welcome addition and doubles as a device rest.
Setup
You’ll want to add 4 AAAs and then you’re ready to connect your devices. Each input is clearly marked with the controlling knob right next to it. I’m going to make the assumption that you don’t need much help connecting your instruments or mics.
If you do connect a mic that requires power, make sure you slide the phantom power switch to on.
Roland made device compatibility as broad as possible by including 3 different device cables. Lightning, USB-C and USB-Micro are all included for you to select from. If you use the Micro cable, please note that the white end should connect to the Go:Mixer Pro. Connect the other end to your device, rest it in the cradle and launch your favorite recording app.
Performance
Having reviewed the original Go:Mixer, Satch and I weren’t sure how much difference we’d find in the Go:Mixer Pro.
Just to list out the key additions over the original. They are…
- Combo mic/XLR input
- Phantom 48v mic power support
- Loop back switch
- Batteries
Overall, it has a cleaner, more expensive look along with more heft adding to the perceived value. It’s not much bigger, so still very portable. The new layout results in a more balanced workstation that isn’t likely to get pulled off the table by heavier cables and easily supports a 10″ iPad as you can see here leaving you free to record with the device of your choosing.
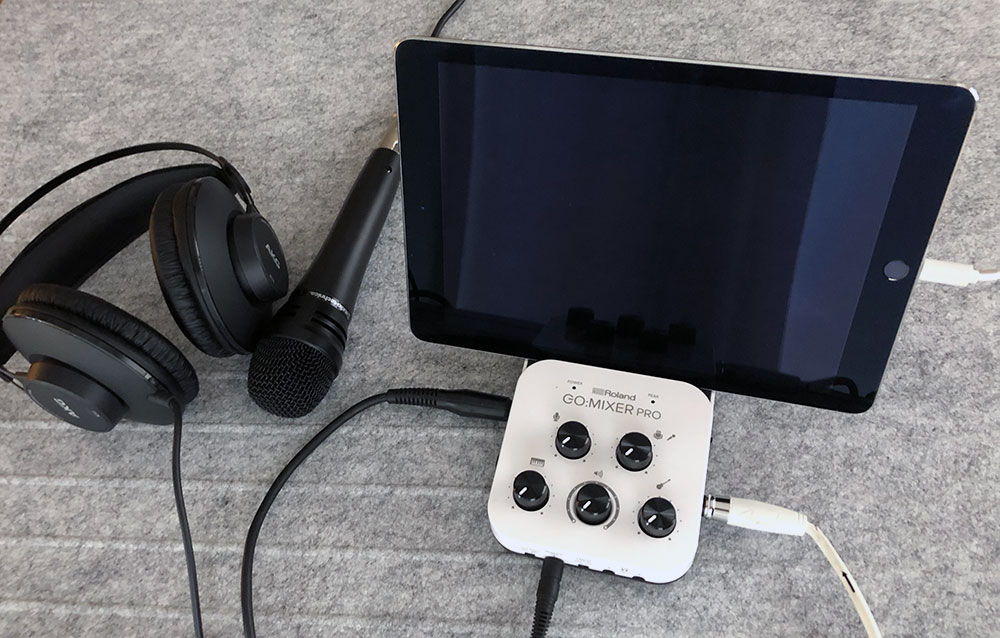
The device stand functionality is a great addition, but be prepared to remove the case from your device as it’s unlikely to work with anything but the thinnest of protective cases.
The new knob layout just makes sense instantly and paired with the larger diameter, taller knobs, much easier to use.
The original Go:Mixer relied on your device for its power and while initially convenient, ended up being a pretty significant draw on battery life with your screen on. As phones, and more specifically apps, get more powerful, battery life becomes an issue. Big kudos here to Roland for addressing this with the addition of batteries.
As for recording, it’s just as easy. Actually, more so now that everything feels better situated. Here’s a song Satch wrote and recorded the night it arrived. Shot on iPhone8 using the stock camera app with audio through Go:Mixer Pro’s instrument input and the phone resting in the stand.
View this post on Instagram
What I like
- Battery powered
- Built-in device stand
- Large analog knobs
- Understandable layout
What needs to be improved
- Stand support for devices with cases on
Final thoughts
This is a solid addition to a recording musician’s toolkit. The ability to capture directly from multiple devices, instruments, and mics simultaneously is key. It’s easy to understand and even easier to use. If you have the original Go:Mixer and it’s working great, you may be able to skip this version. If you need support for a phantom power mic or want the addition of a loopback switch, dedicated batteries or the device stand then the upgrade is worth it at $169. [Both links below have been showing $129 since the start of the new year and at the time of writing this post]
Price: $169.99
Where to buy: Amazon or Guitar Center
Source: The sample of this product was provided by Roland.


Gadgeteer Comment Policy - Please read before commenting
Thanks for the great review! I have the original GO:Mixer and have one question about the Pro. The original one didn’t allow you to record into a DAW, say Garage Band or whatever, that already had some parts recorded without playing the whole signal back. So, say you had some drums and bass recorded and wanted to just record some guitar. The entire song would play through the mixer as you tried to record. Is that the case with this? Because thought it’s ok if you’re trying to record and mix with it in real time, it’s almost useless to use with a DAW for multitracking. Does that make sense? Thanks!
Hi, can you dig more on the loopback feature? I didn’t get the functionality of the loopback yet. I was thinking the function is to record video while playback music from the music app, but every-time i turn music the video recording stopped
Even on roland 4x app didn’t work
I was hoping i wont need any aux input for playback with go mixer pro
Thanks
Hello , I cant seem to get enough level without distortion on my android phone recordings or live streaming. In order to maintain a clear signal I am recording at a very low level. Any thoughts?
Thanks
The “front end” of this little mixer is not particularly “strong.” Listening with headphones, lower the volume of your SOURCE’s output and run the GO MIXER PRO’s input at the three o’clock position (for the 1/4” inputs, for example.). Get your sound to be undistorted on the mixer itself. Download a recording program that will give you stereo audio level meters and adjust the OUTPUT of the GO MIXER PRO so your highest levels stay away from the red. My digital piano has a hot, peaky output (Casio p5s), so I run its output level at the 9-10 o’clock position.
Hi,
I want run a backing track through my Go Mixer Pro then solo over it to record, What is the best way to do this please?
Thanks
Adam D
I have an LG V60ThinQ android. I record (for my sax) using TomPlay thru my iMac. The recordings are fine, but when I play back, the sound thru my headphones is soft. When I replay on my phone, the sound is great but the image of me is muted. Not vivid. Do I need an app to solve this problem. Any problem with compatability between the android and iMac?
Am hesitant to buy this. Hate spending my time changing batteries! Why can’t Roland simply add a small connector for a 6 v. adapter or an external power supply? If you use the USB port for power you can’t hook it to your phone without draining your phone battery!
https://www.amazon.com/Battery-Eliminator-LED-Power-Basic/dp/B07314FCKM